RSSFeeder
Global Moderator
Deep One
 
Karma: 0
 Offline Offline
Posts: 3916

|
 |
« Reply #315 on: 30 October 2014, 18:30:03 » |
|
Assembling Your SquadronAn X-Wing (TM) Turn Zero Article by 2013 World Champion Paul Heaver
“Keep your eyes open for those fighters!”
–Garven Dreis In his “Turn Zero” articles, reigning World Champion Paul Heaver offers a look at one of the most critical components in mastering the game of X-Wing™… getting started. In previous articles, Paul has addressed how best to place asteroids to complement your strategy, how to place your starships at the start of a game, and how to develop a winning battle plan within an evolving metagame. Today, Paul addresses another crucial step along your path to victory: assembling your squadron. Whether you’re looking to improve your chances at FFG’s 2014 World Championship Weekend or you’re just thinking about the best way to introduce the game to one of your friends, squad building is a critical component of your experience and one that’s best to approach with a solid plan.

2013 X-Wing World Champion Paul Heaver in action during the 2013 finals
2013 X-Wing World Champion Paul Heaver on Building Your Squad The best way to build your X-Wing squad depends on many factors. The first thing you should consider is the event to which you are bringing your squad. Are you headed to a casual game night with some friends, or are you headed to the World Championships? Is your goal to build a thematic squad that recreates the Trench Run or another iconic moments from the movies? It’s not always about winning! I build some of my lists to help me improve my skills with a new ship or upgrade, or to test the choices of another person’s list and see if I agree with them. Speaking of other people’s lists, you shouldn’t be afraid to grab a popular list off of the internet and try it out. I often do this to see if I can fly the squad as well as others have, or if I think I can make the list better. If you are new to the game, grabbing a known list and learning how to play it will help you improve your skills. You don’t have to worry about whether or not you made good build choices, so you can concentrate on visualization and planning. Plus, the experience will help you in the future when you face other players running the same ships; you’ll know what their ships can do, and knowing where your opponent’s ship will end its movement is the first step toward defeating it. However, if you feel you’re ready to design your own squad, it’s an exciting time to do so because there are a lot of viable designs. The X-Wing metagame is moving away from squads that feature swarms of ships firing lots of red dice at their opponents, and elite pilots are finding their way back to the top tables. Even so, the lists with lots of ships are still doing well! This fact further solidifies my opinion that it’s very important to be comfortable with the ships in the list you are playing, and it’s also important to gain knowledge of the ships you’re facing. 
A squad of TIE bombers in action at the 2014 North American Championships
Shore Up Your Defenses I tend to think, first, about how my ships perform defensively, and then I try to maximize my squad’s offense afterward. Defensively, I don’t like to have all my ships share the same weakness. That increases my chances of running into a squad that easily counters mine. Squads work best when you they have multiple parts with different strengths, so that your various parts can cover each others’ weaknesses. For example, the old Rebel swarm of three Blue Squadron Pilots and two Prototype Pilots could tailor its plan of attack to counter TIE swarms and other squads that had many two-die attacks, or they could adjust to counter squads with fewer ships that each attacked for more damage. 
Another example is the TIE phantom. It’s an “arc dodger,” designed to position for attacks against foes that can’t shoot back. Since you know that arc dodgers have a weakness against turreted ships, you shouldn’t pair your phantom with other arc dodgers. Instead, since most turreted ships have high health and low defense, using multiple TIE fighters with your phantom has been proven to shore up its main weakness. 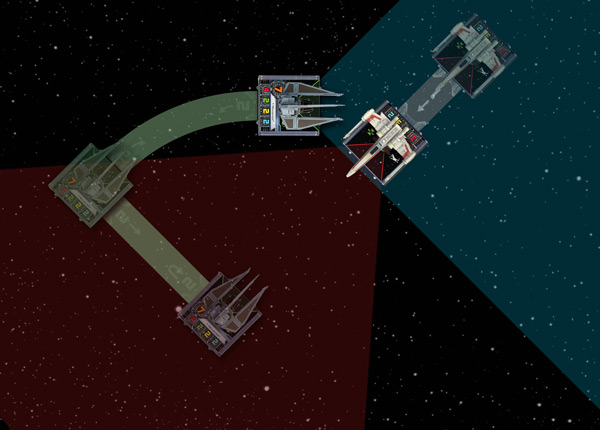
With its ability to cloak and decloak, the TIE phantom excels at slipping out of the firing arcs of fighters flown by pilots with lower pilot skills.
Maximize Your Offense After you diversify and mitigate your weaknesses, you need to maximize your offense. This means trying to squeeze in as many attack dice as possible and making sure you can modify your rolls. It also means that you need to make sure those ships stay alive. You do not want to make your strongest ship the easiest one for your opponent to destroy. You want to give your opponent hard choices; encourage them to make mistakes. This is why unique pilots with offensive abilities tend to be combined with defensive upgrades, such as Wedge Antilles with an Engine Upgrade or Corran Horn with R2-D2. 
Similarly, if your pilots are already hard to kill, you want to boost them with offensive upgrades, such as giving Jake Farrell Outmaneuver and Push the Limit. 
Upgrading Your Squad Once you decide on what ships you want, it’s time to determine upgrades. I always recommend fewer upgrades for beginning players. It’s easier to lose track of things when you have multiple ships, with different pilot abilities and upgrades. Then you may fail to take advantage of the important upgrades for which you’re spending your squad points. When you do use upgrades, it’s easiest to remember their functions if you use the same upgrade on multiple ships or put most of your upgrades on a single elite ship. For example, if you take the previously mentioned Jake Farrell with Push the Limit and Outmaneuver, and then pair it with three Blue Squadron Pilots who each have Fire Control Systems, you are likely to remember to use all of your upgrades correctly. 
Bidding on Pilot Skill Pilot skill is another important consideration. In most cases, the ideal pilot skill value is one higher than whatever your opponent is fielding. But spending squad points to hit that ideal pilot skill is a gambit that can fail if your opponent has pilots with higher skill than yours, or simply doesn’t bother to “bid” on pilot skill and just sticks with the minimum skill levels. Right now, most lists tend towards the extremes of pilot skill, either bidding high with nines and above or going with non-uniques at pilot skills one and two. In this sort of environment, spending squad points for pilots with skill values of four to eight often results in wasted points. Currently, I’d only take pilots in that region if their pilot abilities were extremely useful for my list, such as Biggs Darklighter or “Howlrunner."  
Your List Is More Than a Collection of Cards Once you have settled on your list, you’re ready to playtest it to learn how it functions. For smaller, local events, I’m usually happy coming up with a basic three-round opening where my ships don’t collide, and I can point all my weapons in the direction I desire. For larger events, I’ll playtest online and in person multiple times to become familiar with how my ships function together and how I can adapt my strategy to face popular squads so that I can make the right adjustments quickly. Knowing where you want to place your asteroids and your ships at the start is also closely related to the list-building process, and has been covered in previous articles in this series. Thanks, Paul! Whether you follow Paul’s advice or adhere to a squad-building formula of your own devising, you can soon put your squad to the ultimate test in the galaxy’s greatest battles. The 2014 X-Wing World Championships are nearly upon us. We hope to see you this November 6th – 9th in Roseville, MN. But even if you can't join us, you can still be a part of the action by following our livestream on Twitch.tv and supporting your friends. Coverage begins Thursday, November 6th at 9:45 AM CST! ... Source: Assembling Your Squadron
|
|
|
|
|
 Logged
|
|
|
|
RSSFeeder
Global Moderator
Deep One
Karma: 0
Offline
Posts: 3916
|
|
« Reply #316 on: 31 October 2014, 03:00:02 » |
|
STAR WARS (R): Force and Destiny (TM) Beta Update #8News From the Developers of the Force and Destiny Beta 
Hello Force and Destiny™ beta testers, This week’s update (pdf, 323 KB) focuses on Force powers, adding quite a few upgrades and modifications. Some of these are clerical as we tweaked the rules slightly to bring them back in line with Edge of the Empire™ and Age of Rebellion™. Because we made these clerical changes, we also added a lot of minor clarifications to powers. These may not be flashy, but they’ll make them easier to use at the table. However, a few powers got more exciting tweaks. Protect/Unleash saw some big changes. Protect was modified to give more control to the character, and Unleash now does twice as much damage. Also, for you wannabe dark siders out there, Unleash’s mastery upgrade is absolutely brutal. The dreaded Force lightning now well and truly lives up to its reputation! The other power to see some major enhancement is Battle Mediation. We’ve been hearing that this power needed some punch, so we’ve changed its basic ability. Now, instead of adding Advantage to checks, it adds Success.  Very few abilities do this in the game, so Battle Meditation has a unique and very potent role in a party. We also made an interesting change to its range upgrades that we hope you test in your games. Very few abilities do this in the game, so Battle Meditation has a unique and very potent role in a party. We also made an interesting change to its range upgrades that we hope you test in your games. That’s it for this week. For next week, we want to hear how these modified Force powers work in your games. Also, at this stage of the beta, we would like feedback on anything you feel we’ve missed, and we would like to hear how the updates in our beta have affected your game sessions. In-game experiences are very valuable to us, so please send those along! Finally, since we’ve introduced a lot of changes over the last couple weeks, we won’t be posting any update to the errata next week. We want to give you the time to test the latest errata on the tabletop, and get some play experience with these changes. As always, thanks for your continued participation and feedback! ... Source: STAR WARS (R): Force and Destiny (TM) Beta Update #8
|
|
|
|
|
Logged
|
|
|
|
RSSFeeder
Global Moderator
Deep One
Karma: 0
Offline
Posts: 3916
|
|
« Reply #317 on: 31 October 2014, 11:30:03 » |
|
The Battlefields of TerrinothPreview the Campaign and Skirmishes of BattleLore: Command 
The Flesh Ripper Brutes roared and reared at the guard so he sliced at their bellies, blood spilling onto the ground as he killed two with one stroke. A third leapt onto his back, but before it could bite he stabbed the spearpoint of his poleaxe deep into the beast’s mouth. The others ran off in fear. He took a deep breath and looked around. Coming towards him was an ugly, gargantuan demon wielding a scythe as big as a man: Ravos the Ever-Hungry. The guard recognized Ravos and suddenly knew his own death was imminent, but killing Ravos meant saving his homeland, and so he had no choice. Valiant warriors and vicious demons go to war in BattleLore: Command, an application for iOS, Android, and PC. Whether you command the Daqan army in combating the worst threat they have faced for centuries, or lead the ravenous demonic hordes of the Uthuk Y’llan into Terrinoth, BattleLore: Command offers you the chance to fight epic fantasy battles and wield arcane powers in a variety of tactically challenging missions. Today we will look at some of the battles that await you in the app’s single-player campaign mode, and at the different scenarios you can choose to play in the skirmish mode, which pits your army against the computer’s or against the army of a friend on the same wireless network. A Heroic Campaign Baron Frederic looks you in the eye. “You can’t let Kell fall into enemy hands. I know that all you’ve got right now are a few units of young infantry and archers, most of whom have never seen battle before. But under your command, guided by your strategic insight, they can stop the Uthuk Y’llan invasion before advances any further." He paused. "Well, what are you waiting for? Muster your troops. Terrinoth is depending on you." The war begins when the Uthuk Y’llan, who have long been gathering strength in the desert wastelands of the Ru Steppes, invade and occupy Hernfar Isle, a defensive outpost on Terrinoth’s northeastern border in the barony of Kell. As the commander of the Daqan army, your task is to expel them from the land and ensure that they never threaten your people again. In your quest to do so, you’ll encounter a variety of battlefields across Terrinoth, from castles and farms to thick forests and blasted, barricaded deserts. You'll have to win battles with only a few units of infantry and archers, strategically deploy flying Roc Warriors, and learn how to defeat demons that have three times the strength of a group of Rune Golems. You'll have to penetrate enemy lines, take defensive stands, and prevent entire villages from being burned. 
In the beginning of the campaign both armies are still assembling their forces. As the Uthuk Y’llan occupy border settlements and slaughter livestock, you must both protect your people and go behind enemy lines to light the signal fires that will summon the Riverwatch Riders. Before the Roc Warriors will join your army, you must ensure that the mountains clans are safe and chase the Uthuk Y’llan out of the Rookery where the Roc Warriors are trained. In order to bring the Rune Golems to life, you must ransack the Uthuk Y’llan encampment for the stolen rune shards that will animate Terrinoth’s stone sentinels. 
The Uthuk Y’llan are not the only threat to peace in Terrinoth. With the land’s military might focused on defending against the Uthuk invasion, groups of bandits have begun to raid farms and attack caravans. If you can defeat the bandit king, you may be able to convince the bandits to fight alongside your own Daqan forces. But as the campaign progress and your army grows, the Uthuk Y’llan also become more powerful. A powerful demon called Ravos the Ever-Hungry appears in Kell, who leads wandering bands of Uthuk Y’llan that destroy and consume everything in their path, leaving heaps of bones in their wake– all that remains of Ravos’ animal and human victims. Since a commander cannot be on two battlefields at once, some stages of the campaign force you to make difficult choices: do you save the valuable herds that provide a living for the people of Kell, or do you prevent the ancient and powerful energy orbs at the Tomb of Pelius from falling into enemy hands? Do you rescue a group of unarmed villagers held captive by the Uthuk Y’llan, or do you attempt to free Baron Frederic, a powerful leader beloved by his people, before he is sacrificed on a demonic altar? 
Once you have pushed the Uthuk Y’llan army out of Terrinoth you must still defeat them in their own territory. There in the barren expanses of the Ru Steppes you must encounter the blood priestess who masterminded the Uthuk Y’llan invasion, Malaana, whose psyche is so powerful that it could control Baron Frederic’s dreams from hundreds of miles away. Since Malaana takes supernatural strength from the blood rites she practices, it takes ten blows to kill her, which may prove difficult since her dark magic slays soldiers long before they can approach her. Her gargantuan black scorpion protects her, swinging its poisonous tail that can murder a human with one sting. Only slaying Malaana can you ensure that Terrinoth is free from the threat of an Uthuk Y’llan invasion. 
Savage Skirmishes Only few Rune Golems stood between them and the Daqan stronghold, but those could easily be eliminated. The Uthuk Y’llan archers exchanged smiles with bloodstained mouths and let their poisoned arrows fly. One found its target, and the Rune Golem burst apart with a brilliant blue glow, leaving behind only a lifeless pile of rubble and clay. The archers reached for more arrows and took aim again. “Now let us darken the skies.” In the campaign mode, your army, its size, and the units available to you depend on your current mission. In the skirmish mode you can choose whether to play the Daqan army or the Uthuk Y’llan. It’s even possible to pit two armies of the same faction against each other. You can vary the gold limit to alter the size of your army, taking the field with a strike force of a few units or mustering a full army of multiple elite units with the infantry and archers to support them. As you progress in the campaign mode, moreover, you can unlock new units for your army. Once you've defeated them, you can even deploy Ravos the Ever-Hungry and the blood priestess Malaana in your skirmish battles. 
Five different scenarios offer a range of objectives and strategic challenges. In Deathmatch, you have ten rounds to destroy as many of your opponent’s units as possible. In Demolition, the attacker must invade a village and burn down at least four buildings to win. Cross the Line is another invasion scenario, in which the attacking army must fight their way across a river into enemy territory. Gather Power asks you to prevent the enemy from stealing your energy orbs as you send forces out to steal theirs. Similarly, Strongholds challenges you to simultaneously defend your own fortress and invade your opponent’s fortress, compelling you to fight on two fronts at opposite ends of the map. Prepare for War From sneaking through enemy lines to fighting until every last enemy is slain, from defending Baron Frederic’s keep to conquering your opponent’s stronghold, , the missions and scenarios of BattleLore: Command will test and develop the tactical skills of any commander. Are you ready to lead an army into battle against its greatest foe? BattleLore: Command is coming soon to the App Store, Amazon Marketplace, and to Google Play. ... Source: The Battlefields of Terrinoth
|
|
|
|
|
Logged
|
|
|
|
RSSFeeder
Global Moderator
Deep One
Karma: 0
Offline
Posts: 3916
|
|
« Reply #318 on: 31 October 2014, 20:00:03 » |
|
Get What You Want, When You Want ItAn Overview of the Shaper Faction by Guest Writer Andrew Grace
Welcome to the second of our faction overview articles for Android: Netrunner! If you’re a new player, you’ve come to the right spot to learn what the Shaper faction is all about. Guest writer Andrew Grace is an avid player in Salt Lake City, where he coordinates the Android: Netrunner league at Game Night Games. He is also a fervent advocate of the game’s Shaper faction. 
Why Go Shaper? My least favorite thing to say as a Runner is “Click Two, I draw a card.” (“That’s a Snare!” rates as a close second, but I try to be a good sport about such things.) Spending clicks to draw cards is the necessary-but-evil byproduct of the open-ended, click-based turn system that keeps Android: Netrunner riveting at every stage of a match. Yet every time I spend a click to draw a card, I’m not spending a click to play a card, and I buy Data Packs to play cards. More to the point, spending a click to a draw a card is Criminally inefficient. If you don’t get the card you want, you’re one click poorer and no strategically richer. So the first reason Shapers are the best faction ever is that they’re the best at giving you the cards you want when you want them. You never have to tell your opponent that you’re spending a click to draw a card and then grimace when you pull your third copy of the sentry breaker you’ve already installed. Shapers are masters of getting what they want – when they want it – for two reasons: card draw and card search.  
Shapers have the cards with the most effective card-drawing mechanics, like Diesel (Core Set, 34) and Quality Time (Humanity’s Shadow, 87). Even as they benefit from the immediate bursts of cards that these events supply, Shapers get to save two influence by running the universally beloved Professional Contacts (Creation and Control, 49) in-faction. “ProCon,” as we efficiency-oriented Shapers call it, turns every click spent drawing a card into two clicks, one for the card and one for the credit. Cards like these not only enable Shapers to get their rigs together in the early game;  they can protect your grip against taxing net damage and potentially lethal meat damage as you approach the endgame. they can protect your grip against taxing net damage and potentially lethal meat damage as you approach the endgame. But Shapers don’t just rely on drawing more cards; they know how to search for the programs they need with cards like Test Run (Cyber Exodus, 47), Scavenge (Creation and Control, 34), Self-modifying Code (Creation and Control, 46), and Clone Chip (Creation and Control, 38). Self-modifying Code (or SMC) and Clone Chip, in particular, enable you to run fearlessly into unidentified ICE. Whether the Corp rezzes a sentry like Komainu (Honor and Profit, 17) or a barrier like Ice Wall (Core Set, 103), you can search your stack or heap mid-run for the most efficient breaker and continue on your way. The Shapers’ proclivity for recovering cards from their heaps also means they can make optimal use of one-shot programs like Deus X (A Study in Static, 66), Sharpshooter (True Colors, 67), Faerie (Future Proof, 104), and Grappling Hook (Honor and Profit, 45) that offer maximum breaking power for minimal cost. Know More About the Corp Than the Corp Itself All of that card-drawing efficiency pays off when you achieve the vaunted “R&D lock,” in which you successfully access three or four cards from your opponent’s deck each turn, giving you the power to steal agendas before the Corp can feasibly draw them. Shapers excel at accessing cards from R&D and not just because they’re perpetually curious. Even Criminals and Anarchs commonly spend their influence on R&D Interface (Future Proof, 107) and The Maker’s Eye (Core Set, 36) to start locking down their opponents. Shapers can also take advantage of in-faction cards with high influence costs like Indexing (Future Proof, 106), which enables them to look at, and arrange, the top five cards in R&D without accessing them. Combined with R&D Interface or The Maker’s Eye, this wins games for you when you can move two agendas to the top of the deck. It also keeps you alive against the more vicious Jinteki decks by letting you uncover copies of Shock! (True Colors, 73) and Snare! (Core Set, 70) without triggering their ambushes.  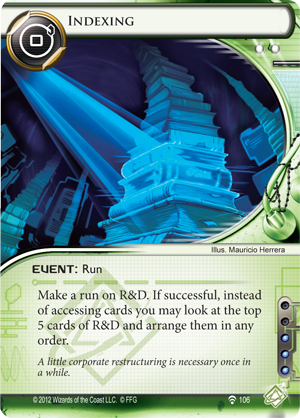
Of course, you can’t really lock down R&D if you have to spend three turns rebuilding your credit pile between each run. This is why Shapers assemble hardware and code programs to make themselves the masters of recurring credits. By installing two or three copies of Cloak (Creation and Control, 41), a Toolbox (Core Set, 41), and a couple of Lockpicks (Opening Moves, 6) before playing your Net Celebrity (The Spaces Between, 38), you can afford to run every turn, especially if you’re gaining another credit or two each turn by talking to your Professional Contacts. Run with the True Angels of New Angeles But my love for Shapers isn’t all about click efficiency and R&D locks. The way I see it, Shapers are the least ambiguous “good guys” in the game. That may not be important to everyone, but I’m the kind of guy who plays Paladins the way they’re meant to be played, by giving my opponents a fair warning before launching a sneak attack and by raising my sword against evil demons on sight no matter how outmatched I am. So yeah, I like to play on the side of the angels, and not only are Shapers pure at heart, they’re happy to let you know about it with cards like Notoriety (Trace Amount, 26) and Net Celebrity that give them benefits when they take credit (as well as credits). Criminals are obviously just in it for the money. They want to get in quietly and get out quickly. So long as they’re making money from a broken system, they’ll never be interested in fixing it. Anarchs make a good show of rejecting the oppressive status quo. But they’ll always be too focused on breaking things apart to recognize the importance of building something new. 
But that’s what Shapers do. They fix things and they build things, and then they show off how awesome their things are. Sure, they can seem a bit conceited — and I’ve seen a lot of Shapers lose games because they were too busy building the perfect rig to stop the Corp from scoring agendas — but look at how affable they are!
- Kate “Mac” McCaffrey (Core Set, 33) is so busy tinkering with codes and chips that she doesn’t have time to make enemies. There’s a reason she graces the art and text of Public Sympathy (Cyber Exodus, 50).
- Chaos Theory (Cyber Exodus, 46) is best friends with a dinosaur-shaped AI, and if that doesn’t warm your heart, you’re broken inside.
- Meanwhile, The Professor (Creation and Control, 29) is that cool teacher who told you the terrible and hilarious things that revered historical figures really did with their time.
- Exile (Creation and Control, 30) appears to get his motivation from a picture of his lost love.
- Rielle “Kit” Peddler (Creation and Control, 28) is so open-minded that she’s prepared to give lines of code civil rights.
- Finally, as I see it, Nasir Meidan (Upstalk, 17) is like a future knight errant on an honest-to-g00ru mythical quest.
When an opponent flatlines my Anarch with a well-timed Scorched Earth (Core Set, 99), I congratulate him on a solid play. When someone destroys my Dinosaurus (Cyber Exodus, 48) with a sneaky Shattered Remains (First Contact, 50), I shed a single tear and swear to the Net that I can fix it, and if I can’t, I’ll build a new rig – better, stronger, faster. 
Thanks, Andrew! Are you one of those Runners who’s less interested in scoring a couple credits than chasing all the latest tech? Then you just might be a Shaper! On the other hand, if you’re not quite certain that Shapers are the Runners that resonate most with your play style, then you can check out El-ad David Amir’s guide to the Anarch faction and keep checking back as we look at the defining elements of the Criminals and the game’s Corp factions. After all, in Android: Netrunner, your faction’s personality isn’t just flavor, it’s a guide to how your deck may function. ... Source: Get What You Want, When You Want It
|
|
|
|
|
Logged
|
|
|
|
RSSFeeder
Global Moderator
Deep One
Karma: 0
Offline
Posts: 3916
|
|
« Reply #319 on: 01 November 2014, 13:00:03 » |
|
A Champion's Perspective: A Game of ThronesA Tournament Report by 2014 North American Champion Jonathan Andrews
As World Championship Weekend approaches, we will be posting articles each week with tips for players on how to prepare for their next large tournament. Whether you’re planning on attending Worlds or following along through our online coverage, these articles are a great insight into how some of the best players of your favorite game prepare for major tournaments.
Today, we are joined by 2014 A Game of Thrones: The Card Game North American Champion Jonathan Andrews. Jonathan shares how he prepared for the 2014 North American Championships and how important it is to prepare in a systematic manner. Jonathan Andrews on the 2014 North American Championship Since I covered my Gen Con experience in Alex Hynes and my Game of Thrones podcast, “Beyond The Wall” Episode 29, I thought I would do a little something different and talk about how I prepared for the event. For major events like Gen Con I like to test decks with one or two other people for two reasons; one, it’s hard to for me to playtest alone, and two, a second set of eyes is always great. However, this year I had a problem in that all my normal deck-building partners were not attending this illustrious event. I was a bit disappointed, but I eventually managed to coax Steven Simoni and Aaron Glazer to help me get ready for the event. Practice Like You Mean It  As we playtested, we discovered that Steven and I have very different play styles, which made it impossible for us to agree on a deck. After two months of playing various decks a few times each week, we were no closer to picking a deck for the event. As we playtested, we discovered that Steven and I have very different play styles, which made it impossible for us to agree on a deck. After two months of playing various decks a few times each week, we were no closer to picking a deck for the event.
This was not a wasted effort. In fact, I remember a study from the 1950's I researched for a paper which proved empirically the correlation between practice and performance. The study further determined that not only does the amount of practice affect performance, the quality of practice has an equal, if not greater, impact. How does this relate to playing A Game of Thrones: The Card Game? Players preparing for an A Game of Thrones tournament should practice with their decks using a tournament mindset if they want to perform to the best of their abilities. For example, focusing on every practice game as if it is taking place in a tournament will establish tournament habits in your overall play. This means that when preparing for a tournament, you should maintain a serious and competitive attitude. If you prepare for a tournament in a sloppy, unfocused way, those sloppy, unfocused habits will migrate into your tournament play. Perhaps not immediately—you will be able to focus on the first few games in a tournament—but as the day wears on you will be more inclined to slip into bad habits. It is okay to have a good time, but make sure you take your time and think your actions through just like you would in a tournament setting. This is what my playtest partners and I have always done. We treat all of our playtest games seriously, and we always try to make ‘the correct play.’ These winning habits are key to going far at Gen Con, or any other large tournament. The mental fatigue a player starts to experience in the later rounds is significant, and the more tired you are, the more you begin to operate on ‘autopilot.’ Practice is about programming this autopilot with good habits. Even with all my pre-Gen Con preparations, I experienced this mental fatigue and some poor play in my final game, but I believe that my earlier elimination games were won partially because of all the practice games I had played and all the good habits (i.e. winning habits) I established in those test games. To summarize, playing a ton of games against skilled players who were using the most competitive decks in the metagame was very good for me. Sharpening My Blade  All the practice did not, however, get me any closer to picking the perfect deck, and the tournament was only nine days away. So, I decided to step back and think a bit. I remembered one of the cardinal rules to deck building: all decks have limitations and no deck can do everything. The best you can hope for is to have a deck that is powerful and consistent. A deck does not have to handle every situation, it just needs to be able to beat the common decks you expect to see. All the practice did not, however, get me any closer to picking the perfect deck, and the tournament was only nine days away. So, I decided to step back and think a bit. I remembered one of the cardinal rules to deck building: all decks have limitations and no deck can do everything. The best you can hope for is to have a deck that is powerful and consistent. A deck does not have to handle every situation, it just needs to be able to beat the common decks you expect to see.
With this in mind, I chose to pull out an old Power Behind the Throne (Lions of the Rock, 48) deck that I had built previously and tweak it slightly. My minor tweaks included adding Daenerys Targaryen (Ancestral Home, 76) who could pair with the Game of Thrones (Lions of the Rock, 53) plot to destroy my opponent's board presence, and the addition of a second copy of some of the stronger characters already in the deck.  I decided to take the deck for a test run at a small tournament in Montreal. I chose the tournament because I believe that the Montreal meta is currently one of the most competitive groups in North America. The deck performed great at the tournament, going undefeated, and just like that, my choice for Gen Con was locked in. I decided to take the deck for a test run at a small tournament in Montreal. I chose the tournament because I believe that the Montreal meta is currently one of the most competitive groups in North America. The deck performed great at the tournament, going undefeated, and just like that, my choice for Gen Con was locked in.
With my changes, I believed the deck could beat Stark and Greyjoy easily, and I thought that these two houses would be over represented during the elimination rounds. Boy, was I wrong. Knowledge is a Weapon  Even though I had anticipated the meta incorrectly, all my playtesting gave me a great understanding of the best decks around and a good idea of what could beat them. For example, I knew that opening turn one with Fear of Winter (Beyond the Wall, 40) after kneeling some of my opponent’s key characters before plot choice with events would assure me victory early in Swiss rounds. During the elimination rounds, especially against Martell decks, I knew that a Fear of Winter opening could cause me issues since their Fury of the Sun (Ancient Enemies, 30) plot could be so devastating against my deck. Many of my opponents would also have an answer to Fear of Winter, such as Even though I had anticipated the meta incorrectly, all my playtesting gave me a great understanding of the best decks around and a good idea of what could beat them. For example, I knew that opening turn one with Fear of Winter (Beyond the Wall, 40) after kneeling some of my opponent’s key characters before plot choice with events would assure me victory early in Swiss rounds. During the elimination rounds, especially against Martell decks, I knew that a Fear of Winter opening could cause me issues since their Fury of the Sun (Ancient Enemies, 30) plot could be so devastating against my deck. Many of my opponents would also have an answer to Fear of Winter, such as
Forgotten Plans (Kings of the Storm, 50).
This knowledge allowed me to change my strategy each game and helped me win some games I would not have won otherwise. Thanks to this, I ended up going 10-1 in the Joust, losing only in the finals. With my 1st-place finish in the Melee the day before, I was lucky enough to win the Overall Championship and the chance to design a card! The 2014 World Championship Weekend is Approaching Thanks, Jonathan!
Jonathan took a methodical approach that anyone can replicate when preparing for a major tournament. The combination of quality time, good competition, and analysis is a tried and true approach that can lead to great results.
Check back next week to hear stories from our Star Wars™: The Card Game and X-Wing™ North American Champions. Be sure to tune in to our coverage of the 2014 World Championship Weekend starting Thursday, Nov 6th, as players from around the world battle for prizes, fame, and the right to design a card in their favorite game! ... Source: A Champion's Perspective: A Game of Thrones
|
|
|
|
|
Logged
|
|
|
|
RSSFeeder
Global Moderator
Deep One
Karma: 0
Offline
Posts: 3916
|
|
« Reply #320 on: 01 November 2014, 21:30:04 » |
|
LCG (R) State of the UnionJoin Us Wednesday, November 5th for a Look at the Direction of Our LCGs-white.png) 
In 2008, Fantasy Flight Games launched the Living Card Game® (LCG) format with A Game of Thrones: The Card Game, followed shortly thereafter by Call of Cthulhu: The Card Game. The decision to introduce this new format did not come without challenges. It took us some time to really hit our stride and learn how best to publish the new format, and it took some time for players to embrace it. Every month, though, sales increased, and the format continued to grow. Fast forward to 2014. The LCG format is bigger and more successful than ever. It has grown to include several other games, including the innovative, co-operative LCG, The Lord of the Rings, and our newest LCG, Warhammer 40,000: Conquest. From humble beginnings, the LCG category has grown to become one of the most important that we have. 
Looking Ahead Now that the 2014 FFG World Championship Weekend is upon us, and because it features so many of the LCGs that have made this category so successful, we thought it would be a great time to give you an update on where your favorite LCGs are at and where they are going. Registration and badge pick up for the World Championship Weekend starts at 4 PM on Wednesday, November 5th. Attendees who have registered and picked up their badges are invited to join us at 6 PM on Wednesday to hear our LCG State of the Union address and participate in the Q&A that follows. We will also be posting the information on our website following the address. Thank you for your support for the LCG category over the past six years, and we look forward to the next sixty! ... Source: LCG (R) State of the Union
|
|
|
|
|
Logged
|
|
|
|
RSSFeeder
Global Moderator
Deep One
Karma: 0
Offline
Posts: 3916
|
|
« Reply #321 on: 02 November 2014, 06:00:03 » |
|
LCG (R) State of the UnionJoin Us Wednesday, November 5th for a Look at the Direction of Our LCGs
In 2008, Fantasy Flight Games launched the Living Card Game® (LCG) format with A Game of Thrones: The Card Game, followed shortly thereafter by Call of Cthulhu: The Card Game. The decision to introduce this new format did not come without challenges. It took us some time to really hit our stride and learn how best to publish the new format, and it took some time for players to embrace it. Every month, though, sales increased, and the format continued to grow. Fast forward to 2014. The LCG format is bigger and more successful than ever. It has grown to include several other games, including the innovative, co-operative LCG, The Lord of the Rings, and our newest LCG, Warhammer 40,000: Conquest. From humble beginnings, the LCG category has grown to become one of the most important that we have.
Looking Ahead Now that the 2014 FFG World Championship Weekend is upon us, and because it features so many of the LCGs that have made this category so successful, we thought it would be a great time to give you an update on where your favorite LCGs are at and where they are going. Registration and badge pick up for the World Championship Weekend starts at 4 PM on Wednesday, November 5th. Attendees who have registered and picked up their badges are invited to join us at 6 PM on Wednesday to hear our LCG State of the Union address and participate in the Q&A that follows. We will also be posting the information on our website following the address. Thank you for your support for the LCG category over the past six years, and we look forward to the next sixty! ... Source: LCG (R) State of the Union
|
|
|
|
|
Logged
|
|
|
|
RSSFeeder
Global Moderator
Deep One
Karma: 0
Offline
Posts: 3916
|
|
« Reply #322 on: 02 November 2014, 14:30:03 » |
|
LCG (R) State of the UnionJoin Us Wednesday, November 5th for a Look at the Direction of Our LCGs
In 2008, Fantasy Flight Games launched the Living Card Game® (LCG) format with A Game of Thrones: The Card Game, followed shortly thereafter by Call of Cthulhu: The Card Game. The decision to introduce this new format did not come without challenges. It took us some time to really hit our stride and learn how best to publish the new format, and it took some time for players to embrace it. Every month, though, sales increased, and the format continued to grow. Fast forward to 2014. The LCG format is bigger and more successful than ever. It has grown to include several other games, including the innovative, co-operative LCG, The Lord of the Rings, and our newest LCG, Warhammer 40,000: Conquest. From humble beginnings, the LCG category has grown to become one of most important that we have.
Looking Ahead Now that the 2014 FFG World Championship Weekend is upon us, and because it features so many of the LCGs that have made this category so successful, we thought it would be a great time to give you an update on where your favorite LCGs are at and where they are going. Registration and badge pick up for the World Championship Weekend starts at 4 PM on Wednesday, November 5th. Attendees who have registered and picked up their badges are invited to join us at 6 PM on Wednesday to hear our LCG State of the Union address and participate in the Q&A that follows. We will also be posting the information on our website following the address. Thank you for your support for the LCG category over the past six years, and we look forward to the next sixty! ... Source: LCG (R) State of the Union
|
|
|
|
|
Logged
|
|
|
|
RSSFeeder
Global Moderator
Deep One
Karma: 0
Offline
Posts: 3916
|
|
« Reply #323 on: 02 November 2014, 23:00:03 » |
|
Darkness Over the LandPreview Monsters and Foul Fate in The Witcher Adventure Game
“Only Evil and Greater Evil exist and beyond them, in the shadows, lurks True Evil. True Evil, Geralt, is something you can barely imagine, even if you believe nothing can still surprise you. And sometimes True Evil seizes you by the throat and demands that you choose between it and another, slightly lesser, Evil.”
–Andrzej Sapkowski, The Last Wish Enter a world of unlimited adventure in The Witcher Adventure Game! You and up to three other players take on the roles of iconic heroes from the Witcher series, each attempting to gain renown by completing quests and defeating any foe that dares stand in your way. In our first preview, we examined how you move across the Continent, investigating strange occurrences, and gaining leads from your travels. We also explored the various quests that can you may take on, whether freeing an air genie from its servitude or battling a ravenous pack of wolves. 
Of course, the world of The Witcher is filled with peril. Today, we examine both the monsters and the foul fate that may plague you in your adventures. Legendary Battles Monsters from other spheres fill the Continent, preying on the innocent and offering a challenge to heroes everywhere. Your adventures across the world of The Witcher will undoubtedly bring you into close contact with a number of terrifying creatures. Fortunately, you have the combat prowess and the skills necessary to vanquish these creatures and safeguard the realm. 
In this game, monsters belong to three classes of increasing difficulty: bronze, silver, and gold. No matter which class a monster belongs to, it can pose a deadly threat to heroes that face it without the proper preparation. To vanquish a monster requires a degree of skill with arms, but you must also consider how you will survive the fight without taking too many wounds. You fight monsters by rolling three battle dice alongside your hero dice. These dice generate swords, shields, and other results that you may then use in conjunction with special abilities from your development cards to battle a monster, destroying the creature and safeguarding you from harm! We’ll take a closer look at each hero’s development deck and the powerful effects within in a future preview. Most monsters bear two numbers: a sword stat that determines how many swords you must roll to destroy the monster, and a shield stat that shows how many shields you must roll to escape the fight unscathed. For example, the kikimore, a silver monster, has a sword stat of four and a shield stat of two. It also has a text box that determines the consequences of your fight, based on your success. 
For example, Geralt may face a kikimore in battle at the end of his turn. He rolls the three battle dice alongside his three hero dice and obtains the results shown above: four swords, one shield, and one ritual. The ritual result has no effect in this battle, but four swords is equal to the kikimore’s sword stat, so Geralt defeats the monster in pitched battle, slaying it and ridding the land of a dangerous creature. Geralt resolves the kikimore’s successful sword effect, claiming one victory point. If Geralt had failed to roll swords equal or greater than the kikimore’s sword stat, the kikimore would have remained in the region to be battles by another hero in the future. Although Geralt slew the deadly kikimore successfully, he did not escape unscathed. He rolled only one shield, which is less than the kikimore’s shield stat of two. Geralt must resolve the kikimore’s failed shield effect, taking one wound for each shield he is short, forcing him to suffer one wound, which he places over one of his actions, preventing him from using that action until the wound is healed. Finally, because Geralt’s sword results equaled the monster’s sword stat, the monster is placed on the bottom of the silver monster stack. Battles can occur in nearly any circumstance. You may be called upon to fight for your life as part of resolving a quest, in addition to gathering the necessary proofs. Alternatively, you may be forced to fight when your investigations turn sour. No matter where you travel in the realm, your combat skills are sure to prove essential to your success and survival. A Fate Most Foul Not every obstacle that befalls you in your adventures is a monster ravening for your blood. You’ll also encounter foul fate tokens across the regions of the Northern Kingdoms, which can bring any number of dangerous events into your journey. When you encounter a foul fate token, you must discard it and draw a foul fate card, resolving the effects on the card. You may encounter Bandits on the open road, or run afoul of Dijkstra’s Henchmen. You might even suffer the ill effects of The Plague or Poison! 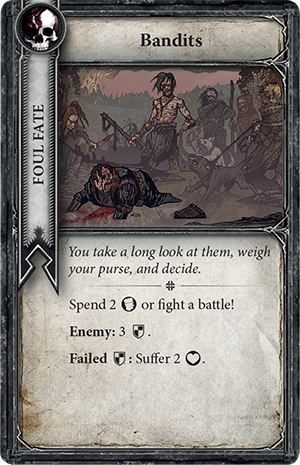 
Foul fate may catch up with you at almost any point in your adventure. Travel across the Continent is dangerous at the best of times, and a long journey only exacerbates these perils. If you choose to move along two routes with a single travel action, you must draw a foul fate card after you move, forcing you to face the consequences of your quick movement. Careful travelers may avoid foul fate cards by moving only one route per travel action, but they find themselves falling behind in the race to influence the outcome of events in the Northern Kingdoms. You may also be forced to take a foul fate token from a variety of effects, including quests, investigation cards, and monsters. When this happens, you must place a foul fate token beside one of the actions on your hero sheet. The next time you choose to execute that action, you remove the foul fate token and draw a foul fate card, resolving its ill effects before you have the chance to complete your action. Face Your Fears The world of The Witcher holds countless adventures and beneficial encounters, but it is also full of unfathomable danger. No matter where you travel, you cannot escape the monsters and foul fate tokens that plague the Northern Kingdoms. Muster your will and prepare to battle against the darkness in The Witcher Adventure Game.
Join us in our next preview to watch a video overview of gameplay and learn the secrets of the realm by downloading the rulebooks! ... Source: Darkness Over the Land
|
|
|
|
|
Logged
|
|
|
|
RSSFeeder
Global Moderator
Deep One
Karma: 0
Offline
Posts: 3916
|
|
« Reply #324 on: 03 November 2014, 07:30:04 » |
|
The Border War Grows DarkerNightmare Decks for The Lord of the Rings: Heirs of Numenor Are Now Available
“He brought tidings of Ithilien and of movements of the Enemy and his allies; and he told of the fight on the road when the men of Harad and their great beast were overthrown: a captain reporting to his master such matters as had often been heard before, small things of border-war that now seemed useless and petty, shorn of their renown.”
–J.R.R. Tolkien, The Return of the King The realm of Gondor presses hard against the Enemy’s western border. From the tallest walls of Minas Tirith, the Men of Gondor who cast their gaze eastward can very nearly see the Dark Lord gathering his strength in the land of Mordor. Gondor and its stalwart Men are the first defense against the Shadow. They are the shield wall that protects all the Free Peoples of Middle-earth, yet as the Enemy’s armies swell with Orcs and Southrons, treason threatens the very heart of Gondor… Now available via FFG’s in-house manufacturing, Heirs of Númenor Nightmare Decks is a single set of three twenty-card Nightmare Decks that allow you to revisit each of the three scenarios from the Heirs of Númenor deluxe expansion for The Lord of the Rings: The Card Game, except in Nightmare Mode, the stakes are greater, the evils stronger, and the treachery runs even deeper. 
Lead Developer Matt Newman on Heirs of Númenor Nightmare Decks Grab your swords and shields, and head to the realm of Gondor… It’s time for the Heirs of Númenor Nightmare Decks! We’ve been hard at work on these new Nightmare Decks, and I am very excited to preview some of the new cards and challenges players will face in these updated Heirs of Númenor scenarios. As always, each of these Nightmare Decks brings its scenario greater challenges, a slightly tweaked strategy, and a renewed focus on the scenario’s atmosphere and themes. Peril in PelargirPeril in Pelargir assaults players right off the bat with a swarm of Brigand enemies, tasked with stealing Alcaron’s Scroll (Heirs of Númenor, 19), the scenario’s centerpiece. Our heroes start with the scroll and must protect it throughout the scenario from the thieves and brigands who seek to steal it for their own nefarious purposes. However, in the original version of this quest, we only need to hold onto the scroll at critical moments, such as to defeat stages two and three. In fact, holding onto the scroll for longer than one round often proved fatal!  The Nightmare version of Peril in Pelargir further explores this theme, reinforcing the importance of the scroll and heightening the tension as the heroes seek to prevent its theft, by adding a new loss condition, which is introduced on the new setup card (Peril in Pelargir Nightmare Deck, 1). First of all, it has two Forced effects: The Nightmare version of Peril in Pelargir further explores this theme, reinforcing the importance of the scroll and heightening the tension as the heroes seek to prevent its theft, by adding a new loss condition, which is introduced on the new setup card (Peril in Pelargir Nightmare Deck, 1). First of all, it has two Forced effects:
“Forced: At the end of the combat phase, if Alcaron’s Scroll is in the staging area, attach it to the enemy in play with the highest [Defense Strength]. “Forced: At the beginning of the refresh phase, if Alcaron’s Scroll is attached to an enemy, place 1 progress on that enemy.” These effects allow the many Brigands that are attacking our heroes to actually accomplish their goal: They can grab the scroll if it is not attached to a hero. This forces the players to defeat that enemy in order to progress. Meanwhile, for each turn that an enemy holds onto the scroll, it gets a progress token. This represents the enemy fleeing from the heroes and escaping their grasp. Finally, the setup card introduces a loss condition should any enemy slip off with the scroll: “If at any point there are 3 or more progress tokens on an enemy, that enemy has escaped with the scroll, and the players lose the game.” In Nightmare Mode, once an enemy takes the scroll, the situation becomes truly desperate, and players must race to defeat that enemy and reclaim the scroll. Should they wait, they risk defeat. Many of the new encounter cards in the nightmare deck add to this tension and explore the concept of a tug-of-war between the players and the encounter deck. Alcaron’s Scroll will be at the center of attention, as our heroes must struggle to reclaim the scroll every time it is stolen from their grasp. When a Harbor Brute (Peril in Pelargir Nightmare Deck, 3) is revealed from the encounter deck, other Brigands will hand him the scroll to defend, as he is much tougher to defeat than his comrades. You must also be quick to recover the scroll once it has been stolen, because cards like They’re Getting Away! (Peril in Pelargir Nightmare Deck, 9) can cause defeat much quicker than you’d expect. Into IthilienThe Nightmare version of Into Ithilien explores the battle and siege keywords first introduced in Heirs of Númenor and alters the dynamic between the quest’s fork in the road at stages two and three. Into Ithilien introduces us to Celador (Heirs of Númenor, 25), one of Faramir’s Rangers ambushing the vicious men of Harad. It is difficult to keep this Ranger alive as wargs and Haradrim constantly assault your party, but if Celador survives stage one, the players are rewarded with the opportunity to proceed directly to stage three. Otherwise, if Celador falls, the players must go to the punishing second stage. However, since stage three does not have the battle or siege keywords, whereas all the other quest stages have one or the other, many players found it easier to craft a deck specifically to defeat battle or siege quests, and they would allow poor Celador to perish so that they would never have to worry about Willpower. Accordingly, the Into Ithilien Nightmare Deck does more than reinforces the quest’s themes; it includes punishing cards that are even worse when the current quest has the battle or siege keyword, such as the Haradrim Marksman (Into Ithilien Nightmare Deck, 3), who changes drastically from one stage to another. Savage Fray (Into Ithilien Nightmare Deck, 9) makes your questing even more unpredictable by shifting the tides of the conflict from battle to siege, or siege to battle.  
If you are unfortunate enough to lose Celador and be forced to advance to stage two, you’ll also face the wrath of one of Harad’s dreaded Mûmak Elite (Into Ithilien Nightmare Deck, 2). For these reasons and more, you will find yourself wanting to safeguard Celador as much as possible, so the Ranger can guide you through Ithilien’s hidden paths and help you avoid the most brutal enemies in the Southron army. The Siege of Cair AndrosThis difficult quest introduced players to three Battlegrounds, locations under attack by Orcs and Haradrim which must be protected at all costs. If you could explore these Battleground locations before they took damage equal to their quest points, you would be rewarded with the removal of one of the quests’s five quest stages. As the enemy’s armies surrounded your heroes and assaulted them on all sides, you were forced with difficult decisions, including the need to make sacrifices to keep these Battlegrounds – or your heroes – alive.  The Nightmare version of The Siege of Cair Andros adds more Battleground locations to the encounter deck, all of which have effects that punish the players if they are destroyed by the enemy. This helps keep the quest tense and difficult even after the scenario’s original three Battleground locations are explored or destroyed, and it keeps each of the encounter deck’s enemies relevant throughout the entire quest. When locations like the Besieged Courtyard (The Siege of Cair Andros Nightmare Deck, 5) and Anduin Wharf (The Siege of Cair Andros Nightmare Deck, 7) are in play, each decision you make can mean the difference between victory and defeat. You may wish to take the archery damage from a Southron Mounted Archer (The Siege of Cair Andros Nightmare Deck, 2) on one of these locations instead of your battered and weary heroes… But how much damage will you risk taking on the locations you are sworn to defend? The Nightmare version of The Siege of Cair Andros adds more Battleground locations to the encounter deck, all of which have effects that punish the players if they are destroyed by the enemy. This helps keep the quest tense and difficult even after the scenario’s original three Battleground locations are explored or destroyed, and it keeps each of the encounter deck’s enemies relevant throughout the entire quest. When locations like the Besieged Courtyard (The Siege of Cair Andros Nightmare Deck, 5) and Anduin Wharf (The Siege of Cair Andros Nightmare Deck, 7) are in play, each decision you make can mean the difference between victory and defeat. You may wish to take the archery damage from a Southron Mounted Archer (The Siege of Cair Andros Nightmare Deck, 2) on one of these locations instead of your battered and weary heroes… But how much damage will you risk taking on the locations you are sworn to defend?
As always, we strive to make each Nightmare encounter more thematic and engaging, in addition to increasing its difficulty. I hope you enjoy the new challenges and twists that the Heirs of Númenor Nightmare Decks offer. Good luck. Gondor is counting on your aid! Alámenë! Stand Against the Nameless Enemy “The Nameless Enemy has arisen again. Smoke rises once more from Orodruin that we call Mount Doom. The power of the Black Land grows and we are hard beset.”
–Boromir, The Fellowship of the Ring In 2012, the Heirs of Númenor deluxe expansion first allowed fans of The Lord of the Rings: The Card Game to explore the lands of Gondor and stand fast against the Shadow of Mordor. Since then, the Shadow has grown in strength, and Gondor is once again in need of heroes. Will you be able to withstand the nightmarish forces the Dark Lord has now assembled? Heirs of Númenor Nightmare Decks are now available! ... Source: The Border War Grows Darker
|
|
|
|
|
Logged
|
|
|
|
RSSFeeder
Global Moderator
Deep One
Karma: 0
Offline
Posts: 3916
|
|
« Reply #325 on: 03 November 2014, 16:00:03 » |
|
The Border War Grows DarkerNightmare Decks for The Lord of the Rings: Heirs of Numenor Are Now Available
“He brought tidings of Ithilien and of movements of the Enemy and his allies; and he told of the fight on the road when the men of Harad and their great beast were overthrown: a captain reporting to his master such matters as had often been heard before, small things of border-war that now seemed useless and petty, shorn of their renown.”
–J.R.R. Tolkien, The Return of the King The realm of Gondor presses hard against the Enemy’s western border. From the tallest walls of Minas Tirith, the Men of Gondor who cast their gaze eastward can very nearly see the Dark Lord gathering his strength in the land of Mordor. Gondor and its stalwart Men are the first defense against the Shadow. They are the shield wall that protects all the Free Peoples of Middle-earth, yet as the Enemy’s armies swell with Orcs and Southrons, treason threatens the very heart of Gondor… Now available via FFG’s in-house manufacturing, Heirs of Númenor Nightmare Decks is a single set of three twenty-card Nightmare Decks that allow you to revisit each of the three scenarios from the Heirs of Númenor deluxe expansion for The Lord of the Rings: The Card Game, except in Nightmare Mode, the stakes are greater, the evils stronger, and the treachery runs even deeper.
Lead Developer Matt Newman on Heirs of Númenor Nightmare Decks Grab your swords and shields, and head to the realm of Gondor… It’s time for the Heirs of Númenor Nightmare Decks! We’ve been hard at work on these new Nightmare Decks, and I am very excited to preview some of the new cards and challenges players will face in these updated Heirs of Númenor scenarios. As always, each of these Nightmare Decks brings its scenario greater challenges, a slightly tweaked strategy, and a renewed focus on the scenario’s atmosphere and themes. Peril in Pelargir Peril in Pelargir assaults players right off the bat with a swarm of Brigand enemies, tasked with stealing Alcaron’s Scroll (Heirs of Númenor, 19), the scenario’s centerpiece. Our heroes start with the scroll and must protect it throughout the scenario from the thieves and brigands who seek to steal it for their own nefarious purposes. However, in the original version of this quest, we only need to hold onto the scroll at critical moments, such as to defeat stages two and three. In fact, holding onto the scroll for longer than one round often proved fatal! The Nightmare version of Peril in Pelargir further explores this theme, reinforcing the importance of the scroll and heightening the tension as the heroes seek to prevent its theft, by adding a new loss condition, which is introduced on the new setup card (Peril in Pelargir Nightmare Deck, 1). First of all, it has two Forced effects: “Forced: At the end of the combat phase, if Alcaron’s Scroll is in the staging area, attach it to the enemy in play with the highest [Defense Strength]. “Forced: At the beginning of the refresh phase, if Alcaron’s Scroll is attached to an enemy, place 1 progress on that enemy.” These effects allow the many Brigands that are attacking our heroes to actually accomplish their goal: They can grab the scroll if it is not attached to a hero. This forces the players to defeat that enemy in order to progress. Meanwhile, for each turn that an enemy holds onto the scroll, it gets a progress token. This represents the enemy fleeing from the heroes and escaping their grasp. Finally, the setup card introduces a loss condition should any enemy slip off with the scroll: “If at any point there are 3 or more progress tokens on an enemy, that enemy has escaped with the scroll, and the players lose the game.” In Nightmare Mode, once an enemy takes the scroll, the situation becomes truly desperate, and players must race to defeat that enemy and reclaim the scroll. Should they wait, they risk defeat. Many of the new encounter cards in the nightmare deck add to this tension and explore the concept of a tug-of-war between the players and the encounter deck. Alcaron’s Scroll will be at the center of attention, as our heroes must struggle to reclaim the scroll every time it is stolen from their grasp. When a Harbor Brute (Peril in Pelargir Nightmare Deck, 3) is revealed from the encounter deck, other Brigands will hand him the scroll to defend, as he is much tougher to defeat than his comrades. You must also be quick to recover the scroll once it has been stolen, because cards like They’re Getting Away! (Peril in Pelargir Nightmare Deck, 9) can cause defeat much quicker than you’d expect. Into Ithilien The Nightmare version of Into Ithilien explores the battle and siege keywords first introduced in Heirs of Númenor and alters the dynamic between the quest’s fork in the road at stages two and three. Into Ithilien introduces us to Celador (Heirs of Númenor, 25), one of Faramir’s Rangers ambushing the vicious men of Harad. It is difficult to keep this Ranger alive as wargs and Haradrim constantly assault your party, but if Celador survives stage one, the players are rewarded with the opportunity to proceed directly to stage three. Otherwise, if Celador falls, the players must go to the punishing second stage. However, since stage three does not have the battle or siege keywords, whereas all the other quest stages have one or the other, many players found it easier to craft a deck specifically to defeat battle or siege quests, and they would allow poor Celador to perish so that they would never have to worry about Willpower. Accordingly, the Into Ithilien Nightmare Deck does more than reinforces the quest’s themes; it includes punishing cards that are even worse when the current quest has the battle or siege keyword, such as the Haradrim Marksman (Into Ithilien Nightmare Deck, 3), who changes drastically from one stage to another. Savage Fray (Into Ithilien Nightmare Deck, 9) makes your questing even more unpredictable by shifting the tides of the conflict from battle to siege, or siege to battle.
If you are unfortunate enough to lose Celador and be forced to advance to stage two, you’ll also face the wrath of one of Harad’s dreaded Mûmak Elite (Into Ithilien Nightmare Deck, 2). For these reasons and more, you will find yourself wanting to safeguard Celador as much as possible, so the Ranger can guide you through Ithilien’s hidden paths and help you avoid the most brutal enemies in the Southron army. The Siege of Cair Andros This difficult quest introduced players to three Battlegrounds, locations under attack by Orcs and Haradrim which must be protected at all costs. If you could explore these Battleground locations before they took damage equal to their quest points, you would be rewarded with the removal of one of the quests’s five quest stages. As the enemy’s armies surrounded your heroes and assaulted them on all sides, you were forced with difficult decisions, including the need to make sacrifices to keep these Battlegrounds – or your heroes – alive. The Nightmare version of The Siege of Cair Andros adds more Battleground locations to the encounter deck, all of which have effects that punish the players if they are destroyed by the enemy. This helps keep the quest tense and difficult even after the scenario’s original three Battleground locations are explored or destroyed, and it keeps each of the encounter deck’s enemies relevant throughout the entire quest. When locations like the Besieged Courtyard (The Siege of Cair Andros Nightmare Deck, 5) and Anduin Wharf (The Siege of Cair Andros Nightmare Deck, 7) are in play, each decision you make can mean the difference between victory and defeat. You may wish to take the archery damage from a Southron Mounted Archer (The Siege of Cair Andros Nightmare Deck, 2) on one of these locations instead of your battered and weary heroes… But how much damage will you risk taking on the locations you are sworn to defend? As always, we strive to make each Nightmare encounter more thematic and engaging, in addition to increasing its difficulty. I hope you enjoy the new challenges and twists that the Heirs of Númenor Nightmare Decks offer. Good luck. Gondor is counting on your aid! Alámenë! Stand Against the Nameless Enemy “The Nameless Enemy has arisen again. Smoke rises once more from Orodruin that we call Mount Doom. The power of the Black Land grows and we are hard beset.”
–Boromir, The Fellowship of the Ring In 2012, the Heirs of Númenor deluxe expansion first allowed fans of The Lord of the Rings: The Card Game to explore the lands of Gondor and stand fast against the Shadow of Mordor. Since then, the Shadow has grown in strength, and Gondor is once again in need of heroes. Will you be able to withstand the nightmarish forces the Dark Lord has now assembled? Heirs of Númenor Nightmare Decks are now available! ... Source: The Border War Grows Darker
|
|
|
|
|
Logged
|
|
|
|
RSSFeeder
Global Moderator
Deep One
Karma: 0
Offline
Posts: 3916
|
|
« Reply #326 on: 04 November 2014, 00:30:03 » |
|
A 2014 World Championship Weekend UpdateInformation for Those Attending or Viewing the Events
The 2014 World Championship Weekend is almost here, and it is set to smash old attendance records, with more players preregistered this year than the total number of attendees last year. This year will be an event to remember, filled with passionate players, hard-fought games, laughter, and exciting and exclusive prizes. In addition, representatives from Gen Con will be attending the event and handing out additional giveaways. It all starts Wednesday night with an LCG® State of the Union address. Live Coverage The official Fantasy Flight Games Twitch stream will be active throughout the event, covering games in each of our Championships all day, every day. This year, FFG is taking another large step toward providing fans at home the best event coverage possible; we will have live commentating for every match we show on camera! During breaks between matches, we will have exciting announcements, interviews, and more.    
Each day, viewers can tune into the FFG Twitch channel to see live streaming of their favorite games, including the Finals for every Championship. Almost all matches will be shown in their entirety, allowing viewers to see how a game plays out from start to finish. The crew from Team Covenant will also be joining FFG staff for commentating, interviews, and more. In particular, viewers will want to make sure to tune in Thursday at 12:45pm and 17:30pm CST (Central Standard Time) for important discussions. Event and Tournament Registration Preregistration for World Championship Weekend has closed. Even though space is limited, players can still register onsite starting on Wednesday, Nov. 5th, at 4 pm CST (Central Standard Time). The cost to register onsite is $50. Due to the high volume of players who have preregistered, if the number of players registering onsite would push registration beyond what our fire code allows, we may have to turn away players. All players must register for the tournaments they are participating in an hour before it starts. Tournament registration closes fifteen minutes before each tournament starts. Receiving a badge onsite or answering the survey sent to those who preregistered does not automatically enter you into a tournament. X-Wing™ players who have reserved a spot in one of the X-Wing World Championship Flights must still register for the tournament and bring two squad lists. Side Events Due to the unprecedented number of players attending World Championship Weekend, we will be holding some side events on Thursday, Friday, and Saturday in an auxiliary space one block away from the Fantasy Flight Games Center. This space is an easy 5-10 minute walk from the Games Center, and we will have a shuttle van running between the two locations all three days. All World Championships will remain in the Games Center. 
The auxiliary space is located at 1975 Oakcrest Ave, Roseville, MN 55113
The side event schedule has been updated to represent which games will be located in the auxiliary space. An Event to Remember The 2014 World Championship Weekend will be an event to remember. With a record-setting number of players set to attend, countless events, streaming live coverage with commentators, and no end of prizes, attendees and viewers alike are sure to have a blast. Don’t forget! For those attending, it all kicks off the night of Wednesday, Nov. 5th, with the LCG State of the Union address. For those watching, streaming begins bright and early Thursday, Nov. 6th, with matches of X-Wing Flight One. ... Source: A 2014 World Championship Weekend Update
|
|
|
|
|
Logged
|
|
|
|
RSSFeeder
Global Moderator
Deep One
Karma: 0
Offline
Posts: 3916
|
|
« Reply #327 on: 04 November 2014, 09:00:03 » |
|
The Galaxy's Most Wanted, Part TwoA Preview of the Most Wanted Expansion Pack for X-Wing (TM)
“Bounty hunters? We don’t need that scum.”
–Admiral Piett As it turns out, Admiral Piett was wrong about the bounty hunters. The Empire did, in fact, need them, and it was Boba Fett, the most notorious of all bounty hunters, who ultimately located the Millennium Falcon and led Darth Vader to Cloud City, Han Solo, Chewbacca, and Princess Leia. For argument’s sake, though, what might have happened had the Empire not recruited Boba Fett? There’s no shortage of work for talented bounty hunters in the Star Wars galaxy, and there’s no doubt that Boba Fett ranks among the deadliest and most talented of them all. If the Empire hadn’t offered Fett a reward for locating the Falcon, he may have taken different work with a Hutt or with the Black Sun crime syndicate. This is one of the theoretical situations presented by the upcoming Most Wanted Expansion Pack for X-Wing™. With its twenty ship cards, Most Wanted allows you to jump start your own Scum and Villainy faction, partially by calling upon the services of Boba Fett, the galaxy’s most fearsome bounty hunter. In our last preview of Most Wanted, we looked at how the expansion reinvents the Y-wing and Z-95 Headhunter for use within the Scum faction. Not only does the expansion come with one Y-wing miniature and two Z-95 Headhunter miniatures, all given Scum-themed paint schemes, it introduces four new unique pilots for them and a host of upgrades that completely explode pre-existing player expectations for these starfighters and provide them new personalities. Today, we continue our exploration of the Most Wanted Expansion Pack and how its ship cards and upgrades allow you to repurpose several previously released ships as the foundation for your new Scum fleet. 
Most Wanted and the Firespray-31 Originally released in the second wave of X-Wing starship expansions, the Firespray-31 has a long and storied history of service to the Empire, but we’ve still only seen a fraction of what the starship brings to the game. In Most Wanted, we find the starship rejuvenated by its induction into the Scum faction, along with a couple of its unique pilots, who are given all-new abilities. We also find a couple of new pilots who help to reinforce the idea that the Firespray-31, like any starship, isn’t just a machine, it’s a nexus of tactical possibilities. Boba Fett Without a doubt, Boba Fett is the most renowned and most feared of all the pilots in the Most Wanted Expansion Pack. He’s clever. He’s resourceful. His ship is loaded with potent weaponry. And whenever there’s a bounty worthy of his attention, he delivers. Without a doubt, Boba Fett is the most renowned and most feared of all the pilots in the Most Wanted Expansion Pack. He’s clever. He’s resourceful. His ship is loaded with potent weaponry. And whenever there’s a bounty worthy of his attention, he delivers.
Of course, much of Boba Fett’s success owes to the ways that he adapts to the task put before him. In the Scum faction, Fett is every bit as task-oriented as he is in the Star Wars saga: “When attacking or defending, you may reroll 1 of your dice for each enemy ship at Range 1.” Whereas the Imperial-aligned Boba Fett can adjust his maneuvers on the fly in order to better track his prey, the Scum faction Fett takes to the battlefield to defend his employers’ interests. They don’t care if he can avoid enemy firing arcs; they want him to eliminate enemy ships as fast as possible. So that’s what he’s going to do. Rather than rely upon all the arc-dodging tricks the Imperial Fett might employ, the Scum faction version of Boba Fett is going to spend as much time as possible at Range 1 of his foes, where combat is deadliest and where his ability gives him a distinct advantage, simultaneously increasing the accuracy of his attacks and his chances of avoiding retaliatory strikes. Meanwhile, it’s worth noting that while the galaxy’s most notorious bounty hunter is bound to see all manner of upgrades, two bear particular attention. Since his Firespray-31 already features solid attack and defense, Outmaneuver is a natural complement to Fett’s pilot ability, allowing him to strip away his opponent’s defenses, and a Recon Specialist ensures that you’ll be able to make use of your  results on both offense and defense. results on both offense and defense. Kath Scarlet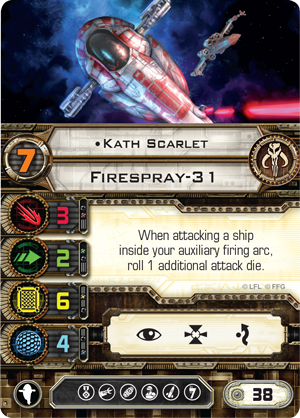 Like Boba Fett, Kath Scarlet gains a new pilot ability as she joins the Scum faction, one geared less toward gaining tactical advantages during combat and more directly geared toward dealing damage. Like Boba Fett, Kath Scarlet gains a new pilot ability as she joins the Scum faction, one geared less toward gaining tactical advantages during combat and more directly geared toward dealing damage.
“When attacking a ship inside your auxiliary firing arc, roll 1 additional attack die.” As potent as it is, Kath Scarlet’s ability is likely more interesting because it promotes a different sort of flying. Most pilots want to do two things as they fly: get out of their enemies’ firing arcs and catch their enemies within their own firing arcs. Ideally, they’ll manage to flank their targets, get behind them, and trail them at a short distance, anticipating their movements as best as possible. Even if you’re facing a squad with turret weapons, weapons with rear arcs, or “Hot Shot” Blasters, getting into position behind your foes still increases your odds that you’ll keep your foes in your sights in subsequent rounds. Kath Scarlet, on the other hand, wants to overshoot her foes in an opening joust and then weave around the battlefield, performing a series of low-speed maneuvers and hard turns that her foes won’t likely expect. She may even adjust these maneuvers by outfitting her ship with an Engine Upgrade. In some situations, she may even perform a calculated Koiogran-turn that places her right in front of her opponent’s ship. While this maneuver would be suicidal in most traditional circumstances, Kath Scarlet has a high enough pilot skill value that she’ll often fire before her foe, and her Scum employers may be willing to pay enough for her to bring an Outlaw Tech aboard her ship so that she can gain a focus token even as she loses the opportunity to perform an action. Emon Azzameen Emon Azzameen, the third of the unique Firespray-31 pilots from Most Wanted, also reflects the Scum faction’s aggressive tendencies. His ability, partnered with that of the Title card for his signature vessel, the Andrasta, makes him arguably the game’s most impactful bomber. Whenever Emon Azzameen drops a bomb, he can use the straight “3” template or either “3” turn template instead of the straight “1” template. Of course, as this is an optional ability, he can still use the straight “1” template if he so desires. This means that his bombs threaten roughly three times as much space as those dropped by other pilots, and that makes it harder for his foes to fly in such a way as to remain safe from them, especially if their pilot skill values are lower than Emon Azzameen’s pilot skill of “6.” Against squads with lower pilot skill values, Emon Azzameen can drop his bombs with unparalleled precision, not just in locations that allow them to score one or two points of damage, but in locations that they may wreak havoc on entire squads. 
A pair of X-wing pilots maneuver carefully in order to remain outside the standard blast radius of Emon Azzameen’s Seismic Charges.

Here, we see how Emon Azzameen’s ability allows him to defy your opponent’s expectations. The X-wing pilots who thought they were safe now suddenly find themselves within the blast radius of Emon Azzameen’s Seismic Charges. He can catch one of the X-wings by dropping his bomb along the straight “3” template, or he can catch both X-wings by using a “3” turn template.
Moreover, since Emon Azzameen’s Andrasta can equip as many as three different bombs, he doesn’t have to worry about whether or not his current chance to drop a bomb is the one, singular, best opportunity that he’ll have in the game. If Emon Azzameen sees the opportunity to bomb his opponents, he takes it. Then, if another, better opportunity comes along, he doesn’t have to regret his first bomb; he can just drop a second. As often as not, your opponent’s likely to run out of hull before a fully loaded Andrasta is going to run out of bombs. Mandalorian Mercenary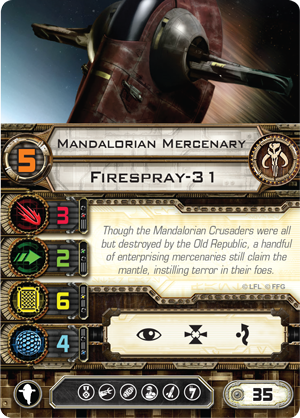 The final Firespray-31 pilot from Most Wanted is the non-unique Mandalorian Mercenary, but if you were to suggest that a non-unique pilot without a unique pilot ability couldn’t help reinforce the faction’s distinctive, aggressive, self-centered approach to the starship, you would be wrong. The final Firespray-31 pilot from Most Wanted is the non-unique Mandalorian Mercenary, but if you were to suggest that a non-unique pilot without a unique pilot ability couldn’t help reinforce the faction’s distinctive, aggressive, self-centered approach to the starship, you would be wrong.
At thirty-five squad points the Mandalorian Mercenary costs two more than the Empire’s Bounty Hunter. For the additional two squad points, the Mandalorian Mercenary offers you two additional points of pilot skill, as well as the elite pilot talent and illicit upgrades. We’ve already seen a wide range of the different tricks that illicit upgrades can bring to the table, and the different advantages that elite pilot talents offer are as numerous as the talents themselves. The trade-off, of course, is that you can’t fly three Firespray-31s in a Scum squad. Whereas dirty tricks are the province of the galaxy’s Scum and Villainy, it’s tremendously difficult to improve upon the Empire’s mechanical efficiencies. The result is that since you’re forced to pay extra for even your most basic Scum Firespray-31, you’re more likely to bring the ship into your squad in order to take advantage of its elite pilots and their talents, or to take advantage of some devious combination of elite pilot talents and illicit upgrades. Scum pilots are less likely to fly a stock Firespray-31; they want to make sure they have multiple tricks on hand. A Support Ship No Longer In X-Wing, the HWK-290 has long played the role of “support ship,” incorporated into Rebel squads for its pilots’ abilities to pass focus tokens, boost other pilots’ pilot skills, and add dice to other ships’ attacks. Additionally, the ship’s limited maneuverability, weak primary attack, and ability to wield a turret weapon almost always dictate that it wields an Ion Cannon Turret, attacking to ionize enemy ships and set them up for kill shots made by X-wings, B-wings, or other more potent attackers. Whenever you see a HWK-290 in a Rebel squad, you can safely bet that it will be flying within “Range 1–3” of its wingmates, because everything that the ship does, it does most effectively while flying within that range of the rest of its squad. 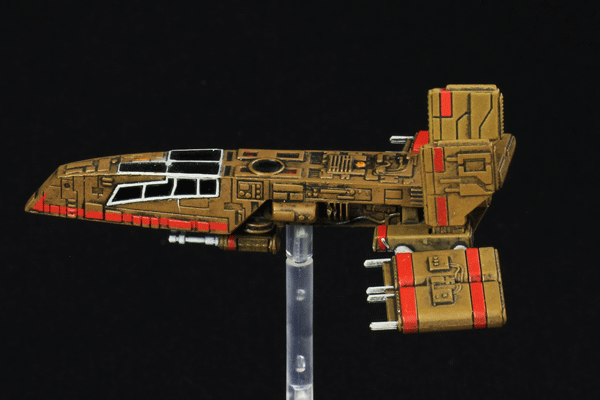
A 360-degree view of the miniature from the HWK-290 Expansion Pack
The ship’s role will soon change, though, with the release of the Most Wanted Expansion Pack. In Scum fleets, the HWK-290 is no support ship. Its maneuver dial, hull, shields, agility value, and attack value may remain completely unchanged, but its personality receives a radical overhaul. As with most Scum pilots, the expansion’s three unique HWK-290 pilots are every bit as self-serving and self-interested as they are talented. They don’t boost their teammates; they disrupt their rivals. They prey upon them. Moreover, the ship no longer needs to fly within Range 1–3 of its own squad; instead, the ship’s three unique pilots all feature unique abilities that trigger off of proximity to enemy forces. One wants to fly within Range 1–3 of his enemies, while the other two want to fly within Range 1–2 of theirs. Dace Bonearm At twenty-three squad points, Dace Bonearm is the most expensive and, also, the most lethal of the Scum faction’s HWK-290 pilots: “When an enemy ship at Range 1–3 receives at least 1 ion token, if you are not stressed, you may receive 1 stress token to cause that ship to suffer 1 damage.” In many respects, Ion Cannon Turrets are among the best weapons in the game; they can fire in any direction, they attack with three dice, and when they ionize ships, they strip away their maneuverability. The one real downside of the Ion Cannon Turret, however, is that it can only deal a single point of damage – that is, unless you are Dace Bonearm. So long as he remains unstressed within Range 1–3 of an enemy ship, Dace can help you pile on the damage whenever you ionize it. He does this after the Ion Cannon Turret’s text resolves to reduce its initial damage, and he does it without requiring any additional rolls. Palob Godalhi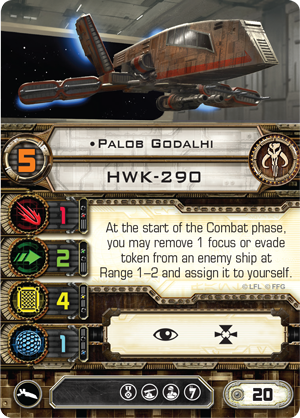 Palob Godalhi is another Scum pilot your foes would be wise to avoid. Whenever he can get within Range 1–2 of an enemy ship, he can steal an evade or focus token from it at the beginning of the Combat phase. Palob Godalhi is another Scum pilot your foes would be wise to avoid. Whenever he can get within Range 1–2 of an enemy ship, he can steal an evade or focus token from it at the beginning of the Combat phase.
This is an ability that is bound to have a massive impact. Most of the time, Palob Godalhi’s ability will serve him at least as well as Push the Limit would, allowing him to perform attacks modified by both target lock and focus tokens. After all, the focus action is the game’s most ubiquitous and, arguably, its most efficient. So if Palob Godalhi flies within Range 1–2 of a number of foes, there’s a very good chance, he can find a focus token on one of them, meaning that he need only perform the target lock action to end up with both tokens. At the same time, the fact that Palob Godalhi can bolster his attacks by stripping a focus token from an enemy means that that enemy is denied a good portion of the defenses it had intended to use to survive Palob Godalhi’s attack in the first place. However, as much as Palob Godalhi’s ability can create some really nasty swings in action efficiency, it is likely to make its greatest impact in another, entirely different fashion – by disrupting your opponent’s intended tactics. While you have Palob Godalhi threatening to steal focus and evade tokens from your opponent’s ships, you’re tempting your opponent to do one of two things (or a combination of both): Either your opponent will select maneuvers he hopes will get his ships outside of Range 1–2 from Palob Godalhi, or he’ll avoid performing focus and evade actions. X-Wing is largely about advantageous positioning, so if your opponent starts selecting suboptimal maneuvers just to avoid Palob Godalhi, that’s a win, and it’s your job to capitalize upon it. Meanwhile, there are only two types of defensive tokens. Evade tokens allow you to cancel one hit or critical hit result; focus tokens allow you to count all of your results as  results, greatly increasing your chances of avoiding hits and surviving multiple attacks. If your opponent stops performing these actions simply to prevent Palob Godalhi from stealing his tokens, then once again, you’ve won a serious advantage. results, greatly increasing your chances of avoiding hits and surviving multiple attacks. If your opponent stops performing these actions simply to prevent Palob Godalhi from stealing his tokens, then once again, you’ve won a serious advantage. Torkhil Mux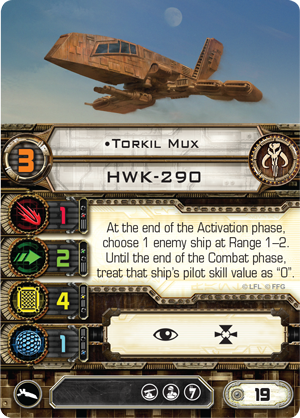 The last of the unique HWK-290 pilots from Most Wanted is Torkhil Mux, and his ability offers yet another reason that the Scum faction is soon bound to shake up the X-Wing metagame. The last of the unique HWK-290 pilots from Most Wanted is Torkhil Mux, and his ability offers yet another reason that the Scum faction is soon bound to shake up the X-Wing metagame.
As 2013 World Champion Paul Heaver notes in his most recent “Turn Zero” article, any points you spend in your squad build toward pilot skill are always implicitly part of a “bid” to fire first and perform your actions with greater knowledge of what your opponent intends to do in the round. Points spent toward pilot skill don’t directly increase the amount of damage your ship can deal, nor do they directly increase its defenses. Thus, the ideal pilot skill is one higher than your opponent’s, a point at which you maximize the impact of winning pilot skill but minimize the number of squad points it costs you to win the bid. When we combine this knowledge with the fact that the game’s unique TIE phantom pilots have pushed winning pilot skill bids toward the extremes of “10” and “11,” we see that Torkhil Mux enters the game as a sort of wild card, throwing the whole bidding process into disarray. When you have Torkhil Mux on the table, all those squad points your opponent just invested into pilot skill are greatly devalued. At just twenty-four squad points, Torkhil Mux can wield an Ion Cannon Turret to ignore your opponent’s arc dodging, and then he can lower an opponent’s pilot skill value to “0” to ensure that pilot fires last… if at all. Unleash Your Aggressive Instincts Altogether, the unique pilots and upgrades that you’ll find in the Most Wanted Expansion Pack are bound to transform the Firespray-31 and HWK-290 into much more aggressive starships within the Scum faction than they are within the Empire and Rebellion. Moreover, when you combine them with the expansion’s other new pilots and upgrades, you get the single greatest infusion of new tactical options and possibilities since the Core Set. There’s no question that Most Wanted is going to help you launch your Scum fleet at full speed; the only question is what set of pilots and tactics you’ll choose to employ. In the meantime, you can share your thoughts about these pilots and upgrades in our community forums, and you can keep an eye to our website for more X-Wing news and announcements. In the coming weeks, we’ll continue to look at the Scum faction, its ships, and its distinctive personality within your X-Wing battles, resuming our Wave VI previews with a look at the StarViper Expansion Pack! ... Source: The Galaxy's Most Wanted, Part Two
|
|
|
|
|
Logged
|
|
|
|
RSSFeeder
Global Moderator
Deep One
Karma: 0
Offline
Posts: 3916
|
|
« Reply #328 on: 04 November 2014, 17:30:03 » |
|
The Treason of SarumanAnnouncing a New Saga Expansion for The Lord of the Rings: The Card Game
“Nothing that we have endured of late has seemed so grievous as the treason of Isengard. Even reckoned as a lord and captain Saruman has grown very strong. He threatens the Men of Rohan and draws off their help from Minas Tirith, even as the main blow is approaching from the East.”
–Gandalf, The Two Towers The Fellowship is broken. Of the Nine Walkers that set forth from Rivendell, two have fallen, two have been captured, and two have disappeared, including Frodo Baggins, the Ring-bearer, on whom rest all the hopes of Middle-earth. Still, three remain, three who draw breath and can still draw arms. Led by Aragorn, son of Arathorn, the rightful heir of Gondor, they must do what good they can, even if they must do it without hope… Fantasy Flight Games is proud to announce the upcoming release of The Treason of Saruman, the third The Lord of the Rings Saga Expansion for The Lord of the Rings: The Card Game! With its 165 new cards, The Treason of Saruman introduces three new scenarios that allow you and your friends to immerse yourselves in key events pulled straight from the pages of the first half of The Two Towers. Join Aragorn and the Three Hunters as they pursue a pack of Uruk-hai across the plains. Take up arms against the forces of Isengard at the defense of Helm’s Deep. Steel your will against Saruman and his wizardry as you join the march on Orthanc. Throughout your trials, you’ll visit iconic locations, confront infamous villains, and enjoy game experiences shaped by innovative new mechanics that bring you as close as you can get to the drama of the classic fantasy epic without finding your name in its pages. 
Meanwhile, even though each of the three scenarios in The Treason of Saruman presents a unique and rewarding set of challenges, you can also play them in Campaign Mode, combining them with the scenarios from The Black Riders and The Road Darkens as the three latest chapters in an epic narrative designed to carry you from the Shire to the fires of Mount Doom. In Campaign Mode, every decision you make has far-reaching consequences, and you can earn boons and burdens that stay with you from adventure to adventure. The Treason of Saruman introduces six new boons and five new burdens. A New Leader for Your Fractured Fellowship “Let me think!” said Aragorn. “And now may I make a right choice, and change the evil fate of this unhappy day!” He stood silent for a moment. “I will follow the Orcs,” he said at last.
–J.R.R. Tolkien, The Two Towers The events of The Treason of Saruman take place after the disappearance of Frodo Baggins and The One Ring. Accordingly, the Saga Expansion introduces a new hero to lead the way, a Fellowship sphere version of Aragorn (The Treason of Saruman, 1).  The pivotal character from the first half of The Two Towers, Aragorn takes the lead throughout the expansion’s three scenarios. Like Bilbo Baggins in the two Hobbit Saga Expansions and Frodo Baggins in The Black Riders and The Road Darkens, Aragorn passes along with the first player and must survive in order for you to overcome the forces of Mordor and of Isengard. Unlike the two Hobbits, however, Aragorn is a powerful Dúnedain and Ranger, able both to hold his own in battle and to inspire others. The question that emerges, then, is how much you’ll risk making use of Aragorn’s talents in order to press through the dangers that assail you. The pivotal character from the first half of The Two Towers, Aragorn takes the lead throughout the expansion’s three scenarios. Like Bilbo Baggins in the two Hobbit Saga Expansions and Frodo Baggins in The Black Riders and The Road Darkens, Aragorn passes along with the first player and must survive in order for you to overcome the forces of Mordor and of Isengard. Unlike the two Hobbits, however, Aragorn is a powerful Dúnedain and Ranger, able both to hold his own in battle and to inspire others. The question that emerges, then, is how much you’ll risk making use of Aragorn’s talents in order to press through the dangers that assail you.
Equipped with the Andúril boon from The Road Darkens (The Road Darkens, 14), Aragorn makes an excellent defender, but whenever he defends, one nasty Shadow effect can spell disaster. You risk everything. Even should you face your enemies with more caution, Aragorn’s special ability may help you stand against overwhelming odds: “Action: Spend 2 resources from Aragorn’s resource pool to ready a hero.” In The Treason of Saruman, you may have to do without hope, you may have to do without knowledge of The One Ring and its whereabouts, and you may even have to do without those companions who have fallen along the way. But you will not have to do without guidance. Instead, Aragorn, the son of Arathorn and heir of Isildur, emerges as a peerless leader, one who truly inspires those around him. The Forces of Isengard “The world changes, and all that once was strong now proves unsure. How shall any tower withstand such numbers and such reckless hate? Had I known that the strength of Isengard was grown so great, maybe I should not so rashly have ridden forth to meet it.”
–Théoden, The Two Towers Of course, even a leader so noble as Aragorn is no match for Saruman and all the armies and wizardry he has secretly assembled within the towering walls of Isengard. You will need every hero and every ally you can assemble in order to confront the Uruk-hai, Dunlendings, and enchantments commanded by the former head of the White Council. Though he doesn’t make a personal appearance until the expansion’s third scenario, Saruman’s influence underscores each and every encounter. His Uruk-hai are tough and brutal warriors, he has manipulated the wild men of Dunland toward new heights of fervor and hatred, and he has blanketed the lands within Isengard with powerful enchantments. Saruman’s hands guide each of the three scenarios in The Treason of Saruman, and together they present a vivid picture of just how devious and varied an Istari’s machinations can be. Each presents a new, scenario-specific mechanic that ensures it offers a unique and thematic experience, unlike anything that has come before it.
 In The Uruk-hai, the expansion’s first scenario, you and your friends chase the band of Uruk-hai that is marching your captive friends across the plains of Rohan; as you race to place progress on the scenario’s quest stages, the Uruk-hai push forward to raise the scenario’s “pursuit” value. If the pursuit value ever reaches thirty, the Uruk-hai have successfully taken their prisoners to Isengard, and you lose the scenario. In The Uruk-hai, the expansion’s first scenario, you and your friends chase the band of Uruk-hai that is marching your captive friends across the plains of Rohan; as you race to place progress on the scenario’s quest stages, the Uruk-hai push forward to raise the scenario’s “pursuit” value. If the pursuit value ever reaches thirty, the Uruk-hai have successfully taken their prisoners to Isengard, and you lose the scenario.
- In Helm’s Deep, your heroes and the encounter deck exchange roles! While your heroes join the defense of Helm’s Deep, the scenario’s enemies and its treachery cards lay siege to the quest and any active location.
- Finally, in The Road to Isengard, your heroes march against Saruman himself (The Treason of Saruman, 47), but he’ll test their resolve at every turn. His realm is protected by powerful spells, and his voice can bend the mind. Accordingly, The Road to Isengard adds a third loss condition. Not only do you lose if your threat level reaches fifty or all your heroes are eliminated; you also lose if your hand is reduced to zero cards. And, of course, Saruman has prepared plenty of evil spells to punish those who draw cards and resist his lures.
A Long Road, and Much to Do “We must do without hope,” he said. “At least we may yet be avenged. Let us gird ourselves and weep no more! Come! We have a long road, and much to do.”
–J.R.R. Tolkien, The Fellowship of the Ring The Fellowship has fractured, but there is no time for despair. Instead, you must join Aragorn and the remaining members of the Fellowship for an epic journey through the realms of Rohan and Isengard. You’ll need every bit of help you can get, so The Treason of Saruman introduces thirty-nine new player cards (six new boons and three copies each of eleven different cards) and three renowned heroes, including the Fellowship sphere version of Aragorn. The Treason of Saruman is scheduled to arrive at retailers in the first quarter of 2015. Until then, you can visit its description page for more information and keep your eyes open for additional previews of The Treason of Saruman, its challenges, and its player cards! ... Source: The Treason of Saruman
|
|
|
|
|
Logged
|
|
|
|
RSSFeeder
Global Moderator
Deep One
Karma: 0
Offline
Posts: 3916
|
|
« Reply #329 on: 05 November 2014, 02:00:06 » |
|
The Threat BeyondAnnouncing the Fifth War Pack in the Warlord Cycle
“My purpose is to destroy the daemonic, and if I must rise to command an entire sector to do so, then so be it.”
–Torquemada Coteaz Fantasy Flight Games is proud to announce The Threat Beyond, the fifth War Pack in the Warlord cycle for Warhammer 40,000: Conquest! As the Warlord cycle approaches its epic conclusion, The Threat Beyond invites you to take on the mantle of an Imperial Inquisitor and exercise the power of the Inquisition with a new warlord for the Astra Militarum. Nowhere is truly safe in the darkness of the far future, but more than most leaders, Torquemada Coteaz has carved out a region of relative stability among the stars. His eternal watchfulness and unflagging zeal have exterminated countless heresies. Now, he turns his gaze to the Traxis sector, eager to bring the order of the Imperium to this newly discovered space. 
The power of the Inquisition stands against dark heresies throughout the Traxis sector, but new cards for every faction also continue the cycle’s main themes, granting more significance to your warlords and how you to choose to use them every turn. With this War Pack, you can fight alongside the Salamanders legion of Space Marines, lead a vicious attack with the Orks, or turn to the excess of Slaanesh with the Chaos faction. The Wargear of the Dark Eldar is yours to command, as are the deadly wraithknights of the Eldar, or the grenadiers of the Tau. Every faction gains new cards as they struggle to conquer the Traxis sector. The Fury of the Righteous  With the introduction of The Threat Beyond, Torquemada Coteaz (The Threat Beyond, 89) offers you a number of distinct advantages, breaking away from standards set by other warlords and forging his own path to victory. Torquemada Coteaz allows you to start the game with both eight cards and eight resources, whereas most other warlords provide seven of each. This extra advantage may seem small, but the options that it brings you can easily shape the entire game. Torquemada Coteaz also bears eight HP on his hale side, more than any other warlord. With the introduction of The Threat Beyond, Torquemada Coteaz (The Threat Beyond, 89) offers you a number of distinct advantages, breaking away from standards set by other warlords and forging his own path to victory. Torquemada Coteaz allows you to start the game with both eight cards and eight resources, whereas most other warlords provide seven of each. This extra advantage may seem small, but the options that it brings you can easily shape the entire game. Torquemada Coteaz also bears eight HP on his hale side, more than any other warlord.
These bonuses come at a cost, however: Torquemada Coteaz has an ATK of zero. Even here, however, Torquemada Coteaz’s resourcefulness can increase his prowess in battle. He bears a Combat Action that reads, “Sacrifice a unit at this planet to give this warlord +3 ATK for its next attack this phase. (Limit once per attack.)” By drawing upon the nigh-limitless manpower of the Astra Militarum, including token units like the Guardsman, Torquemada Coteaz can easily strike for more damage than any other warlord. The units in Torquemada Coteaz’s signature squad live to serve him in battle and enhance his power. The signature squad includes four copies of Coteaz’s Henchmen (The Threat Beyond, 90). This unit can engage in battle on its own, but perhaps its most useful purpose is to support Torquemada Coteaz. Coteaz’s Henchmen has an Interrupt that allows you to ready your warlord when this unit leaves play. Because of this, you can attack with Coteaz’s Henchmen and then sacrifice the Henchmen to ready Coteaz and boost his attack, allowing him to rain the fury of the Inquisition down on his foes.  Expendable Guardsman token units may be ideally suited to fuel Torquemada Coteaz, but they may not always be present when you need to boost Torquemada Coteaz’s attack. Thankfully, that’s where some of the other cards in the signature squad come in. You’ll gain access to a new support, the Formosan Black Ship (The Threat Beyond, 91), which allows you to put two Guardsman token units into play when you sacrifice a non-token unit, giving you more fodder to fling at the enemies of the Imperium. Expendable Guardsman token units may be ideally suited to fuel Torquemada Coteaz, but they may not always be present when you need to boost Torquemada Coteaz’s attack. Thankfully, that’s where some of the other cards in the signature squad come in. You’ll gain access to a new support, the Formosan Black Ship (The Threat Beyond, 91), which allows you to put two Guardsman token units into play when you sacrifice a non-token unit, giving you more fodder to fling at the enemies of the Imperium.
You may also choose to use The Emperor Protects (The Threat Beyond, 93) to save your sacrificed units. By playing this free event when one of your units leaves play from your warlord’s planet, you can return that unit to your hand instead, allowing you to redeploy the unit and continue the onslaught of Torquemada Coteaz and the Astra Militarum. The final card in the signature squad is The Glovodan Eagle (The Threat Beyond, 92). This card is an attachment that can only be attached to your warlord, giving him a permanently raised ATK. Obviously, this can be crucial for giving Torquemada a means to attack even when you don’t have units to sacrifice. However, you can also detach this attachment from your warlord, causing it to become a unit with one ATK and one HP, allowing you to deal more damage after your opponent’s units are exhausted. Then, you can sacrifice it to boost Torquemada Coteaz’s damage. Alternatively, you can take an Action to return this unit to your hand, allowing you to redeploy it next round or use it as a shield card to block up to three damage. The Glovodan Eagle offers an unprecedented amount of versatility, allowing you to command the forces of the Astra Militarum in the best possible way. Confront the Threat Darkness stirs among the stars and planets of the Traxis sector, and only the vigilance of the Inquisition can root out corruption and bring this new sector into the fold of the Imperium. Confront the darkest servants of Chaos in The Threat Beyond and stand triumphant with Torquemada Coteaz! Look for The Threat Beyond at your local retailer in the first quarter of 2015! ... Source: The Threat Beyond
|
|
|
|
|
Logged
|
|
|
|
|


