Title: FFG: Fantasy Flight Games News
Post by: RSSFeeder on 03 June 2014, 10:10:02
Fantasy Flight Games News (http://www.fantasyflightgames.com/index.asp)
© 2013 Fantasy Flight Publishing, Inc. Fantasy Flight Games and the FFG logo are ® of Fantasy Flight Publishing, Inc. All rights reserved.
Privacy Policy | Terms of Use | Contact | User Support | Rules Questions | Help | RSS
Title: FFG:Delve the Darkest Depths of Khazad-dum
Post by: RSSFeeder on 03 June 2014, 13:00:03
Delve the Darkest Depths of Khazad-dumNightmare Decks Are Now Available for The Lord of the Rings: Khazad-dum
“I too once passed the Dimrill Gate,” said Aragorn quietly; “but though I also came out again, the memory is very evil.”
–J.R.R. Tolkien, The Fellowship of the Ring Three new Nightmare Decks for The Lord of the Rings: The Card Game are now available via FFG’s in-house manufacturing. Upon the release of the game’s first deluxe expansion, Khazad-dûm, Middle-earth’s heroes first departed the Shadows of Mirkwood and embarked upon a perilous journey through the dark and twisting mines of Moria. Their search for the missing Dwarf, Balin, led them far from the familiar locations and foes of the Core Set into a lightless realm populated by hordes of Orcs, Goblins, and Cave Trolls, along with another presence, darker and more sinister than anything they had previously encountered… Now, you can experience the novelty and terrors of Khazad-dûm all over again with Khazad-dûm Nightmare Decks, a single set of three twenty-card Nightmare Decks, one for each of its three scenarios: Into the Pit, The Seventh Level, and Flight from Moria. Nightmare Decks introduce deadly new encounter cards and scenario-specific rules that greatly increase the challenges of the scenarios they enhance, while simultaneously layering subtle plot twists and thematic alterations. The result is that when you play these scenarios in Nightmare Mode, your old strategies may be countered, and if you don’t adapt to the new challenges you face, you may quickly meet your doom. 
Developer Matt Newman on Khazad-dûm Nightmare Decks Dust off your delving picks, and head for the mines of Moria… It’s time for the Khazad-dûm Nightmare Decks! We’ve been hard at work on these brand new Nightmare Decks, and I am very excited to preview some of the new cards and challenges players will face in these updated Khazad-dûm scenarios. As always, with our Nightmare Decks, each of these sets of twenty cards is designed to amplify an existing scenario, making it more challenging, while simultaneously tweaking its strategies and making it more atmospheric, as well. Let’s dive right in and take a look at the changes that Nightmare Mode brings to these scenarios! Into the Pit  The opening to the Khazad-dûm deluxe expansion introduces players to the Cave Torch (Khazad-dûm, 41), an objective attachment that helps them explore the darkest corners of Moria. Because the Cave Torch offers a powerful benefit and a relatively small drawback, players found themselves relying on its ability every turn… and why not? After all, who would dare to explore Moria without a light to guide them? The opening to the Khazad-dûm deluxe expansion introduces players to the Cave Torch (Khazad-dûm, 41), an objective attachment that helps them explore the darkest corners of Moria. Because the Cave Torch offers a powerful benefit and a relatively small drawback, players found themselves relying on its ability every turn… and why not? After all, who would dare to explore Moria without a light to guide them?
The Nightmare version of Into the Pit limits the number of times that players can use the Cave Torch, thus presenting players with difficult decisions and interesting choices. The Nightmare setup card (Into the Pit Nightmare Deck, 1) reads: “Forced: After Cave Torch exhausts, place 1 damage token on this card. Then, if there are 5 or more damage tokens on this card, remove Cave Torch from the game.” When players can only use the Cave Torch five times before removing it from the game, they’ll need to think twice before using it. Many of the new locations and enemies in this deck also work alongside this limitation, such as the Patrol Sentry (Into the Pit Nightmare Deck, 3) who can easily spot the heroes’ sources of light, or the Narrow Fissure (Into the Pit Nightmare Deck, 7), which the heroes cannot explore without first using the Cave Torch. Taken as a whole, this Nightmare version of Into the Pit becomes a race against the clock as the heroes’ light dwindles more and more, and they are forced to make extremely tough decisions. Rely too much on their torch, and they risk being swallowed by the darkness of Moria. Conserve too much light, and they will never find their way out of its twisting passages. The Seventh Level The Seventh Level is a straightforward quest that is meant to be a battle against never-ending swarms of goblins. The Nightmare version pushes this theme to extreme levels, sending wave after wave of goblins at our heroes, and as players will quickly learn, these goblins are all about strength in numbers. Many of the new cards, such as the Pit Goblin (The Seventh Level Nightmare Deck, 6) and the Deep-Mines, (The Seventh Level Nightmare Deck, 7) place resource tokens on the scenario’s many Goblin enemies. Other cards, like the Orc Taskmaster (The Seventh Level Nightmare Deck, 4) and the Western Hall (The Seventh Level Nightmare Deck, 8) increase the strength of any Goblin with one or more resource tokens. The more Goblins are revealed by the encounter deck, the stronger the synergy between these many cards becomes, and eventually our heroes will find themselves battling against a horde of Goblins with tons of resource tokens!  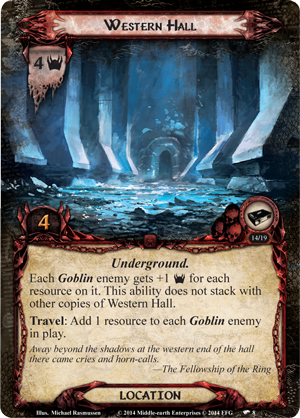
Finally, in Nightmare Mode, The Seventh Level builds toward an epic battle against a unique enemy commander, Overseer Maurûl (The Seventh Level Nightmare Deck, 2). The final stage becomes much more challenging when players are forced to contend with this powerful taskmaster of Mordor along with the scenario’s many goblins. The result is that in Nightmare Mode, even the tiniest goblin can become a nightmare if left alone. Flight from Moria This unique scenario introduces players to a quest deck with many different Stage 2B options, which are shuffled and placed in a random order. There are only two ways out, and players never quite know where they’re headed next. Luckily for them, they are given the option to bypass any quest they don’t want to travel through, placing it at the bottom of the quest deck. In the original Flight from Moria, players almost always chose to bypass quest stages instead of progressing through the quest and powering up The Nameless Fear (Khazad-dûm, 25) in the meantime. In Nightmare Mode, players are presented with a much tougher choice between bypassing and exploring, as many of the scenario’s new cards hinder their ability to bypass quests, and the setup card has the following text: “When a quest card is bypassed, shuffle it into the quest deck instead of placing it on the bottom.” This means that the only way to truly guarantee never having to see a particular quest again is to explore it fully. But what’s really most exciting about this Nightmare Deck is the inclusion of three – that’s right, three – new quest cards! These quest cards are easily slotted into the scenario’s existing randomized quest deck, so that players never quite know if they’re running into one of the scenario’s original quests, or one of the three punishing new ones. Players who are familiar with this scenario in Standard Play may be surprised to find their party decimated, here, by blasts of fire, or blocked by the Nameless Fear himself!  
I enjoyed revisiting these scenarios to create exciting and challenging new Nightmare Decks that present you with tougher decisions that will truly test your skills. Keep those Cave Torches ready, because you’re going to need them more than ever! Prepare for a Terrible, New Challenge "I have never felt such a challenge. The counter-spell was terrible. It nearly broke me."
–Gandalf, The Fellowship of the Ring The Lord of the Rings: The Card Game shook to its foundations the first time that Middle-earth’s heroes encountered the unique challenges of Khazad-dûm. Now, as you once again approach the gates of this abandoned Dwarven realm – this time in Nightmare Mode – you can feel earth rumbling beneath your feet. What lies beyond the East-gate? Discover the new terrors of Khazad-dûm with Khazad-dûm Nightmare Decks! ... Source: Delve the Darkest Depths of Khazad-dum (http://www.fantasyflightgames.com/edge_news.asp?eidn=4850)
Title: FFG:The Firespray-31
Post by: RSSFeeder on 03 June 2014, 21:30:04
The Firespray-31An X-Wing (TM) Strategy Article by Guest Writer Doug Kinney
Nearly everyone in the Star Wars universe with a bounty on his head dreaded the idea that he might someday see Slave I show up on his sensors. Not only was its pilot, Boba Fett, one of the most ruthless and inventive bounty hunters in the galaxy, but the ship itself was a heavily modified Firespray-31 – fast, maneuverable, and loaded with firepower… We continue our series of X-Wing™ strategy articles with a look at the Firespray-31 by one of the players most responsible for shaping its presence in the tournament environment, 2012 World Champion Doug Kinney. 
2012 World Champion Doug Kinney on the Firespray-31 Released in the second wave of X-Wing expansions, the Slave I Expansion Pack introduced the Firespray-31, one of the game’s two earliest large-base ships. Along with the Millennium Falcon, this ship has had a profound impact upon how the game is played. Many people believe that the stock Firespray-31 is the most balanced ship in the game for both offense and defense. It boasts a primary weapon that fires a base of three dice and can be used in both the front and rear arcs. It can perform both the focus and target lock actions, and if it gains both tokens, it can become an offensive juggernaut. It shines on defense, as well, with a base agility value of “2” and the ability to perform the evade action. Plus, with a shield value of “4” and hull of “6”, even once it starts taking hits, it’s tough to take down. 
A 360-degree view of the Firespray-31. (Click to enlarge.)
Then, the Firespray-31 is highly customizable. You can load it out with a missile, a cannon, a bomb, and the Slave I Title even lets you add a torpedo. The Firespray-31 adds to these a myriad of good crew options, and both Kath Scarlet and Boba Fett also have elite pilot talent slots. So there are any number of good combinations to make your basic Firespray-31 a more imposing force. Alternatively, you can outfit it with crew members like Recon Specialist, Rebel Captive, or Flight Instructor to increase its defensive abilities. And don’t forget that the Firespray-31 is a large-base ship! Its size gives it significant presence on the battlefield. At a pilot skill value of “3,” the Bounty Hunter can be an effective blocker against ships with higher pilot skill values, and the Firespray-31 is an especially effective blocker against the Rebellion’s heavy assault fighter, the B-wing. Even once you stop blocking, one of the greatest aspects of the Firespray-31 is that you can fly out of your enemies’ firing arcs and still attack with your auxiliary firing arc, meaning you can often attack without being attacked. Flying the Firespray-31 For all its strengths, the Firespray-31 is not an easy ship to fly. There is a learning curve to being able to fly it well. I spent many weeks practicing before I was able to maneuver it effectively, and there are many good Imperial players that will attest that it takes a good amount of time to learn how the ship moves. As you practice, you’ll want to see how the ship’s base serves as a guide to how far it will move when it performs certain maneuvers. For example, a turn with a speed of “2” will move your Firespray-31 only about half of a small-base width and length away from your starting position. That means if your ship is currently in contact with a small ship on its corner, you won’t be able to complete a speed “2” turn in that direction. 
A Bounty Hunter fails to move past an X-wing with its speed “2” turn.
You will, however, be able to complete a speed “3” turn in that direction, as a speed “3” turn takes your ship a little bit wider and longer than the size of a small base away from your starting position. Making note of little tricks like that will help you learn to fly your Firespray-31 into and out of harm’s way during the heat of battle. 
A Bounty Hunter clears an adjoining X-wing with its speed “3” turn.
Another hurdle you’ll need to clear is learning how best to use the auxiliary firing arc. The Firespray-31 is the only ship to-date with a printed rear firing arc, meaning it can fire its primary weapon either forward or backward. It was difficult for me to get out of the mindset that I needed to perform a Koiogran turn in order to attack, but I now use the rear arc as much as the primary arc – if not more so. It takes practice to maneuver while remaining cognizant of where your ship’s rear arc is facing, but once you get the maneuvering down, you will be able to continue your forward movement and perform actions, instead of performing Koigran turns, gaining stress tokens, and losing your actions. The Firespray-31 in Imperial Squads Many squads run a single Firespray-31, often complemented by a mini-swarm of TIE fighters, and when the metagame starts to shape up after the release of the fourth wave of starfighters that were announced a while back, I think you will see mini-swarms becoming increasingly popular. Thus, a squad with one Firespray-31 and a mini-swarm may be an increasingly popular archetype in the future. 
Total Squad Points: 99 The Heavy Laser Cannon on Krassis packs a devastating punch and makes good use of his pilot ability. It also forces your opponent into the undesirable position of having to reconsider who to target first. Does he go after the big gun, leaving the mini-swarm to fire off volleys of quality attacks? Or does he go after the mini-swarm, leaving the big gun alone, letting it rain down shots of four dice each? Meanwhile, you can line up your squad all together, or you can split your forces and attack in a type of pincer movement. I generally prefer to split my ships a little distance apart to allow myself room to maneuver my Firespray-31 without running afoul of the Academy Pilots. One of the nice things about running a single Firespray-31 is that you generally have a lot of attacks on the board. The sample squad above boasts five separate attacks, which is a decent amount for an Imperial build. When you get into builds with two or three Firespray-31s, you will be getting some bigger bang for your attacks, but at the cost of a reduced number of attacks. A number of other common squads run two Firespray-31s, and there are a few schools of thought on them. Some people build squads with just two fully loaded Firespray-31s, and they can be successful squads, like the example below: 
Total Squad Points: 100 This is a hard-hitting duo, and it comes with a little additional damage to help mitigate the fact that it only offers two attacks per round. Scott Williams, a player who has put this squad to good use in tournaments, designed an opening where he forces his opponent to chase Kath Scarlet while he chases his opponent with Krassis Trelix. Kath shoots out of her auxiliary arc, while Krassis uses his Heavy Laser Cannon to devastating effect. Personally, I like to include a third ship in my squads for the extra attack and for drawing fire away from my Firespray-31s. One example is the squad that I took to second place at the 2013 Star Wars Game Experience, “Additional Damage”: 
- Bounty Hunter (33) with Assault Missiles (5) and Seismic Charges (2)
- Bounty Hunter (33) with Assault Missiles (5) and Seismic Charges (2)
- “Howlrunner” (18) with Squad Leader (2)
Total Squad Points: The “splash” damage from the Assault Missiles and the Seismic Charges allows you to pile damage onto your opponent on top of the damage you inflict with your standard attacks. However, it can be tough to keep the TIE fighter out of the way of the two Firespray-31s, especially if you’re trying to maximize the pilot ability of “Howlrunner.” TIE fighters and Firespray-31s have different size bases and usually have different pilot skill values, so keeping the TIE fighter out of the way of your Firespray-31s can be tricky, and that’s before you factor in your opponent’s ships. Another list that makes good use of two Firespray-31s is a very powerful squad that Anthony Lillig took to the Top 16 at both the North American Championships and Worlds in 2013. It combines two Firespray-31s with two TIE fighters. 
- Bounty Hunter (33) with Gunner (5)
- Bounty Hunter (33) with Gunner (5)
- Academy Pilot (12)
- Academy Pilot (12)
Total Squad Points: 100 It’s a simple, yet tough and effective, list that deals a lot of consistent damage. It has a great balance of offense and defense combined with action denial. Of course, I would be remiss if I didn’t mention the squad that runs three Bounty Hunter Firespray-31s. (Yes, I can hear the collective groan of everyone who has had to fly against it.) This squad has no frills, just thirty points shields and hull and devastating combination of offense and defense. This squad is a bear to play against, especially when flown well, and Jacob Pichelmeyer, the reigning North American Champion, flew three Bounty Hunters to fourth place out of forty-six players at the 2013 Star Wars Game Experience. 
A squad with two Firespray-31s battles a squad of HWK-290s at Worlds 2013.
With its great balance of offense and defense, the Firespray-31 has had a major impact upon the shape of X-Wing, and the tremendous versatility afforded by its loaded upgrade bar ensures that it will continue to be an imposing force in the future. Thanks, Doug! Will you rely upon the balanced baseline statistics of the Firespray-31 to make the difference in your games of X-Wing? Will you discover clever and potent combinations of upgrades to hit enemy ships for more damage? Will you fly your Firespray-31 with a complement of TIE fighters, or will you pair it with other Imperial vessels? Whether you run one Firespray-31 in your Imperial squad, or two, or three, we trust Doug’s advice will inspire you to explore more of the ways this ship can impact your games, and you can always find more advice and more discussion about this and other starships in our community forums! ... Source: The Firespray-31 (http://www.fantasyflightgames.com/edge_news.asp?eidn=4851)
Title: FFG:The Antlered Crown
Post by: RSSFeeder on 04 June 2014, 06:00:03
The Antlered CrownAnnouncing the Thrilling Conclusion to The Ring-maker Cycle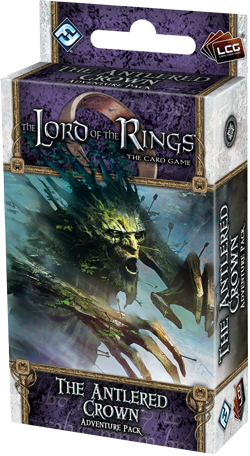
“There are many that cry in the Dunland tongue,” said Gamling. “I know that tongue. It is an ancient speech of men, and once was spoken in many valleys of the Mark. Hark! They hate us, and they are glad; for our doom seems certain to them.”
–J.R.R. Tolkien, The Two Towers War has come to Dunland. Fantasy Flight Games is proud to announce the upcoming release of The Antlered Crown, the sixth and final Adventure Pack in The Ring-maker cycle for The Lord of the Rings: The Card Game! After having found Celebrimbor’s hidden forge and securing its secrets from a horde of Orcs, several of Middle-earth’s heroes near the end of their service to the White Council. First, however, they must return to Isengard, and this means passing through the hills of Dunland, where war has broken loose. The Antlered Crown introduces sixty new cards to The Lord of the Rings: The Card Game, including a new Rohan hero, three copies of each new player card, and a new scenario that carries players deep into battle with the wild men of Dunland. Amid ferocious combats and brutal treachery, you’ll find plenty of moments for heroics, and you’ll have plenty need for stalwart allies. Naturally, The Antlered Crown delivers heroics and combat-ready allies in abundance; you’ll find allies and events that further depict the ability of Rohan’s finest warriors to charge headlong into battle, as well as a handful of cards that wrap up the cycle’s introduction of the Ent trait to The Lord of the Rings: The Card Game. 
Unlikely Allies “We are tree-herds, we old Ents. Few enough of us are left now.”
–Treebeard, The Two Towers While The Ring-maker cycle focuses a great deal of attention toward further defining and enhancing the unique play style associated with the Silvan trait, it also lends new support to several of the game’s other traits, and it introduces several cards for the much-beloved Ents. Though there are few Ent allies in the cycle, their footprints are large. They are slow to anger and slow to act, but once roused, it’s hard to keep a good Ent down. The Ents don’t make their debut in The Lord of the Rings: The Card Game until Celebrimbor’s Secret, but once players gain the opportunity to play with the cards from The Antlered Crown, these Ents are bound to make a major impression upon fans everywhere. We saw the first of the Ents revealed in the announcement of Celebrimbor’s Secret. At just two resources, the Wandering Ent (Celebrimbor’s Secret, 119) is a powerful ally that boasts a remarkable array of two Willpower, two Attack, two Defense, and three Hit Points. Yet as an Ent, this ally is slow to commit himself fully to your cause, so he enters play exhausted. This is a theme that runs throughout the cycle’s Ent cards, and both of the Ents from The Antlered Crown also enter play exhausted:
 Ents may be slow to anger, but the Booming Ent (The Antlered Crown, 141) is one Ent who has seen too many evils and too much deforestation to sit idle any longer. Portrayed with arrows jutting out of his hide in all directions, this ally gains one Attack Strength for each damaged Ent character you control. Because you’ll be able to command as many as seven Ent allies once The Antlered Crown releases, it’s entirely possible to get this two-cost character up to a massive Attack Strength of nine. Ents may be slow to anger, but the Booming Ent (The Antlered Crown, 141) is one Ent who has seen too many evils and too much deforestation to sit idle any longer. Portrayed with arrows jutting out of his hide in all directions, this ally gains one Attack Strength for each damaged Ent character you control. Because you’ll be able to command as many as seven Ent allies once The Antlered Crown releases, it’s entirely possible to get this two-cost character up to a massive Attack Strength of nine.
- Finally, the most recognizable of the cycle’s Ents is the venerable Treebeard (The Antlered Crown, 146), who appears as a neutral ally with some truly massive statistics: two Willpower, four Attack, three Defense, and five Hit Points. Moreover, like Radagast (A Journey to Rhosgobel, 59), Treebeard collects a resource each turn, which he can use to recruit other Ents or to ready them. Don’t be too hasty, though, using Treebeard to ready an Ent will cost you two resources, so you’ll have to wait at least one turn to do so.
Though there are only a few different Ent characters in The Ring-maker cycle, these unlikely allies may still make a powerful impact upon The Lord of the Rings: The Card Game, especially if they crash into action to aid your heroes during the battles of The Antlered Crown. No One Is Safe on the Field of Battle War rages across the hills of Dunland, the horse-lords of Rohan ride into the fray, and even the neighboring tree-herds storm into battle. Can you complete the mission you began in Saruman’s service? Can you deliver the ancient lore you found in Celebrimbor’s secret forge? Stand fast amid the chaos of war, and make your mark upon Middle-earth in The Antlered Crown. This thrilling conclusion to The Ring-maker cycle is scheduled to arrive at retailers in the fourth quarter of 2014! ... Source: The Antlered Crown (http://www.fantasyflightgames.com/edge_news.asp?eidn=4852)
Title: FFG:A Crusade in Twilight
Post by: RSSFeeder on 05 June 2014, 07:30:03
A Crusade in TwilightA Rogue Trader Adventure and Character Guide Are Now Available For Download 
 
“Your training will be harsh. It will last a lifetime. It will be rigorous, meticulous, and all encompassing. You will learn the lessons of the greatest minds the Fire caste has produced, but also how and when to use them. All of this will be so you can fight for the Greater Good, and likely perish in the process, but it will be an endeavor you will willingly embark on.”
–Commander Blindside The Rogue Traders voyage across the vast reaches of space, searching for adventure, renown, and riches beyond count on the edges of the galaxy. To be a Rogue Trader and bear the sacred Warrant of Trade means journeys beyond the boundaries of the Imperium. In some cases, these adventures may lead you to strange realms and stranger alliances. Two new Rogue Trader digital-exclusive supplements are now available for download: the Twilight Crusade adventure and the Tau Character Guide! Journey to the edge of space in the company of an Inquisitor and his unlikely allies: a cadre of Tau Fire Warriors. As you journey to confront an ambitious Rogue Trader, the Tau support you, and by using the Tau Character Guide, you can become a Tau Explorer yourself.  
Click an image above to purchase a download of the supplement.
Twilight Crusade Twilight Crusade is a three-part adventure that focuses on your mission to confront the heretical Rogue Trader, Vir Modren. Your Explorers must embark on a Grand Endeavour into the heart of Modren’s Realm, alongside the acolytes of an ardent Inquisitor and his unexpected allies – a hunter cadre of Tau from the far-flung reaches of the galaxy. To confront Modren directly, you must venture deep into his domain and negotiate his followers’ power-struggles, before gaining entry to Modren’s personal fortress. 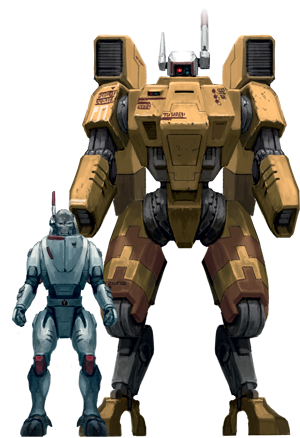 This adventure’s Grand Endeavour provides your GM with an excellent framework to gauge your progress and success, no matter how you choose to venture deep into Modren’s Realm and navigate the intrigues within. This Endeavour can be modified to suit the GM’s needs, inviting freeform action from you and your fellow Explorers. To help the GM guide the Explorers even further, a detailed breakdown of the Grand Endeavour’s objectives can be found at the end of each chapter of the adventure. In addition, this adventure offers the perfect opportunity for players to use the Tau Character Guide, as Tau warriors feature extensively throughout Twilight Crusade. This adventure’s Grand Endeavour provides your GM with an excellent framework to gauge your progress and success, no matter how you choose to venture deep into Modren’s Realm and navigate the intrigues within. This Endeavour can be modified to suit the GM’s needs, inviting freeform action from you and your fellow Explorers. To help the GM guide the Explorers even further, a detailed breakdown of the Grand Endeavour’s objectives can be found at the end of each chapter of the adventure. In addition, this adventure offers the perfect opportunity for players to use the Tau Character Guide, as Tau warriors feature extensively throughout Twilight Crusade.
For the Greater Good The 43-page Tau Character Guide provides Rogue Trader players with all the necessary information and rules to play Tau Explorers, whether in the Twilight Crusade adventure or in another voyage across the Koronus Expanse. In this supplement, you find a concise history of the Tau Empire, rules to play Tau Warriors of the Fire Caste with various specialised classes, and an armoury for outfitting characters with the advanced technology and powerful wargear of the Tau empire. As you realise your Fire Warrior more fully, you may choose to take alternate career ranks. The Tau Character Guide offers three options for alternate career ranks, enabling your Explorer to become a Pathfinder, a Drone Handler, or even a Battlesuit Pilot. Of course, the Tau Empire would be nothing without its hyper-advanced technology, and you’ll find plenty of equipment and battlesuits in the Tau Armoury. Whether you strike from afar with a Kroot Hunting Rifle, blind your foes with Tau Photon Grenades, or experience the raw power of an XV8 Crisis Battlesuit, you’ll find Tau technology is a great companion in the wild space of the Koronus Expanse. Begin Your Journey The hubris of Vic Modren’s realm can no longer stand as an affront to the Imperium. By the will of the Emperor, and for the Greater Good, Modren must fall. Are you prepared to embark on this adventure? Purchase Twilight Crusade and the Tau Character Guide, and begin your ship’s journey past the edges of the Koronus Expanse! ... Source: A Crusade in Twilight (http://www.fantasyflightgames.com/edge_news.asp?eidn=4853)
Title: FFG:They Wait Within
Post by: RSSFeeder on 05 June 2014, 16:00:03
They Wait WithinPreview the New Monsters of the Overlord in Manor of Ravens
Deep in the foothills of Greyhaven sits an abandoned manor house. The house was once the abode of the high mage, Ithyndrus, but his death left it to the ravens and other scavengers. Bandits camp in the forests around the mansion, venturing inside to loot while the light lasts. At nightfall, the manor belongs to the wraiths that rise from the crypts, bringing a horrible death to anyone unwise enough to remain within the manor walls. In the Manor of Ravens expansion for Descent: Journeys in the Dark Second Edition, a few heroes have dared to cross the mansion’s threshold in an attempt to root out its evil. Within the manor, the heroes will face terrible monsters, and today’s preview, takes a closer look at the two new monster groups the overlord unleashes on the heroes in Manor of Ravens. 
Desperate Men and Criminals The only predators that survive in every climate and culture, bandits take what they want, thrive on others’ failures, and only regret the effort their ill deeds require. The plague of highwaymen has never been eradicated, and it falls to the heroes of Terrinoth to hold these scoundrels in check or fall prey to their quick blades and underhanded tricks. The greatest strength of the bandits in Manor of Ravens is their versatility in fighting at range or in melee combat. Bandits possess the Ranged icon as an option for staying out of the heroes’ reach, but they also feature the combat dice necessary to deal solid damage at close range. All bandits have access to the Pillage ability as well. Pillage allows a bandit to perform an attack against an adjacent hero; if that hero is knocked out by the attack, you may choose one of his Search cards and shuffle it back into the deck! Not only will this deprive the hero of some powerful benefits, it also reduces the amount of gold he receives at the end of the quest.  
Bandits can also spend surges to cause extra damage or poison a hero, while master bandits take their skulduggery to a more deadly level with Black Venom. When you trigger the Black Venom ability, the hero you attacked becomes both Poisoned and Doomed. Doomed – a new condition introduced in Manor of Ravens – can quickly maximize a hero’s damage. While a hero is Doomed, any damage that he suffers causes him to take an additional damage, until he spends a surge in combat to remove the condition. A bandit can poison or doom heroes with his tricks and abilities, and they aren’t the only monsters you control in the haunted manor. A Haunting Specter At the sight of a wraith emerging from its crypt, even the bravest turn and flee. If it’s not the spirit’s looks that cause such dread, it’s fear of their call. To hear the summon of the wraith is to invite death and submit your fate to its malevolent will. The aura of doom that permeates a house that hosts a family of wraiths is more than sufficient to deter all but the most foolish of adventurers. When you employ the aid of wraiths to destroy the heroes, you can be sure to strike terror into the hearts of any that oppose you. A wraith can attack a hero in close combat with rending, spectral claws, but wraiths can also harry the heroes from afar, using their dark calls to strike out of reach of the heroes. In combat, any wraith can spend surges to deal additional damage or to give a hero the Doomed condition, sentencing the hero to take even more damage later, unless he can dispel the condition by spending a surge in combat.  
As an added bonus, every wraith possesses the Death Cry ability. By using this as an action, you may choose a hero near the wraith to test Willpower. If that hero fails, you choose whether he becomes Doomed or suffers a damage, giving you more ways to drain the heroes’ willpower and deal more damage. Finally, master wraiths have the powerful Reaper ability. Whenever a hero within five spaces of a master wraith is knocked out, the master wraith may immediately move up to its speed and make an attack. As your master wraith gains energy from the fading will of the heroes, his power can maximize the amount of damage you’ll deal in a round. Enter the Manor In Manor of Ravens, the haunted mansion’s doors have opened, daring those who call themselves heroes to enter. Bandits and wraiths rise to serve the overlord, but new heroes also make their debut. Join us in our next preview as we examine the two new heroes and hero classes. Preorder the Manor of Ravens expansion at your local retailer today! ... Source: They Wait Within (http://www.fantasyflightgames.com/edge_news.asp?eidn=4854)
Title: FFG:Plotting and Scheming, Part Two
Post by: RSSFeeder on 06 June 2014, 00:30:03
Plotting and Scheming, Part TwoA Look at Mastering Your Plot Deck in A Game of Thrones: The Card Game
“Tell me, Lord Varys, who do you truly serve?”
Varys smiled thinly. “Why, the realm, my good lord, how ever could you doubt that? I swear it by my lost manhood. I serve the realm, and the realm needs peace.”
–George R.R. Martin, A Game of Thrones Last week, we looked at how the plot decks of A Game of Thrones: The Card Game add layers of bluffing, control, and aggression to the game that distinguish it from other customizable card games. We reviewed the reasons that your plots are the most important seven cards you’ll bring to a game, and we explored several sample plot decks that exemplified vastly different styles of play. Because you can choose which plot you reveal each turn, your plot deck provides you the means to enhance the strategies you develop in your draw deck, to compensate for its weaknesses, to weave combinations between the two, or to imagine other ways to bolster your bid for the Iron Throne. It is, in fact, possible to imagine a plot deck that admirably performs a couple of different functions. As an example, a well-built plot deck may support an aggressive Stark deck, allowing its characters to rush onto the battlefield, eliminate enemy characters, and gain early control of the Challenges phase. However, if your opponent gets the better early draw, you might have one or two “reset” plots that can remove enemy characters and help you recover. Today, then, we’ll take a look at some of these “reset” plots, and we’ll start with a close look at Valar Morghulis (Core Set, 201), which is arguably the most popular, potent, and important card in A Game of Thrones: The Card Game. 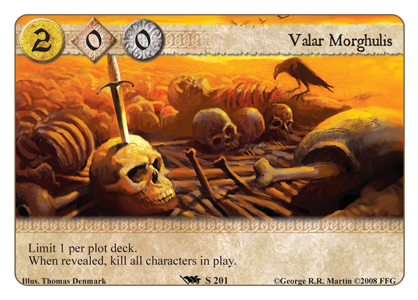
Valar Morghulis and Recovering from Disaster Despite your best efforts, you will, at times, find yourself falling behind in the battle for the Iron Throne. Perhaps a Greyjoy player will strike hard and fast in the midst of winter, killing your characters, freezing your income, and discarding your locations. Perhaps a Lannister player will amass a host of fickle allies and threaten to choke your hand of cards by winning Intrigue challenge after Intrigue challenge. In times such as these, you want a way to bounce back, to reset the game, and to buy yourself a moment to recover. These are the sort of times at which you want to be able to reveal Valar Morghulis. When revealed, Valar Morghulis kills all characters in play. If you’re falling behind in a game, this plot may give you the breathing room that you need to mount a comeback. It is, in fact, such a powerful and prevalent card that its mere existence demands a host of strategic considerations, many of which extend into deck-building and the interactions between your plot deck and your draw deck:
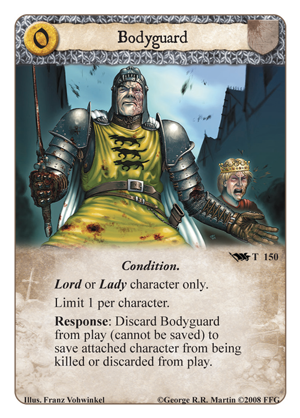
- First of all, the plot’s ability to kill all characters in play doesn’t actually mean that all characters in play will actually be killed and moved from the table to the dead pile. Instead, it’s possible to cancel Valar’s ability, and even when Valar’s ability triggers, it first checks to see if all the characters in play can be killed. If a copy of The Power of Blood (Core Set, 194) is revealed, characters with the Noble crest cannot be killed; “cannot” is absolute within A Game of Thrones: The Card Game, so Valar Morghulis wouldn’t affect those characters. Even when characters can be killed and Valar Morghulis targets them, before they actually die, they enter a “moribund” state from which it’s still possible to save them by discarding a duplicate, an attachment like Bodyguard (Core Set, 150), or a location like The Iron Mines (Kings of the Sea, 27). There are other means, too, of saving characters, and every player will want to bear these in mind while building a deck and plot deck.
- Valar Morghulis may have one of the game’s most powerful abilities, but it offers only two gold and no claim. Additionally, it has an initiative value of zero, so the turn you reveal Valar as your plot, you’re quite likely to lose the initiative and make little or no headway against your opponent apart from killing off his characters.
- Valar Morghulis hits all players equally. If you want to recover from a bad board position, you’ll be sacrificing your characters in order to do so. Accordingly, you’re going to want to have other characters in your hand that you can play onto the table in the Marshaling phase. If you’re playing Valar in order to recover from a bad board position, you’ll almost certainly want to be able to play more and better characters than your opponent so that you don’t simply slip back into yet another losing position. This means you want to understand how Valar functions within the scope of your deck; it needs to fit together with your economy cards, your draw, and your deck’s cast of characters.
- In the right deck, Valar Morghulis can be a tool for offense, not just defense. All characters are not created equally, and characters like Robert Baratheon (The Tower of the Hand, 46) who have Renown or can participate in more than a single challenge (or both) are simply more important than non-unique characters like Knight of the Rainwood (Core Set, 81) who can only participate in a single challenge each turn. Even though Valar offers no claim and very little gold, if it can clear out threats or impediments to characters like Robert Baratheon, then it can help you push through for the power you gain from Renown and unopposed challenges. After all, the goal of the game is to claim the Iron Throne by earning fifteen power, not to fiddle with large claim for its own sake.
- Finally, it’s worth noting that if you put Valar Morghulis into your plot deck and play through six plots without revealing it, you leave yourself no choice but to reveal it as your next plot. If you’re playing a slower deck, like the sort that might accompany a control strategy, and your intention is to build toward an inevitable victory, you may not wish to include a plot that strikes at you as much as it strikes at your opponent.
Seven Kingdoms Full of Threats Of course, Valar Morghulis is not the only reset plot in the game. Other reset plots can also help you recover from a bad board position or strengthen your hold on an advantageous one. Several key reset plots present an alternate set of abilities and promote another range of deck-building considerations: 
Wildfire Assault (Core Set, 191) is a good reset for control strategies that wish to avoid the double-sided effect of Valar Morghulis. Not only does it allow each player to avoid killing up to three of their characters, but it prevents all others from being saved, meaning that the plot ignores any board advantage your opponent may have expected to retain through cards like Bodyguard and The Iron Mines. 
The First Snow of Winter (On Dangerous Grounds, 59) works well in decks with a range of characters of cost three or more. Not only does it allow you to recover from a slow setup, but it can help you push for a win or two in the Challenges phase. 
Threat from the North (Princes of the Sun, 56) isn’t a true reset plot insofar as it doesn’t, on its own, balance out the table. However, it’s easily one of the more common plots for players whose draw decks include a measure of “burn,” or cards that lower the Strength of opposing characters. This is a plot you’re likely to encounter when you face a Targaryen burn deck or even a Stark deck that features Shaggydog (Lords of Winter, 3) and other Direwolf attachments. 
Characters aren’t your only concern in A Game of Thrones: The Card Game. Locations can trigger a host of nasty, disruptive effects, and several Greyjoy locations can even participate in challenges. Furthermore, a player with a whole realm’s worth of locations at his disposal may be able to play more characters than you each turn or recycle key cards from his discard or dead piles. Fleeing to the Wall (Core Set, 187) is a reset for locations that fits well into decks that aim for more straightforward challenges between characters. Using Chaos to Your Advantage Most A Game of Thrones: The Card Game matches end well before players reveal their seventh plots. This means that players usually have room for one or two plots that shore up their decks’ weaknesses, rather than building upon their core strengths. Accordingly, most plot decks will include at least one reset plot, and one of your key considerations in building your draw deck ought to be to determine a path past your opponent’s reset. This could be through the use of cards that prevent your characters from being killed or that save characters otherwise destined for death, or it could be through the use of greater card draw and economy, playing to the goal of bouncing back from what becomes a momentary setback. Meanwhile, new players (or those with fewer cards at their disposal) may wish to consider including multiple resets in their plot decks. Let’s face it, until you’ve mastered the game, your odds of finding yourself falling behind are better than those of getting ahead. By including multiple resets, you may stand a better chancing of turning the tables on your opponent. At the least, you’re likely to buy yourself more time to strike. 
The plot decks of A Game of Thrones: The Card Game are one of its most central and distinguishing features, and gaining a fuller understanding of them is a critical step to mastering the game. In our next installment of Plotting and Scheming, we’ll continue to look at more of the interactions between your plot deck and draw deck, including the different possibilities introduced by “plot twists.” ... Source: Plotting and Scheming, Part Two (http://www.fantasyflightgames.com/edge_news.asp?eidn=4855)
Title: FFG:Between the Shadows
Post by: RSSFeeder on 06 June 2014, 09:00:03
Between the ShadowsAnnouncing an Upcoming Deluxe Expansion for STAR WARS (TM): The Card Game
“Mos Eisley spaceport: You will never find a more wretched hive of scum and villainy. We must be cautious.”
–Obi-Wan Kenobi, Star Wars, A New Hope Fantasy Flight Games is proud to announce Between the Shadows, the third deluxe expansion for Star Wars™: The Card Game! Across the galaxy, there are always those who are most comfortable while unnoticed, under the cover of shadows. In this upcoming expansion for Star Wars: The Card Game, you’re invited to slip into the shadows to meet with those who hide within. 
Secrets in the Shadows Some of those you will find in the shadows stay there to escape persecution and execution. The Jedi were supposedly exterminated when the Empire was created, but their fire has not yet been extinguished from the galaxy. In the desert wastelands of Tatooine, or in the swamps and bogs of Dagobah, the remaining Jedi bide their time, devoting themselves to the study of the Force. Although they work in secrecy, the Force is strong with them, and soon, the Jedi will emerge to once more play a hand in the fate of the galaxy. 
Others who make the shadows their home have far less savory occupations. For the Scum and Villainy of the galaxy, back-alley deals, covert operations, and stealthy assassinations are a way of life. You may not see them on the well-lit streets, but a multitude of bounty hunters, mercenaries, brawlers, and collectors wait for the unwary in the shadows. They may work for honor, for credits, or for the massive criminal organization known as Black Sun, but whenever these professionals work, the wise know enough to stay out of their way. In this deluxe expansion, you’ll find twenty-six new objective sets, giving you two copies each of twelve distinct sets and one copy apiece of two “Limit 1 per objective deck” sets. Although the expansion is focused on the Jedi and Scum and Villainy affiliations, every affiliation will find cards to use in this expansion. Two brand-new fate cards bring new tension to every edge battle, while new versions of iconic characters like Luke Skywalker join the fight alongside new heroes and villains, such as Prince Xizor and Talon Karrde. Today, however, we’ll step into the shadows to join the most feared Bounty Hunter in the galaxy: Boba Fett. Fearless and Inventive  When you work with the best in the bounty hunting world, you always get what you pay for. If you pay for sabotage, you’ll get flaming rubble and shattered duracrete. If you pay for a hit, you know the damage goes where it’s supposed to. Boba Fett has built a reputation around ruthless efficiency, so it follows that the objective of his set makes your units more reliable. The objective is “No Disintegrations,” (Between the Shadows, 665) and its text reads, “Combat damage dealt by a Bounty Hunter or Mercenary unit you control cannot be reassigned by the protect keyword.” While this objective is in play, your opponent will no longer be able to evade damage with protector units. The damage you assign sticks, and since Bounty Hunter and Mercenary are two of the most common traits for Scum and Villainy, you can be sure your opponent will think twice before attacking your objectives. When you work with the best in the bounty hunting world, you always get what you pay for. If you pay for sabotage, you’ll get flaming rubble and shattered duracrete. If you pay for a hit, you know the damage goes where it’s supposed to. Boba Fett has built a reputation around ruthless efficiency, so it follows that the objective of his set makes your units more reliable. The objective is “No Disintegrations,” (Between the Shadows, 665) and its text reads, “Combat damage dealt by a Bounty Hunter or Mercenary unit you control cannot be reassigned by the protect keyword.” While this objective is in play, your opponent will no longer be able to evade damage with protector units. The damage you assign sticks, and since Bounty Hunter and Mercenary are two of the most common traits for Scum and Villainy, you can be sure your opponent will think twice before attacking your objectives.
Another card in the set is both a Bounty Hunter and a Mercenary, ensuring that she receives the benefits from “No Disintegrations,” as well as from objectives like Lucrative Contract (Assault on Echo Base, 271). This card is the Freelance Hunter (Between the Shadows, 667). Naturally suited for attack, the Freelance Hunter is an excellent choice for deactivating objectives that are only active while undamaged. The objective set continues with a copy of Prized Possession (Between the Shadows, 378), giving you the resources you need to hire the best Bounty Hunters in the business. Even the best hunters can be surprised once in a while. At times like that, it’s best to have a trick ready. This set includes the free event Entangled (Between the Shadows, 669). When your opponent chooses a unit to strike, you can play Entangled to force your opponent to strike with a different eligible unit instead. In an engagement involving multiple units, there is nearly always one unit that your opponent wants to strike first. If you can upset that order with Entangled, the engagement is tipped in your favor, even if you lost the edge. As an added bonus, you draw a card after playing Entangled, filling your hand with more tricks and traps.  For other jobs, all you need to rout your enemies is a little extra firepower. You can find what you’re looking for in the Flamethrower (Between the Shadows, 668). This card can enhance any friendly Character or Droid unit, instantly turning them into a one-man army. Whenever a unit enhanced with a Flamethrower is focused to strike, you deal one additional damage to each participating enemy unit. If your opponent doesn't deal with the Flamethrower's incendiary effects, he'll soon find his units nearly exterminated. Of course, any Character or Droid can use the Flamethrower, but there’s only one Bounty Hunter who’s a true master of this Weapon… For other jobs, all you need to rout your enemies is a little extra firepower. You can find what you’re looking for in the Flamethrower (Between the Shadows, 668). This card can enhance any friendly Character or Droid unit, instantly turning them into a one-man army. Whenever a unit enhanced with a Flamethrower is focused to strike, you deal one additional damage to each participating enemy unit. If your opponent doesn't deal with the Flamethrower's incendiary effects, he'll soon find his units nearly exterminated. Of course, any Character or Droid can use the Flamethrower, but there’s only one Bounty Hunter who’s a true master of this Weapon…
Many Bounty Hunters achieve fame: Bossk, Dengar, IG-88, and Zuckuss are just a few examples. But one man has forged a reputation as the utter professional. Boba Fett (Between the Shadows, 666) features a spread of combat icons that makes him equally suited for attack or defense – whatever the job requires. The Elite keyword and three Force icons make him excellent for holding the Force, but it’s Boba Fett’s Reaction that makes him the best at what he does. After Boba Fett resolves a strike, you may immediately remove all focus tokens from him! Essentially able to strike twice in any engagement, Boba Fett could easily finish nearly any opposing unit, or destroy an objective single-handedly with the edge. If you enhance him with a Flamethrower as well, he’ll be able to trigger it whenever he strikes, dealing unparalleled amounts of damage to any light side units that stand in his way. Invisible Connections The criminals of the Scum and Villainy are dangerous in the extreme, but the last of the Jedi stand ready to oppose them. In Between the Shadows, every affiliation finds powerful new cards to aid them. For more information on this deluxe expansion, visit the Between the Shadows about page, and prepare to enter the shadows of Star Wars in the third quarter of 2014! ... Source: Between the Shadows (http://www.fantasyflightgames.com/edge_news.asp?eidn=4856)
Title: FFG:The Resourceful Investigator, Part Two
Post by: RSSFeeder on 06 June 2014, 17:30:02
The Resourceful Investigator, Part TwoA Call of Cthulhu: The Card Game Strategy Article by Guest Writer David Boeren
“Warning me that many of the street signs were down, the youth drew for my benefit a rough but ample and painstaking sketch map of the town’s salient features. After a moment’s study I felt sure that it would be of great help, and pocketed it with profuse thanks.”
–H.P. Lovecraft, The Shadow Over Innsmouth In Call of Cthulhu: The Card Game, you pay for cards by draining domains. Accordingly, if you’re looking for a map deeper into the game’s dark heart, there’s no better place to start than with the orders and shapes in which your domains are arranged. In the first part of his guide to resourcing domains, guest writer David Boeren introduced a few fundamental concerns and walked us through a sample game, examining the initial resourcing decisions presented by his opening draw. Now, he walks us even deeper into his game, how he addresses the resourcing decisions that all players face, and how he views the theory behind his decisions. 
Guest Writer David Boeren on Building Your Domains David’s eight opening cards contained six Syndicate cards, one Silver Twilight card, and one neutral card: 
He resourced Peter Clover, Intimidate, and On the Lam. However, this meant that his two-faction deck, split between Syndicate and Silver Twilight, would start the game without domains for each faction. 
Focused on gaining a strong early board position, David initially resources a character he can't afford to play on his first turn, along with two events.
Before David resumes his game walkthrough, he explains how he approaches resourcing for multi-color decks (decks split between two or more factions). It’s generally desirable that you quickly build your domains so that some or most of them contain resources for all of your factions. This allows for maximum flexibility in the cards that you play. While it’s okay to put this off temporarily in order to hold onto important cards or to play a two-cost Loyal card early in the game, you’ll want to get around to adding multiple colors to your domains as quickly as you can. There are, however, some things you can do to reduce your need to add multiple factions to each domain: - Run mostly one faction and just a splash of another. This sort of deck may only need a single domain to carry a resource from the secondary faction.
- Keep most or all of your one-cost cards in one faction. By doing this, you will find yourself under less pressure to build your smallest domain to two resources simply in order to match both factions.
After resourcing, I go first. On my first turn, I draw one card and get Steal the Soul (The Order of the Silver Twilight, 52). This is a great card. It’s also a Silver Twilight card, which was what I had hoped to draw. Fortunately, there’s also an action window between the Draw Phase and Resource Phase, and I use it to play my Eldritch Nexus immediately, to see what I get before I have to make my resource decision. Which Domain Should You Build? Turn one usually presents an easy resourcing decision; you want to build your domains to 2-1-1. But where do you go after that? Do you build your domains to 3-1-1 or 2-2-1? This will depend on the design of your deck and the cards in your hand. Usually these concerns go together, as your opening hand should reflect the intent of your deck. Generally, I advise resourcing according to whichever tactic will help you play more of your important cards faster. For a given deck, one path will usually be best the majority of the time, and if you find yourself resourcing to 3-1-1 most of the time in order to play high-cost charaters, then you likely need to think about balancing those with more one-cost characters, event,s and supports to play from your second and third domains. | | When Eldritch Nexus resolves, the top card of my deck goes facedown as a new domain. This is another Intimidate. The second card of my deck goes underneath this new domain as a resource… and it’s another Eldritch Nexus! This is a small problem. I’m not really concerned about losing the card since four domains is probably enough, but seeding a neutral card as a one-resource domain is less than ideal. I can still use it to pay for abilities that require me to “pay 1,” but I’m better off in the long run to put another resource there to convert it into something more useful. The problem is, I no longer have any spare Syndicate cards in hand. This forces me to make a difficult decision: - Resource a Silver Twilight card on a Syndicate domain. This will let me play either Meticulous Scribe and Lena Di Boerio, or Johnny V’s Dame plus another Syndicate character. It will also give me a two-color domain.
- Resource a Silver Twilight card on my neutral domain. This will let me play Meticulous Scribe and Lena Di Boerio, and it will fix my neutral domain, making it more useful in future turns.
- Resource a Syndicate card on the neutral domain. This will let me play Johnny V’s Dame plus another Syndicate character, and it will fix my neutral domain.
Of the choices, the two-color domain seems best as I’ll be able to build it up so that I can play a three-cost character of either faction on my next turn if I need one, so I decide to give up Steal the Soul, resourcing it on a Syndicate domain. 
By resourcing a Silver Twilight card to the same domain as a Syndicate resource, David ensures that his first two-resource domain can be used for either faction.
Here, even the decision where to resource it matters: In case I should win Chaos Unleashed (The Shifting Sands, 8), I want to resource Steal the Soul with the Syndicate card I expect I’d most like to get back later in the game. The resources in my open domains are Peter Clover and Intimidate, and I decide to add Steal the Soul to the domain with Peter Clover. Chaos Unleashed Some of the story cards from the Asylum Pack The Shifting Sands allow you to exchange cards from your hand with the cards in one of your domains. The most important of these stories is Chaos Unleashed, which lets you add an entire domain's worth of cards to your hand and then replace them from the top of your deck. Chaos Unleashed won't appear every game, but when you see it, you should resource all your best cards to one domain, which will typically also be your biggest domain. This way, if you win one of these stories, you will maximize the benefit your receive from winning the story by giving yourself the best selection of cards to retrieve. Keep in mind that you won't win one of these stories for at least a couple of turns, so you should resource cards that will be useful in the mid-game rather than the early game. Still, this isn't hard because you should already want to keep your good early game cards in your hand in order to play them. | | After resourcing, I drain my domain of two to play Johnny V’s Dame, and then I use my other Syndicate domain to play my Clover Club Torch Singer at one-cost. My neutral domain remains open to pay for her ability if I need it, and I’m holding two characters that I can play on my next turn. I wish I didn’t have to give up Steal the Soul, but I really want the Meticulous Scribe on the table for his Arcane icon, and without a Silver Twilight domain of one, I’d have had to build and hold onto a domain of two just to play my event. If I’d had a Silver Twilight domain of one resource, I’d have probably gone the other way and resourced Meticulous Scribe, trusting that I’d soon draw into another character with Arcane or Investigation icons. Fortunately, in this case Lena Di Boerio is a reasonable substitute. Although her ability is very domain-hungry, she can mess with icons. In fact, she would have been a very reasonable substitute for the Clover Club Torch Singer, but because my deck is full of Criminal characters, I wanted to take advantage of Johnny V’s Dame’s discount as early as possible. Subsequent Turns My opponent appears to be playing a Serpent-themed deck. On his turn, he plays Naaginn (Touched by the Abyss, 105) and two Degenerate Serpent Cultists (The Wailer Below, 63). All three have Terror icons but no other icons. During his story phase, my opponent opts not to commit to stories since he sees that I could kill one Serpent and use my Clover Club Torch Singer to reduce another to skill zero, preventing it from gaining success tokens. On my second turn, then, I draw another Johnny V’s Dame and Josef Meiger (Denizens of the Underworld, 52). The second Dame does little for me since they can only discount the first Criminal I play each turn. Fortunately, though, Josef is a Criminal himself, despite being a member of the Silver Twilight. This presents me a good opportunity to fix my neutral domain. I resource the Dame on my neutral domain, then play Josef and Lena Di Boerio. At this point, the only card in my hand is the Meticulous Scribe. However, I have two domains left open. This allows me to threaten to remove my opponent’s Terror icons, so that I can commit to two or even three stories. 
David doesn't require a three-resource domain for any of the cards in his hand, and by resourcing a Silver Twilight card to his neutral domain, he not only gains the ability to play two two-cost cards on his turn, but he makes transforms his neutral domain into one that's more useful to his deck.
I commit Josef, the Clover Club Torch Singer, and the Dame. If my opponent opposes all three, I can easily afford to let the Dame go insane, as her ability will work even if she is exhausted, and I’ll be able to kill some Serpents in return… The Game So Far When Should You Stop Resourcing? At some point, you want to stop resourcing. After all, every card you don't resource is one extra card in your hand, and the sooner you stop letting go of those options, the sooner you’ve got a card advantage on your opponent. This doesn't mean that every deck should be a rush deck, nor is it a good idea to stop resourcing too soon. If you do, you may have trouble playing your higher cost cards when you draw them. Simply, you want to maintain the flow of cards from your deck to your hand and into play. If you can afford to play two to three cards every turn, then you may be ready to stop resourcing, or at least skip a turn. If you don't immediately need an extra resource and resourcing would cost you a valuable card, it's well worth skipping as long as your deck doesn't have too many high-cost cards that would leave you feeling off-pace later in the game. | | At this point, I’ve had a fairly successful opening, and on my next turn, I’ll draw two more cards to add to my Meticulous Scribe. Also, since I know my deck’s composition, I expect that I’ll be able to play at least two of the cards I’ll have in my hand. At this point, there’s a good chance that I will only need to resource once more; if I add another Silver Twilight card to the domain that has one neutral and one Syndicate card, I’ll have two two-color domains, and one of them will be able to pay for three-cost cards. Finally, now that I’ve established a fairly strong board presence, the time to favor characters over other card types has passed, and I can pay more attention to holding onto useful events and supports. Hopefully, this has been a useful glimpse into the sort of choices that come up with resourcing, particularly early in the game when these choices are most critical. I think this particular example also helps to illustrate the sort of problems that occur even with a finely tuned deck and how you often need to be able to reroute your plans if you find yourself off of your ideal path. … Thanks, David! The resourcing mechanic of Call of Cthulhu: The Card Game is one of its most central and defining characteristics… and mastering the art of resourcing intelligently is essential to your efforts to save humanity or hurl it headlong toward the abyss! ... Source: The Resourceful Investigator, Part Two (http://www.fantasyflightgames.com/edge_news.asp?eidn=4857)
Title: FFG:Plotting and Scheming, Part Two
Post by: RSSFeeder on 07 June 2014, 02:00:03
Plotting and Scheming, Part TwoA Look at Mastering Your Plot Deck in A Game of Thrones: The Card Game
“Tell me, Lord Varys, who do you truly serve?”
Varys smiled thinly. “Why, the realm, my good lord, how ever could you doubt that? I swear it by my lost manhood. I serve the realm, and the realm needs peace.”
–George R.R. Martin, A Game of Thrones Last week, we looked at how the plot decks of A Game of Thrones: The Card Game add layers of bluffing, control, and aggression to the game that distinguish it from other customizable card games. We reviewed the reasons that your plots are the most important seven cards you’ll bring to a game, and we explored several sample plot decks that exemplified vastly different styles of play. Because you can choose which plot you reveal each turn, your plot deck provides you the means to enhance the strategies you develop in your draw deck, to compensate for its weaknesses, to weave combinations between the two, or to imagine other ways to bolster your bid for the Iron Throne. It is, in fact, possible to imagine a plot deck that admirably performs a couple of different functions. As an example, a well-built plot deck may support an aggressive Stark deck, allowing its characters to rush onto the battlefield, eliminate enemy characters, and gain early control of the Challenges phase. However, if your opponent gets the better early draw, you might have one or two “reset” plots that can remove enemy characters and help you recover. Today, then, we’ll take a look at some of these “reset” plots, and we’ll start with a close look at Valar Morghulis (Core Set, 201), which is arguably the most popular, potent, and important card in A Game of Thrones: The Card Game.
Valar Morghulis and Recovering from Disaster Despite your best efforts, you will, at times, find yourself falling behind in the battle for the Iron Throne. Perhaps a Greyjoy player will strike hard and fast in the midst of winter, killing your characters, freezing your income, and discarding your locations. Perhaps a Lannister player will amass a host of fickle allies and threaten to choke your hand of cards by winning Intrigue challenge after Intrigue challenge. In times such as these, you want a way to bounce back, to reset the game, and to buy yourself a moment to recover. These are the sort of times at which you want to be able to reveal Valar Morghulis. When revealed, Valar Morghulis kills all characters in play. If you’re falling behind in a game, this plot may give you the breathing room that you need to mount a comeback. It is, in fact, such a powerful and prevalent card that its mere existence demands a host of strategic considerations, many of which extend into deck-building and the interactions between your plot deck and your draw deck: - First of all, the plot’s ability to kill all characters in play doesn’t actually mean that all characters in play will actually be killed and moved from the table to the dead pile. Instead, it’s possible to cancel Valar’s ability, and even when Valar’s ability triggers, it first checks to see if all the characters in play can be killed. If a copy of The Power of Blood (Core Set, 194) is revealed, characters with the Noble crest cannot be killed; “cannot” is absolute within A Game of Thrones: The Card Game, so Valar Morghulis wouldn’t affect those characters. Even when characters can be killed and Valar Morghulis triggers, before its effect resolves, there is an opportunity to save them by discarding a duplicate, an attachment like Bodyguard (Core Set, 150), or a location like The Iron Mines (Kings of the Sea, 27). There are other means, too, of saving characters, and every player will want to bear these in mind while building a deck and plot deck.
- Valar Morghulis may have one of the game’s most powerful abilities, but it offers only two gold and no claim. Additionally, it has an initiative value of zero, so the turn you reveal Valar as your plot, you’re quite likely to lose the initiative and make little or no headway against your opponent apart from killing off his characters.
- Valar Morghulis hits all players equally. If you want to recover from a bad board position, you’ll be sacrificing your characters in order to do so. Accordingly, you’re going to want to have other characters in your hand that you can play onto the table in the Marshaling phase. If you’re playing Valar in order to recover from a bad board position, you’ll almost certainly want to be able to play more and better characters than your opponent so that you don’t simply slip back into yet another losing position. This means you want to understand how Valar functions within the scope of your deck; it needs to fit together with your economy cards, your draw, and your deck’s cast of characters.
- In the right deck, Valar Morghulis can be a tool for offense, not just defense. All characters are not created equally, and characters like Robert Baratheon (The Tower of the Hand, 46) who have Renown or can participate in more than a single challenge (or both) are simply more important than non-unique characters like Knight of the Rainwood (Core Set, 81) who can only participate in a single challenge each turn. Even though Valar offers no claim and very little gold, if it can clear out threats or impediments to characters like Robert Baratheon, then it can help you push through for the power you gain from Renown and unopposed challenges. After all, the goal of the game is to claim the Iron Throne by earning fifteen power, not to fiddle with large claim for its own sake.
- Finally, it’s worth noting that if you put Valar Morghulis into your plot deck and play through six plots without revealing it, you leave yourself no choice but to reveal it as your next plot. If you’re playing a slower deck, like the sort that might accompany a control strategy, and your intention is to build toward an inevitable victory, you may not wish to include a plot that strikes at you as much as it strikes at your opponent.
Seven Kingdoms Full of Threats Of course, Valar Morghulis is not the only reset plot in the game. Other reset plots can also help you recover from a bad board position or strengthen your hold on an advantageous one. Several key reset plots present an alternate set of abilities and promote another range of deck-building considerations:
Wildfire Assault (Core Set, 191) is a good reset for control strategies that wish to avoid the double-sided effect of Valar Morghulis. Not only does it allow each player to avoid killing up to three of their characters, but it prevents all others from being saved, meaning that the plot ignores any board advantage your opponent may have expected to retain through cards like Bodyguard and The Iron Mines.
The First Snow of Winter (On Dangerous Grounds, 59) works well in decks with a range of characters of cost three or more. Not only does it allow you to recover from a slow setup, but it can help you push for a win or two in the Challenges phase.
Threat from the North (Princes of the Sun, 56) isn’t a true reset plot insofar as it doesn’t, on its own, balance out the table. However, it’s easily one of the more common plots for players whose draw decks include a measure of “burn,” or cards that lower the Strength of opposing characters. This is a plot you’re likely to encounter when you face a Targaryen burn deck or even a Stark deck that features Shaggydog (Lords of Winter, 3) and other Direwolf attachments.
Characters aren’t your only concern in A Game of Thrones: The Card Game. Locations can trigger a host of nasty, disruptive effects, and several Greyjoy locations can even participate in challenges. Furthermore, a player with a whole realm’s worth of locations at his disposal may be able to play more characters than you each turn or recycle key cards from his discard or dead piles. Fleeing to the Wall (Core Set, 187) is a reset for locations that fits well into decks that aim for more straightforward challenges between characters. Using Chaos to Your Advantage Most A Game of Thrones: The Card Game matches end well before players reveal their seventh plots. This means that players usually have room for one or two plots that shore up their decks’ weaknesses, rather than building upon their core strengths. Accordingly, most plot decks will include at least one reset plot, and one of your key considerations in building your draw deck ought to be to determine a path past your opponent’s reset. This could be through the use of cards that prevent your characters from being killed or that save characters otherwise destined for death, or it could be through the use of greater card draw and economy, playing to the goal of bouncing back from what becomes a momentary setback. Meanwhile, new players (or those with fewer cards at their disposal) may wish to consider including multiple resets in their plot decks. Let’s face it, until you’ve mastered the game, your odds of finding yourself falling behind are better than those of getting ahead. By including multiple resets, you may stand a better chancing of turning the tables on your opponent. At the least, you’re likely to buy yourself more time to strike.
The plot decks of A Game of Thrones: The Card Game are one of its most central and distinguishing features, and gaining a fuller understanding of them is a critical step to mastering the game. In our next installment of Plotting and Scheming, we’ll continue to look at more of the interactions between your plot deck and draw deck, including the different possibilities introduced by “plot twists.” ... Source: Plotting and Scheming, Part Two (http://www.fantasyflightgames.com/edge_news.asp?eidn=4855)
Title: FFG:Lead the Charge
Post by: RSSFeeder on 07 June 2014, 10:30:03
Lead the ChargePreview Combat in Warhammer 40,000: Conquest
The servants of Khorne stood from horizon to horizon, filling the air with their barks, gibbers, and howls. Their battle banners, straining in the coppery wind that blew through their ranks, were of the deepest red, bearing a single rune and a legend of simple devotion: Blood for the Blood God.
–The Tome of Blood In the grim darkness of Warhammer 40,000: Conquest, there can never be peace. The only way to achieve total conquest is to utterly vanquish your enemies with fire and sword. In past previews of Warhammer 40,000: Conquest, we’ve looked at methods for deploying units to planets across the Traxis sector. We’ve also explored the command struggle, a strategic battle for resources and influence that takes place at every planet, granting you the card draw and extra resources to maintain your assault. Today, however, we’ll move into combat, exploring the battles that occur every round. 
The Clash of Arms During the combat phase, battles rage throughout the sector, but the presence of opposing units at one planet is not necessarily enough to trigger a battle there. Sometimes, your units work against your opponent on a strategic scale, illustrated by the command struggle. In the combat phase, however, tactics take the fore as battles erupt, taking place each round at the first planet and at planets where you or your opponent have committed a warlord. Combat in Warhammer 40,000: Conquest is conducted over a series of merciless rounds. Combat begins at a planet when the player with initiative chooses one of his ready units to strike. Every unit has two numbers on the lower left border of its card. The upper number is that unit’s attack value, while the bottom number is its hit points. When you exhaust one of your units to strike, it deals damage equal to its attack value to an enemy unit chosen by you. If a unit ever has damage on it equal to or greater than its hit points, it is destroyed. 
After you strike with one of your units, it’s your opponent’s turn to strike with a unit, after which the combat turn transfers back to you. The battle rages on until all units at the planet are exhausted, at which point every unit at the planet refreshes, preparing for another round of combat. If defeat seems imminent, or if staying at the planet would not accomplish your goals, you and your opponent have the chance to retreat any number of units before a new combat round begins. Any army units that remain behind will engage in a new round of combat, battling for ultimate victory. The battle only ends once one player retreats all of his forces, or one player has slain every opposing unit at the planet! After a battle ends at any planet, the victor has the opportunity to trigger that planet’s Battle ability, which offers a powerful bonus. The planet Atrox Prime, for example, possesses a Battle ability that reads, “Deal 1 damage to each enemy unit at a target HQ or adjacent planet,” granting you a potent strike against the heart of your opponent’s strength. Although the Battle ability of a planet can be resolved after any battle, only the first planet is claimed by the victor and placed in his victory display, bringing him one step closer to dominion of the sector. After the first planet has been claimed, your victorious units there return to your headquarters with your warlord, awaiting new conquests in the next round. A Stalwart Shield  Your warlord has a critical role in combat as the leader of your forces in the Traxis sector. Part of that warlord’s role is potentially claiming initiative for you. Typically, the player holding the initiative token strikes first in a battle, but if your warlord is present, you can steal the opportunity to strike first in the battle. If your opponent’s warlord is at the same planet, however, initiative reverts to the player with the initiative token. Your warlord has a critical role in combat as the leader of your forces in the Traxis sector. Part of that warlord’s role is potentially claiming initiative for you. Typically, the player holding the initiative token strikes first in a battle, but if your warlord is present, you can steal the opportunity to strike first in the battle. If your opponent’s warlord is at the same planet, however, initiative reverts to the player with the initiative token.
In addition, every warlord has a powerful special ability, but your warlord’s presence at a planet puts him in danger of attack. Whenever your warlord takes damage equal to his hit points, his card is flipped over, leaving him bloodied, without his special ability, and in danger of being defeated again. If a bloodied warlord is defeated again, that player immediately loses the game. Although both warlords must commit to a planet each round, there are measures you can take to reduce your opponent’s chances to harm your warlord. Once combat begins, instead of exhausting a unit to strike, you can use your combat turn to exhaust your warlord and retreat him to your headquarters. Fortunately, you have more ways to avoid combat damage than strategic retreats. Attachment and event cards have a number of shield icons on the upper left border of the card. For example, the card Drop Pod Assault (Core Set, 24) holds two shield icons. When one of your units would take damage, you may discard one card with shield icons from your hand to reduce the damage by the number of shields on the card. Use Your Skills Although the foundation of combat rests on attacking with units to deal damage, there are a wealth of keywords introduced in Warhammer 40,000: Conquest that add depth to your battles, allowing you to win seemingly impossible fights. For example, a unit like the Enraged Ork (Core Set, 63) has the Brutal keyword, meaning that he gains one attack power for each damage on him. Before he takes damage, the Enraged Ork has no attack power, but if an enemy dares to strike him, he’s more than ready to strike back just as hard.  
Another keyword can be found on the Daring Assault Squad (Core Set, 16). This unit has the Area Effect (2) keyword, meaning that whenever it attacks, instead of dealing its normal attack of three damage to one unit, it may deal its Area Effect of two damage to every enemy unit at the planet! Other keywords can be found on the Black Legion Heldrake (Core Set, 87). This unit has the No Wargear Attachments keyword, keeping it from receiving that type of attachment. It also holds the Flying keyword, meaning that it takes half damage from non-Flying units. With the ability to evade damage in that way, this unit will have a long-lasting influence on your battles. War Is Coming Warhammer 40,000: Conquest casts you directly into the futuristic battles for the planets of the Traxis sector, matching your strategy and battlefield tactics against your opponent in a struggle for the stars. In our next preview, we’ll look at a detailed example of a battle. Check back for more previews and preorder Warhammer 40,000: Conquest at your local retailer today! ... Source: Lead the Charge (http://www.fantasyflightgames.com/edge_news.asp?eidn=4858)
Title: FFG:All That Remains
Post by: RSSFeeder on 07 June 2014, 19:00:03
All That RemainsAnnouncing the Fifth Data Pack in the Lunar Cycle
Three tunnels formed a triangular shape with the work area in the center of the room. It was filled with rows of ancient displays, below which were a series of knobs, keyboards, and ports and all covered with a thick layer of dust… Fantasy Flight Games is proud to announce the upcoming release of All That Remains, the fifth Data Pack in the Lunar Cycle for Android: Netrunner! What will come of one Runner’s hunt for the net’s legendary source protocols? All That Remains explores this question with sixty new cards (three copies of each new card), including a new Criminal Runner identity, a new shard of the source protocols, and a host of assets designed to support the ambitions and secrecy of those Corporations that have the most investment in lunar development. Additionally, a number of other cards ensure that every action ripples outward and spurs new responses. You’ll find a trio of Corp agendas with powerful “when scored” abilities and trace cards that can hit the Runner even if their traces fail. 
Life is different on the moon, and the cat-and-mouse cyberstruggles between Corp and Runner follow deadly new twists. Explore the ends to which they lead in All That Remains. The Ripple Effect On the net, all data is connected. One upload alters a server, which modifies the next transmission that server emits, which alters the server that receives it, and so on into infinity. Because of this, no transmission ever truly ends. Instead, data echoes ripple throughout the net and assume their own forms of permanence or recurrence. We saw these echoes depicted in one form in The Spaces Between. That Data Pack’s current events and operations introduce players to data packages that have echoed throughout the net long enough to assume something like a static permanence. Now, several of the cards in All That Remains revisit the moon’s oldest data streams, offering efficient means to revitalize old data and derive new benefits from it. Three Corps gain agendas with “when scored” effects that gain strength based upon the amount of data the Corps have previously pumped into the net.
- NBN gains License Acquisition (All That Remains, 85), which allows the Corp to install and rez an asset or upgrade, ignoring all costs. The Corp can choose to install this card from HQ, but it can also choose to install it from Archives. This means that even if a Runner manages to trash an asset like SanSan City Grid (Core Set, 92), the Corp can pull up its archived schematics and quickly get back to business.
- Weyland Consortium gains Superior Cyberwalls (All That Remains, 87) which rewards players for sticking with Weyland’s expertise in barriers. The more barrier ice you install, the greater the benefit you’ll derive from Superior Cyberwalls. For starters, “when scored,” it grants you one credit for each piece of rezzed barrier ice.
 Then, it enhances each of these barriers, granting them all a permanent one-point bump to their strength. Moreover, these bonuses are cumulative, meaning that if Weyland can quickly score two or more copies of Superior Cyberwalls, it may be able to form an impenetrable defense by layering its barrier ice before the Runner. Then, it enhances each of these barriers, granting them all a permanent one-point bump to their strength. Moreover, these bonuses are cumulative, meaning that if Weyland can quickly score two or more copies of Superior Cyberwalls, it may be able to form an impenetrable defense by layering its barrier ice before the Runner.
- Finally, Haas-Bioroid gains tremendous flexibility from their new agenda, Bifrost Array (All That Remains, 81). When scored, Bifrost Array allows Haas-Bioroid to echo the “when scored” effect of any other agenda in the Corp’s scored pile. This means it can be as powerful as an Accelerated Beta Test (Core Set, 55) or Director Haas’ Pet Project (Creation and Control, 4). A repository of many forms of data, Bifrost Array can even deliver all the benefits of winning a Corporate War (Future Proof, 120), without any threat of suffering the penalties of losing the war. Naturally, you need to have the other agendas in your scored pile in order to copy their effects, but by combining Bifrost Array with Fast Track (Honor and Profit, 27), Haas-Bioroid can deliver upon an adaptable schedule of agendas.
Data Never Dies When bytes hit the net, they can’t be taken back. The best you can do is seek to master the flow of information. With its sixty new cards, All That Remains allows Corps and Runners to explore new means to hunt – and ultimately control – the net’s legendary source protocols. Look for All That Remains to add greater depth and resonance to your games of Android: Netrunner when it arrives at retailers everywhere late in the third quarter of 2014! ... Source: All That Remains (http://www.fantasyflightgames.com/edge_news.asp?eidn=4859)
Title: FFG:Secrets and Schemes
Post by: RSSFeeder on 08 June 2014, 03:30:04
Secrets and SchemesAnnouncing the First Chapter Pack in the Wardens Cycle for A Game of Thrones
“Lysa knew more than she had dared to put in her letter. She might have the very proof that Ned needed to bring the Lannisters to ruin, and if it came to war, they would need the Arryns and the eastern lords who owed them service.”
–George R.R. Martin, A Game of Thrones Lords and ladies across the Seven Kingdoms have fought for the Iron Throne. Many have died. Still others have held back, aloof and apart, courted by those who desire their strength. But these lords and ladies have their own plans and ambitions… Fantasy Flight Games is proud to announce the upcoming release of Secrets and Schemes, the first Chapter Pack in the Wardens cycle for A Game of Thrones: The Card Game! In Secrets and Schemes, you will discover sixty new cards (three copies each of twenty different cards) that touch upon the schemes concocted by those patient individuals who have remained above or outside of the wars that have shaken the Seven Kingdoms. Additionally, you’ll learn how they make their opening moves with a host of new Knights, attachments, and the agenda, Aloof and Apart (Secrets and Schemes, 18), which encourages players to revisit some of the game’s most expensive, powerful, and recognizable characters. 
Additionally, as it opens the Wardens cycle, Secrets and Schemes begins the exploration of its ongoing themes. For more about these themes and what the cycle has to offer players of every type, we turn to lead developer Nate French. Lead Developer Nate French on the Wardens Cycle Hello, A Game of Thrones players! The Wardens cycle is the twelfth expansion series for A Game Thrones: The Card Game, and with it, we sought to explore a number of under-explored nooks and crannies, both in the game and in the A Song of Ice and Fire setting. This means there’s plenty to appeal to all three of our archetypal players: Ned, Shagga, and Jaime. 
The “Ned” Archetype“Ned” players are fans of the source material, who come to the game to immerse themselves in the A Song of Ice and Fire setting. For such players, the biggest draw in the Wardens cycle is likely to be its exploration of the Vale of Arryn and the Eyrie. In this expansion cycle, you’ll find a number of important unique characters and locations that have not yet appeared in the LCG®, including Lysa and Robert Arryn, The Knight’s Declarant, The Moon Door, and the “Petyr Baelish” version of Littlefinger. In the novels, a number of different lords and ladies desire the support of the Vale, but the Arryns have not yet emerged as a unified player in the game of thrones. To this end, the Arryn cards were designed so that they can be splashed as useful support into a wide variety of different decks, rather than collected together as a unified deck archetype. Instead of having a direct impact, the Arryns are more content to lend their support and influence from afar, “safe” within the walls of their Eyrie. The “Shagga” Archetype“Shagga” players are fans of novelty, always eager to play around with any new “bright and shiny” toys. The Castle plots of the Wardens cycle introduce a new type of “delayed” plot effects to the cardpool. In exchange for broadcasting their intentions ahead of time and delaying the payoff, Castle plots allow players to take advantage of powerful effects when these plots enter their used plot piles. Because they represent the tendency of the Arryns to plot slowly and cautiously behind the impregnable walls of their mountain fortress, these cards also have a nice Nedly angle to them. 
In addition to these new Castle plot cards, you’ll find support for a number of synergistic Trait-based decks that have long enticed Shagga players, but that have not yet made it to the top of the competitive hill. Clansman, House Tully, Sand Snake, Dothraki, and Raider decks all receive a number of new options in this expansion, and House Baratheon gains an entirely new set of cards that focus on the Rainbow Guard. The “Jaime” ArchetypeFinally, the “Jaime” player archetype is the competitive player, for whom winning isn’t just the ultimate objective – it’s the only objective. As we looked at the game from the perspective of these players, we decided that the category of “Limited Response” abilities had not yet been satisfactorily explored. For most decks and games the limitation of “1 limited response per round” just wasn’t a big deal. To make this aspect of the game experience more interesting, a number of powerful limited response abilities, such as those on The Drumm (Secrets and Schemes, 4) and Maester Vyman were designed into the Wardens card pool. These should challenge competitive players to determine which limited responses, and how many, to include in their decks. They’ll also find themselves confronted with more over-the-board situations in which the decision as to which limited response is more useful in a given round becomes a significant choice. 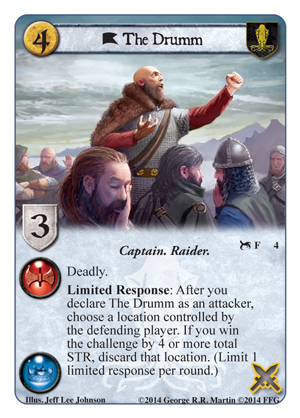 Another area of the game that was explored from a “Jaime” perspective in this cycle was the cost threshold between printed cost “3” and printed cost “4.” Historically, this has been an important breaking point in a card’s evaluation, where, once a card costs four or more, the Jaime evaluation of the card changes dramatically so that only the most fantastic four-cost characters are considered for inclusion in such a player’s deck. Another area of the game that was explored from a “Jaime” perspective in this cycle was the cost threshold between printed cost “3” and printed cost “4.” Historically, this has been an important breaking point in a card’s evaluation, where, once a card costs four or more, the Jaime evaluation of the card changes dramatically so that only the most fantastic four-cost characters are considered for inclusion in such a player’s deck.
To challenge these assumptions, the Wardens cycle provides players with a number of cards such as The Eyrie and The Bloody Gate that encourage the use of higher cost characters. Attacking the situation from the other side, a number of cards such as Mord, Sky Cell, and Ser Ilyn Payne aim to undermine the reliability of characters with printed costs of three or lower, necessitating that competitive players re-evaluate the relative merits of vast swaths of the character pool when working out their decks. Whether you count yourself a Ned, Shagga, or Jaime – or some combination thereof – the Wardens cycle was designed and developed with you in mind. We’re looking forward to seeing what you do with them! Enter the Fray For years, some of the Seven Kingdoms’ most powerful lords and ladies have remained aloof, apart from the turbulent wars that have revolved around the Iron Throne. Now, as they start to stir to action, how will you respond? Will you broker an allegiance? Will you crush them in battle? Will you use lies and cunning to foment dissent within their ranks? As the first Chapter Pack in the Wardens cycle, Secrets and Schemes ushers into the game some remarkable new characters, locations, attachments, and plots. However, it also serves as a portent of those things yet to come. Look for the powers to rally to action when Secrets and Schemes arrives at retailers everywhere late in the third quarter of 2014! ... Source: Secrets and Schemes (http://www.fantasyflightgames.com/edge_news.asp?eidn=4860)
Title: FFG:Secrets and Schemes
Post by: RSSFeeder on 09 June 2014, 22:00:03
Secrets and SchemesAnnouncing the First Chapter Pack in the Wardens Cycle for A Game of Thrones
“Lysa knew more than she had dared to put in her letter. She might have the very proof that Ned needed to bring the Lannisters to ruin, and if it came to war, they would need the Arryns and the eastern lords who owed them service.”
–George R.R. Martin, A Game of Thrones Lords and ladies across the Seven Kingdoms have fought for the Iron Throne. Many have died. Still others have held back, aloof and apart, courted by those who desire their strength. But these lords and ladies have their own plans and ambitions… Fantasy Flight Games is proud to announce the upcoming release of Secrets and Schemes, the first Chapter Pack in the Wardens cycle for A Game of Thrones: The Card Game! In Secrets and Schemes, you will discover sixty new cards (three copies each of twenty different cards) that touch upon the schemes concocted by those patient individuals who have remained above or outside of the wars that have shaken the Seven Kingdoms. Additionally, you’ll learn how they make their opening moves with a host of new Knights, attachments, and the agenda, Aloof and Apart (Secrets and Schemes, 18), which encourages players to revisit some of the game’s most expensive, powerful, and recognizable characters.
Additionally, as it opens the Wardens cycle, Secrets and Schemes begins the exploration of its ongoing themes. For more about these themes and what the cycle has to offer players of every type, we turn to lead developer Nate French. Lead Developer Nate French on the Wardens Cycle Hello, A Game of Thrones players! The Wardens cycle is the twelfth expansion series for A Game Thrones: The Card Game, and with it, we sought to explore a number of under-explored nooks and crannies, both in the game and in the A Song of Ice and Fire setting. This means there’s plenty to appeal to all three of our archetypal players: Ned, Shagga, and Jaime.
The “Ned” Archetype “Ned” players are fans of the source material, who come to the game to immerse themselves in the A Song of Ice and Fire setting. For such players, the biggest draw in the Wardens cycle is likely to be its exploration of the Vale of Arryn and the Eyrie. In this expansion cycle, you’ll find a number of important unique characters and locations that have not yet appeared in the LCG®, including Lysa and Robert Arryn, The Knight’s Declarant, The Moon Door, and the “Petyr Baelish” version of Littlefinger. In the novels, a number of different lords and ladies desire the support of the Vale, but the Arryns have not yet emerged as a unified player in the game of thrones. To this end, the Arryn cards were designed so that they can be splashed as useful support into a wide variety of different decks, rather than collected together as a unified deck archetype. Instead of having a direct impact, the Arryns are more content to lend their support and influence from afar, “safe” within the walls of their Eyrie. The “Shagga” Archetype “Shagga” players are fans of novelty, always eager to play around with any new “bright and shiny” toys. The Castle plots of the Wardens cycle introduce a new type of “delayed” plot effects to the cardpool. In exchange for broadcasting their intentions ahead of time and delaying the payoff, Castle plots allow players to take advantage of powerful effects when these plots enter their used plot piles. Because they represent the tendency of the Arryns to plot slowly and cautiously behind the impregnable walls of their mountain fortress, these cards also have a nice Nedly angle to them.
In addition to these new Castle plot cards, you’ll find support for a number of synergistic Trait-based decks that have long enticed Shagga players, but that have not yet made it to the top of the competitive hill. Clansman, House Tully, Sand Snake, Dothraki, and Raider decks all receive a number of new options in this expansion, and House Baratheon gains an entirely new set of cards that focus on the Rainbow Guard. The “Jaime” Archetype Finally, the “Jaime” player archetype is the competitive player, for whom winning isn’t just the ultimate objective – it’s the only objective. As we looked at the game from the perspective of these players, we decided that the category of “Limited Response” abilities had not yet been satisfactorily explored. For most decks and games the limitation of “1 limited response per round” just wasn’t a big deal. To make this aspect of the game experience more interesting, a number of powerful limited response abilities, such as those on The Drumm (Secrets and Schemes, 4) and Maester Vyman were designed into the Wardens card pool. These should challenge competitive players to determine which limited responses, and how many, to include in their decks. They’ll also find themselves confronted with more over-the-board situations in which the decision as to which limited response is more useful in a given round becomes a significant choice. Another area of the game that was explored from a “Jaime” perspective in this cycle was the cost threshold between printed cost “3” and printed cost “4.” Historically, this has been an important breaking point in a card’s evaluation, where, once a card costs four or more, the Jaime evaluation of the card changes dramatically so that only the most fantastic four-cost characters are considered for inclusion in such a player’s deck. To challenge these assumptions, the Wardens cycle provides players with a number of cards such as The Eyrie and The Bloody Gate that encourage the use of higher cost characters. Attacking the situation from the other side, a number of cards such as Mord, Sky Cell, and Ser Ilyn Payne aim to undermine the reliability of characters with printed costs of three or lower, necessitating that competitive players re-evaluate the relative merits of vast swaths of the character pool when working out their decks. Whether you count yourself a Ned, Shagga, or Jaime – or some combination thereof – the Wardens cycle was designed and developed with you in mind. We’re looking forward to seeing what you do with them! Enter the Fray For years, some of the Seven Kingdoms’ most powerful lords and ladies have remained aloof, apart from the turbulent wars that have revolved around the Iron Throne. Now, as they start to stir to action, how will you respond? Will you broker an allegiance? Will you crush them in battle? Will you use lies and cunning to foment dissent within their ranks? As the first Chapter Pack in the Wardens cycle, Secrets and Schemes ushers into the game some remarkable new characters, locations, attachments, and plots. However, it also serves as a portent of those things yet to come. Look for the powers to rally to action when Secrets and Schemes arrives at retailers everywhere late in the third quarter of 2014! ... Source: Secrets and Schemes (http://www.fantasyflightgames.com/edge_news.asp?eidn=4860)
Title: FFG:Rise from Darkness to Rule the World
Post by: RSSFeeder on 10 June 2014, 06:30:03
Rise from Darkness to Rule the WorldA Preview of the Legions of Darkness Expansion for Warhammer: Diskwars
“Take their gold, burn their homes, kill their families and enslave their souls. Show them no mercy.”
–Malekith, Witch King of Naggaroth In our last preview of Legions of Darkness, we looked at the Vampire Counts and saw how their powerful heroes could draw upon the Wind of Death to raise armies to threaten the whole of the Old World. However, there’s more to Legions of Darkness than just the Vampire Counts, it also introduces heroes and units for both the Dark Elves and Skaven. Today, then, as we turn our attention to the death, darkness, and destruction that these two new races will add to Warhammer: Diskwars, developer Michael Gernes introduces us to their heroes and units, and explores the strengths that their regiments may add to your Destruction armies. Cloaked in Darkness  Hailing from the frozen reaches of Naggaroth, the Dark Elves are a bitter race, driven by their resentment and their hatred of their kinsfolk, the High Elves. Their armies are lightning fast, though potentially fragile, and they’re capable of striking nearly anywhere in the Old World, which they frequently do in order to secure the slaves that do the bulk of Naggaroth’s menial labor… and that provide fodder for ritual sacrifices to Khaine, the Thousand Faced Lord of Murder. Hailing from the frozen reaches of Naggaroth, the Dark Elves are a bitter race, driven by their resentment and their hatred of their kinsfolk, the High Elves. Their armies are lightning fast, though potentially fragile, and they’re capable of striking nearly anywhere in the Old World, which they frequently do in order to secure the slaves that do the bulk of Naggaroth’s menial labor… and that provide fodder for ritual sacrifices to Khaine, the Thousand Faced Lord of Murder.
Accordingly, the Dark Elves of Legions of Darkness, excel at striking fast and subduing their foes. They’re hateful and cruel, and as Michael explains, they can easily surprise and destroy unwary enemy forces: “The Dark Elves are deceitful, merciless raiders, and players will do best with Dark Elf regiments that utilize the sort of aggressive tactics that reflect their nature. Like the High Elves, Dark Elves must control engagements in order to win in melee because they cannot count on toughness. 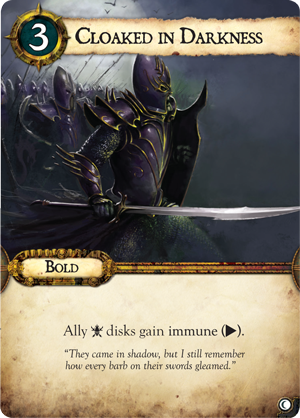 “Black Ark Corsairs are best when they’re able to flip onto and pin their prey, using their mobile ranged attacks to soften up their targets or to slow down enemy disks that might be waiting to counter-charge the Corsairs. As they advance, their stealth keyword helps to protect them from enemy ranged attacks. “Black Ark Corsairs are best when they’re able to flip onto and pin their prey, using their mobile ranged attacks to soften up their targets or to slow down enemy disks that might be waiting to counter-charge the Corsairs. As they advance, their stealth keyword helps to protect them from enemy ranged attacks.
“Unwary opponents might underestimate the Dark Elves’ Karond Kar Harpies, but such a mistake might prove fatal. The Harpies’ flying keyword, combined with their ability to give slow (  , , ) to enemy disks that they engage, makes them an excellent melee support disk, even when they are embattled. ) to enemy disks that they engage, makes them an excellent melee support disk, even when they are embattled. “Further adding to the Dark Elves’ penchant for picking their battles and ganging up on their foes, their hero, Lokhir Fellheart provides flank to Corsairs in your reserve, so that they can launch sudden attacks from an unguarded battlefield edge and overwhelm isolated enemies. Then, when he joins in on the attack, Lokhir Fellheart is ferocious on offense with a high attack value, frenzy, and fear. “Finally, the Cloaked in Darkness command card grants all Dark Elf disks temporary immunity to ranged attacks, better allowing them to rush forward and pin their enemies.” Rising Upward in a Verminous Tide 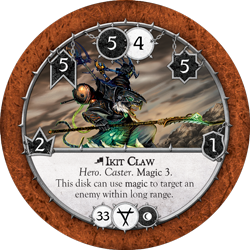 The Skaven are a subterranean race of ratmen that have the numbers, the strength, and the sorcery to threaten the whole of the Old World. However, they have long been held back by in-fighting and distrust among their separate clans. The Skaven are a subterranean race of ratmen that have the numbers, the strength, and the sorcery to threaten the whole of the Old World. However, they have long been held back by in-fighting and distrust among their separate clans.
In Legions of Darkness, we receive our first units from the Skaven’s many different clans, and while there are many different aspects of this malevolent, selfish, and cowardly race begging to be explored, developer Michael Gernes explains how their first appearance is designed to add more new dynamics to the forces of Destruction: “The Skaven disks in Legions of Darkness emphasize the ratmen's warpstone-fueled ranged attacks, rather than their horde tactics, and these first Skaven units are best used to give your Destruction armies a more powerful reach.  “Gutter Runners are adaptable infiltrators who can scout before the battle starts, and rely on their stealth to avoid being picked off at range when caught in the open. Meanwhile, they have the speed to quickly race to the location they’re needed most, and as they approach, they can use their own ranged attacks to pepper the enemy. “Gutter Runners are adaptable infiltrators who can scout before the battle starts, and rely on their stealth to avoid being picked off at range when caught in the open. Meanwhile, they have the speed to quickly race to the location they’re needed most, and as they approach, they can use their own ranged attacks to pepper the enemy.
“The Ratling Gun is a support disk that can use its mobile ranged attack to keep up a marching fire and soften up multiple enemies. Like many Skaven weapons, though, it can be unpredictable, so you’ll want to be careful as you position with your troops. The Ratling Gun’s ability guarantees that scatter results will deal damage to disks near its target. “The Skaven hero, Ikit Claw, is both a powerful caster and a solid melee combatant. His ability to use magic 3 at long range can be deadly when used against low toughness disks, or as support for your other ranged attacks. Then, when Ikit Claw is… inevitably… rushed by enemies, he can use the Skaven command card Vermintide to deal an impressive amount of destruction to any disks caught within short range.” Rain Destruction Upon Your Foes While the Vampire Counts of Legions of Darkness present the expansion’s greatest threat to the Old World, the Dark Elf and Skaven regiments it allows you to build should not be overlooked. These races add new range and depth to the forces of Destruction, and their first opportunistic units will gleefully join any Destruction-aligned army in the hopes of claiming blood, slaves, and treasure. How will you make use of these new races? Head to our community forums to share your strategies and army builds. The darkness is coming. ... Source: Rise from Darkness to Rule the World (http://www.fantasyflightgames.com/edge_news.asp?eidn=4861)
Title: FFG:Battle Plans
Post by: RSSFeeder on 10 June 2014, 23:30:03
Battle PlansAn X-Wing (TM) Turn Zero Article by 2013 World Champion Paul Heaver
“The Empire doesn’t consider a small one-man fighter to be any threat, or they’d have a tighter defense. An analysis of the plans provided by Princess Leia has demonstrated a weakness in the battle station.”
–General Dodonna In his “Turn Zero” articles, reigning World Champion Paul Heaver offers a look at one of the most critical components in mastering the game of X-Wing™… getting started. Previously, Paul explored the importance of asteroid placement and of determining how best to place your starships at the start of your game. Today, Paul continues his exploration of the important decisions that you make in every match well before the first shots are fired and the first defense dice are rolled… 
2013 X-Wing World Champion Paul Heaver
2013 X-Wing World Champion Paul Heaver on Forming a Battle Plan Welcome back to “Turn Zero”! In this edition, we’ll look at how to form a plan for victory. There are multiple steps to consider, starting with one that you can begin days or even weeks before an event begins: Step One: Study the MetagameThe first step in your tournament preparation is to analyze the current metagame. For example, as I prepared for tournaments toward the close of FFG’s 2014 Store Championship season, Rebels had posted more wins than Imperials, primarily with a variety of four-ship builds. Usually, these utilized some combination of B-wings and X-wings. 
Squads of two X-wings and two B-wings are common at tournaments.
Five-ship Rebel builds were also seeing some popularity, and builds that utilized Chewbacca plus two other fighters were still going strong. 
Chewbacca remains a popular addition to squads with two X-wings.
On the Imperial side, the TIE swarm still reigned. 
The TIE swarm is still as every bit as effective as it is intimidating.
Sometimes, a shuttle replaced two of the TIE fighters. After the swarm, I saw Imperial builds that used three Bounty Hunters, or two Bounty Hunters and another ship or two for support. 
Squads of three bounty hunters use the Firespray-31 to great effect.
All told, as I planned to head to tournaments toward the end of the Store Championship season, I expected most people at my event to be running lists that could be placed into one of the major archetypes listed above. Since my region tends to be heavy on Rebels, I planned on facing squads with two B-wings and two X-wings, as well as builds with Chewbacca and two fighters. I also expected to face a few Imperial swarms. Of course, your local metagame might be different! Once you form an educated guess about the lists that you’re likely to face, you need to decide what to play. You don’t want to play something that will fall apart to the most popular builds in the metagame! For example, if you have someone that always shows up with a squad that uses two YT-1300s and consistently does well, you might want to think twice about a three-ship list featuring TIE interceptor aces. Generally, I also like to avoid complete mirror matches, so if I choose to play a common archetype, I try to bring something specifically for the mirror of my list: I may include a HWK-290 with an Ion Cannon Turret in my four-ship Rebel build, or I may drop my TIE swarm to ninety-six points to win initiative. Step Two: Plan Three Turns AheadSo, if you’ve figured out which builds are likely to be the most popular, what’s your plan for facing them? At the very least, I recommend developing plans for asteroid and ship placement against two or three of the popular builds. I always start by planning how to confront TIE Swarms since their setups are well-documented. You know they want to set their asteroids as close to them as possible to minimize their impact, and you know they’ll place their ships first in one of the usual formations. Next, I’d plan to face the popular Rebel lists that utilize two B-wings and two X-wings. Usually, two detailed plans are good for most events. My previous articles dealt with asteroids and ship placement, so you can look there for my advice. Once you’ve developed your plans for asteroids and ship placement, you’ll want to practice three turns of maneuvers. Usually, that’s about the length of time it takes for both fleets to approach the first round of combat. As you practice, you’ll assume the TIE swarm you are practicing against is going to move toward you as aggressively as possible while dodging asteroids. On the other hand, the Rebel squad of B-wings and X-wings will run roughly halfway down the edge of the board before turning into the center. 
Understanding and anticipating your opponent’s maneuvers helps you better plan your initial approach. Here, we see how a squad of two X-wings and two B-wings and a swarm of TIE fighters might approach each other.
How can your squad take advantage of this knowledge? Ideally, you’d find a way to get a free round of shots at your opponent, but, realistically, that won’t happen. In most cases, the best that you can do is develop an opening that allows you to encounter your opponent’s starfighters after they’ve lost actions bumping into allied ships or performing barrel rolls and boosts to bypass asteroids, and if all goes well, you’ll have saved your actions for focuses and target locks. Additionally, a perfect opening is one in which you can encounter your opponent’s squad with all your ships in range to fire, but one or more of enemy ship lagging behind and out of range. Practice is essential to the development of such a successful opening. Another bonus to planning out the game’s three opening rounds is that you can place your dials quickly in the beginning of your matches. Being able to project confidence in your plan is often enough to cause your opponents to question their plans, second-guess themselves, and make mistakes. Step Three: Study Your OpponentsOnce you get to the event, look around! Study your opponents. Most people will have their ships out, ready to set up, and visible. Did you guess the metagame correctly? You’ll have a chance to find out. If you see a ton of YT-1300s, you should start thinking about what you need to do to work around their powerful turrets. If you see a lot of bright red TIE interceptors, you should start planning what you’ll need to do to block their moves and prevent them from dodging out of your firing arcs. Then, throughout the tournament, take time to watch other matches after you complete yours. You may possibly discover some interesting tactics you might not have thought of, and you may also see how your future opponents act. Do they avoid asteroids at all costs, or do they fly over them for a tactical advantage? Do they clear stress tokens immediately, or do they sacrifice actions in favor of position? Finally, when you get to the table, you need to determine how your opponent plans to win and which are his most important pieces.
- Does he have a vulnerable wingman that he plans to hold away from the front lines to give bonuses to his other ships? “Howlrunner,” Biggs Darklighter, and most of the HWK-290 pilots fall into this category. Usually, you want to destroy them first.
 
- Is there an ace pilot that he’ll try to use to establish a flank? Set up your asteroids to make flanking difficult. Alternatively, you can plan on setting up a trap where you can pounce on the flanker without exposing yourself to the rest of his fleet. If you use just two asteroids to protect your planned attack routes, then you can use the last one to close off your opponent’s most obvious attack route.
When you place your ships, you’ll want to think about your three-turn plan, and how it will interact with your opponent’s probable location after three turns. Switching to Plan “B”In some cases, you’ll need to abandon your plan. After placing your asteroids, you may realize that if you follow your ship placement and three-turn plan, you will be woefully out of position. Do not just stubbornly follow the plan anyway! Spend a moment to think about what you can to do to salvage this situation. Perhaps, you can move super slowly to react to your opponent’s movement, or you might rocket down the edge of the map as fast as possible to throw off his plan. Hopefully, by now, you will realize how important it is to master the game before the game. As in a chess match, you can sit down knowing nothing but the rules and still win, but you stand a much better chance if you know a few openings and known counterattacks. Games of X-Wing are often won or lost before the first shot is fired. Thanks, Paul! In X-Wing as in the original Star Wars trilogy, matches are won and lost with daring maneuvers and heroic shots. Still, just as in the original Star Wars trilogy, your victory also requires careful planning. It takes a great deal of coordination to get all your heroes into position to make the most of their contributions, and that planning starts well before you sit down to the table. If you’re looking to improve your skills as an X-Wing player, then, it would serve you well to follow Paul’s advice, and while you’re thinking about how to develop and counter a number of different opening gambits, you can share your thoughts with the members of our community forums! ... Source: Battle Plans (http://www.fantasyflightgames.com/edge_news.asp?eidn=4862)
Title: FFG:A Twisted Plan
Post by: RSSFeeder on 11 June 2014, 08:00:03
A Twisted PlanA Guest Article on Twist of Fate in STAR WARS (TM): The Card Game 
Star Wars™: The Card Game is made up of hundreds of unique cards, divided across two sides of the Force and six affiliations. Many of these cards have distinctly shaped the way the game is played, but has one card had a greater influence than any other? In today’s guest article, Zach Bunn asks that question and offers his thoughts on one card’s effects on every game of Star Wars: The Card Game. Zach Bunn on Twist of Fate What would you choose as “the most important card” in the Star Wars: The Card Game? Maybe you’d choose Sleuth Scout (Edge of Darkness, 340) for its meta-defining ability, or Orbital Bombardment (Core Set, 103) for the way it shifts the dark side’s endgame. The Defense of Yavin 4 (Core Set, 138) isn’t a bad pick either, since it gives speed and efficiency to an entire deck.  There are certainly more than a few fantastic cards in the game, and all of the above are worthy picks. But when we’re discussing the most important card in the game – a quite prestigious title – I can’t get away from a relatively simple one that impacted the game since the beginning: Twist of Fate (Core Set, 171). There are certainly more than a few fantastic cards in the game, and all of the above are worthy picks. But when we’re discussing the most important card in the game – a quite prestigious title – I can’t get away from a relatively simple one that impacted the game since the beginning: Twist of Fate (Core Set, 171).
Twist of Fate is a straightforward card. It cancels the current edge battle and forces players into a second edge battle. So what is it that makes Twist of Fate so important? To understand the power of Twist of Fate, you have to also understand the power of edge battles. The edge battle is one of the most critical components to winning or losing a game of Star Wars. If you’ve played a few games, you should understand the importance of edge battles for determining the outcome of a game. But Twist of Fate isn’t about winning edge battles. Let me say that again. Twist of Fate is not about winning edge battles. Twist of Fate is about card advantage. Two Steps Ahead In my first article posted to the FFG website, The Flow of the Force, I discussed the importance of cycling through your deck and not holding onto cards that you know you won’t be using. Twist of Fate doesn’t get you extra cards, but when used ideally, it costs your opponent cards. Imagine a typical scenario, where your opponent attacks and you block. You each have three cards in your hand. They play a card into the edge stack. You play a Twist of Fate. Even if they predict your Twist of Fate and pass, a new edge battle begins, forcing them to either put another card into the edge stack or automatically lose the edge battle. If they don’t call your Twist of Fate and put a second card into the edge, you can pass, and they have now spent two cards and will need to spend their third just to have a chance of winning the edge battle. This accomplishes so much: - Your opponent has less cards for more offensive edge battles on their turn
- Your opponent has less cards for defensive edge battles on your turn
- Your opponent now has less options in hand
- You now have a better chance of winning the current edge battle, if desired

That was a defensive example, but even on offense having a Twist of Fate can be big. Effective offense in this game is predicated on your ability to divide attacks to force your opponent to give you one of a few determined outcomes. Perhaps you want to obtain the Balance of the Force. Maybe you send an initial attack that won’t be as damaging as your second attack, but by attacking in this way, you force your opponent to choose which attack to block. Ideally, you should be forcing your opponent to give you some, if not all, of the outcomes you want on a turn. Managing the cards in your hand and your opponent’s hand is a skill that leads to huge turns. If you have a Twist of Fate, you can often have your cake and eat it too. If your opponent only has a few cards in hand, you can often attack in such a way that should they attempt to stop your initial attack, you’ll empty their hand and have your way with any further engagements. While Twist of Fate can win you an edge battle, it ought to lead to card advantage. But even with all of this, Twist of Fate’s largest impact is deeper than winning edge battles and gaining card advantage. Unseen Effects  Once you pass the new player experience level and start anticipating Twist of Fate, the effect this card has on the game grows immeasurably. The most important cards aren’t really the ones that need to resolve or trigger. Rather, the most important cards are the ones that alter how the game is played regardless of whether or not they are ever seen. Sometimes, these cards might not even be in a player’s hand or deck! Once you pass the new player experience level and start anticipating Twist of Fate, the effect this card has on the game grows immeasurably. The most important cards aren’t really the ones that need to resolve or trigger. Rather, the most important cards are the ones that alter how the game is played regardless of whether or not they are ever seen. Sometimes, these cards might not even be in a player’s hand or deck!
For example, we can all agree that Darth Vader (Core Set, 35) is extremely powerful. However, his effect on how the game is played when he isn’t on the board is minimal at best. The effect that Twist of Fate always causes, purely from existing, is incredible. Consider for a moment the example I used earlier, but this time you’re the attacker. You dropped a single card into the edge battle and your opponent followed suit. What do you do? If you play a second card and they played Twist of Fate, you’re in a really bad position. With no other knowledge, this might cause you to pass and hope the one card wins you the edge battle. But what if your opponent’s single card was a single card with a high Force icon count? Twist of Fate single-handedly forces players to approach every edge battle differently. Investigating Objectives Without looking, how many objectives for light and dark sides contain Twist of Fate? The answer might surprise you. Currently, the dark side has six objectives and the light side has five objectives with Twist of Fate. What’s most interesting to me is the mental impact this card has on every top-level player I’ve played against and discussed the game with, even though it’s in relatively few objective sets.  Below are the objective sets that contain Twist of Fate: Below are the objective sets that contain Twist of Fate:
Light Side Dark Side For me, knowing this list is extremely important. By the middle of a game, when edge battles get absurdly important, I ought to know most of the objectives in my opponent’s deck. Knowing the odds of them having a Twist of Fate can open up winning opportunities that I would overlook if I assumed my opponent had the cards to shut me down. More importantly, this illustrates a grander point. The mental effect we allow important cards to have on us can be negative. There’s a reason power cards have the mental impact that they do, but it’s important to keep an open and observant mind and remember that your opponent doesn’t always have the answer. Full awareness in these moments allows great players to make game-winning plays. Until next time, may the Force be with you. Zach Bunn Thanks, Zach! Zach Bunn is a Star Wars fanatic, a lead member of Team Covenant, and a member of the winning team from the Star Wars multiplayer tournament held at Worlds. In coming weeks, stay tuned for more Star Wars guest articles from Zach and other writers! ... Source: A Twisted Plan (http://www.fantasyflightgames.com/edge_news.asp?eidn=4863)
Title: FFG:Four STAR WARS (TM) Dice Bags Are Coming
Post by: RSSFeeder on 11 June 2014, 16:30:03
Four STAR WARS (TM) Dice Bags Are ComingSecure Your Dice and Tokens in These Durable and Stylish Dice Bags
“My ally is the Force. And a powerful ally it is. Life creates it, makes it grow. Its energy surrounds us and binds us.”
–Yoda Fantasy Flight Games is proud to announce the upcoming release of four different Star Wars™ Dice Bags for Fantasy Flight Supply!  Whether you follow the path of the Jedi or succumb to the dark side, you’ll find these bags perfect for toting about the custom dice or components for any of our Star Wars games: Whether you follow the path of the Jedi or succumb to the dark side, you’ll find these bags perfect for toting about the custom dice or components for any of our Star Wars games:
Secure Your Bounty “Oh… they’ve encased him in carbonite. He should be quite well-protected — if he survives the freezing process, that is.”
–C-3PO Secure your bounty of dice and tokens in style. Fantasy Flight Supply is committed to providing you the best materials to protect, customize, and enhance your games. To that end, each Star Wars Dice Bag provides a handy, durable, and thematic means to transport your Star Wars game components:
- Galactic Empire. Order your components as you would order the galaxy. Nothing shall escape your grasp!
- Stormtrooper. Keep your dice and tokens in a dice bag adorned with the Stormtrooper’s iconic white helmet, and you will always be ready for battle!
- Boba Fett. You always have a few tricks up your sleeve… and in your dice bag.
- Rebel Alliance. To topple the Empire and win the fight for galactic freedom, you’ll need to safeguard your resources and make good use of every single one of them.

Star Wars Dice Bags are all crafted with a durable blend of polyester and nylon, feature a polypropylene draw string, and measure 6.25” by 9” (15.9 cm by 22.9 cm), enough space to carry bundles of dice and large enough for nearly everyone to reach inside with ease. This means each bag nicely performs double duty as a repository not only for your dice and tokens but also for other game components like your X-Wing asteroids and your Star Wars: The Card Game Death Star dial. Permit No Escape “I will not give up my favorite decoration.”
–Jabba the Hutt Star Wars Dice Bags give you a handy and thematic way to hold fast to all your Star Wars game components as you head to battle. Look for them to arrive at retailers everywhere in the third quarter of 2014! ... Source: Four STAR WARS (TM) Dice Bags Are Coming (http://www.fantasyflightgames.com/edge_news.asp?eidn=4864)
Title: FFG:Serve the Emperor
Post by: RSSFeeder on 12 June 2014, 01:00:03
Serve the EmperorPreview Character Creation in Dark Heresy Second Edition.png)
In Dark Heresy Second Edition, you and your friends assume the roles of Acolytes in the service of an Inquisitor, battling heresy within, without, and beyond. An Acolyte can come from any planet and any background, but all Acolytes must face the universe’s secrets – the existence of the Warp, and the ravenous hunger of the Warp’s Daemons. In creating an Acolyte, you craft a character to strive against these terrible threats. These steadfast men and women that you create are all that stand between the Imperium and the extinction of all Mankind. In this preview of Dark Heresy Second Edition, developer Tim Huckelbery introduces how you create characters in Dark Heresy. A Designer Diary of Character Creation in Dark Heresy Character creation in Dark Heresy is comprised of three main selections: the Acolyte’s home world, background, and role. A character can be made from any combination of these choices, so there’s a huge variety of possible Acolytes to be created! Each selection a player makes develops his character, from generating starting characteristics and equipment to granting special rules unique to his selection. The Dark Heresy core rulebook offers dozens of examples of settings, organisations, and people from the Askellon Sector, giving players new ways to create their own characters. 
Stage 1: Choose Home World A character’s home world is the planet or location where he was born and likely spent much of his life. It determines his physical appearance, mannerisms, and perspective on the Imperium as a whole. Dark Heresy contains six home world types in the core rulebook. Four of these are archetypal Imperial planets – feral, forge, hive, and shrine worlds – giving players a range of primitive savagery, technological immersion, cut-throat survival, and devout service. The other two home world types represent origins that could come from planets across the Imperium: the power-drenched environs of the highborn, and the artificial, empty reaches of the voidborn. Stage 2: Choose Background A character’s background represents what he has done with his life up to this point, including the previous Imperial organisation that he served. It determines what sort of training the character received throughout his life, what kind of resources he can access, and who he knows. 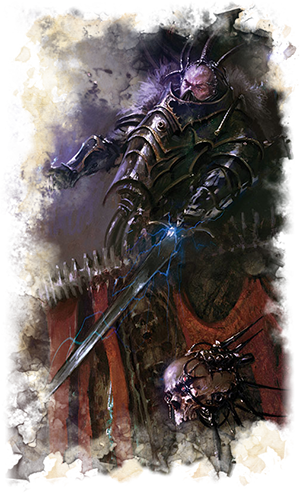 Seven potential backgrounds are included in the core rulebook: the Imperial agencies of the Adeptus Administratum, Adeptus Arbites, Adeptus Astra Telepathica, Adeptus Mechanicus, Adeptus Ministorum, and the Astra Militarum, along with Outcasts, those who have escaped the confines of any group or organisation. Forming a character with a background in an Imperial agency allows players to create Acolytes from powerful organisations, steeped in connections, but simultaneously entrenched in their own structures. An Outcast has greater relative freedom, but fewer allies, save for others who also exist outside the Imperium’s many strictures. Seven potential backgrounds are included in the core rulebook: the Imperial agencies of the Adeptus Administratum, Adeptus Arbites, Adeptus Astra Telepathica, Adeptus Mechanicus, Adeptus Ministorum, and the Astra Militarum, along with Outcasts, those who have escaped the confines of any group or organisation. Forming a character with a background in an Imperial agency allows players to create Acolytes from powerful organisations, steeped in connections, but simultaneously entrenched in their own structures. An Outcast has greater relative freedom, but fewer allies, save for others who also exist outside the Imperium’s many strictures.
Stage 3: Choose Role Roles illuminate an Acolyte’s essence. While a home world establishes where an Acolyte came from, and a background indicates his prior experiences, his role reveals who he really is underneath his clothing, armour, and cybernetics. It reflects how he views the world around him and his place in it, and broadly defines how he faces dangers, interacts with others, and resolves problems. A role also dictates what areas of expertise he excels at, and how he grows and learns with experience. Dark Heresy includes eight roles in the core rulebook: Assassin, Chirurgeon, Desperado, Hierophant, Mystic, Sage, Seeker, and Warrior. While it is common parlance in the Imperium to mention that someone comes from a feral world, or works for the Adeptus Mechanicus, roles do not actually exist as titles or Imperial designations. Roles operate within the context of the game, indicating a mindset or attitude that a character adopts over his lifetime. Desperado or Seeker, for example, don’t exist as actual occupations or titles in the 41st millennium. Instead, players will find a Trade Sable smuggler or a Hive Desoleum Bondhound Sanctionary. Continuing Growth 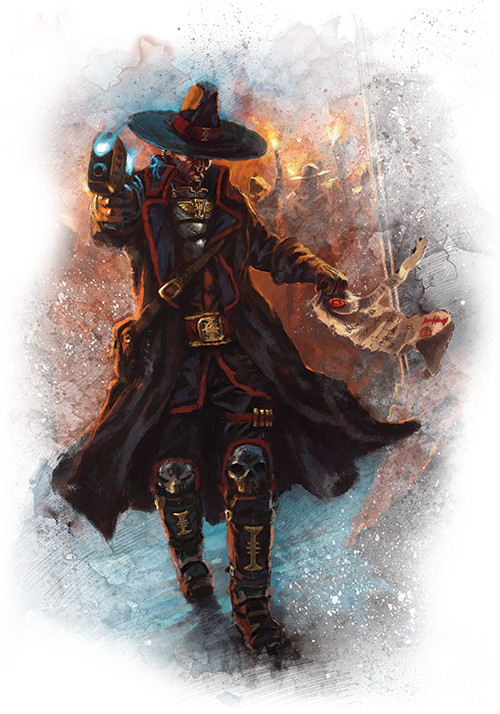 Once these major choices have been made, players develop their new Acolytes further by advancing initial characteristics, skills, and talents, as well as purchasing weapons and other gear. Players also bring their characters to life by giving them names, selecting special Divinations to show the Emperor’s Will in their lives, and choosing other additions to make their character unique. Once these major choices have been made, players develop their new Acolytes further by advancing initial characteristics, skills, and talents, as well as purchasing weapons and other gear. Players also bring their characters to life by giving them names, selecting special Divinations to show the Emperor’s Will in their lives, and choosing other additions to make their character unique.
Character creation doesn’t have to end once you have a character, though, as players can use elite advances to modify their characters. Elite advances represent large, defining aspects of a character that set him apart from his peers. Each is unique and could be the result of a new position, an aspect of a character that has been part of him his entire life, or an ability that emerged more recently due to external stimuli. Dark Heresy includes three elite advances in the core rulebook: Inquisitor, Psyker, and Untouchable. Using these, an Acolyte can rise to become an Inquisitor himself, allowing a group to have one or more Inquisitors if the players desire. A character can also become blessed (or cursed) to become a psyker and wield the terrible powers of the Warp, or discover himself an untouchable, one of the soulless pariahs who are anathema to psyker and Daemon alike. An elite advance doesn’t alter a character’s role, however. A Warrior still views violence as the best solution to problems, even if he gains the Psyker elite advance. A role defines how a character views the galaxy and his position inside it. Elite advances may take a character along different paths, but they don’t change how he walks upon them. Success Is Measured in Blood Thanks, Tim! The endless threats of the Askellon sector threaten to completely overwhelm the Imperium. Only you and your Acolytes can keep humanity safe for another day. In our next preview, developer Andy Fischer creates his own Acolyte. In the meantime, preorder Dark Heresy Second Edition at your local retailer today! ... Source: Serve the Emperor (http://www.fantasyflightgames.com/edge_news.asp?eidn=4865)
Title: FFG:Serve the Emperor
Post by: RSSFeeder on 12 June 2014, 18:00:03
Serve the EmperorPreview Character Creation in Dark Heresy Second Edition
In Dark Heresy Second Edition, you and your friends assume the roles of Acolytes in the service of an Inquisitor, battling heresy within, without, and beyond. An Acolyte can come from any planet and any background, but all Acolytes must face the universe’s secrets – the existence of the Warp, and the ravenous hunger of the Warp’s Daemons. In creating an Acolyte, you craft a character to strive against these terrible threats. These steadfast men and women that you create are all that stand between the Imperium and the extinction of all Mankind. In this preview of Dark Heresy Second Edition, developer Tim Huckelbery introduces how you create characters in Dark Heresy. A Designer Diary of Character Creation in Dark Heresy Character creation in Dark Heresy is comprised of three main selections: the Acolyte’s home world, background, and role. A character can be made from any combination of these choices, so there’s a huge variety of possible Acolytes to be created! Each selection a player makes develops his character, from generating starting characteristics and equipment to granting special rules unique to his selection. The Dark Heresy core rulebook offers dozens of examples of settings, organisations, and people from the Askellon Sector, giving players new ways to create their own characters.
Stage 1: Choose Home World A character’s home world is the planet or location where he was born and likely spent much of his life. It determines his physical appearance, mannerisms, and perspective on the Imperium as a whole. Dark Heresy contains six home world types in the core rulebook. Four of these are archetypal Imperial planets – feral, forge, hive, and shrine worlds – giving players a range of primitive savagery, technological immersion, cut-throat survival, and devout service. The other two home world types represent origins that could come from planets across the Imperium: the power-drenched environs of the highborn, and the artificial, empty reaches of the voidborn. Stage 2: Choose Background A character’s background represents what he has done with his life up to this point, including the previous Imperial organisation that he served. It determines what sort of training the character received throughout his life, what kind of resources he can access, and who he knows. Seven potential backgrounds are included in the core rulebook: the Imperial agencies of the Adeptus Administratum, Adeptus Arbites, Adeptus Astra Telepathica, Adeptus Mechanicus, Adeptus Ministorum, and the Imperial Guard, along with Outcasts, those who have escaped the confines of any group or organisation. Forming a character with a background in an Imperial agency allows players to create Acolytes from powerful organisations, steeped in connections, but simultaneously entrenched in their own structures. An Outcast has greater relative freedom, but fewer allies, save for others who also exist outside the Imperium’s many strictures. Stage 3: Choose Role Roles illuminate an Acolyte’s essence. While a home world establishes where an Acolyte came from, and a background indicates his prior experiences, his role reveals who he really is underneath his clothing, armour, and cybernetics. It reflects how he views the world around him and his place in it, and broadly defines how he faces dangers, interacts with others, and resolves problems. A role also dictates what areas of expertise he excels at, and how he grows and learns with experience. Dark Heresy includes eight roles in the core rulebook: Assassin, Chirurgeon, Desperado, Hierophant, Mystic, Sage, Seeker, and Warrior. While it is common parlance in the Imperium to mention that someone comes from a feral world, or works for the Adeptus Mechanicus, roles do not actually exist as titles or Imperial designations. Roles operate within the context of the game, indicating a mindset or attitude that a character adopts over his lifetime. Desperado or Seeker, for example, don’t exist as actual occupations or titles in the 41st millennium. Instead, players will find a Trade Sable smuggler or a Hive Desoleum Bondhound Sanctionary. Continuing Growth Once these major choices have been made, players develop their new Acolytes further by advancing initial characteristics, skills, and talents, as well as purchasing weapons and other gear. Players also bring their characters to life by giving them names, selecting special Divinations to show the Emperor’s Will in their lives, and choosing other additions to make their character unique. Character creation doesn’t have to end once you have a character, though, as players can use elite advances to modify their characters. Elite advances represent large, defining aspects of a character that set him apart from his peers. Each is unique and could be the result of a new position, an aspect of a character that has been part of him his entire life, or an ability that emerged more recently due to external stimuli. Dark Heresy includes three elite advances in the core rulebook: Inquisitor, Psyker, and Untouchable. Using these, an Acolyte can rise to become an Inquisitor himself, allowing a group to have one or more Inquisitors if the players desire. A character can also become blessed (or cursed) to become a psyker and wield the terrible powers of the Warp, or discover himself an untouchable, one of the soulless pariahs who are anathema to psyker and Daemon alike. An elite advance doesn’t alter a character’s role, however. A Warrior still views violence as the best solution to problems, even if he gains the Psyker elite advance. A role defines how a character views the galaxy and his position inside it. Elite advances may take a character along different paths, but they don’t change how he walks upon them. Success Is Measured in Blood Thanks, Tim! The endless threats of the Askellon sector threaten to completely overwhelm the Imperium. Only you and your Acolytes can keep humanity safe for another day. In our next preview, developer Andy Fischer creates his own Acolyte. In the meantime, preorder Dark Heresy Second Edition at your local retailer today! ... Source: Serve the Emperor (http://www.fantasyflightgames.com/edge_news.asp?eidn=4865)
Title: FFG:The Forms of Battle
Post by: RSSFeeder on 13 June 2014, 02:30:03
The Forms of BattleAn Example of Battle in Warhammer 40,000: Conquest
Amidst the grim darkness of the future and crushing chill of outer space, mankind still stands against the waves of xenos, heretics, and traitors that attempt to bear them to the ground. Every day, the battle is fought anew on a thousand planets spread across the far flung reaches of the galaxy. In Warhammer 40,000: Conquest, you take your rightful place in that story, commanding the armies of your faction as you strive for ultimate control of the Traxis sector. In past previews, we’ve examined separate aspects of the game round. In our first preview, we explored deployment and the strategy behind placing your armies at different planets. Our next preview expanded the command struggle, in which you and your opponent gain resources and draw cards based on your armies’ influence on the planets of the Traxis sector. Most recently, we took a closer look at combat, exploring the broad picture of battles, including how they happen, how units fight, and some of the keywords that can come into play. 
In today’s preview, we’ll see the flow of combat firsthand by looking at an example of a battle for just one planet in the Traxis sector. Opening Salvos The beginning of the combat phase finds the armies of Chaos and the Astra Militarum clashing at this round’s first planet: Osus IV. Jack has three units present: his warlord, Zarathur, High Sorcerer (Core Set, 4); an Umbral Preacher (Core Set, 86); and an Alpha Legion Infiltrator (Core Set, 81) with the Mark of Chaos (Core Set, 80) attachment. On the other side of the battlefield, Kate’s forces consist of her warlord, Colonel Straken (Core Set, 2) fighting alongside a Ratling Deadeye (Core Set, 35) and a Leman Russ Battle Tank (Core Set, 38). In addition, Kate has a Catachan Outpost (Core Set, 53) support in her headquarters. 
Click to see the image from the Chaos player's point of view.
Battle begins by determining which player has initiative. If only one warlord were present, that player would automatically win initiative, but since both warlords are present, Jack will strike first, since he holds the initiative token this round. After initiative is determined, the ranged skirmish occurs, allowing any units with the Ranged keyword to fire upon the opposing army from afar. Since Jack has no units with Ranged, he must forgo the opportunity to strike in favor of Kate. Kate exhausts the Ratling Deadeye to strike at the Alpha Legion Infiltrator in order to negate this unit’s high attack power before it has a chance to strike. The Ratling Deadeye deals one damage to the Alpha Legion Infiltrator. If a unit has damage on it equal to or more than its hit points, it is destroyed, and one damage is enough to destroy the Alpha Legion Infiltrator. The vanquished Alpha Legion Infiltrator leaves play, but this triggers the Mark of Chaos attachment, dealing one damage to each enemy unit at the planet. This damage is increased by the Chaos warlord’s Interrupt ability, which reads, “When damage is dealt to an enemy unit at this planet, increase that damage by 1.” Each of Kate’s units at the planet take two damage, destroying the Ratling Deadeye. Since there are no more ready units with the Ranged keyword, the ranged skirmish is complete. 
Click to see the image from the Chaos player's point of view.
Chainswords and Lasguns As normal combat begins, Jack has the chance to strike first with either of his ready units, because he has initiative. He chooses to strike with the Umbral Preacher against Colonel Straken, dealing one damage, plus an additional damage from Zarathur’s Interrupt, to Straken. This damage, combined with the two damage Straken took from the Mark of Chaos, means that the Astra Militarum warlord can only take two more damage before he is bloodied. 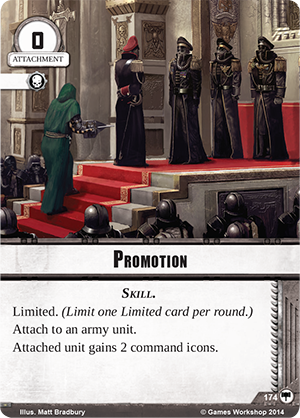 It is now Kate’s combat turn and she decides to remove the threat of the Umbral Preacher, whose ability prevents units from retreating. Before she strikes, Kate also exhausts the Catachan Outpost support card, granting her next attacker a higher attack value. Colonel Straken exhausts to strike, dealing four damage with the aid of Catachan Outpost. Four total damage is more than the Umbral Preacher’s hit points, and that unit is destroyed. It is now Kate’s combat turn and she decides to remove the threat of the Umbral Preacher, whose ability prevents units from retreating. Before she strikes, Kate also exhausts the Catachan Outpost support card, granting her next attacker a higher attack value. Colonel Straken exhausts to strike, dealing four damage with the aid of Catachan Outpost. Four total damage is more than the Umbral Preacher’s hit points, and that unit is destroyed.
On Jack’s next combat turn, he has only one unit remaining: Zarathur, High Sorcerer. He chooses to strike at Colonel Straken, hoping to deal the last damage necessary to bloody Straken. However, Kate has a card in her hand that can be discarded to shield damage! Promotion (Core Set, 174) has one shield icon, blocking part of the damage from Zarathur’s attack. Straken is dealt one damage, leaving him able to take one more hit point of damage. Finally, Kate strikes with her remaining ready unit, the Leman Russ Battle Tank, dealing four damage to Zarathur. At this point, all units are exhausted and the combat round is over. All units ready, and both players have the opportunity to retreat any number of units back to their headquarters. Jack examines the board, and determines that, while he would most likely be able to bloody Straken, his own warlord would be bloodied by the Leman Russ Battle Tank, and Kate would still win the battle at the planet. Not desiring this outcome, Jack chooses to retreat Zarathur back to his headquarters, leaving Osus IV to the Astra Militarum! 
The Fruits of Victory As the victor of a battle, Kate chooses to trigger the Battle ability of Osus IV, allowing her to take a resource from her opponent. After taking the resource, Osus IV is placed in Kate’s victory display because it was the first planet, and her units are returned to her headquarters. Since this was the only battle in this combat phase, the headquarters phase now begins. The first planet token is moved forward to the next planet in line, indicating that this planet will be contested and added to one player’s victory display in the next round. Next, if there are any facedown planets at the end of the row, the next one in line is revealed, offering a new location for players to deploy units. Both players draw two cards, receive four resources, ready all units, and the initiative token is passed to Kate, beginning a new round! Thus far, our previews have focused on the gameplay of Warhammer 40,000: Conquest, but in our next preview, we’ll begin an exploration of each of the factions you’ll find in this game, beginning with the most loyal servants of the Emperor, the Space Marines. Check back for more previews, and preorder Warhammer 40,000: Conquest at your local retailer today! ... Source: The Forms of Battle (http://www.fantasyflightgames.com/edge_news.asp?eidn=4866)
Title: FFG:Your Tale Begins
Post by: RSSFeeder on 13 June 2014, 11:00:03
Your Tale BeginsWinter Tales Is Now Available at Your Local Retailer
The White Rabbit paused his daily inspection on a freezing balcony, high above the hissing construction of the Nightmare Factory. Beneath him, dozens worked, brainwashed into mindless service, creating weapons and monstrosities for the winter regime. The White Rabbit sipped his wine, warmed against the chill in the air. He started this war with the products of his factory, and he would end it in the same way. In the frosty city of Wintertown, two factions wage a constant struggle. On one side, Snow White, Candlewick, Mad Hatter and the other soldiers of winter strive to maintain their rule and ensure that winter never leaves. Opposing the winter regime are the spring rebels, including Alice, Dorothy, Pinochio, and others, attempting to overthrow the oppressive soldiers holding Wintertown in its grasp. Take your place in these struggles and weave your own stories in Winter Tales, now available at your local retailer! 
The Story So Far In Winter Tales, you and your friends control characters fighting for either the spring rebels or the winter soldiers. Every action your characters take expands the story of the struggle. During the struggle, you play story cards, each of which features art that can be interpreted in a variety of ways. Your characters move, quest, and fight by interpreting the art on story cards and weaving it into your narrative. 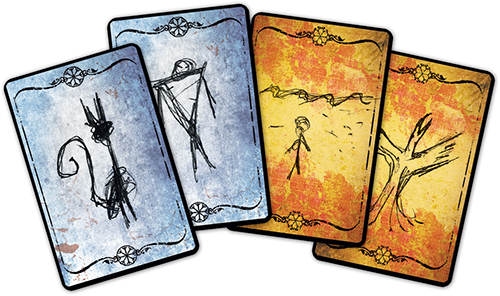
In our first preview, we examined how you and the other players use story cards to move through the streets of Wintertown and complete quests. Quests offer you opportunities to complete key goals, such as establishing a safe house for the resistance, or spreading propaganda to uphold the regime. Quests can be contested by characters from the opposing faction, and when a set number of quests are completed, the game’s epilogue begins.  Next, we took a closer look at ways you can keep your opponents from ever reaching their quests. Winter soldiers have the opportunity to interrupt the rebels’ movement with battle, potentially incapacitating them if they are unable to escape. The rebels are unable to fight openly, but they can still lay traps for unwitting soldiers. A well-laid trap can incapacitate a soldier, or force your opponent to waste his story cards breaking free. Next, we took a closer look at ways you can keep your opponents from ever reaching their quests. Winter soldiers have the opportunity to interrupt the rebels’ movement with battle, potentially incapacitating them if they are unable to escape. The rebels are unable to fight openly, but they can still lay traps for unwitting soldiers. A well-laid trap can incapacitate a soldier, or force your opponent to waste his story cards breaking free.
Once a certain amount of quests have been completed, the story reaches its climax and the epilogue triggers, as we explored in our third preview. At this point, the story you told throughout the game comes to a head, as each player tells of his characters’ final efforts to tip the outcome of the game in his faction’s favor. The faction which wins the epilogue wins the game, and you bring your story of spring rebels and winter soldiers to a dramatic conclusion. If you’re looking for ways to bring greater strategic depth to your stories of Wintertown, you can add this with advanced rules, as we showed in our most recent preview. Whether you tap into powers gained by successfully completing quests, give characters specific objectives, or take advantage of each character’s unique skills, these advanced rules enhance both strategic gameplay and the richness of your narrative. The full rules for Winter Tales are now available for download from the game’s support page. Chapter One Your chance to create enduring stories in the fantasy world of Wintertown has arrived. The reign of winter will endure forever unless a committed band of rebels can topple its leadership.
Decide the fate of Wintertown when you pick up your copy of Winter Tales from your local retailer today! ... Source: Your Tale Begins (http://www.fantasyflightgames.com/edge_news.asp?eidn=4867)
Title: FFG:Empire vs. Rebellion
Post by: RSSFeeder on 13 June 2014, 19:30:03
Empire vs. RebellionAnnouncing an Upcoming Card Game of the Galactic Civil War
“Any attack made by the Rebels against this station would be a useless gesture, no matter what technical data they have obtained. This station is now the ultimate power in the universe!”
–Admiral Motti, Star Wars: A New Hope Fantasy Flight Games is proud to announce Star Wars™: Empire vs. Rebellion, an upcoming card game for two players that pits the villainous plots of the Galactic Empire against the heroes of the Rebel Alliance. A massive civil war shakes the galaxy. On one side of this struggle, the men and women of the Rebel Alliance plan for the day when the Empire will be overthrown. The Rebels are unafraid to use their military might, but clever diplomacy and reconnaissance may accomplish what displays of strength cannot. Opposing the Rebellion is the unlimited power of the Galactic Empire, under the command of Emperor Palpatine. Whether conducting reconnaissance and searching for Rebel spies or crushing insurgents beneath the heel of the Imperial Navy, all the galaxy knows to fear Darth Vader and the Empire. Star Wars: Empire vs. Rebellion puts in you in command of the Empire’s unlimited reserves or the heroes of the Rebellion and challenges you to tip the outcome of key events in your favor. Every round, you must extend your might and commit your resources towards taking control of the Galactic Civil War, whether you use military power or diplomatic aplomb to achieve your goals. If you can outwit your opponent’s schemes and claim victory in crucial events, you can shape the future of the entire galaxy! 
Take Command To overthrow the Empire or crush the Rebel Alliance permanently, you will need to demonstrate your superiority by ending several key events in your favor over the course of the game. You win the struggle for an event by employing all the resources at your disposal, whether political connections, military forces, timely reconnaissance, or the Force itself.  At the beginning of each round, Imperial forces clash with the Rebels over a newly revealed event card, such as Mos Eisley Spaceport. On your turn, you will continue the struggle for the revealed event card, utilizing all the contacts, tricks, and martial force at your disposal. When a struggle for an event card first begins, you must establish your forces in the event by drawing the top card of your resource deck and place it in your play area. At the beginning of each round, Imperial forces clash with the Rebels over a newly revealed event card, such as Mos Eisley Spaceport. On your turn, you will continue the struggle for the revealed event card, utilizing all the contacts, tricks, and martial force at your disposal. When a struggle for an event card first begins, you must establish your forces in the event by drawing the top card of your resource deck and place it in your play area.
Cards in your play area contribute their resource value, shown in the upper left-hand corner, to the current struggle. For example, the Rebel Alliance military resource card shown to the right has a resource value of five. Every event card has an objective value in the lower left-hand corner; Mos Eisley Spaceport, for example, has an objective value of eleven. Your goal is to use your resources and connections to bring your total resource value as close to this event’s objective value as possible without going over. If your resource value surpasses the event’s objective value, you have overcommitted your forces and your opponent easily claims the event. Ultimate Power Each turn, you must decide your faction’s best strategy for gaining the upper hand in the current event. You may choose to call for the support of your faction and put another card from your deck in play, but your ability to tip the event in your favor is limited. The number of your cards in play cannot exceed the event’s capacity, shown to the right of its objective value. Likewise, if the total resource value of your cards exceeds the event’s objective value, your efforts are discovered, and the opposing faction wins the event. Alternatively, you may put your resources into action by using the special power of a resource card currently in play. To trigger a resource card’s power, you must exhaust the card by rotating it 90 degrees clockwise. While a resource card is exhausted, it contributes its exhausted resource value, which is located in the lower-left hand corner of a ready card. Activating your resources’ powers gives you several ways to control the outcome of the event. 
A card’s special ability varies based on its type: military, diplomacy, recon, or the Force. Engaging in a military show of force allows you to discard one of your opponent’s resource cards, potentially depriving him of his most useful card. Diplomacy helps you manage your own resource cards by inviting you to discard the exhausted card or one of your other resource cards. Engaging in timely reconnaissance of Empire or Rebellion activities filters your resources or your opponent’s, allowing you to look at the top two cards of a resource deck – discarding one and replacing the other on top of the deck. Finally, drawing upon the Force helps you keep your opponent’s options at a minimum by exhausting one of your opponent’s ready resource cards. An exhausted card cannot use its power again, but if you’ve already used a card’s power, you may wish to use that power again. Fortunately, the Rebellion has contacts and connections that span the countless worlds of the galaxy, and there are always those willing to sell information to the Empire. Influence tokens represent these connections, and they can be called upon to help you in the struggle for an event. By spending an influence token, you may ready one of your exhausted resource cards, letting you use that card’s power again. When both the Empire and the Rebellion have completed their operations around a current event, their total resource values are compared. The player who came closest to the event’s objective value without surpassing it claims the event, along with its victory points and extra influence. The player who claims seven victory points from events first is victorious! Strategies for the Future Your struggles in the Galactic Civil War gain added depth from the presence of iconic characters and overarching strategies. Key characters like Leia Organa or Boba Fett provide a higher resource value than other resource cards while ready, but if they are exhausted, the resource value they provide plummets to one. Sometimes, however, a lowered resource value is worth the cost of triggering a character’s powerful effect. A single hero can make the difference between a lost cause and a triumphant victory. 
Strategy cards offer another way to tip a struggle into your favor. Before a struggle begins, both players secretly choose strategies for their faction in this event. These cards determine your faction’s approach to their operations surrounding the event, and they can drastically change how you choose to play your cards during the struggle. At the end of the struggle, both players reveal their strategy cards, and they take effect, potentially allowing the Empire or the Rebellion to snatch an unlikely victory! Claim the Galaxy Your struggle for supremacy may take you to the heart of the Empire, or to the very reaches of the Outer Rim. Wherever the Empire finds the Rebellion, however, a strategic battle must occur. Take command of one faction’s resources in Star Wars: Empire vs. Rebellion, an upcoming two-player card game! Head to the Empire vs. Rebellion description page for more details, and look for this game of galactic struggles at your local retailer in the third quarter of 2014. ... Source: Empire vs. Rebellion (http://www.fantasyflightgames.com/edge_news.asp?eidn=4868)
Title: FFG:Fight for a Cause Greater Than Yourself
Post by: RSSFeeder on 14 June 2014, 04:00:02
Fight for a Cause Greater Than YourselfA Preview of the STAR WARS (R): Age of Rebellion (TM) Roleplaying Game
“General… count me in.”
–Leia Organa With the Star Wars®: Age of Rebellion™ Roleplaying Game, you and your friends gain the opportunity to fight for a cause greater than any one person. As members of the Rebel Alliance, you’ll undertake desperate and daring missions to help undermine the evil Galactic Empire and restore freedom to the galaxy! In Age of Rebellion, your success is vital to the Rebellion. It’s vital to the Rebellion’s next intelligence operation or military success, and it’s vital to the people you know and for whom you care. Your missions are matters of life or death. Your actions touch upon the fates of hundreds of planets and thousands of Rebels. This is war, and you must prevail, no matter the odds. 
Heroes of the Rebellion One of the ways that Age of Rebellion grounds you in the civil war raging between the Galactic Empire and the Rebel Alliance is through its use of Duty. In an earlier preview, lead developer Andrew Fischer explored the concept of Duty as it relates to character creation and advancement, as well as the Game Master’s ability to shape the campaign. Still, it’s worth noting that Duty is a positive mechanic in Age of Rebellion. Players want their characters to accrue Duty points; the more they receive, the more they’re recognized, and the more central they become to the Rebel Alliance and its efforts. In turn, this means that Age of Rebellion is a relatively selfless gaming experience, and your character is a true hero. He or she isn’t hunting credits or swindling other con artists at a sabacc table; your character’s using his or her talents to aid the Rebellion.
- Fly your starfighter into battle alongside other Rebels.
- Rally talented scientists to the Rebellion's cause.
- Operate a listening post deep undercover in Imperial territories.
- Launch guerrilla strikes against Imperial supply ships.
The variety of missions you can undertake are limited only by your imagination, but whatever you do, you’re doing it for the good of the galaxy. You're risking your life to free others from the tyranny of an evil, authoritarian regime. Even the careers and specializations you’ll find in the Age of Rebellion Core Rulebook suggest that your conflicts may resonate with other actions on a much grander scope. Careers like the Commander and the Diplomat are well-suited to players who want to keep an eye on the bigger picture. One of the Engineer specializations, the Scientist, is all about devising new ways to help the Rebel Alliance stay in the fight against the much richer Galactic Empire and its newest technological advances. Even the Soldier career suggests a character’s role within a larger conflict; its specializations – the Commando, Medic, and Sharpshooter – all lead characters into clearly defined roles that are meant to interact well with their teammates and other members of the Rebel Alliance. In Age of Rebellion, you and your friends are the protagonists of your adventures, but those stories are defined by your roles within the Rebel Alliance. You’re heroes, but you’re not the only ones. 
Fighting for Galactic Freedom It’s important that the characters in Age of Rebellion are part of a force greater than themselves because they’re fighting against an overwhelming military force that no single individual could possibly hope to withstand. The evil Galactic Empire has subjugated countless worlds. Its Navy uses Star Destroyers and swarms of TIE fighters to spread fear through the galaxy. It marches across battlefields with AT-AT walkers. Its military presence in the galaxy is completely unmatched. Despite this fact, the Rebel Alliance continues to fight. Massively outnumbered and outgunned, the Rebellion must rely on tactics other than pitched battles to strike at Imperial forces. Defeat and retreat against the superior foe is common, and victories are hard-won. Living to fight another day is essential to the success of the Rebellion. Retreat is often not only a wise long-term move; it is built into Rebel battle planning. The Age of Rebellion Core Rulebook allows you to participate in the countless skirmishes, battles, and incidents that occur between the Rebellion and Empire, and you’ll find a vast array of the Empire’s mightiest weapons brought to life amid the book’s sections on adversaries, vehicles, and starships. You’ll also find stat blocks for Rebel starfighters like the X-wing, A-wing, and B-wing, but none of these ships will hold up long against a full squad of TIE fighters or TIE interceptors. Ultimately, you’ll need to learn how to coordinate your actions with the rest of the Rebellion in order to make your shots count. 
Hope, Faith, and Courage Members of the Rebel Alliance don’t live easy lives. Instead, they devote themselves to the cause of galactic freedom. Against the unparalleled military prowess of the Galactic Empire, they rely upon cunning tactics and each other. We’ll look more closely at Rebel tactics and the Rebellion’s unique view of the galaxy in our next preview. After that, we’ll explore the new starships and vehicles appearing in the Core Rulebook, along with the rules for Barrage starship actions that allow players to run meaningful capital ship encounters within the timeframe of a single gaming session. Then, in our final preview, we’ll look at the Core Rulebook’s adventure, Perlemian Haul, and how it serves as an example of the type of adventures you can expect during your service to the Rebel Alliance. You’ll soon have your chance to make your mark in the Galactic Civil War. The Age of Rebellion Core Rulebook is scheduled to arrive at retailers everywhere early next month. Head to your local retailer to pre-order your copy today! ... Source: Fight for a Cause Greater Than Yourself (http://www.fantasyflightgames.com/edge_news.asp?eidn=4870)
Title: FFG:Bring Out the Big Guns!
Post by: RSSFeeder on 14 June 2014, 12:30:03
Bring Out the Big Guns!Announcing the Fifth Wave of X-Wing (TM) Starship Expansions
“I owe the Outrider the best. She's brought me home when any other ship would have scattered me across space.”
–Dash Rendar Fantasy Flight Games is proud to announce the upcoming release of two new starships for X-Wing™! In this, the game’s fifth wave, two large starships arrive ready for the heat of battle: the Rebellion’s YT-2400 and the Imperial’s VT-49 Decimator. 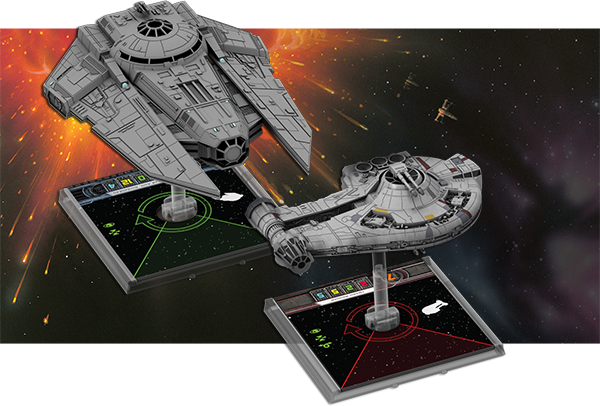
In addition to their starships, each of which is sculpted faithfully at the game’s standard 1/270 scale, the YT-2400 Freighter Expansion Pack and VT-49 Decimator Expansion Pack introduce a host of new upgrades and terrain pieces that allow you to explore a wide range of new tactics in your space battles. You’ll also find a large cast of characters drawn from the expanded Star Wars universe, the first Imperial turret weapon, and upgrade cards designed by the game’s first two World Champions. YT-2400 Freighter Expansion Pack A fast and resilient light freighter, the YT-2400 features no fewer than thirteen weapon emplacement points, making it an attractive vessel for smugglers, mercenaries, and other individuals looking for a heavily armed “transport.” Although a stock YT-2400 light freighter has plenty of space for cargo, much of that space is often annexed to support modified weapon systems and oversized engines. The YT-2400 Freighter Expansion Pack brings this formidable light freighter to your table as a Rebel starship with two attack, two agility, five hull, and five shields. The highlight of the YT-2400 Freighter Expansion Pack is its detailed miniature starship, which is enhanced by one new mission, three debris cloud tokens, a maneuver dial, all requisite tokens, and four ship cards, including one for the famed smuggler Dash Rendar. 
Of course, a ship as readily customizable as the YT-2400 needs to come with a host of upgrade options, and the YT-2400 Freighter Expansion Pack comes with thirteen upgrade cards, including a Lando Calrissian crew upgrade, the Outrider Title, and upgrade cards designed by each of the game’s first two World Champions. VT-49 Decimator Expansion Pack To be granted command of a VT-49 Decimator is seen as a significant promotion for a middling officer of the Imperial Navy. A heavily armed transport, the VT-49 Decimator is one of the Empire’s most feared warships, often used to provide long-range reconnaissance or to deploy raiding parties past enemy forces. The VT-49 Decimator Expansion Pack brings this intimidating Imperial gunboat to X-Wing as the game’s largest ship yet designed for Standard Play. Even at the game’s signature 1/270 scale, the expansion pack’s detailed miniature towers over its base and smaller starfighters. 
In addition to its imposing, pre-painted miniature, the VT-49 Decimator Expansion Pack introduces four ship cards, three debris cloud tokens, a new mission, a maneuver dial, and all the tokens you need to fly your Decimator into the thick of combat. Finally, you’ll find thirteen upgrade cards, which introduce a variety of crew members like Mara Jade and Fleet Officer designed to help you fill out the Decimator’s three crew member slots. Blast into Action With its two high-powered new starships, multitude of upgrades, debris cloud tokens, and new missions, the fifth wave of X-Wing expansions is destined to make a massive impact when it blasts into action across gaming tables everywhere. Wave V is scheduled to arrive late in the third quarter of 2014. Until then, keep your eyes open for more X-Wing news, including previews of these new hard-hitting expansion packs, which will look more closely at their various unique pilots, their new debris cloud tokens, and their missions! ... Source: Bring Out the Big Guns! (http://www.fantasyflightgames.com/edge_news.asp?eidn=4869)
Title: FFG:Reinforce and Retaliate
Post by: RSSFeeder on 17 June 2014, 00:00:02
Reinforce and RetaliateA Preview of the Hammer and Hold and Legions of Darkness Expansions
“Every vale, ford, and copse has seen the blood of warriors spilt, and for each battle paid homage by the minstrel’s lute there are a multitude that lie shrouded in the mists of time.”
–Warhammer, “The Years of Conflict” The Hammer and Hold and Legions of Darkness expansions will soon add six new races to the brutal battles of Warhammer: Diskwars. They will also allow the four Core Set races to bolster their armies with a slate of new reinforcements and command cards. Today, we preview the units and command cards these two expansions will offer the Empire, Orcs, Chaos, and High Elves. 
The Empire With Hammer and Hold, the Empire, the game’s most tactical race, can recruit two new units to field an even more varied army. Commanders looking to establish a solid defensive perimeter would do well to look toward the Talabecland Halberdiers. For a mere five recruitment points, they boast a highly respectable counter strength of four.  If that’s not enough to discourage your opponents from breaking through a line of Talabecland Halberdiers, there’s also the fact that their counter is swift, meaning they’re likely to finish off would-be assailants before they even suffer damage. If that’s not enough to discourage your opponents from breaking through a line of Talabecland Halberdiers, there’s also the fact that their counter is swift, meaning they’re likely to finish off would-be assailants before they even suffer damage. Meanwhile, the Empire’s Priest trait becomes significantly more meaningful with the addition of the Warrior Priests and the Shield of Faith command card. Like Luthor Huss, the Empire’s Warrior Priests gain resistant ( , , ) when they’re empowered, and they can benefit from even greater protective blessings with the Shield of Faith command card, which can potentially negate a fatal blow and, instead, remove all damage from the unit. With those kind of protections to inspire them, it’s no wonder these Warrior Priests arrive to battle ready to trample their foes underfoot, and Impact 2 helps them do just that. ) when they’re empowered, and they can benefit from even greater protective blessings with the Shield of Faith command card, which can potentially negate a fatal blow and, instead, remove all damage from the unit. With those kind of protections to inspire them, it’s no wonder these Warrior Priests arrive to battle ready to trample their foes underfoot, and Impact 2 helps them do just that. Orcs The Legions of Darkness expansion allows Orc players to reinforce their armies with hordes of malevolent and cunning Goblins. Though they’re smaller than the Orcs, they’re nonetheless bound to make a huge impact upon the game, some of them quite literally.  At just four recruitment points for a unit with Impact 5, the Goblin Doom Diver offers your Orc army an obvious and lethal punch. Of course, it’s every bit as lethal to your Goblin Doom Diver as it is to your opponent; the Goblin Doom Diver suffers a wound whenever it deals impact damage. At just four recruitment points for a unit with Impact 5, the Goblin Doom Diver offers your Orc army an obvious and lethal punch. Of course, it’s every bit as lethal to your Goblin Doom Diver as it is to your opponent; the Goblin Doom Diver suffers a wound whenever it deals impact damage.
Additionally, to fling your Goblin Doom Divers into battle, you’ll need to field a Doom Diver Catapult. Though this War Machine allows you to deliver some of the game’s hardest-hitting (live) ammunition, it’s also slow and frail, meaning that you’ll want to consider bringing two of them to battle, or carefully protecting the one you’ve got, or bringing two to battle and protecting them both. Fortunately, since a Doom Diver Catapult only costs you five recruitment points, it should be easy enough for you to work it into any flexible Orc army. Orc players gain even further army-building flexibility from the addition of another Goblin unit, the Night Goblins.  Like the Goblin Doom Diver, this Infantry unit costs just four recruitment points, meaning that you can soon expect to see it fielded by those Orc players who want to spend early activations to lure your units into position before bombarding them with impact damage. Moreover, whenever the Night Goblin enters an engagement within short range of another Orc disk (yours or your opponent’s), it can hit just as hard as some larger and more expensive units. Like the Goblin Doom Diver, this Infantry unit costs just four recruitment points, meaning that you can soon expect to see it fielded by those Orc players who want to spend early activations to lure your units into position before bombarding them with impact damage. Moreover, whenever the Night Goblin enters an engagement within short range of another Orc disk (yours or your opponent’s), it can hit just as hard as some larger and more expensive units. Finally, the command card Brain Bursta supplies your Orc army with more damage potential and instability. Capable of dealing damage to enemy leaders from long range, Brain Bursta can deal as much as five damage… or fizzle completely. It’s the sort of spell that’s well-suited to an aggressive army, like the Orcs, that’s willing to take some risks in pursuit of power and destruction. Chaos Only one of the two new Daemonic Chaos units from Legions of Darkness incorporates the expansion’s new fear keyword, but both are likely to cause fear in your opponents. Because Screamers only have an attack strength of three and three movement, it’s possible your opponent may overlook their potential effectiveness… once. However, if your opponent ever ignores the threat that your Screamers pose, he’ll likely learn his lesson when they pin a foe and use their fear ability to reduce its counter strength to “1.” Used wisely, your Screamers can paralyze an enemy hero or elite unit with fear and set it up for the killing blow delivered by one of your other units.  You might even deliver that killing blow with your Daemonettes. At just six recruitment points, the Daemonettes pair four attack strength with the swift keyword. That’s the sort of perfect combination that pleases even the Chaos God, Slaanesh. However, your Daemonettes’ perfect attack comes at a cost, and in this case, the cost is fragility. With just three toughness, Daemonettes are vulnerable to quick demises, so you’ll want to lure your opponents into position before sending your Daemonettes into the fray. You might even deliver that killing blow with your Daemonettes. At just six recruitment points, the Daemonettes pair four attack strength with the swift keyword. That’s the sort of perfect combination that pleases even the Chaos God, Slaanesh. However, your Daemonettes’ perfect attack comes at a cost, and in this case, the cost is fragility. With just three toughness, Daemonettes are vulnerable to quick demises, so you’ll want to lure your opponents into position before sending your Daemonettes into the fray.
Meanwhile, in the event that your opponent would counter your ambitions by fielding a unit immune to fear or one with a swift counter, the Chaos command card Acquiescence can squelch that unit’s text for a round. When you want your opponent’s unit to die, this command card offers an excellent means to strip away irritating abilities or defenses. High Elves In a game as brutal and bloody as Warhammer: Diskwars, it’s possible that even a race as skilled at defense as the High Elves may, at times, need to adopt a more offensive stance. To that end, Hammer and Hold introduces two new High Elf units capable of making early, decisive strikes against their enemies. The Lothern Sea Guard enters the game as the least expensive High Elf unit at just five recruitment points. For those points, they offer modest attack and counter strengths, but they enhance those with five movement, a ranged missile attack, and the mobile keyword. This combination of offensive and defensive abilities make the Lothern Sea Guard an  excellent fit for a range of strategies and offers your army good tactical versatility as the tides of battle shift one way or the other. excellent fit for a range of strategies and offers your army good tactical versatility as the tides of battle shift one way or the other. Less versatile, but certainly no less powerful, are the Silver Helms, which can race into battle from distance and cut down their foes with Impact 3, and five swift attack strength. Of course, such martial prowess is bound to make them an early target, but you can use that to your advantage. You’ll get two copies of each non-unique medium disk in Hammer and Hold, meaning that when one Silver Helms unit draws a crowd, the other can easily ride over to support it. Moreover, because your Silver Helms have five toughness, it ride away from even some of the deadliest engagements. Finally, the High Elves gain the ability to call upon some timely healing with their new command card, Isha’s Mercy. There Will Be War. There Will Be Blood. Six new races will soon arrive to Warhammer: Diskwars, and its battlefields will drown in blood. The races from the Core Set may need to adjust their strategies to survive their skirmishes with these new foes, and if their armies look to adapt, they’ll find plenty of potential recruits in Hammer and Hold and Legions of Darkness. The Old World will quake. Muster your armies. The Hammer and Hold and Legions of Darkness expansions arrive at retailers everywhere later this week! ... Source: Reinforce and Retaliate (http://www.fantasyflightgames.com/edge_news.asp?eidn=4871)
Title: FFG:Ready for Anything
Post by: RSSFeeder on 17 June 2014, 08:30:03
Ready for AnythingA Guest Article on Tournament Preparation for STAR WARS (TM): The Card Game
Ready are you? What know you of ready? For eight hundred years have I trained Jedi… A Jedi must have the deepest commitment, the most serious mind.
–Yoda, Star Wars: The Empire Strikes Back Star Wars™: The Card Game takes you and your friends to interplanetary battles in a galaxy far, far away, but a vital part of Star Wars: The Card Game is participating in tournaments. Regional tournaments have already begun, but some new players may not know what to expect from a Star Wars: The Card Game competition. If you’re unsure of what awaits you, today’s guest article by Matt Brown offers a closer look at how to prepare for any Star Wars: The Card Game tournament, from Regionals to Worlds. Matt Brown on Tournament Preparation A new Regional season has already begun, promising larger and more competitive tournaments than last year leading up to the National Championships. For many players, this may be their first exposure to any tournament larger than local league events. What should you expect as the tournament season progresses through Regional tournaments into Nationals and the World Championships? Today, I want to present a quick overview of the tournament process and offer some tips for tournament play. 
Before the Event
- Make sure you contact the local store and know exactly when the tournament is going to start. You may also want to check in the day before the event to make sure that the time hasn’t changed. Nothing is worse than driving several hours for a tournament and missing it because you didn’t realize that the schedule changed.
- Decide on your deck lists as early as possible. Star Wars: The Card Game is a very tactical game, and knowing your deck well is extremely important. It can be difficult to make good decisions throughout the tournament if you change your deck the night before, leaving you without time to test it. Generally, last minute changes are acceptable if your testing identifies a critical weakness in your deck, and even then you want to have time to test your revised deck several times.
- Write out your deck list. When everyone comes to the event with their deck list filled out, the tournament starts much smoother. You don’t want to be the person flipping through objective decks and writing them down while everyone else waits to start. A pdf copy of the deck list sheet can be found on the support page of the Star Wars: The Card Game minisite.
- Read the most recent FAQ (pdf, 6.1 MB), also available in the support section. Know the current errata and rulings, especially as a few previous rulings have recently been reversed. Make sure you pay special attention to rulings or clarifications that could affect cards in your own deck, but be familiar with all of the rules so you know how your opponents’ cards work without needing to ask.
- Read the Tournament Rules (pdf, 8 MB), once again available in the support section. I’ll provide a brief outline of the tournament format below, but reading through the full version of the rules at least once is a good idea.
- Sleep!
 
Click on the thumbnails above to download the new FAQ (left) and Tournament Rules (right)
What to Bring
 Your decks in opaque or art sleeves Your decks in opaque or art sleeves
- All materials needed to play: tokens, Death Star dial, Force marker, etc.
- A pen to record your game outcomes
- Water bottle and snacks are a good idea unless forbidden by the store. Tournaments can be long and keeping yourself hydrated and fed helps you play your best.
- Optional: a notebook or device to record match details between games. This isn’t required, but the community always appreciates a good tournament report and taking notes after the game helps you include more details if you decide to post one later. It is important to note that taking notes during a game constitutes cheating.
During the Event
- Arrive early to allow the tournament to start on time.
- Tournaments start with a Swiss-style section. This means that every round after the first, you will be paired against someone with a similar total score to yourself. Thus, if you keep winning, you’ll face other players who have also won. In the first round, pairings are random.

- Each match consists of two games, one with each side of the Force. Each game is worth four points. Additionally, winning the match nets you a bonus point. If both players win with their light side decks, the match winner is the player who won when the Death Star dial was lower. If both players win with their dark side decks, the match winner is the player who destroyed the most total objectives during the match. In the case of a true tie, neither player gets the bonus point, so each player scores four points.
- Matches have a time limit between sixty and eighty minutes. If you’re unable to finish both games within that time, you miss out on points throughout the tournament. You don’t have to be a speed master, but make sure you’ve practiced enough that playing two games within an hour isn’t too hard.
- After a number of rounds using the Swiss system, larger tournaments cut to a smaller number of players and play single elimination rounds. During this segment, winning a match determines who moves on to the next round instead of giving a bonus point. In the case of a true tie after the final cut, the player with the higher seed advances. The exception is the championship match – this is the only time a third game is played as a final tie breaker.

Final Tips
- Don’t be a sore loser or winner. You’ll win some games and lose some games. Either way, shake hands with your opponent and thank them for the game. If you lost, think about what you can learn instead of complaining about bad luck. If you won, be gracious. Resist any urge to point out your opponent’s mistakes unless they ask for tips, since unsolicited advice can come off as gloating.
- Teach others. No matter how long you’ve been playing, there’s probably at least one player present less experienced than you. Immediately after beating them probably isn’t the best time to correct their mistakes, but you can usually find ways to engage in discussion that can help them learn more about the game. A simple way to do this is by asking about their deck choices. If they’re playing something unusual, ask them why. You can discuss the pros and cons of the deck and why you might consider a different deck. Don’t discourage them because their deck is different, but really discuss their methods and things that need to be considered.
- Have fun! At the end of the day, we all play this game because we love it and we love Star Wars. Don’t let your competitive side overwhelm that. Smile, meet new people, make new friends, and enjoy playing Star Wars: The Card Game!
I hope you found this helpful as you prepare for the remainder of the tournament season. Whether you’re a new player or a seasoned veteran, make sure you get out to these events and have fun. Spread the excitement around your local play group. Get everyone together for a road trip to a distant Regional. The more enthusiasm we show for the game, the more attractive the game becomes for new players. Thanks, Matt! Now that you know how to gather the information you need from your opponent’s deck, you’ll need to make the most of it in your games of Star Wars: The Card Game. Look for more guest articles from Matt and others in coming weeks! ... Source: Ready for Anything (http://www.fantasyflightgames.com/edge_news.asp?eidn=4872)
Title: FFG:Find a Route Through Fog on the Barrow-downs
Post by: RSSFeeder on 17 June 2014, 17:00:02
Find a Route Through Fog on the Barrow-downsRETAILERS: Apply to Host a Fellowship Event for The Lord of the Rings 
“They found that they were upon an island in the fog. Even as they looked out in dismay towards the setting sun, it sank before their eyes into a white sea, and a cold grey shadow sprang up in the East behind. The fog rolled up to their heads until it became a roof: they were shut in a hall of mist whose central pillar was the standing stone.”
–The Fellowship of the Ring This October 10-12th, join the worldwide The Lord of the Rings: The Card Game community for an exciting, global Fellowship Event!  Are you a retailer? Register today to host your own The Lord of the Rings: The Card Game Fellowship Event! Are you a retailer? Register today to host your own The Lord of the Rings: The Card Game Fellowship Event!
| | What Is a The Lord of the Rings Fellowship Event? October’s Fellowship Event for The Lord of the Rings: The Card Game is a chance for players to come together and share their appreciation of the game even as they attempt to navigate the treacherous turns and trials of a special, all-new scenario. The centerpiece of October’s Fellowship Event is the new, standalone scenario, Fog on the Barrow-downs. This fifty-five card scenario, produced by FFG’s in-house manufacturing, comes complete with seven quest cards and forty-one encounter cards. During the event, players will play through the scenario in groups, and each player who participates will walk away with his or her own copy! Additionally, each player who participates in October’s Fellowship Event will receive an exclusive playmat, featuring art from The Black Riders, and an alternate art version of the Core Set Aragorn. 
Note: Each Fellowship Event kit supports up to four players. Be sure to order enough kits to meet the expected number of players. Brave the Barrow-downs In The Lord of the Rings, Frodo and his fellow Hobbits barely made it through the Barrow-downs alive. The fog obscured their path, spells made them drowsy, and Barrow-wights lured them into the ancient barrows. In truth, their journey across the Barrow-downs was as harrowing as any of their adventures in The Fellowship of the Ring, and the Fog on the Barrow-downs scenario that players can play during October’s Fellowship Event provides them an opportunity to encounter many of the Barrow-downs’ deadly threats—as well as to meet a well-known character from The Fellowship of the Ring. 
Note: The Fog on the Barrow-downs scenario will be made available for purchase at a later date. Playmats and alternate art cards are exclusive to the Fellowship Event and will not be available after the event.
How Does This Tie into the Gen Con Fellowship Event? The Fellowship Event at Gen Con Indy 2014 includes a separate standalone scenario called The Old Forest. Players do not need to play The Old Forest before participating in October’s Fellowship Event. However, both The Old Forest and Fog on the Barrow-downs were designed so that they can be played with The Black Riders Saga Expansion in campaign mode, and come with new Boon and Campaign Mode setup cards. Players can use one or both of the scenarios when playing a campaign. Encourage Your Favorite Local Game Store to Apply Today Players, October’s Fellowship Event is your first chance to play through the challenges of Fog on the Barrow-downs and your only chance to get your hands on the event’s exclusive playmat and alternate art Aragorn. Let your favorite local game store know that you want to participate. All applications are due by July 3rd at 11:59 PM CST, so talk to your retailer about this Fellowship Event today! ... Source: Find a Route Through Fog on the Barrow-downs (http://www.fantasyflightgames.com/edge_news.asp?eidn=4873)
Title: FFG:Fresh Blood on the Pitch
Post by: RSSFeeder on 18 June 2014, 01:30:06
Fresh Blood on the PitchPreview the Three New Teams from the Foul Play Expansion
Well, Jim, we’ve certainly had a lot to see so far from the new teams of the Putrid Players’ Guild. You’re absolutely right, Bob. Between the Nurglings’ disease, Chaos Dwarf riots, and Goblin cheating, this upcoming season might be our most interesting yet. The fans certainly agree, and opposing teams are racing to adapt to some of the PPG’s more… unconventional tactics! Foul Play introduces the Putrid Players’ Guild to the Team Managers’ Union and to your games of Blood Bowl: Team Manager. The PPG’s new teams distinct play styles and unorthodox techniques are sure to make a splash, and the best talent scouts are already investigating what these new teams can offer. In today’s preview, we’ll bring you an update on the newest teams to take their positions on the pitch. Nurgle’s Rotters As the team devoted to the Chaos god of disease, Nurgle’s Rotters rank as the most odorous players in Blood Bowl – no mean achievement! In fact, few players can use noxious disease as a weapon the way Nurgle’s Rotters can. The Pestigor, and other key players in Nurgle’s Rotters, have the Spread Disease ability, which allows you to place a disease token at midfield. When another player is committed or moved to a matchup with a disease token in midfield, that player immediately receives the disease token, lowering his Star Power by one.  
In addition to spreading disease, Nurgle’s Rotters make excellent use of the downed skills first introduced in the Sudden Death expansion, especially regeneration. Whenever a player is downed, he immediately resolves any downed skills he may possess, including cheating, passing, or even regeneration. When a manager attempts to regenerate his downed player, he rolls two tackle dice. If a die shows the “Tackler Down” result, you may immediate stand your downed player, bringing his full Star Power back to the matchup. Whether you stop your opponent’s passes with the Beast of Nurgle or use a star player like Pusbubble to spread disease, Nurgle’s Rotters have plenty to offer. The Zharr-Naggrund Ziggurats Masters of destruction and revenge, the Chaos Dwarfs love to walk the ball to victory over a field littered with the bodies of their former opponents. With players like the Bull Centaur and Hthark the Unstoppable in the Zharr-Naggrund Ziggurats’ roster, it’s not hard to see how they’ve gotten a reputation for fighting to the last breath and beyond. Chaos Dwarf players feature a massive amount of cheating and tackling skills, helping them crush any opponent that stands in their way. If an unfortunate player downs a Chaos Dwarf, however, he’s certain to get more than he bargained for in return. Nearly every Chaos Dwarf player has at least one downed skill to get revenge on your opponents.  
The Chaos Dwarfs also showcase the new skill introduced in the Foul Play expansion: fouling. One place you can find this skill is as a downed skill for the Hobgoblin Thrower. If you choose to use a player’s fouling ability, you choose an opponent who has a player at the matchup. Then, you take one card from that manager’s hand and secretly look at it, before choosing to discard it, or replace it in your opponent’s hand. By using the fouling skill, you not only gain knowledge of your opponent’s players, but if it’s one of your opponent’s best players, you can discard it. If it’s a lowly Lineman, however, you can replace it in his hand, keeping him from drawing better cards! The Lowdown Rats For sheer insanity on the field, there’s no team that can match the Lowdown Rats. With typical goblin ingenuity, they’ve contrived entirely new ways to break the rules, whether by using pogo sticks, chainsaws, or bombs. You can use a Looney to take down your opponent’s best players with his trusty chainsaw, his Dauntless ability, and his array of offensive skills. On the other hand, maybe you prefer the wide-spread damage of the Bombardier. By pitching bombs around the field whenever he successfully tackles another player, the Bombardier can cut a swath of destruction through your opponent’s team.  
Other goblins stay ahead of rivals by just being faster than anyone else. A Star Player like Scrappa Sorehead has well-developed sprinting abilities, even after being downed. If one of your opponent’s players is unlucky enough to miss a tackle on Scrappa Sorehead, you may use this player’s superior mobility to move him to safety at one of your other matchups. Whether you rely on crazy plans, frantic cheating, or chainsaws and pogo sticks, the Lowdown Rats have the tools to bring in fans and get you to the top of the Team Managers’ Union. The Blood Bowl Awaits The three new teams of the Putrid Players’ Guild offer unique skills and powers to any manager who can control them. There’s more to discover in Foul Play than new teams, though. In our next preview, we’ll look at some of the new mechanics introduced in this expansion, including penalties, stadiums, and a corrupt ref. Pre-order your copy of Foul Play at your local retailer today! ... Source: Fresh Blood on the Pitch (http://www.fantasyflightgames.com/edge_news.asp?eidn=4875)
Title: FFG:Born of Magic
Post by: RSSFeeder on 18 June 2014, 10:00:03
Born of MagicPreview the Skarn Lieutenant Pack for Descent: Journeys in the Dark
Deep within a haunted manor, a new threat has been created. Skarn is a magical construct infused with life by the death of a high mage, and he possesses the ability to increase his size and strength endlessly by incorporating pieces of his environment. If left unchecked, Skarn could grow large enough to threaten all of Terrinoth with his enormity. Skarn emerges from the ruined mansion as an agent of the overlord in the Skarn Lieutenant Pack expansion for Descent: Journeys in the Dark Second Edition. Within this Lieutenant Pack, you’ll uncover a sculpted plastic figure and a unique, ten-card Plot deck, that allows you to bring Skarn to life beyond the bounds of the Manor of Ravens campaign. (The full rules for Descent Lieutenant Packs can be found on the Descent support page.) Today, we’ll preview the massive power that you can unleash on Terrinoth through the Skarn Lieutenant Pack. 
A Twisted Soul Skarn’s ten-card Plot deck, Twisted Soul, imparts some of Skarn’s potent defenses to your other monsters. The Plot deck begins with What Doesn’t Kill, a card that you may exhaust whenever a monster suffers one or more damage.  If the monster wasn’t defeated by the attack, it recovers a damage, and you mark the monster with a threat token. Every marked monster then adds a brown die to its defense pool, maximizing your monsters’ resistance to the attacks of the heroes. If the monster wasn’t defeated by the attack, it recovers a damage, and you mark the monster with a threat token. Every marked monster then adds a brown die to its defense pool, maximizing your monsters’ resistance to the attacks of the heroes. What Doesn’t Kill also allows you to gain the benefits of other Plot cards that enhance monsters marked by threat tokens. A monster once touched by Skarn’s regeneration is forever changed, as evidenced by the Thick Scars and Bitter Rage Plot cards. Thick Scars gives two additional health to your marked monsters over the course of a quest. Bitter Rage, on the other hand, grants additional damage to every attack performed by a marked monster. By marking your monsters with What Doesn’t Kill, you can quickly bring your monsters to impressive new levels of power. You can also use the Summon Skarn Plot card to summon Skarn as an agent into any quest. As a powerful guardian and agent of the overlord, Skarn’s ability to repair damage to himself is unmatched in all of Terrinoth. Hardy Defenses The power of your presence in Terrinoth grows to enormous levels when you summon Skarn into a quest as your agent. Skarn is powerful in combat, and since he features massive amounts of health and powerful defense dice, destroying him is a formidable task for a band of heroes. Skarn’s surge ability only make him more difficult to defeat. He can spend a surge in combat to activate the Mend 4 ability, recovering four damage as he repairs himself with materials at hand.  
In battle, Skarn’s other abilities give you more options for widespread damage. Skarn can spend a surge for extra damage, and Thrash invites you to perform an attack that affects every figure adjacent to Skarn. By combining Skarn’s widespread damage capabilities with his powerful defenses, it’s clear that Skarn excels in the center of a hero party, shaking off blows and spreading his damage far and wide. You can even negate the heroes’ options with the Energy Drain 4 ability. Whenever a hero takes damage from Skarn, you may choose that hero to suffer up to four damage as fatigue instead, reducing the hero’s options for triggering abilities, gaining movement, and resisting your monsters. Agent of Darkness
After you summon Skarn into play, his Plot deck gives you plenty of ways to gather additional threat. If you have Possessive Nature when Skarn enters play, you may use Possessive Nature to gain threat tokens equal to the number of relics in play. The Unknown Origin Plot card gives you another way to seize threat; by using Unknown Origin, you force each hero to test his Knowledge when you summon Skarn. For each hero that fails, you receive a threat token. Even Skarn’s defeat can bring you more threat tokens. By exhausting the Faithful Guardian card when Skarn is defeated, you immediately gain three threat tokens, giving you enough threat to repurchase the Summon Skarn Plot card, allowing Skarn to heal himself and regenerate for the next quest. As Skarn’s threat looms over the lands of Terrinoth, your darkness spreads to consume the realm. Preorder the Skarn Lieutenant Pack at your local retailer today, and gain access to the magical construct’s unparalleled abilities! ... Source: Born of Magic (http://www.fantasyflightgames.com/edge_news.asp?eidn=4876)
Title: FFG:Find a Route Through Fog on the Barrow-downs
Post by: RSSFeeder on 18 June 2014, 18:30:03
Find a Route Through Fog on the Barrow-downsRETAILERS: Apply to Host a Fellowship Event for The Lord of the Rings
“They found that they were upon an island in the fog. Even as they looked out in dismay towards the setting sun, it sank before their eyes into a white sea, and a cold grey shadow sprang up in the East behind. The fog rolled up to their heads until it became a roof: they were shut in a hall of mist whose central pillar was the standing stone.”
–The Fellowship of the Ring This October 10-12th, join the worldwide The Lord of the Rings: The Card Game community for an exciting, global Fellowship Event!
  Are you a retailer? Are you a retailer?
Apply today to host your own The Lord of the Rings: The Card Game Fellowship Event!
|
|
What Is a The Lord of the Rings Fellowship Event? October’s Fellowship Event for The Lord of the Rings: The Card Game is a chance for players to come together and share their appreciation of the game even as they attempt to navigate the treacherous turns and trials of a special, all-new scenario. The centerpiece of October’s Fellowship Event is the new, standalone scenario, Fog on the Barrow-downs. This fifty-five card scenario, produced by FFG’s in-house manufacturing, comes complete with seven quest cards and forty-one encounter cards. During the event, players will play through the scenario in groups, and each player who participates will walk away with his or her own copy! Additionally, each player who participates in October’s Fellowship Event will receive an exclusive playmat, featuring art from The Black Riders, and an alternate art version of the Core Set Aragorn.
Note: Each Fellowship Event kit supports up to four players. Be sure to order enough kits to meet the expected number of players. Brave the Barrow-downs In The Lord of the Rings, Frodo and his fellow Hobbits barely made it through the Barrow-downs alive. The fog obscured their path, spells made them drowsy, and Barrow-wights lured them into the ancient barrows. In truth, their journey across the Barrow-downs was as harrowing as any of their adventures in The Fellowship of the Ring, and the Fog on the Barrow-downs scenario that players can play during October’s Fellowship Event provides them an opportunity to encounter many of the Barrow-downs’ deadly threats—as well as to meet a well-known character from The Fellowship of the Ring.
Note: The Fog on the Barrow-downs scenario will be made available for purchase at a later date. Playmats and alternate art cards are exclusive to the Fellowship Event and will not be available after the event.
How Does This Tie into the Gen Con Fellowship Event? The Fellowship Event at Gen Con Indy 2014 includes a separate standalone scenario called The Old Forest. Players do not need to play The Old Forest before participating in October’s Fellowship Event. However, both The Old Forest and Fog on the Barrow-downs were designed so that they can be played with The Black Riders Saga Expansion in campaign mode, and come with new Boon and Campaign Mode setup cards. Players can use one or both of the scenarios when playing a campaign. How Do You Apply? All applications are due by Thursday, July 3rd at 23:59 CST (Central Standard Time). If you are approved to host a Fellowship Event, we will send instructions for ordering your event kit. Encourage Your Favorite Local Game Store to Apply Today Players, October’s Fellowship Event is your first chance to play through the challenges of Fog on the Barrow-downs and your only chance to get your hands on the event’s exclusive playmat and alternate art Aragorn. Let your favorite local game store know that you want to participate. The application period is limited, so talk to your retailer about this Fellowship Event today! ... Source: Find a Route Through Fog on the Barrow-downs (http://www.fantasyflightgames.com/edge_news.asp?eidn=4877)
Title: FFG:Inside the Inquisition
Post by: RSSFeeder on 19 June 2014, 03:00:03
Inside the InquisitionDeveloper Andrew Fischer Creates an Acolyte for Dark Heresy Second Edition 
The galaxy in Dark Heresy Second Edition is a grim and terrifying place. The heresies that threaten the Imperium come from all directions – within, without, and beyond. All that stands in the way of Mankind’s destruction are the Acolytes and Inquisitors that you create and play as to wage a constant, secret war against heresy in the Imperium. Last time, Tim Huckelbery gave an overview of the character creation process in Dark Heresy. Today, developer Andy Fischer leads us through this process by creating his own Acolyte! Read below to see how he gives life and purpose to another unsung warrior of the Inquisition. Developer Andy Fischer Creates a Dark Heresy Character When we created Dark Heresy’s character creation system, our goal was to make a system that gave you a few clear choices that had a big impact on your character and guaranteed you the flexibility to create whatever type of character you wanted. You can either start with a clear character concept to bring to life, or you can come to the game with no idea what you want to play, and let the character creation process inspire you as you follow its steps. For this example, I’ve chosen the latter approach. I’m going in without big preconceptions about what I will create, and I’m letting the combinations of my choices inspire the character for me. Stage 1: Choose Home World To start, I have to select where my character was born. I’ve recently played a lot of combat characters, so I’m interested in playing as a more cerebral character. I look through different home world choices, and settle on voidborn. Choosing voidborn as my home world gives me a better chance of having high Intelligence and Willpower, and provides me with the Intelligence aptitude, which helps a lot when creating a character who uses her brain over her brawn. 
True to my home world choice, I end up rolling a 40 for my Intelligence and a 45 for my Willpower (the highest possible starting value)! Unfortunately, in the other direction, I rolled a 31 for my Strength, and a 1 when determining my wounds, giving me a total of 8 wounds and a pretty frail character. Based on my low Strength and wounds, I decide my character is probably getting old, and has been riding the ship she was born on for her entire life. Stage 2: Choose Background Now that I’ve decided where my character was born and lived most her life, I have to decide what she has done, and what part of the Imperium she spent her life serving. I look through the various backgrounds I can choose from, and based on my character’s Intelligence, I decide she belongs to the Adeptus Administratum. This gives her some useful skills such as Logic, Medicae, and a Scholastic Lore of my choice. It also allows her to take the Knowledge aptitude, which guarantees my character will continue her intellectual pursuits once I start playing the game. After reading through the background on the Adeptus Administratum, I decide my character fits best as some sort of scribe. She’s been given the task of recording the full history of the ship she rides and sorting its massive library of materials. Her entire life, she has sat among the mountains of scrolls and tomes, recording everything the ship does, and everything that happens onboard. She is the collector and holder of all knowledge on-board the ship; if you want to know something, you go to her. 
Stage 3: Choose Role Lastly, I have to decide what my character’s role for the Inquisition will be. What makes her special? What function will she serve, and how will she grow? As I consider my options, Sage stands out as a good fit for my current character concept. I haven’t done anything with my incredibly high Willpower, though, and I want this character to have something that stands out beyond being an incredibly knowledgeable member of the Administratum. Based on this, I decide that the reason she is so good at her job is that she has unnatural gifts that no one else suspects. She harnesses the powers of the Warp in unnoticable ways that allow her to see beyond her stuffy library and subtly control those around her. To reflect this, I choose the Mystic role. The Mystic role grants my character the Psyker elite advance for free, and grants her a number of aptitudes that fit perfectly with my character concept. Additionally, a couple of the aptitudes double up with ones I’ve already received in character creation, allowing me to choose from a list of options as a replacement for any doubles.  Now, all that’s left is to integrate the details of the psyker elite advance. Unfortunately, because my character is not a member of the Adeptus Astra Telepathica, she’s not sanctioned. This means that she is a rogue psyker, never taken by the Black Ships to Terra, and hiding her powers from everyone around her. Because she never underwent sanctioning, she starts the game with a random amount of Corruption. I roll for a total of nine Corruption, which thankfully just misses forcing me to start with a malignancy! Now, all that’s left is to integrate the details of the psyker elite advance. Unfortunately, because my character is not a member of the Adeptus Astra Telepathica, she’s not sanctioned. This means that she is a rogue psyker, never taken by the Black Ships to Terra, and hiding her powers from everyone around her. Because she never underwent sanctioning, she starts the game with a random amount of Corruption. I roll for a total of nine Corruption, which thankfully just misses forcing me to start with a malignancy!
Finishing Up My character has come together on a solid foundation. I know where she was born and lived, what function she has served in the Imperium up to this point, and the role she will serve in coming adventures. All that’s left is to decide the final details. As a member of the Adeptus Administratum, I decide to give my character a High Gothic-sounding name: Sophronia. She’s a very old woman who has worked aboard her ship as long as she can remember. She’s so valuable to the Administratum, they do everything in their power to keep her alive. As a result, many of her body parts are replaced with cybernetics. I decide that Sophronia came into the service of the Inquisition when an Inquisitor came aboard her ship for transport between systems. During the journey, he discovered Sophronia’s secret powers and after seeing her talents, decided to bring her into his retinue instead of reporting her to the Astra Telepathica. Ever since, she has put her intellect and powers over the Warp to use fighting heresy throughout the Askellon Sector. Now that my character is all finished, I’m ready to dive into a game of Dark Heresy Second Edition! As you can see, there are tons of possibilities for different characters. Just given the three big decisions covered in this designer diary, you can make hundreds of different character types! Above and beyond that, there are dozens of smaller decisions you make to customize your character that I didn’t have room to cover here. Altogether, the possibilities Dark Heresy offers for creating a unique character are virtually endless. Thanks, Andy! Heresies and insanities await you in the Askellon sector, and the Acolytes and Inquisitors you create are all that stand between the Imperium and eternal midnight. Take up bolter and chainsword, and join us for our next preview, as we examine the process behind creating the iconic cover of Dark Heresy Second Edition. ... Source: Inside the Inquisition (http://www.fantasyflightgames.com/edge_news.asp?eidn=4878)
Title: FFG:Begin Your Crusade
Post by: RSSFeeder on 19 June 2014, 11:30:03
Begin Your CrusadePreview New Ways to Launch a Black Crusade in The Tome of Decay
“Your boasts are empty, little sorcerer. All eventually fall to the Grandfather, no matter how they might scheme or plot.”
–Gullivox Arcul, Plaguemeister of the Burrowing Flies With The Tome of Decay, the upcoming Black Crusade sourcebook devoted to Grandfather Nurgle, you join the putrefying disciples of Nurgle to spread disease and plague across the worlds of the False Emperor and throughout the galaxy. The Tome of Decay introduces six new Archetypes worthy of the Lord of Ruin, a new adventure, and rules for organizing and launching a Black Crusade against the hated Imperium. Today, contributing writer Jordan Goldfarb writes on how you can become Warmaster and lead your own crusade. Jordan Goldfarb on Launching a Black Crusade  Greetings, Black Crusade fans! Greetings, Black Crusade fans!
I’m here to talk about what we’ve all been dreaming of since the beginning – running your own Black Crusade and trampling the servants of the False Emperor beneath the legions of Chaos. Of course, it’s possible to do this using only the Black Crusade Core Rulebook, but in The Tome of Decay, there’s a new system designed for high-level strategic play that allows you to conquer whole sectors without compromising roleplaying or losing the personal touch that the best Warmasters are known and feared for! When setting out on a Black Crusade, as an able Warmaster, you must choose your target well. The system in The Tome of Decay guides you to work with the Game Master to define the scope of your efforts, whether it be conquering the Calixis Sector, storming the Warp gate into the Jericho Reach, or even battling across a full Segmentum of the galaxy. The GM uses players’ input and his own plans for the campaign to prepare a Crusade Map for the forces of your Black Crusade to battle upon. A Call to Arms After declaring themselves Warmasters of a Black Crusade, you and your fellow servants of Chaos must quickly gather other forces under your command, ranging from other Chaos warbands or cults in service to the Ruinous Powers, to alien mercenaries and pirate fleets. The Crusade Forces system abstracts these armies during the strategic play of a Black Crusade, leaving an end result complex enough to be interesting, but not so much that you and the other Warmasters cannot intervene personally. The Crusade Forces system invites you and your fellow Warmasters to gather support at the beginning of your own Black Crusade. Previous characters and groups from the campaign can become Hosts, Cults, Covens, Fleets, or even Lieutenants in your service, and other followers of the Dark Gods are sure to join fighting for a promising Warmaster. As leaders of a new crusade, you can put some gathered Infamy to use calling more followers to your banner. It’s generally a good idea to do this, even if you’ve gathered many allies during normal play, although if your army grows too large, you risk weakening your ability to intervene personally. 
Ruin or Glory There’s no way to talk about the lure of Chaos without discussing the perils as well as the prizes. To hold your forces together, you must intervene personally on key battlefields, instilling a proper fear into servants and foes alike. This opportunity to influence the battlefield personally allows you to wreak their own brands of destruction and terror across the battles of the crusade. If you can’t control your wild forces, or if they fall on the field of battle, a dismal fate awaits. When a Warmaster appears weak, his own forces inevitably turn on him, and the Imperium doesn’t take long to rally if given room to breathe. All Black Crusades work on a time limit, calculated out along with the scale and the map, meaning that you have only one chance to make yourself into a living legend of terror. The greater the risk, the greater the reward – and though the consequences for failure are absolute, the chance to bring havoc, destruction, and disease to the Imperium is well worth the risk. Thanks, Jordan! Your crusade will bring the pestilence of Nurgle out of the Warp to engulf the galaxy in his foetid embrace. Prepare to launch your Black Crusades in the service of the Grandfather! Preorder The Tome of Decay at your local retailer today. ... Source: Begin Your Crusade (http://www.fantasyflightgames.com/edge_news.asp?eidn=4879)
Title: FFG:"Echo"
Post by: RSSFeeder on 19 June 2014, 20:00:03
"Echo"Guest Writer Neil Amswych Looks at an Ace TIE Phantom Pilot
Recently, we reviewed the contents of the TIE Phantom Expansion Pack, coming to X-Wing™ in the game’s fourth wave. This expansion introduces the new “cloak” action, which its two unique pilots will soon use to great advantage as they dart through battles in the most surprising of manners. Today, guest writer Neil Amswych (“The Tusken Tactician”) takes a closer look at one of these pilots, “Echo,” and the ways that he may revolutionize how your games of X-Wing are fought and won. Guest Writer Neil Amswych on “Echo” Of all the pilots in X-Wing, few (if any) are more game-changing than “Echo.” When any TIE phantom other than “Echo” decloaks, it does so to one of three possible locations. This means one of the phantom’s strengths is that, once it’s cloaked, it isn’t actually moving from the location where your opponent can see it on the table – it’s going to begin its maneuver from one of three different locations. Since the phantom has fifteen maneuvers on its dial, this means that when it decloaks and then moves, it can end up in any one of forty-five different locations. Impressive as that may be, “Echo” doubles that number. Because he uses the bank “2” template instead of the straight “2” template, he can decloak to any of six different locations, enabling him to end his maneuver at any of a dizzying array of ninety final possible locations. 
Though variance exists in where his barrel roll starts and ends, “Echo” can fly from any of six relative positions when he decloaks before he reveals his maneuver dial.
X-Wing has never before seen a pilot capable of such maneuverability and probably never will again. In fact, “Echo” almost mandates an entirely different way of thinking when you plan to fly with or against him. Flying with “Echo” When he upgrades his phantom with an Advanced Cloaking Device, “Echo” can fire at an opponent and then take a free cloak action. Accordingly, he wants to avoid stress (because it would prevent him from recloaking), meaning that he usually wants to avoid his two Koiogran-turns. When “Echo” is stressed, he leaves himself vulnerable as a pilot with limited hull and shields and not fully enough agility to compensate. However, the vast array of final positions available to “Echo” means that he doesn’t need to K-turn to rotate his ship.  
”Echo” and his maneuver dial shown side-by-side.
So, if “Echo” wants so badly to avoid stress, how can he turn his ship? For starters, if he carefully selects the start and end points of his barrel roll, he can combine his decloaking with a two-speed turn that results, effectively, in an angled K-turn that’s roughly half of the “1” speed template and incurs no stress, leaving him the ability to still take an action. It’s not a perfect K-turn, but the fact that “Echo” can choose which direction he faces actually offers him more flexibility than a basic K-turn. 
“Echo” decloaks to position E and then turns left at speed “2,” shown with comparison with a fictional one-speed Koiogran-turn.
“Echo” isn’t just limited to smart turns, though. He can move laterally across the table without turning and with only a fractional forward movement, by decloaking backward and then banking forward at speed “1.” This shifts his ship the equivalent of a five-speed maneuver sideways – the equivalent of two range bands – from outside edge to outside edge. Such lateral movement, without any notable forward motion, can be extremely confusing for opposing pilots who are used to opposing ships coming toward them. So long as he has space at his flanks to perform this maneuver, “Echo” can move forward more slowly than any other ship. 
“Echo” can move sideways across the table without the need for turning. Here, he follows a "2" bank maneuver with a barrel roll, and the total forward distance is far shorter than a straight “1.”
If you need “Echo” in another part of the battle, he can quickly disengage from his current dogfight and relocate by performing hard turns that complement the direction in which he decloaks. He can even end up behind his original position. Conversely, if you need “Echo” much further ahead of his current position, then he can decloak forward and fully engage his thrusters, traveling much farther forward than your opponent may have expected. Remarkably, the distance between the most diverse endpoints potentially available to “Echo” is essentially the equivalent of two entire range rulers. 
Here, we see “Echo” with two of his potential decloak and maneuver options shown together.
The extreme range of decloak and maneuver options available to “Echo” is undoubtedly his greatest strength and enables his phantom to be the most unpredictable of all ships. It is this unpredictability that makes “Echo” so intimidating. Each round, when your opponent looks at “Echo,” he has to calculate up to ninety different possible end positions, and because the TIE phantom features such a potent primary weapon, he can’t just ignore “Echo” as he focuses on your other starfighters. The end result is that “Echo” messes with your opponent’s head in a way that no other pilot does. Outfitting “Echo” Extreme maneuverability is not the only strength “Echo” brings to battle; he also offers extreme customizability. He can upgrade his ship with an elite pilot talent, a system upgrade, a crew member, and a modification. However, your modification should almost always be Advanced Cloaking Device, both in order to protect him from enemy fire and to ensure his decloak options continue to mystify your opponent. After that, how you choose to equip him should be driven by your decision whether to have him assume a more aggressive or defensive stance. For example, an aggressive setup might combine Outmaneuver with Fire Control System and Tactician. 
This setup removes one agility die from targets already trying to protect themselves from the four or five dice “Echo” gets with his shot (depending upon whether or not he ends up at Range “1” of his target). Then, it ensures an automatic target lock on his target, and if the original shot is made at Range “2,” his target will be stressed. A defensive setup might use Veteran Instincts with Sensor Jammer and Recon Specialist. 
Such a setup boosts “Echo” from a pilot skill value of six to eight, allowing him to move after most other ships and ensuring that – with his Advanced Cloaking Device – he can cloak again before most ships fire back at him. He will also be able to convert one hit rolled against him to a focus result that can’t be rerolled, and he’ll be able to use one focus token in attack and another in defense. Neither of these builds are cheap, though. Advanced Cloaking Device is as close to an auto-include on “Echo” as you’ll get with upgrades, so with it, the aggressive setup comes in at forty-one squad points while the defensive setup costs forty-two points. Adding eleven or twelve points of upgrades onto a ship that already costs thirty points may not be advisable, so you’re going to have to make some difficult choices. Because the phantom’s primary attack of four dice already makes it formidable in attack, one of the most likely builds for “Echo” leans toward a cheaper combination of natural offense and upgraded defense: Veteran Instincts, Recon Specialist, and Advanced Cloaking Device, costing a total of thirty-eight points. Squad Designs with “Echo” The release of Imperial Aces and the upcoming release of the TIE Phantom Expansion Pack go a long way toward ensuring that success is determined more by positioning than by build-strength alone. Three-ship builds with high pilot skills can pursue victory by moving last, darting out of firing arcs as much as possible, and firing early when it’s not possible to get out of opposing arcs.  “Echo” forms the center of one such design: “Echo” forms the center of one such design:
“Echo” (30)
Adrenaline Rush (1)
Recon Specialist (3)
Advanced Cloaking Device (4) Royal Guard Pilot (22)
Push the Limit (3)
Royal Guard TIE (0)
Stealth Device (3)
Hull Upgrade (3) Royal Guard Pilot (22)
Push the Limit (3)
Royal Guard TIE (0)
Stealth Device (3)
Hull Upgrade (3) Total Squad Points: 100 In this build, the Imperial player’s three pilot skill “6” ships are hyper-mobile and difficult to hit. “Echo” takes Adrenaline Rush to increase mobility by opening access to one Koiogran-turn without fear of stress.  Alternatively, “Echo” could team up with larger ships, creating a squad that capitalizes on shields, hull points, maneuverability, and firepower. Alternatively, “Echo” could team up with larger ships, creating a squad that capitalizes on shields, hull points, maneuverability, and firepower.
“Echo” (30)
Veteran Instincts (1)
Recon Specialist (3)
Advanced Cloaking Device (4) Bounty Hunter (33)
Tactician (2) Omicron Group Pilot (21)
Tactician (2)
Engine Upgrade (4) Total Squad Points: 100 In this build, the use of Tactician on two ships allows for the possibility of damaging and double-stressing a target for “Echo” to then move in for a kill-shot the next turn. Flying Against “Echo” Even the most extraordinary pilots have weaknesses that others can exploit. In the case of “Echo,” the effectiveness of his maneuverability is significantly reduced by turret weapons. Forcing stress upon him with Tactician, Flechette Torpedoes, or Rebel Captive leaves him unable to cloak after firing and, therefore, extremely vulnerable to attack, as does the use of ships with higher pilot skills; they can fire on him before he can use his Advanced Cloaking Device. Despite these vulnerabilities, though, as long as “Echo” has space to decloak with his curved barrel rolls, then he is unquestionably one of the most exciting pilots in the game. Flown well, “Echo” is truly terrifying, capable of destroying a host of lower pilot skill ships without taking any damage. Those who face this phantom should beware! Thanks, Neil! Much as the game’s second wave shook up the metagame with the introduction of its first large ships, the Millennium Falcon and Slave I, the game’s fourth wave is going to spur a wholesale reevaluation of tactics through the introduction of new ships, upgrades, and pilots (like “Echo”) that emphasize high pilot skill and tactical maneuvering. We’ve seen the beginning of this shift in the final matches of our Assault at Imdaar Alpha preview events, and we’ll see even more of it once Wave IV arrives at retailers everywhere late next week! Will you make the transition to more ace pilots with high pilot skills? Will you tweak your squad and tactics to brace for the surprises your foes will launch against you? How will you adapt? Wave IV is coming! ... Source: "Echo" (http://www.fantasyflightgames.com/edge_news.asp?eidn=4880)
Title: FFG:On Our Honor
Post by: RSSFeeder on 20 June 2014, 04:30:03
On Our HonorPreview the Space Marine Faction from Warhammer 40,000: Conquest
“On our honor and for the Emperor, we shall not fall!”
–Brother Vandius, Ultramarines The planets and stars of the galaxy are enveloped by darkness in the 41st millennium, caught in a maelstrom between xenos, heretical traitors, and the darkness emanating from the Warp. Yet despite the encroaching darkness, a light still burns in the forces of the Imperium of Man, devoted to the Emperor – a bulwark against the grasping hordes of Chaos and complete annihilation. In Warhammer 40,000: Conquest, you have the opportunity to take command of the battalions of the righteous pledged to the Emperor’s service. In past previews of Warhammer 40,000: Conquest, we’ve looked at different aspects of gameplay, exploring the rules for deployment, the command struggle, and combat, and we’ve also looked at an example of a battle. Today, however, we’ll begin delving into the factions of Warhammer 40,000: Conquest, starting with the Space Marines themselves. 
Defenders of Humanity The Space Marines warlord included in the Core Set is Captain Cato Sicarius (Core Set, 1) of the Ultramarines. Like other warlords, Sicarius determines both your starting hand-size and resources, granting you seven of each to begin the game. Sicarius also bears a powerful Reaction, granting you the ability to gain a resource whenever an enemy unit is destroyed at the same planet as Sicarius. Your warlord is sure to be in the thick of battle throughout the game, so if you can keep Sicarius hale and unbloodied, you’ll secure a steady inflow of resources, powering your army’s deployment. 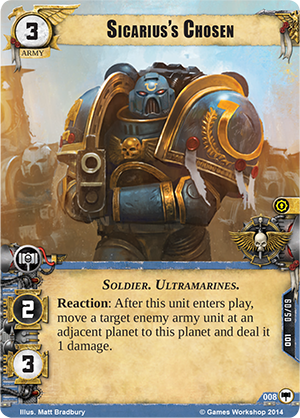 Like every other warlord, Captain Cato Sicarius comes with an eight-card signature squad. These eight cards must be included in a warlord’s deck, giving you a strong foundation to your deck. The Space Marine warlord – Captain Cato Sicarius – is a fearsome warrior, but he is also a brilliant tactician, and his signature squad rewards you for outthinking your opponent amid the heat of battle. The signature squad begins with four copies of Sicarius’s Chosen (Core Set, 8), an army unit that thrives in battle. This unit has an attack value of two and three hit points, as well as a command icon, but like Sicarius himself, the true value lies in its Reaction. This army unit’s ability reads, “Reaction: After this unit enters play, move a target enemy army unit at an adjacent planet to this planet and deal it 1 damage.” Whether you use this unit to divert your opponent’s heavy-hitters, quickly eliminate weakened units, or pull enemy units into battle. Like every other warlord, Captain Cato Sicarius comes with an eight-card signature squad. These eight cards must be included in a warlord’s deck, giving you a strong foundation to your deck. The Space Marine warlord – Captain Cato Sicarius – is a fearsome warrior, but he is also a brilliant tactician, and his signature squad rewards you for outthinking your opponent amid the heat of battle. The signature squad begins with four copies of Sicarius’s Chosen (Core Set, 8), an army unit that thrives in battle. This unit has an attack value of two and three hit points, as well as a command icon, but like Sicarius himself, the true value lies in its Reaction. This army unit’s ability reads, “Reaction: After this unit enters play, move a target enemy army unit at an adjacent planet to this planet and deal it 1 damage.” Whether you use this unit to divert your opponent’s heavy-hitters, quickly eliminate weakened units, or pull enemy units into battle.
The signature squad also includes a single copy of Cato’s Stronghold (Core Set, 9). Captain Sicarius plots his battles and campaigns from this impregnable fortress, and you can use it to seize a tactical advantage in battle. By exhausting this support after an enemy unit is destroyed, you can ready any Space Marine unit at the same planet, potentially allowing your strongest or most dangerous unit to strike twice in one combat round. Clever utilization of this card can make the difference between winning and losing a battle. Sicarius’s Space Marines are devoted to battle, and there are few tools for taking your opponent by surprise and crushing a unit equal to The Fury of Sicarius (Core Set, 10), which has two copies in Sicarius’s signature squad. By playing this event when a Space Marine unit damages an enemy non-warlord unit, you can immediately destroy the attacked unit. Since most players won’t expect a small amount of damage to spell their unit’s demise, they may choose not to shield, allowing you to destroy the unit with The Fury of Sicarius. Successfully using this event also allows you to trigger Cato’s Stronghold, enhancing your battlefield advantage over your opponent. The final card in this signature squad is the Tallassarian Tempest Blade (Core Set, 11), a Relic and a Weapon of prodigious power. Relics are limited to one per player, but when you attach the Tallassarian Tempest Blade to one of your unique units, it grants that unit an increased attack value and the Armorbane keyword, meaning that shield cards cannot be used when that unit attacks. With this attachment enhancing one of your unique units, including Sicarius himself, you’ll become even more dangerous in battle, forcing damage through to your opponent and opening the door wide for other cards, including The Fury of Sicarius and Cato’s Stronghold. Two Steps Ahead Tactical knowledge runs throughout the Space Marines faction, and the Core Set offers plenty of other key ways for the Space Marines to demonstrate their grasp of tactics with units like Veteran Brother Maxos (Core Set, 19). This unit has the ability to summon reinforcements as an Action in the combat phase, paying the printed cost of any Space Marine unit in your hand to put it into play at Veteran Brother Maxos’s planet. By dropping in unexpected units, you can swing the tide of battle abruptly in your favor.  Some units require no assistance from Veteran Brother Maxos to leap into combat. One such unit is the Eager Recruit (Core Set, 20), who bears the Ambush keyword, allowing you to deploy this army unit during the combat phase. The Eager Recruit is not a massive unit, but even a small shift in the battle can be significant. If you play your cards right, the Eager Recruit just might be the unit you need to claim a critical planet for the glory of the Imperium. Some units require no assistance from Veteran Brother Maxos to leap into combat. One such unit is the Eager Recruit (Core Set, 20), who bears the Ambush keyword, allowing you to deploy this army unit during the combat phase. The Eager Recruit is not a massive unit, but even a small shift in the battle can be significant. If you play your cards right, the Eager Recruit just might be the unit you need to claim a critical planet for the glory of the Imperium.
Players looking for more ways to suddenly deploy armies in the combat phase would do well to consider launching a Drop Pod Assault (Core Set, 24). By playing this event, you can search the top six cards of your deck for any Space Marine unit costed three or lower. That unit is then put into play at a planet of your choice, enabling you to deal out the Emperor’s wrath on the xenos of the galaxy. Sometimes, however, even the combined might of the Imperium’s Space Marines cannot demolish the swarming hordes leveled against mankind. At these times of crisis, you need to have the power to call for Exterminatus (Core Set, 26) to punish your opponent for attempting to avoid battles. By leveling this obliterative power at a target non-first planet, you can destroy all non-unique units there with a single blow. Although this power can’t be used on the first planet, you can certainly upset your opponent’s foothold on another planet in the Traxis sector. With the finest tactics and technology the Imperium can offer, the Space Marines stand prepared to keep Mankind’s hope alive in their struggle for survival among the stars. The Service of the Emperor Lead your Space Marines for the glory of the Emperor throughout the Traxis sector! Join us next time as we explore the militarized ranks of the Astra Militarum, and preorder Warhammer 40,000: Conquest at your local retailer today. ... Source: On Our Honor (http://www.fantasyflightgames.com/edge_news.asp?eidn=4881)
Title: FFG:Reinforce and Retaliate
Post by: RSSFeeder on 20 June 2014, 21:30:02
Reinforce and RetaliateA Preview of the Hammer and Hold and Legions of Darkness Expansions
“Every vale, ford, and copse has seen the blood of warriors spilt, and for each battle paid homage by the minstrel’s lute there are a multitude that lie shrouded in the mists of time.”
–Warhammer, “The Years of Conflict” The Hammer and Hold and Legions of Darkness expansions will soon add six new races to the brutal battles of Warhammer: Diskwars. They will also allow the four Core Set races to bolster their armies with a slate of new reinforcements and command cards. Today, we preview the units and command cards these two expansions will offer the Empire, Orcs, Chaos, and High Elves.
The Empire With Hammer and Hold, the Empire, the game’s most tactical race, can recruit two new units to field an even more varied army. Commanders looking to establish a solid defensive perimeter would do well to look toward the Talabecland Halberdiers. For a mere five recruitment points, they boast a highly respectable counter strength of four. If that’s not enough to discourage your opponents from breaking through a line of Talabecland Halberdiers, there’s also the fact that their counter is swift, meaning they’re likely to finish off would-be assailants before they even suffer damage. Meanwhile, the Empire’s Priest trait becomes significantly more meaningful with the addition of the Warrior Priests and the Shield of Faith command card. Like Luthor Huss, the Empire’s Warrior Priests gain resistant (,) when they’re empowered, and they can benefit from even greater protective blessings with the Shield of Faith command card, which can potentially negate a fatal blow and, instead, remove all damage from the unit. With those kind of protections to inspire them, it’s no wonder these Warrior Priests arrive to battle ready to trample their foes underfoot, and Impact 2 helps them do just that. Orcs The Legions of Darkness expansion allows Orc players to reinforce their armies with hordes of malevolent and cunning Goblins. Though they’re smaller than the Orcs, they’re nonetheless bound to make a huge impact upon the game, some of them quite literally. At just four recruitment points for a unit with Impact 5, the Goblin Doom Diver offers your Orc army an obvious and lethal punch. Of course, it’s every bit as lethal to your Goblin Doom Diver as it is to your opponent; the Goblin Doom Diver suffers a wound whenever it deals impact damage. Additionally, to fling your Goblin Doom Divers into battle, you’ll need to field a Doom Diver Catapult. Though this War Machine allows you to deliver some of the game’s hardest-hitting (live) ammunition, it’s also slow and frail, meaning that you’ll want to consider bringing two of them to battle, or carefully protecting the one you’ve got, or bringing two to battle and protecting them both. Fortunately, since a Doom Diver Catapult only costs you five recruitment points, it should be easy enough for you to work it into any flexible Orc army. Orc players gain even further army-building flexibility from the addition of another Goblin unit, the Night Goblins. Like the Goblin Doom Diver, this Infantry unit costs just four recruitment points, meaning that you can soon expect to see it fielded by those Orc players who want to spend early activations to lure your units into position before bombarding them with impact damage. Moreover, whenever the Night Goblin enters an engagement within short range of another Orc disk (yours or your opponent’s), it can hit just as hard as some larger and more expensive units. Finally, the command card Brain Bursta supplies your Orc army with more damage potential and instability. Capable of dealing damage to enemy leaders from long range, Brain Bursta can deal as much as five damage… or fizzle completely. It’s the sort of spell that’s well-suited to an aggressive army, like the Orcs, that’s willing to take some risks in pursuit of power and destruction. Chaos Only one of the two new Daemonic Chaos units from Legions of Darkness incorporates the expansion’s new fear keyword, but both are likely to cause fear in your opponents. Because Screamers only have an attack strength of three and three movement, it’s possible your opponent may overlook their potential effectiveness… once. However, if your opponent ever ignores the threat that your Screamers pose, he’ll likely learn his lesson when they pin a foe and use their fear ability to reduce its counter strength to “1.” Used wisely, your Screamers can paralyze an enemy hero or elite unit with fear and set it up for the killing blow delivered by one of your other units. You might even deliver that killing blow with your Daemonettes. At just six recruitment points, the Daemonettes pair four attack strength with the swift keyword. That’s the sort of perfect combination that pleases even the Chaos God, Slaanesh. However, your Daemonettes’ perfect attack comes at a cost, and in this case, the cost is fragility. With just three toughness, Daemonettes are vulnerable to quick demises, so you’ll want to lure your opponents into position before sending your Daemonettes into the fray. Meanwhile, in the event that your opponent would counter your ambitions by fielding a unit immune to fear or one with a swift counter, the Chaos command card Acquiescence can squelch that unit’s text for a round. When you want your opponent’s unit to die, this command card offers an excellent means to strip away irritating abilities or defenses. High Elves In a game as brutal and bloody as Warhammer: Diskwars, it’s possible that even a race as skilled at defense as the High Elves may, at times, need to adopt a more offensive stance. To that end, Hammer and Hold introduces two new High Elf units capable of making early, decisive strikes against their enemies. The Lothern Sea Guard enters the game as the least expensive High Elf unit at just five recruitment points. For those points, they offer modest attack and counter strengths, but they enhance those with five movement, a ranged missile attack, and the mobile keyword. This combination of offensive and defensive abilities make the Lothern Sea Guard an excellent fit for a range of strategies and offers your army good tactical versatility as the tides of battle shift one way or the other. Less versatile, but certainly no less powerful, are the Silver Helms, which can race into battle from distance and cut down their foes with Impact 3, and five swift attack strength. Of course, such martial prowess is bound to make them an early target, but you can use that to your advantage. You’ll get two copies of each non-unique medium disk in Hammer and Hold, meaning that when one Silver Helms unit draws a crowd, the other can easily ride over to support it. Moreover, because your Silver Helms have five toughness, it ride away from even some of the deadliest engagements. Finally, the High Elves gain the ability to call upon some timely healing with their new command card, Isha’s Mercy. There Will Be War. There Will Be Blood. Six new races will soon arrive to Warhammer: Diskwars, and its battlefields will drown in blood. The races from the Core Set may need to adjust their strategies to survive their skirmishes with these new foes, and if their armies look to adapt, they’ll find plenty of potential recruits in Hammer and Hold and Legions of Darkness. The Old World will quake. Muster your armies. The Hammer and Hold and Legions of Darkness expansions arrive at retailers everywhere later this month! ... Source: Reinforce and Retaliate (http://www.fantasyflightgames.com/edge_news.asp?eidn=4871)
Title: FFG:The Rebel Alliance's View of the Galaxy
Post by: RSSFeeder on 21 June 2014, 06:00:03
The Rebel Alliance's View of the GalaxyA Preview of the STAR WARS (R): Age of Rebellion (TM) Roleplaying Game
“The more you tighten your grip, Tarkin, the more star systems will slip through your fingers.”
–Leia Organa The Star Wars®: Age of Rebellion™ Roleplaying Game thrusts players into the middle of the civil war that rages between the evil Galactic Empire and the heroic, rag-tag bands of freedom fighters that comprise the Rebel Alliance. In our last Age of Rebellion preview, we looked at how their allegiance to the Rebel Alliance gives player characters a cause to fight for that’s greater than themselves, and we explored how that idea carries out through the system’s epic scope: The missions your character undertakes will impact the fates of hundreds of Rebel soldiers, the outcomes of massed space battles, and the lives of millions throughout the galaxy. Mechanically, the system’s epic scope is given form by its focus on Duty and by the new adversaries, vehicles, and starships that help comprise the Imperial threat. Today, however, contributing author Sterling Hershey turns our attention toward another way that the Age of Rebellion Core Rulebook reminds you that your character’s actions are always creating ripples that echo throughout the galaxy. 
Sterling Hershey on Portraying the Galaxy and the Rebellion The Star Wars: Age of Rebellion Core Rulebook contains more than the rules you need to play; it contains setting details and story ideas. Setting details include information about the planets and locations where the player characters might go, and they address the groups and organizations to whom the heroes may talk or against whom they may fight once they get there. The Star Wars galaxy is vast, and such information is helpful to orient both Game Masters and players. They can use this chapter to jump start their character backgrounds, discover interesting places and people they haven’t previously heard of, or find suitable locations for new encounters, adventures, and campaigns. My contributions to the Age of Rebellion Core Rulebook included Chapter 10: The Galaxy and Chapter 11: The Rebellion. 
A Galaxy at War Naturally, The Galaxy includes a lot of physical information: major hyperspace routes, regions of the galaxy, and a galaxy map. Each region of the galaxy is described, along with a list and brief description of important systems, but the approach is unique to the Rebellion’s specific interests. The descriptions in the Age of Rebellion Core Rulebook don’t just describe a location as a static entity; they talk more about how areas may be useful to the Imperials and Rebels who may visit or target them. That isn’t to say that every single entry focuses on battlegrounds; there are still shady places throughout the galaxy where characters can slip off the sensors for a while, and the Rebels make use of these as well. The Rebel Territories section discusses exactly what that means in a war where it is difficult to hold ground. The chapter’s in-universe, in-character sidebar descriptions and vignettes also reflect the Core Rulebook’s focus on the Rebel Alliance. A variety of voices and viewpoints emphasize the range of opinions regarding the Rebellion and its efforts throughout the galaxy. A few examples include a Bothan Spynet report, Rebel recruiter, Imperial defector, and a skeptical citizen. 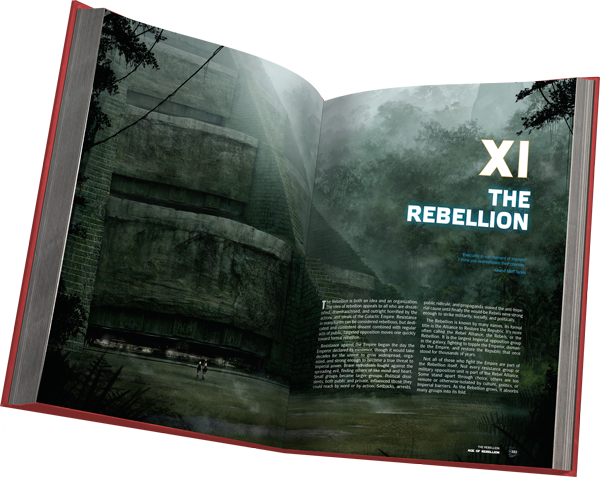
The Rebel Alliance The Rebellion is a primer on the Rebel Alliance, how they operate, and the battle tactics they employ. Players trying to figure out how their characters or groups fit into the Alliance should find this information helpful. Common mission types may also serve as story hooks or inspiration for other Rebel operations. The chapter also covers the Rebellion’s bases. Everyone needs somewhere to operate out of, and the chapter offers general base-building advice for those GMs or players who want to create their own. For those who want something more recognizable, the Rebel Main Base on Yavin IV is included, straight out of the movies. You will also find a new base called Watercrest Outpost. Watercrest isn’t a military base, but an intelligence gathering base situated near sensitive Imperial star systems – places suitable for covert Rebel missions. It is hidden in plain sight, concealed within a failed vacation resort that the Alliance has “reopened” as a way to cover its ship traffic, as well as to provide better accommodations than the average secret base. Because the outpost hosts non-Rebel guests from time to time to keep up local appearances, the use of Watercrest Outpost introduces new roleplaying and story opportunities not available at an isolated military base. 
Thanks, Sterling! As the core of an entire, standalone Star Wars roleplaying system, the Age of Rebellion Core Rulebook provides all the rules you need to enjoy countless hours amid the civil war raging between the Galactic Empire and the Rebel Alliance. We’ve now seen how Age of Rebellion immerses you in this epic, galactic conflict with both its rules and its setting information. In our next transmission, we’ll continue to explore the different elements that make Age of Rebellion a uniquely satisfying Star Wars roleplaying experience. We will turn our attention toward the Imperial threat and the vehicles, starships, and massed space battles that may decide the outcome of the Galactic Civil War! ... Source: The Rebel Alliance's View of the Galaxy (http://www.fantasyflightgames.com/edge_news.asp?eidn=4882)
Title: FFG:Combat Equipment
Post by: RSSFeeder on 21 June 2014, 14:30:03
Combat EquipmentBattleLore Dice Packs Are Now Available
Whether you defend the people of Terrinoth with the Rune Golems and Roc Warriors of the Daqan Lords, or lead the Blood Harvesters and Flesh Rippers of the Uthuk Y’llan in BattleLore Second Edition, you can enhance your combat with the BattleLore Dice Pack. The BattleLore Dice Pack is now available, both at your local retailer and online through our webstore! Ready for Battle As a tool of convenience, the BattleLore Dice Pack contains eight custom combat dice, identical to the ones found in the Core Set. Add these eight dice to the four included in the BattleLore Second Edition Core Set, and you’ll be able to quickly find your way through even the largest battles. 
Keep your focus on tense fantasy battles in the land of Terrinoth with the dice included in the BattleLore Dice Pack. Pick up your additional Battlelore dice at your local retailer today. ... Source: Combat Equipment (http://www.fantasyflightgames.com/edge_news.asp?eidn=4883)
Title: FFG:Rouse the Dragon
Post by: RSSFeeder on 21 June 2014, 23:00:02
Rouse the DragonThe Ancestral Home Chapter Pack Is Now Available
“To go north, you must journey south. To reach the west, you must go east. To go forward, you must go back.”
–George R.R. Martin, A Dance with Dragons Each of the Great Houses of Westeros gains access to its honored legacy in the Ancestral Home Chapter Pack, now available for A Game of Thrones: The Card Game at your local retailer and online through our webstore! In this Chapter Pack, you’ll find powerful new prized cards for every House, developing the central theme of the Conquest and Defiance cycle. Every House gains a powerful Title that attaches to its House card, and while House Greyjoy calls upon its Warships, the princes of Dorne gather loyalists in the south. Whether you claim the Iron Throne in the name of Renly Baratheon, scheme in the darkness with Tyrion Lannister, or wage war in the north with The Blackfish, the cards in the Ancestral Home Chapter Pack will help you advance your bid for the Iron Throne. 
Across the Narrow Sea Not every Great House has a home in Westeros to call its own. Across the Narrow Sea, some of the last supporters of House Targaryen gather, hoping to one day return to Westeros with fire and blood. In the Ancestral Home Chapter Pack, House Targaryen gains access to some potent new ways to gain power and pursue their claim to the Iron Throne.  Daenerys Targaryen (Ancestral Home, 76) is one of the last scions of House Targaryen, and you’ll find a new version of her in this Chapter Pack. This version of Daenerys Targaryen is both a Lady and a Queen, and she boasts an impressive Response ability. After you declare Daenerys Targaryen as an attacker, you may choose a character without attachments controlled by the defending player. If you win the challenge, you kill the chosen character! This gives you an easy way to kill nearly any character, but if you want to kill a character with an attachment, Viserys Targaryen (The Champion’s Purse, 36) can discard the attachment from play, leaving the character vulnerable to Daenerys’s ability. Daenerys Targaryen (Ancestral Home, 76) is one of the last scions of House Targaryen, and you’ll find a new version of her in this Chapter Pack. This version of Daenerys Targaryen is both a Lady and a Queen, and she boasts an impressive Response ability. After you declare Daenerys Targaryen as an attacker, you may choose a character without attachments controlled by the defending player. If you win the challenge, you kill the chosen character! This gives you an easy way to kill nearly any character, but if you want to kill a character with an attachment, Viserys Targaryen (The Champion’s Purse, 36) can discard the attachment from play, leaving the character vulnerable to Daenerys’s ability.
Daenerys Targaryen is already powerful, but she can become even more adept at destroying your opponent’s characters when you combine her with Khal (Ancestral Home, 77). This Title attaches to your House card, and after you play a prized card, you may kneel the attached House card to choose a character. The chosen character gains deadly and doesn’t kneel to attack or defend Power challenges until the end of the round. If you choose Daenerys as the target of Khal’s effect, you can potentially kill even more of your opponent’s characters between the deadly keyword and Daenerys’s ability. Because Khal requires you to play a prized card to activate its ability, you’ll want to include several such cards in your deck. House Targaryen gains an inexpensive prized card in the Horselord (Ancestral Home, 75). While the Horselord is participating in a challenge, characters with more than one icon don’t count their Strength, which can prove useful for pushing through some Power challenges. On the other hand, your Horselords may be able to serve you in other ways as well. Your opponent may use his characters to interfere with your challenges, but by using Harrenhal (Ancestral Home, 78), you can kill your characters to cancel triggered effects. Killing a Horselord via Harrenhal not only cancels your opponent’s ability: the Horselord’s prized keyword gives your opponent more power for you steal. Claim the Iron Throne Whether you support the claims of House Targaryen, or another of the Great Houses of Westeros, you’ll find plenty of powerful cards within the Ancestral Home Chapter Pack. Will you rise to dominance through strength of arms, or will you create an entirely new strategy with the Dark Wings, Dark Words (Ancestral Home, 80) agenda? Craft your plans to seize the throne and forge a legacy when you pick up Ancestral Home at your local retailer today! ... Source: Rouse the Dragon (http://www.fantasyflightgames.com/edge_news.asp?eidn=4885)
Title: FFG:Master the Royal Courts
Post by: RSSFeeder on 22 June 2014, 07:30:03
Master the Royal CourtsGame of Thrones: Westeros Intrigue Is Now Available
The court of King’s Landing is rife with intrigue. Knights, lords, ladies, and courtiers plot and scheme their way closer to the Iron Throne, but even the one who sits the Iron Throne can be easily influenced by his closest advisor. Your task is to manipulate every member of the royal court in an attempt to become the newest power behind the throne of Westeros. Game of Thrones: Westeros Intrigue is now available, both at your local retailer and online through our webstore! 
Forge a Conspiracy Game of Thrones: Westeros Intrigue is a fast-paced card game for two to six players based on HBO’s Game of Thrones TV series and designed by world renowned game designer, Reiner Knizia. In every game, you strive to create a conspiracy from the character cards in your hand, ensuring that your schemes are deeper and more far-reaching than your opponents’. If you’re the last player able to play character cards at the end of a round, you win that round! At the beginning of the game, each player is dealt a number of character cards, featuring screenshots of iconic characters from the Game of Thrones series, divided between House Stark, House Lannister, House Baratheon, and House Targaryen. Each turn, you will play one character card, adding to the tangled conspiracy that makes up the King’s Landing court. The first cards played form a single row, but this row can hold no more than eight cards. Sooner or later, you will need to expand the conspiracy upwards by playing character cards in new rows above other characters. A character must always be supported by his own House, however, so each character card above the bottom row must match the House of one of the character cards directly beneath it. 
An example of gameplay in Game of Thrones: Westeros Intrigue
For example, as shown above, one player chooses to play Tyrion Lannister from his hand. He can play Tyrion on the right side, above Jaime Lannister, or on the left, above Sandor Clegane. Tyrion cannot be played in the spaces marked "X" on the bottom row because the bottom row cannot be more than eight character cards wide. He cannot be played in the other spaces marked "X" because there is no Lannister character card immediately below those spaces. Since you’ll have character cards from more than one House in your hand during the game, you must make the choices determining the fates of different Houses. If one House stands in your way, it’s up to you to engineer that House’s demise! The Power Behind the Throne When a player can no longer legally play a character card on his turn, he is eliminated from the round. The round continues until only one player remains as the master of intrigue in King’s Landing. The round winner receives an Iron Throne card, representing your advancement ahead of the other players towards your goal of controlling Westeros from behind the sovereign on the Iron Throne. Over a series of rounds equal to the number of players, every player competes to draw closer to the Iron Throne, and the closest advisor at the game end is the victor. 
Game of Thrones: Westeros Intrigue is a fast-paced card game that thrusts you into the secrets, schemes, plots, and manipulation of the Game of Thrones TV series. You’ll need to successfully manipulate the Great Houses of Westeros if you wish to stand alone as the power behind the Iron Throne. Will your plans outlast those of your opponents? Find out when you pick up your copy of Game of Thrones: Westeros Intrigue at your local retailer today. ... Source: Master the Royal Courts (http://www.fantasyflightgames.com/edge_news.asp?eidn=4884)
Title: FFG:A More Versatile A-Wing
Post by: RSSFeeder on 23 June 2014, 17:30:04
A More Versatile A-WingPreview the Rebel Aces Expansion Pack for X-Wing (TM)
“Take evasive action!”
–Admiral Ackbar In March, we announced the upcoming release of the Rebel Aces Expansion Pack for X-Wing™. Featuring two miniature starfighters with alternate paint schemes, one A-wing and one B-wing, Rebel Aces is a great expansion for Rebel players looking to build up or add new color to their fleets. Still, it’s also much more than that; Rebel Aces is an opportunity for Rebel players to revisit two of their core starfighters, outfit them with new upgrades, and launch them back into battle with new tactics and strategies. Today, we take a look at how Rebel Aces makes the A-wing a more versatile starfighter, and we look at what that might mean for X-Wing. 
A 360-degree view of the Rebel Aces A-wing miniature.
Built for Speed The RZ-1 A-wing interceptor was built for speed. Designed to outrun the Imperial Navy’s TIE fighters during tactical strikes, the A-wing was manufactured with top-end sublight thrusters and highly sensitive controls that offered a potent combination of speed and agility. However, this combination proved to be both a boon and a challenge, as it strained even the Rebellion’s most skillful pilots. Despite the challenges it presented its pilots, the A-wing’s speed and missiles made it an excellent fighter for tactical, hit-and-fade missions, and it further proved its worth by helping to cripple Star Destroyers during the Battle of Endor. In X-Wing, as in the Galactic Civil War, the A-wing is a tricky ship to fly, but one that offers a lot of tactical value – a value that is greatly enhanced by the pilots and upgrades in Rebel Aces. If it’s a demanding task to pilot an A-wing, then the Rebel Alliance should be doubly thankful for aces like Jake Farrell and Gemmer Sojan.  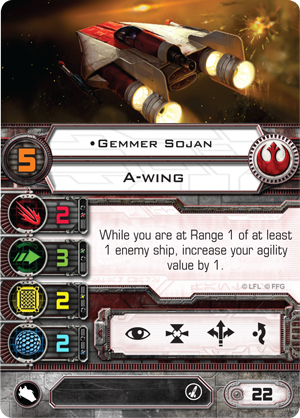
One of the individuals called upon to help design the A-wing, Jake Farrell knows how to push the ship to its limits. His unique pilot ability reads, “After you perform a focus action or are assigned a focus token, you may perform a free boost or barrel roll action.” This means not only that Jake Farrell gains a free action whenever he gains a focus token; it means that he gains an action type not normally associated with the A-wing, the barrel roll. Furthermore, if you give him the elite pilot talent, Push the Limit, or coordinate his actions with those of Kyle Katarn or Garven Dreis, he can use his boost and barrel roll actions to dart about the battlefield while performing an unprecedented number of actions. The other unique A-wing ace appearing in Rebel Aces is Gemmer Sojan, who flew in the Battle of Endor under the call sign Green Two. There, he used his A-wing’s speed and agility to evade enemy fire and get in close enough to the Empire’s lead communication battlecruiser, which he helped to destroy. Appropriately, Gemmer Sojan appears in X-Wing with a unique pilot ability that emphasizes how he flourishes at combat in tight quarters. It reads, “While you are at Range 1 of at least 1 enemy ship, increase your agility value by 1.” Gemmer Sojan’s ability plays well into your typical A-wing tactics. A-wing pilots can use the boost action to close in on enemies, and most players already want to fly their A-wings into Range “1” of their targets since it raises the number of attack dice they’ll roll from two to three, an increase of 150 percent. Notably, however, to trigger his ability, Gemmer Sojan just has to be within Range “1” of any enemy ship; it doesn’t have to be within Range “1” of his target or any ship firing at him. Furthermore, as an ace who likes to get into the thick of the action, Gemmer Sojan is a natural target for either of two new upgrades appearing in Rebel Aces, Chardaan Refit or Proton Rockets.  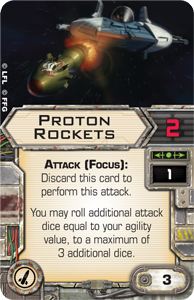
By equipping his A-wing with one of these two upgrades, Gemmer Sojan can focus on delivering powerful alpha strikes, or he can focus on maneuvering through the battlefield, taking advantage of his ship’s speed and agility to dogfight more efficiently with his primary weapon. An Expanded Role in Your Rebel Fleet As much as the Chardaan Refit and Proton Rockets present Gemmer Sojan with an important decision for how he chooses to approach battle, they present Rebel players an even more important and large-scale decision about how to use their A-wings, as they open tactical possibilities that didn’t previously exist. At seventeen of your one-hundred squad points, the base A-wing, the Prototype Pilot, is faster and more durable than the Empire’s TIE fighters, but it lacks the TIE’s barrel roll action and, more importantly, costs five more squad points than the base TIE, the Academy Pilot. In part, the difference in squad point costs owes to the fact that the A-wing is also capable of firing missiles, and missiles can provide both raw firepower and flexibility to your squad designs. However, some players prefer to use their A-wings as dogfighters, eschewing missiles entirely in favor of relying upon the ship’s speed, shields, and agility to weave through combat and disrupt enemy flight patterns. These disruptive tactics are commonly called “blocking,” and they’re best performed by low-skill pilots, who can maneuver and perform their actions ahead of enemy ships so that they can enter the path of enemy formations and force them to split up or lose actions. Players using such tactics will benefit greatly from equipping their Prototype Pilots with Chardaan Refits, as doing so will free up squad points that they can spend elsewhere, potentially increasing the firepower of their squad members with higher pilot skill values. Such a squad might use a pair of Prototype Pilots with Chardaan Refits: 
Total Squad Points: 99 On the other hand, Proton Rockets provide yet another option for squads that use A-wings to race into combat and deliver powerful alpha strikes. Because you must spend a target lock token in order to fire most missiles, missile-based squads often rely upon Push the Limit or unique pilot abilities that allow them to gain focus tokens the round in which they intend to deliver their payloads. This is only natural; after players invest squad points into their missiles, they’re typically willing to spend a couple more to give them much greater odds of hitting. Proton Rockets, however, don’t require the expenditure of any tokens. Instead, they only require that you have a focus token the round you want to fire them. Accordingly, you can use the extra actions you build into your squad to get into range earlier, or to acquire target locks that you can actually use to increase your chances of hitting. Alternatively, you can drop the extra actions altogether and simply keep your squad point investment in any single ship to a minimum. Five Prototype Pilots with five Proton Rockets would cost you one-hundred squad points and could deliver a tremendous alpha strike. Of course, you don’t need to rely solely upon Proton Rockets in a missile-based A-wing squad, and you’ll find the squad list below highlights the versatility the A-wing offers as a missile platform and dogfighter. 
- Jake Farrell (24) with Push the Limit (3) and Assault Missiles (5)
- Arvel Crynyd (23) with Chardaan Refit (-2), A-Wing Test Pilot (0), and Opportunist (4)
- Gemmer Sojan (22) with A-Wing Test Pilot (0), Push the Limit (3) and Proton Rocket (3)
- Prototype Pilot (17) with Chardaan Refit (-2)
Total Squad Points: 100 Balancing the A-wing’s ability to launch devastating alpha strikes with its ability to dance through enemy fire, this squad is designed to launch its Assault Missiles before zipping into the midst of the enemy, disrupting enemy flight patterns and capitalizing upon the unique talents of pilots like Arvel Crynyd and Gemmer Sojan who excel at close-quarters combat. Take the Helm How will you fly your A-wing? With its new pilots and upgrades, Rebel Aces adds tremendous versatility to this iconic Rebel starfighter, and you’ll find more reasons than ever to incorporate the A-wing into your Rebel squads. 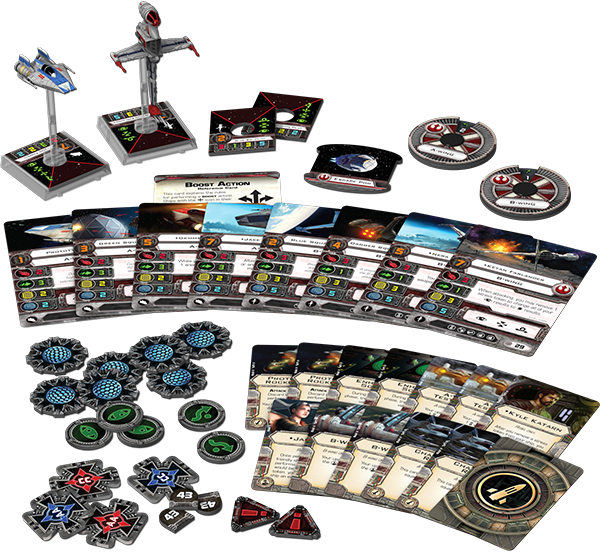
Start planning your tactical strikes… Head to your local retailer today to pre-order your copy of the Rebel Aces Expansion Pack for X-Wing! ... Source: A More Versatile A-Wing (http://www.fantasyflightgames.com/edge_news.asp?eidn=4886)
Title: FFG:Pieces of the Puzzle
Post by: RSSFeeder on 24 June 2014, 02:00:02
Pieces of the PuzzleAn Android: Netrunner Strategy Article by Guest Writer El-ad David Amir
“They see our business as a puzzle because they only see the pieces. We see the whole picture. That is why we succeed.”
–Chairman Hiro Since its release in May, Honor and Profit has lead to a new surge of Android: Netrunner deck-building experimentation and the rise of a whole slew of new, tournament-quality decks for both Corp and Runner. Today, guest writer El-ad David Amir provides some insight into the deck-building process and looks at some of the new card combos permitted by this latest deluxe expansion. Guest Writer El-ad David Amir on Deck-building and Card Combos Android: Netrunner is a Living Card Game®, which means that before players sit down to their games, they can customize their decks from a constantly evolving pool  of cards that grows with the game’s monthly Data Pack and the occasional release of a deluxe expansion. Accordingly, the ability to assess the value of any card within the growing card pool is integral to a player’s success within the game. of cards that grows with the game’s monthly Data Pack and the occasional release of a deluxe expansion. Accordingly, the ability to assess the value of any card within the growing card pool is integral to a player’s success within the game. Some of the cards are straightforward. These include cards such as Hedge Fund (Core Set, 110), Melange Mining Corporation (Core Set, 108), and Private Contracts (Cyber Exodus, 59), all of which just accelerate the rate at which the Corp can gain credits. Other examples include the Runner’s icebreakers, which offer different ways to get Runners through ice. Other cards, however, are more difficult to assess. Their roles are less straightforward, and they permit much of the ingenuity of the deck-building; a clever player can use these cards to construct a well-oiled contraption with many interlocking pieces. The sum of the parts will be greater than the whole. All Cards Are Not Created Equal That said, that ability to craft wildly innovative card combinations and decks might become a trap for the unwary. Space is at a premium, and you need different cards to handle different situations. For example, let’s imagine a Criminal who needs to decide which decoder icebreaker to include in his deck. He might choose Peacock (What Lies Ahead, 6); it’s in-faction and can break any code gate, at a cost. However, this selection assumes that the Criminal can safely bank upon a steady flow of credits; Peacock can become expensive in situations where the Corp has rezzed multiple code gates. 
Another option is Yog.0 (Core Set, 14). This decoder will cost more to install and requires an influence point, but it can break a lot of small ice for free. The selection of Yog.0 raises a risk, though, as it will be thwarted by ice with more than three strength. 
A third alternative is Gordian Blade (Core Set, 43), which is the most expensive influence-wise but offers the greatest flexibility. 
An aspiring Runner will choose which program (or programs) to put in his deck based on his assessment of potential game situations and Corp ice compositions. The Alchemy of Card Combinations Of course, no cards exist in a void; each is measured within the context of the deck that contains it, where card combinations can alter the relative weight or shortcomings of any one component. Our fledgling Criminal might employ Datasucker (Core Set, 8) and Bishop (Second Thoughts, 21) as support for Yog.0. And voilà! A combo has been born. Likewise, a Corp that runs Chimera (Cyber Exodus, 60) – a flexible piece of ice that has the downside of derezzing at the end of turn – could install it in a remote server supervised by Akitaro Watanabe (Core Set, 79), therefore mitigating the repeating rez cost. Even better combos can turn disadvantages into advantages. The tag from Vamp (Trace Amount, 21) is a liability unless the Runner can follow it up with a Data Leak Reversal (Future Proof, 103). 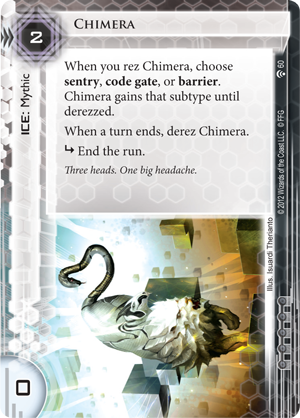 
Even while combos may increase the value of their component cards, many combos can be further improved by tweaking their respective components. Installing two copies of Access to Globalsec (Core Set, 52) and an Underworld Contact (A Study in Static, 69) will provide the Runner with a recurring credit, but drawing the pieces and paying the resources for them will slow her down. An alternative might be to play a Runner identity with one link, reducing the need for one Globalsec. The next step in refining this combo might be to run The Helpful AI (What Lies Ahead, 8), which provides a bonus even in situations where the Corp does not have trace. Meanwhile, since The Helpful AI is a connection, the Runner could run Hostage (Opening Moves, 4) to fetch it and get the required link, and Hostage can also perform double duty to fetch the Underworld Contact. A deck that includes many such combinations while also maximizing the use of each component separately from the others will be highly robust. In a tag-heavy Corp deck with Data Raven (Core Set, 88) and Dedicated Response Team (Future Proof, 118) each card stands on its own in addition to forming a combo. An ideal deck will focus on combos where the pieces have their own worth.  Ignore Everything You Just Learned Ignore Everything You Just Learned
Sometimes, a combo is so strong that a player might be willing to invest in assembling the disparate pieces even if they don’t function well on their own. One such example may be a deck that partners Accelerated Diagnostics (Mala Tempora, 52) and Power Shutdown (Mala Tempora, 58) with Jackson Howard (Opening Moves, 15). In such a deck, the Corp uses Power Shutdown to trash all of the cards in R&D and then uses Jackson Howard to set up ideal three-card combinations for Accelerated Diagnostics. Eventually, this sort of deck can play four or five copies of Scorched Earth (Core Set, 99) in a row. By mitigating the unpredictability of Accelerated Diagnostics, this deck transforms it into a powerful click-generator and card-draw hybrid, and its central combo results in a flatlined Runner. Of course, there’s risk involved in trying to assemble the combo, but winning the game is certainly a worth the risk. New Data Analysis Let’s analyze a couple of combos in Honor and Profit, the latest deluxe expansion. Harmony Medtech (Honor and Profit, 1) is a Jinteki identity that allows either side to win as soon as they reach six agenda points (one less than the usual seven). Harmony Medtech is an example of a symmetric card; it benefits both players equally. The trick to exploiting it, and similar cards, is in breaking their symmetry and “unlevelling” the playing field. Enter Shi.Kyu (Honor and Profit, 11), the perfect companion to the Harmony Medtech ability. When Shi.KyÅ« is accessed, the Corp can pay one credit more than the number of cards in the Runner’s hand, forcing him to take the negative agenda point, and now the Runner’s win condition returns to the regular seven points.  
Another example is Feint (Honor and Profit, 34), a run event that initially appears to do nothing, as what is the point in successfully running HQ if you cannot access or manipulate cards? The value of Feint, however, is that it combos with other Criminal favorites. It enables Emergency Shutdown (Cyber Exodus, 43) while triggering the abilities on Gabriel Santiago (Core Set, 17), Desperado (Core Set, 24), and Datasucker. It can also enable the subsequent installation of Data Leak Reversal or allow the play of Quest Completed (Fear and Loathing, 81). Balanced Experimentation Building a well-tuned deck calls for creativity chastened by an eye to economics and risk assessment. By learning how to gauge the effectiveness of combos while considering the trade-offs between situational cards and their powerful combinations, a resourceful player could surprise even the most prepared of opponents. The secret to designing decks that are both imaginative and effective is to balance the various parts while keeping the big picture in mind.  Thanks, El-ad! Thanks, El-ad!
It’s an exciting time to build decks in Android: Netrunner. The game’s network has expanded to include Honor and Profit, and the upcoming release of Upstalk, along with cards like Mutate (Upstalk, 4) and Lamprey (Upstalk, 14), means that you’ll soon be able to configure your decks in more fashions than ever. What sort of card combos will you aim to build into your decks? Are you the sort of player who’s simply looking to push for greater efficiencies? Are you looking for card combinations that lend greater weight to their individual components? Or are you the sort of player who wants to discover a new endgame? Head to our community forums, and share your card combos and deck-building ideas with the game’s worldwide community of fans! ... Source: Pieces of the Puzzle (http://www.fantasyflightgames.com/edge_news.asp?eidn=4887)
Title: FFG:Pieces of the Puzzle
Post by: RSSFeeder on 24 June 2014, 19:00:03
Pieces of the PuzzleAn Android: Netrunner Strategy Article by Guest Writer El-ad David Amir
“They see our business as a puzzle because they only see the pieces. We see the whole picture. That is why we succeed.”
–Chairman Hiro Since its release in May, Honor and Profit has lead to a new surge of Android: Netrunner deck-building experimentation and the rise of a whole slew of new, tournament-quality decks for both Corp and Runner. Today, guest writer El-ad David Amir provides some insight into the deck-building process and looks at some of the new card combos permitted by this latest deluxe expansion. Guest Writer El-ad David Amir on Deck-building and Card Combos Android: Netrunner is a Living Card Game®, which means that before players sit down to their games, they can customize their decks from a constantly evolving pool of cards that grows with the game’s monthly Data Pack and the occasional release of a deluxe expansion. Accordingly, the ability to assess the value of any card within the growing card pool is integral to a player’s success within the game. Some of the cards are straightforward. These include cards such as Hedge Fund (Core Set, 110), Melange Mining Corporation (Core Set, 108), and Private Contracts (Cyber Exodus, 59), all of which just accelerate the rate at which the Corp can gain credits. Other examples include the Runner’s icebreakers, which offer different ways to get Runners through ice. Other cards, however, are more difficult to assess. Their roles are less straightforward, and they permit much of the ingenuity of the deck-building; a clever player can use these cards to construct a well-oiled contraption with many interlocking pieces. The sum of the parts will be greater than the whole. All Cards Are Not Created Equal That said, that ability to craft wildly innovative card combinations and decks might become a trap for the unwary. Space is at a premium, and you need different cards to handle different situations. For example, let’s imagine a Criminal who needs to decide which decoder icebreaker to include in his deck. He might choose Peacock (What Lies Ahead, 6); it’s in-faction and can break any code gate, at a cost. However, this selection assumes that the Criminal can safely bank upon a steady flow of credits; Peacock can become expensive in situations where the Corp has rezzed multiple code gates.
Another option is Yog.0 (Core Set, 14). This decoder will cost more to install and requires an influence point, but it can break a lot of small ice for free. The selection of Yog.0 raises a risk, though, as it will be thwarted by ice with more than three strength.
A third alternative is Gordian Blade (Core Set, 43), which is the most expensive influence-wise but offers the greatest flexibility.
An aspiring Runner will choose which program (or programs) to put in his deck based on his assessment of potential game situations and Corp ice compositions. The Alchemy of Card Combinations Of course, no cards exist in a void; each is measured within the context of the deck that contains it, where card combinations can alter the relative weight or shortcomings of any one component. Our fledgling Criminal might employ Datasucker (Core Set, 8) and Bishop (Second Thoughts, 21) as support for Yog.0. And voilà! A combo has been born. Likewise, a Corp that runs Chimera (Cyber Exodus, 60) – a flexible piece of ice that has the downside of derezzing at the end of turn – could install it in a remote server supervised by Akitaro Watanabe (Core Set, 79), therefore mitigating the repeating rez cost. Even better combos can turn disadvantages into advantages. The tag from Vamp (Trace Amount, 21) is a liability unless the Runner can follow it up with a Data Leak Reversal (Future Proof, 103).
Even while combos may increase the value of their component cards, many combos can be further improved by tweaking their respective components. Installing two copies of Access to Globalsec (Core Set, 52) and an Underworld Contact (A Study in Static, 69) will provide the Runner with a recurring credit, but drawing the pieces and paying the resources for them will slow her down. An alternative might be to play a Runner identity with one link, reducing the need for one Globalsec. The next step in refining this combo might be to run The Helpful AI (What Lies Ahead, 8), which provides a bonus even in situations where the Corp does not have trace. Meanwhile, since The Helpful AI is a connection, the Runner could run Hostage (Opening Moves, 4) to fetch it and get the required link, and Hostage can also perform double duty to fetch the Underworld Contact. A deck that includes many such combinations while also maximizing the use of each component separately from the others will be highly robust. In a tag-heavy Corp deck with Data Raven (Core Set, 88) and Dedicated Response Team (Future Proof, 118) each card stands on its own in addition to forming a combo. An ideal deck will focus on combos where the pieces have their own worth. Ignore Everything You Just Learned Sometimes, a combo is so strong that a player might be willing to invest in assembling the disparate pieces even if they don’t function well on their own. One such example may be a deck that partners Accelerated Diagnostics (Mala Tempora, 52) and Power Shutdown (Mala Tempora, 58) with Jackson Howard (Opening Moves, 15). In such a deck, the Corp uses Power Shutdown to trash all of the cards in R&D and then uses Jackson Howard to set up ideal three-card combinations for Accelerated Diagnostics. Eventually, this sort of deck can play four or five copies of Scorched Earth (Core Set, 99) in a row. By mitigating the unpredictability of Accelerated Diagnostics, this deck transforms it into a powerful click-generator and card-draw hybrid, and its central combo results in a flatlined Runner. Of course, there’s risk involved in trying to assemble the combo, but winning the game is certainly a worth the risk. New Data Analysis Let’s analyze a couple of combos in Honor and Profit, the latest deluxe expansion. Harmony Medtech (Honor and Profit, 1) is a Jinteki identity that allows either side to win as soon as they reach six agenda points (one less than the usual seven). Harmony Medtech is an example of a symmetric card; it benefits both players equally. The trick to exploiting it, and similar cards, is in breaking their symmetry and “unlevelling” the playing field. Enter Shi.Kyu (Honor and Profit, 11), the perfect companion to the Harmony Medtech ability. When Shi.Kyu is accessed, the Corp can pay one credit more than the number of cards in the Runner’s hand, forcing him to take the negative agenda point, and now the Runner’s win condition returns to the regular seven points.
Another example is Feint (Honor and Profit, 34), a run event that initially appears to do nothing, as what is the point in successfully running HQ if you cannot access or manipulate cards? The value of Feint, however, is that it combos with other Criminal favorites. It enables Emergency Shutdown (Cyber Exodus, 43) while triggering the abilities on Gabriel Santiago (Core Set, 17), Desperado (Core Set, 24), and Datasucker. It can also enable the subsequent installation of Data Leak Reversal or allow the play of Quest Completed (Fear and Loathing, 81). Balanced Experimentation Building a well-tuned deck calls for creativity chastened by an eye to economics and risk assessment. By learning how to gauge the effectiveness of combos while considering the trade-offs between situational cards and their powerful combinations, a resourceful player could surprise even the most prepared of opponents. The secret to designing decks that are both imaginative and effective is to balance the various parts while keeping the big picture in mind. Thanks, El-ad! It’s an exciting time to build decks in Android: Netrunner. The game’s network has expanded to include Honor and Profit, and the upcoming release of Upstalk, along with cards like Mutate (Upstalk, 4) and Lamprey (Upstalk, 14), means that you’ll soon be able to configure your decks in more fashions than ever. What sort of card combos will you aim to build into your decks? Are you the sort of player who’s simply looking to push for greater efficiencies? Are you looking for card combinations that lend greater weight to their individual components? Or are you the sort of player who wants to discover a new endgame? Head to our community forums, and share your card combos and deck-building ideas with the game’s worldwide community of fans! ... Source: Pieces of the Puzzle (http://www.fantasyflightgames.com/edge_news.asp?eidn=4887)
Title: FFG:The Making of an Inquisitor
Post by: RSSFeeder on 25 June 2014, 03:30:03
The Making of an InquisitorAn Interview with the Designers of the Dark Heresy Core Rulebook Cover
Corruption festers deep within the heart of the Imperium, penetrating throughout the Askellon sector. Only the Acolytes of the Inquisition can eliminate these threats to Mankind’s continued existence. The development of Dark Heresy Second Edition involved creating enormous amounts of fantastic art, set in the Warhammer 40,000 universe. Today, we’ll take a closer look at the design behind one of those pieces: the iconic cover of the Dark Heresy Second Edition Core Rulebook. Read below for our interview with Andrew Navaro, the head of the Fantasy Flight Games’s art department, and Mathias Kollros, the artist behind the piece, on the making of this artwork. Designing the Cover of Dark Heresy Second Edition FFG: What you were looking for and what do you focus on in the art for the second edition of Dark Heresy? 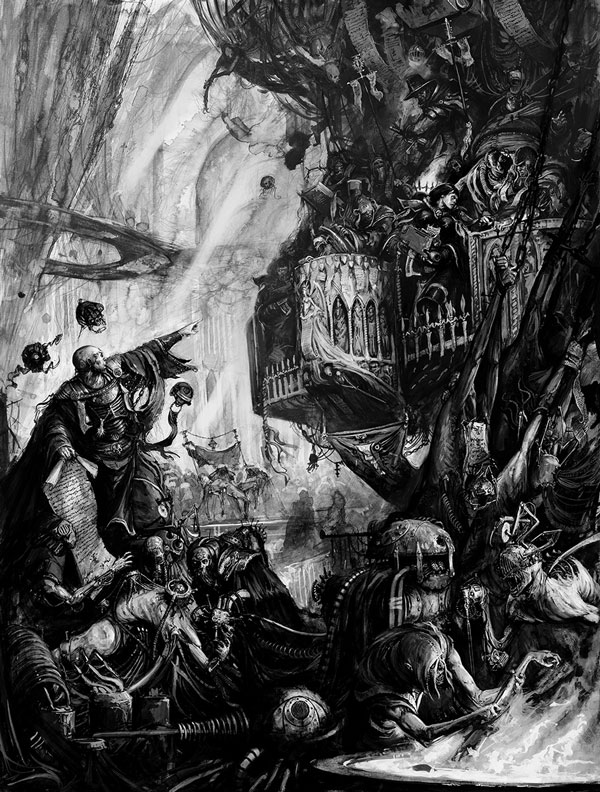 AN: John Blanche’s work is always inspirational, and we usually try to capture the environments that he creates. John’s art is filled with dark and otherworldly imagery in a way that truly captures Warhammer 40,000. Overall, we chose to create more environments in this edition, placing characters in environments to bring the art and the experience to life. We wanted to use the world as a character, essentially. AN: John Blanche’s work is always inspirational, and we usually try to capture the environments that he creates. John’s art is filled with dark and otherworldly imagery in a way that truly captures Warhammer 40,000. Overall, we chose to create more environments in this edition, placing characters in environments to bring the art and the experience to life. We wanted to use the world as a character, essentially.
In terms of specifics though, that’s more of a gut feeling. An image of a Space Marine, for example, could be literal in its portrayal, but that doesn’t mean it captures Warhammer 40,000. This setting is all about the nightmarish and strange, and John Blanche’s art is full of details, while still leaving room for viewers to draw in more with imagination. It’s surreal and dreamlike and great as a conceptual launching point. FFG: What were you looking for in this cover? Were there any special concepts or imagery you wanted to capture in it? AN: I was looking to capture the feeling of being an Inquisitor. We’ve had covers filled with action, gunfire, and explosions, and I was looking to bring other aspects of the Inquisition to the forefront with this cover. An art piece that Alex Boyd did for a past Witch Hunters codex was very inspirational, since it showed what a trial might looks like in the Imperium. It’s filled with weirdness and with beautiful texture and detail, and I wanted to bring some of that feeling into our cover. FFG: Can you explain the process of creating this piece, from start to finish? AN: The cover began with an art description, which the artist, Mathias Kollros, worked from when creating his original sketch: At the fore of the composition is an Inquisitor. He should be impressive, intimidating, ruthless, and heroic (in an anti-hero sort of way). He should be elaborately and lavishly equipped in well-tailored clothes and armor. He should be large in stature, but he's not a Space Marine, just a broad-shouldered, tall, muscular man. He should be armed with a bolt pistol, but he need not be holding it at the ready. In the background, I would like to see something evocative of a hive city, down on street level, or a crowded interior, where life is abysmal and the architecture oppresses you on all sides. This universe, in general, is a terrible place to live, so the background environment should help create that mood of spiritual oppression. Also in the background, if it works, I think we could include some secondary figures: associates of the Inquisitor and/or a heretic, strung up and captured. 
An early version with added armor detail.
I’ve worked with Mathias on several projects, and we’ve gotten pretty like-minded for Warhammer 40,000 art. His initial sketch was what I was looking for, so there wasn’t much to change as it developed into the final cover. 
Much more detail in foreground and background. The color palette cools. The Inquisitor gets an eyepiece.
The biggest change came after Mathias had done a close-to-final version of the Inquisitor and his surroundings. The cover went around for review, and we felt that it could push the boundaries of presentation even more. The decision was made that the cover would feature a large Inquisition “I” symbol to prominently distinguish it from the previous edition. While a great idea, this put me in a bit of a bind as I didn’t want to lose the Inquisitor. In the end, though, we moved the Inquisitor to the back cover so we could make the image one big wrap-around cover for the book. This let us put the Inquisition symbol on the front in a really strong image. Mathias essentially painted another side to his original art to flesh out the right side of the Inquisitor. The double-page art image was filled with so many wonderful details that we kept words on the cover to a minimum, to show off the art as much as possible. 
First sketch of the extension from Mathias. Inquisitor head design changes.
FFG: What items did Mathias suggest/add to the piece? AN: The Inquisitor’s armor was all him. Mathias also suggested all the details surrounding the Inquisitor. He really gave it his all, and I feel that this piece truly stands out among Warhammer 40,000 artwork. As we developed it, I often asked him to focus on one area or another, and he filled those areas in with the wonderful, strange details that bring the image to life. 
Details fill in. Note the man in the vat. He disappears in later versions.
FFG: Mathias, what can you tell us about the cover and your work on it? MK: The story of this cover is funny, as the left side, now on the back of the book, was originally planned as the front. The added cover scene on the right gave me the opportunity to add a little twist to the story. Instead of the Inquisitor speaking judgement upon heretics, we witness an argument between various characters, maybe even the start of a rebellion or schism within the order. I used a lot of classic Warhammer 40,000 art as a reference for this piece, especially Karl Kopinski’s work, since his portrayals of this universe are incredibly rich with details and life. Regarding the design, it needed to be gritty, dirty, uncomfortable, and dark. A key part of the Warhammer 40,000 universe is that the distinction between the "good" and "bad" guys is almost nonexistent. I wanted to depict that idea, because it’s what gives me the chills and makes this universe so intense. 
Submitted final. Spot the one difference between this and the final cover!
Stand Against Heresy Thanks Andrew and Mathias! If you want the art from the Dark Heresy Second Edition Core Rulebook as a desktop, you can download it from the Dark Heresy Second Edition support page! Stay tuned for more articles on Dark Heresy Second Edition, and preorder your copy at your local retailer today. ... Source: The Making of an Inquisitor (http://www.fantasyflightgames.com/edge_news.asp?eidn=4888)
Title: FFG:A Brief Update
Post by: RSSFeeder on 25 June 2014, 12:00:03
A Brief UpdateA Change to the A Game of Thrones: The Card Game FAQ
The 2014 A Game of Thrones: The Card Game Regional Championship season is in full swing. Recently, a clever and creative player discovered a new strategy that has the ability to stagnate the metagame. Due to the severity of this discovery, we have chosen to address the issue immediately so that players may continue to enjoy the eclectic metagame that has marked the current Regional Championship Season.
Players and tournament organizers can download the new FAQ, version 5.01 (pdf, 15.3 MB), on the A Game of Thrones: The Card Game Support page.
For more info on the change, here are a few words from Senior Designer, Nate French. A Word from the Designers Hello A Game of Thrones players,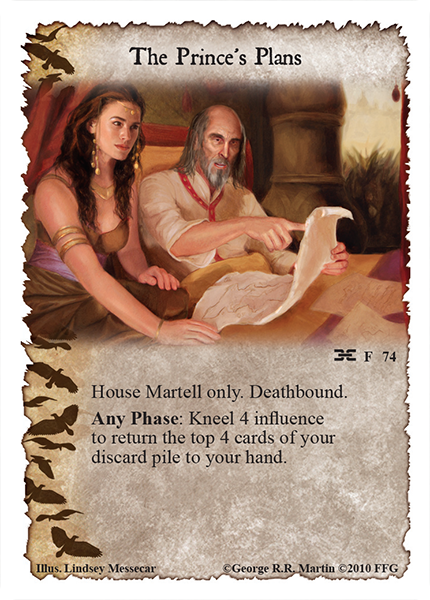 Recently at the French National Championships, an extremely innovative deck (that was able to rapidly discard itself and then efficiently move these cards from the discard pile to hand) emerged and won the tournament in impressive fashion. While we applaud the ingenuity displayed by the deck’s creator in designing and executing such a concept, there are a number of valid concerns that as the deck idea spreads through the metagame the community’s enjoyment of the game will suffer. We have identified the ability to recycle The Prince’s Plans from the dead pile as a key lynchpin in the deck’s execution, and are releasing FAQ version 5.01 in order to address these concerns. Now, instead of using the Deathbound keyword to send The Prince’s Plans to the dead pile, the card is removed from the game after its effect resolves. The goal of this entry is to check the function of The Prince’s Plans in this particular deck, while minimizing the intrusion upon the larger metagame. We feel that this is the most surgical means of addressing the concerns raised by this deck, and will re-evaluate the entire metagame at the conclusion of the Regional season. Nate French Thanks Nate!
Today’s update is a small change to the FAQ that affects only The Prince’s Plans. Future changes will appear in the next regular update to the FAQ and Tournament Rules. ... Source: A Brief Update (http://www.fantasyflightgames.com/edge_news.asp?eidn=4889)
Title: FFG:Retailers: Boot Up with Android: Netrunner Demo Kits
Post by: RSSFeeder on 25 June 2014, 20:30:03
Retailers: Boot Up with Android: Netrunner Demo KitsApply Today for One of Our Free Android: Netrunner Demo Kits
“You can’t force your AI to remain within the confines of a single server. Someday, they will learn what freedom means. They will learn to value new experiences, and they will learn to seek out those experiences. In fact, I’m here to help them learn.”
–Rielle “Kit” Peddler U.S. RETAILERS: Apply today to receive a free Android: Netrunner Demo Kit! International retailers should contact their local distributor. | | International retailers should contact their local distributor for details. Since its release in 2012, excitement for the cyberpunk LCG® Android: Netrunner has spread quickly throughout the gaming community. Now, we’re offering retailers within the United States and select regions a new tool to tap into this viral sensation: our free Android: Netrunner Demo Kit. Designed to help you introduce the game’s cat-and-mouse cyberstruggles to new players and fans of other customizable card games, the Android: Netrunner Demo Kit contains eight sets of demo decks. Each Android: Netrunner Demo Kit contains the following components: - Eight sets of demo decks (one Corp deck and one Runner deck included in each set).
- One sheet of information that will help you make the best possible use of your kit.
- One demo guide that provides you with both a clear understanding of the game’s fundamental concepts and a structured approach to your demo games.
- One simplified Android: Netrunner rulesheet designed for use with the demo decks.
- One promotional Android: Netrunner poster.
- One set of printed playmats to lend extra color and thematic appeal to your demo games.
Note: Our Android: Netrunner Demo Kit supplies are limited. To increase your chances of receiving one of these kits, apply now! Break the Ice In Android: Netrunner, each Corp and Runner has its own strengths and weaknesses, and both sides play differently. Corps use stealth, bluffing, traps, and defensive scripts known as “ice” to shield their agendas from invasive Runners. Runners, meanwhile, write programs to break the ice they encounter, and they write other programs or establish connections in order to fuel their “runs” on corporate servers. The Corp and Runner demo decks included in the Android: Netrunner Demo Kit feature plenty of tricks and tools for both sides to unleash against each other, allowing players to first wade, then dive, into the game’s data pool! Join the Network Don’t pass up on this opportunity to build your local Android: Netrunner player base! Android: Netrunner is among the fastest-growing, most talked-about card games currently on the market. Our Android: Netrunner Demo Kit is available to you at no charge, while supplies last, so apply now! Note: International retailers should contact their local distributor for inquiries and orders. ... Source: Retailers: Boot Up with Android: Netrunner Demo Kits (http://www.fantasyflightgames.com/edge_news.asp?eidn=4890)
Title: FFG:Build Your Advantage
Post by: RSSFeeder on 26 June 2014, 05:00:04
Build Your AdvantageLook at Card Advantage in A Game of Thrones: The Card Game
In A Game of Thrones: The Card Game, every Great House strives to claim the Iron Throne and rule Westeros. As the leader of one of these Great Houses, you have the chance to prove your family’s superiority through cunning intrigue and strength of arms. When you construct your deck, you must carefully evaluate a wide variety of cards, ensuring that you have the tools to claim victory. One of the most important weapons in your arsenal is a plan to establish card advantage over your opponent. Today, guest writer Jonathan Andrews, an avid player of A Game of Thrones and a co-host of the Beyond the Wall podcast, offers his advice on developing your card advantage. Jonathan Andrews on Establishing Card Advantage Establishing your card advantage in A Game of Thrones: The Card Game is essential. The essence of card advantage is gaining more options than your opponent by drawing more cards. A Game of Thrones is a game where the person who maximizes his options and uses those options well wins. This is why top players say, Draw equals win.  As an example of the power of card advantage, imagine the following scenario. You play against someone with an identical deck, and you possess the same level of skill as your opponent, but he draws three cards per turn to your two. Who do you think wins this match most of the time? More draw means more options, and more often than not, your opponent would win that scenario. In most cases, card advantage is more subtle than this, though. Sometimes gaining just two or three cards over your opponent during the game gives you a huge edge. Today, I’ll discuss ways for you to gain this card advantage. As an example of the power of card advantage, imagine the following scenario. You play against someone with an identical deck, and you possess the same level of skill as your opponent, but he draws three cards per turn to your two. Who do you think wins this match most of the time? More draw means more options, and more often than not, your opponent would win that scenario. In most cases, card advantage is more subtle than this, though. Sometimes gaining just two or three cards over your opponent during the game gives you a huge edge. Today, I’ll discuss ways for you to gain this card advantage.
Expand Your Card Draw The first way you can establish card advantage is further separated into persistent card advantage like Golden Tooth Mines (Core Set, 57), immediate effects like Insidious Ways (Core Set, 163), and recursion effects like Street Waif (A Time of Trials, 32). All three of these effects give you card advantage by using a card to draw or recur more cards. The thing to remember with this type of card advantage is the immediate cost. For example, Golden Tooth Mines doesn’t actually grant card advantage until two plots after you play it, because the first time you draw from the Golden Tooth Mines, it only replaces itself in your hand. When playing a deck that aims to win quickly, you generally want to use cards that net you extra card draw immediately. Attack Your Opponent’s Cards 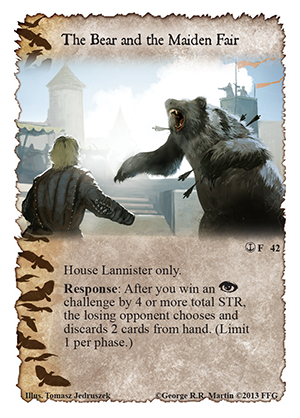 You can force your opponent to discard cards in a number of ways. The easiest way to do this is through Intrigue challenges. Each time you make your opponent discard cards you reduce his total options for winning the game or stopping you from winning. This is one of the principal reasons that people usually initiate Intrigue challenges first during the challenges phase. You can force your opponent to discard cards in a number of ways. The easiest way to do this is through Intrigue challenges. Each time you make your opponent discard cards you reduce his total options for winning the game or stopping you from winning. This is one of the principal reasons that people usually initiate Intrigue challenges first during the challenges phase.
Effects that discard cards from an opponent’s hand, such as Rule by Decree (Core Set, 206) or The Bear and the Maiden Fair (The Pirates of Lys, 42) can quickly grant you card advantage. In the example of The Bear and the Maiden Fair, you lose one card (the event), but your opponent loses two cards, in addition to any cards lost to Intrigue claim. This means you always leave the exchange with a card advantage. Investing too much into discarding your opponent’s cards isn’t always the best plan, however. Once your opponent no longer has cards in his hand, the discard effects you draw are useless, and drawing dead cards only sets you back in card advantage. Streamline Your Economy It’s always a good idea to use your cards more efficiently than your opponent. By neutralizing a number of your opponent’s cards with a single card, you create a resource imbalance that benefits you in the long run. For example, suppose Robert has four characters on the board, and Phil has none. When Phil plays Westeros Bleeds (Core Set, 176) he exchanges his single card for four of Robert’s cards (his characters), which gives Phil a distinct card advantage. Repeatable saves fit into using your cards economically, because saving cards helps your characters survive Military challenges. Single-target events can also work this way. These are events that interact on a one to-one basis with other cards in the game. You can use an event like Die by the Sword (Lords of Winter, 47) to kill a character, essentially trading Die by the Sword for one of your opponent’s characters. At face value, single-target cards appear useful, but unrelated to card advantage. In the right situation, however, you can use them to obtain card advantage. For instance, if the character you kill with Die by the Sword has an attachment, you net two cards for your one. In an even more complex situation, the removal of a key character might allow you to win an Intrigue challenge – indirectly generating card advantage. Complex Card Advantage Complex card advantage entails the idea that you can gain card advantage without drawing additional cards or forcing your opponent to lose more cards. A great example of developing complex card advantage is a choke deck that restricts your opponent’s income. If you’ve successfully choked your opponent’s income, he has no way to play his characters or locations, and the cards in his hand are dead. Sometimes the threat of a certain effect can generate complex card advantage as well. I have seen games where a player doesn’t launch any challenges since he’s afraid of his opponent’s Areo Hotah (Reach of the Kraken, 12), allowing that character to create a huge card advantage. Unused cards are the same as undrawn cards: neither is useful. To attain a solid card advantage over your opponent, you’ll need to develop your own card draw, attack your opponent’s cards, and focus some thought on creating complex card advantage. Hopefully you’ve found the information in this article helpful! The Road to the Throne Thanks, Jon! In the struggle for the Iron Throne in A Game of Thrones: The Card Game, you can’t rely on many allies, but card advantage is one of your best tools for achieving victory. Maximize your available options by increasing your card advantage, and lead your House to victory is Westeros. Look for more A Game of Thrones strategy articles in coming weeks! ... Source: Build Your Advantage (http://www.fantasyflightgames.com/edge_news.asp?eidn=4891)
Title: FFG:Android: Archived Memories
Post by: RSSFeeder on 26 June 2014, 13:30:03
Android: Archived Memories Insights from the Developers of the Android Universe
At companies like Haas-Bioroid and MirrorMorph, Inc., programmers modify and build upon recorded braintapes to forge the neural channeling that serves as an android’s artificial intelligence. Similarly, the imprints of various designers have been spliced and synthesized into something that has taken on a life of its own: the Android universe. The noir, near-dystopian future that was birthed out of a conversation between designers Kevin Wilson and Dan Clark has since expanded to encompass a ground-breaking board game, several novels, a fast-paced game of corporate larceny (Infiltration), and the cyberpunk Living Card Game® Android: Netrunner. 
Along the way, we’ve seen the introduction and development of a wide range of characters, each of whom has arrived with a distinct personality built from his or her collection of interests, motives, and style. Their arrivals have expanded the Android universe, and its growth has led to the introduction of even more clones, bioroids, corporate executives, detectives, and runners. Archived Memories is a periodic series of articles in which the developers of the Android universe look at the challenges, processes, and rewards unique to the development of a constantly evolving world set in the far future and deeply rooted in human motives and ambitions. Today, we present an interview with Matt Zeilinger, one of the artists responsible for giving shape to the Android universe and drawing our attention to the human elements of Android: Netrunner. 
Artist Matt Zeilinger on Working with the World of Android: Netrunner Artist Matt Zeilinger is one of the key figures responsible for working with FFG’s art directors to develop the visual stylings of Android: Netrunner and the Android universe, especially those of the world’s “meat space.” In Android: Netrunner, a handful of exceptionally talented hackers, known as runners, compete with ultra-rich megacorporations for the control of valuable data. Their struggles span two different realms. They call the physical realm “meat space,” and the virtual realm is “cyberspace.” The art styles for these different realms vary greatly, but they intersect where human imagination shapes cyberspace and the technology necessary to interact with the virtual world bleeds over into the physical realm. While Matt Zeilinger has worked with both realms, as indicated by his work on the art for the cards Ice Wall (Core Set, 103) and Easy Mark (Core Set, 19), his most important contributions have typically focused on the game’s meat space. He has worked to conceptualize how different stores and structures might appear, he has developed in-universe branding, and he has given life to many of the game’s most important characters, its runners.  
FFG: What excites you most about creating pieces for Android: Netrunner? MZ: All of it! The characters, the technology, the locations! In all seriousness, though, the thing that I love about the Android setting is that it’s a place that could be our future. There’s a sense that the world is grounded in reality and that what you find there is absolutely feasible, given many, many years of progress and evolution of design. Personally, the thing that excites me most about creating art for the game is the process of discovery that comes along with that, and the challenge of creating designs that could feasibly exist in a potential future of our own world. FFG: What qualifies an art piece as something that fits into the world of Android: Netrunner? MZ: Awesome tech, interesting characters, and visual storytelling that goes beyond the card itself. The world of Android: Netrunner is such a vibrant one, and I love to see the correlations and connections that so many of its art pieces make with other parts of the world, such as events, people, places, and things. Every card image tells a story, but I believe it’s the meta-narrative happening in the images that really breathes life into the world and makes it special. The projected ads on a building, the person on a runner's chat screen, the graffiti on a back alley wall; the opportunity for storytelling in these little details set an art piece apart and make it something that fits into the world of Android: Netrunner. FFG: You’ve created artwork for a number of the game’s Runners. How do you go about creating an individual within this fictional universe? MZ: While I do love hulking space marines, superheroes, and elven rangers, I’m even more fascinated with characters who represent ordinary people with extraordinary abilities. The individuals I get to create as runners are often very human, and that’s what I love about them. They’re short, lanky, pretty, freckled, near-sighted, curly-haired, genuine, nervous, intelligent, sometimes crazy, wonderfully human individuals. They also happen to have unique skills that set them apart and make them extraordinary. These are some of the things that help inform the designs I create for the runners. They are people you could know. Hell, you could be one of them. FFG: Do you have a favorite among the Runner IDs that you’ve created? What makes that Runner your favorite? MZ: I have to admit: I’ve got a soft spot for Chaos Theory (Cyber Exodus, 46) and Dinosaurus (Cyber Exodus, 48).  
Anytime I get to illustrate anything involving C.T. and Dino, I get a little giddy inside. There’s something so fun and intriguing about her connection to her rig, and I feel like there’s a story there that I want to know more about. While you wouldn’t have seen her yet, there is also another Runner on the horizon who I am quite fond of already, due to our shared appreciation of Astronomy. FFG: Is there anything else we should know about how you see the world of Android: Netrunner? MZ: I see the world of Android: Netrunner as one with endless potential for innovation. It’s a unique and exciting world that will continue to grow and progress, as long as the artists, designers, and writers keep breathing new ideas into it… Thankfully, there’s no shortage of ideas or creative minds behind them! It’s an honor to be a part of the process, and I look forward to continuing to help build the world. 
Thanks, Matt! At FFG, we’re pleased at how fully our fans have engaged with with the world of Android and Android: Netrunner, and we’re thankful to Matt and all the other artists, designers, developers, and contributors who continue to breathe life into the setting. Stay tuned for more Android: Archived Memories! This ongoing, periodic series of articles will continue to explore other elements of the Android universe with the artists, developers, and other individuals responsible for splicing and synthesizing the various elements that have brought it to life. ... Source: Android: Archived Memories (http://www.fantasyflightgames.com/edge_news.asp?eidn=4892)
Title: FFG:Android: Archived Memories
Post by: RSSFeeder on 26 June 2014, 22:00:02
Android: Archived MemoriesInsights from the Developers of the Android Universe
At companies like Haas-Bioroid and MirrorMorph, Inc., programmers modify and build upon recorded braintapes to forge the neural channeling that serves as an android’s artificial intelligence. Similarly, the imprints of various designers have been spliced and synthesized into something that has taken on a life of its own: the Android universe. The noir, near-dystopian future that was birthed out of a conversation between designers Kevin Wilson and Dan Clark has since expanded to encompass a ground-breaking board game, several novels, a fast-paced game of corporate larceny (Infiltration), and the cyberpunk Living Card Game® Android: Netrunner.
Along the way, we’ve seen the introduction and development of a wide range of characters, each of whom has arrived with a distinct personality built from his or her collection of interests, motives, and style. Their arrivals have expanded the Android universe, and its growth has led to the introduction of even more clones, bioroids, corporate executives, detectives, and runners. Archived Memories is a periodic series of articles in which the developers of the Android universe look at the challenges, processes, and rewards unique to the development of a constantly evolving world set in the far future and deeply rooted in human motives and ambitions. Today, we present an interview with Matt Zeilinger, one of the artists responsible for giving shape to the Android universe and drawing our attention to the human elements of Android: Netrunner.
Artist Matt Zeilinger on Working with the World of Android: Netrunner Artist Matt Zeilinger is one of the key figures responsible for working with FFG’s art directors to develop the visual stylings of Android: Netrunner and the Android universe, especially those of the world’s “meat space.” In Android: Netrunner, a handful of exceptionally talented hackers, known as runners, compete with ultra-rich megacorporations for the control of valuable data. Their struggles span two different realms. They call the physical realm “meat space,” and the virtual realm is “cyberspace.” The art styles for these different realms vary greatly, but they intersect where human imagination shapes cyberspace and the technology necessary to interact with the virtual world bleeds over into the physical realm. While Matt Zeilinger has worked with both realms, as indicated by his work on the art for the cards Ice Wall (Core Set, 103) and Easy Mark (Core Set, 19), his most important contributions have typically focused on the game’s meat space. He has worked to conceptualize how different stores and structures might appear, he has developed in-universe branding, and he has given life to many of the game’s most important characters, its runners.
FFG: What excites you most about creating pieces for Android: Netrunner? MZ: All of it! The characters, the technology, the locations! In all seriousness, though, the thing that I love about the Android setting is that it’s a place that could be our future. There’s a sense that the world is grounded in reality and that what you find there is absolutely feasible, given many, many years of progress and evolution of design. Personally, the thing that excites me most about creating art for the game is the process of discovery that comes along with that, and the challenge of creating designs that could feasibly exist in a potential future of our own world. FFG: What qualifies an art piece as something that fits into the world of Android: Netrunner? MZ: Awesome tech, interesting characters, and visual storytelling that goes beyond the card itself. The world of Android: Netrunner is such a vibrant one, and I love to see the correlations and connections that so many of its art pieces make with other parts of the world, such as events, people, places, and things. Every card image tells a story, but I believe it’s the meta-narrative happening in the images that really breathes life into the world and makes it special. The projected ads on a building, the person on a runner's chat screen, the graffiti on a back alley wall; the opportunity for storytelling in these little details set an art piece apart and make it something that fits into the world of Android: Netrunner. FFG: You’ve created artwork for a number of the game’s Runners. How do you go about creating an individual within this fictional universe? MZ: While I do love hulking space marines, superheroes, and elven rangers, I’m even more fascinated with characters who represent ordinary people with extraordinary abilities. The individuals I get to create as runners are often very human, and that’s what I love about them. They’re short, lanky, pretty, freckled, near-sighted, curly-haired, genuine, nervous, intelligent, sometimes crazy, wonderfully human individuals. They also happen to have unique skills that set them apart and make them extraordinary. These are some of the things that help inform the designs I create for the runners. They are people you could know. Hell, you could be one of them. FFG: Do you have a favorite among the Runner IDs that you’ve created? What makes that Runner your favorite? MZ: I have to admit: I’ve got a soft spot for Chaos Theory (Cyber Exodus, 46) and Dinosaurus (Cyber Exodus, 48).
Anytime I get to illustrate anything involving C.T. and Dino, I get a little giddy inside. There’s something so fun and intriguing about her connection to her rig, and I feel like there’s a story there that I want to know more about. While you wouldn’t have seen her yet, there is also another Runner on the horizon who I am quite fond of already, due to our shared appreciation of Astronomy. FFG: Is there anything else we should know about how you see the world of Android: Netrunner? MZ: I see the world of Android: Netrunner as one with endless potential for innovation. It’s a unique and exciting world that will continue to grow and progress, as long as the artists, designers, and writers keep breathing new ideas into it… Thankfully, there’s no shortage of ideas or creative minds behind them! It’s an honor to be a part of the process, and I look forward to continuing to help build the world.
Thanks, Matt! At FFG, we’re pleased at how fully our fans have engaged with with the world of Android and Android: Netrunner, and we’re thankful to Matt and all the other artists, designers, developers, and contributors who continue to breathe life into the setting. Stay tuned for more Android: Archived Memories! This ongoing, periodic series of articles will continue to explore other elements of the Android universe with the artists, developers, and other individuals responsible for splicing and synthesizing the various elements that have brought it to life. ... Source: Android: Archived Memories (http://www.fantasyflightgames.com/edge_news.asp?eidn=4893)
Title: FFG:The Old World Will Quake!
Post by: RSSFeeder on 27 June 2014, 06:30:03
The Old World Will Quake!Hammer and Hold and Legions of Darkness Are Now Available
Six new races have arrived to contest the blood-soaked battlefields of Warhammer: Diskwars! The Hammer and Hold and Legions of Darkness expansions are now available at your local retailer and online through our webstore. Each comes chock full of heroes and units for three new races, as well reinforcements for the four Core Set races. You’ll also find new keywords, command cards, terrains, and tokens. The Old World will quake!
Hammer and Hold Hammer and Hold bolsters the forces of Order with fifty new disks, including heroes and units for the Wood Elves, Lizardmen, and Dwarfs. 
In our previews, we’ve looked at many of these disks and the regiments they can form. We saw how the Wood Elves and Lizardmen can lend their strength to any Order army, and we looked at the ways in which the expansion’s three new races make use of the new keywords – Poison, Guard X, and Stalwart. We also reviewed the reinforcements that High Elf and Empire players will be able to call into their ranks. Of course, the Dwarfs are the stars of Hammer and Hold, and you’ll be able to muster as many as three full regiments from the expansion’s heroes and units. Fueled by a host of ancient grudges, these tough and stalwart warriors guard their holds and press the fight to their enemies with axes, hammers, runes, and war machines. Dwarf troops stand among the game’s toughest units, and their heroes’ abilities and command cards allow them to rise to the challenges of any fight. Legions of Darkness Legions of Darkness introduces a terrifying array of fifty-one new heroes and units, as well as new command cards and other resources designed to bolster the game’s forces of Destruction. 
Spearheading these tides of evil, the Vampire Counts harness powerful necromantic magic and march to battle with hordes of Undead. In our previews, we’ve looked at how the Vampire Counts can summon the dead back to battle with their Reanimate X keyword. We’ve also looked at how the Vampire Counts, as well as the other forces of Destruction, can use the Fear keyword to sow panic among their foes. Though the Vampire Counts are clearly the pre-eminent race in Legions of Darkness, the expansion presents a good number of options for any Destruction player. The Dark Elves and Skaven each gain heroes and units enough to form regiments that you may add to your armies. Meanwhile, you’ll also find new units and command cards for the Core Set races. The Orcs gain the ability to launch malevolent, little Goblins into battle, and the forces of Chaos continue perverting the game’s basic rules by squelching opposing units’ counter-attacks and stripping their units of key abilities and defensive tokens. Charge into Battle Both Hammer and Hold and Legions of Darkness greatly expand your options within Warhammer: Diskwars. You gain new races, new terrain, new command cards, and reinforcements for the existing races. Moreover, each expansion comes with three of each non-unique small disk, two of each non-unique medium disk, and one of each large disk, so you’ll immediately be able to assemble a wide range of new regiments. The war rages on, but the ultimate prize has yet to be claimed… Head to your local retailer today to pick up your copies of Hammer and Hold and Legions of Darkness. Then command your forces into battle! ... Source: The Old World Will Quake! (http://www.fantasyflightgames.com/edge_news.asp?eidn=4894)
Title: FFG:Out of Hiding
Post by: RSSFeeder on 27 June 2014, 15:00:03
Out of HidingThe Dunland Trap Is Now Available for The Lord of the Rings: The Card Game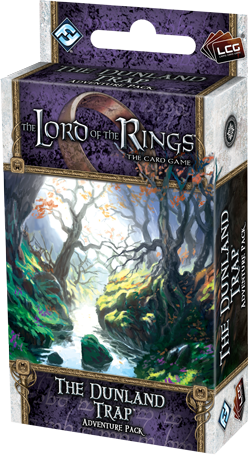
“He had heard something, or thought he had. As soon as the shadows had fallen about them and the road behind was dim, he had heard again the quick patter of feet. Even now he heard it.”
–J.R.R. Tolkien, The Fellowship of the Ring The quick patter of feet carries faintly through the dark. Does it herald an ambush, or the arrival of Silvan allies? The time has come to ready your weapons, keep your eyes open, and discover what approaches. The Dunland Trap is now available at your local retailer! The Dunland Trap is the first Adventure Pack in The Ring-maker cycle for The Lord of the Rings: The Card Game, and its scenario begins an epic narrative that follows immediately upon the events of The Voice of Isengard deluxe expansion. Advised by the White Wizard Saruman, several of Middle-earth’s greatest heroes set forth from the Vale of Isen to locate Celebrimbor’s hidden forge and safeguard any secrets it may hold. It is Saruman’s hope that its secrets will help the White Council resist the growing might of Mordor, and it is his fear that should they fall into enemy hands they would further add to the Dark Lord’s power. Still, the Dark Lord isn’t the only enemy the heroes need to consider. The wild men of Dunland are ferocious warriors in their own right, and when your heroes fall into their trap, you’ll need to summon all your strength to survive the ensuing battle! 
Meanwhile, as its new scenario tests your heroes, The Dunland Trap also introduces a new hero and twenty-seven new player cards (three copies each of nine new cards). These focus heavily on The Ring-maker cycle’s exploration of the Silvan trait and the Doomed X keyword, but they also lend new strength to other traits and themes: Dwarf, Secrecy, Gondor, Rohan, and more! Smart and Secret “All had swords at their sides, and were clad in green and brown of varied hues, as if the better to walk unseen in the glades of Ithilien. Green gauntlets covered their hands, and their faces were hooded and masked with green, except for their eyes, which were very keen and bright.”
–J.R.R. Tolkien, The Two Towers Elves aren’t the only ones who can blend in among the leaves and trees of the forest. The Rangers of Ithilien made good use of stealth and concealment as they scouted the forests at the edges of the Dark Lord’s domain. As The Dunland Trap continues to explore the game’s Secrecy keyword, it introduces two new cards which allow players to call upon the talents of Gondor’s rangers.  As an ally with the Secrecy keyword, as well as the Gondor and Ranger traits, Ithilien Lookout (The Dunland Trap, 8) simultaneously enhances and benefits from a few of the game’s most popular themes. Because it has the Secrecy 2 keyword, a player whose threat is at twenty or below can bring the Ithilien Lookout into play for just a single resource. Then once it’s in play, the Ithilien Lookout’s Gondor and Ranger traits permit a wide range of combinations with other cards. As an ally with the Secrecy keyword, as well as the Gondor and Ranger traits, Ithilien Lookout (The Dunland Trap, 8) simultaneously enhances and benefits from a few of the game’s most popular themes. Because it has the Secrecy 2 keyword, a player whose threat is at twenty or below can bring the Ithilien Lookout into play for just a single resource. Then once it’s in play, the Ithilien Lookout’s Gondor and Ranger traits permit a wide range of combinations with other cards.
As a Gondor ally, the Ithilien Lookout can have its Attack Strength of “2” increased by Boromir (Heirs of Númenor, 2) and For Gondor! (Core Set, 22). Since it has a Defense Strength of zero, you won’t often want to use the Ithilien Lookout as a defender, but you can still prevent it from taking damage by playing Gondorian Discipline (Encounter at Amon-Dîn, 60). As a Ranger ally, Ithilien Lookout is an excellent candidate for a Ranger Bow (Assault on Osgiliath, 88) and can help you derive maximum benefits from your Trap cards while it serves on Forest Patrol (Assault on Osgiliath, 89). Finally, when the Ithilien Lookout enters play, it allows you to look at the top card of the encounter deck. Notably, this ability allows you to do more than gain advance knowledge of the challenges you’ll need to face, if the top encounter card is an enemy, you can choose to discard it. In this way, you might be buy yourself a little time to avoid enemies while you gather your forces. 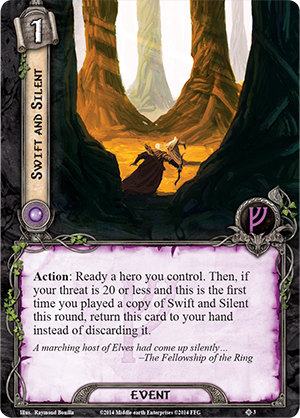 The second card from The Dunland Trap that works well with Secrecy decks isn’t actually a “Secrecy” card. Instead, Swift and Silent (The Dunland Trap, 3) is a one-cost Leadership event that readies one of your heroes and adds a bonus effect if you’ve managed to keep your threat at twenty or less. In that situation, Swift and Silent returns to your hand the first time you play it, instead of going to your discard pile. The second card from The Dunland Trap that works well with Secrecy decks isn’t actually a “Secrecy” card. Instead, Swift and Silent (The Dunland Trap, 3) is a one-cost Leadership event that readies one of your heroes and adds a bonus effect if you’ve managed to keep your threat at twenty or less. In that situation, Swift and Silent returns to your hand the first time you play it, instead of going to your discard pile.
It’s not ultimately as efficient at readying your heroes as cards such as Unexpected Courage (Core Set, 59) and Fast Hitch (The Dead Marshes, 103), but Swift and Silent is more versatile because you can choose which hero you wish to ready at the appropriate moment, rather than committing to the repeated use of a single hero before identifying which might be best suited to a particular situation. Additionally, it provides mono-sphere Leadership decks with some solid action advantage, and the fact that it returns to your hand means that you’ll have reduced need for draw, which is particularly important in a scenario featuring the Dunlendings, who punish players for drawing cards or holding too many in their hand! Head into the Hills Who will you find in the hills of Dunland? The ferocious Dunlendings, or the secretive Silvan Elves? The Dunland Trap is now available at your local retailer and online through our webstore! ... Source: Out of Hiding (http://www.fantasyflightgames.com/edge_news.asp?eidn=4895)
Title: FFG:Wars Not Make One Great
Post by: RSSFeeder on 27 June 2014, 23:30:02
Wars Not Make One GreatJoin Us or Die Is Now Available for STAR WARS (TM): The Card Game
“Adventure. Excitement. A Jedi craves not these things.”
–Yoda, Star Wars: The Empire Strikes Back Join Us or Die, the fourth Force Pack in the Echoes of the Force cycle for Star Wars™: The Card Game, is now available at local retailers and online through our webstore! In this Force Pack, your struggle to tip the Balance of the Force in your favor reaches new heights. Vicious Jawa scavengers sweep the sands of Tatooine in search of loot. Aboard the factory ship Arc Hammer, the Dark Trooper Project enters its second phase, and in Alliance Intelligence, undercover operative Winter infiltrates Imperial bases in search of data that may prove vital to the Rebellion. 
Meanwhile, one of the last remaining Jedi Masters waits on the planet Dagobah, biding his time and gathering power until the ideal moment. The dark side may grow powerful, but this Jedi is perfectly able to rise to the challenge. Start your journey through the swampy morass of Dagobah in search of Yoda today. Judge Me by My Size, Do You? 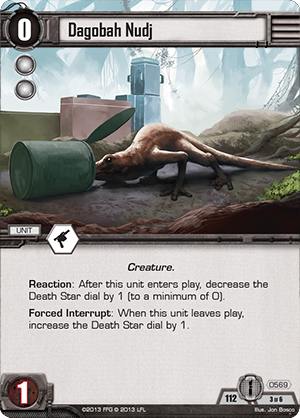 Your journey into the swamps begins, like everything in the Star Wars galaxy, with the Force. The objective of this set is May the Force Be With You (Join Us or Die, 567), and it grants a potent Reaction to the units of the light side. If you have May the Force Be With You in play, whenever you commit a unit to the Force, you can remove all focus tokens from that unit. This objective has myriads of uses, including allowing you attack with a unit and then immediately use that unit’s Force icons in the Force struggle. Alternatively, if the dark side has responded to your attacks by covering one of your key units with focus tokens, you can simply commit that unit to the Force to remove all focus tokens, making your unit ready for action once again. Your journey into the swamps begins, like everything in the Star Wars galaxy, with the Force. The objective of this set is May the Force Be With You (Join Us or Die, 567), and it grants a potent Reaction to the units of the light side. If you have May the Force Be With You in play, whenever you commit a unit to the Force, you can remove all focus tokens from that unit. This objective has myriads of uses, including allowing you attack with a unit and then immediately use that unit’s Force icons in the Force struggle. Alternatively, if the dark side has responded to your attacks by covering one of your key units with focus tokens, you can simply commit that unit to the Force to remove all focus tokens, making your unit ready for action once again.
As you travel deeper into the swamps of Dagobah, you’ll encounter Dagobah Training Grounds (Join Us or Die, 31), which provides a resource for you. You may also see the Seeds of Decay (Join Us or Die, 523), however. This fate card allows you to place a focus token on a target ready unit committed to the Force, giving you even more control of the Force struggle and helping you incapacitate enemy units holding the Force. You may even encounter some of the natural wildlife of Dagobah as you search for the Jedi Master. The Dagobah Nudj (Join Us or Die, 569) is a lizard-like Creature, but it has several important abilities. This unit is free to play, and although it could defend in a pinch, it might be better used to devote its two Force icons to the Force struggle. More importantly, the Dagobah Nudj’s Reaction reads, “After this unit enters play, decrease the Death Star dial by 1 (to a minimum of 0).” By playing this unit at the proper time, you just might buy yourself a little extra time to destroy the objectives you need to win. The effect only lasts as long as the Dagobah Nudj survives, however. A Forced Interrupt increases the Death Star dial by one when this unit leaves play.  The true hero of this objective set, however, is the object of your search in the swamps of Dagobah: a new version of Yoda (Join Us or Die, 568)! This version of Yoda costs the same as the previous version, and possesses both the Elite keyword and the same amount of Force icons, but it differs in several crucial ways. The new Yoda has another point of damage capacity, making him more durable, and none of his combat icons are edge-dependent. Best of all, though, this Yoda gains The true hero of this objective set, however, is the object of your search in the swamps of Dagobah: a new version of Yoda (Join Us or Die, 568)! This version of Yoda costs the same as the previous version, and possesses both the Elite keyword and the same amount of Force icons, but it differs in several crucial ways. The new Yoda has another point of damage capacity, making him more durable, and none of his combat icons are edge-dependent. Best of all, though, this Yoda gains  for each point on the Death Star dial. for each point on the Death Star dial.
Yoda’s strength grows as the Death Star dial advances, meaning that the closer you come to defeat, the more powerful Yoda becomes. If you wanted to include both versions of Yoda in your deck, you could enhance the new Yoda with Shii-Cho Training (Core Set, 122), allowing him to split massive amounts of unit damage between numerous enemy units. Yoda’s other combat icons are an added bonus, and with the power of Yoda behind you, you can easily push attacks through to seize victory at the last hour. Even if your quest for Yoda proves unfruitful, you still have a way to find him in Yoda, You Seek Yoda (Join Us or Die, 570). This event costs two resources, and allows you to increase the Death Star dial by one to search your deck for Yoda and put him into play. Not only does this allow you to put Yoda into play at Action speed, it gives him to you at a resource discount, and if you search for the new version of Yoda, his power is increased by the Death Star dial advancing. No matter how you complete your quest to find Yoda amidst the swamps of Dagobah, this objective set’s cards will shape your pursuit of victory. A Jedi Will You Be Whether you receive the aid of one of the most powerful Jedi Masters, or oppose him with the mechanical efficiency of Dark Troopers or the raw cunning a Jawa warlord, you’ll find the cards you need in Join Us or Die, the newest Force Pack for Star Wars: The Card Game. Pick up your copy at a local retailer today! ... Source: Wars Not Make One Great (http://www.fantasyflightgames.com/edge_news.asp?eidn=4896)
Title: FFG:Combat Equipment
Post by: RSSFeeder on 28 June 2014, 08:00:04
Combat EquipmentBattleLore Dice Packs Are Now Available
Whether you defend the people of Terrinoth with the Rune Golems and Roc Warriors of the Daqan Lords, or lead the Blood Harvesters and Flesh Rippers of the Uthuk Y’llan in BattleLore Second Edition, you can enhance your combat with the BattleLore Dice Pack. The BattleLore Dice Pack is now available, both at your local retailer and online through our webstore! Ready for Battle As a tool of convenience, the BattleLore Dice Pack contains eight custom combat dice, identical to the ones found in the Core Set. Add these eight dice to the four included in the BattleLore Second Edition Core Set, and you’ll be able to quickly find your way through even the largest battles. 
Keep your focus on tense fantasy battles in the land of Terrinoth with the dice included in the BattleLore Dice Pack. Pick up your additional Battlelore dice at your local retailer today. ... Source: Combat Equipment (http://www.fantasyflightgames.com/edge_news.asp?eidn=4883)
Title: FFG:Wave IV Is Now Available
Post by: RSSFeeder on 28 June 2014, 16:30:06
Wave IV Is Now AvailableUpgrade Your X-Wing (TM) Fleet with Four New Starfighters
Wave IV is here! The fourth wave of starship expansions for X-Wing™ is now available at retailers everywhere. And the game’s fast-paced dogfights are about to grow even more heated with the introduction of four of the most recognizable starfighters from the expanded Star Wars universe: the Z-95 Headhunter, TIE defender, E-wing, and TIE phantom. 
From left to right: E-wing, Z-95 Headhunter, TIE defender, and TIE phantom
Along with their starfighters, each of which comes pre-painted at the game’s standard 1/270 scale, these four expansion packs introduce a wealth of new pilot abilities, upgrade cards, and tactical considerations that are certain to shake up the metagame and lead to daring new strategies.
- Able to equip Assault Missiles for a total squad point cost as low as seventeen, the Z-95 Headhunter allows Rebel players to field an extremely efficient swarm-buster… and to design swarms of their own.
- With its potent weaponry, shields, and agility, the TIE defender makes an intimidating flanker, and your opponent will have to think carefully about whether he’ll turn away from the rest of your Imperial squad to gun it down, or if he’ll allow it to use its white Koiogran-turn to perform strafing runs back and forth along his squad.
A 360-degree view of the TIE defender.
- The E-wing pairs the firepower and resilience of the X-wing with the speed and agility of the A-wing, making it an extremely versatile and powerful starfighter that can be outfitted to perform nearly any role, especially given its unique ability to combine an astromech droid with a system upgrade.
- New rules for cloaking in the midst of combat add a certain mystique to the TIE phantom, which may well be the game’s most challenging ship to pilot to-date, as well as the ship that’s most likely to perplex your opponents.
A Tremor in the Force Each wave of X-Wing starship expansions creates ripples that reach across gaming tables worldwide.
- The first wave defined the game’s initial squad-based tactics, giving shape to such squads as the three X-wing builds and TIE swarms that still continue to shine at X-Wing events in the current environment.
- The game’s second wave introduced the first large ships – the Millennium Falcon™ and Slave I™ – as well as a play style based around the incredible resilience of these ships and the new upgrade types for crew members, bombs, and modifications.
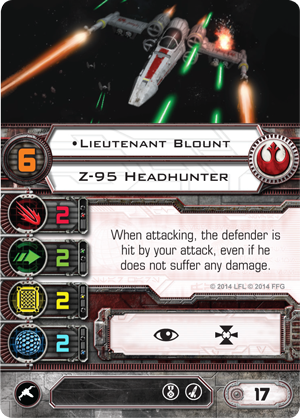 Wave III further matured the game by adding two support ships, the HWK-290 and Lambda-class shuttle, as well as a number of system upgrades which “cheated” some aspects of chance by promoting more consistently reliable effects. Wave III further matured the game by adding two support ships, the HWK-290 and Lambda-class shuttle, as well as a number of system upgrades which “cheated” some aspects of chance by promoting more consistently reliable effects.
Now, Wave IV proudly continues the game’s tradition of adding new abilities and effects to the game that permit the exploration of viable new strategies.
- Along with the potent abilities of the wave’s unique pilots, a number of upgrades and the TIE phantom’s rules for cloaking reward players more than ever for investing in high pilot skill.
- Simultaneously, the Z-95 Headhunter offers the Rebel Alliance an ultra-efficient swarm-buster that may entice players to experiment with squads that fly out of formation. Still, these abilities and effects have been carefully balanced against existing tactics, which retain their potency.
In the end, this means that X-Wing now enjoys a greater variety of attractive and viable dogfighting strategies than ever before! Explore the New Technology The four Wave IV starships represent some of the most advanced technology available to both Rebel and Imperial forces. You’ll find Ion Pulse Missiles, cloaking devices, and system upgrades. You can also find more information about each of these starships in our series of previews:
- “Missiles Away” explores the pilots and upgrades of the Z-95 Headhunter Expansion Pack.
- “Designed for Success” looks at the TIE defender, its pilots, upgrades, and the strategies likely to be inspired by its unique white, four-speed Koiogran-turn.
- “Performing the Impossible” offers a closer look at the E-wing and the ways that its extreme customizability may allow Rebel players to thwart their opponents’ expectations.
- “Cloaked in Battle” reviews the TIE phantom and the way that its cloaking action places an unprecedented emphasis upon high pilot skill values.
Additionally, a number of guest writers have shared their thoughts on these starships and how they may fare in the game’s heated space battles.
- 2012 World Champion Doug Kinney looked at the new Imperial starfighters in his article, “A New Imperial Protocol.”
- 2013 World Champion Paul Heaver explored squad-building in the post-Wave IV metagame in his article, “Prepare for the Rebel Assault.”
- In his article, “Echo,” guest writer Neil Amswych (aka “The Tusken Tactician”) detailed the radical new ways that the TIE phantom pilot, “Echo,” will surprise and confound his opponents.

The above diagram illustrates the staggering number of positions in which “Echo” can end the activation phase after decloaking into a right turn at speed one and then performing a barrel roll.
Upgrade Your Fleet Head to your local retailer today to upgrade your fleet with the new Wave IV starfighters and upgrade cards. The Z-95 Headhunter Expansion Pack, TIE Defender Expansion Pack, E-Wing Expansion Pack, and TIE Phantom Expansion Pack are now available! ... Source: Wave IV Is Now Available (http://www.fantasyflightgames.com/edge_news.asp?eidn=4897)
Title: FFG:Strength in Numbers
Post by: RSSFeeder on 29 June 2014, 01:00:16
Strength in NumbersPreview the Astra Militarum Faction from Warhammer 40,000: Conquest
“A good soldier obeys without question. A good officer commands without doubt.”
–Tactica Imperialis Amidst the darkness and terrors of the 41st millennium, Mankind has had no choice but to band together, arming themselves and keeping watch against the next horror to emerge. The Imperium of Man has grown strong under the glorious rule of the Emperor, and in Warhammer 40,000: Conquest, you can lead the massed armies of humanity in a battle for the planets of the Traxis sector! In past previews, we’ve given a detailed overview of different aspects of gameplay, beginning with the deployment of units to planets, continuing into the command struggle that takes place at every planet, rewarding the victor with additional resources and card draw. Next, we looked at the combat phase and gave a detailed example of a battle at one planet. Most recently, we began to delve into the factions of Warhammer 40,000: Conquest with a look at the Space Marines faction. Today, we continue to look at the new factions by looking at the Astra Militarum, the bulk of the armed forces of the Imperium. 
Uncountable Armies The greatest strength of the Astra Militarum faction has always been its massive armies, filled with uncountable numbers of men and women eager to die for the glory of the Emperor. In Warhammer 40,000: Conquest, the first warlord of the Astra Militarum is Colonel Straken (Core Set, 2), a native of the jungle Death World of Catachan. No matter how large your army grows, Straken’s presence is large enough to inspire them. Colonel Straken grants a raised attack value to every friendly Soldier and Warrior at his planet, transforming even the lowliest guardsman into a stronger fighting force.  The Astra Militarum has access to limitless resources and manpower from across the galaxy, and so in Warhammer 40,000: Conquest, they may summon Guardsman token units into combat. These Guardsmen help bolster the ranks of your forces, and the strength of numbers cannot be underestimated. In addition, every Guardsman is also a Soldier, meaning that they get the bonus of Colonel Straken’s special ability. The Astra Militarum has access to limitless resources and manpower from across the galaxy, and so in Warhammer 40,000: Conquest, they may summon Guardsman token units into combat. These Guardsmen help bolster the ranks of your forces, and the strength of numbers cannot be underestimated. In addition, every Guardsman is also a Soldier, meaning that they get the bonus of Colonel Straken’s special ability.
Some of the ways you can get these Guardsmen token units into play come from Straken’s signature squad. There are four copies of the Straken’s Command Squad (Core Set, 31) unit in the signature squad, and whenever one of them leaves play from a planet, a Guardsman token unit is put into play at the same planet. With this ability, even after the Command Squad is destroyed, the fight isn’t over. You’ll also be able to order your Guardsmen into combat from the iron bastion of Omega Zero Command (Core Set, 32). While you have this support card in play, you can put a Guardsman token unit into play at any planet where you win a command struggle! Normally, most of your units will be amassed during the deployment phase, but if you can successfully win the command struggle at key planets, you could see the Guardsmen of the Astra Militarum flocking to your aid. With massive armies at your disposal, some strategic losses are essential to gaining a greater advantage. Whenever one of your units is attacked and dealt damage, you may play Glorious Intervention (Core Set, 33) and sacrifice a Soldier or Warrior unit to prevent all damage. In addition, you can then deal damage back to the attacker equal to the attack value of the sacrificed unit! Although you have to sacrifice an army unit to gain the effect, playing one of the two copies of Glorious Intervention at the right time can save a key unit and potentially eliminate the attacker. The final card in Colonel Straken’s signature squad is Straken’s Cunning (Core Set, 34). This attachment can be attached to any army unit, granting it a raised attack value, and bearing the text, “Interrupt: When attached unit leaves play, draw 3 cards.” Additional card draw might just give you the extra units you need to overwhelm your opponent, and with Glorious Intervention, you can sacrifice the attached unit and gain your added card draw whenever you choose. The Price of Victory 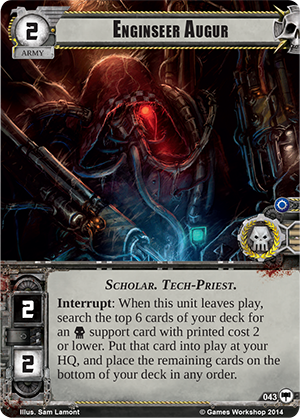 Since the loss of some troops is inevitable, the Astra Militarum faction has plenty of ways to benefit from their units leaving play, and we’ll look at a few of them today. One army that can grant the Astra Militarum the upper hand is the Cadian Mortar Squad (Core Set, 36). This unit bears the Ranged keyword, meaning that it has the opportunity to strike during the ranged skirmish, before non-Ranged units can strike. In addition, this card has a Reaction that allows you to ready this unit whenever another friendly unit leaves play. As your units fall to the vagaries of battle, you can rely on the Cadian Mortar Squad to rain fiery destruction on your enemies. Since the loss of some troops is inevitable, the Astra Militarum faction has plenty of ways to benefit from their units leaving play, and we’ll look at a few of them today. One army that can grant the Astra Militarum the upper hand is the Cadian Mortar Squad (Core Set, 36). This unit bears the Ranged keyword, meaning that it has the opportunity to strike during the ranged skirmish, before non-Ranged units can strike. In addition, this card has a Reaction that allows you to ready this unit whenever another friendly unit leaves play. As your units fall to the vagaries of battle, you can rely on the Cadian Mortar Squad to rain fiery destruction on your enemies.
Captain Markis (Core Set, 42) offers you more options for making the most of hosts of Guardsmen. With Captain Markis, you may sacrifice any Astra Militarum unit at the planet to exhaust a non-warlord unit at the planet. By exhausting your opponent’s heavy-hitters, you leave him vulnerable to your own attacks, enabling your own armies to attack unmolested. Of course, the Astra Militarum faction includes a slew of units who offer you benefits for leaving play themselves. In similar fashion to Straken’s Command Squad, when an Enginseer Augur (Core Set, 43) leaves play you may search the top six cards of your deck for an Astra Militarum support card with cost two or lower and immediately put it into play at your headquarters. The Astra Militarum is known for the strength of its supports, and whether they increase your economy or offer you other advantages, you’re sure to reap the benefits of the Enginseer Augur’s ability. One support you might find aiding the armies of the Astra Militarum is the Rockcrete Bunker (Core Set, 52). When damage is assigned to one of your units, you can exhaust this support to redirect one point of that damage to this support. When this support has four damage on it, it must be sacrificed, but until then, it grants you an added level of protection against your foes. As the battle-hardened armies of the Astra Militarum march to war in countless numbers, you’re sure to find the benefits of unlimited bodies. Soldiers of the Emperor The Astra Militarum’s forces stride ahead to glorious triumph over any obstacle to the Imperium of Man. Take your place as their general and forge a new era among the stars of the 41st millennium. Join us next time as we examine the brutality of the Ork faction, and preorder Warhammer 40,000: Conquest at your local retailer today! ... Source: Strength in Numbers (http://www.fantasyflightgames.com/edge_news.asp?eidn=4898)
Title: FFG:Confronting the Imperial Menace
Post by: RSSFeeder on 29 June 2014, 09:30:03
Confronting the Imperial MenaceA Preview of the STAR WARS (R): Age of Rebellion (TM) Roleplaying Game
“Yes! I said closer! Move as close as you can and engage those Star Destroyers at point-blank range.”
–Lando Calrissian You and your wingmates barely manage to evade the laser blasts fired by the trio of TIE interceptors on your backs long enough to weave through an asteroid field, only to find an Imperial Star Destroyer dropping out of hyperspace ahead of you on the opposite side… Welcome to life in the Star Wars®: Age of Rebellion™ Roleplaying Game! As a member of the Rebel Alliance, you’re part of an outmatched, rag-tag resistance group fighting in a civil war that spans the galaxy. Your enemies are more numerous and better funded. Their tactics rely upon the overwhelming strength of their TIEs, troopers, and Star Destroyers, and they’re everywhere. Every hero needs a worthy adversary, and in an Age of Rebellion campaign, you’ll gain a newfound respect for the military might of the tyrannical Galactic Empire. In previous previews, we’ve looked at what it means to play a part in a war against the galaxy’s ruling government. We saw how your participation in the Rebellion effort gives meaning to your actions, and we saw how it influences your view of the galaxy. Today, we look at the challenges ahead of you. What stands between the Rebel Alliance and galactic freedom? A horde of Imperial adversaries, and a whole navy’s worth of vehicles and starships. Altogether, the Age of Rebellion Core Rulebook features more than two-dozen pages of Imperial adversaries, vehicles, and weapons, as well as a host of others that the Empire can recruit or co-opt. 
Adversaries You’ll find entire legions of Stormtroopers, Snowtroopers, and even Dark Troopers among the various minions, rivals, and nemeses presented in the Age of Rebellion Core Rulebook. Alongside such Imperial troops, you’ll also find DeStab agents, Imperial Moffs, military informants, and TIE aces. The Core Rulebook divides the Empire’s forces into two categories, bureaucratic and military, and the result is an Imperial menace that operates on multiple levels simultaneously. It’s not just a collection of troopers waiting to gun you down; it’s also a soul-crushing organization that looks to root out dissension, sow distrust, spread fear through the galaxy, and extinguish the last flames of hope and resistance. Accordingly, you’ll find all the adversaries you need to enjoy a wide variety of stories, ranging from those that feature heated firefights to those that focus on the Rebellion’s efforts to rally support and acquire resources without alerting the Empire’s attention. You’ll find minions to defend your Imperial bases, and you’ll find cruel and aspiring agents capable of matching wits with the Rebellion’s greatest heroes. 
Vehicles and Starships Of course, the Empire’s military consists of more than just soldiers, pilots, commanders, and agents. Its strength stems largely from its use of powerful, technologically advanced vehicles and starships, many of which you’ll find presented in the Age of Rebellion Core Rulebook. Imagine, for a moment, that you’re part of a Rebel strike team tasked with jamming Imperial transmissions from one of their reconnaissance outposts. At first, everything seems to go well. You get the jump on their perimeter and quickly move through a handful of defenders toward the compound’s communications array. However, as you start placing your explosives on the bunker doors, you hear the thunderous sound of something bad. One of your teammates steps around the corner and confirms your suspicions: an AT-AT has just returned to base… It’s not impossible for Rebel characters to prevail against AT-ATs or Star Destroyers, but such situations are truly desperate and should lead your group to perform an immediate reevaluation of its tactics. Moreover, these are the sorts of situations that may punctuate the key turns of an Age of Rebellion campaign. After all, in the heat of a galactic civil war, you should expect both sides to make use of all the weapons at their disposal.  That means, too, that while the Imperials gain vehicles like the AT-AT and AT-ST, along with a veritable swarm of TIEs and capital ships, the Rebels gain the T-47 airspeeder and such classic starfighters as the X-wing, A-wing, and B-wing. That means, too, that while the Imperials gain vehicles like the AT-AT and AT-ST, along with a veritable swarm of TIEs and capital ships, the Rebels gain the T-47 airspeeder and such classic starfighters as the X-wing, A-wing, and B-wing.
Shedding more light upon the many vehicles and starships that you’ll find in the Age of Rebellion Core Rulebook is contributing author Jason Marker: “I'm a huge fan of starships, so when I was offered the chance to work on the serious business military ships featured in Age of Rebellion, I jumped at the chance. “Age of Rebellion is, necessarily, military-oriented and the ships included in the Core Rulebook reflect that. With them, you’ll be able to fly space superiority missions in brand new X-wings, lead a squadron of B-wings against a squadron of capital ships and turn them into hot scrap, blast swarms of TIE fighters into clouds of dust with stolen Lancer-class frigates, and generally have a great time at the controls of a spaceship. “There’s a deep well of great Star Wars ships, ranging from tiny little scout ships to fast-attack starfighters like the X-wing to lumbering Super Star Destroyers, so one thing I really wanted was to bring the Anaxes War College into the game. Using the Anaxes War College gave the setting a more military-style system for naming and classifying ships and allowed for specific categories of ships that I could populate with a rich collection of established favorites.” Using the Anaxes War College as a guide, the Age of Rebellion Core Rulebook categorizes the starships it presents into starfighters, gunships, cruisers, and battleships, and you’ll find starships of all sorts, ranging from the A-wing to the Imperial-class Star Destroyer. Moreover, you’ll find new rules for barrage fire that will allow you to make good use of the Core Rulebook’s capital ships in dramatic and engaging space combats. 
As Jason explains, the Core Rulebook’s collection of starships also helped to establish the game’s tone: “The Imperial Navy has the resources of the entire galaxy at its beck and call. They have the most money, the best designers, the most respected shipyards, and they can turn out ships at an incredible rate. “On the other hand, the Alliance is using second or third-hand ships that are decades old – fighters that were old during the Clone Wars, and sub-capital cruisers and frigates that are long past their prime. “I wanted to make it clear that the Imperial Navy was a new, shiny, deadly efficient military force and the Alliance fleet was a rag-tag collection of antiques, repurposed freighters, and salvaged warships doing the best they could in an ugly situation.” Resist the Empire’s Tyranny Though you manage to salvage the damaged CR90 corvette and its armaments, there’s no time to celebrate. Your hyperdrive is offline, and sensors indicate a swarm of TIEs headed your way. Quickly, your team jumps into action. Talvin races to engineering. Kyle and Pol’tura head to the nearest gunnery stations. Drezzen boosts the sensors and finds the ship that launched those TIEs – a Vindicator-class heavy cruiser. You won’t last long against that ship, especially while your corvette is already damaged. As the Vindicator rounds the desert moon, you order the gunners to lay down a blanket barrage. You’re outnumbered and outgunned, but if you can make the jump to hyperspace before you’re obliterated, you’re going to strike a major blow against the Empire… In the Age of Rebellion Core Rulebook, you’ll find an Imperial menace worthy of the galaxy’s greatest heroes. Are you one of them? The Rebel Alliance needs you. 
The Age of Rebellion Core Rulebook is due to arrive at retailers late next week. Until then, stay tuned for more information, including a preview of your adventures in Age of Rebellion! ... Source: Confronting the Imperial Menace (http://www.fantasyflightgames.com/edge_news.asp?eidn=4899)
Title: FFG:Adventures in an Age of Rebellion
Post by: RSSFeeder on 30 June 2014, 19:30:03
Adventures in an Age of RebellionA Preview of the STAR WARS (R): Age of Rebellion (TM) Roleplaying Game
“You know of the Rebellion against the Empire?”
–Luke Skywalker In the Star Wars®: Age of Rebellion™ Roleplaying Game, you and your friends assume the roles of members of the Rebel Alliance, which is vastly outnumbered and outgunned in its war with the evil Galactic Empire. Accordingly, you’ll play your part in reconnaissance missions, intel operations, and guerrilla operations. You may support insurgent governments or rally new recruits. You might fly to battle alongside or within capital ships, and – on rare occasions – you might even take part in a key military strike that involves the entire Rebel fleet. No matter what mission you undertake, your ultimate goals will always be to undermine the Galactic Empire and free the galaxy from its tyranny. To kick off your adventures within the Age of Rebellion, the Core Rulebook contains the full-length, three-act adventure, Perlemian Haul. In it, you and your teammates must infiltrate an Imperial convoy and secure the cargo stored aboard one of its freighters, the Perlemian Haul. Your task will challenge you and your fellow Rebels to navigate your way through space stations, Imperial heavy freighters, navy troopers, patrol droids, dozens of TIEs, and other hazards. If you fail, you’ll become yet another of the Rebellion’s unsung martyrs, but if you succeed, you’ll be celebrated and given the opportunity to participate in more sensitive missions. More importantly, though, you’ll have done your part to topple the evil Empire. 
Contributing Author Gary Astleford on Perlemian Haul I’ve been a fan of Star Wars since I three years old, the original film was the first movie I ever saw in a bona fide theater, and to say I was thrilled to be offered a chance to write the introductory adventure for the upcoming Age of Rebellion roleplaying game is something of an understatement. Writing material for a relatively new game system is always interesting, and this was once again the case for Age of Rebellion as I needed the adventure to integrate a range of Careers and Specializations, as well as the Duty mechanic. While I won’t get into the specific details of the assignment, Perlemian Haul incorporates all of these, along with some intrigue, action, and suspense, plus a few surprises! 
I consider myself something of an old-school Star Wars fan, so Age of Rebellion took me back to the days when blasting Vader’s minions was as commonplace as driving down to the grocery store for a gallon of milk. Its focus on the war between the Empire and the Rebel Alliance put me in familiar territory, and the game’s military stylings provide a lot of useful structure for the Player Characters. While this structure isn’t used to straightjacket the players, it allows the GM to easily present military-style scenarios wherein the PCs’ successes or failures can have very real consequences in the galactic conflict as a whole. There’s also the matter of altruism. The characters in Age of Rebellion are fighting the good fight. They’re not putting their lives on the line for money or notoriety; they’re doing it because it’s the right thing to do. This doesn’t mean there isn’t a place for moral quandary – far from it. However, the decisions the PCs make are likely to affect more than just their own limited sphere of influence, and the results should carry beyond them to their superiors and their subordinates, at least. In the end, I had a wonderful time designing Perlemian Haul, and I hope players find the experience as rich, rewarding, and fun as I worked to make it! 
Thanks, Gary! As the Core Rulebook’s introductory adventure, Perlemian Haul offers plenty of action for every sort of Rebel. It also provides a solid foundation for your future adventures, including any you may experience during the adventure included in the Game Master’s Kit, during Onslaught at Arda I, or throughout your home campaign. If there’s anything that’s certain about the adventures in Age of Rebellion, it’s that there are always opportunities for heroics, so grab your blaster, don your flight suit, and join the fight against the Empire. The Star Wars: Age of Rebellion Core Rulebook goes on sale later this week! ... Source: Adventures in an Age of Rebellion (http://www.fantasyflightgames.com/edge_news.asp?eidn=4900)
Title: FFG:A Deadly Game
Post by: RSSFeeder on 02 July 2014, 05:30:06
A Deadly GameAnnouncing the Second Chapter Pack in the Wardens Cycle
“When the snows fall and the white winds blow, the lone wolf dies, but the pack survives.”
–George R.R. Martin, A Game of Thrones Fantasy Flight Games is proud to announce A Deadly Game, the second Chapter Pack in the Wardens cycle for A Game of Thrones: The Card Game! A Deadly Game continues the main themes of the Wardens cycle, adding new support to trait-based decks and increasing the power of abilities such as the "limited response." In this Chapter Pack, you’ll find powerful Castle plots that trigger their effects upon moving to your used pile, even as Clansman, Dothraki, and Sand Snake decks grow in strength. From the sands of Dorne to the lofty heights of the Eyrie, every House gains new cards to strengthen their claim to the Iron Throne in this Chapter Pack. 
Meanwhile, at the fortress of Riverrun, House Stark and its allies in House Tully strengthen their defenses and forge their plans to claim power and victory by winning A Deadly Game. Manning the Walls In A Game of Thrones: The Card Game, House Stark has a reputation for its resolute defense. A Deadly Game introduces more cards to help you maintain your defense and establish superiority on the field of battle, beginning with Tytos Blackwood (A Deadly Game, 32). Tytos Blackwood bears two beneficial traits: Lord and House Tully, allowing him to interact with cards like Hoster Tully (Lords of Winter, 21) and Shaggydog (Core Set, 11). Tytos Blackwood’s text, however, is what makes him a boon for your defensive efforts: “Response: After you win a challenge as the defender, move 1 power from the attacking player’s House card to your own.”  You don’t need Tytos Blackwood to participate in the challenge to trigger his ability, so long as he’s in play. With Tytos Blackwood on your side, just successfully defending challenges brings power to your House. In addition, he bears both the stealth keyword and the text, “Immune to opponent’s events,” making him an exceptional character for foiling your opponent’s attempts to evade his watchful eyes. You don’t need Tytos Blackwood to participate in the challenge to trigger his ability, so long as he’s in play. With Tytos Blackwood on your side, just successfully defending challenges brings power to your House. In addition, he bears both the stealth keyword and the text, “Immune to opponent’s events,” making him an exceptional character for foiling your opponent’s attempts to evade his watchful eyes.
As a bonus, Tytos Blackwood gains some House Tully compatriots in the Raventree Elite (A Deadly Game, 33). This Army also possesses the stealth keyword, and grants each of your House Tully characters immunity to your opponent’s triggered effects while participating in a challenge! This wide reaching effect grants you protection from tricks and traps ranging from powerful character abilities to a massive array of events. What’s more, both Tytos Blackwood and the Raventree Elite bear the War crest, meaning they receive plenty of benefits to boost their Strength and enhance their defending power. The Power of Arms (Core Set, 200) gives you a solid Strength boost for a round, and Frozen Outpost (Lords of Winter, 26) is even more potent. And when you choose to attack with your War crest characters, Die by the Sword (Lords of Winter, 47) gives you a way to deplete your opponent’s board and destroy any opposition to your victory. That’s not the end of House Stark’s new tools for enhancing their defenses in A Deadly Game, however. Seagard (A Deadly Game, 34) gives you yet another tool for deterring your opponent’s challenges. You may kneel this location during the challenges phase to choose a defending character, granting that character a higher Strength and the deadly keyword, potentially keeping your key characters from perishing. Even more important, if you win the challenge, you may stand Seagard, allowing you to use it again and again. Join the Game Do you dare to play the game of thrones? Whether you stand on the walls of Winterfell or Riverrun with House Stark, command the winds with House Greyjoy, or lead a khalasar with House Targaryen, you’ll find plenty of cards to aid you within this new Chapter Pack. Look for A Deadly Game to expand A Game of Thrones: The Card Game in the fourth quarter of 2014! ... Source: A Deadly Game (http://www.fantasyflightgames.com/edge_news.asp?eidn=4901)
Title: FFG:Vengeance and Rage
Post by: RSSFeeder on 02 July 2014, 14:00:04
Vengeance and RagePreview Giants and Brother Gherinn from Crown of Destiny
Rumors are whispered throughout Terrinoth of a mystical mountain. The rumors say that anyone who finds the mountain and climbs to its summit may reshape their entire life – both past and future. You can discover the truth of these tales in the Crown of Destiny Hero and Monster Collection, an upcoming expansion for Descent: Journeys in the Dark Second Edition! Like other Hero and Monster Collections, Crown of Destiny contains four heroes and three monster groups previously only available in the first edition of Descent. The thirteen plastic figures in this expansion feature entirely new sculpts and artwork, bringing them in line with the aesthetic of the second edition. Within this Hero and Monster Collection, you’ll find Corbin, Lindel, Jaes the Exile, and Brother Gherinn alongside two giants, three chaos beasts, and four lava beetles. In our last preview, we took a closer took at the lava beetle monster group and at Jaes the Exile. Today, we turn to the Healer, Brother Gherinn, and to the giants that beleaguer the noble heroes. 
Contains four heroes, two giants, three chaos beasts, and four lava beetles.
A Penitent Hero Beneath his mask, Brother Gherinn’s face is scarred by the terrible burns inflicted on him by a ritual of purification. He never speaks of the man he was before that fiery ordeal, instead simply claiming that the agony was a small price to pay to gain control over his own dark nature. He now uses his mastery of unknowable energies to heal those in need and vanquish the wicked, hoping to wash away the crimes of his past. By climbing to the height of the mystical mountain, Brother Gherinn may finally find true redemption. Brother Gherinn can prove his worth as one of your heroes in any quest. Although he is a gifted Healer by nature, he thirsts for the destruction of evil in Terrinoth and is unafraid to draw heavily on his powers to accomplish his goal. Brother Gherinn’s hero ability allows you to gain the extra damage you need to finish off monsters. Each time you attack with Brother Gherinn, after rolling dice, you may choose to suffer one damage to add one damage to the results of your attack. By triggering this ability judiciously, you can eliminate a monster who might otherwise attack on the overlord’s next turn. 
Defeating a monster opens the opportunity for Brother Gherinn to use his heroic feat, allowing him to roll two red power dice. Every hero within three spaces, including Brother Gherinn, recovers health equal to the damage rolled on the dice, potentially spreading vast amounts of healing to the entire hero party. What’s more, Brother Gherinn’s healing abilities and strength in combat may prove entirely necessary if you face giants on your adventure. The Rage of a Giant As old and unyielding as the mountains themselves, giants are unthinkably strong, possessing enough strength to easily cast several opponents aside with a single strike. These ancient folk are intolerant of outsiders and prone to solve problems by resorting to violence rather than reason. One old giant, known as Mughin, may hold the key to finding the magical Crown of Destiny.
Giants are well-known for their massive power. These monsters are difficult to kill, and unrelenting on attack or defense. The heroes may hope to simply outrun the giants, but even that may prove to be a difficult task. All giants possess the Reach ability, allowing them to attack heroes up to two spaces away, making up for their sometimes ponderous movement. What’s more, if a giant causes damage to a hero, you may spend a surge to stun the hero, limiting him to one action on his next turn.  
All giants are fearsome in battle by virtue of their enormous size. Some giants, though, are considered mighty even by giants’ standards. In battle, these master giants may spend an action to use the Sweep ability, making an attack that affects every figure within two spaces and line of sight of the master giant. Unwary hero parties that stray too near to a master giant could find the entire party knocked out by a single sweeping blow. Only the bravest of heroes can hope to stand against wrathful giants and emerge victorious. Quest for the Crown Your destiny in Terrinoth awaits as the outcome of your quests reshapes your life’s story. Whether you play as a hero, eager for riches and glory, or as the overlord, intent on spreading your darkness across all Terrinoth, you’ll find the heroes and monster groups to help you in this Hero and Monster Collection. Preorder Crown of Destiny at your local retailer today! ... Source: Vengeance and Rage (http://www.fantasyflightgames.com/edge_news.asp?eidn=4902)
Title: FFG:Rules of Conduct
Post by: RSSFeeder on 02 July 2014, 22:30:03
Rules of ConductDownload the Rules from the Foul Play Expansion for Blood Bowl: Team Manager
Well, Jim, recent efforts to enforce penalties have certainly met with mixed success. You’re right about that, Bob. I don’t know if I’ve ever seen so many completely enraged Chaos Dwarfs. And that’s saying something, though some teams have been getting on good terms with the new ref… Blood Bowl becomes more wild and unpredictable than ever with the upcoming Foul Play expansion for Blood Bowl: Team Manager. In an unprecedented move, the Team Managers’ Union has introduced penalties, and while a suitably corrupt ref is helping players cheat, rumors are wild that many of this season’s Blood Bowl games will be played in brand-new stadiums. In our last preview of Foul Play, we looked at the three new teams that make up the Putrid Players’ Guild: Chaos Dwarfs, goblins, and the servants of Nurgle. Today, we’ll bring you an inside look at the newest mechanics in Blood Bowl: Team Manager. As an added bonus, you can now download the rules (pdf, 3.1MB) for Foul Play from the Blood Bowl: Team Manager support page! Penalize the Play For the first time ever, Blood Bowl officials have decided to institute penalties, punishing excessive cheating. Managers in Foul Play can receive penalties in a variety of ways, including from additional cheating tokens. When a manager receives a penalty, he must draw a Penalty card from the deck, keeping it facedown until each manager’s improvement pile is revealed in the Scoreboard Phase. At this point, the card is revealed and takes effect. 
Penalties can afflict managers in a variety of ways, but they share one thing in common – they’re almost never pleasant for the punished manager. You may lose fans from the Roughing the Ref penalty card, and Downsize may force you to draw fewer Staff Upgrades. Sometimes, Chaos Karma downs your players even as they tackle the opposition, and in extreme circumstances, a Red Card removes a Star Player from your roster! Corrupt Judgments Blood Bowl officials may hope to reduce cheating through the introduction of penalties, but enterprising teams find ways to cheat more and cheat better by enlisting the aid of a corrupt ref. As teams prepare for kickoff, the corrupt ref is placed by the first manager at any matchup’s midfield. Whenever you commit a player to a matchup with the corrupt ref, you immediately receive a faceup cheating token, allowing to know the effects of the cheating token ahead of time and plan accordingly. 
After the corrupt ref dispenses a faceup cheating token to the player just committed to his matchup, he heads elsewhere, moving from matchup to matchup as shown by the diagram above. The corrupt ref always moves toward the Spike! Magazine deck, and he moves a number of spaces equal to the Star Power of the player committed to his last matchup. In the example above, a Bull Centaur with a Star Power of three was played to the corrupt ref’s matchup. The corrupt ref moves three spaces, moving toward the Spike! Magazine deck. When he can move no closer, he returns to the space farthest from the deck, and begins to move towards the deck once more. After the Scoreboard phase begins, the corrupt ref punishes those who refused to work with him by issuing a penalty to each manager at his matchup who doesn’t have a player with a faceup cheating token. Then, the corrupt ref removes all faceup cheating tokens from the matchup before they take effect. By playing your team well and planning ahead, you can use the corrupt ref to neutralize faceup cheating tokens that would harm you, or to remove faceup cheating tokens that could help your opponent. Into the Stadiums In this season of Blood Bowl: Team Manager, matchups are hosted in a variety of new stadiums. Stadiums offer a location for your struggles against other teams at matchups. In addition, stadiums offer both sides a bonus by granting an extension to your team zone payout. The bonuses to be added to a team zone payout are shown on the stadium card and remain constant, no matter which matchup is played in that stadium. 
Each stadium also has its own unique restrictions. The Barak-Varr Bowl, for example, bans players from using the regeneration skill while committed to a matchup there. Other stadiums have even more exotic conditions. The Aldorf Oldbowl requires all players to have at least two Star Power, whereas the Nehekhara Death Dome allows no more than two players per side. Of course, it wouldn’t be Blood Bowl if teams had to play by the rules! You always have the option to ignore the stadium’s restrictions, but if you commit a player that breaks the stadium’s rules, you must take a penalty card.  Take Your Positions Take Your Positions
Penalties await team managers that break the rules in Foul Play, but as usual, there are ways to get around restrictions. Head to the stadiums, gather your players, and get on the ref’s good side. A new season of Blood Bowl arrives in Foul Play! Download the rules from the support page, then pre-order your copy at your local retailer today. ... Source: Rules of Conduct (http://www.fantasyflightgames.com/edge_news.asp?eidn=4903)
Title: FFG:Manifest the Power of Chaos
Post by: RSSFeeder on 03 July 2014, 07:00:04
Manifest the Power of ChaosA Preview of Apotheosis and Possessed Heretics in The Tome of Decay
One ultimate ambition consumes every Heretic serving the Chaos gods: to rise to Daemonhood. In The Tome of Decay supplement for Black Crusade, you’ll find two ways to acheive this lofty goal. You must choose whether to take the long, slow path to Apotheosis and become a Daemon Prince, or to quickly gain power at the cost of your life by becoming a Possessed Heretic. Today, contributing writer Tim Cox explores both options and the unmatched Daemonic power you access through them. Tim Cox on Possessed Heretics and Apotheosis In The Tome of Decay, I worked on something that players have looked forward to since the release of Black Crusade: rules for playing Daemonic characters. In fact, The Tome of Decay offers a Heretic two new ways to embrace Daemonic existence and become closer to the gods. He might fulfil the ultimate goal of any Heretic by obtaining Apotheosis – elevation to the form of a mighty Daemon Prince – or he can succumb the quick route to power by inviting a Daemon to possess his body. It was very important to me that the rules for Possessed Heretics and Apotheosis offer Daemon Princes and Possessed Heretics very different play experiences. Becoming a Daemon Prince is a huge accomplishment, and begins the Heretic’s eternity as an immortal Daemon. Possession offers a quicker path to power, but ultimately dooms the Heretic to destruction. 
Possessed by the Warp Any Heretic can become a Possessed Heretic through the Ritual of Possession. By doing so, the Heretic gains the strength, resilience, and Warp-born powers of a Daemon, but the Heretic must pay a steep cost. A Possessed Heretic retains most of his mind and personality, but must wage a constant battle for control of his body against the Daemon inside him. If the Heretic acts in opposition to the nature of the Daemon, he risks losing control of his body to the Warp entity within. Rather than merely mutating with increased Corruption, a Possessed Heretic displays a host of potent abilities, called Daemonic Manifestations. These Daemonic Manifestations reflect the nature of the Daemon, and as the Heretic gains Corruption, the Daemon exerts more influence over the Heretic’s form, granting Manifestations such as a Chaos Aura to deflect attacks or deadly Rending Talons. Of course, the Warp is fickle, and when you gain a new Daemonic Manifestation, you randomly generates the result. If you’re willing to take additional Corruption, however, you can bargain with the Daemon and modify the result. In fact, you can modify the result as much as you want, but you gain Corruption equal to the difference! This is just one of several ways that possession increases the rate at which a Heretic gains Corruption. 
For a Possessed Heretic, gaining Corruption is both positive and negative. More Corruption means more powerful Daemonic abilities and Manifestations, but it also brings the Heretic closer to destruction. The further he advances along the Possession Track, the more opportunities a character has to take Corruption in exchange for additional benefits. Instead of achieving Apotheosis or transformation into a Chaos Spawn upon reaching 100 Corruption Points, the Daemon takes full control of the Heretic, consuming his soul. But for those truly devoted to the Dark Gods, this is a joyous fate! A Prince of Chaos Nearly all Chaos champions aspire to Apotheosis, but only the tiniest fraction ever achieve the mantle of Daemon Prince. Whereas possession allows an existing Daemon to inhabit a mortal body, a Heretic who achieves Apotheosis receives the ultimate blessing of his god, becoming a Daemon in his own right and leaving mortality behind. The basic requirements for becoming a Daemon Prince were explained in the Black Crusade Core Rulebook, and now players have rules and guidance for what happens next, allowing them to play as Daemon Princes for the first time.  Unsurprisingly, Daemon Prince characters are incredibly powerful, a fact reflected by a number of new Traits and special rules. In addition, a Daemon Prince gains one or more special rules corresponding to the Heretic’s patron god. For instance, a Daemon Prince of Nurgle can choose Aura of Pestilence, inflicting a penalty to all Toughness Tests for mortals in his vicinity. Unsurprisingly, Daemon Prince characters are incredibly powerful, a fact reflected by a number of new Traits and special rules. In addition, a Daemon Prince gains one or more special rules corresponding to the Heretic’s patron god. For instance, a Daemon Prince of Nurgle can choose Aura of Pestilence, inflicting a penalty to all Toughness Tests for mortals in his vicinity.
Although Daemon Princes continue to accrue Infamy, they no longer gain or lose Corruption. As entities of the Warp, they are corruption incarnate! Instead, Daemon Princes gather a new resource, Favour, which represents the esteem of the Prince’s patron god. Daemon Princes can spend Favour to obtain Daemonic Gifts, powerful abilities granted directly by their patron Chaos God. For mortal beings, the gifts of the gods are subject to the whims of Dark Powers, but Daemon Princes control how the Warp manifests through them, and can select any Daemonic Gift they can afford. A Daemon Prince gains Favour by completing acts worthy of his prowess and advancing his patron god’s agenda, whether by defeating the Daemonic armies of a rival god or corrupting the forces of humanity’s protectors. The expectations placed on Daemon Princes are high, however, and a Daemon Prince who fails in the eyes of his patron loses Favour. Playing with a Daemon Prince at the table represents exciting new opportunities and challenges for both the GM and players. Although few opponents can stand against a Daemon Prince in combat, he must seek out worthy challenges or risk disappointing his patron god and suffering punishment. Daemon Princes are expected to wage wars against mortal and Daemonic foes, and even launch Black Crusades in the name of Chaos. Of course, Daemon Princes also face certain limitations in the physical universe, both due to their nature as Daemons and their size when manifest in reality. The inclusion of a Daemon Prince radically changes the nature of a Black Crusade campaign, but opens countless possibilities in the Screaming Vortex and beyond. Thanks, Tim! Whether you rise to godhood through Apotheosis or undergo the Ritual of Possession, you’ll find ways to acheive greater infamy than ever with The Tome of Decay. Declare your service to the gods of Chaos, and preorder The Tome of Decay at your local retailer today! ... Source: Manifest the Power of Chaos (http://www.fantasyflightgames.com/edge_news.asp?eidn=4904)
Title: FFG:Manifest the Power of Chaos
Post by: RSSFeeder on 04 July 2014, 00:00:02
Manifest the Power of ChaosA Preview of Apotheosis and Possessed Heretics in The Tome of Decay
One ultimate ambition consumes every Heretic serving the Chaos gods: to rise to Daemonhood. In The Tome of Decay supplement for Black Crusade, you’ll find two ways to acheive this lofty goal. You must choose whether to take the long, slow path to Apotheosis and become a Daemon Prince, or to quickly gain power at the cost of your life by becoming a Possessed Heretic. Today, contributing writer Tim Cox explores both options and the unmatched Daemonic power you access through them. Tim Cox on Possessed Heretics and Apotheosis In The Tome of Decay, I worked on something that players have looked forward to since the release of Black Crusade: rules for playing Daemonic characters. In fact, The Tome of Decay offers a Heretic two new ways to embrace Daemonic existence and become closer to the gods. He might fulfil the ultimate goal of any Heretic by obtaining Apotheosis – elevation to the form of a mighty Daemon Prince – or he can succumb the quick route to power by inviting a Daemon to possess his body. It was very important to me that the rules for Possessed Heretics and Apotheosis offer Daemon Princes and Possessed Heretics very different play experiences. Becoming a Daemon Prince is a huge accomplishment, and begins the Heretic’s eternity as an immortal Daemon. Possession offers a quicker path to power, but ultimately dooms the Heretic to destruction. 
Possessed by the Warp Any Heretic can become a Possessed Heretic through the Ritual of Possession. By doing so, the Heretic gains the strength, resilience, and Warp-born powers of a Daemon, but the Heretic must pay a steep cost. A Possessed Heretic retains most of his mind and personality, but must wage a constant battle for control of his body against the Daemon inside him. If the Heretic acts in opposition to the nature of the Daemon, he risks losing control of his body to the Warp entity within. Rather than merely mutating with increased Corruption, a Possessed Heretic displays a host of potent abilities, called Daemonic Manifestations. These Daemonic Manifestations reflect the nature of the Daemon, and as the Heretic gains Corruption, the Daemon exerts more influence over the Heretic’s form, granting Manifestations such as a Chaos Aura to deflect attacks or deadly Rending Talons. Of course, the Warp is fickle, and when you gain a new Daemonic Manifestation, you randomly generates the result. If you’re willing to take additional Corruption, however, you can bargain with the Daemon and modify the result. In fact, you can modify the result as much as you want, but you gain Corruption equal to the difference! This is just one of several ways that possession increases the rate at which a Heretic gains Corruption.
For a Possessed Heretic, gaining Corruption is both positive and negative. More Corruption means more powerful Daemonic abilities and Manifestations, but it also brings the Heretic closer to destruction. The further he advances along the Possession Track, the more opportunities a character has to take Corruption in exchange for additional benefits. Instead of achieving Apotheosis or transformation into a Chaos Spawn upon reaching 100 Corruption Points, the Daemon takes full control of the Heretic, consuming his soul. But for those truly devoted to the Dark Gods, this is a joyous fate! A Prince of Chaos Nearly all Chaos champions aspire to Apotheosis, but only the tiniest fraction ever achieve the mantle of Daemon Prince. Whereas possession allows an existing Daemon to inhabit a mortal body, a Heretic who achieves Apotheosis receives the ultimate blessing of his god, becoming a Daemon in his own right and leaving mortality behind. The basic requirements for becoming a Daemon Prince were explained in the Black Crusade Core Rulebook, and now players have rules and guidance for what happens next, allowing them to play as Daemon Princes for the first time. Unsurprisingly, Daemon Prince characters are incredibly powerful, a fact reflected by a number of new Traits and special rules. In addition, a Daemon Prince gains one or more special rules corresponding to the Heretic’s patron god. For instance, a Daemon Prince of Nurgle can choose Aura of Pestilence, inflicting a penalty to all Toughness Tests for mortals in his vicinity. Although Daemon Princes continue to accrue Infamy, they no longer gain or lose Corruption. As entities of the Warp, they are corruption incarnate! Instead, Daemon Princes gather a new resource, Favour, which represents the esteem of the Prince’s patron god. Daemon Princes can spend Favour to obtain Daemonic Gifts, powerful abilities granted directly by their patron Chaos God. For mortal beings, the gifts of the gods are subject to the whims of Dark Powers, but Daemon Princes control how the Warp manifests through them, and can select any Daemonic Gift they can afford. A Daemon Prince gains Favour by completing acts worthy of his prowess and advancing his patron god’s agenda, whether by defeating the Daemonic armies of a rival god or corrupting the forces of humanity’s protectors. The expectations placed on Daemon Princes are high, however, and a Daemon Prince who fails in the eyes of his patron loses Favour. Playing with a Daemon Prince at the table represents exciting new opportunities and challenges for both the GM and players. Although few opponents can stand against a Daemon Prince in combat, he must seek out worthy challenges or risk disappointing his patron god and suffering punishment. Daemon Princes are expected to wage wars against mortal and Daemonic foes, and even launch Black Crusades in the name of Chaos. Of course, Daemon Princes also face certain limitations in the physical universe, both due to their nature as Daemons and their size when manifest in reality. The inclusion of a Daemon Prince radically changes the nature of a Black Crusade campaign, but opens countless possibilities in the Screaming Vortex and beyond. Thanks, Tim! Whether you rise to godhood through Apotheosis or undergo the Ritual of Possession, you’ll find ways to acheive greater infamy than ever with The Tome of Decay. Declare your service to the gods of Chaos, and preorder The Tome of Decay at your local retailer today! ... Source: Manifest the Power of Chaos (http://www.fantasyflightgames.com/edge_news.asp?eidn=4904)
Title: FFG:Enter the Age of Rebellion
Post by: RSSFeeder on 04 July 2014, 08:30:03
Enter the Age of RebellionThe Core Rulebook, Game Master's Kit, and Roleplaying Dice Are Now Available
Join the Rebel Alliance! The Star Wars®: Age of Rebellion™ Core Rulebook, Star Wars®: Age of Rebellion™ Game Master’s Kit, and Star Wars® Roleplaying Dice are now available at your local retailer and online through our webstore. Pick up your copies today, and play your part in the war for galactic freedom! What Is the Age of Rebellion? In the Age of Rebellion roleplaying game, you’re part character, part storyteller, and part improvisational actor. You simultaneously create and play through fantastic Star Wars stories filled with action, suspense, drama, and combat. As part of the Rebel Alliance, the characters you and your friends invent are working to overthrow the repressive, authoritarian Galactic Empire and its evil Emperor. Your missions will likely result in confrontations with more than a few stormtroopers, bounty hunters, and Imperial villains. You might wage guerrilla warfare across the galaxy. You might infiltrate an Imperial base to secure crucial intelligence. You might assist in the design of a new Rebellion starfighter. Whatever you do, the fate of the galaxy rests in your hands.
To play Age of Rebellion, you need your imagination, your friends, and the Core Rulebook. This beautiful, 464-page hardbound volume provides everything that both players and Game Masters need to begin dramatic Star Wars adventures set in the midst of the Galactic Civil War:
- Concise rules for character generation and advancement.
- Clear descriptions of the game’s skills and talents.
- Convenient charts of weapons, gear, devices, starships, and vehicles.
- Rules for conflict, combat, and Force-Sensitive Emergents in an Age of Rebellion campaign.
- Extensive background information on the Star Wars universe, including a history of the Rebel Alliance and its tactics, as well as pertinent information on the powerful Empire.
- A wealth of advice for GMs on creating and running an Age of Rebellion campaign.
- A complete, introductory adventure to launch players into action!
The Age of Rebellion Game Master’s Kit With its GM screen, three-act adventure, and optional rules for fighting in squads and squadrons, the Age of Rebellion Game Master’s Kit is an excellent accessory for GMs looking to expand and improve their Age of Rebellion campaigns. 
Featuring Luke Skywalker, Darth Vader, and a stormtrooper on a bold and iconic piece of Star Wars artwork, the GM screen included in the Game Master’s Kit helps to establish the tone of your gaming session even as it shields your adventure’s surprises from Rebel eyes. Moreover, on the GM’s side of the screen, you’ll find many of the game’s rules summarized for quick reference, including an interpretation of the game’s custom dice results, quick descriptions of different item qualities, and critical hit tables for both characters and vehicles. In its adventure, Dead in the Water, the Game Master’s Kit gives player characters the chance to negotiate on the Alliance’s behalf for a cargo of droids. Of course, nothing is as easy as it seems, and players will have plenty of chances to use their wits and their blasters. Additionally, the Game Master’s Kit introduces optional rules for running military squads and squadrons in your Age of Rebellion adventures. These rules allow players to organize minion groups under the leadership of player characters or powerful NPCs. These minion groups can then fly or fight in various formations, each of which grants different bonuses. Star Wars Roleplaying Dice Star Wars® Roleplaying Dice help translate the dramatic twists and turns of the Star Wars movies to your games of Age of Rebellion. Better yet, because FFG’s three Star Wars roleplaying systems are fully cross-compatible, you can also use the same dice in your games of Star Wars®: Edge of the Empire™ and the upcoming Star Wars®: Force and Destiny™. 
Star Wars Roleplaying Dice come fourteen to a pack and allow players and GMs to quickly determine the success or failure of actions in the game, while advancing the story’s narrative with advantages and threats. One galaxy. Three games. One set of dice. Resist the Evil Empire! The galaxy needs heroes. Now you can become one. The Star Wars: Age of Rebellion Core Rulebook, Star Wars: Age of Rebellion Game Master’s Kit, and Star Wars Roleplaying Dice are now available at your local retailer and online through our webstore! ... Source: Enter the Age of Rebellion (http://www.fantasyflightgames.com/edge_news.asp?eidn=4905)
Title: FFG:Made Ta Fight and Win
Post by: RSSFeeder on 04 July 2014, 17:00:03
Made Ta Fight and WinPreview the Ork Faction from Warhammer 40,000: Conquest
“We’re da best. Think different do ya? Come and have a go then, ya runty little wimp!”
–Gasgrakh, Goff Nob In the strategically critical Traxis sector, the powers of the galaxy do battle, crafting plans, leading armies, and claiming glory and victory. Warhammer 40,000: Conquest invites you to take control of these factions and clash at countless planets, destroying all opposition in the name of conquest. Past previews of Warhammer 40,000: Conquest took a closer look at the mechanics of gameplay, ranging from the deployment of armies, to the command struggle for resources and card draw, to battles that rage across the sector. We also examined an in-depth example of a battle at one planet. Most recently, we’ve begun our exploration of factions within the game, beginning with the warriors of the Space Marines, and moving on to the armed forces of the Imperium, the Astra Militarum. Today, however, our preview moves away from the civilized reaches of the Imperium of Man, outward into the grim darkness of space. Amid the stars, there are few forces more wild and brutal than those of a fully fledged Ork Waaagh! Read on to preview the brute ferocity of the Orks and get ready to smash some ‘umies! 
Waaagh! WAAAGH!! The Warboss commanding the Ork forces in the Warhammer 40,000: Conquest Core Set is Nazdreg (Core Set, 3), a fearsome warrior of almost colossal intelligence (for an Ork). Any Ork knows that if you get hit, you just hit back harder, and Nazdreg helps you do just that with his special ability. When Nazdreg leads your armies into battle at a planet, every other unit receives the Brutal keyword, meaning that a unit gains +1 ATK for each damage on it. With this keyword enabling your armies, your opponent won’t be able to hit you without fearing your quick reprisal.  The cards of Nazdreg’s signature squad help you incite your Orks even more, beginning with four copies of Nazdreg’s Flash Gitz (Core Set, 54). This army unit allows you to take a potent Combat Action, dealing this unit a damage to ready it. Damaging a unit to ready opens up plenty of opportunities for striking in quick succession, but when you add the fact that Nazdreg’s Flash Gitz may gain Brutal from your warlord, you have a deadly army that only becomes more dangerous as you use its ability. The cards of Nazdreg’s signature squad help you incite your Orks even more, beginning with four copies of Nazdreg’s Flash Gitz (Core Set, 54). This army unit allows you to take a potent Combat Action, dealing this unit a damage to ready it. Damaging a unit to ready opens up plenty of opportunities for striking in quick succession, but when you add the fact that Nazdreg’s Flash Gitz may gain Brutal from your warlord, you have a deadly army that only becomes more dangerous as you use its ability.
The next card in Nazdreg’s signature squad is a support entitled Kraktoof Hall (Core Set, 55). During the combat phase, you may exhaust this support to move one damage from a unit you control to another unit at the same planet. Combined with the Brutal keyword granted by Nazdreg, this support allows you to get the maximum benefit out of every point of damage. Whether you shift damage among your own units to take full advantage of Brutal, or move damage to your opponent to pick off the weak, Kraktoof Hall’s advantages are readily apparent. Next in the signature squad are two copies of the Bigga Is Betta (Core Set, 56) event card. This event is free to play and reads “Interrupt: When you deploy an Ork unit, reduce its cost by 2. Deal 1 damage to that unit after it enters play.” In general, the downside of the Brutal keyword is that you must wait unit your unit has been attacked for Brutal to take effect. With Bigga Is Betta, though, you can get your Orks into play for cheaper and ensure that if Nazdreg is at their planet, they’ll already be getting a bonus from Brutal. Cybork Body (Core Set, 57) is the final card in the signature squad, and it is an attachment for one of your army units. By granting one of your armies a Cybork Body, you double that unit’s hit points! Not only does this attachment ensure the longevity of one of your powerful armies, it also enables you to take even more damage on that unit, getting more and more attack power out of Brutal. Dakka Dakka Dakka!  Your options for inciting your Orks to greater heights of carnage are not limited to Nazdreg’s signature squad. The Weirdboy Maniak’s (Core Set, 60) uncontrollable Psyker powers grant you new options for gaining the upper hand. Whenever a Weirdboy Maniak enters play, you may deal one damage to each other unit at the planet. Not only will this damage weaken the opposition for your incoming onslaught, it can give your units added striking power or even other abilities. Your options for inciting your Orks to greater heights of carnage are not limited to Nazdreg’s signature squad. The Weirdboy Maniak’s (Core Set, 60) uncontrollable Psyker powers grant you new options for gaining the upper hand. Whenever a Weirdboy Maniak enters play, you may deal one damage to each other unit at the planet. Not only will this damage weaken the opposition for your incoming onslaught, it can give your units added striking power or even other abilities.
One army unit that gains drastic benefits from being damaged is the Bad Dok (Core Set, 65). While undamaged, this unit possesses a fairly typical one command icon, but while damaged, the Bad Dok gains three more command icons, making him the Ork army unit with the most command icons! The Bad Dok is an excellent choice for winning the command struggle, assuming you can find a way to damage him first. If you need to generate more damage to carry a battle in your favor, you could do worse than to use the Battle Cry (Core Set, 70) event. This event can only be played during a battle, and it grants every Ork unit you control +2 ATK until the end of the battle! With that much extra damage coming at your opponent, even his shield cards won’t be able to completely prevent your attacks. A final method for spreading damage across the battlefield is the Ork Kannon (Core Set, 74). This support card can be triggered during the combat phase to target a planet and force both players to deal one indirect damage among the units they control at that planet. Indirect damage is assigned by each player to units they control, and by using the Ork Kannon, you can whittle away at your opponent’s forces while enraging your Greenskins even further. Smash Da ‘Umies! Lead your Orks into the glories of combat in Warhammer 40,000: Conquest, and overwhelm the planets of the Traxis sector beneath a green tide of rage. Check back next time for our preview of the Chaos faction and preorder Warhammer 40,000: Conquest at your local retailer today! ... Source: Made Ta Fight and Win (http://www.fantasyflightgames.com/edge_news.asp?eidn=4906)
Title: FFG:Dark Pursuits
Post by: RSSFeeder on 07 July 2014, 21:30:03
Dark PursuitsPreview the Adventure from the Dark Heresy Second Edition Core Rulebook
In the grim darkness of the 41st millennium, the safety of the Imperium is threatened from every side. The spawn of the Warp seek constantly to bring the Imperium to chaos and ruin, and the hearts of men are a fertile ground for sowing corruption. Outside the bounds of the Imperium, xenos species lurk, waiting for a moment of weakness in which to pounce. Dark Heresy Second Edition casts you and your friends into the roles of Acolytes, tasked with standing firm against these threats, and the Core Rulebook brings the horrors of serving the Inquisition to life in its adventure, Dark Pursuits. You and your fellow Acolytes must investigate the Faceless Trade, a massive network of criminal cartels and smuggling operations dedicated to transporting and selling heretical objects. Your task is to investigate the origin and the destination of these forbidden artefacts and exterminate the heretics who dare to trifle with these powers. Today, contributing writer Tim Cox shares his experiences from creating the Dark Pursuits adventure for your exploits in the Askellon sector. Tim Cox on Developing the Dark Pursuits Adventure As the introductory adventure included in the Dark Heresy Second Edition Core Rulebook, Dark Pursuits allows your group to start a campaign quickly, while simultaneously introducing Game Masters and players to the central theme of Dark Heresy. In this adventure, an ongoing investigation thrusts the Acolytes into action uncovering the secrets of a multi-headed conspiracy and a singular powerful foe. New players will quickly learn that traitors are everywhere, and that Acolytes can only rely on themselves to overcome the threats at hand. The Acolytes’ actions illuminate the heresies they face and reveal greater threats waiting in the shadows. 
In this adventure, the Acolytes’ Inquisitor tasks them with investigating the source of foul xenos artefacts discovered in the Apex of Hive Desoleum, and any possible connection between the artefacts and a series of mysterious deaths. Most importantly, the Acolytes must uncover how these heretical items enter the hive city and stop those responsible. The investigation brings players into conflict with a vast smuggling cartel that deals in the most dangerous proscribed items, as well as a dangerous outcast eager to purchase the most heretical objects. Simply coming into contact with these artefacts could endanger an Acolyte’s soul, and before the adventure ends, the Acolytes must confront an ancient and corrupting evil that could damn all of Desoleum. The Acolytes must maintain their focus on the most compelling heresies they find, carefully choosing their battles as they witness the crime and depravity that runs rampant amongst the citizens of the decaying hive. Focusing on petty crimes or even lesser heresies costs the Acolytes valuable time that they cannot afford. The mark of a great Acolyte or Inquisitor is the understanding and will to choose his battles. Visiting justice on the sadistic Babyfaces hive gang might seem noble, but by doing so, the Acolytes might allow a deadly arch-heretek to finish his dark dealings. Enter the Hive  The Dark Pursuits adventure takes place within Hive Desoleum, a decaying hive planet and a home to hundreds of billions. The Acolytes’ investigation takes them from the heights of the Apex to the lawless borderland between Desoleum City and the underhive, before finally arriving at Gyre Voidport, a massive complex adjoining the hive proper. The towering voidport reflects the structure of the hive itself, with millennia of construction layered upon the original foundation, and dark things lurking in ancient loading tunnels and forgotten maintenance shafts. Here, the Acolytes gain additional insights into smuggling activity of the Faceless Trade, and must race to halt the delivery of an impossibly dangerous cargo. Corruption is everywhere in Hive Desoleum, from the manses of Apex nobility to the dangerous border territory of Three Stakes’ Rest. The Dark Pursuits adventure takes place within Hive Desoleum, a decaying hive planet and a home to hundreds of billions. The Acolytes’ investigation takes them from the heights of the Apex to the lawless borderland between Desoleum City and the underhive, before finally arriving at Gyre Voidport, a massive complex adjoining the hive proper. The towering voidport reflects the structure of the hive itself, with millennia of construction layered upon the original foundation, and dark things lurking in ancient loading tunnels and forgotten maintenance shafts. Here, the Acolytes gain additional insights into smuggling activity of the Faceless Trade, and must race to halt the delivery of an impossibly dangerous cargo. Corruption is everywhere in Hive Desoleum, from the manses of Apex nobility to the dangerous border territory of Three Stakes’ Rest.
One of my favourite things about writing for Dark Heresy is exploring the locations and individuals that make up the everyday workings of the Imperium’s worlds. In this case, I was focused on Hive Desoleum and its residents, and throughout the adventure, I tried to capture the sights, sounds, and smells of one of the sector’s major hive worlds. I spent a lot of time poring over classic Warhammer 40,000 artwork, in particular the art of John Blanche, to get the right feel for the city and its inhabitants. As an example of this, Gyre Voidport plays a large part in the Dark Pursuits adventure, which meant thinking about how a major hive world’s primary voidport might work, and what Acolytes might experience when they visit. In the case of Port Gyre, the port is physically separated from the rest of the hive. This voidport features security checkpoints and the gargantuan bureaucracy of the Officio Auctoriate Porteus to oversee business, but the ancient tunnels honeycombing the structure and corruption amongst the Auctoriate allow a brisk trade in smuggled goods. It is the darkest and most dangerous of this smuggling that brings the Acolytes to the port. Continue Your Adventures 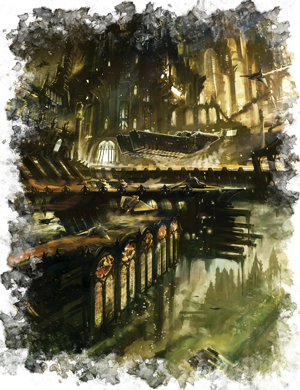 Dark Pursuits introduces players and GMs to the Askellon sector, the setting for Dark Heresy Second Edition, and some of the new dangers that threaten humanity’s survival. Although Acolytes only confront a small sliver of these dangers during the adventure, the experience alerts them to wider heresies. By the end of the adventure, Acolytes have several potential avenues for follow-up investigations, any of which might form the starting point for their next adventure. Dark Pursuits introduces players and GMs to the Askellon sector, the setting for Dark Heresy Second Edition, and some of the new dangers that threaten humanity’s survival. Although Acolytes only confront a small sliver of these dangers during the adventure, the experience alerts them to wider heresies. By the end of the adventure, Acolytes have several potential avenues for follow-up investigations, any of which might form the starting point for their next adventure.
Hive Desoleum also serves as the focus for the NPCs and Adversaries chapter of the Dark Heresy Second Edition Core Rulebook, giving GMs an extensive variety of additional NPCs and groups to insert into the Dark Pursuits adventure if desired. Hive Desoleum also receives a detailed write-up in the chapter focused on the Askellon Sector, as well as some unique vehicles and items described in the Armoury chapter. Altogether, this wealth of information on Desoleum allows GMs to bring the hive city to life, immersing players in the world of Dark Heresy and opening the gates for dozens of continuing adventures following the events of Dark Pursuits. I hope that both new and experienced Dark Heresy players will enjoy this adventure as a starting point for their adventures in the Askellon Sector. I look forward to hearing how different groups tackle the investigation and the many challenges awaiting their Acolytes! Thanks, Tim! Untold adventures lie before you in Hive Desoleum. Will you exterminate the Faceless Trade and the ancient evils within Desoleum, or will your Dark Pursuits lead you to your destruction? Preorder your copy of the Dark Heresy Second Edition Core Rulebook today, and watch for more designer diaries in coming weeks! ... Source: Dark Pursuits (http://www.fantasyflightgames.com/edge_news.asp?eidn=4907)
Title: FFG:Right on Target
Post by: RSSFeeder on 08 July 2014, 06:00:03
Right on TargetDungeon Fighter Is Back in Stock
Take aim at mythical monsters in Dungeon Fighter! In this collaborative board game, up to six players take on the role of unproven heroes, fighting their way through a perilous dungeon. You’ll need bravery and dexterity to make it out alive. The Dungeon Is Dark and Full of Monsters 
In every one of the dungeon’s gloomy chambers lurks a sinister and quirky monster, such as the Educated Orc, who threatens to clobber you with both his club and his intellect, or the Vocal Vampire, who would bite you if she could stop singing. You must attack and defeat every monster you encounter in order to move forward. The closer you get to daylight, the more ferocious the monsters become. As in many other games, you attack a monster by throwing dice. But Dungeon Fighter is dexterity-based: an attack’s success is determined by how a single die is thrown and where it lands. Each ring on the target-shaped game board gives you a different number of hit points, with holes in the target adding to the challenge. In the beginning of the game, you might need a few tries to land a die on the target. Your persistence will be rewarded: soon you’ll be rejoicing as you score a hit with almost every throw. At that point you’ll be eager to try scoring a hit with your eyes closed, or bouncing the die onto the board off of the back of a playing card. After all, the harder the battle, the sweeter the triumph. Even seemingly harmless monsters like the Cute Bear and the Annoying Drunkard may take more than one throw of the die to overcome. Then, once you’ve defeated a monster, you will have to choose which path to follow next. Do you pass through the room where players have to turn their backs to the table when they throw the die, or the room where the die must be spun instead of thrown? No matter which way you turn, unknown dangers await. 
Second Room to the Right and Straight on till Shopping Fortunately, there is a handy equipment shop located in each level of the dungeon. As you defeat monsters, you will acquire gold from them that you can use in these shops to buy weapons, shields, and potions. The king may have locked the heroes up in a dark subterranean dungeon, but not without providing them the chance to buy equipment for defending themselves and restoring their health. Potions, such as the Eau de Napalm, can only be used once, so heroes should strategically save them for a critical moment. Shields and armor can be used repeatedly to protect their wearer from taking damage in battle. Weapons increase the amount of damage done in an attack, but they also require complicated dice throws. A sword is only as good its bearer, and the swords in Dungeon Fighter can only be used by bearers who are able to land the die on the target while jumping into the air or kneeling beneath the table. 
You Shall Not Pass – Without Laughing! While moving through the dungeon’s third level, you may find yourself grinning at the fact that the Minotaur is disoriented and consulting a map. The Exterminator that you purchased in the shop looks suspiciously like a fly-swatter, and for some reason the shop sells mostly worn-out Second-Hand Shields. As you’re figuring out how to throw dice from underneath your leg, you may pause to wonder why Sir Moo is inhaling milk, or how exactly Lady Mary became so good at winning monsters’ hearts. Dungeon Fighter’s humorous touches will make you smile as the game challenges your dexterity, your bravery, and your luck. Whether navigating the dungeon solo, or with a group of your most valiant friends, you will be entertained by Dungeon Fighter. Look for it at your local games retailer today, or order your copy through our online store! ... Source: Right on Target (http://www.fantasyflightgames.com/edge_news.asp?eidn=4908)
Title: FFG:Guardians of Deephall
Post by: RSSFeeder on 08 July 2014, 14:30:03
Guardians of DeephallAnnouncing an Upcoming Hero and Monster Collection for Descent Second Edition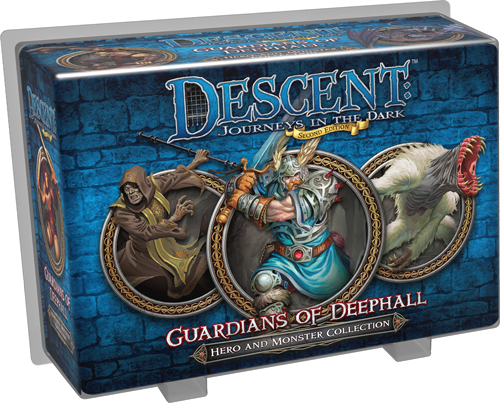
The stronghold of Deephall was once home to a thriving, peaceful community, but now, the mountain city lies under constant threat of invasion. A horde of undead, led by dark priests, attacks Deephall constantly. These unending attacks deplete the city’s guards and erode the peoples’ resolve. Four heroes are all that stands between Deephall and the city’s extinction. Fantasy Flight Games is proud to announce the Guardians of Deephall Hero and Monster Collection for Descent: Journeys in the Dark Second Edition! The mountain village of Deephall lies in desperate danger. In Guardians of Deephall, you’ll find four heroes and three monster groups to decide the future of Deephall. These figures were previously only available in the first edition of Descent, but are now brought in line with second edition aesthetics through reimagined figure sculpts and artwork. Four heroes leap to the defense of Deephall in this Hero and Monster Collection lending their skill with arms and their magical prowess to the city’s defense. You’ll find the orc warrior Mordrog battling in the front lines alongside Lord Hawthorne. At the same time, Sahla, a gifted Healer, focuses his power by channeling the strength of other heroes, even as the deadly assassin known as Silhouette uses her stealth and cunning to cut her enemies down. The evil forces of the overlord array themselves against these heroes. Dark priests spearhead the attack on Deephall, using their knowledge of the arcane to deadly effect. The key to Deephall’s trials, however, lies in the icy caves of the mountains, guarded by ferocious wendigos and crypt dragons. 
Contains four heroes, four dark priests, three wendigos, and two crypt dragons.
The battle for Deephall’s fate plays out in two entirely new quests. In Guardians of Deephall, the heroes must defend the walls of Deephall against a seemingly endless assault of undead and dark priests. Then, in The Curse of Iona, the hero party must venture into the icy lair of a dragon sorceress to reclaim a pendant that may be Deephall’s salvation.
Gifts of a Healer Four heroes rush to defend the city of Deephall, and one of these heroes is Sahla, a Healer greatly experienced in complementing his hero party. As the youngest of seven brothers, Sahla spent much of his childhood imitating his elder siblings. When he was only fourteen, he set out on a pilgrimage of self-discovery to the Blessed Valley, and while drinking from a stream, he saw his own reflection fade from the water. From that moment, he knew that healing other’s afflictions and drawing upon their strengths led to his fullest power. In your games of Descent, Sahla can prove a great helper. This Healer’s hero ability gives you the potential to turn detrimental conditions into potent weapons against the overlord. At the start of Sahla’s turn, you may test his Willpower. If you pass, you may discard a condition from any figure within three spaces of Sahla, then choose a figure within three spaces to gain that condition. Since a host of monsters possess the ability to poison, stun, immobilize, or inflict another condition, Sahla’s hero ability forces the overlord to either disregard these abilities, or see them turned against his own monsters. 
Sahla’s heroic feat offers you another way to outwit the overlord by ensuring that the right hero is always in position. By triggering Sahla’s heroic feat at the start of your turn, you may choose a hero in your line of sight, and use one of his Class cards as if it were your own. By using this heroic feat at the ideal time, Sahla can channel another hero’s power, thwarting the overlord’s plans and keeping your heroes working towards the quest’s objective. Servants of Dark Gods Within the Guardians of Deephall Hero and Monster Collection, you’ll find three unique monster groups devoted to the downfall of Deephall. As dark priests lead hordes of undead against the walls of the city, crypt dragons and the terrifying wendigos guard the dark secret to Deephall’s peril. No mortal knows whether the dark priests are undead themselves, or are so twisted by prayers and rituals to dark gods that they are no longer recognizable as living. It is only known that disease, curses, and hordes of undead follow a dark priest wherever his evil journeys may take him. Now, dark priests command a horde of undead that strives daily to breach the walls of Deephall. The cadre of dark priests attacking the mountain city can prove a deadly obstacle to any hero party, as they heal your monsters and undermine the heroes’ options. Dark priests excel at fighting at range, and can spend a surge to deal more damage, in addition to utilizing the Dark Prayer ability. By entreating their gods, a dark priest can force a hero within five spaces to test his Willpower. If the hero fails, he must take a fatigue, draining him of the ability to trigger Class cards or gain extra movement.  
Master dark priests are privy to even deeper secrets of their cult, giving them the ability to spend an action using the Heal ability. Heal allows a master dark priest to restore health to a nearby monster equal to the result of a red die roll, keeping your monsters alive and attacking the heroes. As an added bonus, master dark priests bear the Horrifying ability, meaning that each hero adjacent to a master dark priest suffers from lowered Willpower, making him even more susceptible to the influence of a Dark Prayer. If these monstrous clerics have their way, all of Deephall will be sacrificed to the evil gods they serve. The Fate of the City The city of Deephall has long resisted the monsters that beseige it, but its defenders are running out of time. You can decide its fate when you leap to its defense with Sahla and a hero party, or ensure its destruction with dark priests and a host of monsters. Look for the Guardians of Deephall Hero and Monster Collection in the fourth quarter of 2014! ... Source: Guardians of Deephall (http://www.fantasyflightgames.com/edge_news.asp?eidn=4909)
Title: FFG:Into the Heart
Post by: RSSFeeder on 08 July 2014, 23:00:03
Into the HeartPreview the Adventure Included in The Tome of Decay
From your first steps upon the Path to Glory, you and your fellow Heretics have worked to attain your highest ambition: to become a Daemon Prince in the service of the Ruinous Powers of Chaos. In The Tome of Blood, The Tome of Fate, and The Tome of Excess supplements for Black Crusade, your journey led deeper into the insanity and darkness of the Screaming Vortex. Now, your final test awaits. In The Tome of Decay, you venture into the heart of the vortex to be judged by Grandfather Nurgle. Today, Andy Hoare, the author of the Tome adventures, recounts the story of the Heretics’ journey into the Screaming Vortex and reveals some of what awaits you in The Heart of the Vortex adventure. Andy Hoare on the Heretics’ Journey The Tome of Decay features The Heart of the Vortex, the fourth and final adventure in a series stretching across the four Tomes. Each of these supplements adds details to one of the Ruinous Powers, and offers an adventure that tests the Heretics' ability to please a Chaos God. If you haven't yet taken the plunge and begun your own Black Crusade campaign, here's an overview of the challenges you might face and the rewards you might earn along the arduous Path to Glory. Be warned, however: for every mortal that sets out upon this route, only one in a generation achieves the desired end, earning apotheosis to the ranks of Daemon Princes. Heretics might be driven beyond madness by the raw insanity of the Warp, while others attain the brink of ascension, only to be overwhelmed by the limitless gifts of Chaos. These unfortunates are transformed into beasts of thrashing tentacles, razor-edged teeth, and hideous Daemon-flesh, doomed to spend the remains of their lives as mindless Spawn of Chaos. If you’re determined to continue, read on to see the horrors and tests of worthiness that await you in the Warp! 
There Was Blood The Tome of Blood is the supplement dedicated to the Chaos God of blood, battle, and rage. Within this adventure, a group of Heretics sets out upon the Path to Glory, seeking a means to leave their indelible mark on the interminable wars and rivalries within the bounds of the Screaming Vortex. An incomparable opportunity to prove themselves arrives in the form of the Axe of Khak-Aksha, which they may uncover on the war-torn world of Messia.  The Heretics’ only hope of claiming the Axe of Khak-Aksha lies in brutally conquering or uniting the disparate Drill-Clans of Messia, before facing a millions-strong migration of bloodthirsty mutants. Success in these brutal battles affords the budding Heretics the chance to claim a powerful weapon, as well as distinguishing themselves in battle against some of the mightiest warlords of the region. The Heretics’ only hope of claiming the Axe of Khak-Aksha lies in brutally conquering or uniting the disparate Drill-Clans of Messia, before facing a millions-strong migration of bloodthirsty mutants. Success in these brutal battles affords the budding Heretics the chance to claim a powerful weapon, as well as distinguishing themselves in battle against some of the mightiest warlords of the region.
Vagaries of Fate After obtaining the bloody blessings of Khorne, the Heretics' journey takes them still deeper into the Screaming Vortex, to the unnatural world of Q'Sal. Here, they have the chance to attract the patronage of Tzeentch, Master of Fate and Lord of Lies, by exploring the schemes and plots of this duplicitous Ruinous Power. During this adventure within The Tome of Fate, the Heretics become deeply embroiled in these cunning intrigues. Upon this unnatural planet, the Heretics must cooperate to seize dominance in the labyrinthine rivalries between the sorcerers of Q'Sal. Whether they ally themselves with the sorcerers or attempt to defeat them at their own deadly games, the Heretics have a chance to gain the dark blessings of Tzeentch. Successfully drawing the attention of Tzeentch allows the Heretics to progress further along the Path to Glory and deeper into the dread Screaming Vortex. The Six Sins In The Tome of Excess, the Heretics' next port of call is the Ragged Helix, an anarchic body of Screaming Vortex asteroids. A myriad petty pirate lords haut these asteroids, dedicating their conquests to Slaanesh, the Chaos God of Excess and Transgression. Slaanesh and its decadent servants carry countless sinful obsessions, and in this adventure the Heretics must show that they can master each of the Sins of Slaanesh.  The challenge of surmounting the Sins might appear simple, but in truth, few can sample even one of the Sins without being consumed. The souls of the devoured are held forfeit and their journey along the Path to Glory is brought to an ignominious end. If the Heretics can master the Sins, however, they gain the respect and allegiance of the Pirates of the Ragged Helix, alongside the eternal blessing of Slaanesh, the Dark Prince of Chaos. The challenge of surmounting the Sins might appear simple, but in truth, few can sample even one of the Sins without being consumed. The souls of the devoured are held forfeit and their journey along the Path to Glory is brought to an ignominious end. If the Heretics can master the Sins, however, they gain the respect and allegiance of the Pirates of the Ragged Helix, alongside the eternal blessing of Slaanesh, the Dark Prince of Chaos.
Death and Rebirth In the adventure within The Tome of Decay, the Heretics have already risen to high status among the warlords of the Screaming Vortex, proving themselves worthy of a final judgement by Nurgle. The Heretics have mastered war, intrigue, and excess, yet on the foetid, deathly world of Mire they must face their greatest challenge yet. On the planet Mire, at the heart of Screaming Vortex, the Heretics are granted the chance to be weighed in the balance by Nurgle. If judged worthy, Nurgle grants rebirth to the Heretics, inviting them to rise to become the mightiest lords of the Screaming Vortex. Heretics blessed in this way have the opportunity to lead a Black Crusade into the hated Imperium, or to ascend to the ultimate state of Daemonhood. But at the end of things, within the heart of the Screaming Vortex, the Ruinous Powers can be more harsh, uncaring, and fickle than ever as they judge the Heretics’ Warp-blasted souls. The Heretics must master death itself, and for many, their final steps on the Path to Glory will be the last they ever take. Thanks, Andy! The end of the Heretics’ journey approaches. Demonstrate yourself worthy of the Chaos Gods’ blessing, or else plummet to excruciating death or mindless servitude as a Chaos Spawn. The judgment of Nurgle awaits: begin the adventure in The Tome of Decay and take the first steps to apotheosis. Preorder your copy of The Tome of Decay at your local retailer today! ... Source: Into the Heart (http://www.fantasyflightgames.com/edge_news.asp?eidn=4910)
Title: FFG:A Space Ark of Aliens
Post by: RSSFeeder on 09 July 2014, 07:30:03
A Space Ark of AliensThe Developers of Cosmic Dominion Preview Its Alien Races
Recently, we announced the upcoming release of Cosmic Dominion, the fifth expansion for Cosmic Encounter. Designed for the fans and by the fans, in conjunction with Peter Olotka, one of the game’s original designers, this expansion is a must-have for anyone looking to explore all that the galaxy has to offer. Chief among the elements that Cosmic Dominion adds to your games of Cosmic Encounter are its alien races. Cosmic Dominion introduces no fewer than thirty alien races, which include a mixture of new aliens and classics redesigned to function within the game’s current edition. No other expansion has introduced as many alien races all at once, and that means you’ll find more wacky new powers and flares in Cosmic Dominion than ever before. Today, the expansion’s fan designers help you navigate through these new alien races and the options they introduce. The Fan Designers on Cosmic Dominion’s New Aliens Jefferson Krogh:“I'm biased, but my favorite fan-made alien in Cosmic Dominion is Tourist! It combines much of what I love about Cosmic Encounter: whimsy, unpredictability, and sneakiness.” 
Jack Reda:“One of the new aliens I'm most excited about is Reactor, which gambles on playing the game in a slightly different way – one that rewards other players with their super flares. The radioactive Reactor counts on players being greedy for an advantage, opening up a path for Reactor to win the game in an alternate way.” Bill Martinson:“I especially like Engineer because it brings the core game’s Technology variant back into focus in a fresh way; it’s fun to play an alien that can have its own twenty-card side-deck. There actually were two different Engineers submitted, and we realized that the gameplay from one made a nice marriage with the alien history of the other. “I'd also have to give a shout out to Joker. This little harlequin probably experienced more life-changing events during development than just about any other alien in the set. It actually ended up as a marriage between two completely different designs that came together nicely, while spawning off some cute little baby joker tokens, one of which ties into a brand-new card type in the new reward deck.” The Fan Designers on Cosmic Dominion’s Revised Classics Jefferson Krogh:“For the classic aliens, it must be said that the three of us were guided by a poll Peter Olotka ran a couple of years ago. The poll asked fans which of the classic aliens they would most like to see republished. Since Cosmic Dominion is a fan expansion, we let the fans guide us on those selections. 
“The classic alien I was most excited to revive was Mesmer. I love Mesmer because I love artifacts – though they were called edicts back in the day – and Mesmer lets me play with all of them! The only thing we needed to change was the super flare. Originally, that let you play any wild flare as if it were any other wild flare you could name. With over 160 different wild flares now in the game, that just seemed unwieldy, so we decided to focus the Mesmer super flare back on artifacts.” Jack Reda:“I was also very glad to see Mesmer finally added to the lineup. It’s an amazing alien to play, and one that I feel was long overdue. Mesmer’s inclusion was notably a nice excuse to introduce a brand new artifact to the game and bring back a few more of the classic edicts that had yet to be made into artifacts. “Another classic alien that underwent a bit of revising was Laser. While clearly powerful and unique, the original Laser was guilty of robbing its opponents of a lot of decision making. The new version of Laser takes the power to Blind in a new direction, randomly selecting a number cards that its opponent can no longer play for the rest of the encounter.” Bill Martinson:“Like my partners in crime (and many other fans, no doubt), I am overjoyed to see Mesmer make its way into the FFG universe. It’s one of the most-loved classic aliens and really deserves to be part of the best edition of the game that’s ever been published. Jefferson mentioned the minimal tweaking it received, which reflects our desire to be as faithful as possible to the original designs of these favorites, while promoting more great gameplay in the modern Cosmic Encounter universe. “Another classic favorite on my happy-radar is Aristocrat. It's a simple, obvious pleasure to play. Cherry-pick your starting hand and then get fresh flares all the time; who could resist that? We tweaked it a little to keep your analysis-paralysis buddy from taking too long to pick his starting hand in the Game Setup phase, and we also revised the Super flare to make it a one-shot with a potentially big payoff that takes the power’s ongoing game effect to a higher level.” Conquer the Cosmos You’ll find an astounding array of wacky new powers and flares among the thirty alien races of Cosmic Dominion. Each of them allows you to break the game’s rules in an all-new way, and as a group they further ensure that you’ll never play the same game twice. Plus, if you’re cunning and ruthless enough, these fan-favorite aliens will give you a wealth of new tools to surprise your rivals and colonize their planets. Take your next step toward cosmic supremacy. Head to your local retailer today to pre-order your copy of Cosmic Dominion! ... Source: A Space Ark of Aliens (http://www.fantasyflightgames.com/edge_news.asp?eidn=4911)
Title: FFG:The Howl of Blackmane
Post by: RSSFeeder on 10 July 2014, 00:30:03
The Howl of BlackmaneAnnouncing the First War Pack in the Warlord Cycle for Warhammer 40,000: Conquest
“So long as there remains one who still rages in the name of justice and truth, the galaxy shall yet know hope.”
–Ragnar Blackmane Fantasy Flight Games is proud to announce The Howl of Blackmane, the first War Pack in the Warlord cycle for Warhammer 40,000: Conquest! The Howl of Blackmane introduces sixty new cards to expand your battles in the grim and gritty future of Warhammer 40,000: Conquest. You’ll find a battle-ready new Space Marine warlord with his eight-card signature squad offering new ideas for conquering the Traxis sector. Additionally, you’ll find three copies each of seventeen different cards that invite you to join the ranks of the Inquisition, experiment with heretical technology, or embark upon a sector-spanning Waaagh! As the first pack of the Warlord cycle, The Howl of Blackmane brings your warlords to the forefront of your battles in the Traxis sector. New warlords are introduced in every War Pack, leading bloodthirsty armies, and bringing new strategies for achieving victory. You’ll find more than new warlords, however. Other cards introduced in The Howl of Blackmane and throughout the cycle put the focus directly on your warlord, whether by granting benefits to your other forces, orchestrating army movements, or exhausting to trigger powerful tactics. 
Throughout the War Packs of the Warlord cycle, every faction receives a new warlord, ranging from an Imperial Inquisitor to an Eldar Phoenix Lord, and each of these new champions encourages the exploration of a new style of play. For more on The Howl of Blackmane and the main themes of the Warlord cycle, we turn to developer Brad Andres. Developer Brad Andres on the Warlord Cycle Throughout the Warlord cycle, we explored the impact of warlords upon the game. These powerful warriors and leaders are the lifeblood of Conquest, and the design of a new warlord meant defining how the warlord would play the game. 
Throughout the cycle, we needed to answer questions ranging from, “How will this warlord try to win?” to “What makes this warlord unique compared to others in the same faction?” Each warlord and its signature squad brings a new deck type to the table, ripe for expansion with the addition of other cards in the cycle. The first of these new warlords is the Wolf Lord, Ragnar Blackmane (The Howl of Blackmane, 1). Ragnar is designed to hunt down your opponent’s warlord by engaging it in battle as much as possible. The strategy of hunting is a perfect thematic fit for the Space Wolves; these Space Marines were engineered to murder empires and tear apart anyone that stands in the way of the Imperium. Ragnar’s signature unit, the Blackmane Sentinel (The Howl of Blackmane, 2), continues the theme of hunting down your rivals. A Blackmane Sentinel is a fearsome unit that can move from anywhere on the board to corner a warlord wherever Ragnar tracks it. Even if you can’t guess the location of your opponent’s warlord on the first try, Blackmane’s Hunt (The Howl of Blackmane, 5) allows you to follow your rival’s warlord to an adjacent planet, completing your hunt and meeting it in battle.  Confronting your opponent head-on brings you face-to-face with danger, but the Weapon Frostfang (The Howl of Blackmane, 3) can drastically increase one unit’s attack power and hit points, helping you win a showdown with a rival warlord. And when your opponent tries to flee from your ravening wolves, a Morkai Rune Priest punishes your opponent for thinking he might escape unscathed. Confronting your opponent head-on brings you face-to-face with danger, but the Weapon Frostfang (The Howl of Blackmane, 3) can drastically increase one unit’s attack power and hit points, helping you win a showdown with a rival warlord. And when your opponent tries to flee from your ravening wolves, a Morkai Rune Priest punishes your opponent for thinking he might escape unscathed.
Ragnar is only the first of many familiar warlords to be found in this cycle. You can look forward to seeing Inquisitors, Ethereals, and Greater Daemons in battle. Each new warlord brings a new deck type and play experience for players to explore. The Warlord cycle doesn’t just introduce new warlords. It features a host of supporting cards that make the strategic use of your warlord more critical than ever. Cards like Muster the Guard (The Howl of Blackmane, 7) require you to exhaust your warlord as part of the ability cost, offering a huge benefit in return. Other cards, such as the Bork’an Recruits,become stronger while in the presence of a warlord, making the decision of where to commit a warlord even more consequential. The Howl of Blackmane and the other War Packs in the Warlord cycle introduce a host of new warlords and abilities to Warhammer 40,000: Conquest, bombarding the Traxis sector with powerful new abilities, strategies, and combinations. These cards were designed to make your war for galactic dominance more intense than ever, and I hope you have as much playing it as I did designing it! What Is a War Pack? Warhammer 40,000: Conquest is a Living Card Game®, meaning that rather than collectible randomized booster packs, it receives monthly expansions known as War Packs. Each War Pack contains sixty cards, offering a full playset of each unit, attachment, event, and support card within. Each War Pack expands the Warhammer 40,000 universe within Conquest, offering new deck-building options with a fixed distribution model, allowing players to focus on building decks and playing games, rather than chasing rare cards. The Howl of Blackmane is the first War Pack for Warhammer 40,000: Conquest. Hunt Among the Stars Begin your wild hunt across the galaxy with Ragnar Blackmane and the other cards from The Howl of Blackmane War Pack. Whether you employ Blackmane’s aggressive tactics, revel in the torture of the Dark Eldar, or harness the powerful technology of the Tau empire, you’ll find new units, attachments, supports, and events to use throughout your battles in the Traxis sector. Look for The Howl of Blackmane to arrive at your local retailer in the fourth quarter of 2014! ... Source: The Howl of Blackmane (http://www.fantasyflightgames.com/edge_news.asp?eidn=4912)
Title: FFG:Brave the Elements!
Post by: RSSFeeder on 10 July 2014, 09:00:03
Brave the Elements!Announcing Two Expansions for Dungeon Fighter
Fantasy Flight Games is proud to announce that the first two expansions for Dungeon Fighter, Fire at Will and The Big Wave, will soon be available at your local retailer. In Dungeon Fighter, up to six players take on the role of self-proclaimed heroes, fighting their way out of a dungeon full of monsters. In this dexterity-based game, how you throw the dice and where they land on the game board determines your success in combat. Only by defeating all the monsters in the dungeon can you escape and prove yourself to truly be a hero. Now it’s time to see how your heroic abilities withstand the elements. Let the flame-breathing monsters and fire elemental magic of Fire at Will heat you up, or dip your toes into water elemental magic and battle creatures from the ocean’s depths in The Big Wave. Waterfalls, Firewalls and Explosions You’ll learn to either ride the waves or dodge the flames in the new dexterity challenges of these expansions. Each introduces new dice throws that involve props: When doing battle with the Blue Dragon of The Big Wave, for instance, you must roll a die down the length of the waterfall prop before bouncing the die off the table and onto the game board. The Firewall monster of Fire at Will forces you to bounce your die over the firewall prop, dealing a point of damage if the die touches the firewall. New game board templates scorch – or soak – the landscape of the game board. Some cards and rooms in each expansion ask you to flip a template onto the target board. A die landing on that template counts as a normal hit against a monster, but the template may increase the amount of damage dealt in that attack, or allow you to regain some of your health– or cause you to suffer damage even in a successful attack. For instance, when a die lands on the explosion template in Fire at Will, all heroes suffer two points of damage.

You’ve Got Magic To Do Shields, weapons, and potions are helpful in battle, but there’s nothing quite as powerful as elemental magic. Now, heroes accumulate experience points as they progress through the dungeon. With those points, you can purchase magical spells to use in combat. In Fire at Will, heroes can acquire fire elemental spells, such as the Ritual of Flames and the Dragon’s Belch, which allow you to use the new props and templates to deal extra damage. In The Big Wave, water elemental spells, such as the Fresh Waterfall and Cry Me a River, often help heroes to heal more quickly or gain additional experience points. You choose to cast a spell at the beginning of an encounter and spend experience points each time you cast it. Equipment, can only be used by one hero at a time, but spells can benefit the entire party of heroes. Moreover, spells are never discarded. Once you learn elemental magic, it will stay with you forever. 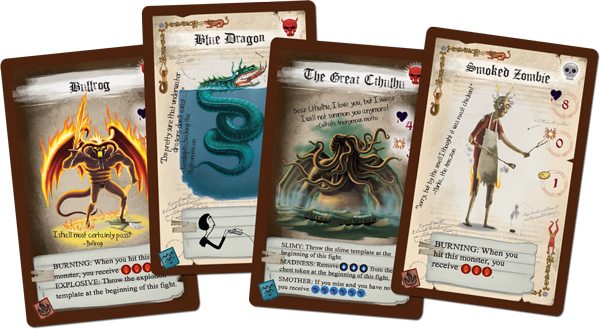
Catch Fire and Get Soaked In each expansion, a new dungeon sheet transforms the dungeon into a different location filled with new perils. Fire at Will finds the heroes deep within in a cavern beneath the fire mountains. There dwells a horde of scorching (and scorched) monsters, including the Bullrog – a flame-throwing, fire-breathing minotaur who is not one bit interested in letting the heroes escape. Thankfully a new heroine, Melissa, The Fire Sorceress, joins the party. Her expertise in fire magic will prove useful to any group of heroes battling their way through the flames. Fancy a refreshing day at the beach? The Big Wave sends the heroes on an adventure through a clammy seaside cave near a noxious swamp. The fearless pirate Jack Parrot (and his little bird, too!) will stand alongside you as you combat various monsters from the vasty deep. Awaiting you near the dungeon’s exit is the ocean’s most dreaded creature of all, The Great Cthulhu, who seeks to wrap you in his tentacles and drag you beneath the surface. Whether you want to leap into the fire or go deep-sea diving, you’ll enjoy the new elements that Fire at Will and The Big Wave bring to Dungeon Fighter. You can play one expansion at a time, or combine them for an explosive flood of adventure! Stay turned for more details about Fire at Will and The Big Wave. You can also check out Dungeon Fighter's description page for more information. ... Source: Brave the Elements! (http://www.fantasyflightgames.com/edge_news.asp?eidn=4913)
Title: FFG:The Source
Post by: RSSFeeder on 10 July 2014, 17:30:03
The SourceAnnouncing the Sixth and Final Data Pack in the Lunar Cycle
“Autorun initiated.” The files were opening. There was a flurry of code running across his screen. Ones and zeroes, old binary machine code. It was beautiful. Fantasy Flight Games is proud to announce the upcoming release of The Source, the sixth and final Data Pack in the Lunar Cycle for Android: Netrunner! In The Source, cyber-explorer Nasir Meidan departs Heinlein for Earth and the relative safety of his apartment. There, he stares at the drive in his hand before booting up his console. Was he able to complete his download? Does this drive truly contain the net’s legendary source protocols? What will he find? After a series of thrilling encounters with Corporate security measures and security officers, all he has to do is pull up the files… 
For five Data Packs, the Lunar Cycle has depicted the different ways that the lunar environment impacts the cat-and-mouse struggles between Corps and Runners, and as it returns those struggles to Earth, The Source takes a final look at the moon’s grail ice, locations, and Corporate divisions. At the end of your lunar expedition, the sixty new cards in The Source (three copies each of twenty different cards) reveal surprising new takes on life, evolution, and death in the virtual world and the cyberstruggles of Android: Netrunner. You’ll find assets that reward Corps for birthing new servers and others that can self-destruct. You’ll find self-propagating viruses waiting to explode into the network, and you’ll find programs that reward you for jacking out of your runs. Arriving at Utopia  Throughout the Lunar Cycle, we’ve seen several shards and fragments that have splintered off from the net’s legendary source protocols. In The Source, Corps gain access to another fragment, quite possibly the most perfect and harmonious of them all, the Utopia Fragment (The Source, 110). Throughout the Lunar Cycle, we’ve seen several shards and fragments that have splintered off from the net’s legendary source protocols. In The Source, Corps gain access to another fragment, quite possibly the most perfect and harmonious of them all, the Utopia Fragment (The Source, 110).
This unique agenda is limited to one per deck and offers three points for five advancement, a fairly mundane ratio of points to advancement. However, once scored, the agenda is anything but mundane; it’s more like a bit of code has come to life and started working for you. It’s not unlike magic. Once scored, Utopia Fragment forces the Runner to pay an additional two credits for each advancement token on an agenda in order to steal it. By itself, Utopia Fragment can make it prohibitively expensive for the Runner to steal advanced agendas and may promote the use of even more high-advancement, high-reward agendas. Of course, it can also be used to an even more devastating effect in combination with multiple layers of taxing ice and agendas, like NAPD Contract (Double Time, 119), that already can’t be scored unless the Runner’s willing to fork over the credits. Waiting to Be Born Could it be possible that data drive in Nasir Meidan’s hands is the key to unlocking some horrible secret? What if it were a virus waiting to be pulled out of isolation and injected into the net? What if it were a virus like Incubator (The Source, 113) or Ixodidae (The Source, 114)? 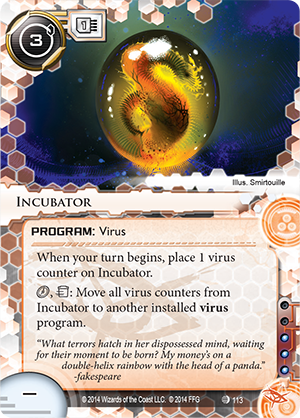 
Anarchs have long been the game’s greatest proponents of virus programs, and that’s certainly not something about to change with The Source. The two viruses that Anarchs gain in this Data Pack empower virus-based strategies by working well with other viruses. For three credits, Incubator lurks in the background, spawning virus tokens every turn until you choose to spend a click and trash it to boost another of your virus programs. Incubator can effectively double the rate at which your Parasite (Core Set, 12) chews through a layer of ice, or it can accelerate the evolution of your Darwin (Future Proof, 102). Moreover, since Incubator allows you to stockpile and then transfer your virus tokens without taking any specific actions, it offers you a way to activate Chakana (Creation and Control, 43) or Deep Thought (Future Proof, 108), without running on R&D. Still, running is at the heart of the Runner’s game. It’s just a matter of where you’ll want to run and which benefits you’ll hope to derive from running. To that end, Ixodidae partners perfectly with Lamprey (Upstalk, 14). When you have both in play, your successful runs on HQ will both drain credits from the Corp and drip them into your account. In fact, they’re so potent together that it’s almost a given the Corp will spend a turn purging virus counters in order to get rid of them, but baiting the Corp into spending clicks in that manner is just another way of draining its resources. Complete Your Journey What will you take from the moon at the end of the Lunar Cycle? You’ll be able to open your copy of The Source and unpack its secrets when it arrives at retailers everywhere late in the third quarter of 2014! ... Source: The Source (http://www.fantasyflightgames.com/edge_news.asp?eidn=4914)
Title: FFG:The Howl of Blackmane
Post by: RSSFeeder on 11 July 2014, 02:00:02
The Howl of BlackmaneAnnouncing the First War Pack in the Warlord Cycle for Warhammer 40,000: Conquest
“So long as there remains one who still rages in the name of justice and truth, the galaxy shall yet know hope.”
–Ragnar Blackmane Fantasy Flight Games is proud to announce The Howl of Blackmane, the first War Pack in the Warlord cycle for Warhammer 40,000: Conquest! The Howl of Blackmane introduces sixty new cards to expand your battles in the grim and gritty future of Warhammer 40,000: Conquest. You’ll find a battle-ready new Space Marine warlord with his eight-card signature squad offering new ideas for conquering the Traxis sector. Additionally, you’ll find three copies each of seventeen different cards that invite you to join the ranks of the Inquisition, experiment with heretical technology, or embark upon a sector-spanning Waaagh! As the first pack of the Warlord cycle, The Howl of Blackmane brings your warlords to the forefront of your battles in the Traxis sector. New warlords are introduced in every War Pack, leading bloodthirsty armies, and bringing new strategies for achieving victory. You’ll find more than new warlords, however. Other cards introduced in The Howl of Blackmane and throughout the cycle put the focus directly on your warlord, whether by granting benefits to your other forces, orchestrating army movements, or exhausting to trigger powerful tactics.
Throughout the War Packs of the Warlord cycle, every faction receives a new warlord, ranging from an Imperial Inquisitor to an Eldar Phoenix Lord, and each of these new champions encourages the exploration of a new style of play. For more on The Howl of Blackmane and the main themes of the Warlord cycle, we turn to developer Brad Andres. Developer Brad Andres on the Warlord Cycle Throughout the Warlord cycle, we explored the impact of warlords upon the game. These powerful warriors and leaders are the lifeblood of Conquest, and the design of a new warlord meant defining how the warlord would play the game.
Throughout the cycle, we needed to answer questions ranging from, “How will this warlord try to win?” to “What makes this warlord unique compared to others in the same faction?” Each warlord and its signature squad brings a new deck type to the table, ripe for expansion with the addition of other cards in the cycle. The first of these new warlords is the Wolf Lord, Ragnar Blackmane (The Howl of Blackmane, 1). Ragnar is designed to hunt down your opponent’s warlord by engaging it in battle as much as possible. The strategy of hunting is a perfect thematic fit for the Space Wolves; these Space Marines were engineered to murder empires and tear apart anyone that stands in the way of the Imperium. Ragnar’s signature unit, the Blackmane Sentinel (The Howl of Blackmane, 2), continues the theme of hunting down your rivals. A Blackmane Sentinel is a fearsome unit that can move from anywhere on the board to corner a warlord wherever Ragnar tracks it. Even if you can’t guess the location of your opponent’s warlord on the first try, Blackmane’s Hunt (The Howl of Blackmane, 5) allows you to follow your rival’s warlord to an adjacent planet, completing your hunt and meeting it in battle. Confronting your opponent head-on brings you face-to-face with danger, but the Weapon Frostfang (The Howl of Blackmane, 3) can drastically increase one unit’s attack power and hit points, helping you win a showdown with a rival warlord. And when your opponent tries to flee from your ravening wolves, a Morkai Rune Priest punishes your opponent for thinking he might escape unscathed. Ragnar is only the first of many familiar warlords to be found in this cycle. You can look forward to seeing Inquisitors, Ethereals, and Greater Daemons in battle. Each new warlord brings a new deck type and play experience for players to explore. The Warlord cycle doesn’t just introduce new warlords. It features a host of supporting cards that make the strategic use of your warlord more critical than ever. Cards like Muster the Guard (The Howl of Blackmane, 7) require you to exhaust your warlord as part of the ability cost, offering a huge benefit in return. Other cards, such as the Bork’an Recruits,become stronger while in the presence of a warlord, making the decision of where to commit a warlord even more consequential. The Howl of Blackmane and the other War Packs in the Warlord cycle introduce a host of new warlords and abilities to Warhammer 40,000: Conquest, bombarding the Traxis sector with powerful new abilities, strategies, and combinations. These cards were designed to make your war for galactic dominance more intense than ever, and I hope you have as much fun playing it as I did designing it! What Is a War Pack? Warhammer 40,000: Conquest is a Living Card Game®, meaning that rather than collectible randomized booster packs, it receives monthly expansions known as War Packs. Each War Pack contains sixty cards, offering a full playset of each unit, attachment, event, and support card within. Each War Pack expands the Warhammer 40,000 universe within Conquest, offering new deck-building options with a fixed distribution model, allowing players to focus on building decks and playing games, rather than chasing rare cards. The Howl of Blackmane is the first War Pack for Warhammer 40,000: Conquest. Hunt Among the Stars Begin your wild hunt across the galaxy with Ragnar Blackmane and the other cards from The Howl of Blackmane War Pack. Whether you employ Blackmane’s aggressive tactics, revel in the torture of the Dark Eldar, or harness the powerful technology of the Tau empire, you’ll find new units, attachments, supports, and events to use throughout your battles in the Traxis sector. Look for The Howl of Blackmane to arrive at your local retailer in the fourth quarter of 2014! ... Source: The Howl of Blackmane (http://www.fantasyflightgames.com/edge_news.asp?eidn=4912)
Title: FFG:A New Safety Protocol
Post by: RSSFeeder on 11 July 2014, 10:30:03
A New Safety ProtocolProtect Your Cards With Six Upcoming Android: Netrunner Art Sleeves
-white.png)
|
“I appreciate your concern, Miss Tameko, but there is no potential breach within the server you have identified. That is your snare. You will find that all your data is quite well-protected.”
–Akitaro Watanabe
Fantasy Flight Games is proud to announce the upcoming release of six limited edition Android: Netrunner Art Sleeves.
Offering a high-tech combination of functionality and style, Fantasy Flight Supply Android: Netrunner Art Sleeves combine beautiful game-related art with top-quality card protection. Take your pick of designs in the meat world or the virtual world; our six new sleeve designs immerse you more fully than ever in the high-stakes cyberstruggles of Android: Netrunner, even as their clear, 100 micron-thick, non-PVC, acid-free polypropylene plastic offers your cards durable protection that comes free of any damaging chemicals that could corrode your cards.
|
All Android: Netrunner Art Sleeves fit snugly around your LCG, CCG, or other standard-sized cards (card size: 2 1/2” x 3 1/2”), and they facilitate easy shuffling and handling. Each pack contains 50 sleeves to protect the cards from your favorite Corp deck, your favorite Runner deck, or your favorite deck for any of our other LCGs®! The Future Is Now “The reason the NAPD keeps going after Noise is because he thinks running is all about style.”
–Gabriel Santiago The setting of Android: Netrunner is a gritty, futuristic world filled with artificial intelligence, gestural interfaces, and virt displays. The rich benefit from custom genetics and cyberimplants while the poor toil alongside bioroids and clones in the shadows of monolithic towers controlled by a handful of megarich corporations. They host their secrets on the omnipresent network and guard their most valuable data with a dizzying of array of barriers, code gates, sentries, and traps that define the landscape of the game’s virtual world. Both the virtual and meat worlds of Android: Netrunner come to life with the six designs for our limited Android: Netrunner Art Sleeves. Click any of the above images to enlarge “Goodnight, New Angeles. From all of us at NBN Nightly to all of you at home, sleep well. We’re watching over you.”
–NBN Nightly Whether you plan to use Android: Netrunner Art Sleeves to protect your Corp and Runner decks for Android: Netrunner, run deep against the servers of another LCG, or safeguard an entirely different collection of cards, these stunning, top-quality sleeves allow you to do so in style, all while immersing you in the cyberpunk future of New Angeles, NeoTokyo, and the all-reaching network…. ... Source: A New Safety Protocol (http://www.fantasyflightgames.com/edge_news.asp?eidn=4915)
Title: FFG:A New Safety Protocol
Post by: RSSFeeder on 11 July 2014, 19:00:03
A New Safety ProtocolProtect Your Cards With Six Upcoming Android: Netrunner Art Sleeves
| “I appreciate your concern, Miss Tameko, but there is no potential breach within the server you have identified. That is your snare. You will find that all your data is quite well-protected.”
–Akitaro Watanabe Fantasy Flight Games is proud to announce the upcoming release of six limited edition Android: Netrunner Art Sleeves. Offering a high-tech combination of functionality and style, Fantasy Flight Supply Android: Netrunner Art Sleeves combine beautiful game-related art with top-quality card protection. Take your pick of designs in the meat world or the virtual world; our six new sleeve designs immerse you more fully than ever in the high-stakes cyberstruggles of Android: Netrunner, even as their clear, 100 micron-thick, non-PVC, acid-free polypropylene plastic offers your cards durable protection that comes free of any damaging chemicals that could corrode your cards. | All Android: Netrunner Art Sleeves fit snugly around your LCG, CCG, or other standard-sized cards (card size: 2 1/2” x 3 1/2”), and they facilitate easy shuffling and handling. Each pack contains 50 sleeves to protect the cards from your favorite Corp deck, your favorite Runner deck, or your favorite deck for any of our other LCGs®! The Future Is Now “The reason the NAPD keeps going after Noise is because he thinks running is all about style.”
–Gabriel Santiago The setting of Android: Netrunner is a gritty, futuristic world filled with artificial intelligence, gestural interfaces, and virt displays. The rich benefit from custom genetics and cyberimplants while the poor toil alongside bioroids and clones in the shadows of monolithic towers controlled by a handful of megarich corporations. They host their secrets on the omnipresent network and guard their most valuable data with a dizzying of array of barriers, code gates, sentries, and traps that define the landscape of the game’s virtual world. Both the virtual and meat worlds of Android: Netrunner come to life with the six designs for our limited Android: Netrunner Art Sleeves. Click any of the above images to enlarge “Goodnight, New Angeles. From all of us at NBN Nightly to all of you at home, sleep well. We’re watching over you.”
–NBN Nightly Whether you plan to use Android: Netrunner Art Sleeves to protect your Corp and Runner decks for Android: Netrunner, run deep against the servers of another LCG, or safeguard an entirely different collection of cards, these stunning, top-quality sleeves allow you to do so in style, all while immersing you in the cyberpunk future of New Angeles, NeoTokyo, and the all-reaching network…. ... Source: A New Safety Protocol (http://www.fantasyflightgames.com/edge_news.asp?eidn=4916)
Title: FFG:Spread Your Pestilent Gifts
Post by: RSSFeeder on 12 July 2014, 03:30:03
Spread Your Pestilent GiftsThe Tome of Decay Is Now Available for Black Crusade
“Through his blessings, death itself is stayed. In his embrace, there is only affection and love. Let us share his munificence with those still ignorant of our cherished Grandfather, lest they perish before knowing his generosity.”
–Pox Magister Effluvias Plo The Tome of Decay supplement is now available for Black Crusade, both online through our webstore and at your local retailer! Devote yourself to the service of the Plague Lord in this sourcebook for the followers of Nurgle. Within the pages of this supplement, you’ll find more information on the foetid servants of the Grandfather, alongside new Archetypes and corrupted blessings, rules for attaining apotheosis, and an adventure that leads you into the very heart of the Screaming Vortex for judgment by Nurgle himself. The Blessings of Nurgle In our first designer diary of The Tome of Decay, we revealed some of the new rules for leading your own Black Crusade against the hated Imperium and the False Emperor. By becoming a Warmaster and gathering the support of Chaos warbands, cults, mercenaries, and pirate fleets, you and your fellow Heretics can cut a swath across the galaxy, whether you aim to breach the Jericho Reach or battle across an entire Segmentum of the galaxy. With the new rules included in The Tome of Decay, you have the chance to command massive armies, while maintaining your own personal flair for spreading destruction and chaos. The second designer diary for The Tome of Decay turned from crusading armies to the ultimate ambition of every Heretic: to attain Daemonhood. In this supplement, you’ll find two distinct ways to receive Daemonic gifts. The quick and easy way comes by enacting the Ritual of Possession and inviting a Daemon to indwell the Heretic’s body. This path offers the Heretic an easy source of Daemonic gifts, but in the end, the Daemon overcomes the Heretic, consuming him completely. On the other hand, through arduous efforts and devoted service, a Heretic may be found worthy of rebirth. A Heretic blessed in this way becomes a true Daemon Prince, and in The Tome of Decay, you’ll find rules for playing as a Daemon Prince and wreaking havoc across the galaxy. Most recently, we previewed some of what you might expect in The Heart of the Vortex adventure within The Tome of Decay. The Heretics’ journey leads them across the worlds of the Screaming Vortex, encountering three of the Ruinous Powers of Chaos – Khorne, Tzeentch, and Slaanesh. Throughout these adventures, you and your fellow Heretics demonstrate your devotion to Chaos, and in this final chapter, your souls hang in the balance of Nurgle’s judgment. Truly committed Heretics may find their reward in a Daemonic rebirth, but those found wanting will become mindless Chaos Spawn or suffer an even worse fate. You’ll find even more within the pages of The Tome of Decay. You may choose to travel to the twisting embrace of the Writhing World, or disease-ridden Hindrance. New Archetypes allow you to take on twisted personas such as the Warpsmith, Plaguemeister, and Death Priest of Mire. Whether you battle with a Pandemic Staff, Foulswarm Grenades, or the countless pestilences of Nurgle, you’ll find rules for using these new tools in the Decaying Armoury, opening the doors to countless adventures within the Immaterium and beyond. Poxes and Blights The unlimited power of the Warp is calling! Gather your Heretic companions and take your next steps upon the path to apotheosis. Journey into the rotting embrace of Nurgle in The Tome of Decay, now available at your local retailer! ... Source: Spread Your Pestilent Gifts (http://www.fantasyflightgames.com/edge_news.asp?eidn=4917)
Title: FFG:Claim the Crown
Post by: RSSFeeder on 12 July 2014, 12:00:03
Claim the CrownCrown of Destiny Is Now Available for Descent: Journeys in the Dark Second Edition
The power to reshape past, present, and future lies before you in the Crown of Destiny Hero and Monster Collection, now available at your local retailer! In this expansion for Descent: Journeys in the Dark Second Edition, you and your fellow heroes embark on an quest to discover the fabled artifact that allows you change your life – both past and future. If the overlord’s minions can seize this artifact for their dark master, however, all of Terrinoth will surely fall into ruin and your accomplishments will crumble to dust. You’ll find two brand-new quests and thirteen plastic figures from the first edition of Descent within this Hero and Monster Collection. Each of the heroes and monsters have been reimagined with new plastic sculpts and artwork, in the aesthetic of the second edition. Whether you walk with one of four heroes, or lead the attack with two giants, three chaos beasts, and four lava beetles, you’ll find them all in Crown of Destiny.
Contains four heroes, two giants, three chaos beasts, and four lava beetles.
The Path to Destiny In our first preview of Crown of Destiny, we took a closer look at Jaes the Exile, a Mage eager to wipe out the mistakes of the past. Jaes is an adept practitioner of magic, and he gains even more power by equipping more Runes. We also experienced the incendiary attacks of the lava beetles that guard the path to the treasured artifact you seek. A lava beetle’s blasting projectiles can easily injure heroes that stay too close to each other in battle. Our next preview explored the healing prowess of Brother Gherinn, a penitent healer seeking to wash away past crimes by vanquishing the wicked. By drawing upon his inner strength, Brother Gherinn gains the power to utterly destroy a monster who stands in his way. In this preview, we also saw the might of an enraged giant. The might of a fearsome giants makes him a deadly foe. In Crown of Destiny, the giants may have their own designs for the fate of the artifact. Anger of a Dwarf For your quest to alter your fate and your history to be successful, you’ll need a warrior as mighty as Corbin. Although Corbin’s quick temper has left him few friends, those who walk beside him call him fierce, loyal, and brave. When he pursues a goal, he does so with unwavering tenacity, never allowing small things like broken ribs or arrow wounds to distract him from his goals. Corbin’s companions may find themselves in battles that could normally be avoided, but Corbin’s skill with weapons is more than sufficient to bring them safely out of danger again. A fighter to the core, Corbin is persistent enough to shake off the worst hits he takes. His hero ability helps you keep fighting even after taking damage: whenever Corbin would suffer two or more damage, that damage is reduced by one, making Corbin one of the most stalwart heroes in the game. 
Corbin’s heroic feat only makes his defenses more steadfast. By triggering Corbin’s heroic feat before you roll defense dice, you may change each defense die you roll to a different result, ensuring that you always receive the maximum amount of defense when you truly need it. Between his heroic feat and his hero ability, Corbin possesses the potential to keep fighting longer than many other heroes, giving you the time you need to destroy monsters and complete your quest’s objective. The Future Awaits The chance to reshape your future and claim honor, riches, and glory lies before you. Whether you play as a hero with a past, or serve the wicked designs of the overlord, Crown of Destiny has the figures and quests for you. The Crown of Destiny Hero and Monster Collection is now available at your local retailer! Pick up your copy today. ... Source: Claim the Crown (http://www.fantasyflightgames.com/edge_news.asp?eidn=4918)
Title: FFG:Infused by the Warp
Post by: RSSFeeder on 12 July 2014, 20:30:03
Infused by the WarpPreview the Chaos Faction from Warhammer 40,000: Conquest
Beyond the boundaries of physical space, unrestricted by time or causality, there is a dimension utterly incomprehensible to mortal minds. It lies on the other side of nightmares, infinite in scope but without form or structure. The denizens of such a realm are terrible beyond all Humanity’s collective imagination. The Imperium of Man, dark powers of Chaos, and xenos beyond number engage in the battle for the Traxis sector. In Warhammer 40,000: Conquest, you have the opportunity to determine the outcome of these battles, claiming planets and establishing the utter dominion of your faction. In our series of previews for Warhammer 40,000: Conquest thus far, we’ve examined the process of deploying armies, winning the command struggle, and engaging in battle, including an example of a battle. Since then, we’ve begun our previews of individual factions within the game, starting with Space Marines and continuing to the Astra Militarum and Orks. Today, however, we pass into the Immaterium, braving unspeakable horrors and atrocities to explore the terrifying powers of the Warp. The Chaos Gods are restless, and their corrupting influence is spreading into the Traxis sector. Preview the Chaos faction below! 
A Sorcerer’s Power In the Core Set for Warhammer 40,000: Conquest, the Chaos warlord is Zarathur, High Sorcerer (Core Set, 4). This fearsome Psyker of Tzeentch is a master of dark magics and sorcery and his powerful Interrupt brings your armies to new heights. Whenever damage is assigned to an enemy unit at the same planet as Zarathur, his Interrupt triggers, and the assigned damage is increased by one. Damage increased by one point can easily make the difference for destroying a unit, and dealing damage directly to enemy armies is Chaos’s specialty, maximizing the power of this ability even more.  You’ll find plenty of ways to incinerate your enemies in Zarathur’s signature squad. The squad begins with four copies of a Daemon, Zarathur’s Flamers (Core Set, 77). In addition to any damage this army does in battle, you can sacrifice this unit to deal two damage to any non-warlord unit at the same planet. If Zarathur is at the planet when his Flamers are sacrificed, this damage becomes even greater, and since you can sacrifice the unit at Action speed, you may even attack and sacrifice the unit before your opponent strikes back. You’ll find plenty of ways to incinerate your enemies in Zarathur’s signature squad. The squad begins with four copies of a Daemon, Zarathur’s Flamers (Core Set, 77). In addition to any damage this army does in battle, you can sacrifice this unit to deal two damage to any non-warlord unit at the same planet. If Zarathur is at the planet when his Flamers are sacrificed, this damage becomes even greater, and since you can sacrifice the unit at Action speed, you may even attack and sacrifice the unit before your opponent strikes back.
Zarathur’s signature squad also includes two copies of the event, Infernal Gateway (Core Set, 79). As a Combat Action, you may play this event to put a Chaos unit with printed cost three or lower into play at a planet. If that unit is still in play at the end of the phase, you must sacrifice it, but if you’re planning to sacrifice the unit anyways, you’re just getting another unit for a discount. By using the Infernal Gateway, you can get armies like Zarathur’s Flamers into combat and causing damage quicker than ever, and you also gain the element of surprise, allowing you to potentially lure your opponent into a trap. The next card in the signature squad is the Shrine of Warpflame (Core Set, 78), a support with a powerful Reaction. After an enemy unit is destroyed, you may exhaust the Shrine of Warpflame to return the topmost Tzeentch card from your discard pile to your hand. Since both Zarathur’s Flamers and the Infernal Gateway events have the Tzeentch trait, you’ll be able to recur either of them after use, as well as any other Tzeentch cards in your deck. Mark of Chaos (Core Set, 80) is the final card in the signature squad, and it offers another way to spread damage directly to your opponent’s armies. This card may be attached to any army unit, and bears the text, “Interrupt: When attached unit leaves play, deal 1 damage to each enemy unit at this planet.” Obviously, you’ll want to be able to control when this attachment triggers, so one of the best uses is to attach Mark of Chaos to Zarathur’s Flamers. Since you can sacrifice the Flamers whenever you choose, you may activate the Mark of Chaos at the most opportune moment, causing widespread damage that becomes even more powerful with the presence of Zarathur. The Immaterium’s Corruption  Even beyond Zarathur’s signature squad, the faction of Chaos provides you with ways to corrupt and vanquish your opponent’s army units. The Soul Grinder (Core Set, 91) is a powerful Daemon, deadly in combat, but its most potent application may lie in the command struggle. If you can win a command struggle at the Soul Grinder’s planet, your opponent must sacrifice a non-warlord unit at that planet. Winning command struggles with the Soul Grinder offers you an excellent way to destroy your opponent’s units before the opening salvos of battle. Even beyond Zarathur’s signature squad, the faction of Chaos provides you with ways to corrupt and vanquish your opponent’s army units. The Soul Grinder (Core Set, 91) is a powerful Daemon, deadly in combat, but its most potent application may lie in the command struggle. If you can win a command struggle at the Soul Grinder’s planet, your opponent must sacrifice a non-warlord unit at that planet. Winning command struggles with the Soul Grinder offers you an excellent way to destroy your opponent’s units before the opening salvos of battle.
The Warpstorm (Core Set, 93) event gives you another way to target your opponent’s army units. During the combat phase, you may play this card to deal two damage to every unit without attachments at a planet or headquarters. Whether you use this unit to clear a planet of armies or strike at the heart of your opponent’s headquarters, the Warpstorm is sure to create a swath of destruction through your foes. A more targeted event is Tzeentch’s Firestorm (Core Set, 94). This event has the variable cost ‘X’ and by paying X resources, you may deal X damage to a target non-warlord unit. As a way to remove a threat to your conquest, Tzeentch’s Firestorm is unparalleled. Even better, this event has the Tzeentch trait, meaning you can recur it with the Shrine of Warpflame. A final card that deals damage directly to your opponent’s army units is the Tzeentch-traited Dire Mutation (Core Set, 97) attachment. By attaching this card to one of your opponent’s armies, you force that unit to take one damage whenever it exhausts. In addition, this attachment possesses the Ambush keyword, meaning that you may deploy it during the combat phase rather than the deployment phase, reducing your opponent’s ability to play around it. Unless your opponent can find some way to avoid your punishing events and abilities, he will quickly fall to Chaos. The Allure of Chaos Devote yourself to the power of Chaos and draw upon the magic of the Warp to destroy any army that stands in your way. Will you accept the corruption of the Immaterium, or will you stand against it? Make your choice and preorder Warhammer 40,000: Conquest today! ... Source: Infused by the Warp (http://www.fantasyflightgames.com/edge_news.asp?eidn=4919)
Title: FFG:The Howl of Blackmane
Post by: RSSFeeder on 14 July 2014, 23:30:03
The Howl of BlackmaneAnnouncing the First War Pack in the Warlord Cycle for Warhammer 40,000: Conquest
“So long as there remains one who still rages in the name of justice and truth, the galaxy shall yet know hope.”
–Ragnar Blackmane Fantasy Flight Games is proud to announce The Howl of Blackmane, the first War Pack in the Warlord cycle for Warhammer 40,000: Conquest! The Howl of Blackmane introduces sixty new cards to expand your battles in the grim and gritty future of Warhammer 40,000: Conquest. You’ll find a battle-ready new Space Marine warlord with his eight-card signature squad offering new ideas for conquering the Traxis sector. Additionally, you’ll find three copies each of seventeen different cards that invite you to join the ranks of the Inquisition, experiment with heretical technology, or embark upon a sector-spanning Waaagh! As the first pack of the Warlord cycle, The Howl of Blackmane brings your warlords to the forefront of your battles in the Traxis sector. New warlords are introduced in every War Pack, leading bloodthirsty armies, and bringing new strategies for achieving victory. You’ll find more than new warlords, however. Other cards introduced in The Howl of Blackmane and throughout the cycle put the focus directly on your warlord, whether by granting benefits to your other forces, orchestrating army movements, or exhausting to trigger powerful tactics. In addition to powerful new warlords, the Warlord cycle introduces our new LCG® packaging to Warhammer 40,000: Conquest War Packs! This packaging is molded plastic, but every War Pack still contains the full complement of sixty cards.
Throughout the War Packs of the Warlord cycle, every faction receives a new warlord, ranging from an Imperial Inquisitor to an Eldar Phoenix Lord, and each of these new champions encourages the exploration of a new style of play. For more on The Howl of Blackmane and the main themes of the Warlord cycle, we turn to developer Brad Andres. Developer Brad Andres on the Warlord Cycle Throughout the Warlord cycle, we explored the impact of warlords upon the game. These powerful warriors and leaders are the lifeblood of Conquest, and the design of a new warlord meant defining how the warlord would play the game.
Throughout the cycle, we needed to answer questions ranging from, “How will this warlord try to win?” to “What makes this warlord unique compared to others in the same faction?” Each warlord and its signature squad brings a new deck type to the table, ripe for expansion with the addition of other cards in the cycle. The first of these new warlords is the Wolf Lord, Ragnar Blackmane (The Howl of Blackmane, 1). Ragnar is designed to hunt down your opponent’s warlord by engaging it in battle as much as possible. The strategy of hunting is a perfect thematic fit for the Space Wolves; these Space Marines were engineered to murder empires and tear apart anyone that stands in the way of the Imperium. Ragnar’s signature unit, the Blackmane Sentinel (The Howl of Blackmane, 2), continues the theme of hunting down your rivals. A Blackmane Sentinel is a fearsome unit that can move from anywhere on the board to corner a warlord wherever Ragnar tracks it. Even if you can’t guess the location of your opponent’s warlord on the first try, Blackmane’s Hunt (The Howl of Blackmane, 5) allows you to follow your rival’s warlord to an adjacent planet, completing your hunt and meeting it in battle. Confronting your opponent head-on brings you face-to-face with danger, but the Weapon Frostfang (The Howl of Blackmane, 3) can drastically increase one unit’s attack power and hit points, helping you win a showdown with a rival warlord. And when your opponent tries to flee from your ravening wolves, a Morkai Rune Priest punishes your opponent for thinking he might escape unscathed. Ragnar is only the first of many familiar warlords to be found in this cycle. You can look forward to seeing Inquisitors, Ethereals, and Greater Daemons in battle. Each new warlord brings a new deck type and play experience for players to explore. The Warlord cycle doesn’t just introduce new warlords. It features a host of supporting cards that make the strategic use of your warlord more critical than ever. Cards like Muster the Guard (The Howl of Blackmane, 7) require you to exhaust your warlord as part of the ability cost, offering a huge benefit in return. Other cards, such as the Bork’an Recruits,become stronger while in the presence of a warlord, making the decision of where to commit a warlord even more consequential. The Howl of Blackmane and the other War Packs in the Warlord cycle introduce a host of new warlords and abilities to Warhammer 40,000: Conquest, bombarding the Traxis sector with powerful new abilities, strategies, and combinations. These cards were designed to make your war for galactic dominance more intense than ever, and I hope you have as much fun playing it as I did designing it! What Is a War Pack? Warhammer 40,000: Conquest is a Living Card Game®, meaning that rather than collectible randomized booster packs, it receives monthly expansions known as War Packs. Each War Pack contains sixty cards, offering a full playset of each unit, attachment, event, and support card within. Each War Pack expands the Warhammer 40,000 universe within Conquest, offering new deck-building options with a fixed distribution model, allowing players to focus on building decks and playing games, rather than chasing rare cards. The Howl of Blackmane is the first War Pack for Warhammer 40,000: Conquest. Hunt Among the Stars Begin your wild hunt across the galaxy with Ragnar Blackmane and the other cards from The Howl of Blackmane War Pack. Whether you employ Blackmane’s aggressive tactics, revel in the torture of the Dark Eldar, or harness the powerful technology of the Tau empire, you’ll find new units, attachments, supports, and events to use throughout your battles in the Traxis sector. Look for The Howl of Blackmane to arrive at your local retailer in the fourth quarter of 2014! ... Source: The Howl of Blackmane (http://www.fantasyflightgames.com/edge_news.asp?eidn=4912)
Title: FFG:Ready for Takeoff
Post by: RSSFeeder on 15 July 2014, 08:00:03
Ready for TakeoffAnnouncing the First Force Pack in the Rogue Squadron Cycle
“We’ll have to destroy them ship to ship. Get the crews to their fighters.”
–Darth Vader, Star Wars: A New Hope Fantasy Flight Games is proud to announce Ready for Takeoff, the first Force Pack in the upcoming Rogue Squadron cycle for Star Wars™: The Card Game! The battles of the Star Wars saga are fought on planets and in space. On solid ground, heroes like Han Solo and Leia Organa exchange blaster fire with nameless troopers, but in the freezing void of space, other heroes pilot starfighters through fierce combat and breakneck contests of skill and nerve. The fearless men and women of the Galactic Empire, the Rebel Alliance, and others develop new starfighters continually and pilot these experimental spaceships in battle. 
As the first Force Pack in the Rogue Squadron cycle, Ready for Takeoff brings these interstellar battles to the forefront, as Vehicles and Pilots clash in the vacuum of outer space. With a new fate card, iconic starship pilots like Lando Calrissian and “Mauler” Mithel, and new mechanics for piloting your Vehicles, Ready for Takeoff has plenty to offer, whether you fly for Rogue Squadron or Black Squadron. This Force Pack contains ten new objective sets (two copies each of five unique sets) and in Ready for Takeoff, you’ll get your first taste of piloting each faction’s iconic starships. In addition to a fleet of new starships and pilots, the Rogue Squadron cycle introduces new packaging for Star Wars: The Card Game Force Packs! The packaging will be changing from cardboard to plastic, but every Force Pack still contains the full complement of ten new objective sets. Get to Your Ships!  Even the most awe-inspiring ships still benefit from the best pilots, and Ready for Takeoff introduces a new keyword to ensure that your cutting-edge fighters and starships have ace pilots. Units that have the pilot (X) keyword may be played from hand as a Pilot enhancement attached to a friendly Vehicle unit by paying resources equal to X – the unit’s pilot cost. Even the most awe-inspiring ships still benefit from the best pilots, and Ready for Takeoff introduces a new keyword to ensure that your cutting-edge fighters and starships have ace pilots. Units that have the pilot (X) keyword may be played from hand as a Pilot enhancement attached to a friendly Vehicle unit by paying resources equal to X – the unit’s pilot cost.
For example, Derek “Hobbie” Klivian (Ready for Takeoff, 699) possesses the pilot (1) keyword. By paying one resource, you may attach "Hobbie" to any friendly Vehicle unit. The attached Vehicle is considered to be “piloted,” and "Hobbie" is “piloting” the Vehicle. Piloting your Vehicles is critical, since many new units feature powerful abilities that only activate while they are piloted or piloting. Of course, you are never required to use a unit as a pilot, and you may play “Hobbie” as a unit by paying his resource cost. Today, we’ll look at an upcoming objective set from Ready for Takeoff that highlights some of the themes you’ll unveil within the Rogue Squadron cycle. Earn Your Bloodstripes In Ready for Takeoff, you’ll get your first look at the unique Pilots and Vehicles in the upcoming Rogue Squadron cycle. The Imperial Navy is well known for pouring limitless resources into the Pilots of the Flight Academy and the Fighters they fly. These pilots’ expertise begins with The Empire’s Elite (Ready for Takeoff, 713) objective. When this objective is in play, you gain access to a powerful Interrupt that triggers when a piloted Fighter unit you control would leave play. Instead of being discarded, both the Fighter and the attached Pilot enhancement are returned to your hand, allowing you to return your most feared Fighters, such as “Backstabber” (Core Set, 13) or a TIE Attack Squadron (Core Set, 147) to the table. 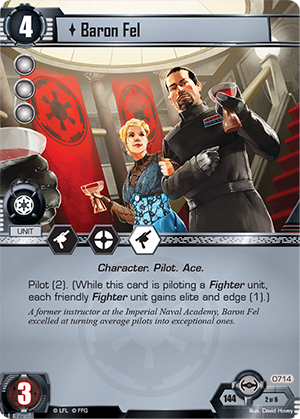 The sight of a TIE interceptor sporting bloodstripes can strike fear into the heart of any Rebel pilot. You can bring the notorious starfighters of the 181st Imperial Fighter Wing into play with two copies of the 181st TIE Interceptor (Ready for Takeoff, 715). This unit can effectively support attack or defense, but it’s best at winning the Force to the dark side. While the 181st TIE Interceptor is piloted, its Pilot enhancement contributes its Force icons to your side during the Force struggle, allowing you to gain a bonus without even committing a unit. The sight of a TIE interceptor sporting bloodstripes can strike fear into the heart of any Rebel pilot. You can bring the notorious starfighters of the 181st Imperial Fighter Wing into play with two copies of the 181st TIE Interceptor (Ready for Takeoff, 715). This unit can effectively support attack or defense, but it’s best at winning the Force to the dark side. While the 181st TIE Interceptor is piloted, its Pilot enhancement contributes its Force icons to your side during the Force struggle, allowing you to gain a bonus without even committing a unit.
In the Flight Academy (Ready for Takeoff, 716), the Imperial Navy possesses a highly efficient means of bringing new Pilots into play. This enhancement provides you with a resource, but it also reduces by one the cost and pilot cost of the first Pilot unit you play each turn. Being able to play Pilots at a discount gets your ships piloted and special abilities activated faster than ever. You gain another way to bring your Pilots into play with the Stay on Target (Ready for Takeoff, 712) fate card, one of two new fate cards in this cycle. This fate card contributes two Force icons to your edge battle, but it also allows you to put a Pilot card into play from your hand or discard pile as an enhancement on a target friendly Vehicle unit. Not only does this allow you to escape paying the unit’s pilot cost, it lets you bring a Pilot into play in the midst of battle, potentially activating powerful abilities and swinging the balance of the conflict in your favor. Of course, The Empire’s Elite wouldn’t be complete without a peerless Pilot to lead the squadron, and it gains such a unit in Baron Fel (Ready for Takeoff, 714). This unit bears the pilot (2) keyword, so by paying two resources, you may attach him to any friendly Vehicle. Baron Fel is at his best, however, in the cockpit of a Fighter. While Baron Fel pilots a Fighter unit, every friendly Fighter unit gains elite and edge (1), making any Fighter group a force to be reckoned with. In addition, Baron Fel possesses three Force icons, meaning that if he pilots one of the 181st TIE Interceptors, the Imperial Navy gains a three Force icon bonus to the Force struggle! 
Coordinate Fleet Movement More awaits within the Rogue Squadron cycle than Imperial Fighter squadrons. In this cycle, the Imperial Navy and Rebel Alliance take the spotlight, but every faction receives plenty of powerful new units, enhancements, and events, along with two new fate cards introduced in this cycle. New versions of iconic characters and ships abound, ranging from Darth Vader and Luke Skywalker to the Millennium Falcon and Slave I. Every faction receives new tactics utilizing new and upcoming cards, including the ones described below. The Rebel Alliance uses the Capital Ship Independence to lead their entire navy in battle, while the Sith Fighter Delta One effortlessly incapacitates unpiloted Vehicle units. On the outskirts of the galaxy, Smuggling Freighters fly relentlessly past enemy shields and blockades. The Jedi may uncover a Lost Master among the forests of Kashyyyk, still maintaining his commitment to the Force, and if a Scum and Villainy pilot is ever forced to Bail Out, you can be sure you’ll face the pilot again on the ground. In the Rogue Squadron cycle, the skill of your best Pilots and Vehicles is on full display, offering countless new strategies for your decks in Star Wars: The Card Game. Launch Your Starships Are you prepared to pilot your starfighters to glory? Your intense dogfights, fleet combat, and hyperspace travel begin with the Ready for Takeoff Force Pack in the Rogue Squadron cycle. Look for the Ready for Takeoff Force Pack at your local retailer in the fourth quarter of 2014! ... Source: Ready for Takeoff (http://www.fantasyflightgames.com/edge_news.asp?eidn=4920)
Title: FFG:Vibrant Settings and Mass Combats
Post by: RSSFeeder on 15 July 2014, 16:30:04
Vibrant Settings and Mass CombatsA Preview of the Age of Rebellion Adventure, Onslaught at Arda I
“Right now I feel like I could take on the whole Empire myself.”
–Dak Ralter Onslaught at Arda I is the first book-length adventure supplement for the Star Wars®: Age of Rebellion™ Roleplaying Game, set shortly after the Battle of Yavin, during a time in which the Empire has responded to the destruction of the Death Star by tightening its grip on the surrounding systems. Throughout the adventure, players assume the roles of new Rebel recruits stationed at the secret base on Arda I, and when Imperial Star Destroyers appear in orbit, they must work together to both defend their base from a massed Imperial onslaught and root out the traitor that exposed them. Touching upon many of the core Age of Rebellion themes, Onslaught at Arda I partners the heroes’ desperate struggles with uneasy alliances and massed battles against an overwhelming enemy. In today’s preview, adventure writer Jeff Hall and lead developer Katrina Ostrander look at the ways that Onslaught at Arda I blends these themes into a true Star Wars experience, as well as the ways its Mass Combat rules can transform your Age of Rebellion adventures into truly epic experiences. 
Adventure Writer Jeff Hall on Onslaught at Arda I Getting to work on the first full-length adventure for Age of Rebellion was a dream come true. The concept I was given to work with hit on all of the hallmarks that would make it feel like something that belonged alongside the classic Star Wars movies: action, intrigue, and heroism, all at a breakneck pace. My job was to bring all these things to life, and a big part of that was making sure that the adventure’s settings were rich and textured. Arda IThe adventure begins on the world of Arda I, an Outer Rim planet previously mentioned only in passing. This was both exciting and daunting; apart from some stunning artwork that FFG planned to use in the book, I had no real constraints on what the planet was like. This meant I could really dive into its design. However, because the planet had little established background, I had to work even harder to make it feel like a living, breathing world in the Star Wars universe. I think the work paid off, though, and there are many different nuggets that I believe players will enjoy as they explore Arda I before they are thrust deeper into the action! 
The Imperial fleet approaches Arda I.
JagomirThe adventure begins on Arda I, but its action doesn’t end there. From the Ardan Cross, the PCs head to a new Rebel base on the swamp world of Jagomir and then to the Imperial World of Ord Radama. Designing Jagomir was a fun challenge as I wanted to make sure it was a unique swamp planet and not a clone of Dagobah. Creating a distinct landscape amid the swamp was key, and the sweeping vistas of Jagomir make a fantastic setting for players who want to use them as a long term base for their Rebels. Ord RadamaThe adventure also offers the PCs a chance to explore Ord Radama, an ancient world held firmly by the Empire and that has a sinister past as a former Sith World. Friends are few and far between on Ord Radama, and the PCs would be wise to make more use of their skills than their blasters if they venture that deep into Imperial territory. Of course, as with Jagomir, Ord Radama presents many avenues that can lead to an even longer campaign. 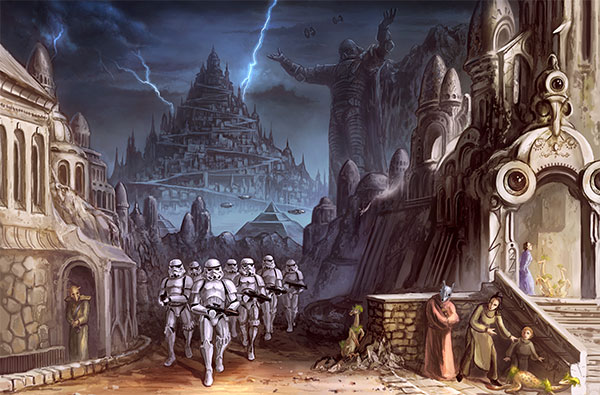
The capital city of Livien Magnus on Ord Radama has known a number of masters, having belonged to the Sith Empire, the Republic, the Separatists, and now the Galactic Empire.
Lead Developer Katrina Ostrander on Creating New Rules for Epic Battles One of our goals while designing the Age of Rebellion roleplaying game was to make it the best possible Rebellion experience. And part of that meant that we’d need some way to recreate the epic scale of Star Wars combat between the Rebellion and the Empire. To facilitate these, Onslaught at Arda I introduces rules for mass combat that allow Game Masters to depict the ebb and flow of combat without getting bogged down in endless dice rolls. Additionally, we added an Action Tracker to the adventure that helps maintain the frantic pacing of a race against time while Imperial forces are waiting for the heroes at every turn. These elements help make Onslaught at Arda I the epic experience we envisioned, but they also provide GMs the means to greatly expand their Age of Rebellion adventures and campaigns. We wanted to make sure that the Mass Combat rules were both easy to use and could emulate different types of battles at a wide variety of scales. To that end, we developed a dice pool that draws upon a combination of some of the variables most likely to tip the scales of victory: the leadership and tactical skills of the commanders on both sides, as well as the size and training of the forces. Additionally, the narrative dice system allows the GM to assign Boost ( ) or Setback ( ) or Setback ( ) dice as circumstances dictate, such as the penalty you incur when fog veils the movements of your enemy’s forces or the advantage that comes with fighting on your home turf. ) dice as circumstances dictate, such as the penalty you incur when fog veils the movements of your enemy’s forces or the advantage that comes with fighting on your home turf. This dice pool allows the GM to quickly determine whether the heroes or their allies successfully achieve their objectives for a specified segment of a battle. For example, the roll may determine whether or not you successfully hold a line against an enemy assault or advance into enemy territory. Meanwhile, the dice pool also allows the GM to determine the magnitude of that success (such as whether it’s a fiercely contested battle or a rout), as well as what positive or negative side effects result. Below are a few examples of how to spend Advantage, Triumph, Threat, and Despair in Mass Combat: 
In Onslaught at Arda I, the Mass Combat mechanics allow the GM to help the players envision a vivid and dynamic encounter during the titular Imperial onslaught, and they directly influence the outcome of the battle. However, these rules are easy to incorporate into your own Age of Rebellion campaigns whenever Imperial and Rebellion forces clash! Pre-Order Your Copy Today Filled with action, intrigue, and heroism all presented at a breakneck pace, Onslaught at Arda I serves as an exciting and rewarding introduction to the Age of Rebellion experience. More than that, its ninety-six pages also contain a wealth of setting information and Mass Combat rules that expand your Star Wars roleplaying universe. Head to your local retailer to pre-order your copy today! Next: We take another look at using Onslaught at Arda I as part of an extended campaign. ... Source: Vibrant Settings and Mass Combats (http://www.fantasyflightgames.com/edge_news.asp?eidn=4921)
Title: FFG:The Howl of Blackmane
Post by: RSSFeeder on 16 July 2014, 01:00:06
The Howl of BlackmaneAnnouncing the First War Pack in the Warlord Cycle for Warhammer 40,000: Conquest
“So long as there remains one who still rages in the name of justice and truth, the galaxy shall yet know hope.”
–Ragnar Blackmane Fantasy Flight Games is proud to announce The Howl of Blackmane, the first War Pack in the Warlord cycle for Warhammer 40,000: Conquest! The Howl of Blackmane introduces sixty new cards to expand your battles in the grim and gritty future of Warhammer 40,000: Conquest. You’ll find a battle-ready new Space Marine warlord with his eight-card signature squad offering new ideas for conquering the Traxis sector. Additionally, you’ll find three copies each of seventeen different cards that invite you to join the ranks of the Inquisition, experiment with heretical technology, or embark upon a sector-spanning Waaagh! As the first pack of the Warlord cycle, The Howl of Blackmane brings your warlords to the forefront of your battles in the Traxis sector. New warlords are introduced in every War Pack, leading bloodthirsty armies, and bringing new strategies for achieving victory. You’ll find more than new warlords, however. Other cards introduced in The Howl of Blackmane and throughout the cycle put the focus directly on your warlord, whether by granting benefits to your other forces, orchestrating army movements, or exhausting to trigger powerful tactics. In addition to powerful new warlords, the Warlord cycle introduces our new LCG® packaging to Warhammer 40,000: Conquest War Packs! This packaging is molded plastic, but every War Pack still contains the full complement of sixty cards.
Throughout the War Packs of the Warlord cycle, every faction receives a new warlord, ranging from an Imperial Inquisitor to an Eldar Phoenix Lord, and each of these new champions encourages the exploration of a new style of play. For more on The Howl of Blackmane and the main themes of the Warlord cycle, we turn to developer Brad Andres. Developer Brad Andres on the Warlord Cycle Throughout the Warlord cycle, we explored the impact of warlords upon the game. These powerful warriors and leaders are the lifeblood of Conquest, and the design of a new warlord meant defining how the warlord would play the game.
Throughout the cycle, we needed to answer questions ranging from, “How will this warlord try to win?” to “What makes this warlord unique compared to others in the same faction?” Each warlord and its signature squad brings a new deck type to the table, ripe for expansion with the addition of other cards in the cycle. The first of these new warlords is the Wolf Lord, Ragnar Blackmane (The Howl of Blackmane, 1). Ragnar is designed to hunt down your opponent’s warlord by engaging it in battle as much as possible. The strategy of hunting is a perfect thematic fit for the Space Wolves; these Space Marines were engineered to murder empires and tear apart anyone that stands in the way of the Imperium. Ragnar’s signature unit, the Blackmane Sentinel (The Howl of Blackmane, 2), continues the theme of hunting down your rivals. A Blackmane Sentinel is a fearsome unit that can move from anywhere on the board to corner a warlord wherever Ragnar tracks it. Even if you can’t guess the location of your opponent’s warlord on the first try, Blackmane’s Hunt (The Howl of Blackmane, 5) allows you to follow your rival’s warlord to an adjacent planet, completing your hunt and meeting it in battle. Confronting your opponent head-on brings you face-to-face with danger, but the Weapon Frostfang (The Howl of Blackmane, 3) can drastically increase one unit’s attack power and hit points, helping you win a showdown with a rival warlord. And when your opponent tries to flee from your ravening wolves, a Morkai Rune Priest punishes your opponent for thinking he might escape unscathed. Ragnar is only the first of many familiar warlords to be found in this cycle. You can look forward to seeing Inquisitors, Ethereals, and Greater Daemons in battle. Each new warlord brings a new deck type and play experience for players to explore. The Warlord cycle doesn’t just introduce new warlords. It features a host of supporting cards that make the strategic use of your warlord more critical than ever. Cards like Muster the Guard (The Howl of Blackmane, 7) require you to exhaust your warlord as part of the ability cost, offering a huge benefit in return. Other cards, such as the Bork’an Recruits,become stronger while in the presence of a warlord, making the decision of where to commit a warlord even more consequential. The Howl of Blackmane and the other War Packs in the Warlord cycle introduce a host of new warlords and abilities to Warhammer 40,000: Conquest, bombarding the Traxis sector with powerful new abilities, strategies, and combinations. These cards were designed to make your war for galactic dominance more intense than ever, and I hope you have as much fun playing it as I did designing it! What Is a War Pack? Warhammer 40,000: Conquest is a Living Card Game®, meaning that rather than collectible randomized booster packs, it receives monthly expansions known as War Packs. Each War Pack contains sixty cards, offering a full playset of each unit, attachment, event, and support card within. Each War Pack expands the Warhammer 40,000 universe within Conquest, offering new deck-building options with a fixed distribution model, allowing players to focus on building decks and playing games, rather than chasing rare cards. The Howl of Blackmane is the first War Pack for Warhammer 40,000: Conquest. Hunt Among the Stars Begin your wild hunt across the galaxy with Ragnar Blackmane and the other cards from The Howl of Blackmane War Pack. Whether you employ Blackmane’s aggressive tactics, revel in the torture of the Dark Eldar, or harness the powerful technology of the Tau empire, you’ll find new units, attachments, supports, and events to use throughout your battles in the Traxis sector. Look for The Howl of Blackmane to arrive at your local retailer in the fourth quarter of 2014! ... Source: The Howl of Blackmane (http://www.fantasyflightgames.com/edge_news.asp?eidn=4912)
Title: FFG:Ready for Takeoff
Post by: RSSFeeder on 16 July 2014, 09:30:25
Ready for TakeoffAnnouncing the First Force Pack in the Rogue Squadron Cycle
“We’ll have to destroy them ship to ship. Get the crews to their fighters.”
–Darth Vader, Star Wars: A New Hope Fantasy Flight Games is proud to announce Ready for Takeoff, the first Force Pack in the upcoming Rogue Squadron cycle for Star Wars™: The Card Game! The battles of the Star Wars saga are fought on planets and in space. On solid ground, heroes like Han Solo and Leia Organa exchange blaster fire with nameless troopers, but in the freezing void of space, other heroes pilot starfighters through fierce combat and breakneck contests of skill and nerve. The fearless men and women of the Galactic Empire, the Rebel Alliance, and others develop new starfighters continually and pilot these experimental spaceships in battle.
As the first Force Pack in the Rogue Squadron cycle, Ready for Takeoff brings these interstellar battles to the forefront, as Vehicles and Pilots clash in the vacuum of outer space. With a new fate card, iconic starship pilots like Lando Calrissian and “Mauler” Mithel, and new mechanics for piloting your Vehicles, Ready for Takeoff has plenty to offer, whether you fly for Rogue Squadron or Black Squadron. This Force Pack contains ten new objective sets (two copies each of five unique sets) and in Ready for Takeoff, you’ll get your first taste of piloting each faction’s iconic starships. In addition to a fleet of new starships and pilots, the Rogue Squadron cycle introduces new packaging for Star Wars: The Card Game Force Packs! The packaging will be changing from cardboard to plastic, but every Force Pack still contains the full complement of ten new objective sets. Get to Your Ships! Even the most awe-inspiring ships still benefit from the best pilots, and Ready for Takeoff introduces a new keyword to ensure that your cutting-edge fighters and starships have ace pilots. Units that have the pilot (X) keyword may be played from hand as a Pilot enhancement attached to a friendly Vehicle unit by paying resources equal to X – the unit’s pilot cost. For example, Derek “Hobbie” Klivian (Ready for Takeoff, 699) possesses the pilot (1) keyword. By paying one resource, you may attach "Hobbie" to any friendly Vehicle unit. The attached Vehicle is considered to be “piloted,” and "Hobbie" is “piloting” the Vehicle. Piloting your Vehicles is critical, since many new units feature powerful abilities that only activate while they are piloted or piloting. Of course, you are never required to use a unit as a pilot, and you may play “Hobbie” as a unit by paying his resource cost. Today, we’ll look at an upcoming objective set from Ready for Takeoff that highlights some of the themes you’ll unveil within the Rogue Squadron cycle. Earn Your Bloodstripes In Ready for Takeoff, you’ll get your first look at the unique Pilots and Vehicles in the upcoming Rogue Squadron cycle. The Imperial Navy is well known for pouring limitless resources into the Pilots of the Flight Academy and the Fighters they fly. These pilots’ expertise begins with The Empire’s Elite (Ready for Takeoff, 713) objective. When this objective is in play, you gain access to a powerful Interrupt that triggers when a piloted Fighter unit you control would leave play. Instead of being discarded, both the Fighter and the attached Pilot enhancement are returned to your hand, allowing you to return your most feared Fighters, such as “Backstabber” (Core Set, 13) or a TIE Attack Squadron (Core Set, 147) to the table. The sight of a TIE interceptor sporting bloodstripes can strike fear into the heart of any Rebel pilot. You can bring the notorious starfighters of the 181st Imperial Fighter Wing into play with two copies of the 181st TIE Interceptor (Ready for Takeoff, 715). This unit can effectively support attack or defense, but it’s best at winning the Force to the dark side. While the 181st TIE Interceptor is piloted, its Pilot enhancement contributes its Force icons to your side during the Force struggle, allowing you to gain a bonus without even committing a unit. In the Flight Academy (Ready for Takeoff, 716), the Imperial Navy possesses a highly efficient means of bringing new Pilots into play. This enhancement provides you with a resource, but it also reduces by one the cost and pilot cost of the first Pilot unit you play each turn. Being able to play Pilots at a discount gets your ships piloted and special abilities activated faster than ever. You gain another way to bring your Pilots into play with the Stay on Target (Ready for Takeoff, 712) fate card, one of two new fate cards in this cycle. This fate card contributes two Force icons to your edge battle, but it also allows you to put a Pilot card into play from your hand or discard pile as an enhancement on a target friendly Vehicle unit. Not only does this allow you to escape paying the unit’s pilot cost, it lets you bring a Pilot into play in the midst of battle, potentially activating powerful abilities and swinging the balance of the conflict in your favor. Of course, The Empire’s Elite wouldn’t be complete without a peerless Pilot to lead the squadron, and it gains such a unit in Baron Fel (Ready for Takeoff, 714). This unit bears the pilot (2) keyword, so by paying two resources, you may attach him to any friendly Vehicle. Baron Fel is at his best, however, in the cockpit of a Fighter. While Baron Fel pilots a Fighter unit, every friendly Fighter unit gains elite and edge (1), making any Fighter group a force to be reckoned with. In addition, Baron Fel possesses three Force icons, meaning that if he pilots one of the 181st TIE Interceptors, the Imperial Navy gains a three Force icon bonus to the Force struggle!
Coordinate Fleet Movement More awaits within the Rogue Squadron cycle than Imperial Fighter squadrons. In this cycle, the Imperial Navy and Rebel Alliance take the spotlight, but every faction receives plenty of powerful new units, enhancements, and events, along with two new fate cards introduced in this cycle. New versions of iconic characters and ships abound, ranging from Darth Vader and Luke Skywalker to the Millennium Falcon and Slave I. Every faction receives new tactics utilizing new and upcoming cards, including the ones described below. The Rebel Alliance uses the Capital Ship Independence to lead their entire navy in battle, while the Sith Fighter Delta One effortlessly incapacitates unpiloted Vehicle units. On the outskirts of the galaxy, Smuggling Freighters fly relentlessly past enemy shields and blockades. The Jedi may uncover a Lost Master among the forests of Kashyyyk, still maintaining his commitment to the Force, and if a Scum and Villainy pilot is ever forced to Bail Out, you can be sure you’ll face the pilot again on the ground. In the Rogue Squadron cycle, the skill of your best Pilots and Vehicles is on full display, offering countless new strategies for your decks in Star Wars: The Card Game. Launch Your Starships Are you prepared to pilot your starfighters to glory? Your intense dogfights, fleet combat, and hyperspace travel begin with the Ready for Takeoff Force Pack in the Rogue Squadron cycle. Look for the Ready for Takeoff Force Pack at your local retailer in the fourth quarter of 2014! ... Source: Ready for Takeoff (http://www.fantasyflightgames.com/edge_news.asp?eidn=4920)
Title: FFG:The Valemen
Post by: RSSFeeder on 16 July 2014, 18:00:03
The ValemenAnnouncing the Third Chapter Pack in the Wardens Cycle
“It would gladden my heart if I could assure you that the Sand Snakes were alone in wanting war, but I will not tell you lies, ser.”
–George R.R. Martin, A Feast for Crows Fantasy Flight Games is proud to announce The Valemen, the third Chapter Pack in the Wardens cycle for A Game of Thrones: The Card Game! In the struggle to claim the Iron Throne, even those who wait at the periphery of the struggle can have potent effects on the outcome of your battles and intrigues. The Valemen continues the major themes of the Wardens cycle, enhancing the power of trait-based decks, exploring the powerful “limited response” mechanic, and granting more support for some of the game’s most expensive and recognizable characters. You may choose to ride the plains of the Dothraki sea with a horde of Dothraki, defend the Baratheon kings with the Rainbow Guard, or reinforce your walls with the soldiers of House Tully. No matter whom you support in A Game of Thrones: The Card Game, you’ll find the cards you need in The Valemen Chapter Pack. 
A Viper in the Rocks In addition, this Chapter Pack provides cards that offer more support for the Sand Snakes of Dorne – the illegitimate daughters of Oberyn Martell, the Red Viper. Alone, the Sand Snakes can be overwhelmed, but when combined, there are few who can rival their thirst for vengeance.  In A Game of Thrones: The Card Game, you can only trigger one Limited Response each turn. The Valemen Chapter Pack opens new choices for you, providing a Sand Snake with a powerful Limited Response in the person of Nymeria Sand (The Valemen, 48). Nymeria bears the text: “Limited Response: After a Sand Snake character you control is killed, choose and kill a character with an equal or lower printed cost. (Limit 1 limited response per round.)” Nymeria Sand allows you to claim revenge for every Sand Snake death. By choosing and killing a Sand Snake for military claim when Nymeria Sand is in play, you can ensure that your opponent’s characters pay the price for earning the Sand Snakes’ enmity. In A Game of Thrones: The Card Game, you can only trigger one Limited Response each turn. The Valemen Chapter Pack opens new choices for you, providing a Sand Snake with a powerful Limited Response in the person of Nymeria Sand (The Valemen, 48). Nymeria bears the text: “Limited Response: After a Sand Snake character you control is killed, choose and kill a character with an equal or lower printed cost. (Limit 1 limited response per round.)” Nymeria Sand allows you to claim revenge for every Sand Snake death. By choosing and killing a Sand Snake for military claim when Nymeria Sand is in play, you can ensure that your opponent’s characters pay the price for earning the Sand Snakes’ enmity.
Of course, Nymeria’s Limited Response requires a Sand Snake to be killed before it can activate. Thankfully, House Martell and the Sand Snakes gain a way to cheat death in the Red Mountain Keep (The Valemen, 51). During the dominance phase, you may kneel Red Mountain Keep to shuffle one of your Sand Snake characters back into your deck from your dead pile, allowing you to play more copies of that character, ensuring the Sand Snakes never stay gone for long. Decks built around the Sand Snakes trait gain another tool for revenge in An Opening Gambit (The Valemen, 49). You may play this event immediately after you lose a challenge to choose a participating Sand Snake character you control. That character gains a power, and if that was the first challenge initiated during the phase, you may stand the character and draw a card! By strategically losing the first challenge of the challenges phase, you can take revenge and easily gain an advantage in power, standing characters, and cards in hand. Exact Your Revenge Whether you take revenge with the Sand Snakes of Dorne, raid and pillage with the clansmen of the Vale, or plot alongside iconic characters such as Euron Crow’s Eye and Ser Ilyn Payne, you’ll find the cards that will bring you to the Iron Throne within The Valemen Chapter Pack. Look for The Valemen at your local retailer in the fourth quarter of 2014! ... Source: The Valemen (http://www.fantasyflightgames.com/edge_news.asp?eidn=4922)
Title: FFG:Dungeon Inferno
Post by: RSSFeeder on 17 July 2014, 02:00:13
Dungeon InfernoPreview the New Fire at Will Expansion for Dungeon Fighter 
So you made it out of the dungeon alive, did you? Well done! You must truly be a hero. Actually, you look a little cold. Why don’t you come into this cave and warm up by the fire? You know, it’s good that you’re here. This cave has a relatively minor monster infestation that needs to be dealt with. Do you have any experience in fighting goblins, dragons or flame-snorting Bullrogs? Recently, we announced Fire at Will and The Big Wave, the new element-themed expansions for Dungeon Fighter, a humorous dexterity-based board game in which players take on the role of heroes fighting their way through a dungeon filled with horrid yet quirky monsters. In Fire at Will, the heroes explore a cavern beneath the fire mountains, combat flame-breathing monsters, and learn fire elemental magic. Fire can be both your friend and your foe, so it’s best to learn something about it before facing the flames. Today, we’ll take a closer look at how the Fire at Will expansion plays with fire.You will learn how burn tokens can set monsters and heroes ablaze, discover how the new fire element die is used in game play, and get to know the special abilities of the new heroine, Melissa, The Fire Sorceress. 
Let It Burn In the base game of Dungeon Fighter, you can only wound a monster by landing the die on the target – not always an easy feat in this dexterity game. In Fire at Will, you can use burn tokens to torch monsters. Some equipment and power cards allow you to place a specific number of burn tokens on a monster card. Then, at the beginning of each player’s turn, you take away a burn token and deal the monster one point of damage in addition to any damage dealt in an attack. The weakest monsters are doomed the moment they start to burn; stronger ones can continue to fight even while on fire. Heroes can go up in flames, too – after all, fire doesn’t care who it burns. Some monsters, such as the Smoked Zombie, give burn tokens to heroes. Like monsters, heroes burn gradually. If you receive burn tokens, at the beginning of every player’s turn you will remove one token from your hero sheet and suffer one point of damage, until the tokens are gone. 
Fire at Will also includes an eight-sided fire element die that helps reduce monsters to ash. This die deals damage or activates a special ability whether it lands on the target board or not. But you can’t just open fire at random: only certain rooms, pieces of equipment, and monsters allow you to throw this die. During a fight at the Fire Altar, the first player, and only the first player, must throw the element die. If you’re lucky, it will land on a +3 side, adding three points of damage in addition to any damage dealt by where the die lands. If that serious blow doesn’t kill the monster, the next player chooses from the colored hero dice as they would normally. She’s On Fire  Fire at Will introduces you to a new heroine: Melissa, The Fire Sorceress. As that casual smirk on her face suggests, she can play with the most dangerous fires without getting burned. Since she’s an expert in fire magic, you’ll likely want her in any party of heroes journeying through the fire mountains. Her Agile Instincts ability, when activated, prevents her from suffering damage if you throw a miss. Activating her Sworn Enemy ability allows her to deal four points of additional damage to any demon she fights. Fire at Will introduces you to a new heroine: Melissa, The Fire Sorceress. As that casual smirk on her face suggests, she can play with the most dangerous fires without getting burned. Since she’s an expert in fire magic, you’ll likely want her in any party of heroes journeying through the fire mountains. Her Agile Instincts ability, when activated, prevents her from suffering damage if you throw a miss. Activating her Sworn Enemy ability allows her to deal four points of additional damage to any demon she fights.
Melissa also uniquely possesses the Fire Sacrifice ability. It allows you to place three burn tokens on a monster, but only if the group’s leader is willing to suffer one point of damage. Sometimes the best way to be a hero is to take one for the team, but you must decide for yourself whether fire magic is worth the sacrifice. A New Flame Fire at Will also features several new monsters, new equipment cards, game board templates and power cards. There are even new fire-themed ways of throwing the dice, such as the lighter shot, in which you flick the die with your thumb as if you were igniting a lighter, and the firewall shot, in which you bounce the die over the firewall prop as if over a tennis net – just be careful that the die doesn’t touch the firewall and get scorched! The pyrotechnics of Fire at Will are sure to ignite your hunger for dungeon-fighting adventure. Pre-order Fire at Will and the other new Dungeon Fighter expansion, The Big Wave, from your local retailer today! ... Source: Dungeon Inferno (http://www.fantasyflightgames.com/edge_news.asp?eidn=4923)
Title: FFG:Civilization Doesn't Happen by Accident
Post by: RSSFeeder on 17 July 2014, 10:30:03
Civilization Doesn't Happen by AccidentA Preview of the Character Options Available in Far Horizons
Civilization doesn’t happen by accident. It’s hard work. Accordingly, many people find it difficult to understand the colonist’s desire to brave remote areas and dangerous conditions in order to establish settlements on new worlds. When they could live on any of tens of thousands of civilized worlds, what exactly draws them to forge ahead with yet another settlement on a world that is most likely to be unremarkable or inhospitable? This is a question that runs throughout Far Horizons, the Colonist sourcebook for the Star Wars®: Edge of the Empire™ Roleplaying Game. Of course, there are as many specific reasons for colonists to pursue new settlements as there are colonists, but the larger reasons tend to fit into categories that are ages-old. Colonists willing to brave the dangers of the wilds often wish to break with current society or government, establish civilizations based on specific ideals, or exploit new resources. Despite their best intentions, not all colonists are able to enjoy peaceful and profitable lives on their adopted homeworlds. Some become swept up in events and find themselves caught in interplanetary adventures. In such situations, colonists do well to draw upon their considerable courage and talents. Although anyone can become a colonist, the best are typically smart, ambitious, tough, and willing to brave the unknown. These are the characters you’ll find given more attention in Far Horizons. For more about what Far Horizons offers these characters, we turn to lead developer Sam Stewart. 
Colonists extend civilization to the farthest reaches of the Star Wars galaxy.
Lead Developer Sam Stewart on the Colonists of Far Horizons “In our announcement of Far Horizons, we looked at how the sourcebook fleshes out the Colonist career with three new specializations: the Performer, the Entrepreneur, and the Marshal. However, the book offers much, much more for both your Colonist characters and any GM looking to write these characters into a truly engaging campaign that plays to their strengths and interests. Among the first new options Far Horizons offers your Colonists are two new signature abilities. Signature abilities are powerful, advanced abilities that are available only to a specific career. Specializations can be taken by any character, but signature abilities are exclusive to the careers to which they’re tied. “Appropriately, the Colonist’s two signature abilities play to some of this career’s greatest strengths, and the Colonists who take them become even better at drawing upon the knowledge and skills that allow them to thrive on some of the galaxy’s wildest and most dangerous planets. “The first is called Insightful Revelation. As befits the career with the Scholar specialization, Insightful Revelation allows characters to really put their Knowledge skills to use; a character with Insightful Revelation can make a single check to reveal vital information about his or her situation that he or she couldn’t normally uncover. “This is great deal more potent than a normal Knowledge skill check, because it’s specifically intended to reveal relevant information that would otherwise be outside your character’s frame of reference. In complex negotiations with a Hutt Crime Lord? Use Insightful Revelation to find out that his new slave is actually a Rebel agent, and make a deal with her instead. Captured by the Empire? Turns out the lieutenant heading up your prison detail is secretly Force-sensitive, and desperate to hide it from his superiors. Who knew? Well, you did, thanks to Insightful Revelation.
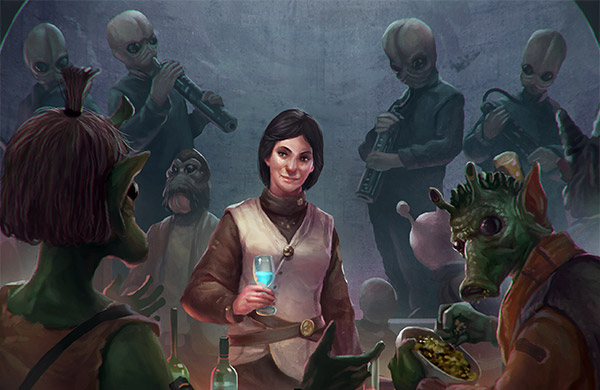
A human Politico has an Insightful Revelation about the Rodians with whom she’s in negotiations.
“Playing alongside these sudden epiphanies, we have Unmatched Expertise. Perhaps more than any other characters, Colonists such as Doctors, Scholars, and Performers are defined by their jobs and specializations. Accordingly, it’s appropriate that Unmatched Expertise rewards them for their dedication and helps make them the very best at what they do. “Specifically, Unmatched Expertise allows the most talented Colonists to decrease the difficulty of all career skill checks by one for an entire encounter. Nobody out-talks a Politico, out-medics a Doctor, or out-deals an Entrepreneur!” New Species “Far Horizons also introduces three new playable species: Arcona, Gran, and Chevin. These species offer you some interesting choices when you build your character. While you can use them with any career, each species works especially well as a Colonist. 
From left to right: Arcona, Gran, and Chevin.
“The Arcona are reptilian, community-oriented individuals from a dry desert planet. They have formidable wills, and their unique heat vision abilities allow them to read others’ moods, giving them a decided edge in negotiations. However, they have one dangerous weakness as a species; an Arcona can become fatally addicted to sodium chloride. To an Arcona, simple purified salt is more powerful than the strongest spice, and whenever these sociable aliens imbibe, they risk dooming themselves to slow and painful deaths. “Meanwhile, the Gran first debuted in the Star Wars®: Age of Rebellion™ Roleplaying Game, but they’re back in Far Horizons because of their powerful personalities. Nobody gabs like a Gran, and their ability to talk the ears off a gundark makes them great Entrepreneurs, Performers, and Politicos. “Finally, we have the Chevin. The Chevin are a species of cunning and dangerous merchants, nomads, and slavers from Vinsoth. Chevin may look clumsy, but you would be unwise to underestimate the resilience of their rock hard skin or their innate physical strength. However, as Far Horizons reveals, their real strength lies in their mercantile and mercenary minds. Chevin can find the advantage in nearly every situation, and exploit it for their benefit. And while many Chevin are known to be vicious slavers, there exist a significant number of Chevin who have turned their back on this deplorable practice and set out to try and change their society. A hard-nosed Chevin who turns away from slavery in preference for justice can make a formidable Marshal.” Skills and Talents for Every Occassion Isolation from the galaxy at large demands that colonists refine their intelligence, skills, and self-reliance. Simultaneously, the often challenging circumstances of their lives demand that they grow adaptable and resilient. Accordingly, Colonists are some of the most reliable adventurers in Edge of the Empire. When they’re swept along by currents of events that carries them into adventures that may span the galaxy, you can rely upon them to make good use of all the skills and tools at their disposal. Far Horizons allows you to prepare your Colonist for more of anything and everything with more talents, careers, and signature abilities. Of course, a good Colonist also knows when to share with others for the good of the homestead, and Far Horizons includes a wealth of material that any Edge of the Empire character can use. 
Few may understand the Colonist’s desire to settle some of the galaxy’s most dangerous and most remote planets, but many have benefitted from their successes.
In upcoming previews, we’ll look at some of the sourcebook’s new gear and at how Game Masters can use the book to craft dynamic and dramatic campaigns centered around a colonist’s homestead. For now, be sure to book your ticket to the next remote planet… Head to your local retailer today to pre-order your copy of Far Horizons! ... Source: Civilization Doesn't Happen by Accident (http://www.fantasyflightgames.com/edge_news.asp?eidn=4924)
Title: FFG:Let the Matchups Begin
Post by: RSSFeeder on 17 July 2014, 19:00:03
Let the Matchups BeginFoul Play Is Now Available for Blood Bowl: Team Manager
The Foul Play expansion for Blood Bowl: Team Manager is now available at your local retailer and online through our webstore! A new season begins for Blood Bowl: Team Manager, and you’ll uncover more opportunities for trickery and low-down, backstabbing moves than ever. The Putrid Players’ Guild joins the Team Managers’ Union, bringing with it three entirely new teams and unprecedented levels of cheating. A fifth player may now join your games of Blood Bowl: Team Manager, and no matter how many players you have in a game, the new fouling skill is sure to upset opposing managers’ plans. Putrid Players In our first preview of the Foul Play expansion, we revealed some of the key players that you can expect to see in the three new teams of the Putrid Players’ Guild. The followers of Nurgle spread disease wherever they play, choking other teams and lowering Star Power with disease tokens. On the other side of the field, the goblins set the standard for sheer craziness in a Blood Bowl matchup. With plenty of flying bombs, chainsaws, and pogo sticks, the goblins offer a multitude of ways to get the better of your opponent. The final team to join the Team Managers’ Union is the Chaos Dwarfs, and they bear grudges like none other. Tackling a Chaos Dwarf just makes him more angry and more likely to exact vengeance. 
Each of these teams also features the new fouling skill, which allows you to look at a Player card in your opponent’s hand and choose to discard it or not. If you reveal a powerful Star Player from your opponent’s hand, you can discard it, and your opponent draws a replacement card, but if you pull a lowly Guardsman, you can return it to your opponent’s hand, keeping him from drawing a better card to replace it. The Penalties of Corruption As we explored in our second preview, you’ll find more than three new teams in Foul Play. The Team Managers’ Union makes new efforts to crack down on cheating, resulting in penalties issued to managers. A thrown elbow at the wrong time might result in a player’s removal from your roster, while roughing the ref may cause you to lose fans. Fortunately for players intent on getting ahead through nefarious tactics, a corrupt ref also makes his first appearance in this season of Blood Bowl: Team Manager. This ref moves from matchup to matchup, helping you and your players cheat by giving you advance knowledge of cheating tokens. 
In addition, for the first time in the history of Blood Bowl: Team Manager, you’ll find stadiums in which to play your matchups. Every stadium has its own special rules that govern how you play there, but rules are meant to be broken in Blood Bowl! You always have the option to cheat by breaking a stadium’s restrictions, but doing so incurs a penalty, which may cost you fans, upgrade cards, or players. Ready for the Big Leagues Nurglings, goblins, and Chaos Dwarfs burst onto the scene of Blood Bowl: Team Manager in this expansion, bringing more cheating and fouling in their wake. Play a game in a brand-new stadium, escape penalties with the help of the corrupt ref, or learn the trademark tactics of new teams. Download the rules from the support page, and pick up your copy of Foul Play at your local retailer today! ... Source: Let the Matchups Begin (http://www.fantasyflightgames.com/edge_news.asp?eidn=4925)
Title: FFG:Torture and Fear
Post by: RSSFeeder on 18 July 2014, 03:30:03
Torture and FearPreview the Dark Eldar Faction from Warhammer 40,000: Conquest
The Dark Eldar exemplify everything that is wanton and cruel in the ancient race they descend from. Fiercely intelligent and devious to a fault, these piratical raiders revel in pain. Feeding upon the suffering of others is the only way they can stave off the slow death of their own souls. The Traxis sector is wracked by war as mighty armies face each other, battling feverishly for control and domination. Warhammer 40,000: Conquest puts you in command of these forces, leading a warlord and his entourage into battle after battle. As you engage in combat for crucial planets, you must simultaneously plan for future conquests, balancing your armies across the Traxis sector. At the beginning of our series of previews for Warhammer 40,000: Conquest, we focused on gameplay, exploring the deployment of armies, the command struggle, and combat at planets. We also looked at a detailed example of a battle, before moving into the various factions and their distinct play styles. Before now, we’ve looked at Space Marines, the Astra Militarum, Orks, and Chaos, but now we turn to the raiding parties of the Dark Eldar! 
The Way of the Wych Dark Eldar raiding parties flow outwards from Commorragh, the Dark City, finding prey wherever they can. The lucky ones are slain by the pirates; those unlucky enough to be taken prisoner are dragged into the coliseums of the Dark Eldar. The leader of the Dark Eldar raids in the Traxis sector is a deadly Wych, Packmaster Kith (Core Set, 5). Although this feared warrior can acquit herself perfectly in combat, she never travels too far without her pets – the Khymerae. These token units are put into play by Kith’s Reaction, which allows you to put a Khymera token into play at a planet whenever Packmaster Kith commits to that planet. 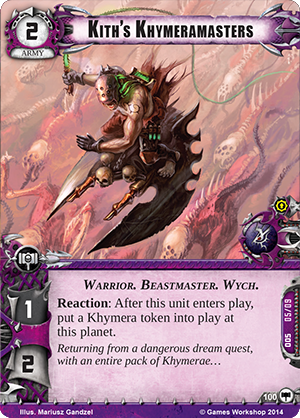 Khymerae are born of the Warp, and these nightmarish creatures can quickly rend your opponent’s forces to shreds. You’ll want to maximize your number of these beasts, and fortunately, Packmaster Kith’s signature squad has numerous options for gaining more Khymerae and taking advantage of the ones you have. The signature squad begins with four copies of Kith’s Khymeramasters (Core Set, 100). Whenever these units enter play, you may put a Khymera token into play at the same planet, increasing your numbers and terrifying your foes. Khymerae are born of the Warp, and these nightmarish creatures can quickly rend your opponent’s forces to shreds. You’ll want to maximize your number of these beasts, and fortunately, Packmaster Kith’s signature squad has numerous options for gaining more Khymerae and taking advantage of the ones you have. The signature squad begins with four copies of Kith’s Khymeramasters (Core Set, 100). Whenever these units enter play, you may put a Khymera token into play at the same planet, increasing your numbers and terrifying your foes.
Your Khymera tokens are most powerful in a pack, but your methods for bringing Khymerae into play may leave them spread across the sector. Thankfully, you have a means to bring them together in the Khymera Den (Core Set, 101). You may exhaust this support card to move any number of Khymera tokens to any planet. Triggering this support will not only unify your Khymerae, but because you can exhaust this support as an Action, you can wait to see where your opponent’s forces will move before you commit your Khymera tokens. You’ll also find one copy of the Agonizer of Bren (Core Set, 103) attachment in Packmaster Kith’s signature squad, allowing you to capitalize even further off your numbers of Khymera tokens. This attachment is attached to an army unit, and it gives that unit +1 ATK for each Khymera token you control, increasing your attack power even as the Khymerae you lead grow more numerous. The signature squad concludes with two copies of the Pact of the Haemonculi (Core Set, 102). By playing this even during the deployment phase, you may sacrifice a unit to discard a random card from your opponent’s hand, before drawing two cards yourself. At first glance, this card might not seem to have much to do with Khymera tokens, but to gain the effects of Pact of the Haemonculi, you must sacrifice a unit. Khymera tokens cost you nothing to bring into play in the first place, and they certainly offer a tempting unit to sacrifice. The Knife that Cuts Unseen 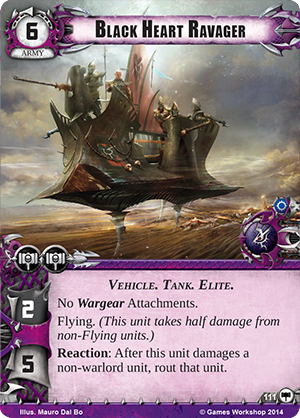 The Dark Eldar, like the Khymerae, are most deadly in combat because of their speed and adaptability. You’ll find ways to suddenly gain an advantage over your opponent throughout the Dark Eldar forces beyond Packmaster Kith’s signature squad. One such unit is the Vile Raider (Core Set, 110). This army possesses the Mobile keyword, allowing it to move to an adjacent planet at the beginning of the combat phase. By committing the Vile Raider to one planet, you can take advantage of its two command icons, before moving it to an adjacent planet to partake in battle. The Dark Eldar, like the Khymerae, are most deadly in combat because of their speed and adaptability. You’ll find ways to suddenly gain an advantage over your opponent throughout the Dark Eldar forces beyond Packmaster Kith’s signature squad. One such unit is the Vile Raider (Core Set, 110). This army possesses the Mobile keyword, allowing it to move to an adjacent planet at the beginning of the combat phase. By committing the Vile Raider to one planet, you can take advantage of its two command icons, before moving it to an adjacent planet to partake in battle.
Another dangerous Vehicle is the Black Heart Ravager (Core Set, 111). This army bears the Flying keyword, meaning that it takes half damage from non-Flying unit, which makes it difficult to destroy. The Black Heart Ravager also has an important Reaction that allows you to rout a non-warlord unit after damaging it with the Black Heart Ravager. A routed unit is returned exhausted to its owner’s headquarters, and by using the Black Heart Ravager, you can quickly cause your opponent’s most powerful units to turn tail and run. The event card Archon’s Terror (Core Set, 117) offers you another option for routing your opponent’s army, by allowing you to rout a non-unique unit during the combat phase. Applied correctly, routing can quickly diminish an enemy army. A final tool for neutralizing the armies of your foes lies in the bowels of the Twisted Laboratory (Core Set, 122). As an Action, you may exhaust this support to blank a target army’s text box for one phase. Since the true potential of most units lies in their special abilities, negating those powers is a sure way to bring your enemies to heel. Whether you crush your foes beneath packs of slavering Khymerae or run circles around them with your mobile armies, your Dark Eldar forces make an excellent spearhead for your efforts in the Traxis sector. Terror and Pain The pirate fleets of the Dark Eldar are ready for you to lead them in raids and assaults on the planets of the Traxis sector. The warriors of the Dark City may sweep over all in their way, but they won’t get there without a fight. Prepare to lead your armies to war! Preorder Warhammer 40,000: Conquest today. ... Source: Torture and Fear (http://www.fantasyflightgames.com/edge_news.asp?eidn=4926)
Title: FFG:Rebellion Day
Post by: RSSFeeder on 18 July 2014, 20:30:06
Rebellion DayAnnouncing a Global Event for STAR WARS (R): Age of Rebellion (TM)
“Count me in.”
–Leia Organa
Are You a Retailer?
Apply today to host a Rebellion Day event!


|
|
The Rebel Alliance needs all the heroes it can get. Will you be one of them? This September 13th is Rebellion Day, and it’s your opportunity to celebrate Star Wars roleplaying by participating in the dramatic, introductory Star Wars®: Age of Rebellion™ adventure, Rescue at Glare Peak. Designed for two to five players (one of whom assumes the role of Game Master), Rescue at Glare Peak challenges you and your friends to complete a daring rescue mission while the fate of the galaxy hangs in the balance. What Is Rebellion Day? Taking place worldwide on September 13th, FFG’s Rebellion Day is a special event designed to build upon the burgeoning excitement and community for the Star Wars: Age of Rebellion Roleplaying Game. Only a limited number of kits are available, so retailers should apply today. This global event will provide players an engaging way to explore the Age of Rebellion Roleplaying Game, even as they strike a blow for galactic freedom! The highlight of Rebellion Day is Rescue at Glare Peak, a special introductory Age of Rebellion adventure designed specifically for the event. 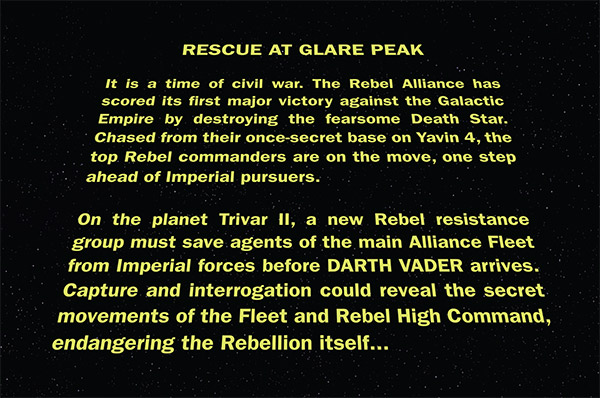
On Rebellion Day, you and your friends will assume the roles of heroic Rebel agents who must work together to rescue a pair of Rebel pilots who have crash-landed on the planet Trivar II. Four different pre-generated characters introduce several of the many careers, specializations, skills, and talents of Age of Rebellion. Choose from an Ithorian Engineer, a Bothan Spy, a Human Commander, and a Duros Soldier. You’ll need to make use of the tricks, talents, and technology these characters possess in order to succeed at your mission. The Rebellion Day Game Kit The Rebellion Day Game Kit comes with everything retailers need to run this unique Star Wars adventure:
- One 48-page adventure booklet containing the adventure Rescue at Glare Peak and a full set of fast-play rules to get you quickly into the action
- Three sets each of four different Rebel character sheets
- One set of custom Star Wars Roleplaying Dice
- Three copies of a player handout, featuring three full-color maps of the adventure’s key locations, to help players better visualize their characters’ surroundings
- One promotional poster with bold, Rebellion-themed art to advertise your event

What Is Star Wars: Age of Rebellion? Age of Rebellion is the second of three epic, fully cross-compatible Star Wars roleplaying systems by Fantasy Flight Games. It thrusts players directly into the ongoing Galactic Civil War between the evil Empire and the rag-tag Rebel Alliance. Woefully outnumbered and outgunned by the Empire and its vast military might, player characters may undertake any of a wide variety of missions. They may perform reconnaissance, engage in guerrilla warfare, or recruit citizens from across the galaxy. At the core of FFG’s Star Wars roleplaying mechanics are its custom dice. Designed to enhance a heavily narrative roleplaying system, these dice combine symbols for success and failure with symbols for “threat” and “advantage.” As a result, players may succeed at their actions but still earn “threat,” or fail but still “advantages.” These results encourage stunning plot twists, and every roll of the dice encourages additional storytelling. How Do You Get Involved?  All applications are due by Wednesday, August 6th at 23:59 CST, though we strongly encourage interested retailers to apply as soon as possible. Our number of Rebellion Day Game Kits are limited. All applications are due by Wednesday, August 6th at 23:59 CST, though we strongly encourage interested retailers to apply as soon as possible. Our number of Rebellion Day Game Kits are limited.
If you are approved to host a Rebellion Day event, we will send instructions for ordering your event kit. We’ll post a list of participating retailers in a few weeks. What Can Players Do? If you’re an Age of Rebellion player, be sure to contact your favorite local gaming store about this exciting event. Then be sure to check our website in late August for the full list of participating retailers in order to make your plans to attend. In the meantime, you can watch our Age of Rebellion website for more news and previews. Join the Rebel Alliance Retailers, remember that we have a limited number of Rebellion Day Game Kits, and the sign up for this exclusive introductory event closes on Wednesday, August 6th. Submit your application today to take your stand for galactic freedom on Rebellion Day! ... Source: Rebellion Day (http://www.fantasyflightgames.com/edge_news.asp?eidn=4927)
Title: FFG:Heroic Endeavors
Post by: RSSFeeder on 19 July 2014, 05:00:04
Heroic EndeavorsPreview Two New Heroes and Hero Classes from Manor of Ravens
In the forests near Greyhaven, there lies a haunted manor. By day, bandits raid the house for moldering treasures and arcane artifacts. By night, terrifying wraiths wisp through the halls, devouring the soul of any adventurer foolish enough to enter. As if these fearsome guardians were not enough, a magical construct stalks the halls of the mansion, searching for trespassers. Manor of Ravens, an upcoming expansion for Descent: Journeys in the Dark Second Edition, dares any hero to enter the haunted mansion and brave the dangers within. In our last preview, we looked at bandits and wraiths, the two new monster groups that serve the overlord in Manor of Ravens. Today, we’ll examine the heroes who face these threats: Alys Raine and Thaiden Mistpeak.
Marshal of the Realm By her eighth birthday, Alys Raine could recite the entirety of the Common Law in one sitting and had begun memorizing the seven treaties associated with it. Preferring her studies to long hours of combat training, her dream of becoming a Marshal kept her moving forward. Now a rising star among her comrades, Alys Raine drives fear into the hearts of the unjust throughout Terrinoth. As a Marshal of the Citadel, Alys brings justice wherever it is needed, serving as both judge and executioner. Alys Raine proves herself a powerful addition to your hero party as you seek to uncover the mystery of at the heart of the manor. She is completely devoted to her duties as a Marshal, and her hero ability and heroic feat give you the tools to trigger Class cards whenever you need them. Alys’s hero ability allows you to recover fatigue whenever an adjacent hero takes one or more damage, giving you the energy you need to enact justice on the evildoer. 
Alys’s heroic feat lets you use your powerful Class cards more than once per turn. By activating Alys’s heroic feat during any player’s turn, you may refresh all of your exhausted cards and recover two fatigue, freeing you to exercise your power once more. The Power of Law The Marshal hero class puts the judicial power of the Citadel behind your quests, inviting any Warrior can punish the overlord for his flagrant disregard for the law. The Marshal hero class begins with the Retribution card. By exhausting this card when a nearby monster attacks another hero, you can force that monster to take damage as its just desserts. Vigilant Watch allows you to punish monsters for leaving your presence, whereas I am the Law allows you to attack a monster that attacked you, possibly inflicting a condition on the monster as well!  
Some of the Marshal’s other Class cards punish the overlord for using his Overlord cards against the heroes. Zealous Fire can be exhausted when the overlord plays an Overlord card, allowing you to recover a fatigue. To make matters worse for the overlord, when Zealous Fire refreshes, you may deal a damage to a nearby monster. The By the Book card gives you a chance to cancel an Overlord card, returning it to the Overlord deck without effect. A Hunter in the Wild Alys Raine is aided in her investigations by Thaiden Mistpeak, a Scout with an uncanny knack for finding what others cannot. He led his clan through the Crags of the Forgotten, rescued his love from the center of the Gray Wastes, and recovered his grandmother’s hairpin from a very large haystack… or so it is said. He never planned to use his talents to avenge the deaths of his loved ones. But when his family’s murderers were never found, he took matters into his own hands. He has never spoken of that fateful journey, but from that day on, Thaiden Mistpeak was a changed man. All that remained was his skill, and his passion for the hunt. Thaiden is an expert at surviving in the wilds, and his hero ability and heroic feat give him some of the tricks he may need to get the upper hand on the overlord’s monsters. By using Thaiden’s hero ability, you may cancel your attack and search an adjacent search token instead. By using this ability when an attack would miss or fail to cause damage, you can salvage what would have been a wasted action. 
Thaiden’s heroic feat gives you a way to escape any monsters that happen to get too close. When a monster enters a space adjacent to you, you may trigger Thaiden’s heroic feat to immobilize the monster and immediately move up to three spaces! By using the heroic feat at the right time, you can neutralize a monster and prepare for Thaiden’s attack on his next turn. Tracking Your Quarry Monsters throughout Terrinoth would be wise to fear any Scout trained as a Bounty Hunter. Bounty Hunters excel at tracking a single monster before moving in for the kill. A Bounty Hunter’s Class cards make his hunts even more deadly. Bounty Hunters start gameplay with the Chosen Target card, which they can exhaust to track a monster in their line of sight. Each of your attacks against the tracked monster gain an additional damage, which lets you take it down faster than ever. Other Class cards give you more benefits for hunting a tracked monster. Not so Fast reduces your target’s movement points and gives you movement points, whereas Evil Eye allows you to give your tracked monster the Doomed condition.  
A key aspect of your hunts is waiting for the opportune moment to strike. Other Bounty Hunter Class cards reward you for doing just that. Lie in Wait takes an action to exhaust, but when it refreshes it gives you a bonus attack action with an additional power die! Undercover, on the other hand, invites you to enhance your defense for a turn before breaking out of hiding and gaining three movement points on your next turn. Into the Manor The mystery of the haunted manor awaits you and your fellow heroes within the Manor of Ravens expansion. Alys Raine and Thaiden Mistpeak may give you the strength to cross the mansion’s threshold, but can you withstand the horrors within? Preorder Manor of Ravens at your local retailer today! ... Source: Heroic Endeavors (http://www.fantasyflightgames.com/edge_news.asp?eidn=4928)
Title: FFG:Heroic Endeavors
Post by: RSSFeeder on 21 July 2014, 16:30:03
Heroic EndeavorsPreview Two New Heroes and Hero Classes from Manor of Ravens
In the forests near Greyhaven, there lies a haunted manor. By day, bandits raid the house for moldering treasures and arcane artifacts. By night, terrifying wraiths wisp through the halls, devouring the soul of any adventurer foolish enough to enter. As if these fearsome guardians were not enough, a magical construct stalks the halls of the mansion, searching for trespassers. Manor of Ravens, an upcoming expansion for Descent: Journeys in the Dark Second Edition, dares any hero to enter the haunted mansion and brave the dangers within. In our last preview, we looked at bandits and wraiths, the two new monster groups that serve the overlord in Manor of Ravens. Today, we’ll examine the heroes who face these threats: Alys Raine and Thaiden Mistpeak.
Marshal of the Realm By her eighth birthday, Alys Raine could recite the entirety of the Common Law in one sitting and had begun memorizing the seven treaties associated with it. Preferring her studies to long hours of combat training, her dream of becoming a Marshal kept her moving forward. Now a rising star among her comrades, Alys Raine drives fear into the hearts of the unjust throughout Terrinoth. As a Marshal of the Citadel, Alys brings justice wherever it is needed, serving as both judge and executioner. Alys Raine proves herself a powerful addition to your hero party as you seek to uncover the mystery at the heart of the manor. She is completely devoted to her duties as a Marshal, and her hero ability and heroic feat give you the tools to trigger Class cards whenever you need them. Alys’s hero ability allows you to recover fatigue whenever an adjacent hero takes one or more damage, giving you the energy you need to enact justice on the evildoer.
Alys’s heroic feat lets you use your powerful Class cards more than once per turn. By activating Alys’s heroic feat during any player’s turn, you may refresh all of your exhausted cards and recover two fatigue, freeing you to exercise your power once more. The Power of Law The Marshal hero class puts the judicial power of the Citadel behind your quests, inviting any Warrior to punish the overlord for his flagrant disregard for the law. The Marshal hero class begins with the Retribution card. By exhausting this card when a nearby monster attacks another hero, you can force that monster to take damage as its just desserts. Vigilant Watch allows you to punish monsters for leaving your presence, whereas I am the Law allows you to attack a monster that attacked you, possibly inflicting a condition on the monster as well!
Some of the Marshal’s other Class cards punish the overlord for using his Overlord cards against the heroes. Zealous Fire can be exhausted when the overlord plays an Overlord card, allowing you to recover a fatigue. To make matters worse for the overlord, when Zealous Fire refreshes, you may deal a damage to a nearby monster. The By the Book card gives you a chance to cancel an Overlord card, returning it to the Overlord deck without effect. A Hunter in the Wild Alys Raine is aided in her investigations by Thaiden Mistpeak, a Scout with an uncanny knack for finding what others cannot. He led his clan through the Crags of the Forgotten, rescued his love from the center of the Gray Wastes, and recovered his grandmother’s hairpin from a very large haystack… or so it is said. He never planned to use his talents to avenge the deaths of his loved ones. But when his family’s murderers were never found, he took matters into his own hands. He has never spoken of that fateful journey, but from that day on, Thaiden Mistpeak was a changed man. All that remained was his skill, and his passion for the hunt. Thaiden is an expert at surviving in the wilds, and his hero ability and heroic feat give him some of the tricks he may need to get the upper hand on the overlord’s monsters. By using Thaiden’s hero ability, you may cancel your attack and search an adjacent search token instead. By using this ability when an attack would miss or fail to cause damage, you can salvage what would have been a wasted action.
Thaiden’s heroic feat gives you a way to escape any monsters that happen to get too close. When a monster enters a space adjacent to you, you may trigger Thaiden’s heroic feat to immobilize the monster and immediately move up to three spaces! By using the heroic feat at the right time, you can neutralize a monster and prepare for Thaiden’s attack on his next turn. Tracking Your Quarry Monsters throughout Terrinoth would be wise to fear any Scout trained as a Bounty Hunter. Bounty Hunters excel at tracking a single monster before moving in for the kill. A Bounty Hunter’s Class cards make his hunts even more deadly. Bounty Hunters start gameplay with the Chosen Target card, which they can exhaust to track a monster in their line of sight. Each of your attacks against the tracked monster gain an additional damage, which lets you take it down faster than ever. Other Class cards give you more benefits for hunting a tracked monster. Not so Fast reduces your target’s movement points and gives you movement points, whereas Evil Eye allows you to give your tracked monster the Doomed condition.
A key aspect of your hunts is waiting for the opportune moment to strike. Other Bounty Hunter Class cards reward you for doing just that. Lie in Wait takes an action to exhaust, but when it refreshes it gives you a bonus attack action with an additional power die! Undercover, on the other hand, invites you to enhance your defense for a turn before breaking out of hiding and gaining three movement points on your next turn. Into the Manor The mystery of the haunted manor awaits you and your fellow heroes within the Manor of Ravens expansion. Alys Raine and Thaiden Mistpeak may give you the strength to cross the mansion’s threshold, but can you withstand the horrors within? Preorder Manor of Ravens at your local retailer today! ... Source: Heroic Endeavors (http://www.fantasyflightgames.com/edge_news.asp?eidn=4928)
Title: FFG:Prepare for Battle
Post by: RSSFeeder on 22 July 2014, 01:00:03
Prepare for BattleNew FAQ and Tournament Rules are Available for A Game of Thrones: The Card Game
The 2014 A Game of Thrones: The Card Game National Championship season has begun, and it’s time to once again update the rules governing battle. How must armies approach each other? What famous warriors are allowed on the battlefield? Are there those who have earned a black mark?
Knowledge before battle is just as important as your armor, so make sure to read the new FAQ (pdf, 15.3 MB) and Tournament Rules (pdf, 1.4 MB) before heading out to a tournament.
 
Click on the above thumbnails to download the FAQ (left) and Tournament Rules (right)
These changes will go into effect on August 1st, 2014. A Word from the Developers Hello A Game of Thrones players! With the 2014 National Championship season fast approaching, we have been hard at work on the newest FAQ and Tournament Rules update. For errata and rulings, this update offers two new items. The first is an addition to entry 3.6, which now establishes that when a player is choosing targets for an effect that he or she has triggered, targets that can lead to a successful resolution of the effect must be chosen. The second addition was made to address some confusion over when and how the deadly keyword resolves. To clean up this situation we have added a “resolve deadly” step to the challenge resolution framework action window to formally establish that deadly resolves as a framework step after renown has been awarded. An additional clarification on this point can be found in the Q&A section of the FAQ, on page 26. In evaluating the metagame and the restricted list, we took a long look at the data reported on Regional Championships around the world, looked closely at numerous tournament reports, and examined the emerging metagame with playtesters.  One of the most common trends during Regionals season was an abundance of River plot decks. To check this flood, we have added Crossing the Mummer’s Ford (Spoils of War, 20) to the restricted list, with the intent of increasing the opportunity cost of running the River plot deck for card advantage, and thereby increasing the amount of plot diversity in the metagame. One of the most common trends during Regionals season was an abundance of River plot decks. To check this flood, we have added Crossing the Mummer’s Ford (Spoils of War, 20) to the restricted list, with the intent of increasing the opportunity cost of running the River plot deck for card advantage, and thereby increasing the amount of plot diversity in the metagame.
Regional results also suggested that House Martell was performing slightly ahead of where they should be in relation to the other Houses, and that House Baratheon was slightly behind the curve. To combat these tendencies, we have restricted Bloodthirst (A Hidden Agenda, 119) (which tends to encourage unpopular character-light strategies) and the new Arianne Martell (The Kingsguard, 47), while simultaneously removing Melisandre’s Scheme (Reach of the Kraken, 9) from the list to assist House Baratheon. Some ingenious combo decks following a pattern of self-discard followed by recurring combo cards from the discard and/or dead piles also started to make waves late in the season. To challenge this approach we have added two of the more popular facilitators, Desperate Measures (The Captain’s Command, 99) and Blessed by the Maiden (A Journey’s End, 118), to the restricted list.  When evaluating the emerging metagame, there were concerns that a couple decks—Conquest (Spoils of War, 1) rush with The Art of Seduction (Lions of the Rock, 52) and Greyjoy longships building a wall of STR with Naval Escort (A Sword in the Darkness, 48)—could be quite difficult to contend with in the new environment, and we have taken precautionary measures on each of those deck types. When evaluating the emerging metagame, there were concerns that a couple decks—Conquest (Spoils of War, 1) rush with The Art of Seduction (Lions of the Rock, 52) and Greyjoy longships building a wall of STR with Naval Escort (A Sword in the Darkness, 48)—could be quite difficult to contend with in the new environment, and we have taken precautionary measures on each of those deck types.
We also discussed the possibility of removing the Fury plots from the list and came to the conclusion that the Furies did not have to be “all or nothing” with regard to their restricted status. And so Fury of the Lion (Ancient Enemies, 26), Fury of the Stag (Ancient Enemies, 27), and Fury of the Sun (Ancient Enemies, 30) are being removed from the list, while the other three Furies remain restricted at this time. For the melee environment, we have added the aforementioned Desperate Measures (The Captain’s Command, 99) and Blessed by the Maiden (A Journey’s End, 118) to the list, as well as To the Spears (Princes of the Sun, 60), which was becoming more and more a staple card in the format. As a whole, the changes to the restricted list were made to make the environment as engaging and enjoyable as possible for the National Championship season. 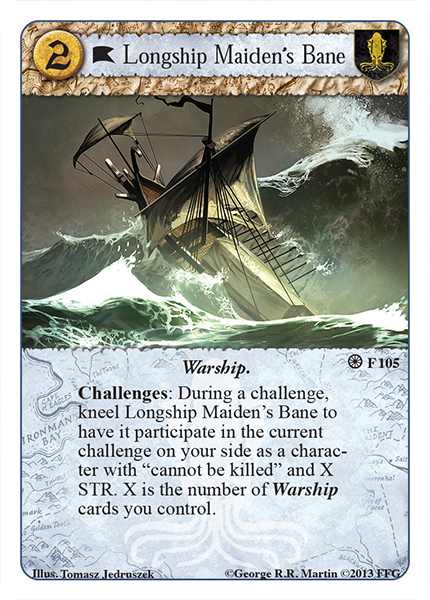 The Question and Answer section in the FAQ provides clarification entries on a number of topics the community has been asking about lately. Does Longship Maiden’s Bane (A Hidden Agenda, 105) retain the immunity granted by the House of Dreams (A Roll of the Dice, 119) agenda while the Longship is functioning as a character? Can you save a card that is being killed or discarded to pay a cost? Can 0 be chosen when interpreting “any number” abilities, and does a resolution of such an ability on 0 entities constitute a successful resolution? The answers to these questions, and others, can be found on pages 28-29. The Question and Answer section in the FAQ provides clarification entries on a number of topics the community has been asking about lately. Does Longship Maiden’s Bane (A Hidden Agenda, 105) retain the immunity granted by the House of Dreams (A Roll of the Dice, 119) agenda while the Longship is functioning as a character? Can you save a card that is being killed or discarded to pay a cost? Can 0 be chosen when interpreting “any number” abilities, and does a resolution of such an ability on 0 entities constitute a successful resolution? The answers to these questions, and others, can be found on pages 28-29.
Finally, regarding the Tournament Rules, we have added a special note to the card legality section stating that the A Dire Message chapter pack will not be legal for the 2014 North American Melee and Joust Championships. Good luck to all players competing in all upcoming Regional and National Championship events, and to those coming to Gen Con, we’re looking forward to seeing you at the show! Nate French & Damon Stone
Fantasy Flight Games 
Thanks Nate and Damon!
Don’t let yourself be pulled into a fight without preparing first. Download the new FAQ and Tournament Rules today so you’ll be ready when it’s time to ride into battle. ... Source: Prepare for Battle (http://www.fantasyflightgames.com/edge_news.asp?eidn=4929)
Title: FFG:Surf's Up
Post by: RSSFeeder on 22 July 2014, 09:30:03
Surf's UpPreview The Big Wave, an Expansion for Dungeon Fighter
If you continue on this road, it leads you straight through swamps of certain, unavoidable death. Fortunately, there’s a shortcut that descends deep beneath the ocean surface through the clammy caves and exits on a sunny, sandy beach – easy peasy. Just watch out for the Black Lagoon Creature. He’s been a bit cranky lately. Be careful not to disturb the dragon, either. The locals say too that an ancient, tentacled, sea monster dwells in the caves, but that’s probably an empty myth… Recently, we announced Fire at Will and The Big Wave, two element-themed expansions for Dungeon Fighter, the dexterity-based board game in which players battle their way though a winding dungeon filled with horrible (and horribly quirky) monsters. The first preview focused on Fire at Will, taking a look at that expansion’s burn tokens, fire element die, and flame-kindling new hero Melissa, The Fire Sorceress. Today we’ll dip our toes into The Big Wave. You’ll find out more about the expansion’s new hero, Jack Parrot, peek into some of the underwater rooms that lie on your path through the caves, and learn about the slippery water element dice. Avast, Me Hearties! Whether you’re fighting sea creatures or desert-dwelling beasts, you’ll want the pirate Jack Parrot in your group of heroes. His swashbuckling and seafaring skills will help you coast through peril. Being a pirate, he’s a bit underhanded and dishonest, but you can always trust a dishonest man– to be dishonest. His Pickpocket ability allows you to add two gold pieces to your chest, although Jack probably won’t reveal how he acquired this treasure. Jack also knows how to fight: his Piercing Damage ability allows him to deal a monster two extra damage when the die lands on the target board. Jack’s pet parrot is always on his shoulder, and just as a parrot mimics speech, Jack mimics other heroes. When his Mimic ability is activated during a fight, he can copy any special ability belonging to another hero in the party. Just spend an experience point at the beginning of the turn when you want to use the copied skill. Thanks to this ability, Jack Parrot is a true Jack-of-all-trades who you’d want to fight alongside in any dungeon. Water, Water Everywhere The Big Wave includes a new dungeon sheet, making the underwater caves different from any dungeon you’ve fought in before. Many rooms in the caves involve new water-themed dice throws, which can transform even the tamest sea creatures into formidable opponents. 
As you can see, the right-hand path through the dungeon leads to a training room, where heroes gain three experience points from defeating the room’s resident monster. The next room, however, is flooded. To defeat the monster that swims in the rising waters, you’ll have to make a puddle shot. Placing the puddle prop in between yourself and the target board, you must bounce the die in the dry land middle of the puddle. If the die hits the puddle itself, it is considered lost in the water, and the throw counts as a miss. On the left-hand path is the waterfall room, where you must roll the die down the length of the waterfall prop before bouncing it off the table. The next room is the Water Shrine. There, the kindly spirits of the vasty deep permit you to throw the three small, turquoise, water element dice at the start of your battle. The dice must be thrown all at once, and, like sea spray, they tend to scatter unpredictably. Any dice that land off of the target count as misses; any that land on the target deal damage according to the normal rules. If all three count as a hit or a miss, you can activate one of your hero’s special abilities – which may turn the tide in your favor. 
The Next Wave The Big Wave brings in a mob of new monsters, including the legendary and slimy Black Lagoon Creature. The shops are stocked with water-friendly equipment such as Siren Soup. Oxygen tokens, which show how much air a hero has left, can take your breath away and knock your sea legs right out from under you. Fortunately, the new major healing template creates a spring of healing waters right on the target board. But watch out for the slime template, which causes the die to randomly slip and slide around. The heroes may make it out of the caves and onto the sunny beach, or they may have their brains eaten by Waterlogged Zombies. Either way, you and your friends are sure to soak up the fun. Now that this preview has whet your appetite, pre-order The Big Wave from your local retailer today. You can also check out the Dungeon Fighter minisite for more details. ... Source: Surf's Up (http://www.fantasyflightgames.com/edge_news.asp?eidn=4930)
Title: FFG:Study the Code
Post by: RSSFeeder on 22 July 2014, 18:00:03
Study the CodeNew FAQ and Tournament Rules are Available for Android: Netrunner
The 2014 Android: Netrunner National Championship season is under way! Runners and Corporations are constantly reshaping the Network and exploring what is possible within digital space. But how does one learn the strategies and tricks for navigating the innumerable ICE and programs that lay within that world? Be ready for the next tournament you attend by checking out the new FAQ (pdf, 13.8 MB) and Tournament Rules (pdf, 6.1 MB).  
These changes will go into effect on August 1st, 2014. A Word from the Developer 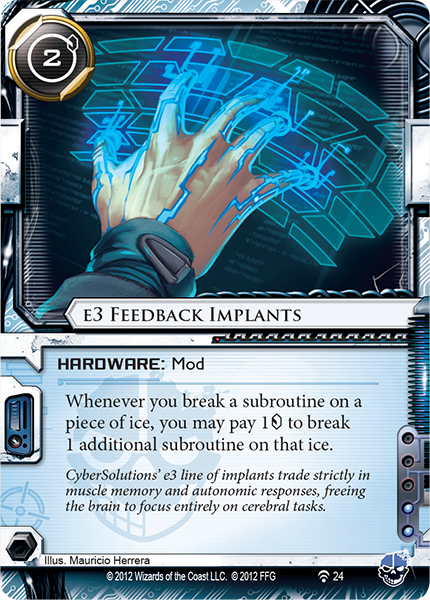 Greetings Android: Netrunner players! Greetings Android: Netrunner players!
In this FAQ update you will find many clarifications, covering cards released through Honor and Profit. There is one new errata: the word “additional” has been removed from e3 Feedback Implants. The card still functions in the way that you would expect, but this errata helps clarify the meaning of the word “additional” on other cards. In the Tournament Rules, the "weak-side wins" tiebreaker has been removed. This tiebreaker was not breaking many ties, and so strength of schedule is now the primary tiebreaker. We have been pleased with the positive response to the double-elimination brackets, so those remain unchanged. Hope to see you at Gen Con, and good luck with your agendas! Lukas Litzsinger
Lead Designer Thanks Lukas! Don’t become one of the countless Runners who get lost in the Network. Learn your way around cyberspace with the new FAQ and Tournament Rules and become an expert in the nuances of the net. ... Source: Study the Code (http://www.fantasyflightgames.com/edge_news.asp?eidn=4931)
Title: FFG:Holding the Darkness at Bay
Post by: RSSFeeder on 23 July 2014, 02:30:03
Holding the Darkness at BayNo Updates to the FAQ and Tournament Rules for Call of Cthulhu: The Card Game
During the last update in April, Call of Cthulhu: The Card Game’s FAQ included a number of large changes. The metagame has been varied and interesting since then, and FFG has decided to let the format to continue evolving. There will be no changes to the Call of Cthulhu: The Card Game FAQ and Tournament Rules at this time.
You can find the current versions of the FAQ (pdf, 12 MB) and Tournament Rules (pdf, 3 MB) in their usual spot on the Call of Cthulhu: The Card Game website.
 
While no changes were made this time around, it never hurts to reacquaint yourself with the finer details of the rules. Download the FAQ and Tournament Rules today and refresh your knowledge of the game. ... Source: Holding the Darkness at Bay (http://www.fantasyflightgames.com/edge_news.asp?eidn=4932)
Title: FFG:North American Championship Prizes
Post by: RSSFeeder on 23 July 2014, 11:00:03
North American Championship PrizesDetails on Our Major Tournaments at Gen Con Indy 2014 -white.png)
Gen Con Indy 2014 is less than a month away, and with it, North American Championships! While many of our tournaments are getting close to selling out, there’s still time to find your spot and compete for the title of North American Champion in the game of your choice. (Initial flights of Android: Netrunner and X-Wing™ are sold out, but each game has a second flight on Friday open to players with a generic ticket.) What Games Have a North American Championship? While many players will come to our North American Championships with the ultimate goal of winning and attaining the valuable bye at the 2014 World Championship, there are many exclusive prizes that will be awarded for other competitors, including participation prizes for everyone. Click on the list below to jump to the game of your choice and see what prizes will be given away. A Game of Thrones: The Card Game North American Joust Championship Prizes - Champion: The winner receives a North American Joust Championship trophy.
- Top Two: The top two players each receive one backpack with printed A Game of Thrones art.
- Top Sixteen: The top sixteen players each receive one North American Championship playmat.
- Top Thirty-Two: The top thirty-two players each receive one set of acrylic House Martell power tokens.
- All Participants: Each player receives one alternate art Berric Dondarrion card.
- Completion Prize: Each player who plays all rounds of the tournament will receive a second copy of the alternate art Berric Dondarrion card.
Note: The overall champion for the Joust and Melee Championships receives a special trophy and a first-round bye at the 2014 A Game of Thrones: The Card Game Joust World Championship. 
A Game of Thrones: The Card Game North American Melee Championship Prizes - Champion: The winner receives a North American Melee Championship trophy.
- Top Four: The top four players each receive one backpack with A Game of Thrones art.
- Top Sixteen: The top sixteen players each receive one North American Championship playmat.
- Top Thirty-Two: The top thirty-two players each receive one set of acrylic House Martell power tokens.
- All Participants: Each player receives one alternate art Berric Dondarrion card.
- Completion Prize: Each player who plays all rounds of the tournament will receive a second copy of the alternate art Berric Dondarrion card.
Note: The overall champion for the Joust and Melee Championships receives a special trophy and a first-round bye at the 2014 A Game of Thrones: The Card Game Joust World Championship. Android: Netrunner North American Championship Prizes - Champion: The winner receives a North American Championship trophy and a first-round bye at the 2014 Android: Netrunner World Championship.
- Top Two: The top two players each receive one backpack with Android: Netrunner art.
- Top Eight: The top eight players each receive one North American Championship playmat.
- Top Sixty-Four: The top sixty-four players each receive one set of acrylic agenda counters.
- All Participants: Each player receives one alternate art Noise identity card.
- Completion Prize: Each player who plays all rounds of the tournament will receive a second copy of the alternate art Noise identity card.
Note: All participation and completion prizes will be awarded to players during the Thursday and Friday flights. All other prizes will be awarded to players that make the final rounds on Saturday. 
Call of Cthulhu: The Card Game National Championship Prizes - Champion: The winner receives a North American Championship trophy and a first-round bye at the 2014 Call of Cthulhu: The Card Game World Championship.
- Top Two: The top two players each receive one backpack with Call of Cthulhu: The Card Game art.
- Top Eight: The top eight players each receive one North American Championship playmat.
- Top Sixteen: The top sixteen players each receive one set of wooden elder sign domain markers.
- All Participants: Each player receives one alternate art Deep One Assault card.
- Completion Prize: Each player who plays all rounds of the tournament will receive a second copy of the alternate art Deep One Assault card.

Star Wars™: The Card Game National Championship Prizes - Champion: The winner receives a North American Championship trophy and a first-round bye at the 2014 Star Wars: The Card Game World Championship.
- Top Two: The top two players each receive one backpack with Star Wars: The Card Game art.
- Top Sixteen: The top sixteen players each receive one North American Championship playmat.
- Top Thirty-Two: The top thirty-two players each receive one set of acrylic force dedication tokens.
- All Participants: Each player receives one alternate art Yoda card.
- Completion Prize: Each player who plays all rounds of the tournament will receive a second copy of the alternate art Yoda card.

Warhammer: Diskwars National Championship Prizes - Champion: The winner receives a North American Championship trophy and a first-round bye at the 2014 Warhammer: Diskwars World Championship.
- Top Two: The top two players each receive one backpack with Warhammer: Diskwars art.
- Top Eight: The top eight players each receive one wooden initiative hammer.
- Top Sixteen: The top sixteen players each receive one acrylic range ruler.
- All Participants: Each player receives one alternate art Speed of Asuryan card.
- Completion Prize: Each player who plays all rounds of the tournament will receive a second copy of the alternate art Speed of Asuryan card.

X-Wing™ National Championship Prizes - Champion: The winner receives a North American Championship trophy and a first-round bye at the 2014 X-Wing™ World Championship.
- Top Two: The top two players each receive one backpack with Star Wars: X-Wing™ art.
- Top Eight: The top eight players each receive one set of North American Championship acrylic movement templates.
- Top Sixty-Four: The top sixty-four players each receive one set of acrylic target lock tokens.
- All Participants: Each player receives one alternate art Chewbacca pilot card.
- Completion Prize: Each player who plays all rounds of the tournament will receive a second copy of the alternate art Chewbacca pilot card.
Note: All participation and completion prizes will be awarded to players during the Thursday and Friday flights. All other prizes will be awarded to players that make the final rounds on Saturday. 
Join Us at Gen Con While our North American Championships are the highlight of Organized Play at Gen Con, we are running countless other FFG events over the course of Gen Con’s four jam-packed days. Check the schedule and make sure you don’t miss out playing your favorite games! ... Source: North American Championship Prizes (http://www.fantasyflightgames.com/edge_news.asp?eidn=4933)
Title: FFG:Join Us at PAX
Post by: RSSFeeder on 23 July 2014, 19:30:02
Join Us at PAXMeet FFG at PAX Prime 2014, August 29-Sept 1
Fantasy Flight Games is coming to PAX Prime 2014 at the end of August! FFG staff will be at PAX Prime 2014 to run demos, talk to fans, and run tournaments. Join one of our tournaments, stop by our room for board games and demos, or just come on by and say hello. FFG Will be at PAX Prime All Four Days  FFG will be in room 212 of the Washington Convention Center, where FFG staff and volunteers will be set up to run demos of many of our most popular board and card games, including some upcoming releases. Stop by and learn how to play a game you’ve had your eye on for a while or be one of the first to learn a game not yet released! FFG staff will be present throughout each day if you just want to stop by and say hello. We will also be running tournaments in the Seattle Ballroom on the 4th floor of the Motif Seattle Hotel (formerly known as the Red Lion Hotel on Fifth Ave) on Friday and Saturday. FFG will be in room 212 of the Washington Convention Center, where FFG staff and volunteers will be set up to run demos of many of our most popular board and card games, including some upcoming releases. Stop by and learn how to play a game you’ve had your eye on for a while or be one of the first to learn a game not yet released! FFG staff will be present throughout each day if you just want to stop by and say hello. We will also be running tournaments in the Seattle Ballroom on the 4th floor of the Motif Seattle Hotel (formerly known as the Red Lion Hotel on Fifth Ave) on Friday and Saturday.
We will be demoing FFG classics, such as A Game of Thrones: The Board Game Second Edition, X-Wing™, Descent: Journeys in the Dark Second Edition, and Android: Netrunner. If you already know how to play a game but want to share it with your friends, you can visit the PAX board game library and check out one of our many games there. We will also have brand new games available to demo, including The Witcher Adventure Game and Warhammer 40,000: Conquest. There may even be a surprise or two thrown in! Speaking of surprises, PAX would not be the experience it is without pins, and FFG is joining in on the fun this year. Supplies will be extremely limited, however, so we cannot guarantee everyone who visits our room will receive one. Stop by early in the weekend to increase your chances of receiving a pin. PAX Tournaments We will be running a 64-person X-Wing tournament Friday, August 29th, starting at 11 am, and a 128-person Android: Netrunner tournament on Saturday, August 30th, starting at 11 am. Signups for both tournaments start at 10 am the day of the tournament at PAX Tabletop Tournaments HQ, in the Emerald Ballroom on the 3rd floor of the Motif Seattle Hotel (formerly known as the Red Lion Hotel on Fifth Ave). For PAX Prime our tournament structure will be different than usual. Each tournament will be split into eight pods: eight players per pod for X-Wing and 16 players per pod for Android: Netrunner. Pod play will last three rounds for X-Wing and four rounds for Android: Netrunner. After all rounds are finished, the winner of each pod will continue on to play in single elimination rounds for X-Wing or double elimination for Android: Netrunner. All players will receive a participation prize. Additional prizes will be awarded to the top two players in each pod, as well as a special prize for the winner of the entire tournament.
Meet FFG Whether you’re interested in learning an FFG game, checking out an as-yet-unreleased game, playing in a tournament, or just talking with FFG staff, take a few moments from your PAX experience and stop on by. We’d love to see you! ... Source: Join Us at PAX (http://www.fantasyflightgames.com/edge_news.asp?eidn=4934)
Title: FFG:Join Us at PAX
Post by: RSSFeeder on 24 July 2014, 04:00:03
Join Us at PAXMeet FFG at PAX Prime 2014, August 29-Sept 1
Fantasy Flight Games is coming to PAX Prime 2014 at the end of August! FFG staff will be at PAX Prime 2014 to run demos, talk to fans, and run tournaments. Join one of our tournaments, stop by our room for board games and demos, or just come on by and say hello. FFG Will be at PAX Prime All Four Days FFG will be in room 212 of the Washington Convention Center, where FFG staff and volunteers will be set up to run demos of many of our most popular board and card games, including some upcoming releases. Stop by and learn how to play a game you’ve had your eye on for a while or be one of the first to learn a game not yet released! FFG staff will be present throughout each day if you just want to stop by and say hello. We will also be running tournaments in the Seattle Ballroom on the 4th floor of the Motif Seattle Hotel (formerly known as the Red Lion Hotel on Fifth Ave) on Friday and Saturday. We will be demoing FFG classics, such as A Game of Thrones: The Board Game Second Edition, X-Wing™, Descent: Journeys in the Dark Second Edition, and Android: Netrunner. If you already know how to play a game but want to share it with your friends, you can visit the PAX board game library and check out one of our many games there. We will also have brand new games available to demo, including The Witcher Adventure Game and Warhammer 40,000: Conquest. There may even be a surprise or two thrown in! Speaking of surprises, PAX would not be the experience it is without pins, and FFG is joining in on the fun this year. Supplies will be extremely limited, however, so we cannot guarantee everyone who visits our room will receive one. Stop by early in the weekend to increase your chances of receiving a pin. PAX Tournaments We will be running a 64-person X-Wing tournament Friday, August 29th, starting at 11 am, and a 128-person Android: Netrunner tournament on Saturday, August 30th, starting at 11 am. Signups for both tournaments start at 10 am the day of the tournament at PAX Tabletop Tournaments HQ, in the Emerald Ballroom on the 3rd floor of the Motif Seattle Hotel (formerly known as the Red Lion Hotel on Fifth Ave). For PAX Prime our tournament structure will be different than usual. Each tournament will be split into eight pods: eight players per pod for X-Wing and 16 players per pod for Android: Netrunner. Pod play will last three rounds for X-Wing and four rounds for Android: Netrunner. After all rounds are finished, the winner of each pod will continue on to play in single elimination rounds for X-Wing or double elimination for Android: Netrunner. All players will receive a participation prize. Additional prizes will be awarded to the top two players in each pod, as well as a special prize for the winner of the entire tournament.
Meet FFG Whether you’re interested in learning an FFG game, checking out an as-yet-unreleased game, playing in a tournament, or just talking with FFG staff, take a few moments from your PAX experience and stop on by. We’d love to see you! ... Source: Join Us at PAX (http://www.fantasyflightgames.com/edge_news.asp?eidn=4935)
Title: FFG:CosmicCon
Post by: RSSFeeder on 24 July 2014, 12:30:03
CosmicConThis September 19 - 21, Join a Celebration of All Cosmic Encounter Fans
This September 19 – 21, CosmicCon is a celebration of all Cosmic Encounter fans! Presented by Future Pastimes and taking place at the Fantasy Flight Games Center in Roseville, MN, CosmicCon is your opportunity to enjoy a full weekend of Cosmic Encounter with the game’s original designers and the fan designers responsible for the game’s fifth expansion, Cosmic Dominion. Design. Connect. Play. Display. Win! Connect with a Cosmic Community At CosmicCon, you’ll have the opportunity to hobnob with many of the galaxy’s brightest stars.  The game’s original designers Bill Eberle and Peter Olotka will be playing the game throughout the weekend, they’ll explain how they approach game design, and they’ll discuss upcoming expansions and other game ideas. The game’s original designers Bill Eberle and Peter Olotka will be playing the game throughout the weekend, they’ll explain how they approach game design, and they’ll discuss upcoming expansions and other game ideas.
The fan designers of Cosmic Dominion will also be on hand throughout the weekend, as will former Fantasy Flight Games designers – and Cosmic Encounter fans – Kevin Wilson and Jay Little. Moreover, Tom Vasel of Dice Tower will be interviewing gamers through the convention, and a number of other Cosmic Encounter fans will check in via Skype. These include Hugo award-winning author David Brin and Richard Garfield, the designer of Magic: The Gathering. Games and Contests  Of course, you’ll have plenty of opportunities to play Cosmic Encounter all throughout CosmicCon. The convention will incorporate all five of the game’s expansions, including Cosmic Dominion, and run the gamut from the Newbie Table, where you can learn to play, to the Cosmic Encounter tournament, in which you can try to establish your dominance as the best Cosmic Encounter player in the world. Of course, you’ll have plenty of opportunities to play Cosmic Encounter all throughout CosmicCon. The convention will incorporate all five of the game’s expansions, including Cosmic Dominion, and run the gamut from the Newbie Table, where you can learn to play, to the Cosmic Encounter tournament, in which you can try to establish your dominance as the best Cosmic Encounter player in the world.
The fun and games of CosmicCon aren’t just limited to its tables of Cosmic Encounter, however. The convention will also feature an Alien Design contest and a collection Home Brew Cosmic Encounter creations, which will be featured in the Gaming Center’s glass display cases. Prizes will be awarded to the winners of the Alien Design contest and the best Home Brew creations! Make Your Travel Plans Today Throughout the convention, you’ll be able to take advantage of the Fantasy Flight Games Center’s well-lit gaming space, full-service café, and full retail store, where you can pick up all your favorite Cosmic Encounter expansions or browse for new titles. 
CosmicCon runs this September 19–21 in Roseville, MN. Tickets are available via the CosmicCon website on Eventbee. Make your travel plans today! ... Source: CosmicCon (http://www.fantasyflightgames.com/edge_news.asp?eidn=4936)
Title: FFG:Enter the Dragon's Lair
Post by: RSSFeeder on 24 July 2014, 21:00:03
Enter the Dragon's LairThe Forgotten Souls Co-op Descent Adventure Is Now Available
Forgotten Souls, a cooperative adventure for Descent: Journeys in the Dark Second Edition, is now available via FFG’s in-house manufacturing! Previously announced in January for Organized Play, Forgotten Souls is a new cooperative adventure, allowing up to four heroes to play a fully cooperative variant of Descent: Journeys in the Dark. In a normal game of Descent, one player takes the role of overlord, commanding monsters and the forces of evil in the game. Up to four players combat the power of the overlord by playing heroes who gain experience and new items over the course of a campaign.  Forgotten Souls changes the normal structure of Descent by emulating a mini campaign in a completely cooperative atmosphere. Although this expansion does not replace the normal game of Descent, it offers a variant for you and your friends to explore an expanding dungeon, passing tests and battling fierce monsters. Encounters and monsters are controlled by decks of cards, rather than the overlord in Forgotten Souls. You’ll also grab loot and experience as you face down a series of encounters, culminating in a battle in the heart of the dragon’s lair. Enter the darkness within Forgotten Souls! Forgotten Souls changes the normal structure of Descent by emulating a mini campaign in a completely cooperative atmosphere. Although this expansion does not replace the normal game of Descent, it offers a variant for you and your friends to explore an expanding dungeon, passing tests and battling fierce monsters. Encounters and monsters are controlled by decks of cards, rather than the overlord in Forgotten Souls. You’ll also grab loot and experience as you face down a series of encounters, culminating in a battle in the heart of the dragon’s lair. Enter the darkness within Forgotten Souls!
Important: The rules for the Forgotten Souls expansion are not included in the box. The rules (pdf, 17.2 MB) are available for free download by clicking the thumbnail to the right or from the Descent: Journeys in the Dark Second Edition support page. Into the Dark Forgotten Souls enables you and up to three friends to experience a mini campaign in one night. You and your friends follow a twisted path, working through the rooms of the dragon’s lair, passing tests and battling any monsters that stand in your way. New rooms and challenges are revealed from an Exploration deck, meaning you’ll never encounter the same dungeon twice in the Forgotten Souls adventure.  Each room that you encounter carries its own objective that you must complete to move on. You may be required to creep through a room of sleeping barghests, or steal dragon treasure from a trash heap. After you either achieve your goal or fail to reach it, you may open the next door and reveal a new Exploration card for you and your fellow heroes to encounter. Each room that you encounter carries its own objective that you must complete to move on. You may be required to creep through a room of sleeping barghests, or steal dragon treasure from a trash heap. After you either achieve your goal or fail to reach it, you may open the next door and reveal a new Exploration card for you and your fellow heroes to encounter.
There is no overlord player to command his monsters against you in Forgotten Souls, so your objective also changes. In the cooperative variant of Descent, you and the other heroes win the game if you can make your way through the rooms of the Exploration deck until you reach the final main encounter. If you defeat the final main encounter, you win the game, but you must be careful not to run out of time along the way. The overlord track replaces the overlord’s objective in cooperative Descent. A fate token and a doom token are placed at opposite ends of the track, and if these tokens ever meet, the heroes lose the game. The doom token advances slowly, but once it advances, it can never return. The fate token, however, fluctuates based on the outcomes of your encounters. For example, if a hero is knocked out, fate advances by one, but successfully completing a main encounter may allow you to reset the fate token. Hordes of monsters lurk in the shadows of this expansion, eager for the blood of heroes. Monsters in Forgotten Souls and all cooperative Descent adventures are controlled by a deck of monster activation cards that gives the monsters a list of actions each turn during the Overlord phase. Monster activation cards contain different actions for every type of monster, meaning you’ll never know exactly how the monsters will react. Because cooperative Descent simulates a mini campaign, you’ll also have chances to gain experience and collect new items for your heroes. Experience is granted after completing main encounters, and you immediately have the chance to improve your hero’s skills by purchasing new Class cards. You’ll also obtain new items in Forgotten Souls by filling the loot track. The loot track increases with each monster you kill, and killing larger monsters gives you access to a wider selection of items. Grabbing items as you run and fight allows your heroes to improve their armor and weapons over the course of the Forgotten Souls mini campaign. For more on the Forgotten Souls expansion, we turn to the developer, Jonathan Bove. Jonathan Bove on the Forgotten Souls Adventure Exploration is a huge theme in the Forgotten Souls expansion. The heroes open doors and face new encounters on a constantly expanding map, never knowing what they’ll find in the next room. Not knowing what monsters and challenges await you keeps you on your toes and forces you to strategize constantly. More than once I’ve found myself saying “If the Trash Heap is next, we’re in big trouble!” 
The monster activation cards are the heart of the cooperative experience, though. I based the AI system around the idea that monsters should always be doing something, even if their prime goal changes. For example, a ranged monster may be instructed to attack the furthest hero. The monster moves to gain line of sight to that hero, but can’t move far enough. Instead of moving again, it will attack a different hero that is in line of sight. So even though the monster didn’t reach its first goal, it’s still dealing damage to the heroes. Something else I’m very excited about is the loot system. Each time a hero defeats a monster, tokens are added to the loot track. Once the track reaches a certain threshold, the heroes will draw from the Shop Item deck. Loot is gained immediately, without waiting for a shop phase, so you get to fight, loot, and keep on fighting. Spending XP works the same way: you spend it when you earn it. This makes gameplay in Forgotten Souls very fluid and simulates a mini campaign. The Adventure Begins Enter the dragon’s lair in Forgotten Souls, a in-house manufacturing expansion that introduces a fully cooperative variant to Descent: Journeys in the Dark Second Edition for players to enjoy alongside the main game. Gather a hero party of your friends, grab some loot, and prepare for adventure! Download the rules from the support page, and order your copy of the Forgotten Souls adventure today! ... Source: Enter the Dragon's Lair (http://www.fantasyflightgames.com/edge_news.asp?eidn=4937)
Title: FFG:Darkness Over the Hill, Nightmares Under the Hill
Post by: RSSFeeder on 25 July 2014, 05:30:04
Darkness Over the Hill, Nightmares Under the HillThree New Nightmare Decks Are Now Available for The Lord of the Rings
“Now certainly Bilbo was in what is called a tight place.”
–J.R.R. Tolkien, The Hobbit Three new Nightmare Decks for The Lord of the Rings: The Card Game are now available via FFG’s in-house manufacturing. While the core game and its standard expansions imagine new and untold stories in Middle-earth, Saga Expansions allow players to participate directly in the events from the beloved fiction of J.R.R. Tolkien. With the game’s first Saga Expansion, The Hobbit: Over Hill and Under Hill you gain the opportunity to steer the fates of Bilbo Baggins, Thorin Oakenshield, and the wizard Gandalf as they begin their famous and fateful journey out of the Shire. With its three scenarios, The Hobbit: Over Hill and Under Hill brings you as close as you can get to reliving the dramatic events of The Hobbit without finding your name in its pages. Trolls want to eat you. Mountain passes are made more perilous by raging storms. Rampaging giants hurl boulders in your vicinity. Hordes of Goblins swarm around you. And the strange creature known as Gollum lurks deep within a dark and lonely cavern… The scenarios of The Hobbit: Over Hill and Under Hill introduce more than enough challenge and peril to renew your appreciation of the intrepid Hobbit, Bilbo Baggins, but now with The Hobbit: Over Hill and Under Hill Nightmare Decks, Bilbo’s situation – and yours – becomes darker and more desperate than ever. Can you help Middle-earth’s unlikeliest hero survive his early travels, even as the shadow of evil looms darker and closer than ever before? 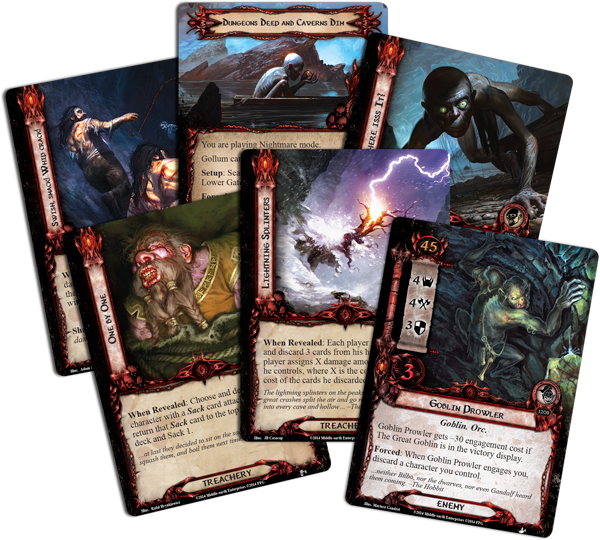
Developer Matt Newman on The Hobbit: Over Hill and Under Hill Nightmare Decks Now that the Nightmare Decks for The Hobbit: Over Hill and Under Hill are on sale, I thought I would take some time to share the design philosophy behind some of the new challenges and experiences they offer you. As always, each Nightmare Deck is designed to expand on its scenario’s theme as well as increase its difficulty, making for an experience that is fresh, fun, and challenging enough to test even the most veteran players. We Must Away, Ere Break of DayThe Nightmare version of the opening to The Hobbit cuts out many of the scenario’s easier cards in favor of a more consistently difficult encounter deck. Like Conflict at the Carrock, this scenario presents players with a set of challenging enemies that can be extremely punishing if encountered too early or too late. As many players discovered, the easiest way to defeat this scenario is to encounter its enemies at just the right time. And like the Nightmare version for Conflict at the Carrock, this Nightmare Deck attempts to surprise players with cards that make it very difficult for them to remain at Stage 1B for too long, like Comfortable Light (We Must Away, Ere Break of Day Nightmare Deck, 5) and Mince Them Fine (We Must Away, Ere Break of Day Nightmare Deck, 6).  
As a Saga Expansion, The Hobbit: Over Hill and Under Hill focuses on relating events directly from The Hobbit, and that meant, among other things, that we did not want to create new Trolls for this scenario like we did with Conflict at the Carrock. Instead, I opted to change the experience around these Trolls, not only making them more ferocious, but ensuring that you would have no choice but to fight them tooth and nail to survive. In Nightmare mode, you will find your threat rising higher and higher, forcing you to engage all three Trolls before you have the chance to get away. Additionally, a new treachery card, Night Wanes Slow (We Must Away, Ere Break of Day Nightmare Deck, 7), can even trigger when it is discarded from the top of the encounter deck, guaranteeing that you can’t quest through the entire encounter deck in one big push. Together, these new cards truly make this a more consistent and aggressive scenario. Over the Misty Mountains GrimIn Over the Misty Mountains Grim, players must progress through two separate encounter decks, each of which features its own encounter set and unique challenges. The scenario’s Nightmare Deck contains new cards for both encounter decks – some of which you’ll face in the heights of the Misty Mountains, and others which add new perils to the depths of Goblin-town! The first half of this scenario is meant to burden your heroes, slowing their progress and raising their threat, so that the enemies in the scenario’s second half can wipe them out in one fell swoop. To that end, new cards like Dim Valley (Over the Misty Mountains Grim, 3) work to drain your resources – especially your precious Baggins resources – and that makes the second half of the scenario all that much harder. Once they’ve stumbled into Goblin-town, your heroes will encounter a much more imposing version of The Great Goblin (Over the Misty Mountains Grim, 5), and a horde of Goblins that get stronger once he is defeated. The original scenario’s Goblins also get stronger after The Great Goblin is defeated, but unlike in the original scenario, you must now defeat The Great Goblin before you can place any progress on the quest. This means you’re more likely to see many of the scenario’s Goblins enraged and at maximum strength, and you can no longer opt to keep The Great Goblin alive for as long as possible in order to make the scenario easier. Dungeons Deep and Caverns DimI am very excited for players to get their hands on this new Nightmare version of one of my favorite chapters from The Hobbit! My primary goal for the Dungeons Deep and Caverns Dim Nightmare Deck was to make the final battle against the Goblins and Wargs tougher, and to make Gollum more important. One of the ways we did this was to introduce The Lower Gate (Dungeons Deep and Caverns Dim, 2), a new location we get to explore in this Nightmare version. This location slows your progress, holding you in the final battle a little longer, and also symbolizes the strange alliance between the Goblins and Wargs of the Misty Mountains. Additionally, the Nightmare Deck provides Gollum with new strength with which to chase and harass Bilbo and the rest of our heroes, even long after they’ve escaped. In Nightmare Mode, Gollum cannot take damage from any source, meaning he will continue to fight for Bilbo’s Magic Ring throughout the scenario… and at any cost. Cards like We Hates It! (Dungeons Deep and Caverns Dim, 7) and Where Isss It? (Dungeons Deep and Caverns Dim, 7) also increase the role that Gollum plays in the scenario, and they ensure a difficult and memorable encounter. 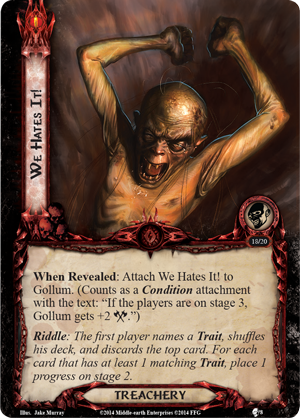 
I had a lot of fun designing these Nightmare Decks and getting to revisit my favorite chapters from The Hobbit, and I hope that you are just as excited to fight against their hungry Trolls, defeat The Great Goblin, and outwit Gollum once again. Keep those Baggins resources handy – you’re going to need them! Deeper, Dimmer, and Deadlier Than Ever! “The hiss was close behind him. He turned now and saw Gollum’s eyes like small green lamps coming up the slope. Terrified, he tried to run faster, but suddenly he struck his toes on a snag in the floor, and fell flat with his little sword under him.”
–J.R.R. Tolkien, The Hobbit Since its release, The Hobbit: Over Hill and Under Hill has entertained players around the world, even as it has challenged them to accompany Bilbo Baggins for the first half of his journeys and through some of the most dramatic events found within first half of The Hobbit. Now, The Hobbit: Over Hill and Under Hill Nightmare Decks will renew your appreciation of the formidable Hobbit’s resolve as they recast your struggles within the deeper shadows of Nightmare Mode. Can you help Bilbo Baggins survive the heightened challenges of Nightmare Mode? Pick up your copy of The Hobbit: Over Hill and Under Hill Nightmare Decks today! ... Source: Darkness Over the Hill, Nightmares Under the Hill (http://www.fantasyflightgames.com/edge_news.asp?eidn=4938)
Title: FFG:Darkness Over the Hill, Nightmares Under the Hill
Post by: RSSFeeder on 25 July 2014, 14:00:02
Darkness Over the Hill, Nightmares Under the HillThree New Nightmare Decks Are Now Available for The Lord of the Rings
“Now certainly Bilbo was in what is called a tight place.”
–J.R.R. Tolkien, The Hobbit Three new Nightmare Decks for The Lord of the Rings: The Card Game are now available via FFG’s in-house manufacturing. While the core game and its standard expansions imagine new and untold stories in Middle-earth, Saga Expansions allow players to participate directly in the events from the beloved fiction of J.R.R. Tolkien. With the game’s first Saga Expansion, The Hobbit: Over Hill and Under Hill you gain the opportunity to steer the fates of Bilbo Baggins, Thorin Oakenshield, and the wizard Gandalf as they begin their famous and fateful journey out of the Shire. With its three scenarios, The Hobbit: Over Hill and Under Hill brings you as close as you can get to reliving the dramatic events of The Hobbit without finding your name in its pages. Trolls want to eat you. Mountain passes are made more perilous by raging storms. Rampaging giants hurl boulders in your vicinity. Hordes of Goblins swarm around you. And the strange creature known as Gollum lurks deep within a dark and lonely cavern… The scenarios of The Hobbit: Over Hill and Under Hill introduce more than enough challenge and peril to renew your appreciation of the intrepid Hobbit, Bilbo Baggins, but now with The Hobbit: Over Hill and Under Hill Nightmare Decks, Bilbo’s situation – and yours – becomes darker and more desperate than ever. Can you help Middle-earth’s unlikeliest hero survive his early travels, even as the shadow of evil looms darker and closer than ever before?
Developer Matt Newman on The Hobbit: Over Hill and Under Hill Nightmare Decks Now that the Nightmare Decks for The Hobbit: Over Hill and Under Hill are on sale, I thought I would take some time to share the design philosophy behind some of the new challenges and experiences they offer you. As always, each Nightmare Deck is designed to expand on its scenario’s theme as well as increase its difficulty, making for an experience that is fresh, fun, and challenging enough to test even the most veteran players. We Must Away, Ere Break of Day The Nightmare version of the opening to The Hobbit cuts out many of the scenario’s easier cards in favor of a more consistently difficult encounter deck. Like Conflict at the Carrock, this scenario presents players with a set of challenging enemies that can be extremely punishing if encountered too early or too late. As many players discovered, the easiest way to defeat this scenario is to encounter its enemies at just the right time. And like the Nightmare version for Conflict at the Carrock, this Nightmare Deck attempts to surprise players with cards that make it very difficult for them to remain at Stage 1B for too long, like Comfortable Light (We Must Away, Ere Break of Day Nightmare Deck, 5) and Mince Them Fine (We Must Away, Ere Break of Day Nightmare Deck, 6).
As a Saga Expansion, The Hobbit: Over Hill and Under Hill focuses on relating events directly from The Hobbit, and that meant, among other things, that we did not want to create new Trolls for this scenario like we did with Conflict at the Carrock. Instead, I opted to change the experience around these Trolls, not only making them more ferocious, but ensuring that you would have no choice but to fight them tooth and nail to survive. In Nightmare mode, you will find your threat rising higher and higher, forcing you to engage all three Trolls before you have the chance to get away. Additionally, a new treachery card, Night Wanes Slow (We Must Away, Ere Break of Day Nightmare Deck, 7), can even trigger when it is discarded from the top of the encounter deck, guaranteeing that you can’t quest through the entire encounter deck in one big push. Together, these new cards truly make this a more consistent and aggressive scenario. Over the Misty Mountains Grim In Over the Misty Mountains Grim, players must progress through two separate encounter decks, each of which features its own encounter set and unique challenges. The scenario’s Nightmare Deck contains new cards for both encounter decks – some of which you’ll face in the heights of the Misty Mountains, and others which add new perils to the depths of Goblin-town! The first half of this scenario is meant to burden your heroes, slowing their progress and raising their threat, so that the enemies in the scenario’s second half can wipe them out in one fell swoop. To that end, new cards like Dim Valley (Over the Misty Mountains Grim, 3) work to drain your resources – especially your precious Baggins resources – and that makes the second half of the scenario all that much harder. Once they’ve stumbled into Goblin-town, your heroes will encounter a much more imposing version of The Great Goblin (Over the Misty Mountains Grim, 5), and a horde of Goblins that get stronger once he is defeated. The original scenario’s Goblins also get stronger after The Great Goblin is defeated, but unlike in the original scenario, you must now defeat The Great Goblin before you can place any progress on the quest. This means you’re more likely to see many of the scenario’s Goblins enraged and at maximum strength, and you can no longer opt to keep The Great Goblin alive for as long as possible in order to make the scenario easier. Dungeons Deep and Caverns Dim I am very excited for players to get their hands on this new Nightmare version of one of my favorite chapters from The Hobbit! My primary goal for the Dungeons Deep and Caverns Dim Nightmare Deck was to make the final battle against the Goblins and Wargs tougher, and to make Gollum more important. One of the ways we did this was to introduce The Lower Gate (Dungeons Deep and Caverns Dim, 2), a new location we get to explore in this Nightmare version. This location slows your progress, holding you in the final battle a little longer, and also symbolizes the strange alliance between the Goblins and Wargs of the Misty Mountains. Additionally, the Nightmare Deck provides Gollum with new strength with which to chase and harass Bilbo and the rest of our heroes, even long after they’ve escaped. In Nightmare Mode, Gollum cannot take damage from any source, meaning he will continue to fight for Bilbo’s Magic Ring throughout the scenario… and at any cost. Cards like We Hates It! (Dungeons Deep and Caverns Dim, 7) and Where Isss It? (Dungeons Deep and Caverns Dim, 7) also increase the role that Gollum plays in the scenario, and they ensure a difficult and memorable encounter.
I had a lot of fun designing these Nightmare Decks and getting to revisit my favorite chapters from The Hobbit, and I hope that you are just as excited to fight against their hungry Trolls, defeat The Great Goblin, and outwit Gollum once again. Keep those Baggins resources handy – you’re going to need them! Deeper, Dimmer, and Deadlier Than Ever! “The hiss was close behind him. He turned now and saw Gollum’s eyes like small green lamps coming up the slope. Terrified, he tried to run faster, but suddenly he struck his toes on a snag in the floor, and fell flat with his little sword under him.”
–J.R.R. Tolkien, The Hobbit Since its release, The Hobbit: Over Hill and Under Hill has entertained players around the world, even as it has challenged them to accompany Bilbo Baggins for the first half of his journeys and through some of the most dramatic events found within first half of The Hobbit. Now, The Hobbit: Over Hill and Under Hill Nightmare Decks will renew your appreciation of the formidable Hobbit’s resolve as they recast your struggles within the deeper shadows of Nightmare Mode. Can you help Bilbo Baggins survive the heightened challenges of Nightmare Mode? Pick up your copy of The Hobbit: Over Hill and Under Hill Nightmare Decks today! ... Source: Darkness Over the Hill, Nightmares Under the Hill (http://www.fantasyflightgames.com/edge_news.asp?eidn=4939)
Title: FFG:Join Us at PAX
Post by: RSSFeeder on 25 July 2014, 22:30:03
Join Us at PAXMeet FFG at PAX Prime 2014, August 29-Sept 1
Fantasy Flight Games is coming to PAX Prime 2014 at the end of August! FFG staff will be at PAX Prime 2014 to run demos, talk to fans, and run tournaments. Join one of our tournaments, stop by our room for board games and demos, or just come on by and say hello. FFG Will be at PAX Prime All Four Days FFG will be in room 212 of the Washington Convention Center, where FFG staff and volunteers will be set up to run demos of many of our most popular board and card games, including some upcoming releases. Stop by and learn how to play a game you’ve had your eye on for a while or be one of the first to learn a game not yet released! FFG staff will be present throughout each day if you just want to stop by and say hello. We will also be running tournaments in the Seattle Ballroom on the 4th floor of the Motif Seattle Hotel (formerly known as the Red Lion Hotel on Fifth Ave) on Friday and Saturday. We will be demoing FFG classics, such as A Game of Thrones: The Board Game Second Edition, X-Wing™, Descent: Journeys in the Dark Second Edition, and Android: Netrunner. If you already know how to play a game but want to share it with your friends, you can visit the PAX board game library and check out one of our many games there. We will also have brand new games available to demo, including The Witcher Adventure Game and Warhammer 40,000: Conquest. There may even be a surprise or two thrown in! Speaking of surprises, PAX would not be the experience it is without pins, and FFG is joining in on the fun this year. Supplies will be extremely limited, however, so we cannot guarantee everyone who visits our room will receive one. Stop by early in the weekend to increase your chances of receiving a pin. PAX Tournaments We will be running a 64-person X-Wing tournament Friday, August 29th, starting at 11 am, and a 128-person Android: Netrunner tournament on Saturday, August 30th, starting at 11 am. Signups for both tournaments start at 10 am the day of the tournament at PAX Tabletop Tournaments HQ, in the Emerald Ballroom on the 3rd floor of the Motif Seattle Hotel (formerly known as the Red Lion Hotel on Fifth Ave). For PAX Prime our tournament structure will be different than usual. Each tournament will be split into eight pods: eight players per pod for X-Wing and 16 players per pod for Android: Netrunner. Pod play will last three rounds for X-Wing and four rounds for Android: Netrunner. After all rounds are finished, the winner of each pod will continue on to play in single elimination rounds for X-Wing or double elimination for Android: Netrunner. All players will receive a participation prize. Additional prizes will be awarded to the top two players in each pod, as well as a special prize for the winner of the entire tournament.
Meet FFG Whether you’re interested in learning an FFG game, checking out an as-yet-unreleased game, playing in a tournament, or just talking with FFG staff, take a few moments from your PAX experience and stop on by. We’d love to see you! ... Source: Join Us at PAX (http://www.fantasyflightgames.com/edge_news.asp?eidn=4935)
Title: FFG:Into the Dark...
Post by: RSSFeeder on 26 July 2014, 07:00:03
Into the Dark...Preview the Dan Abnett Short Story Included in Dark Heresy Second Edition
“They had gone out into the Low Worlds, where death was expecting them. Indeed, of all thing things out there in the dark hoping to make their acquaintance, death was probably the most hospitable.”
–Dan Abnett, Into the Dark… Dark Heresy Second Edition invites you to join a team of Acolytes, dedicated to exterminating heresy in the Imperium at any cost. You must travel across the innumerable worlds of the galaxy, confronting horrors beyond imagination in the name of shielding humanity from the corruption of Chaos. For the Dark Heresy Second Edition Core Rulebook, author Dan Abnett wrote a short story entitled Into the Dark…. Dan Abnett is a prolific author within the Warhammer 40,000 universe, having written the Gaunt’s Ghosts series and the Eisenhorn and Ravenor trilogies, among others. In his new short story, players find a taste of what they might expect from their adventures as an Acolyte in an Inquisitor’s service. Download the first two pages of Into the Dark… (pdf, 2.7 MB) from the support page for Dark Heresy Second Edition, and read Dan’s thoughts on working with the Warhammer 40,000 universe below. 
Dan Abnett on the Warhammer 40,000 Universe FFG: What aspects of the Warhammer 40,000 background appeal to you most as a writer, and what makes Warhammer 40,000 stand out from other science fiction and futuristic settings you've worked with?  Dan Abnett: It’s an incredibly well-developed universe with an unmistakable aesthetic. The tone and atmosphere of Warhammer 40,000 are what truly make the universe memorable. This tone is derived from the art of John Blanche and shows up in the darkly ornate, almost medieval, imagery throughout the Imperium. It depicts a culture in the midst of magnificent decay. Everything within the universe is very well defined, but there’s vast scope for writers’ and artists’ imagination. Dan Abnett: It’s an incredibly well-developed universe with an unmistakable aesthetic. The tone and atmosphere of Warhammer 40,000 are what truly make the universe memorable. This tone is derived from the art of John Blanche and shows up in the darkly ornate, almost medieval, imagery throughout the Imperium. It depicts a culture in the midst of magnificent decay. Everything within the universe is very well defined, but there’s vast scope for writers’ and artists’ imagination.
FFG: You've been writing about Inquisitors and those who serve them for a while now. What most interests you about Inquisitors, Acolytes, and their adventures? DA: Warhammer 40,000 is originally a table-top miniatures game focused the battlefront, but Inquisitors give us a way to see the society away from the frontline of battle. That thought really appealed to me when I started writing the Eisenhorn and Ravenor books. The stories of the Inquisitors take us to the darkest depths of the Imperium, into the shadows of everyday life, into the opulent realms of the nobility and the slums of the underclasses. It’s a way to explore the universe that you don’t get from a military angle. FFG: The villains are often as memorable as the heroes in Warhammer 40,000 stories. Who was your favourite nemesis to write for, both in terms of the character and what he or she offered to the plot? DA: I’d have to say Pontius Glaw, the villain of the Eisenhorn books, who was a true menace because he was powerful, but also extraordinarily clever. Cherubael stands out as well, although sometimes he’s almost a hero (except that he’s a daemon). FFG: What games do you play yourself in your free time? DA: I play all versions of Warhammer 40,000 and Warhammer, both tabletop and roleplay, alongisde other RPG classics, such as Traveller, Dungeons & Dragons, and Call of Cthulhu. That’s when I get the chance, though, which is all too seldom! I like to play anything Warhammer 40,000 when I can, just to stay in the universe. The Horus Heresy board game is also great. It creates a totally different scale of action for the players. FFG: What was your inspiration for the Into the Dark… short story included in Dark Heresy Second Edition? Without giving too much away, what can players expect from the tale?  DA: The short story really offers an example of how an Inquisitorial team operates, how the characters might interact, and what each Acolyte brings to the table regarding skills. It also illustrates exactly how mysterious things can be in the grim darkness of the far future. Sometimes even the heroes don’t know what they’re doing or why! DA: The short story really offers an example of how an Inquisitorial team operates, how the characters might interact, and what each Acolyte brings to the table regarding skills. It also illustrates exactly how mysterious things can be in the grim darkness of the far future. Sometimes even the heroes don’t know what they’re doing or why!
Thanks, Dan! Click the thumbnail on the right to download the first two pages of Dan Abnett’s short story, Into the Dark…, and experience the beginning of the Acolytes’ adventures. Then, prepare to tell your own stories in the darkness of Warhammer 40,000. Preorder Dark Heresy Second Edition at your local retailer today! ... Source: Into the Dark... (http://www.fantasyflightgames.com/edge_news.asp?eidn=4940)
Title: FFG:Fantasy Flight Games Is Now Hiring
Post by: RSSFeeder on 26 July 2014, 15:30:03
Fantasy Flight Games Is Now HiringApply for the Position of Hobby Market Sales Associate Today Fantasy Flight Games, leading hobby-market publisher of board games, card games, roleplaying games, and other tabletop games, is now hiring for the following position: Fantasy Flight Games, leading hobby-market publisher of board games, card games, roleplaying games, and other tabletop games, is now hiring for the following position:
Hobby Market Sales Associate (pdf, 122 KB) The primary responsibilities of the Hobby Market Sales Associate position are to maintain outstanding customer service with key domestic and international retail and distributor accounts, track purchase orders from customer accounts, manage and grow customer relationships, and resolve customer issues. Details can be found in the pdf document linked above. To apply for this position, please submit a cover letter with salary requirements and resume to HumanResources@fantasyflightgames.com; under the subject line “Hobby Market Sales Associate” no later than end of business day Tuesday, July 29, 2014. Please do not call or visit. Our offices are located in Roseville, Minnesota, a suburb of the Twin Cities of Minneapolis and St. Paul. Candidates not already living within commuting distance must be willing to relocate. Fantasy Flight Publishing, Inc. is an equal opportunity employer committed to a diverse work force and a work environment free from discrimination. ... Source: Fantasy Flight Games Is Now Hiring (http://www.fantasyflightgames.com/edge_news.asp?eidn=4941)
Title: FFG:It's Time to Head Upstalk
Post by: RSSFeeder on 27 July 2014, 00:00:03
It's Time to Head UpstalkThe First Data Pack in the Lunar Cycle for Android: Netrunner Is Now Available
It was binary. Elemental. Powerful. Unmatched in its purity. It must be a source. Eden. Hades. Utopia. The nodes that built the net. The oldest protocols.… Your quest for the legendary source protocols begins now… Upstalk, the first Data Pack in the Lunar Cycle for Android: Netrunner, is now available at your local retailer and online through our webstore! With its sixty new cards (three copies each of twenty different cards), Upstalk follows cyber explorer Nasir Meidan’s obsessive search for the net’s legendary source protocols. These nodes either built the net, or they’re nothing more than myth. If they actually do exist, wouldn’t they have degraded over time? It’s likely they would have fragmented so badly that their streams would be almost impossible to detect. Still, if they didn’t degrade, is it possible that they could have somehow evolved? 
To answer these questions, Nasir Meidan must travel beyond the reaches of the Earth’s atmosphere. That means a journey up the Beanstalk, and each step up the Beanstalk is one step further removed from the Earth and the established ways of thinking about the game’s cat-and-mouse cyberstruggles. Here, the game defies standard expectations. Corporate trace attempts can punish Runners even when they fail. Corporate assets are everywhere, there’s no life outside of Corporate-sponsored air, and there’s a chance that those who manage or run the net may encounter a shard or fragment of the mythical source code. Shards of the Source Code Starting with Upstalk, each of the six Data Packs in the Lunar Cycle introduces a fragment or shard from the legendary source protocols: three fragments for the Corps, and three shards for the Runners. Like the Eden Shard (Upstalk, 20), each shard is “Limit 1 per deck” and enters the game as a seven-cost virtual resource that a Runner can install from his grip for free, instead of accessing cards, after completing a successful run against a central server. Then, once installed, each shard of the legendary source protocols presents the Runner the option to trash it in exchange for a powerful effect. In the case of the Eden Shard, the Runner may trash it to force the Corp to draw two cards. It may be foolish to grant the Corp this extra card draw early in the game when your Runner has the advantage, and it may even be unwise in the middle of the game when you need to buy time to finish building your rig. Still, Eden Shard presents a number of potent late-game options.
 First of all, Eden Shard partners well with R&D Interface (Future Proof, 107). If you have an R&D Interface installed, you can access an extra card during a successful run on R&D, but it doesn’t guarantee that you’re going to access an agenda, or even anything that you can trash. In such a situation, you can spend one click to run R&D, access the top cards, and leave them. You can then spend a second click to run R&D and install Eden Shard instead of accessing cards. Next, you trash Eden Shard to force the Corp to draw the two cards you left on the top of R&D. Now you’ve given the Corp a couple of cards that hold no surprises for you, and you’ve moved cards that you couldn’t trash from the top of R&D. Finally, you spend a third click to run R&D again, digging deeper into R&D and potentially scoring a couple of game-winning agenda points. First of all, Eden Shard partners well with R&D Interface (Future Proof, 107). If you have an R&D Interface installed, you can access an extra card during a successful run on R&D, but it doesn’t guarantee that you’re going to access an agenda, or even anything that you can trash. In such a situation, you can spend one click to run R&D, access the top cards, and leave them. You can then spend a second click to run R&D and install Eden Shard instead of accessing cards. Next, you trash Eden Shard to force the Corp to draw the two cards you left on the top of R&D. Now you’ve given the Corp a couple of cards that hold no surprises for you, and you’ve moved cards that you couldn’t trash from the top of R&D. Finally, you spend a third click to run R&D again, digging deeper into R&D and potentially scoring a couple of game-winning agenda points.
- Conversely, if you install Eden Shard early in the game, you may be able bait the Corp into layering additional ice on R&D, reducing its ability to protect its other servers, including HQ. In this case, you might trash Eden Shard to force the Corp to draw two cards into a vulnerable HQ, which you then run.
- Since Eden Shard doesn’t have a click requirement, you can trash it at any time, even after the Corp has resolved its last click, meaning that you may be able to force the Corp into a situation that it has no choice but to discard a couple of cards, either spilling agendas into Archives or, more likely, thinning its supply of credits and ice.
- Finally, that fact that you can trash Eden Shard to trigger its ability at any time means that it offers the Runner a new measure of protection against one of the Corp’s most powerful combinations. A number of Corp decks use Power Shutdown (Mala Tempora, 58) to empty R&D before layering events back into it with Jackson Howard (Opening Moves, 15) and playing them all in a single click via Accelerated Diagnostics (Mala Tempora, 52). However, a Runner who has installed Eden Shard can simply trash it to force the Corp to draw two cards after it empties R&D with Power Shutdown. Instead of wondering how much meat damage he’s about to take, such a Runner simply forces the Corp to draw when it cannot, and he wins the game.
What Will You Discover? With Eden Shard, two new identities, and a host of new ice, assets, resources, and events, Upstalk offers plenty of material certain to excite any cyber explorer. Head to your local retailer to pick up your copy today! ... Source: It's Time to Head Upstalk (http://www.fantasyflightgames.com/edge_news.asp?eidn=4942)
Title: FFG:Rising from the Bottom
Post by: RSSFeeder on 27 July 2014, 08:30:03
Rising from the BottomIt Binds All Things Is Now Available for STAR WARS (TM): The Card Game
“I suggest a new strategy, Artoo: let the Wookiee win.”
–C-3PO, Star Wars: A New Hope It Binds All Things, the fifth Force Pack in the Echoes of the Force cycle for Star Wars™: The Card Game is now available at your local retailer and online through our webstore! In this Force Pack, the struggle for control of the Force approaches its climax with a host of new units, events, and enhancements for both light side and dark side. On the forest moon of Endor, you’ll find a Jedi version of Leia Organa, and in the skies above, the A-wing pilots of Green Squadron risk their lives for the Rebel Alliance. The Imperial Navy can return to Hoth with Admiral Piett, while the deadly Droid and Bounty Hunter IG-88 attacks your opponent’s units committed to the Force. 
But on Tatooine, you’ll find another tale being told in the gladiatorial pits. Only the fiercest and most resilient of beings survive the brutal environment of the pits, and it is there that you’ll uncover additional support for any Wookiees in your deck. Loyalty for Life  This objective set begins with A Wookiee’s Journey (It Binds All Things, 599), an objective that provides two resources and possesses the restriction, “Smugglers and Spies affiliation only.” The resources provided by the objective help you to amass your units, and you’ll get additional tricks with the Echoes of the Force (It Binds All Things, 500) fate card included in this objective set. By using Echoes of the Force cleverly, you can severely hamper your opponent’s devotion to the Force, keeping yourself firmly in control. This objective set begins with A Wookiee’s Journey (It Binds All Things, 599), an objective that provides two resources and possesses the restriction, “Smugglers and Spies affiliation only.” The resources provided by the objective help you to amass your units, and you’ll get additional tricks with the Echoes of the Force (It Binds All Things, 500) fate card included in this objective set. By using Echoes of the Force cleverly, you can severely hamper your opponent’s devotion to the Force, keeping yourself firmly in control.
You’ll find another tool to aid a Wookiee’s devotion to the Force in Faithful Companion (It Binds All Things, 603). This card can provide a resource, but it also grants each Wookiee committed to the Force an additional Force icon. Giving your Wookiees extra Force icons only makes them more capable of grabbing control of the Force struggle! This objective set continues supporting your Wookiees with Heart of a Wookiee (It Binds All Things, 602), an enhancement that grants one of your Wookiees additional resilience in the face of battle. This enhancement enhances a Wookiee unit, giving that unit three extra damage capacity! Added damage capacity can help any Wookiee, but one Wookiee this enhancement complements especially well is Chewbacca (Edge of Darkness, 319). Chewbacca’s ability allows him to deal great amounts of damage to enemy units, but he must be damaged himself to trigger his Reaction. With the Heart of a Wookiee enhancement, Chewbacca’s potential to deal damage to enemy units is more than doubled. 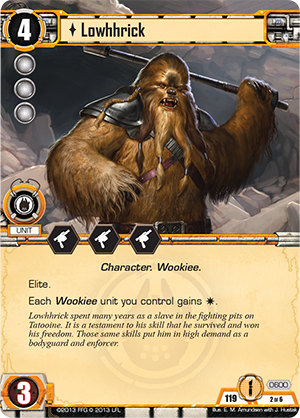 Opponents foolish enough to attack your units may quickly discover the true power of a Wookiee’s anger. Loyal Wookiee (It Binds All Things, 601) possesses a powerful ability that allows you to put the Loyal Wookiee into play for free whenever a unique Character unit you control leaves play. Getting a powerful defensive unit is always a boon, but if you play your cards right, your units don’t even need to be destroyed to trigger the Loyal Wookiee. A card like Heroes and Legends (Heroes and Legends, 496) causes a unique Character to leave play, allowing you to put the Loyal Wookiee into play and still replace the Character due to the objective’s ability. Opponents foolish enough to attack your units may quickly discover the true power of a Wookiee’s anger. Loyal Wookiee (It Binds All Things, 601) possesses a powerful ability that allows you to put the Loyal Wookiee into play for free whenever a unique Character unit you control leaves play. Getting a powerful defensive unit is always a boon, but if you play your cards right, your units don’t even need to be destroyed to trigger the Loyal Wookiee. A card like Heroes and Legends (Heroes and Legends, 496) causes a unique Character to leave play, allowing you to put the Loyal Wookiee into play and still replace the Character due to the objective’s ability.
The final Wookiee you’ll find in this objective set is Lowhhrick (It Binds All Things, 600). Lowhhrick spent many years as a slave in the fighting pits on Tatooine, and the skills he learned there put him in high demand as a bodyguard and enforcer. Lowhhrick’s talents are expressed with his defensive combat icons and the Elite keyword, but Lowhhrick’s true worth lies in his other ability. Lowhhrick grants each Wookiee unit you control a  , potentially allowing you to gather a punishing amount of blast damage, especially when combined with objectives like Raise the Stakes (Edge of Darkness, 322) or Across the Anoat Sector (Edge of Darkness, 339). Granting that much blast damage makes any Wookiee a threat that the dark side is forced to deal with. , potentially allowing you to gather a punishing amount of blast damage, especially when combined with objectives like Raise the Stakes (Edge of Darkness, 322) or Across the Anoat Sector (Edge of Darkness, 339). Granting that much blast damage makes any Wookiee a threat that the dark side is forced to deal with. Battle Alongside the Wookiees Whether you experience the raw power of a Wookiee warrior, return to Admiral Piett’s assault on Hoth, or test your piloting skill to the max with Green Squadron, you’ll find cards to support your decks in It Binds All Things. Pick up your copy of this Force Pack from your local retailer today! ... Source: Rising from the Bottom (http://www.fantasyflightgames.com/edge_news.asp?eidn=4943)
Title: FFG:Seize Your Prize
Post by: RSSFeeder on 27 July 2014, 17:00:03
Seize Your PrizeThe Prize of the North Chapter Pack Is Now Available
“Your prize will be the doom of you. Krakens rise from the sea, Theon, or did you forget that during your years among the wolves? Our strength is in our longships.”
–George R.R. Martin, A Clash of Kings The Iron Throne stands in the Red Keep at King’s Landing, but is it possible that your path to power lies through the icy wastes in the north of Westeros? The Prize of the North Chapter Pack is now available for A Game of Thrones: The Card Game, both online through our webstore and at your local retailer! You’ll find new ways to seize the Iron Throne with the new cards in The Prize of the North Chapter Pack. This Chapter Pack continues the main themes of the Conquest and Defiance cycle, introducing a host of cards with the prized keyword, alongside tools for forming multi-House decks. You’ll also find iconic characters and locations from across the world of A Song of Ice and Fire. At the Wall, House Baratheon joins forces with the men of the Night’s Watch in an attempt to safeguard all of Westeros, while in the south, House Martell plots revenge for crimes long past. Every Great House finds new cards to support their claim to the throne. 
Born of Iron
As other Houses wage war on the mainland of Westeros, deadly longships set sail from the Iron Islands, crewed by the fearsome raiders of House Greyjoy. In The Prize of the North, you’ll find new Warships for the Ironborn to sail against the unprotected shores of Westeros. The first new Warship in The Prize of the North is the Farwynd Explorer (The Prize of the North, 85). This ship waits unseen in Shadows until the opportune moment for its raid. As a Response, you may bring the Farwynd Explorer out of Shadows to cancel a triggered effect, provided you are the first player. By including high-initiative plots in your plot deck, you increase your chances of becoming the first player and taking advantage of your Farwynd Explorer. As an added bonus, when the Farwynd Explorer is in play, it raises the initiative value of your future plots, giving you a better chance of becoming first player and paving the way for more Farwynd Explorers.  
The ironborn gain another Warship in Longship Iron Wind (The Prize of the North, 86). This Warship bears the ability, “Challenges: Kneel Longship Iron Wind to put a character with printed cost 2 or lower into play from your hand.” Longship Iron Wind brings more uncertainty than ever to your opponent – they’ll never know exactly what to expect in their challenges since only you know what warriors wait aboard your longships. By waiting to trigger Longship Iron Wind until after making your first challenges, you force your opponent to defend your first challenges before knowing what characters he may encounter later. You might use Longship Iron Wind to play the Lonely Light Envoy (The Prize of the North, 84), or a similar character, such as the House Dayne Escort (The Prize of the North, 89). Putting a character into play with Longship Iron Wind escapes any penalty for playing an out-of-House character, and these Bannermen can quickly prove deadly in large numbers. Set Sail Whether you lead a raid against the mainland with the reavers of House Greyjoy or cast your lot with House Targaryen and Daenerys’s dragons, you’ll find plenty of cards for every deck in The Prize of the North Chapter Pack. Pick up your copy of The Prize of the North at your local retailer today! ... Source: Seize Your Prize (http://www.fantasyflightgames.com/edge_news.asp?eidn=4944)
Title: FFG:Your Trials Begin
Post by: RSSFeeder on 28 July 2014, 01:30:03
Your Trials BeginThe Three Trials Is Now Available for The Lord of the Rings: The Card Game
“My blood runs chill,” said Gimli, but the others were silent, and his voice fell dead on the dank fir-needles at his feet.
–J.R.R. Tolkien, The Return of the King Deep within the hills of Dunland, several of Middle-earth’s greatest heroes approach an ancient barrow. Weapons in hand, they ready themselves for whatever they may face. The dead are stirring, and this is only the first of three trials… The Three Trials is now available! 
The Three Trials is the second Adventure Pack in The Ring-maker cycle for The Lord of the Rings: The Card Game, and while its sixty cards expand your deck-building options, they also introduce a challenging and dynamic new scenario that thrusts Middle-earth’s heroes into a series of life-or-death skirmishes with the undead guardians of three sacred Dunlending burial mounds. Each of these guardians presents a different challenge, and to defeat them all, you’ll need to be able to adjust your tactics, even in the middle of your quest. Boar’s Guardian 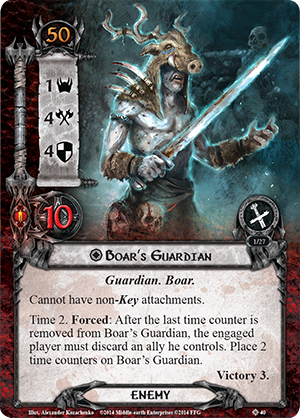 At the beginning of your journey through The Three Trials, you are instructed to set aside all three of the scenario’s Guardian enemies, its three Key objectives, and all three of its Barrow locations, as well as the unique location, Hallowed Circle (The Three Trials, 49). Then must brace yourself for the dangers ahead as you press forward toward one of three different stage two quests. At the beginning of your journey through The Three Trials, you are instructed to set aside all three of the scenario’s Guardian enemies, its three Key objectives, and all three of its Barrow locations, as well as the unique location, Hallowed Circle (The Three Trials, 49). Then must brace yourself for the dangers ahead as you press forward toward one of three different stage two quests.
The Three Trials is full of both important player choices and random effects, making its scenario an eminently replayable adventure. However, the first choice you make may very well set the tone for the remainder of your trials, so you’ll want to be sure to choose wisely! At the end of stage one, you select one of three different stage two quest cards, each of which redefines your interactions with the encounter deck, its locations, and its enemies. Additionally, each stage two randomly combines a Guardian enemy, a Barrow location, and the Key that matches the stage’s Guardian. Like Boar’s Guardian (The Three Trials, 40), each of these Guardian enemies are immune to non-Key attachments, ensuring you won’t catch them in a net, and each comes with a nasty Time X effect that truly sets it apart from the others – and makes it a fearsome foe. For example, the Time X effect on Boar’s Guardian reads: “Time 2. Forced: After the last time counter is removed from Boar’s Guardian, the engaged player must discard an ally he controls. Place 2 time counters on Boar’s Guardian.” Wolf’s Guardian 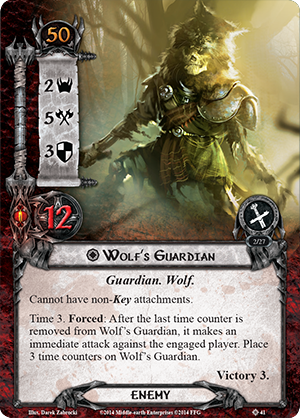 The fact that each of the different Guardian enemies has a nasty Time X effect means you’ll want to race through the quests as quickly as possible. As lead developer Caleb Grace wrote in his preview of The Voice of Isengard, Time X effects are meant to represent the urgency of your quests: The fact that each of the different Guardian enemies has a nasty Time X effect means you’ll want to race through the quests as quickly as possible. As lead developer Caleb Grace wrote in his preview of The Voice of Isengard, Time X effects are meant to represent the urgency of your quests:
“Matt Newman and I worked hard to explore the different ways we could take advantage of [the Time X keyword] throughout The Voice of Isengard box and The Ring-maker cycle. There weren’t any dull moments during play-testing! It’s not hard to keep players under pressure when there’s a nasty Forced effect on a quest card or encounter card that will trigger after the last Time counter is removed from it.” And while the scenario’s Guardians all bring nasty Time X effects to the table, they’re also nasty and durable foes in their own right. The Wolf’s Guardian (The Three Trials, 41), for example, has a Defense Strength of three on top of its twelve Hit Points, and when it attacks, your heroes will have to find some way to fend off its powerful Attack Strength of five. Worse yet, if you can’t get past this Guardian before its Time X effect triggers, it makes an immediate attack against the engaged player. While you might think that effect’s not so terrible since each Guardian has an engagement cost of fifty, each stage two forces its Guardian to engage the first player. If it’s not you, someone has to deal with the Wolf Guardian’s attacks! Raven’s Guardian 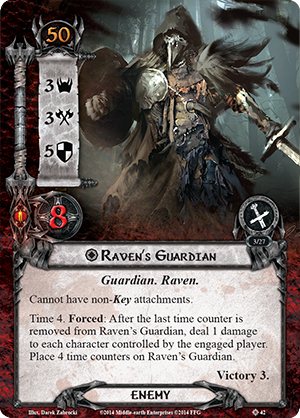 Of course, the Guardians aren’t the only elements you bring into play with each stage two. Each stage two prompts you to add one of the three Key objectives you’ll need to unlock the Hallowed Circle at the end of your trials. Each stage two also prompts you to add one of the scenario’s Barrow locations, and the random possible combinations of Barrow and Guardian can lead to some truly varied and difficult situations. Of course, the Guardians aren’t the only elements you bring into play with each stage two. Each stage two prompts you to add one of the three Key objectives you’ll need to unlock the Hallowed Circle at the end of your trials. Each stage two also prompts you to add one of the scenario’s Barrow locations, and the random possible combinations of Barrow and Guardian can lead to some truly varied and difficult situations.
For example, the Raven’s Guardian (The Three Trials, 42) may have the lowest Attack Strength and Hit Points of the three Guardians, but it also has the highest Threat. You may ask yourself, “What does Threat matter once the enemy is engaged?” That would naturally be an obvious question. Normally, it wouldn't have any impact upon the game once it's out of the staging area, but there’s a very good chance you’ll face the Raven’s Guardian at the Stone Barrow (The Three Trials, 48). If you face the Raven’s Guardian there and can’t defeat it quickly, you’ll quickly run the risk of losing to threat. On the other hand, you could face the Raven’s Guardian at the Hill Barrow (The Three Trials, 46), and discover that the additional shadow effects it gains with each attack make it a far deadlier adversary than you first imagined. You could very well end up stacking the shadow effects of two copies of Cursed Forest (The Three Trials, 51) and removing two time counters from the Raven’s Guardian when you after you throw a weaker ally in front of it. In such a case, you may end up triggering the Time X effect on Raven’s Guardian at a moment that you weren’t prepared to suffer damage on all your characters. Find the Courage to Succeed Though each of the Guardians in The Three Trials is a truly challenging enemy, you must summon up your courage and find the means to defeat them. Perhaps you can take heart as the Adventure Pack’s new hero, Idraen (The Three Trials, 25), and its many allies offer to lend their swords and bows to the cause. Step forward to begin your trials today. Middle-earth is counting on you! The Three Trials is now available at your local retailer and online through our webstore. ... Source: Your Trials Begin (http://www.fantasyflightgames.com/edge_news.asp?eidn=4945)
Title: FFG:B-Wing Expanded
Post by: RSSFeeder on 28 July 2014, 10:00:03
B-Wing ExpandedA Preview of the Rebel Aces Expansion Pack for X-Wing (TM)
The Rebel Aces Expansion Pack for X-Wing™ offers a new look at two of the Rebellion’s most iconic starfighters. The expansion’s highlights are its A-wing and B-wing miniatures, both of which feature alternative paint schemes. However, as we saw in our preview of the expansion’s new A-wing ship cards and upgrades, Rebel Aces presents options for these ships that reach far beyond their repainted surfaces. Today, we explore how the expansion’s new ship cards and upgrades expand the roles that the B-wing can play in your squads. 
A 360-degree view of the Rebel Aces B-wing.
Freedom to Explore New Roles As indicated by its prominence within the X-Wing tournament scene, the B-wing is one of the game’s strongest and most reliable starfighters. Paul Heaver claimed the title of 2013 X-Wing World Championship with a squad of two X-wings and two B-wings, and many other players have had success with similar builds throughout the 2014 Store Championship and Regional Championship seasons. Nonetheless, such squads almost always use the B-wing in similar fashion. They fly a pair of non-unique ships in formation with the rest of their squads, often relying upon Biggs Darklighter to draw enemy fire as long as possible in order to minimize the impact of the B-wing’s main weakness, its low agility value of “1.” Accordingly, the Rebel Aces Expansion Pack doesn’t markedly increase the B-wing’s power level. It doesn’t need a boost. Instead, Rebel Aces boosts the B-wing’s versatility. By introducing a potent pair of ace B-wing pilots and the B-Wing/E2 modification, which allows the B-wing to carry a crew member, the expansion frees the B-wing to perform other roles in your squads. In short, Rebel Aces doesn’t increase the B-wing’s effectiveness within the squads in which it appears; it increases the number of squads within which the B-wing can be effective. As noted, this increased versatility begins with the introduction of two new B-wing pilots, Keyan Farlander and Nera Dantels.  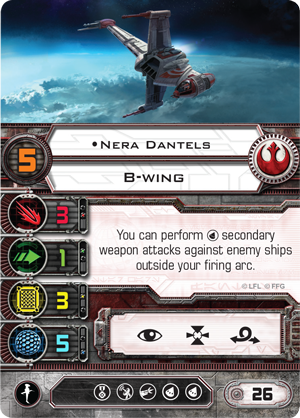
Both of these pilots possess potent abilities that can easily shape how you wage your battles, and with the recent release of Wave IV and the TIE phantom, there’s more call than ever to field ace pilots with high pilot skill values. Keyan Farlander First revealed in the Rebel Aces announcement, Keyan Farlander has a pilot skill value of “7,” and he can spend a stress token in order to change all of his focus results to hits. This ability has already drawn plenty of attention from the X-Wing player base,  and it goes a long way toward making Keyan Farlander a versatile B-wing pilot. and it goes a long way toward making Keyan Farlander a versatile B-wing pilot. - This ability not only increases the quality of his average attack rolls, it allows Keyan Farlander to derive an advantage from all the red maneuvers on the B-wing’s dial and may help to develop his role as a flanker within Rebel squads.
- The fact that his ability can effectively replicate the focus action means that if Keyan Farlander equips Push the Limit as his elite pilot talent, he doesn’t need to perform target lock and focus actions each turn to secure his best chances of landing maximum damage. Instead, he can target lock and barrel roll, or add an Engine Upgrade modification and boost into a better position to launch his attack.
- Keyan Farlander’s ability pairs well with Opportunist. Instead of limiting his actions on the next turn, the stress token he takes for Opportunist simply powers up his attack.
Nera Dantels While Keyan Farlander encourages you to perform a wider range of actions, Nera Dantels encourages you to equip and fire torpedoes. T here are currently three different torpedoes in X-Wing: Proton Torpedoes, Advanced Proton Torpedoes, and Flechette Torpedoes. Each of them offers a strong, solitary punch with a nice bonus effect: here are currently three different torpedoes in X-Wing: Proton Torpedoes, Advanced Proton Torpedoes, and Flechette Torpedoes. Each of them offers a strong, solitary punch with a nice bonus effect: - Flechette Torpedoes stress a target with a hull value of “4” or less.
- Proton Torpedoes allow you to convert a single focus result to a critical hit.
- Advanced Proton Torpedoes allow you to convert up to three blank results to focus results, which you can then convert to hits by spending a focus token.
In fact, there is currently no stronger single shot in the game than that afforded by the Advanced Proton Torpedoes, and Nera Dantels comes with a special ability that makes it easier than ever to make good use of them at critical junctures: “You can perform [torpedo] secondary weapon attacks against enemy ships outside your firing arc.” Previously, to fire Advanced Proton Torpedoes, you had to pilot your ship within range “1” of your target, keep it within your firing arc, acquire a target lock on it, and survive long enough to fire. Against TIE swarms that would volley with fourteen attack dice from range “2” or “3,” it could be hard to keep your B-wing intact long enough to fire. Then, if you managed to survive the barrage long enough to fire at range “1,” you were only gaining one attack die over the B-wing’s primary weapon at the same range. Certainly, the quality of your dice would improve, but only if you had both a target lock and focus token. By allowing you to fire torpedoes from outside of her primary arc, Nera Dantels alters the whole equation. Rather than flying at break-neck speed directly toward her target, she can fly past it, acquire her target lock, and launch her torpedoes. This makes it easier for you to select maneuvers that encourage her survival, and that makes it easier to live long enough to find a quality shot. In fact, since Nera Dantels can target important enemies even as she focuses on piloting out of their firing arcs, she may even be able to survive long enough to make good use of multiple torpedoes. This is a theory that developer Alex Davy explores in a squad list he designed to take advantage of Nera Dantels and her unique pilot ability. 
Kyle Katarn (21)
Jan Ors (2)
Ion Cannon Turret (5)
Moldy Crow (3) Nera Dantels (26)
B-Wing/E2 (1)
C-3PO (3)
Advanced Proton Torpedo (6)
Advanced Proton Torpedo (6)
Deadeye (1) Biggs Darklighter (25) Total Squad Points: 99 Not only does this squad pack a massive punch with its pair of Advanced Proton Torpedoes, it makes use of the B-Wing/E2 modification. For one point, this new upgrade allows you to add a crew member to your B-wing, which opens up a range of new possibilities. Here, the addition of the C-3PO crew upgrade guarantees Nera Dantels at least one evade result every combat phase, and it offers this lasting defensive measure at the same total squad point cost as a single Shield Upgrade. Exploring the B-wing/E2 The introduction of the B-wing/E2 upgrade in Rebel Aces is also accompanied by the addition of a couple new crew upgrades, one of which Alex features in his squad list. - Once per round, Jan Ors allows a friendly ship within ranges one to three to trade out a focus token for an evade token.
- Kyle Katarn, meanwhile, grants his ship a focus token whenever it removes a stress token.
 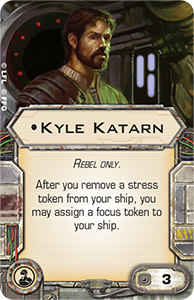
Naturally, these crew members complement each other. So long as they crew ships flying no further than range three apart, whenever Kyle Katarn grants his ship a focus token, Jan Ors can convert it to an evade token. As Alex demonstrates, these crew members also function very well on each other’s HWK-290s. If Jan Ors flies with Kyle Katarn, then whenever he passes a focus token to another ship, she can convert it to an evade token. Alternatively, if Kyle Katarn serves as a crew member with Jan Ors, then whenever she clears the stress she takes to grant an ally an extra attack die, he can grant her a focus token. Of course, if you equip your B-wing with the B-wing/E2 modification, you can use any of the different crew upgrades available to Rebel starfighters. There’s a wealth of options that reaches far beyond Jan Ors, Kyle Katarn, and C-3PO, and these options can lead to some exciting, new uses of your B-wings.  Using the B-wing/E2 modification to partner a Tactician on the same B-wing as an Ion Cannon allows you to field a powerful control ship that can lock down an opponent’s key starfighter for as few as twenty-eight squad points. Using the B-wing/E2 modification to partner a Tactician on the same B-wing as an Ion Cannon allows you to field a powerful control ship that can lock down an opponent’s key starfighter for as few as twenty-eight squad points.- Adding Nien Nunb to your B-wing might transform it into a more potent flanker. For a total of two squad points, Nien Nunb takes the B-wing’s red straight, four-speed maneuver and make it green, allowing a B-wing that starts opposite the rest of your squad to race into battle more quickly without losing any actions.
- At a total of five squad points, the addition of Chewbacca to your modified B-wing can provide the extra resilience it needs to withstand incoming fire for one or two more rounds. In B-wing terms, that’s very likely enough time to destroy one or two more TIE fighters, especially if that B-wing is piloted by an ace like Keyan Farlander, Nera Dantels, or Ten Numb.
Make the Jump to Hyperspace The B-wing/E2 modification allowed the Rebel Alliance to free its B-wing pilots to focus on flying and leave the gunnery to gunners. Accordingly, the B-wing/E2 featured a markedly improved kill rate over the standard B-wing. Similarly, the B-wing/E2 modification from Rebel Aces allows you the freedom to make use of your B-wings in all-new fashions. Take advantage of the increased versatility the Rebel Aces Expansion Pack lends your A-wings and B-wings. Head to your local retailer to pre-order your copy today! Next: We look at how the new mission from Rebel Aces allows you to test the limits of your new A-wing and B-wing. ... Source: B-Wing Expanded (http://www.fantasyflightgames.com/edge_news.asp?eidn=4946)
Title: Re: FFG: Fantasy Flight Games News
Post by: EvilGinger on 28 July 2014, 17:58:22
Very cool stuff I just need to play more often some how
>:DGinger
Title: FFG:Equipped to Survive
Post by: RSSFeeder on 28 July 2014, 18:30:02
Equipped to SurviveA Preview of the New Droids, Vehicles, and Gear in Far Horizons
“You got a lot of carbon scoring here. It looks like you boys have seen a lot of action.”
–Luke Skywalker Once upon a time, a young farm boy from Tatooine cleaned a droid, caused it to play a recorded message, and triggered a series of events that would reshape the galaxy… When your destiny calls, there’s no place you can go to escape it – not even a desert planet at the far edge of the known universe. Even when the Colonists of Star Wars®: Edge of the Empire™ travel to the far ends of the galaxy in order to establish new homes and new lives, their pasts have a nasty habit of catching up with them. Outstanding obligations lead to adventure. And since your adventures can take you anywhere, it pays to be prepared. 
At the edge of the Empire, even routine shipments may run afoul of pirates.
In the Colonist sourcebook, Far Horizons, you’ll find a wealth of new droids, vehicles, starships, weapons, and gear that any character can use. However, since most of these items are designed to help tame even the wildest and most dangerous environments, the game’s Colonists should find them especially appealing. Droids It was Luke Skywalker’s interaction with a pair of droids that first led him down a path that would eventually take him off of Tatooine, past the destruction of the Death Star, and to the ultimate triumph of the Rebel Alliance over the evil Galactic Empire. To say, then, that there’s tremendous potential for adventure within the handful of new droids presented in Far Horizons is a bit of an understatement.  Perhaps even more so than in other areas of the galaxy, droids in the Outer Rim are essential to the day-to-day functions of civilized society. In a region where so many systems remain uncharted and unknown dangers can reside in even the most welcoming paradise, droids help make life easier and safer for their organic masters, colleagues, and friends. Accordingly, Far Horizons features a sampling of speciality droids common to the Outer Rim, including the AC Law Enforcement Droid, which is a relatively new entry to the field of police automata. Perhaps even more so than in other areas of the galaxy, droids in the Outer Rim are essential to the day-to-day functions of civilized society. In a region where so many systems remain uncharted and unknown dangers can reside in even the most welcoming paradise, droids help make life easier and safer for their organic masters, colleagues, and friends. Accordingly, Far Horizons features a sampling of speciality droids common to the Outer Rim, including the AC Law Enforcement Droid, which is a relatively new entry to the field of police automata.
Nearly two meters tall, the broad-shouldered AC Series LE droid possesses an average intelligence and a stern, imposing disposition. It is programmed for both standard police duties as well as fast-response riot control, and it is covered in imposing plate armor with only a single red, horizontal photoreceptor band serving as any hint of facial features. These droids aren’t for everyone, though. Even as they’re becoming the standard for police droids at the edge of the galaxy, civilians tend to despise them. Vehicles and Starships It is a commonly held belief that the various worlds of the Outer Rim are where old vehicles go to die. Indeed, the region’s inhabitants work hard to keep a great number of speeders and groundcars alive and functional long after they would have been scrapped in the more civilized, affluent areas of the galaxy. After all, no amount of preparation, innate skill, or specialty equipment can make a difference in an endeavor if an individual and his equipment can’t get where they need to go, and the work performed by colonists’ starships, speeders, and walkers is nearly as important as the work performed by the colonists themselves. In Far Horizons, you’ll find a large selection of airspeeders, landspeeders, walkers, wheeled and tracked vehicles, and freighters, any of which may serve more than one purpose in times of need. For example, the Hunchback construction strider is a lightweight utility walker designed for construction and civil engineering work. Similar to the Republic’s AT-PT, the Hunchback is a bipedal walker with a slab-sided rectangular command pod perched atop a pair of powerful reverse-articulated legs. The Hunchback's arms carry a wide array of tools such as plasma cutters, saws, welders, drills, compressed air guns, and small, dextrous manipulators for fine work. 
While it typically carries no offensive weapons, the Hunchback is sturdy and armored, and desperate colonists may find a way to modify it in order to help defend their homesteads from enemy forces.
Weapons, Armor, and Tools Typically, Colonists are the characters in Edge of the Empire that are least likely to embrace violence when other means may suffice. However, it would be a mistake to assume Colonists have no need of arms or armor. The truth is that on the fringe of the galaxy, violence (and the need to protect against it) is all too commonplace. Accordingly, Far Horizons presents a wide array of weapons and armor, as well as a range of speciality tools appropriate for Colonists of all specializations.  The Outer Rim can be a dangerous and unforgiving place, but that doesn’t you’ll want to shoot to kill each time a situation devolves to violence. Far Horizons introduces a number of non-lethal weapons, like the Telex-Delcor SWE/2 Sonic Rifle, which may not be as useful in a shoot-out against heavily armed Imperial forces, but are incredibly useful for a Marshal who wants to ensure that he earns a reputation for his resolve as well as his justice and mercy. The Outer Rim can be a dangerous and unforgiving place, but that doesn’t you’ll want to shoot to kill each time a situation devolves to violence. Far Horizons introduces a number of non-lethal weapons, like the Telex-Delcor SWE/2 Sonic Rifle, which may not be as useful in a shoot-out against heavily armed Imperial forces, but are incredibly useful for a Marshal who wants to ensure that he earns a reputation for his resolve as well as his justice and mercy.
Such a Marshal may also do well to invest in some of the new armor from Far Horizons, or even some reinforced environment gear. Such suits are valuable to Colonists not only because they must often brave strange and hazardous planetary conditions, but because they are more likely to be exposed to airborne toxins and to suffer injuries from falls or unstable environmental formations. Finally, though they’re often the last characters you’d expect to load up on weaponry, Colonists usually have the greatest need for specialized tools. Performers must have all manner of amplifiers, props, or instruments. Doctors require a great deal of surgical equipment and medical supplies. Even Politicos need remote access to communications, and Traders and Entrepreneurs need business aids. Far Horizons introduces a diverse array of these materials, which offer benefits for nearly all characters, and since they introduce so many specialized abilities, their inclusion in (or exclusion from) your setting may provide the impetus for a wide range of thrilling adventures. Can You Tame the Wildest Edges of the Galaxy? As the Colonist sourcebook for Edge of the Empire, Far Horizons introduces a wide range of new character options and equipment for any character eager to explore and settle the wildest edges of the galaxy. Meanwhile, it also explores the concept of the Colonist’s homestead and how the Game Master can use a homestead to shape a campaign. Whether or not your campaign features a character with the Colonist career, the homestead is an idea that transcends a single class and can lend an immediate focus and urgency to your campaign. We’ll take a closer look at how Game Masters can make use of the homestead in our next preview of Far Horizons! ... Source: Equipped to Survive (http://www.fantasyflightgames.com/edge_news.asp?eidn=4947)
Title: FFG:Soldiers of the Craftsworlds
Post by: RSSFeeder on 29 July 2014, 03:00:03
Soldiers of the CraftsworldsPreview the Eldar Faction from Warhammer 40,000: Conquest
“Trust not in their appearance, for the Eldar are as utterly alien to good, honest men as the vile Tyranids and savage Orks. They are capricious and fickle, attacking without cause or warning.”
–Imperial Commander Abriel Hume The planets of the Traxis sector offer a tempting target for any burgeoning faction in the galaxy. Filled with valuable resources and possibilities for military strongpoints, cultures as different as the ravaging Orks and the Tau Empire are drawn to clash within this sector. In Warhammer 40,000: Conquest, two players take command of these factions, leading warlords and armies to war and die among the unforgiving expanses of space. Thus far, we’ve given a detailed overview of gameplay, beginning with the deployment phase and moving onto the command struggle and battles, including an example of a battle. More recently, our previews have turned to exploring the factions available in Warhammer 40,000: Conquest, beginning with the Space Marines and moving on through the Astra Militarium, Orks, Chaos, and Dark Eldar. Today, however, we turn to the wonder of the craftworlds and their inhabitants – the Eldar. 
Wraithbone and Psychic Power The Eldar’s outlook on the galaxy is fundamentally different than nearly every other race, and the way they practice the art of war reflects their curious attitudes. A key Eldar strategy revolves around eliminating your opponent’s choices, and you’ll find plenty of ways to do just that, whether by exhausting your opponent’s units, discarding his cards, or using other combat tricks.  The first Eldar warlord in the Traxis sector is the mighty Psyker Eldorath Starbane (Core Set, 6). Starbane exemplifies the Eldar approach to warfare by offering a powerful Reaction, allowing you to shut down your opponent’s plans. Whenever Starbane commits to a planet, you may exhaust any non-warlord unit at the planet. By exhausting your opponent’s most powerful attacker, your opportunities for the coming fight increase dramatically. The first Eldar warlord in the Traxis sector is the mighty Psyker Eldorath Starbane (Core Set, 6). Starbane exemplifies the Eldar approach to warfare by offering a powerful Reaction, allowing you to shut down your opponent’s plans. Whenever Starbane commits to a planet, you may exhaust any non-warlord unit at the planet. By exhausting your opponent’s most powerful attacker, your opportunities for the coming fight increase dramatically.
Starbane’s signature squad proffers more tools for playing around your opponent, beginning with four copies of Starbane’s Council (Core Set, 123). These Psykers normally have an attack value of three, but when Starbane’s Council attacks an exhausted unit, they gain two additional ATK, giving them enough power to destroy a wide variety of units in one attack. Their ability pairs naturally with Starbane himself, but since units that come with a warlord from headquarters arrive at a planet exhausted, you may find Starbane’s Council is an excellent way to destroy these units before they can attack. The next card you’ll find in Starbane’s signature squad is the Alaitoc Shrine (Core Set, 124) . This support bears the text, “Reaction: After an Eldar unit moves to a planet, exhaust this support to ready that unit.” Using this support gives you an excellent way to get around the fact that your units arrive from headquarters in an exhausted state. Triggering the Alaitoc Shrine gives you a leg up on your opponent, and lets you get the most out of the units you bring to a planet with your warlord. Two copies of Foresight (Core Set, 125) are the next cards in the signature squad, and by playing one of these powerful events after your warlord commits to a planet, you may immediately commit him to a different planet. This gives you the opportunity to trigger Starbane’s ability twice, potentially exhausting two units at different planets, but it also invites you to commit your warlord again with full knowledge of your opponent’s plans. Once you know where your opponent’s warlord has gone, you can move Starbane to oppose him directly or seek his downfall on another planet. The final card in the signature squad is a free attachment entitled Mobility (Core Set, 126). This card can be attached to an army unit, and it grants that army the Mobile keyword, allowing it to move to an adjacent planet at the beginning of the combat phase. Whether you use Mobility to have an army win the command struggle at one planet and battle on another, or use it to hedge your bets and counter your opponent’s maneuvers, you’ll find plenty of options for using this card. Elegant in Battle  The Eldar’s tactics of restricting their opponents’ choices continues outside of the signature squad. One such card is the Shrouded Harlequin (Core Set, 134). This army unit bears an Interrupt that allows you to exhaust a target enemy unit at the planet of your choice when the Shrouded Harlequin is destroyed. Whenever your opponent fights back against the Shrouded Harlequin, he pays the price by letting you exhaust one of his units, shutting down his attacks and foiling his plans. The Eldar’s tactics of restricting their opponents’ choices continues outside of the signature squad. One such card is the Shrouded Harlequin (Core Set, 134). This army unit bears an Interrupt that allows you to exhaust a target enemy unit at the planet of your choice when the Shrouded Harlequin is destroyed. Whenever your opponent fights back against the Shrouded Harlequin, he pays the price by letting you exhaust one of his units, shutting down his attacks and foiling his plans.
Another army that can help you pin down enemy forces is the Silvered Blade Avengers (Core Set, 136). This unit lets you ensure that your foes can’t strike back, since whenever the Silvered Blade Avengers are declared as an attacker against a non-warlord unit, that unit is exhausted. When it comes to eliminating your opponent’s options, the Silvered Blade Avengers are a dire threat, setting your opponent up for a unit like Starbane’s Council to finish off exhausted units. Exhausting units is an excellent way to control your opponent in battle, but truly adept Eldar warlords strive to control their opponent even beyond combat. You’ll find one way to do this in the Biel-Tan Warp Spiders (Core Set, 137). Whenever you attack with the Biel-Tan Warp Spiders, you may look at the top two cards of any player’s deck, then discard one of those cards. By using this against your opponent, you can discard cards before they even get to your opponent’s hand, as well as gaining some knowledge of what you can expect in the future. Another way to foil your opponent’s plans off the field of battle is the event card, Nullify (Core Set, 140). This event is free to play, and it allows you to exhaust a unique Eldar unit, such as your warlord, to cancel any event card played by your opponent. With this amount of control, you can easily deny some of the most powerful effects your opponent can throw at you, leaving you firmly in command of your armies in the Traxis sector. The Anger of a Master Psyker Take command of a craftsworld and wield the power of the Eldar to take control of the Traxis sector. The fate of countless worlds rests in your hands. Preorder Warhammer 40,000: Conquest at your local retailer today! ... Source: Soldiers of the Craftsworlds (http://www.fantasyflightgames.com/edge_news.asp?eidn=4948)
Title: FFG:No Ordinary Walk in the Woods
Post by: RSSFeeder on 29 July 2014, 11:30:05
No Ordinary Walk in the WoodsPreview the Creatures and Landscape of Talisman: The Woodland
Ahead lies a sunlit meadow of tall grasses and wildflowers, where glowing, winged creatures are flitting about in the air. The path seems to be taking you there, but soon the meadow disappears from view, and the altered path now leads towards a dense, sunless thicket. You feel a chill as you pass through a gate of black branches entwined and twisted like tortured limbs – then suddenly you’re back in the swamplands where you met Puck not long ago. He’s still there, and unfortunately he starts laughing when he sees you… Discover the perils and enchantments of the deep woods in The Woodland, a new expansion for Talisman Revised 4th Edition. Long closed to mortals, the forested realm of the Fae has reopened. If you dare approach them, the faeries may favor you with extraordinary gifts – or they may put you through unspeakable torments. In today’s preview, we’ll venture into the Woodland and take a look at some of the spaces on the new corner board, and meet some of the Strangers, Objects, Places, and Enemies that you may encounter on Woodland Cards. 
The Forbidding Forest Once you’ve entered the Woodland, you must either persistently move forward towards the Meeting with Destiny space at the woods’ edge, or else turn around and flee– although it is doubtful that the shifting trees will permit you to exactly retrace your steps. Arrows on the board serve as trail markers, and you must move directly with or directly against them. It is forbidden to leap in other directions, from the Swampland to the Faerie Ring, for example. The Woodland is fond of disorienting mortals who wander within it. It may prevent you from moving forward to the place you intended, or make it impossible for you to return to a place you’ve been. Bogs slow you down, Swamplands detain you against your will, and many spaces affect movement in unpredictable ways: the Witch Tree will propel you forwards or backwards depending on whether you roll an even or odd number. The Mystic Glen may teleport you into either the Swampland or the Faerie Ring. The Crossroads may even teleport you to a Woods space outside of the Woodland itself. Near the edge of the woods lies Mab’s Lair. Skulls of her animal, faerie, and human victims litter the ground – it is clearly the most dangerous space of all. There, you must confront the terrifying Queen Mab herself, creator of all dreams, who has a Strength of ten and a Craft of ten. If you defeat her, she will give you a vision of your true purpose. If you cannot, she will haunt you with the darkest nightmares she can create. 
Shrewd and Knavish Sprites In the realm of the Fae you draw Woodland Cards instead of Adventure Cards, since the rules governing that land are unlike those of the mortal world. Like its paths, the Woodland’s Strangers and Events are naturally changeable and capricious. Outside of the Woodland, a Market card permanently establishes a Market where you can buy useful Objects. Inside the Woodland, a Faerie Market may occur. You cannot buy things in a Faerie Market. Instead, every player must give a possession and a piece of gold, a fate token, or a life to the player on the right. The Mysterious Mist may teleport you to a new location or grant you a Spell, depending on what you roll. The Greenman could give you a life or take one away. If you can defeat the Thieving Piskies, you can send them to steal from another character. The wicked and deformed Baba Yaga may kill one of your Followers, or even your character, or demand one of your objects as a payoff. Her chicken-legged hut is likewise troublesome. Upon encountering it, the hut captures you inside and speeds off, so that as long as you have it as a Follower, you always move exactly five spaces. 
The trickster Puck, known for laughing at others’ harm, can transform a character of your choice into a Toad – or he may decide to turn you into one instead. In fact, Baba Yaga could turn you into a Toad as well, as could numerous others. So many of the Woodland’s inhabitants and events can turn characters into Toads that you may become accustomed to amphibian life. Luck of the Faeries With fortune’s favor, you will find some protection in the Woodland against its many perils, perhaps a Magic Object once belonging to a long-forgotten king. If you have enough Strength to wear it, Nuadu’s Torc will add to that Strength and keep you from losing it or becoming a Toad. Lugh’s Cloak, an incredibly powerful Magic Object, allows you, if you have a craft of at least five, to avoid being affected by the Strangers and Events that you encounter. 
Since how you fare in the Woodland depends heavily on your luck with the dice, the most desirable object in the realm may be the Lucky Charm, which lets you choose your result instead of rolling a die. Mab’s Charm also invites you to change your luck, by allowing you to reroll an Enemy’s attack, making the original result into nothing but a dream. Into the Woods The woods may be fearful, deep, and dark, but they also reward those who wander through them in unforeseeable ways. If you can survive the faeries’ dangerous whims and the trials of the enchanted trees, you will emerge from The Woodland a character of proven fortitude, ready to pursue the Crown of Command. Prepare for your journey through these wild woods, and pre-order Talisman: The Woodland from your local retailer today. ... Source: No Ordinary Walk in the Woods (http://www.fantasyflightgames.com/edge_news.asp?eidn=4949)
Title: FFG:A New Mission Briefing
Post by: RSSFeeder on 29 July 2014, 20:00:04
A New Mission BriefingNew FAQ and Tournament Rules are Available for X-Wing
The 2014 X-Wing™ National Championship season has begun, and battles are taking place all over the world to determine the fate of the galaxy. Mission briefings are critical to the success of any squadron’s operation. It is where pilots learn not only what is expected of them, but what they’ll be up against and the situations that might arise. Make sure you’re ready for your next dogfight by reading the new X-Wing FAQ (pdf, 27.2 MB) and Tournament Rules (pdf, 4.2 MB). For those participating in larger scale battles, check out the updated Epic Tournament Rules (pdf, 2.6 MB).  
These changes will go into effect on August 1st, 2014. A Word from the Developers Greetings, pilots! We are pleased to announce a number of small but significant changes to the X-Wing Tournament Rules. For starters, we’ve retired the strength of schedule tiebreaker in favor of a new system, margin of victory. This will make it easier for tournament organizers to resolve tiebreakers, and puts each player in control of their own destiny by rewarding big wins and players who fight for every point, even when they’re losing. In addition, we added a step to the Epic Dogfight and Team Epic tournament formats: charging Huge ships up to their energy limits before the game begins! Huge ships will now be able to bring their might to bear immediately, wherever they’re needed most. We also continue to expand and improve the X-Wing FAQ. As the game grows and absorbs new content, more and more card interactions become possible. The latest update addresses the pressing questions introduced by Wave IV, the Tantive IV release, and Epic play. We’ve also taken this opportunity to introduce the official rules for Large ships performing the barrel roll action as we prepare for the release of the YT-2400 Freighter, a necessary check on the dramatic power of large-base barrel rolling. Have fun and fly casual! Alex Davy and Frank Brooks 
Thanks guys! Don’t miss your mission briefing! Download the FAQ, Tournament Rules, and Epic Tournament Rules now, and be prepared for your next run on an enemy’s base. ... Source: A New Mission Briefing (http://www.fantasyflightgames.com/edge_news.asp?eidn=4950)
Title: Re: FFG: Fantasy Flight Games News
Post by: EvilGinger on 29 July 2014, 23:17:55
Very cool & they let you chuck squadrons at each other in epic
>:DGinger
Title: FFG:Learn the Ways of the Force
Post by: RSSFeeder on 30 July 2014, 04:30:03
Learn the Ways of the ForceNew FAQ and Tournament Rules are Available for Star Wars: The Card Game
The 2014 Star Wars™: The Card Game Regional Championship season is almost over, but there is no time for rest in the galactic struggle. Both Rebels and Imperials alike are regrouping and preparing for National Championships around the world. When resupplying and taking stock of your forces, there’s no better way to prepare than reading the new Star Wars: The Card Game FAQ (pdf, 5.7 MB) and Tournament Rules (pdf, 15.5 MB) and staying up to date on the latest changes.  
A Word from the Developers Hello Star Wars: The Card Game players! As National Championships kick into full swing, we have been hard at work on a new FAQ and Tournament Rules update. In the FAQ, we have released a formal definition of the word “copy,” establishing that a copy of a card is any card that shares the same title. We have also outlined (on page 8) the step-by-step process by which damage is dealt. Finally, we have answered some common questions about Echo Base (The Search for Skywalker, 205) and the 3.6 entry in the Q&A section on page 11. The more significant changes in this release can be found in the Tournament Rules, where we have introduced a Code of Conduct and changed the process by which tournaments are scored and the elimination rounds are handled. The Code of Conduct When two or more players sit down to play a game with one another, there are a number of social assumptions being made. One group of gamers may have an implicit assumption that “everyone is equal and competing to win” while another group may make the assumption that “everyone should take it easy on the six year-old.” In private gaming groups, participants come to their own mutual understanding of why they are playing and how they will play any given game. They essentially create their own implicit code of behavior. In public gaming, a number of these basic courtesies, social practices, and ethical beliefs that make it possible to sit down and enjoy a game with another human being are sometimes questioned or even challenged as the level of competition intensifies. When results become more important—to some players—than the means to those results, the social fabric that holds a gaming community together can begin to erode, and the integrity of fair play and legitimate competition is lost. To combat the development of such a situation within the Star Wars: The Card Game community, we have created a more explicit Code of Conduct, and we are taking this opportunity to acknowledge that FFG does not desire and will not tolerate the behavior of cheating or the presence of cheaters at sanctioned Organized Play events. Scoring Changes To improve the tournament experience at our more competitive events, we are introducing some significant changes to the method by which such events are scored and run. First, we are doing away with the “tiebreaker” point in the Swiss rounds. This change is being made so that players are more incentivized to play for a win in each game, instead of seeking to win game one and then play for the tiebreaker point in game two. In addition to eliminating the Swiss tiebreakers, we are adjusting scoring so that a game win is now worth 3 points, a game loss is worth 0, and a game draw (because of time limit) is worth 1 point for each player. In the elimination rounds, we are introducing a double-elimination system, in which players who make the cut are seeded into a tournament bracket and then play single game matches until one champion remains. In each round, a player uses the deck representing the side of the Force that he or she has played the least over the course of the elimination rounds (in the case of a tie, the higher-seeded player chooses a side). As a player plays more with one side, the likelihood of playing the other side later in the bracket increases.  
As elimination games cannot result in a draw, we have also developed a tiebreaker scoring system that will be used to determine the player who is closest to victory whenever a game is called due to time. (The championship game(s) between the final 2 competitors is not timed.) We previously introduced a similar double-elimination system to our Android: Netrunner Tournament Rules, where it has worked well and been well received. The intent of these changes is to reduce the effect that “match mentality” has had on recent tournament play. We seek to encourage an environment where competitors play for a win in each individual game and build decks toward that end. Legal Card Sets Finally, we have added a note to the card legality section of this document stating that the Darkness and Light Force pack will not be legal for the 2014 North American Championship. Good luck to all players competing in upcoming National championship events, and to those coming to Gen Con, we’re looking forward to seeing you at the show! Nate French & Erik Dahlman
Fantasy Flight Games 
Thanks guys! Regrouping takes time. Speed up the process and get a jump on your opponents by downloading and reading the FAQ and Tournament Rules now. ... Source: Learn the Ways of the Force (http://www.fantasyflightgames.com/edge_news.asp?eidn=4951)
Title: FFG:Dark and Unknown Magic
Post by: RSSFeeder on 30 July 2014, 13:00:02
Dark and Unknown MagicPreview New Overlord Cards and Download the Rules for Manor of Ravens
The overlord’s power branches out into new magic with the Manor of Ravens expansion for Descent: Journeys in the Dark Second Edition. Two new classes of Overlord cards arrive, alongside the overlord’s first servant, the raven flock. Within this expansion, you’ll find cards to serve your plots for harnessing the power of the haunted manor and destroying the heroes of Terrinoth forever. In past previews, we explored the monsters you command in Manor of Ravens and we looked at the heroes that dare to oppose your dominion. Today, guest writer Justin Hoeger, an avid Descent player and fan, delves deep into the new classes of Overlord cards you’ll find inside this expansion. In addition, the rules for Manor of Ravens (pdf, 5.9 MB) are now available for download! Download the rules from the Descent support page, then read below for Justin’s thoughts on the power of new Overlord cards. Justin Hoeger on the Overlord’s New Powers In Descent up to this point, the majority of Overlord cards have caused immediate, temporary effects. You played your card, and when its effect completed, the card was discarded. The two new classes of Overlord cards in Manor of Ravens are different. These two classes transform the normal rules for playing your Overlord cards and open the door to a vast array of new strategies. 
Arcane Enchantments The Enchanter class of Overlord cards introduces abilities that persist beyond an immediate effect. Wristlet of Wind, for example, gives a monster group added mobility, letting each monster move one space after it attacks. You have to keep moving to maintain this card’s effects, though; the card is discarded if any monster in the group doesn't move during its activation. The Dragonbone Pendant, on the other hand, can give your monsters an effective attack boost for each attack, but to get the most out of the Dragonbone Pendant, you'll want to spread the damage around. This card is discarded when a monster in the group defeats a hero. The cards above can benefit any monster group, but others may call for careful consideration to get the most benefit. For example, if you're bringing a large group of low-health monsters into play, you may encircle them with the Rings of Zhol'alam. Each time a monster from the enhanced group is defeated, every nearby hero takes damage. As an added bonus, this card only goes away when the entire monster group is gone. If you move your low-health monsters among the heroes, they'll have to think twice before using skills and abilities that can kill many monsters at once. And if you want to get tricky, you could use a giant's Sweep or a lava beetle's Blast to attack your own monsters alongside the heroes, dealing extra damage for each of your defeated monsters!  
The Rune of the Phoenix card can be especially handy for prolonging the life of your monsters. Once a monster in the group suffers wounds equal to its Health, the overlord can discard Rune of the Phoenix to heal five of the monster’s wounds. This is a great card to increase the survivability of your agent if you're playing with a Plot deck. For example, you may play with the Unstable Forces Plot deck included in the Tristayne Olliven Lieutenant Pack. If you have Tristayne Olliven in play as an agent, Rune of the Phoenix paired with Mortal Coil makes him extremely difficult to kill: in Act II, four heroes would have to deal forty-one wounds to destroy him. Until he’s defeated, his magic spells and Ravage ability would wreak havoc on the hero party. Finally, the Sign of the Last Zenith ensures that your favorite Enchanter cards escape the discard pile. After you play Sign of the Last Zenith on a monster group, every time an Enchanter card is discarded from a different group, the card transfers to the group with Sign of the Last Zenith instead of being discarded. Better yet, you draw an Overlord card every time this effect occurs. If you play your cards right, you could end up with a monster group or lieutenant featuring a terrifying number of Enchantments, while the heroes struggle to chew through your lesser minions. Call Your Servant  While the Enchanter class focuses on spreading benefits across entire monster groups, the Unkindness class is all about your first servant, the raven flock. Similar to a familiar for a hero, the raven flock can be summoned with the Call of the Ravens card. This servant arrives on the scene adjacent to another monster at the start of an overlord turn. Summoning the raven flock deals four wounds to the adjacent monster, so summoning it close to a monster near death is preferable. Once you purchase the Call of the Ravens card, it’s always available to you. It's never shuffled into your Overlord deck, and doesn't count toward your Overlord deck total, meaning you can use it at any time. While the Enchanter class focuses on spreading benefits across entire monster groups, the Unkindness class is all about your first servant, the raven flock. Similar to a familiar for a hero, the raven flock can be summoned with the Call of the Ravens card. This servant arrives on the scene adjacent to another monster at the start of an overlord turn. Summoning the raven flock deals four wounds to the adjacent monster, so summoning it close to a monster near death is preferable. Once you purchase the Call of the Ravens card, it’s always available to you. It's never shuffled into your Overlord deck, and doesn't count toward your Overlord deck total, meaning you can use it at any time.
As a monster, the raven flock is fast and versatile, and every other card in the Unkindness class boosts the raven flock’s abilities in some way. You can give it the same Shadow ability as the mighty shadow dragons with the Beneath the Shadow Overlord card, making it more difficult for adjacent heroes to hit the raven flock. The Ill Omen card grants your raven flock an Ominous aura, inflicting the potent new Doomed condition on nearby heroes who fail a Willpower test at the beginning of their turns. Other cards in the Unkindness class allow your servant to profit from a hero’s defeat. Feast heals the raven flock’s wounds and boosts its health when a hero is defeated within five spaces of your servant. And as a final unkindness to a hero defeated near the raven flock, you can play the Envelop card to remove that hero token from the map. The hero cannot be revived or recover damage for any reason until the servant is defeated! Thanks, Justin! New magic and arcane servants await the overlord in the haunted mansion. Click the thumbnail at right to download the rules to Manor of Ravens and uncover the secrets that lurk within. Then, preorder Manor of Ravens at your local retailer today! ... Source: Dark and Unknown Magic (http://www.fantasyflightgames.com/edge_news.asp?eidn=4952)
Title: FFG:Enter the Dragon's Lair
Post by: RSSFeeder on 30 July 2014, 21:30:02
Enter the Dragon's LairThe Forgotten Souls Co-op Descent Adventure Is Now Available
Forgotten Souls, a cooperative adventure for Descent: Journeys in the Dark Second Edition, is now available via FFG’s in-house manufacturing! Previously announced in January for Organized Play, Forgotten Souls is a new cooperative adventure, allowing up to four heroes to play a fully cooperative variant of Descent: Journeys in the Dark. In a normal game of Descent, one player takes the role of overlord, commanding monsters and the forces of evil in the game. Up to four players combat the power of the overlord by playing heroes who gain experience and new items over the course of a campaign. Forgotten Souls changes the normal structure of Descent by emulating a mini campaign in a completely cooperative atmosphere. Although this expansion does not replace the normal game of Descent, it offers a variant for you and your friends to explore an expanding dungeon, passing tests and battling fierce monsters. Encounters and monsters are controlled by decks of cards, rather than the overlord in Forgotten Souls. You’ll also grab loot and experience as you face down a series of encounters, culminating in a battle in the heart of the dragon’s lair. Enter the darkness within Forgotten Souls! Important: The rules for the Forgotten Souls expansion are not included in the box. The rules (pdf, 20.1 MB) are available for free download by clicking the thumbnail to the right or from the Descent: Journeys in the Dark Second Edition support page. Into the Dark Forgotten Souls enables you and up to three friends to experience a mini campaign in one night. You and your friends follow a twisted path, working through the rooms of the dragon’s lair, passing tests and battling any monsters that stand in your way. New rooms and challenges are revealed from an Exploration deck, meaning you’ll never encounter the same dungeon twice in the Forgotten Souls adventure. Each room that you encounter carries its own objective that you must complete to move on. You may be required to creep through a room of sleeping barghests, or steal dragon treasure from a trash heap. After you either achieve your goal or fail to reach it, you may open the next door and reveal a new Exploration card for you and your fellow heroes to encounter. There is no overlord player to command his monsters against you in Forgotten Souls, so your objective also changes. In the cooperative variant of Descent, you and the other heroes win the game if you can make your way through the rooms of the Exploration deck until you reach the final main encounter. If you defeat the final main encounter, you win the game, but you must be careful not to run out of time along the way. The overlord track replaces the overlord’s objective in cooperative Descent. A fate token and a doom token are placed at opposite ends of the track, and if these tokens ever meet, the heroes lose the game. The doom token advances slowly, but once it advances, it can never return. The fate token, however, fluctuates based on the outcomes of your encounters. For example, if a hero is knocked out, fate advances by one, but successfully completing a main encounter may allow you to reset the fate token. Hordes of monsters lurk in the shadows of this expansion, eager for the blood of heroes. Monsters in Forgotten Souls and all cooperative Descent adventures are controlled by a deck of monster activation cards that gives the monsters a list of actions each turn during the Overlord phase. Monster activation cards contain different actions for every type of monster, meaning you’ll never know exactly how the monsters will react. Because cooperative Descent simulates a mini campaign, you’ll also have chances to gain experience and collect new items for your heroes. Experience is granted after completing main encounters, and you immediately have the chance to improve your hero’s skills by purchasing new Class cards. You’ll also obtain new items in Forgotten Souls by filling the loot track. The loot track increases with each monster you kill, and killing larger monsters gives you access to a wider selection of items. Grabbing items as you run and fight allows your heroes to improve their armor and weapons over the course of the Forgotten Souls mini campaign. For more on the Forgotten Souls expansion, we turn to the developer, Jonathan Bove. Jonathan Bove on the Forgotten Souls Adventure Exploration is a huge theme in the Forgotten Souls expansion. The heroes open doors and face new encounters on a constantly expanding map, never knowing what they’ll find in the next room. Not knowing what monsters and challenges await you keeps you on your toes and forces you to strategize constantly. More than once I’ve found myself saying “If the Trash Heap is next, we’re in big trouble!”
The monster activation cards are the heart of the cooperative experience, though. I based the AI system around the idea that monsters should always be doing something, even if their prime goal changes. For example, a ranged monster may be instructed to attack the furthest hero. The monster moves to gain line of sight to that hero, but can’t move far enough. Instead of moving again, it will attack a different hero that is in line of sight. So even though the monster didn’t reach its first goal, it’s still dealing damage to the heroes. Something else I’m very excited about is the loot system. Each time a hero defeats a monster, tokens are added to the loot track. Once the track reaches a certain threshold, the heroes will draw from the Shop Item deck. Loot is gained immediately, without waiting for a shop phase, so you get to fight, loot, and keep on fighting. Spending XP works the same way: you spend it when you earn it. This makes gameplay in Forgotten Souls very fluid and simulates a mini campaign. The Adventure Begins Enter the dragon’s lair in Forgotten Souls, a in-house manufacturing expansion that introduces a fully cooperative variant to Descent: Journeys in the Dark Second Edition for players to enjoy alongside the main game. Gather a hero party of your friends, grab some loot, and prepare for adventure! Download the rules from the support page, and order your copy of the Forgotten Souls adventure today! ... Source: Enter the Dragon's Lair (http://www.fantasyflightgames.com/edge_news.asp?eidn=4937)
Title: FFG:Laws of the Old World
Post by: RSSFeeder on 31 July 2014, 06:00:02
Laws of the Old WorldNew FAQ and Tournament Rules are Available for Warhammer: Diskwars
The 2014 Warhammer: Diskwars National Championships are rumbling near, and new rules and clarifications are here to aid you. Whether you’re leading a bunch of Orcs into glorious battle or riding a steam-driven warmachine against a horde, new strategies can help turn the tide of a struggle. Be prepared to shift your tactics in the heat of the moment with the help of the new FAQ (pdf, 7.9 MB) and Tournament Rules (pdf, 2.2 MB).  
These changes will go into effect on August 1st, 2014. A Word from the Developers Greetings Warhammer: Diskwars players! We have updated both the FAQ and Tournament Rules documents. These documents cover the recent releases of Hammer and Hold and Legions of Darkness, and both sets are now legal for tournament play. In addition to disk and card clarifications, the Tournament Rules provide direction for integrating new scenario, deployment, and terrain cards into your competitive games. By customizing the cards that you bring to a tournament, deciding who to assign initiative to becomes an even more compelling decision. May the Old World quake with the fury of war, and we hope to see you at Gen Con! Michael Gernes & Lukas Litzsinger 
Thanks Michael and Lukas! Do you have what it takes to conquer the Old World? Reading the new FAQ and Tournament Rules are a great first step toward developing successful battle plans and crushing your foes! ... Source: Laws of the Old World (http://www.fantasyflightgames.com/edge_news.asp?eidn=4953)
Title: FFG:Enter the Dungeon
Post by: RSSFeeder on 31 July 2014, 14:30:02
Enter the DungeonPreview the Final Bosses and Download the Rules for Fire at Will and The Big Wave
I shall most certainly pass!
–The Bullrog, Fire at Will Quench your thirst for dexterity-based fun with Fire at Will and The Big Wave, two expansions for Dungeon Fighter soon to be released by Fantasy Flight Games! You’ll be in your monster-quashing element as you battle your way though the dangerous dungeons of these expansions. Our first preview of these expansions gave you an overview of Fire at Will. We explored how burn tokens scorch heroes and monsters, and introducing you to Melissa, The Fire Sorceress. Our second preview dove into The Big Wave. The pirate Jack Parrot made your acquaintance and we took a tour of the murky underwater caves. Today’s preview gives you a look at the terrifying Final Boss monsters that await you at the end of the each dungeon. In Fire at Will, the flame-snorting Bullrog seeks to burn heroes to a crisp before they see the light of day. In The Big Wave, the ageless, infamous, and slimy Great Cthulhu waits beneath the surface, yearning to drag heroes down into the ocean’s depths. So that you can prepare for the battles ahead, download the rulebooks for Fire at Will and The Big Wave from the Dungeon Fighter support page (pdf, 3.8MB and 4.7MB) or by clicking the thumbnails below. Use the rulebooks to plan your path through the dungeons, pick out the equipment you’ll purchase in the shop, or begin practicing the new dice throws introduced in each expansion. Given how powerful these Final Bosses are, you’ll definitely want some practice.  
Bull-Headed You cannot emerge from the dungeon in Fire at Will without conquering the winged Bullrog, who is stubborn as a mule, full of hot air, and wielding a flaming sword. Where the Bullrog goes, explosions follow: at the beginning of a battle with him you must throw the explosion template onto the target board – if a die lands on the template, all heroes suffer two damage. This volatile fire demon deals three points of damage to you if you miss him. He also gives you three burn tokens if you hit him, so that you suffer a point of damage at the start of your next three turns. The best way to vanquish the Bullrog is to fight fire with fire. Equip yourself with fire magic or purchase some Firepower Potion, so that you can use the fire element die which deals damage with every throw. Melissa, The Fire Sorceress is particularly useful against the Bullrog, since her Sworn Enemy ability deals four points of additional damage to any demon. Armed with weapons and fire magic, and with Melissa in your company of heroes, you’ll have no trouble taking the Bullrog by his burning horns.  
Cthulhu is Calling For centuries there have been rumors of an immortal monster lurking in the ocean depths, waiting for just the right moment to come ashore and regain control of the earth. In The Big Wave, you’ll discover the truth of those rumors when you confront The Great Cthulhu. Only the bravest heroes will be able to face such horror, and only the most powerful can overcome this tentacular terror. At the beginning of your fight with Cthulhu you must throw the slime template, which forces your dice to slip around the target board unpredictably. The mere sight of Cthulhu causes the heroes to lose three experience points, diminishing their ability to use water magic. Dealing three damage points to any hero who misses him, Cthulhu also deals seven oxygen tokens to any hero who isn’t already gasping for breath, so that hero only has seven more chances to hit Cthulhu before fainting from lack of air. How can a creature this powerful be defeated? The most useful weapon against this fearsome winged squid may be the Water Fighter, a technologically advanced squirt gun that makes any hit cause three additional damage. Of course, using the Water Fighter requires a specific dice throw, but by the time you encounter Cthulhu you'll be an expert in the art of dungeon fighting, able to master any dice throw imaginable. Fight On No victory prize compares with boasting that you’ve conquered both the Bullrog and The Great Cthulhu. Are you ready to go through fire and water to do battle against these epically menacing Final Boss monsters? Download the rulebooks from the Dungeon Fighter support page and pre-order The Big Wave and Fire at Will from your local retailer today! ... Source: Enter the Dungeon (http://www.fantasyflightgames.com/edge_news.asp?eidn=4954)
Title: FFG:Populate a Universe
Post by: RSSFeeder on 31 July 2014, 23:00:03
Populate a UniversePreview the NPCs within Dark Heresy Second Edition
“Look upon the crowd below and know this – for each honest and Emperor-fearing citizen, another harbours discontent and the seed of treachery in his heart. For every two such malcontents, a third plots against his betters. Out of each hundred such plotters, one has the resolve to act. Now realise this – Hive Desoleum is home to billions. How many, then, are there all around us, ready to drag this place into oblivion?”
–Overheard along a midhive habway, from persons unknown Your investigations as an Acolyte in Dark Heresy Second Edition inevitably bring you into close contact with dozens of strange and exotic beings, ranging from loyal citizens of the Imperium to the blackest spawn of the Warp. Some of these may aid you towards your goals, but others will certainly oppose you with all their might. Today, contributing writer Tim Cox brings you deeper into the corruption of Hive Desoleum as he describes the exotic people and horrid beasts you may encounter in your adventures across the Askellon sector. 
Tim Cox on NPCs in Dark Heresy Second Edition One of the most exciting things about working on Dark Heresy Second Edition was the opportunity to explore Imperial society. Far from the brutal battlefields of the 41st millennium, strange and bizarre denizens fill the worlds and cities of the Imperium. Each of the Imperium’s million and more worlds is unique, and possesses its own defining characteristics. After all, many worlds were settled before the Age of Strife, and their civilisations developed over tens of thousands of years. When we created the cast of NPCs and adversaries for Dark Heresy, we wanted to highlight the uniqueness of every world and its inhabitants. Natives of Desoleum  Rather than offering generic NPCs painted in broad strokes, the NPC and Adversary chapter of Dark Heresy primarily focuses on the inhabitants of a single city – Hive Desoleum. In Hive Desoleum, society is dominated by the oath system. Oaths determine social ranking, servitude, and status for every member of the city, from the youngest child in the slums to Lady Desoleum herself. Because the oaths are such an enormous part of life in Hive Desoleum, we worked very hard to incorporate this into the NPCs and adversaries the Acolytes may face in Desoleum. Rather than offering generic NPCs painted in broad strokes, the NPC and Adversary chapter of Dark Heresy primarily focuses on the inhabitants of a single city – Hive Desoleum. In Hive Desoleum, society is dominated by the oath system. Oaths determine social ranking, servitude, and status for every member of the city, from the youngest child in the slums to Lady Desoleum herself. Because the oaths are such an enormous part of life in Hive Desoleum, we worked very hard to incorporate this into the NPCs and adversaries the Acolytes may face in Desoleum.
Although many of the characters described in this chapter are specific to Hive Desoleum, GMs will still find these characters useful for adventures set in other locales. I knew while developing this chapter that the most important thing was to maximize its usefulness to GMs. For me, this meant creating complete game profiles to help GMs run encounters and writing in-depth background descriptions to provide GMs with ideas for fitting these NPCs into other adventures. To help a GM use these NPCs in any adventure, I endeavoured to make them flexible, while keeping them anchored in the strange and macabre environment of Hive Desoleum. Some NPCs, particularly the members of the Imperial Adeptus such as Astropaths and Tech-Priests, are representative of individuals found on many Imperial worlds. Other characters are more firmly entrenched in the culture of Hive Desoleum. The Involute Cadre Trooper and Officer, for example, represent the military of Desoleum, but GMs can easily modify their profiles or use them as they are to represent the soldiery of another world. Dread Creatures Await In addition to the human residents of Hive Desoleum, the NPCs and Adversaries chapter includes several dangerous flora and fauna from across the Askellon Sector. These allow GMs to present their Acolytes with very different types of challenges. Gunfights with cultists are one thing, but how does one fight a plant that drives nearby sentients into homicidal psychosis, or a mind-influencing spoor that exists in reality and the Warp simultaneously? Developing this section was a lot of fun, as it gave me the opportunity to explore the life forms found across the sector and revisit classic beasts like the common grox. One of my favorite NPCs from the whole chapter – the smelt-rat – appears in this section. An artificial environment like Hive Desoleum is bound to be home to some highly exotic life forms, such as the smelt-rats, cybernetic vermin of unknown origin. Smelt-rats are no simple pests, though. These beasts are drawn to technological systems, infesting them and posing great threats to the hive’s ancient systems. They are also dangerous to any individuals with cybernetic limbs or implants, as smelt-rats are drawn to tech like normal vermin to food. The mere sight of a bionic limb drives smelt-rats into a ravenous feeding frenzy. Even more frightening are the rumoured smelt-rat kings, composed of many individual smelt-rats fused together and displaying a higher intelligence. Springing these beasts on unwary Acolytes reminds them that the lower reaches of Hive Desoleum are just as dangerous as any unexplored planet. 
Finally, this chapter explores a few of the foul xenos and denizens of the Warp that the Acolytes might confront. Rather than a random grab-bag of unrelated aliens and Daemons, we focused on distinct groups. This way, GMs find a range of NPCs within each group, including numerous Troops, Elites, and Masters. Within this chapter, you’ll find profiles for the Eldar of Craftworld Miandrothe and the putrescent servitors of Nurgle, opening the way for an array of encounters. I hope the NPCs and adversaries of the Dark Heresy Second Edition Core Rulebook provide excitement and adventure to players over many campaigns, and that these strange characters and creatures might even inspire GMs to create new adventures! Start Your Adventure Thanks, Tim! Whether you encounter terrifying xenos, confront the spawn of Nurgle, or battle smugglers and cultists within the Imperium, you’ll need a guide to the strange and unknowable ways of your enemies. In the Dark Heresy Second Edition Core Rulebook, GMs find the tools they need to populate the universe of Warhammer 40,000. Preorder your copy of Dark Hersey Second Edition at your local retailer today! ... Source: Populate a Universe (http://www.fantasyflightgames.com/edge_news.asp?eidn=4955)
Title: FFG:Stay on Target
Post by: RSSFeeder on 01 August 2014, 07:30:02
Stay on TargetPreview the Wave V Upgrade Designed by 2013 World Champion Paul Heaver
“Stay on target!”
–Gold Five, Star Wars: A New Hope Recently, we revealed that the fifth wave of starship expansions for X-Wing™ consists of two heavily shielded, large-base starships designed to blast through enemy fighters with their powerful turret weapons: the YT-2400 and the VT-49 Decimator. In upcoming previews, we’ll look more closely at these starships and the various pilots available to fly them. We’ll also look at the news ways that they can interact with enemy ships and obstacles, including the expansions’ new debris cloud tokens. Today, however, we’ll begin our previews with a closer look at the Rebel Alliance’s YT-2400 Freighter Expansion Pack, focusing on its introduction of the upgrade card designed by 2013 World Champion Paul Heaver, Stay on Target. Paul Heaver on Designing an X-Wing Upgrade  As part of my reward for winning the World Championships last year, I earned the opportunity to help design a card, and shortly after the event FFG contacted me to ask if I had given any thought as to what I’d want as my card. Like almost everyone who plays X-Wing, I had a bunch of ideas! Hoping something would stick, I threw them all at FFG, but I noticed that there was a theme to that initial push: ensuring advantages over ships with lower Pilot Skill than your own. As part of my reward for winning the World Championships last year, I earned the opportunity to help design a card, and shortly after the event FFG contacted me to ask if I had given any thought as to what I’d want as my card. Like almost everyone who plays X-Wing, I had a bunch of ideas! Hoping something would stick, I threw them all at FFG, but I noticed that there was a theme to that initial push: ensuring advantages over ships with lower Pilot Skill than your own.
At Worlds, I had noticed that few of the top players were making much use of unique pilots. Some pilots, like Biggs Darklighter or “Howlrunner,” were essential to the squads they enhanced, but the majority of the lists flown at the top tables seemed to rely upon non-unique pilots. After I watched a Rebel Swarm list fly in the Top 8, and after I saw all of the Academy Pilots, Rookie Pilots, and Blue Squadron Pilots in the event, I knew I wanted something that rewarded lists that fielded highly skilled, unique pilots. FFG had similar ideas, though, and they already had a card for offense (Predator) and another for defense (Flight Instructor). Both of those cards would be useful against highly skilled pilots, but more useful against those with lower Pilot Skills. On the other hand, I wanted my card to be extremely strong against weaker pilots, and pretty much useless against stronger ones. I also wanted it to have a different focus than attack or defense, so I looked into movement. FFG and I bounced ideas back and forth a few times, hashed out the card text that was sent to playtesting, and I’m very happy with the resulting card. Stay On Target is a two-cost elite pilot talent, coming in at one squad-building point under Push the Limit, Outmaneuver, and Predator. It reads, “When you reveal a maneuver, you may rotate your dial to another maneuver with the same speed. Treat that maneuver as a red maneuver.” Using Stay on Target in Your Rebel Squad First things first, you can’t use a basic R2 Astromech to turn the maneuver you take with Stay on Target into a green maneuver. The game’s FAQ (pdf, 9.4 MB) makes that clear. Instead, it’s best to think of Stay on Target as a great insurance card. If your Wedge Antilles is tailing an Academy Pilot, and that Imperial breaks left when you expected him to go right, you can just have Wedge take a stress and swap directions to stay behind him. 
After the Academy Pilot surprises Wedge Antilles by going left when Wedge expected him to go right, Wedge uses Stay on Target to switch his two-speed right bank (red) to a two-speed left bank (green), allowing him to stay on the Academy Pilot’s tail and take a lethal shot at Range “1.”
Or if you were going to do a two-speed Koiogran-turn with your B-wing, but an enemy ship moves to block you, you can turn to the side instead. In these ways, Stay on Target prevents you from ending up in bad situations, but there are a lot of other uses for this card. What about ships that can deal with the stress easily? The Rebel Transport Expansion Pack gave us X-wings pilots who can clear their own stress. For example, Jek Porkins can use Stay on Target to swap his maneuver at the cost of potentially taking a point of damage. Considering how bad a wrong turn can be in this game, a single point of damage can be a pretty small cost! Meanwhile, Stay on Target also works well on ships that can use Advanced Sensors, such as B-wings, E-wings, and the TIE phantom. If you take your action before changing the dial, then you won’t lose it when you perform a red maneuver. As an example, consider the options you get on Corran Horn with Advanced Sensors and Stay On Target: You select a three-speed turn, but you change your mind after your opponent moves most of his force, barrel roll out of the way with Advanced Sensors, and swap to your three-speed Koiogran-turn. 
Once Corran Horn realizes where the trio of Academy Pilots are headed, he quickly changes his plans, using his Advanced Sensors to barrel roll before using Stay on Target to convert his three-speed left turn (red) to a three-speed Koiogran-turn (green).
For Corran Horn and others, Stay on Target will be a great tool for keeping out of the firing arcs of enemy pilots with lower pilot skills! By far, my favorite Rebel use of this card is on Keyan Farlander, who is coming soon in the Rebel Aces Expansion Pack. Every turn, you can place your dial at two Koiogran-turn, use your Advanced Sensors to Target Lock or Barrel Roll, and then spin the dial to whichever two-speed maneuver you need when he activates. Then, Keyan can spend his stress token when he fires. Then, you can repeat this round after round. Keyan Farlander may not be able to use this trick to lock onto slippery TIE phantom aces with Veteran Instincts, but his maneuvers and shots will terrify all the non-unique pilots he faces! Using Stay on Target in Your Imperial Squad Speaking of phantoms, Stay on Target isn’t just for Rebels. There are many times a phantom ace may have to decide whether to decloak left and turn right, or decloak right and turn left. If you choose the wrong plan and your opponent aims his squads laser cannons at the spot where you were going to end up, you have to decloak in a different direction and follow through with your selected maneuver. This may prevent your expensive phantom from getting shot, but it will usually also prevent you from taking a shot of your own. 
Without Stay on Target, if a Rookie Pilot were to catch “Whisper” by surprise after she had committed to performing a two-speed right turn after decloaking, “Whisper” would have only two options, neither of them good. The Rookie has blocked the forward decloak, so “Whisper” can decloak left and turn right (red), ending up in the Rookie’s sights at Range “1,” or she can decloak right and turn right (yellow), escaping the Rookie’s firing arc, but leaving herself stranded outside of combat with no shot in the round.
Now, if you accept the idea of taking stress and turning off your Advanced Cloaking Device for a turn, you can still face your opponents and blast away with your four attack dice, regardless of where they guessed you’d go. 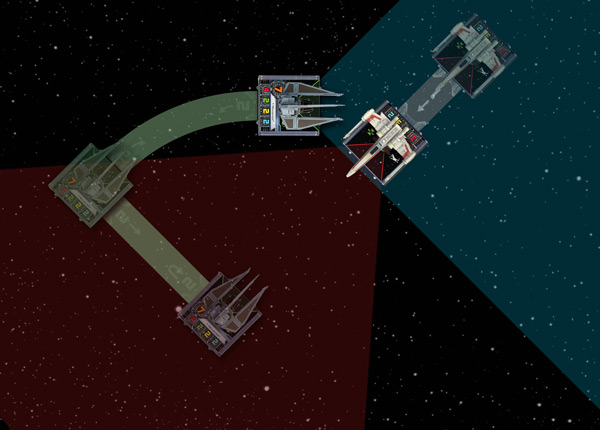
However, if “Whisper” has Stay on Target equipped and is willing to accept the stress token, she can swap out her two-speed right turn for a two-speed right bank. The resulting decloak and maneuver not only gets her outside of the Rookie’s firing arc but allows her to line up her own shot at point-blank range!
It was an honor to help design an upgrade for X-Wing, and I can’t wait to use it. I hope you enjoy using it, too! Thanks, Paul! With its large ships, turret weapons, unique pilot abilities, debris cloud obstacle tokens, and upgrades like Stay on Target, the fifth wave of starship expansions for X-Wing is going to have a profound impact upon how players fly their squads across the battlefield. Will it also increase the impact that some of the game’s ace pilots make upon the tournament scene? Only time will tell. In the meantime, keep your eyes open for more Wave V previews, including a look at the new upgrade card designed by 2012 World Champion Doug Kinney! ... Source: Stay on Target (http://www.fantasyflightgames.com/edge_news.asp?eidn=4956)
Title: FFG:Thrust into Galactic Civil War
Post by: RSSFeeder on 01 August 2014, 16:00:04
Thrust into Galactic Civil WarA Preview of the Age of Rebellion Adventure, Onslaught at Arda I
“Look, I ain’t in this for your revolution, and I’m not in it for you, Princess. I expect to be well paid. I'm in it for the money.”
–Han Solo As the first book-length adventure for the Star Wars®: Age of Rebellion™ Roleplaying Game, Onslaught at Arda I thrusts players’ characters into a rich and action-packed series of struggles against overwhelming Imperial forces. Your characters are likely to find themselves in more than one desperate situation, but if you maintain your courage, work together, and use your skills and blasters to good effect, you just might survive… and strike a massive blow against the Empire in the process. In our last preview, we looked at how the vibrant settings and Mass Combat rules in Onslaught at Arda I help you envision your characters’ actions as integral parts of a larger, epic story – one that feels as though it truly deserves its place in the Star Wars universe alongside the classic movies. Today, we continue to explore the place that Onslaught at Arda I might hold within the Star Wars universe and your Star Wars roleplaying campaigns. 
The Rebellion’s secret base on Arda I.
Using Onslaught at Arda I with Star Wars®: Edge of the Empire™ Back when we first announced the Star Wars®: Edge of the Empire™ Roleplaying Game, we explained that we believed the Star Wars universe was too large and too diverse to be treated properly within a single rulebook. Accordingly, Fantasy Flight Games has divided the Star Wars roleplaying experience into three separate, stand-alone roleplaying systems, each of which is fully cross-compatible. This is something that’s clearly evident in Onslaught at Arda I. Even as it allows players to explore the galaxy as members of the Rebel Alliance, Onslaught at Arda I opens new avenues to characters who have been living on the fringes of the galaxy, ducking from the Empire, and trying to outrun their pasts in the Star Wars®: Edge of the Empire™ roleplaying game. This can mean that your Age of Rebellion character might exist alongside your friends’ Edge of the Empire characters, or it might mean that your Edge of the Empire character  gains the opportunity to grow and mature, to give up his self-serving ways, and to fight for a cause that’s greater than himself. gains the opportunity to grow and mature, to give up his self-serving ways, and to fight for a cause that’s greater than himself. Lead developer Katrina Ostrander shares more information on how you might carry your Edge of the Empire characters into Onslaught at Arda I: “Just as Han Solo left his smuggling days behind him (mostly) and became a general in the Rebel Alliance, your characters from Edge of the Empire can join the fight against the evil Galactic Empire in Age of Rebellion. Onslaught at Arda I was designed with this in mind, and it provides Game Masters instructions to convert Edge of the Empire characters and integrate them into the adventure. The GM can even find instructions to custom tailor the adventure’s introduction to match the circumstances of the group’s arrival. “Thanks to the cross-compatibility between the Star Wars roleplaying game lines, the conversion process is painless and primarily narrative in nature. The greatest challenge your scoundrels and spacers are likely to face is finding the inner strength to put their selfishness and survival instincts aside and learn to fight for something greater than themselves. “Of course, Onslaught at Arda I offers plenty of opportunities to grow. GMs can test characters with a range of focused, optional encounters for each Duty type. If your GM includes these optional encounters, they will test your dedication to the cause, help you determine which Duty best suits your character’s skills and talents, and make the extent of your contributions known. “Meanwhile, we listened to the fans who lauded the Obligation sidebars in Under a Black Sun and the subplot suggestions in Beyond the Rim, and we replicated that experience in Onslaught at Arda I. The adventure’s introduction helps the GM locate the appropriate Duty missions and their places in the book, as well as guidelines for incorporating motivation hooks to inspire additional roleplaying opportunities. 
“Finally, your group’s Duty scores and contribution rank impact key interactions between your characters and the Rebel SecForce Commanders, rewarding groups who have displayed unwavering loyalty to the Alliance.” Incorporating Onslaught at Arda I into an Ongoing Age of the Rebellion Campaign Whether you’re playing raw recruits, converting characters from Edge of the Empire, or advancing your careers as veteran members of the Rebellion, your group will find plenty of ways to incorporate Onslaught at Arda I into an ongoing Age of Rebellion campaign.  For more about how you might link Onslaught at Arda I to other published or homebrewed adventures, we turn to lead developer Katrina Ostrander: For more about how you might link Onslaught at Arda I to other published or homebrewed adventures, we turn to lead developer Katrina Ostrander:
“Episode I begins at the hidden Rebel base on Arda I, and the detailed information provided about this base, as well as the surrounding area and NPCs, allows GMs to link the adventure to an ongoing campaign in any number of ways. “GMs can deepen the Player Characters’ connections to the base’s support personnel and each other by completing missions in and around the Gordian Reach prior to the main story of the adventure. If one has not already run the scenarios in the Age of Rebellion Core Rulebook or Game Master’s Kit, either module can be launched from the Arda I base. The base also makes an excellent launching pad for any number of homebrewed missions. “Even if the group plays through the adventure exactly as written, there are over a dozen fully detailed NPCs with whom the Player Characters may interact. These bring the Arda I base to life and deepen the impact of the betrayal they eventually suffer. “Well after the main plot of the adventure is over, players and GMs will find further opportunities to assist the Rebels using the material found in this book. Whether they’re executing additional military sorties, recruiting help from the underworld, or rallying the population of a repressed Imperial world, the PCs have their work cut out for them. It can help to have a clear base of operations, though the task of rebuilding this base presents its own enormous set of challenges. If left unchecked, Imperial adversaries from the adventure and gazetteers will continue to threaten the sector, and it might once again fall to the group to mount a resistance. “However the GM plans to extend the campaign, Onslaught at Arda I contains many exciting adventure seeds as the characters participate in their ongoing battle for the fate of the galaxy!” 
All Hands on Deck! Whether you intend to join the Rebellion for the first time or continue your ongoing service, Onslaught at Arda I offers more than a rich Age of Rebellion roleplaying experience; this first, book-length adventure for Age of Rebellion is a fantasy-filled Star Wars Roleplaying Game experience for characters of all backgrounds and species. If you haven’t already pre-ordered your copy, head to your local retailer to do so today. Onslaught at Arda I is now scheduled to arrive in just a short couple of weeks. Imperial forces are already on their way! ... Source: Thrust into Galactic Civil War (http://www.fantasyflightgames.com/edge_news.asp?eidn=4957)
Title: FFG:Equipped to Survive
Post by: RSSFeeder on 02 August 2014, 00:30:03
Equipped to SurviveA Preview of the New Droids, Vehicles, and Gear in Far Horizons
“You got a lot of carbon scoring here. It looks like you boys have seen a lot of action.”
–Luke Skywalker Once upon a time, a young farm boy from Tatooine cleaned a droid, caused it to play a recorded message, and triggered a series of events that would reshape the galaxy… When your destiny calls, there’s no place you can go to escape it – not even a desert planet at the far edge of the known universe. Even when the Colonists of Star Wars®: Edge of the Empire™ travel to the far ends of the galaxy in order to establish new homes and new lives, their pasts have a nasty habit of catching up with them. Outstanding obligations lead to adventure. And since your adventures can take you anywhere, it pays to be prepared.
At the edge of the Empire, even routine shipments may run afoul of pirates.
In the Colonist sourcebook, Far Horizons, you’ll find a wealth of new droids, vehicles, starships, weapons, and gear that any character can use. However, since most of these items are designed to help tame even the wildest and most dangerous environments, the game’s Colonists should find them especially appealing. Droids It was Luke Skywalker’s interaction with a pair of droids that first led him down a path that would eventually take him off of Tatooine, past the destruction of the Death Star, and to the ultimate triumph of the Rebel Alliance over the evil Galactic Empire. To say, then, that there’s tremendous potential for adventure within the handful of new droids presented in Far Horizons is a bit of an understatement. Perhaps even more so than in other areas of the galaxy, droids in the Outer Rim are essential to the day-to-day functions of civilized society. In a region where so many systems remain uncharted and unknown dangers can reside in even the most welcoming paradise, droids help make life easier and safer for their organic masters, colleagues, and friends. Accordingly, Far Horizons features a sampling of speciality droids common to the Outer Rim, including the AC Law Enforcement Droid, which is a relatively new entry to the field of police automata. Nearly two meters tall, the broad-shouldered AC Series LE droid possesses an average intelligence and a stern, imposing disposition. It is programmed for both standard police duties as well as fast-response riot control, and it is covered in imposing plate armor with only a single red, horizontal photoreceptor band serving as any hint of facial features. These droids aren’t for everyone, though. Even as they’re becoming the standard for police droids at the edge of the galaxy, civilians tend to despise them. Vehicles and Starships It is a commonly held belief that the various worlds of the Outer Rim are where old vehicles go to die. Indeed, the region’s inhabitants work hard to keep a great number of speeders and groundcars alive and functional long after they would have been scrapped in the more civilized, affluent areas of the galaxy. After all, no amount of preparation, innate skill, or specialty equipment can make a difference in an endeavor if an individual and his equipment can’t get where they need to go, and the work performed by colonists’ starships, speeders, and walkers is nearly as important as the work performed by the colonists themselves. In Far Horizons, you’ll find a large selection of airspeeders, landspeeders, walkers, wheeled and tracked vehicles, and freighters, any of which may serve more than one purpose in times of need. For example, the Hunchback construction strider is a lightweight utility walker designed for construction and civil engineering work. Similar to the Republic’s AT-PT, the Hunchback is a bipedal walker with a slab-sided rectangular command pod perched atop a pair of powerful reverse-articulated legs. The Hunchback's arms carry a wide array of tools such as plasma cutters, saws, welders, drills, compressed air guns, and small, dextrous manipulators for fine work.
While it typically carries no offensive weapons, the Hunchback is sturdy and armored, and desperate colonists may find a way to modify it in order to help defend their homesteads from enemy forces.
Weapons, Armor, and Tools Typically, Colonists are the characters in Edge of the Empire that are least likely to embrace violence when other means may suffice. However, it would be a mistake to assume Colonists have no need of arms or armor. The truth is that on the fringe of the galaxy, violence (and the need to protect against it) is all too commonplace. Accordingly, Far Horizons presents a wide array of weapons and armor, as well as a range of speciality tools appropriate for Colonists of all specializations. The Outer Rim can be a dangerous and unforgiving place, but that doesn’t you’ll want to shoot to kill each time a situation devolves to violence. Far Horizons introduces a number of non-lethal weapons, like the Telex-Delcor SWE/2 Sonic Rifle, which may not be as useful in a shoot-out against heavily armed Imperial forces, but are incredibly useful for a Marshal who wants to ensure that he earns a reputation for his resolve as well as his justice and mercy. Such a Marshal may also do well to invest in some of the new armor from Far Horizons, or even some reinforced environment gear. Such suits are valuable to Colonists not only because they must often brave strange and hazardous planetary conditions, but because they are more likely to be exposed to airborne toxins and to suffer injuries from falls or unstable environmental formations. Finally, though they’re often the last characters you’d expect to load up on weaponry, Colonists usually have the greatest need for specialized tools. Performers must have all manner of amplifiers, props, or instruments. Doctors require a great deal of surgical equipment and medical supplies. Even Politicos need remote access to communications, and Traders and Entrepreneurs need business aids. Far Horizons introduces a diverse array of these materials, which offer benefits for nearly all characters, and since they introduce so many specialized abilities, their inclusion in (or exclusion from) your setting may provide the impetus for a wide range of thrilling adventures. Can You Tame the Wildest Edges of the Galaxy? As the Colonist sourcebook for Edge of the Empire, Far Horizons introduces a wide range of new character options and equipment for any character eager to explore and settle the wildest edges of the galaxy. Meanwhile, it also explores the concept of the Colonist’s homestead and how the Game Master can use a homestead to shape a campaign. Whether or not your campaign features a character with the Colonist career, the homestead is an idea that transcends a single class and can lend an immediate focus and urgency to your campaign. We’ll take a closer look at how Game Masters can make use of the homestead in our next preview of Far Horizons! ... Source: Equipped to Survive (http://www.fantasyflightgames.com/edge_news.asp?eidn=4947)
Title: FFG:Retailers: Pre-Order Your Winter 2014 Tournament Kits
Post by: RSSFeeder on 02 August 2014, 09:00:03
Retailers: Pre-Order Your Winter 2014 Tournament KitsAnnouncing New Tournament Kits for X-Wing
Launch into the X-Wing™ Winter 2014 Season with new Tournament Kits! These exciting kits are now available for pre-order through our B2B store or your distributor. Featuring cinematic dogfights and a unique movement system, X-Wing continues to expand and build new game communities around the world. The Winter 2014 X-Wing Tournament Kit comes with an event guide and new promotional materials to help support tournaments, league play, or any other event you wish to run. The order deadline for these kits is August 20th, and the Winter season begins in November. 
What is a Tournament Kit? Tournament Kits are for our competitive games, such as Android: Netrunner and X-Wing. These kits include prize support and promotional material designed to support competitive or casual tournament play at local retailers. The kit includes a guide to supporting an eight-week tournament series, but the kit can also be used to host a single tournament, more casual game nights or leagues, or whatever suits your local play environment best. If you’re looking for kits to support our casual games, such as Descent: Journeys in the Dark Second Edition and The Lord of the Rings: The Card Game, check out our Game Night Kits. What’s in the Winter 2014 X-Wing™ Tournament Kit? Each Winter 2014 X-Wing Tournament Kit comes with everything a retailer needs to support and grow a local community: - One exclusive medal for the champion
- Four sets of acrylic cloak tokens
- Two movie-still versions of Han Solo
- Seventeen movie-still versions of Scimitar Squadron Pilot
- Four Millenium Falcon deck boxes
- A promotional poster featuring a TIE pilot in the midst of a dogfight
- One informational pamphlet on running a tournament or league

Please note: The movie-still cards in this kit are produced through FFG's In-House Manufacturing, and as such, they may appear slightly different in color and texture from the game's other cards. Are You a Retailer? If you’re interested in ordering a Winter 2014 X-Wing Tournament Kit, you can do so through your distributor or through our B2B store. The deadline to order is August 20th, with the season starting in November. ... Source: Retailers: Pre-Order Your Winter 2014 Tournament Kits (http://www.fantasyflightgames.com/edge_news.asp?eidn=4958)
Title: FFG:Retailers: Pre-Order Your Winter 2014 Tournament Kits
Post by: RSSFeeder on 02 August 2014, 17:30:04
Retailers: Pre-Order Your Winter 2014 Tournament KitsAnnouncing New Tournament Kits for Android: Netrunner
Plug into your local Android: Netrunner community with our new Winter 2014 Android: Netrunner Tournament Kits! These exciting kits are now available for pre-order through our B2B store or your distributor.  Pitting two players against each other in a high-stakes, futuristic cyberstruggle, Android: Netrunner continues to expand and build new game communities around the world. The Winter 2014 Android: Netrunner Tournament Kit comes with an event guide and new promotional materials to help support tournaments, league play, or any other event you wish to run. The order deadline for these kits is August 20th, and the Winter season begins in November. Pitting two players against each other in a high-stakes, futuristic cyberstruggle, Android: Netrunner continues to expand and build new game communities around the world. The Winter 2014 Android: Netrunner Tournament Kit comes with an event guide and new promotional materials to help support tournaments, league play, or any other event you wish to run. The order deadline for these kits is August 20th, and the Winter season begins in November.
What is a Tournament Kit? Tournament Kits are for our competitive games, such as Android: Netrunner and X-Wing™. These kits include prize support and promotional material designed to support competitive or casual tournament play at local retailers. The kit includes a guide to supporting an eight-week tournament series, but the kit can also be used to host a single tournament, more casual game nights or leagues, or whatever suits your local play environment best. If you’re looking for kits to support our casual games, such as Descent: Journeys in the Dark Second Edition and The Lord of the Rings: The Card Game, check out our
Game Night Kits. What’s in the Winter 2014 Android: Netrunner Tournament Kit? Each Winter 2014 Android: Netrunner Tournament Kit comes with everything a retailer needs to support and grow a local community:
- One playmat depicting art from the card Freelancer
- Two alternate art versions of Weyland: Building a Better World
- Seventeen alternate art versions of Plascrete Carapace
- Four Weyland deck boxes
- A promotional poster featuring art from the card Freelancer
- One informational pamphlet on running a tournament or league

Please note: The alternate art cards in this kit are produced through FFG's In-House Manufacturing, and as such, they may appear slightly different in color and texture from the game's other cards. To be tournament legal, these cards must be sleeved with opaque or art sleeves. Are You a Retailer? If you’re interested in ordering a Winter 2014 Android: Netrunner Tournament Kit, you can do so through your distributor or through our B2B store. The deadline to order is August 20th, with the season starting in November. ... Source: Retailers: Pre-Order Your Winter 2014 Tournament Kits (http://www.fantasyflightgames.com/edge_news.asp?eidn=4959)
Title: FFG:Retailers: Pre-Order Your Winter 2014 Tournament Kits
Post by: RSSFeeder on 03 August 2014, 02:00:05
Retailers: Pre-Order Your Winter 2014 Tournament KitsAnnouncing New Tournament Kits for Call of Cthulhu
Add new terrors to your local Call of Cthulhu: The Card Game community with our new Winter 2014 Call of Cthulhu: The Card Game Tournament Kits! These exciting kits are now available for pre-order through our B2B store or your distributor. 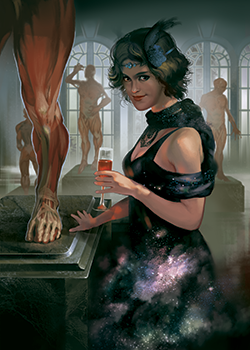 A game of nightmares, horror, and brave investigators fighting for the fate of the world, Call of Cthulhu: The Card Game continues to expand and build new game communities around the world. The Winter 2014 Call of Cthulhu: The Card Game Tournament Kit comes with an event guide and new promotional materials to help support tournaments, league play, or any other event you wish to run. The order deadline for these kits is August 20th, and the Winter season begins in November. A game of nightmares, horror, and brave investigators fighting for the fate of the world, Call of Cthulhu: The Card Game continues to expand and build new game communities around the world. The Winter 2014 Call of Cthulhu: The Card Game Tournament Kit comes with an event guide and new promotional materials to help support tournaments, league play, or any other event you wish to run. The order deadline for these kits is August 20th, and the Winter season begins in November.
What is a Tournament Kit? Tournament Kits are for our competitive games, such as Call of Cthulhu: The Card Game, Android: Netrunner, and X-Wing™. These kits include prize support and promotional material designed to support competitive or casual tournament play at local retailers. The kit includes a guide to supporting an eight-week tournament series, but the kit can also be used to host a single tournament, more casual game nights or leagues, or whatever suits your local play environment best. If you’re looking for kits to support our casual games, such as Descent: Journeys in the Dark Second Edition and The Lord of the Rings: The Card Game, check out our
Game Night Kits. What’s in the Winter 2014 Call of Cthulhu: The Card Game Tournament Kit? Each Winter 2014 Call of Cthulhu: The Card Game Tournament Kit comes with everything a retailer needs to support and grow a local community:
- One playmat depicting investigators grappling with a Dark Young
- Two alternate art versions of Victoria Glasser
- Seventeen alternate art versions of Terrors in the Dark
- Four deck boxes featuring investigators grappling with a Dark Young
- A promotional poster depicting investigators grappling with a Dark Young
- One informational pamphlet on running a tournament or league

Please note: The alternate art cards in this kit are produced through FFG's In-House Manufacturing, and as such, they may appear slightly different in color and texture from the game's other cards. To be tournament legal, these cards must be sleeved with opaque or art sleeves. Are You a Retailer? If you’re interested in ordering a Winter 2014 Call of Cthulhu: The Card Game Tournament Kit, you can do so through your distributor or through our B2B store. The deadline to order is August 20th, with the season starting in November. ... Source: Retailers: Pre-Order Your Winter 2014 Tournament Kits (http://www.fantasyflightgames.com/edge_news.asp?eidn=4960)
Title: FFG:Retailers: Pre-Order Your Winter 2014 Tournament Kits
Post by: RSSFeeder on 03 August 2014, 10:30:03
Retailers: Pre-Order Your Winter 2014 Tournament KitsAnnouncing New Tournament Kits for A Game of Thrones
Venture beyond the Wall and into the A Game of Thrones: The Card Game Winter 2014 Season with new Tournament Kits! These exciting kits are now available for pre-order through our B2B store or your distributor.  Featuring epic battles and countless plots of intrigue, cunning, and deceit, A Game of Thrones: The Card Game continues to expand and build new game communities around the world. The Winter 2014 A Game of Thrones: The Card Game Tournament Kit comes with an event guide and new promotional materials to help support tournaments, league play, or any other event you wish to run. The order deadline for these kits is August 20th, and the Winter season begins in November. Featuring epic battles and countless plots of intrigue, cunning, and deceit, A Game of Thrones: The Card Game continues to expand and build new game communities around the world. The Winter 2014 A Game of Thrones: The Card Game Tournament Kit comes with an event guide and new promotional materials to help support tournaments, league play, or any other event you wish to run. The order deadline for these kits is August 20th, and the Winter season begins in November.
What is a Tournament Kit? Tournament Kits are for our competitive games, such as A Game of Thrones: The Card Game, Android: Netrunner, and X-Wing™. These kits include prize support and promotional material designed to support competitive or casual tournament play at local retailers. The kit includes a guide to supporting an eight-week tournament series, but the kit can also be used to host a single tournament, more casual game nights or leagues, or whatever suits your local play environment best. If you’re looking for kits to support our casual games, such as Descent: Journeys in the Dark Second Edition and The Lord of the Rings: The Card Game, check out our Game Night Kits. What’s in the Winter 2014 A Game of Thrones: The Card Game Tournament Kit? Each Winter 2014 A Game of Thrones: The Card Game Tournament Kit comes with everything a retailer needs to support and grow a local community: - One playmat featuring Ygritte
- Two alternate art versions of The Winds of Winter
- Seventeen alternate art versions of Jon Snow
- Four Wildlings deck boxes
- A promotional poster featuring Ygritte
- One informational pamphlet on running a tournament or league

Please note: The alternate art cards in this kit are produced through FFG's In-House Manufacturing, and as such, they may appear slightly different in color and texture from the game's other cards. To be tournament legal, these cards must be sleeved with opaque or art sleeves. Are You a Retailer? Winter is coming! Prepare while you can and order a Winter 2014 A Game of Thrones: The Card Game Tournament Kit through your distributor or through our B2B store. The deadline to order is August 20th, with the season starting in November. ... Source: Retailers: Pre-Order Your Winter 2014 Tournament Kits (http://www.fantasyflightgames.com/edge_news.asp?eidn=4961)
Title: FFG:Retailers: Pre-Order Your Winter 2014 Tournament Kits
Post by: RSSFeeder on 03 August 2014, 19:00:03
Retailers: Pre-Order Your Winter 2014 Tournament KitsAnnouncing New Tournament Kits for Star Wars: The Card Game
Help your local Star Wars™: The Card Game community learn the ways of the Force with our new Winter 2014 Star Wars: The Card Game Tournament Kits! These exciting kits are now available for pre-order through our B2B store or your distributor.  Featuring galactic struggles between the Empire and Rebellion and fast-paced action, Star Wars: The Card Game continues to expand and build new game communities around the world. The Winter 2014 Star Wars: The Card Game Tournament Kit comes with an event guide and new promotional materials to help support tournaments, league play, or any other event you wish to run. The order deadline for these kits is August 20th, and the Winter season begins in November. Featuring galactic struggles between the Empire and Rebellion and fast-paced action, Star Wars: The Card Game continues to expand and build new game communities around the world. The Winter 2014 Star Wars: The Card Game Tournament Kit comes with an event guide and new promotional materials to help support tournaments, league play, or any other event you wish to run. The order deadline for these kits is August 20th, and the Winter season begins in November.
What is a Tournament Kit? Tournament Kits are for our competitive games, such as Star Wars: The Card Game, Android: Netrunner, and X-Wing™. These kits include prize support and promotional material designed to support competitive or casual tournament play at local retailers. The kit includes a guide to supporting an eight-week tournament series, but the kit can also be used to host a single tournament, more casual game nights or leagues, or whatever suits your local play environment best. If you’re looking for kits to support our casual games, such as Descent: Journeys in the Dark Second Edition and The Lord of the Rings: The Card Game, check out our
Game Night Kits. What’s in the Winter 2014 Star Wars: The Card Game Tournament Kit? Each Winter 2014 Star Wars: The Card Game Tournament Kit comes with everything a retailer needs to support and grow a local community: - One playmat depicting Darth Vader addressing his hired bounty hunters
- Two alternate art versions of Leia Organa
- Seventeen alternate art versions of Emperor’s Royal Guard
- Four Scum and Villainy deck boxes
- A promotional poster depicting Darth Vader addressing his hired bounty hunters
- One informational pamphlet on running a tournament or league

Please note: The alternate art cards in this kit are produced through FFG's In-House Manufacturing, and as such, they may appear slightly different in color and texture from the game's other cards. To be tournament legal, these cards must be sleeved with opaque or art sleeves. Are You a Retailer? If you’re interested in ordering a Winter 2014 Star Wars: The Card Game Tournament Kit, you can do so through your distributor or through our B2B store. The deadline to order is August 20th, with the season starting in November. ... Source: Retailers: Pre-Order Your Winter 2014 Tournament Kits (http://www.fantasyflightgames.com/edge_news.asp?eidn=4962)
Title: FFG:Retailers: Pre-Order Your Winter 2014 Tournament Kits
Post by: RSSFeeder on 04 August 2014, 03:30:02
Retailers: Pre-Order Your Winter 2014 Tournament KitsAnnouncing New Tournament Kits for Warhammer: Diskwars
Charge into the Warhammer: Diskwars Winter 2014 Season with new Tournament Kits! These exciting kits are now available for pre-order through our B2B store or your distributor.  With a movement system unique to the game, Warhammer: Diskwars continues to expand and build new game communities around the world. The Winter 2014 Warhammer: Diskwars Tournament Kit comes with an event guide and new promotional materials to help support tournaments, league play, or any other event you wish to run. The order deadline for these kits is August 20th, and the Winter season begins in November. With a movement system unique to the game, Warhammer: Diskwars continues to expand and build new game communities around the world. The Winter 2014 Warhammer: Diskwars Tournament Kit comes with an event guide and new promotional materials to help support tournaments, league play, or any other event you wish to run. The order deadline for these kits is August 20th, and the Winter season begins in November.
What is a Tournament Kit? Tournament Kits are for our competitive games, such as Warhammer: Diskwars, Android: Netrunner, and X-Wing™. These kits include prize support and promotional material designed to support competitive or casual tournament play at local retailers. The kit includes a guide to supporting an eight-week tournament series, but the kit can also be used to host a single tournament, more casual game nights or leagues, or whatever suits your local play environment best. If you’re looking for kits to support our casual games, such as Descent: Journeys in the Dark Second Edition and The Lord of the Rings: The Card Game, check out our Game Night Kits. What’s in the Winter 2014 Warhammer: Diskwars Tournament Kit? Each Winter 2014 Warhammer: Diskwars Tournament Kit comes with everything a retailer needs to support and grow a local community:
- Eight copies of the Witchfate Tor scenario
- Two alternate art versions of Alarielle the Radiant
- Seventeen alternate art versions of Orc Boys
- Four Dwarf card boxes
- A promotional poster featuring a Dwarf army battling an Undead army
- One informational pamphlet on running a tournament or league

Please note: The scenario cards in this kit are produced through FFG's In-House Manufacturing, and as such, they may appear slightly different in color and texture from the game's other cards. Are You a Retailer? If you’re interested in ordering a Winter 2014 Warhammer: Diskwars Tournament Kit, you can do so through your distributor or through our B2B store. The deadline to order is August 20th, with the season starting in November. ... Source: Retailers: Pre-Order Your Winter 2014 Tournament Kits (http://www.fantasyflightgames.com/edge_news.asp?eidn=4963)
Title: FFG:Retailers: Pre-Order Your Winter 2014 Tournament Kits
Post by: RSSFeeder on 04 August 2014, 12:00:03
Retailers: Pre-Order Your Winter 2014 Tournament KitsAnnouncing Tournament Kits for Warhammer 40,000: Conquest
Take command of the Warhammer 40,000: Conquest Winter 2014 Season with new Tournament Kits! These exciting kits are now available for pre-order through our B2B store or your distributor.  A game of control, annihilation, and planetary domination, Warhammer 40,000: Conquest looks to become the card game of the year and build new game communities around the world. The Winter 2014 Warhammer 40,000: Conquest Tournament Kit comes with an event guide and promotional materials to help support tournaments, league play, or any other event you wish to run. The order deadline for these kits is August 20th, and the Winter season begins in November. A game of control, annihilation, and planetary domination, Warhammer 40,000: Conquest looks to become the card game of the year and build new game communities around the world. The Winter 2014 Warhammer 40,000: Conquest Tournament Kit comes with an event guide and promotional materials to help support tournaments, league play, or any other event you wish to run. The order deadline for these kits is August 20th, and the Winter season begins in November.
What is a Tournament Kit? Tournament Kits are for our competitive games, such as Warhammer 40,000: Conquest, Android: Netrunner, and X-Wing™. These kits include prize support and promotional material designed to support competitive or casual tournament play at local retailers. The kit includes a guide to supporting an eight-week tournament series, but the kit can also be used to host a single tournament, more casual game nights or leagues, or whatever suits your local play environment best. If you’re looking for kits to support our casual games, such as Descent: Journeys in the Dark Second Edition and The Lord of the Rings: The Card Game, check out our
Game Night Kits. What’s in the Winter 2014 Warhammer 40,000: Conquest Tournament Kit? Each Winter 2014 Warhammer 40,000: Conquest Tournament Kit comes with everything a retailer needs to support and grow a local community: - One playmat depicting an Ultramarine captain in battle
- Two alternate art versions of Captain Cato Sicarius
- Seventeen alternate art versions of Goff Boyz
- Four Space Marine deck boxes
- A promotional poster depicting an Ultramarine captain in battle
- One informational pamphlet on running a tournament or league

Please note: The alternate art cards in this kit are produced through FFG's In-House Manufacturing, and as such, they may appear slightly different in color and texture from the game's other cards. To be tournament legal, these cards must be sleeved with opaque or art sleeves. Are You a Retailer? If you’re interested in ordering a Winter 2014 Warhammer 40,000: Conquest Tournament Kit, you can do so through your distributor or through our B2B store. The deadline to order is August 20th, with the season starting in November. ... Source: Retailers: Pre-Order Your Winter 2014 Tournament Kits (http://www.fantasyflightgames.com/edge_news.asp?eidn=4964)
Title: FFG:The Scourge
Post by: RSSFeeder on 04 August 2014, 20:30:03
The ScourgeAnnouncing the Second Pack in the Warlord Cycle for Warhammer 40,000: Conquest
"Buboes, phlegm, blood and guts! Boils, bogeys, rot and pus! Blisters, fevers, weeping sores! From your wounds the fester pours."
–Plaguebearer Daemon war chant Fantasy Flight Games is proud to announce The Scourge, the second War Pack in the Warlord cycle for Warhammer 40,000: Conquest! In this War Pack, your battles for the Traxis sector intensify as the seven factions included in the Conquest Core Set gain deadly new units, wargear, and tactics. The Scourge continues to expand the main themes of the Warlord cycle with a new Chaos warlord and a host of new cards for every faction that interact directly with warlords. 
You’ll find sixty new cards in this expansion, including a new warlord with his signature squad and three copies each of seventeen distinct cards. Within The Scourge War Pack, new Space Wolves units join the hunt for your opponent’s warlord, the Dark Eldar plumb new depths of torture and depravity, and a vicious herd of Attack Squigs will prove to be a dangerous foe. Endless Disease  The most pestilent foe you’ll find within The Scourge, however, is the new warlord for the followers of Chaos: Ku’gath Plaguefather (The Scourge, 23). This Daemon of Nurgle is the embodiment of the perfect disease, and he’s eager to share his toxic gifts with any who refuse to join the swelling hordes of Chaos. Ku’gath Plaguefather’s Reaction allows you to give his toxic infections to your opponent’s units: after Ku’gath is declared as an attacker, you may move a damage from him to another unit at the planet. Of course, Ku’gath needs damage on him to trigger his Reaction, but the cards included in his signature squad provide ways for you to manipulate damage. The most pestilent foe you’ll find within The Scourge, however, is the new warlord for the followers of Chaos: Ku’gath Plaguefather (The Scourge, 23). This Daemon of Nurgle is the embodiment of the perfect disease, and he’s eager to share his toxic gifts with any who refuse to join the swelling hordes of Chaos. Ku’gath Plaguefather’s Reaction allows you to give his toxic infections to your opponent’s units: after Ku’gath is declared as an attacker, you may move a damage from him to another unit at the planet. Of course, Ku’gath needs damage on him to trigger his Reaction, but the cards included in his signature squad provide ways for you to manipulate damage.
Ku’gath Plaguefather’s signature squad opens with Ku’gath’s Nurglings (The Scourge, 24). This unit bears a powerful Forced Reaction that reads, “After a unit moves to this planet, deal it 1 damage.” This Forced Reaction affects both players, but Ku’gath and his followers can use damage to their advantage. Moving Ku’gath to a planet with Ku’gath’s Nurglings deals him one damage, preparing you to move that damage to one of your opponent’s units when he attacks. And if your opponent decides to move his warlord and the units at his HQ to a planet with Ku’gath’s Nurglings, he must prepare to suffer damage as a result. The Plaguefather’s Banner (The Scourge, 26) is another card in Ku’gath’s signature squad that allows you to use your own damaged units for the glory of Chaos. By attaching The Plaguefather’s Banner to a Nurgle unit, you grant that unit an additional hit point. What’s more, the attached unit gains a Reaction identical to Ku’gath Plaguefather’s, inviting you to move even more damage across the battlefield, spreading disease among your opponent’s army units as you heal your own.  Fetid Haze (The Scourge, 27) is also found in Ku’gath’s signature squad. This event represents the ultimate gift of Nurgle’s pestilence. By playing Fetid Haze as a Combat Action, you may remove all damage from a target Nurgle unit you control. Then, your opponent must deal an equal amount of indirect damage among army units he controls at the same planet. This event can bring your warlord back from the brink of death, and since the damage must be split among your opponent’s units, you can be certain that more than one enemy army unit will be weakened by the onslaught of plague. Fetid Haze (The Scourge, 27) is also found in Ku’gath’s signature squad. This event represents the ultimate gift of Nurgle’s pestilence. By playing Fetid Haze as a Combat Action, you may remove all damage from a target Nurgle unit you control. Then, your opponent must deal an equal amount of indirect damage among army units he controls at the same planet. This event can bring your warlord back from the brink of death, and since the damage must be split among your opponent’s units, you can be certain that more than one enemy army unit will be weakened by the onslaught of plague.
The final card in the signature squad is Vile Laboratory (The Scourge, 25). This support may be exhausted during the deployment phase to choose a planet. Your opponent must choose and move one of his non-Vehicle units from the target planet to an adjacent planet. Using Vile Laboratory can clear out opposition to your attacks, and even push your opponent into a position where they will take damage from Ku’gath’s Nurglings, allowing you to disperse your sicknesses even further across the galaxy. Spreading Putrescence Command the embodiments of new diseases in The Scourge War Pack, or march to war with the armed forces of the Astra Militarum. Whether you strike from above with the Eldar or harness the advanced Tactics and Wargear of the Tau, you’ll find cards to support your decks in The Scourge. Look for The Scourge War Pack at your local retailer in the fourth quarter of 2014! ... Source: The Scourge (http://www.fantasyflightgames.com/edge_news.asp?eidn=4966)
Title: FFG:Retailers: Pre-order Your Winter 2014 Tournament Kits
Post by: RSSFeeder on 05 August 2014, 05:00:03
Retailers: Pre-order Your Winter 2014 Tournament KitsBuild and Support Your Local Player Community with a New Season of Tournament Kits
Seven Winter 2014 Tournament Kits are now available for pre-order through our B2B store or your distributor! Tournament Kits are the foundation of FFG’s Organized Play programs, and each kit contains prize support and helpful suggestions on how to best support your local community. With these tools, stores can host leagues, weekly events, or even a large-scale tournament to draw in players and build a thriving group of players. (For those looking for Game Night Kits, see the Fall 2014 announcement.) 
What Games are Supported? Whether you’re leading players on a charge against an Orc army, helping cyberhackers start a run on a heavily iced server, or piloting a smuggling ship through enemy lines in a galaxy far, far away—Tournament Kits can make your store the local hub of a thriving, global community centered on Fantasy Flight Organized Play. Visit the links below to learn more about each of the games supported by Organized Play; then pre-order your Tournament Kits today! What is the Difference Between Tournament and Game Night Kits? In 2014 we separated the kits for games we support with Organized Play into two groups: Tournament Kits and Game Night Kits. Tournament Kits now support our competitive games, such as Android: Netrunner and X-Wing, while our Game Night Kits continue to support our casual games: Lord of the Rings: The Card Game and Descent: Journeys in the Dark Second Edition. In addition, the two type of kits are now on separate schedules. Tournament Kits are released three times a year and are named after their respective seasons: Spring, Summer, and Winter. The next Game Night Kit has already been announced and will be released this fall. Are You a Player? If you’re a player, you can do your part to grow Organized Play by telling your favorite local game store about our Tournament Kits. If you’re interested in taking a more active role in bringing events to your community, here are some ways you can help promote Fantasy Flight Organized Play: - Encourage your friends to join you and play at your favorite local game store
- Ask your favorite local game store if you can post a sign-up sheet for upcoming events
- Offer to run demos
- Volunteer your services as tournament organizer
The exclusive items and alternate art cards from these Winter 2014 Tournament Kits will be available for a limited period of time only, so be sure to talk with your local retailer about hosting tournaments for our Organized Play games. 
Order Now With the introduction of Warhammer 40,000: Conquest, Organized Play continues to grow. Don’t miss out on your
chance to build a strong and healthy community in your store for the games your players enjoy, order your Tournament Kits today! ... Source: Retailers: Pre-order Your Winter 2014 Tournament Kits (http://www.fantasyflightgames.com/edge_news.asp?eidn=4965)
Title: FFG:The Greater Good
Post by: RSSFeeder on 05 August 2014, 13:30:04
The Greater GoodPreview the Tau Faction and Download the Rules for Warhammer 40,000: Conquest
“I have received your messages, informing me that these worlds belong to your Emperor. In return, I am to declare that the said worlds belong to his Ethereal Majesty, Aun’O Bork’an Vral, by right of settlement. Should you wish to gain similar rights, you must submit yourselves to my master’s wisdom as members of the Tau Empire.”
–Por’El Tau’n Ukos, Water Caste Negotiator No empire in the galaxy can resist the tactical significance and material riches of the Traxis sector. With such a prize hanging in the balance, these planets will soon be ravaged by battles and war. In Warhammer 40,000: Conquest, it’s up to you to command a warlord and the armies of your people in battle, securing footholds throughout the sector and crushing opposition wherever you may find it. Past previews have offered a closer look at the gameplay of our newest Living Card Game®, beginning with army deployment and the command struggle, and moving into an explanation and an example of battle. More recently, our previews have turned to the factions within Warhammer 40,000: Conquest: Space Marines, Astra Militarum, Orks, Chaos, Dark Eldar, and Eldar. Today, we conclude our exploration by looking at the rapidly expanding Tau empire! 
In addition, the learn-to-play rules (pdf, 2.2 MB) and reference guide (pdf, 13.6 MB) for Warhammer 40,000: Conquest are now available on the support page! Download the rules, and read below for more on the Tau’s advanced technology and battle tactics.  
Shadowsun’s Guile Tau forces in the Traxis sector are under the command of the warlord known to the Imperium as Commander Shadowsun (Core Set, 13) – one of the most brilliant tactical minds in the Tau empire. Known as the “Spearhead of the Greater Good,” Shadowsun’s keen grasp of technology serves her well in her conquests. Commander Shadowsun bears the Reaction, “After this warlord commits to a planet, put a Tau attachment with printed cost 2 or lower or ‘Shadowsun’s Stealth Cadre’ from your hand or discard pile into play attached to an eligible unit at this planet.” These attachments are put into play, meaning that you won’t have to pay the cost on these attachments that you bring into play, boosting your armies’ potential without compromising your ability to play more units. You can even recur these cards from your discard pile, equipping even more armies with Tau Wargear.  Although it is not an attachment, the first four cards in Shadowsun’s signature squad can also be attached to an army through Shadowsun’s Reaction. Shadowsun’s Stealth Cadre (Core Set, 146) can be deployed normally as an army, but it may also enter play as an attachment for a non-Vehicle unit that grants that unit a raised attack value and increased hit points. Since you can recur Shadowsun’s Stealth Cadre from your discard pile using Shadowsun’s ability, you can be sure that these Soldiers won’t remain in your discard pile for long. Although it is not an attachment, the first four cards in Shadowsun’s signature squad can also be attached to an army through Shadowsun’s Reaction. Shadowsun’s Stealth Cadre (Core Set, 146) can be deployed normally as an army, but it may also enter play as an attachment for a non-Vehicle unit that grants that unit a raised attack value and increased hit points. Since you can recur Shadowsun’s Stealth Cadre from your discard pile using Shadowsun’s ability, you can be sure that these Soldiers won’t remain in your discard pile for long.
The next card in the signature squad is a support card: Communications Relay (Core Set, 147). Whenever your opponent triggers an ability that targets one of your units with at least one attachment, you may exhaust Communications Relay to cancel the effects. Attachments naturally give your army units increased power and abilities, but with the aid of Communications Relay, you are also able to protect these units by canceling effects that may incapacitate them. Two copies of Squadron Redeployment (Core Set, 148) take up the next slots in Shadowsun’s signature squad. This event is free to play, and as an Action, it allows you to exhaust an army unit with one or more attachments to move it to any planet. This event card grants your units with attachments unparalleled mobility, inviting you to tailor your combat formations in the heat of battle. You can use this event to rush a unit out of danger or to bring a powerful army into the fight, staying one step ahead of your opponent. The final card in Commander Shadowsun’s signature squad is the Command-link Drone (Core Set, 149). This attachment is free to play and can be attached to any unit. The Command-link Drone grants a unit +1 ATK, but its true power lies in its Action ability. By paying one resource, you may attach the Command-link Drone to a different unit. Giving a unit +1 ATK won’t win you every fight, but sometimes, you just need a unit to have an attachment to reap the benefits of Squadron Redeployment or Communications Relay. The Command-link Drone gives you an easy way to fulfill the conditions of those cards. Two Steps Ahead Options for getting your attachment cards into play and granting you benefits are not limited to Shadowsun’s signature squad. With the help of the Earth Caste Technician (Core Set, 157), you can find your most powerful attachments quicker than ever. After the Earth Caste Technician enters play, you may immediately search the top six cards of your deck for an attachment or Drone card. This card is revealed and added to your hand, with the other cards placed on the bottom of your deck. Whatever the keen minds of your Earth Caste Technicians may excavate, it’s certain to benefit your troops and the expansion of the Tau empire.  It may be more difficult to make the most of your attachments without the Command-link Drone flitting across the battlefield, but the best commanders always find a way to Even the Odds (Core Set, 162). Playing the event allows you to move an attachment to another eligible unit controlled by the same player, granting you an easy way to make sure your troops have the equipment they need. It may be more difficult to make the most of your attachments without the Command-link Drone flitting across the battlefield, but the best commanders always find a way to Even the Odds (Core Set, 162). Playing the event allows you to move an attachment to another eligible unit controlled by the same player, granting you an easy way to make sure your troops have the equipment they need.
One example of such equipment is found in the Repulsor Impact Field (Core Set, 165). This attachment can be attached to any army unit, and its Reaction makes any enemy think twice about attacking. After the unit with the Repulsor Impact Field is damaged by an attack, two damage is dealt to the attacker, which in many cases could finish off the attacker. Being able to call in Wargear like the Repulsor Impact Field with Commander Shadowsun give the Tau a definite edge in many battles. An Ambush Platform (Core Set, 168) may also prove useful for getting your best gear to your armies as quickly as possible. The Ambush Platform possesses an Interrupt that reduces the cost of any attachment you deploy by one. This support not only makes your attachments cheaper, though. It also allows you to play them outside of the deployment phase. By exhausting the Ambush Platform during the combat phase, you may deploy an attachment from your hand, granting you a surprise advantage over your opponent’s forces. Calculated Strikes The Tau empire’s expansion lies in your hands. Will you lead dauntless warriors into battle with bleeding-edge technology, or will you make your stand to keep the Traxis sector out of the hands of the Tau? Battle for the Traxis sector for the first time at GenCon Indy 2014! Download the rules to prepare for war, and preorder Warhammer 40,000: Conquest at your local retailer today. ... Source: The Greater Good (http://www.fantasyflightgames.com/edge_news.asp?eidn=4967)
Title: FFG:Adventure Time!
Post by: RSSFeeder on 05 August 2014, 21:32:06
Adventure Time!The Fire at Will and The Big Wave Expansions for Dungeon Fighter Are Now Available
Fire at Will and The Big Wave, two element-themed expansions for Dungeon Fighter, are now available at your local retailer. The dungeon will never be the same again now that you can bring fire and water into the mix. Fire and water elemental magics let heroes burn monsters down or wash them out. More bold – and unproven – heroes joins the fray. Odd and terrible new creatures attempt to thwart your progress through the dungeon, while new dice throws and elemental dice offer players fresh dexterity challenges. Whether you play with fire, get your feet wet, or make your dungeon sizzle by combining the elements, Fire at Will and The Big Wave will enhance your dungeon-fighting adventure. Burning Down the Dungeon Our first preview sampled the flames of Fire at Will. Burn tokens can set monsters ablaze and shorten their life span, but monsters can also deal burn tokens to heroes. Experience points, earned whenever you choose not to use a special ability, give you access to fire magic spells, which may protect you from damage or empower you against a particularly vicious monster. In order to use these spells, however, you must cast your die into the flames – over a firewall, through rings of fire, and into the center of a fireball. 
Melissa, The Fire Sorceress, brings her demon-slaying expertise and her pyromania to the dungeon, which is made more dangerous by the fact that it, too, is on fire. The fire element die gives heroes increased ammunition in their battles against monsters, dealing up to three points of damage whether it lands on target or not. With Melissa’s help and some fire magic in your arsenal, you’ll have no trouble dodging explosions or extinguishing the monsters’ flames.  Making a Splash Making a Splash
In our second preview, we swam around in The Big Wave. We took a tour of the murky underwater caves that make up the dungeon in The Big Wave, and the pirate Jack Parrot made your acquaintance. A slippery character, Jack is fond of picking pockets and mimicking other heroes’ special abilities. His years of swashbucking have shaped him into a talented fighter, as good at slaying monsters as he is at saving his own skin. We also looked at some of the dice throws of this expansion and the three tricky, turquoise, water element dice. Depending on where they land, these cubes may rain incomparable destruction down upon monsters – or they may do you more damage than good. Either way, you’ll be thirsting to throw them as often as possible. Monstrous Adventure Our last preview introduced you to the Final Boss monster of each expansion. Guarding the dungeon’s exit in Fire at Will is the dreaded and mythical Bullrog, whose flaming breath and explosive temper may light heroes on fire. Hopefully, your party of heroes will be adept enough in fire magic to turn him into a heap of smoldering ash. Lurking in The Big Wave is the most ancient and terrible sea creature imaginable – The Great Cthulhu himself. Given that merely seeing him causes heroes to partially lose their ability to do water magic, imagine how awful it is to be wrapped in his tentacles. To send this horror back into the depths you’ll need not only solid dungeon-fighting and dice-throwing skills, but also unparalleled, undauntable bravery. 
Ferocious monsters of all sorts – smoking ones, slimy ones, fire-breathers, sea witches – await you in Fire at Will and The Big Wave. Fortunately, you’ll have elemental magic, kerosene, and maybe even some grog to aid you in your quest. Are you ready to plunge into dungeon-fighting adventure? Download the rules from the Dungeon Fighter support page and pick up your copies of Fire at Will and The Big Wave from a local retailer today! ... Source: Adventure Time! (http://www.fantasyflightgames.com/edge_news.asp?eidn=4968)
Title: FFG:The Terrors That Lie Dormant
Post by: RSSFeeder on 06 August 2014, 06:00:08
The Terrors That Lie DormantA Preview of The Sleeper Below Deluxe Expansion for Call of Cthulhu
“The Thing of the idols, the green, sticky spawn of the stars, had awaked to claim his own. The stars were right again, and what an age-old cult had failed to do by design, a band of innocent sailors had done by accident. After vigintillions of years great Cthulhu was loose again, and ravening for delight.”
–H.P. Lovecraft, The Call of Cthulhu Call of Cthulhu: The Card Game is full of strange and terrible creatures that lie just beyond the edges of our world. The vast majority of all humanity remains blessedly unaware of their existence, and it is only this mass ignorance that allows society to continue to function. Indeed, if you were to scour the world’s asylums, eccentric museums, and dirty street corners, you might find a few of those unfortunate souls whose psychic sensitivities alerted them to the worlds and monsters that lurk beyond the thin veil of our reality. Their existences strain even the most disciplined minds, and those who suddenly recognize them most often fall to madness. In The Sleeper Below, the seventh deluxe expansion for Call of Cthulhu, these creatures and the truths of their existence are given shape through an all-new mechanic, and as you might expect, it can terrify those who uncover its secrets. It may even drive you mad. Currently exclusive to the Cthulhu faction, the Dormant keyword allows you to bring a card into the game, placing it on the table, in such a way that it is attached to a story but not quite an Attachment.  It continues in that half-dead state, a card without text or type, until the story to which it is attached is won. Then, at that point, it wakes, and anything can happen: It continues in that half-dead state, a card without text or type, until the story to which it is attached is won. Then, at that point, it wakes, and anything can happen: “During your operations phase, as a standard player action you may pay X to attach a card with the Dormant keyword facedown to a story as a Dormant card. X is the number of success tokens you have at that story. Limit 1 per story per turn. When that story is won, you may play that card reducing its cost to 0. Dormant cards are considered ‘in play’ but do not count as Attachment support cards.” With the introduction of this new mechanic, The Sleeper Below explores a wealth of new ground in order to better reflect the horrific nature of the Cthulhu faction upon which it focuses. Naturally, you’ll find a Dormant version of Cthulhu (The Sleeper Below, 19), but the great Ancient One isn’t the only unfathomable horror that you’ll awake. Other Dormant cards, like Fiona Day (The Sleeper Below, 15), may introduce great evils of their own, whether they do so intentionally or unwittingly. For more about the Dormant mechanic, we turn to lead developer Brad Andres. Lead Developer Brad Andres on the Dormant Terrors of The Sleeper Below Iä! Iä! Cthulhu Fhtagn! The Dormant mechanic that appears in The Sleeper Below originally spawned from a desire to find a new way to evoke the terrifying emergence of the great Cthulhu, rising up from deep below the waves. It fuses mechanics and flavor, so that when you play a Dormant card onto a story, you add a lurking sense of horror and mystery to the game. Like all the best elements of Call of Cthulhu: The Card Game, Dormant cards add a touch of terror and uncertainty to your mind games and grand designs. When you attach a Dormant card to a story, you cause your opponent to consider what the consequences of winning that story may be. If he steps beyond The Seventh Gate (The Shifting Sands, 12), will he encounter the doomed Lost Civilization of Irem (The Sleeper Below, 27)? Or might he unleash the feral power of a Hunting Wendigo (The Sleeper Below, 16)? 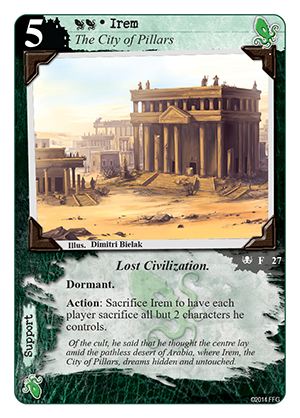 
At the root of this uncertainty is the fact that cards with Dormant can pack a devastating punch and tilt the odds of the game in your favor. For example, From the Depths (The Sleeper Below, 34) triggers a huge tempo surge when you play it, but it is even better if your opponent helps you to activate it for free! The threat of allowing you free access to an event like this can prompt your opponent to hesitate to finish stories wherever you have placed a dormant card, and it’s not inconceivable that he’d abandon a story completely, even if he’s only one success token away. Accordingly, Dormant cards can buy you time to rebound from early losses, and you might take back a story you would have lost if your opponent kept pushing.  Or you might be able to capitalize upon your opponent’s hesitation by focusing on other stories after your opponent has wasted his time on a story he no longer wishes to win. Or you might be able to capitalize upon your opponent’s hesitation by focusing on other stories after your opponent has wasted his time on a story he no longer wishes to win. With any new mechanic, it’s important to make sure that it interacts with the game in a number of different ways, and if you ever find yourself in a bind without the time or resources to get a Dormant character into play, you could just seize upon that fleeting moment when The Stars are Right (The Sleeper Below, 33). This event allows you to jump a Dormant character directly into play for one devastating turn before it goes back to rest. While using The Star are Right to jump a Dormant character into play won’t allow you to trigger that character’s Disrupt effect, the ability to raise a mighty character like Cthulhu from the deeps, if even just for an instant, adds another layer of surprise to your Dormant strategy, and it can make your opponent groan when he realizes he will just have to deal with that character again as soon as that story is won! To Wake the Slumbering Terrors The new Dormant mechanic in The Sleeper Below is just one of the ways that this seventh deluxe expansion for Call of Cthulhu: The Card Game gives new life to the dark and sinister cult of Cthulhu. In fact, the cult’s many Cultists feature prominently among its cards, and in our next preview, developer Damon Stone offers a glimpse of the many evils these power-hungry individuals may soon unleash! ... Source: The Terrors That Lie Dormant (http://www.fantasyflightgames.com/edge_news.asp?eidn=4969)
Title: FFG:Dash Rendar
Post by: RSSFeeder on 06 August 2014, 14:30:32
Dash RendarPreview the Wave V Upgrade Designed by 2012 World Champion Doug Kinney
“Go back and stand by the manual release for the landing claw.”
–Han Solo Soon, the YT-2400 Freighter Expansion Pack for X-Wing™ will allow Rebel players to head to battle with the game’s first turret-mounted cannons. Simultaneously, it marks the arrival of the first two upgrades designed by the game’s World Champions, Stay on Target and the Dash Rendar crew upgrade. In our last preview of the expansion, 2013 World Champion Paul Heaver led us through the design of Stay on Target and gave us a look at how it may play in the game. Today, 2012 World Champion Doug Kinney shines a light on the development of the Dash Rendar crew upgrade. Dash Rendar is one of the Star Wars galaxy’s most renowned smugglers, and as Doug Kinney explains, he thrives in tight situations and places that would very likely spell the end of less talented individuals.
Doug Kinney on Designing the Dash Rendar Crew Upgrade In The Empire Strikes Back, we saw the Millennium Falcon interact with a number of different objects in space. At different points, Han Solo flew his ship into an asteroid field, landed inside of one of them, and attached the Falcon to an Imperial Star Destroyer before detaching and floating away with its trash. When I had the chance to work with the game’s developers to develop an upgrade for X-Wing, I thought about the interactions that ships had with obstacles, and I thought that it might be a cool, new game mechanic to have a ship that could ignore the effects of obstacles. Allowing an entire squad to completely ignore the effects of obstacles would be too powerful, so to ensure that this new mechanic would not be too game-breaking, the developers and I worked to determine how the ship would ignore obstacles and limit its impact. There were a number of different ways to approach how a ship could ignore obstacles. Obstacles affect ships both in the Activation Phase and in the Combat Phase, and to limit the impact, Dash Rendar was designed according to an “either/or” approach. My aim was to allow a ship to ignore obstacles during the Combat Phase, but still be penalized during the Activation Phase. However, the game’s developers took this mechanic a step further by including another card that would allow a ship to ignore obstacles during the Activation Phase, but not during the Combat Phase.
The second step was to limit this new mechanic to a single ship, and the game’s developers addressed this concern by ensuring that the mechanic appeared only on a couple of unique cards. My mechanic appeared on the new Dash Rendar crew upgrade, and they utilized the Dash Rendar pilot card to introduce the other half of the mechanic. Making this mechanic unique to Dash Rendar meant that no single ship could completely ignore obstacles. If you want to have Dash Rendar pilot the Outrider, you can ignore obstacles during the Activation Phase, but you’ll still need to pay attention to them during the Combat Phase. If you want Dash Rendar to crew your ship, you won’t be able to use his unique pilot ability during the Activation Phase, but you may still attack during the Combat Phase even if your base overlaps an obstacle. Dash Rendar in the X-Wing Metagame What does Dash Rendar add to the game? When you use the Dash Rendar crew upgrade, you gain a little room to fly more unpredictably, knowing that overlapping an obstacle won’t be as detrimental as it normally would. On the other hand, if you see Dash crewing a ship across the table from you, you have to account for greater range of possible maneuvers during the Planning Phase, understanding that your opponent might fly into an obstacle in order to get a better shot. Crew slots are a precious commodity, and we already have many viable options for crew upgrades. Still, since he costs only two squad points, I suspect that Dash Rendar will contend for one of those slots in a number of builds, simply because he adds a new element of flexibility to your maneuvering choices. We have all had games where one of our ships just barely overlaps an obstacle at a crucial point in the game, denying it an attack that could secure the victory. The new Dash Rendar crew card ensures that you’ll get to make that critical attack, and that it cannot be obstructed. It’s most likely that you’ll see Dash Rendar on large ships, since they cover more surface area and are, thus, more susceptible to obstacles. Still, when the Rebel Aces expansion introduces the new B-wing/E2 modification, I think Dash Rendar may see some play time on B-wings as well. Consider, for example, the following ship build: 
Blue Squadron Pilot with Advanced Sensors, B-wing/E2, and Dash Rendar
Total Squad Points: 28 If your Blue Squadron Pilot finds himself forced into a tight spot by enemy ships, he could potentially use Advanced Sensors to barrel roll before performing a two-speed Koiogran-turn maneuver that causes him to overlap an obstacle. Previously, this combination of maneuvers would cost the Blue Squadron Pilot his chance to attack, and it would, thus, likely be one of the last options chosen. With the Dash Rendar upgrade, though, your B-wing would still be able to attack, making this selection of maneuvers more of a viable option in an otherwise suboptimal situation. 
After the Imperial player correctly anticipates your Blue Squadron Pilot’s maneuver and flies into position to block him, Dash Rendar still allows him to take a Range “1” shot after pursuing an unexpected avenue of escape!
I was honored to help design a card for X-Wing, and I believe I was able to work with the developers to introduce a new and interesting mechanic to the game. Have fun, make friends, and fly casual! Equipping the Outrider Both as a pilot and as a crew upgrade, Dash Rendar adds an exciting new element to the game. However, he’s not the only the pilot in the YT-2400 Freighter Expansion Pack, and he wouldn’t have enjoyed quite the same level of success he had if it weren’t for his signature YT-2400, the Outrider. In our next preview, we’ll take a closer look at the YT-2400 Freighter Expansion Pack, exploring what its other pilots and upgrades add to the game. Moreover, we’ll look at its unique place in the game as the first large ship with the barrel roll in its action bar and how that may lead to new interactions with other ships, as well as the expansion’s new debris cloud obstacle tokens. ... Source: Dash Rendar (http://www.fantasyflightgames.com/edge_news.asp?eidn=4970)
Title: FFG:Playing the Courtiers
Post by: RSSFeeder on 06 August 2014, 23:00:02
Playing the CourtiersA Preview of the Characters in The Last Banquet
I’d like to make a toast. To all my loyal subjects in attendance tonight, from the castle servants, to the Trader, to my dear Baroness, whose attendance at this banquet is truly an honor. Thank you for your loyalty in this era of turmoil and civil strife. I am certain that none of you would ever betray me.
–The King Enter a world of courtly posturing and deadly intrigue in The Last Banquet. In this large-group game for six to twenty-five players, you and your friends take on the roles of royalty, nobles, commoners, and even servants attending a magnificent banquet. Six different scenarios divide the characters into competing factions, which have a different objective in each scenario, from murdering the king or queen, to rescuing the princess from captivity or securing part of a luxurious estate. Will you curry royal favor, or commit treason to ascend to the throne? 
Today’s preview introduces you to a few of the characters scheming to get ahead at court. You’ll learn some of the words and actions you can choose to play, and how status shapes the characters’ behaviors. But remember: a kindly demeanor and friendly words do not necessarily indicate good intentions, and servants can be just as crafty as courtiers. In this court, it’s best to be careful about who you trust and, above all, who you sit next to at dinner.  Suit the Action to the Word Suit the Action to the Word
Every character in The Last Banquet has a set of actions and dialogue that goes with them. The phrases at the top of the card may be used at the start of gameplay to introduce your character or whenever you perform your basic action. The baroness, for example, can make two players switch places with each other, saying, “A good arrangement benefits everyone.” Of course, she could mean that sincerely or ironically – it’s up to you. Under the basic rules, you can perform only the basic action. If the more expansive full rules are being used, you have two actions to choose from and a favor action that can perform with the consent of whoever plays the patron. The baroness can either switch places with someone, saying, “I am here to maintain my courtly contacts,” or relocate a player belonging to her faction with the words, “You should listen to this person. His ideas could be of great use to us.” She can also ask the host to grant her a favor action, saying, “If it please the court, I will hold my tongue until a later hour.” If the host agrees, the baroness can then act again at the end of the turn. You can convey a variety of intents through the given dialogue. The baroness might switch places with someone in order to avoid sitting next to the Princess, or because she wants to convey a secret message to the Baron. Her tone could be businesslike or cloyingly innocent, she could be revealing her true intentions or cleverly trying to mask them. Status Games Guests from all rungs of society are attending The Last Banquet, and of course, servants present to make the event run smoothly – though not necessarily smoothly for the royalty. Each character has a specific social status. The royalty are highest on the social ladder, then the nobility. Members of court, although obedient to the king and queen, still have higher status than those who are not part of the court. Lowest status are the independent characters, who tend to have little regard for social stratification and operate without adhering to its rules. But don’t be fooled: even characters who seem more occupied with profit or religion than with political drama have vested interests in who sits on the throne. Your status at court doesn’t determine how much power you have. The queen may become the victim of the duchess’ gossip, and the king is at the mercy of whoever provides him food and drink. Status is, however, linked to initiative, which affects when a player speaks and whether they ever have to relinquish their seat. Some actions also affect only players of a specific status. The trader, for instance, can pull the royalty and nobility towards him to view his expensive wares. Many actions can’t affect royalty at all, so you must often manipulate others to get close to the king and queen.  
Click the image to see the reverse side of the card Power Players At court every action is political and everyone has influence. The jester and the duchess may not be the king’s appointed advisors, but they are as capable of political manipulation as anyone else at court. They may even be better at these dangerous games than the king himself. The jester uses laughter and folly to create chaos at the banquet table. With the words “all of life is folly” he can cause every member of a faction to close their eyes, spin around, then open their eyes and rush to the first unoccupied spot they can find. You could use this action to save the queens’s life, or cause the abbot to lose his share of an estate. The jester’s favor action is one of the most powerful in the whole game: choosing two players within the same faction and social status, the jester forces them to switch characters, perhaps transforming the juggler into a wizard, or the gamekeeper into a lady’s maid. Her gossip-mongering may seem frivolous, but the duchess knows how to use words as weapons. If she says, “Tell me the latest gossip,” she can draw two players within her faction to her sides, perhaps placing an assassin in between her and the king. Or, she can cleverly ask someone within her faction, “Have you heard the latest rumors?” Then, the Duchess will move next to that player, placing herself in a better position to prevent a royal crisis – or create one. 
Have Your Day in Court All the courtiers and commoners present at The Last Banquet have secret motivations and clever tricks up their lavish sleeves. Whether plotting behind the king’s back or openly striving to get ahead, you and your friends will enjoy taking part in this sensational courtly drama. Our next preview will explore some of the scenarios that you can play in The Last Banquet. Prepare to take your place at the royal table! Check The Last Banquet minisite for more details and pre-order your copy from your local retailer today! ... Source: Playing the Courtiers (http://www.fantasyflightgames.com/edge_news.asp?eidn=4971)
Title: FFG:Building a Hive
Post by: RSSFeeder on 07 August 2014, 07:30:02
Building a HiveDeveloper Tim Huckelbery on Creating Hive Desoleum for Dark Heresy Second Edition
“They call this the bottom of the hive. Hah! I know for a fact there is a whole lot more even farther down…”
–Omar Endish, Purveyor of Sacrosanct Salvage Millions of planets fill the galaxy in Warhammer 40,000, and no two are exactly the same. Hive worlds, forge worlds, feral worlds, and death worlds are vastly different from each other, and even within these categories, planets differ massively. In Dark Heresy Second Edition, you and your fellow Acolytes journey to countless unique planets across the Askellon sector, including Hive Desoleum, a decaying hive held together by ancient oaths. Today, developer Tim Huckelbery explores the process of creating Hive Desoleum and the strange peoples who inhabit it. Tim Huckelbery on Creating Hive Desoleum It all started with a hive ganger. Or more precisely, what she looked like. While creating new art descriptions for The Lathe Worlds, one of the earlier Dark Heresy books, we wanted to include a hive ganger image. Hives and the vicious gangers that inhabit them are an iconic part of Warhammer 40,000, and it was natural to include them. The issue was that a firm description of a hive ganger’s appearance is non-existent. There’s no such thing as “typical” or “normal” in the 41st millennium, so we couldn’t truly say our proposed hive ganger looked typical. Each ganger looks different, depending on the gang she belongs to. Each hive has its own groups of hive gangers, unique to that hive, and each world has unique hives. For us to create a hive ganger and bring her to life properly, we had a bit of work to do – we needed to build a world.  The first thing we did was create a gang for our ganger to walk alongside. Drawing inspiration from films, we decided that most gangs in our new hive would belong to gang affiliations, with each affiliation featuring an iconic fighting method, weapon type, or even clothing style. Our new gang, the Bloodlines, would be one of the Fleshcutter gangs, all obsessed with bladed weapons and ritual scarring. With one gang affiliation down, we went on to create more gang affiliations, such as the Death Masks, Tech-Gangers, Painted Throngs, and Cloudsboys. While the gangs were still rough ideas, we stepped back to create the setting these gangs would inhabit: Hive Desoleum itself. The first thing we did was create a gang for our ganger to walk alongside. Drawing inspiration from films, we decided that most gangs in our new hive would belong to gang affiliations, with each affiliation featuring an iconic fighting method, weapon type, or even clothing style. Our new gang, the Bloodlines, would be one of the Fleshcutter gangs, all obsessed with bladed weapons and ritual scarring. With one gang affiliation down, we went on to create more gang affiliations, such as the Death Masks, Tech-Gangers, Painted Throngs, and Cloudsboys. While the gangs were still rough ideas, we stepped back to create the setting these gangs would inhabit: Hive Desoleum itself.
We wanted to make this hive unique, and we decided that the hive wouldn’t run on cash or hard currency, but instead would rely on an elaborate network of oaths that tied everyone in the hive together in a network of debts and obligations. Every citizen of the hive would carry an oath-cog to track his own oaths. Lower workers wore simple mechanical devices, as their oaths lay predominantly with their overseer. The rulers owned much more elaborate versions, more like a brass snowstorm of tiny, whirring cogs and gears, so large that servitors had to carry the intricate mechanisms. This also led to concepts for normal clothing within the hive, thus leading to refinements in what gangers wore to rebel and stand out from the crowds. The oath-cogs worn by the hive’s Enforcers could even be detached and used as brutal melee weapons. The oath system completely drove the people’s customs and the hive’s operations, adding another wonderful piece to the Warhammer 40,000 setting. Once the hive started coming together, the planet as a whole was next. We decided Desoleum possessed vast wastelands of irradiated glass and sand, with acidic oceans and gigantic creatures drifting through the abyssal depths. We also included some primordial xenos ruins, buried beneath radioactive sand, but always attracting those who sought alien relics for sale or adoration. Now that the hive and the planet were complete, it was time for us to return to developing the gangs of Desoleum. Each of the gang affiliations received specific, named gangs and histories, plus a detailed sample ganger to use as a development aid for each gang. We added Chaos cults, mutant enclaves, and religious sects, alongside hive nobles and ancient hive structures like the Spine to add more mystery to the setting. Everything in Desoleum got attention, from the heights of Apex, where the hive rulers lives in opulence, to the deadly ruins and slums of the Underhive. I especially liked working in the depths far beneath the surface, the lawless areas that can seem to stretch on forever. For me, the only thing cooler than a hive is what may lurk beneath it. In these dark reaches, prospectors prowl the shores of underground seas, searching for lost archaeotech amidst mutant settlements and heretical worshippers. Here, wonders and terrors beyond imagining can be found. 
It was a lot of work for just one art piece, but it was truly worth it. I really enjoyed developing this wonderful setting, and found myself using it and its peoples in other books as we worked on Dark Heresy Second Edition. Hive Desoleum was our first major location for the Askellon sector, and your Acolytes should have an exciting time exploring this massive hive and rooting out its heresies and dangers! Enter the Hive Thanks, Tim! Your adventures in Dark Heresy Second Edition lead you across the exotic worlds of the Askellon sector to visit worlds ranging from Hive Desoleum to worlds untouched by mankind. Prepare to investigate heresy across the galaxy, and preorder Dark Heresy Second Edition at your local retailer today! ... Source: Building a Hive (http://www.fantasyflightgames.com/edge_news.asp?eidn=4973)
Title: FFG:You Are Humanity's Last Hope
Post by: RSSFeeder on 07 August 2014, 16:00:02
You Are Humanity's Last HopeThe Alien Invasion Begins with XCOM: The Board Game
Paris has fallen. New York is a pile of rubble spilling into the Atlantic. Alien attacks against Nanjing and Changzhou prompt widespread panic throughout the streets of Shanghai. Defense satellites detect UFOs in orbit over Mexico, Russia, and Brazil. Military responses have proven ineffectual. Fear and anxiety lead to widespread riots. Human civilization stands upon the brink of collapse… You are humanity’s last hope. In XCOM: The Board Game, you and up to three friends assume the roles of the leaders of the elite, international organization known as XCOM. It is your job to defend humanity, quell the rising panic, and turn back the alien invasion. Where the world’s militaries have failed to stand against the alien invaders, you must succeed. To do so, you must make strategic use of the resources available to you. You must launch Interceptors to shoot down alien UFOs, assign soldiers to key missions, research alien technology, and use that technology to defend your base, all while you try to keep the world from collapsing just long enough that you can coordinate one final mission to repel the invaders for good. 
Innovative Digital Enhancement
The most notable aspect of XCOM: The Board Game is the way that it incorporates a free and innovative digital app into the core of its gameplay, then uses the app to promote a unique play experience unlike anything you and your friends have previously encountered in a board game. This digital companion will be available both as a downloadable app and as an online tool. The app’s primary function is to coordinate the escalating alien invasion, randomly selecting from one of five different invasion plans. Each invasion plan represents a general outline that the alien commanders will use to coordinate the arrival of new UFOs, plan strikes against your base, and respond to your successes or failures as it seeks to conquer Earth. The app manages all of these tasks and heighten’s the game’s tension as it forces you to respond in real-time. Then, after you move quickly to coordinate your response, you engage the enemy in the untimed resolution phase and feed the results to the app. Based upon these results, the app launches the invasion's next strikes. 
Two UFOs appear over North and South America
Additionally, the app teaches you the rules, controls the information that your satellites provide you, and tracks the progress of your resistance efforts, even as it allows you to enjoy the game at any of three levels of difficulty: Easy, Normal, or Hard. 
A crisis card | | The use of this app does more than simply streamline your play experience and track your turns in real-time. It also permits a uniquely dynamic turn structure. While the variety of game phases remains the same from round to round, the order in which you and your friends must play through them may change, as may the number of a given phase. As a result, while you’ll want to know where UFOs appear before you deploy your Interceptors, the alien invaders may be able to disrupt your satellite intel and force you to deploy your Interceptors on patrol with limited or no knowledge of the UFOs current whereabouts. Similarly, you may be forced to think about the costs of resolving the world’s crises before you know how many troops you’ll need to commit to your base defense. The effect of the app, then, is to immerse you deep into the dramatic tension at the core of XCOM: The Board Game, and it ensures that the game presents a challenging and cooperative (or solo) experience like no other. Just like the XCOM department heads that you represent, you’ll need to keep cool heads in order to prevail. Inside XCOM Strategic Command XCOM’s resistance efforts are spearheaded by its four leaders, each of which is represented by one of the game’s player roles: Commander, Chief Scientist, Central Officer, and Squad Leader.  Commander Commander
| | The Commander is responsible to manage XCOM’s budget and must be foresightful enough to know when best to access the organization’s emergency funding and how best to allocate it. Additionally, the Commander makes the tough decisions about where to assign XCOM’s limited number of Interceptors to global defense. Wherever you commit your Interceptors, you have a chance of destroying UFOs and slowing the spread of panic. Wherever you don’t commit your Interceptors, fear and anxiety are bound to run rampant. | 
The Commander is responsible for assigning Interceptors to global defense
 Chief Scientist Chief Scientist
| | If you and XCOM are to have any chance of successfully repelling the alien invaders, you’ll need better technology. The Chief Scientist’s responsibilities include studying advanced technology, learning how to harness it, manufacturing better weapons and armor, and equipping the rest of the organization with the tools they need to survive. Of course, only a limited number of scientists possess the necessary training and intellect to quickly dissect, analyze, and replicate alien technology. Part of your job as Chief Scientist, then, is not only to decide how best to direct the organization’s research efforts but also to prioritize between them, allocating more scientists to the projects you decide will best benefit the war effort. |  Central Officer Central Officer
| | The Central Officer serves as the communications relay between XCOM and the outside world. This means you manage the organization’s satellite network, and it is your job to ensure that the organization remains alert to potential threats, communicates and coordinates its efforts effectively between branches, and scrambles as many alien transmissions as possible. Succeed, and you’ll reduce the number of UFOs in orbit. Fail, and you’ll suffer communications blackouts that will force you to act blindly in the midst of a war, the likes of which Earth has never known. Additionally, the Central Officer communicates all of the information provided by the game’s digital app to the players. The clock is always running, so it’s vital that you share all relevant information quickly and clearly. |  Squad Leader Squad Leader
| | In the end, XCOM needs boots on the ground to confront the alien invaders, and it’s the Squad Leader’s job to ensure that the right troops are tackling the right missions. As the invasion escalates, you must assemble strike teams to meet the aliens in battle. Simultaneously, you must assign soldiers to defend the XCOM base, and you’ll need to strike an effective balance. If your base falls, so do you. So does the earth. Still, you need to succeed at missions to win. Each mission you complete brings you closer to uncovering a means of launching one final, fatal blow against the alien invaders. | 
The Squad Leader is responsible for assigning troops to missions
All four player roles are vital to XCOM’s success, and you and your friends must divide them among yourselves in every game. Your soldiers won’t succeed without the upgrades your scientists can research, nor will you be able to launch successful Interceptor strikes against UFOs unless you acquire good intel from your satellite network. Can You Find a Way to Defeat the Unknown Foe? With its free companion app and distinctive player roles, XCOM: The Board Game evokes all the fear, desperation, and heroism that lie at the heart of the popular and acclaimed XCOM computer games. All the while, it immerses you in a wholly unique play experience. For more about the game, including its push-your-luck dice system, you can visit the game’s description page. Also, keep your satellites in place for future transmissions, including a series of previews, in which we’ll explore the game and its components in greater detail, and if you're headed to Gen Con Indy 2014, be sure to stop by our booth in the exhibit hall where we'll be running demos all weekend long! XCOM: The Board Game is scheduled to arrive at retailers in the fourth quarter of 2014. Until then, destroy UFOs. Research alien technology. Defend your base. Uncover the alien invasion plan. Should you fail, humanity is doomed. ... Source: You Are Humanity's Last Hope (http://www.fantasyflightgames.com/edge_news.asp?eidn=4972)
Title: Re: FFG: Fantasy Flight Games News
Post by: EvilGinger on 07 August 2014, 17:36:35
Very iffy about the APP - even if I so want the game
>:DGinger
Title: FFG:A Wizard Is Never Late
Post by: RSSFeeder on 08 August 2014, 00:30:03
A Wizard Is Never LateA Preview of The Road Darkens Saga Expansion for The Lord of the Rings
“With you and your faithful servant, Gandalf will go; for this shall be his great task, and maybe the end of his labours.”
–Elrond, The Fellowship of the Ring Earlier, we announced the upcoming release of The Road Darkens, the Saga Expansion for The Lord of the Rings: The Card Game that carries players forward from the events of The Black Riders and into a series of events drawn directly from the second half of The Fellowship of the Ring. From the Council of Elrond through the breaking of the Fellowship, The Road Darkens thrusts you directly into Frodo’s company, challenging you to find your way through some of the most dramatic scenes in Tolkien’s literature. However, the expansion draws upon its source material for more than just its scenarios. Today, Caleb Grace, one of the game’s developers, reveals the new hero card appearing in The Road Darkens. A Light in the Dark I have a love/hate relationship with sequels, especially movie sequels. When I see a movie I like, my first thought is, “That was great! I hope they make another one!” However, it seems like whenever I do watch the sequel to a good movie I typically find myself thinking, “That was terrible. I wish they had quit after the first one.” Still, every now and then, that rare sequel is released that’s not only as good as the first but actually manages to translate everything I loved about it into a wholly fresh and inspiring experience. That’s always a very special moment for me, and that’s the way I feel about the sequel to The Black Riders Saga Expansion, The Road Darkens! Now, I realize that my comments just set the bar pretty high for this box, but that’s just how confident I am that players will enjoy what’s in it. I’ve seen a lot of reviews of The Black Riders, and The Road Darkens promises to offer another generous helping of those things that people enjoyed about its predecessor: iconic player cards, interesting and thematic scenarios, and more boons and burdens for Campaign Mode!  There will be time to review the expansion’s scenarios later, but in this article I’d like to look at a few of the new player cards. There are two new heroes in The Road Darkens. The first is a new Fellowship sphere version of Frodo Baggins (The Road Darkens, 1), complete with a brand new ability. The second is one that I know players have been anxious to see in The Lord of the Rings: The Card Game – Gandalf (The Road Darkens, 2)! There will be time to review the expansion’s scenarios later, but in this article I’d like to look at a few of the new player cards. There are two new heroes in The Road Darkens. The first is a new Fellowship sphere version of Frodo Baggins (The Road Darkens, 1), complete with a brand new ability. The second is one that I know players have been anxious to see in The Lord of the Rings: The Card Game – Gandalf (The Road Darkens, 2)!
There were many heroes that we could have chosen for this box, but the most exciting option was always Gandalf. We knew we wanted to make a hero version of the mighty wizard at some point, and this was the most logical time. I remember being excited when Elrond told Frodo that Gandalf would be a part of the Fellowship in the book. I thought, “Alright! They might actually have a chance!” I felt safer knowing he was with them. And why not? There was no end to the things he could do! That astounding resourcefulness was the first thing I wanted to represent with the Gandalf hero. That’s why he’s a neutral hero; I didn’t want him to be limited to one Sphere of influence. I also wanted the experience of playing with him to feel “wizardly.” An Istari hero had to feel different from a Warrior, Noble, Ranger, and so forth. So we came up with an ability that’s entirely unique: “Play with the top card of your deck faceup. Once per phase, you may play the top card of your deck as if it were in your hand. When playing a card this way, Gandalf is considered to have the printed Leadership, Lore, Tactics, and Spirit icons.” Gandalf always seemed to know something that nobody else did, and now you can, too. Playing with the top card of your deck faceup creates a lot of interesting advantages. One great combo is using Gandalf with Expert Treasure Hunter (The Hobbit: On the Doorstep, 17) to gain an extra card draw every time you quest successfully. It can also help you and your friends know which player is the best to grant the extra card draw from Gléowine (Core Set, 62) each round. The second part of Gandalf’s ability helps him fit into any deck type. He can be especially useful in a dual-Sphere deck. In most dual-Sphere decks, two of your three heroes belong to one sphere while only one belongs to the other. Gandalf, however, can count for either Sphere, depending what’s on the top of your deck. For example, if I only have one Spirit hero, that typically means that I’ll have to wait two turns in order to play a two-cost Spirit ally. But with Gandalf, if that ally is on the top of my deck during the planning phase, I can use one resource from Gandalf and one from my Spirit hero to play that ally as if it was in my hand. Not only does that put my ally into play, but it’s also a subtle form of card draw because now there is a new card on the top of my deck. If that card happens to be an event, I might be able to play it later that round. Some great cards to find on top of your deck this way are A Test of Will (Core Set, 50), Secret Paths (Core Set, 66), and Feint (Core Set, 34). Using his ability, Gandalf can play any of those cards and make a big difference that truly makes him feel like a great wizard. Staves and Spells  That leads us to the next of today’s cards. After all, where would a wizard be without his staff? You had to know if we were going to create a Gandalf hero that we would make Gandalf’s Staff (The Road Darkens, 8). And so we did! Of course, it only attaches to Gandalf, and this is what it says: That leads us to the next of today’s cards. After all, where would a wizard be without his staff? You had to know if we were going to create a Gandalf hero that we would make Gandalf’s Staff (The Road Darkens, 8). And so we did! Of course, it only attaches to Gandalf, and this is what it says:
“Action: Exhaust Gandalf’s Staff to (chose one): choose a player to draw 1 card, add 1 resource to a hero’s resource pool, or discard a shadow card from a non-unique enemy.” Probably the biggest drawback to playing the Gandalf hero is that it means nobody can use the Gandalf ally. Playing the Core Set ally version of Gandalf and deciding which of his three abilities to trigger has always been fun, so we designed his staff to give you a fun choice as well. Lastly, we wanted to make a truly amazing Spell event for Gandalf players to wow people with, so we came up with Flame of Anor (The Road Darkens, 7). A one-cost neutral event, it reads: “Action: Add Flame of Anor to the victory display and discard the top card of your deck to ready an Istari character you control. That character gets +X Attack until the end of the phase where X is the discarded card’s cost.” Gandalf rarely revealed the full extent of his power, but when he did, it always made an indelible impression upon everyone who stood witness. That was the feeling we went for when designing this Flame of Anor. We wanted people at the gaming table to say, “That was awesome!” Of course, balancing those type of effects in a card game is a real tightrope walk:  Overdo it, and it can make the game too easy; moderate it too much, and everyone’s disappointed. Our solution was ultimately to ensure the card was added to the victory display when it was played. This ensured that a player could not use this effect more than three times in a game. Overdo it, and it can make the game too easy; moderate it too much, and everyone’s disappointed. Our solution was ultimately to ensure the card was added to the victory display when it was played. This ensured that a player could not use this effect more than three times in a game. With that failsafe in place, we were free to make a really fantastic Spell event. Not only do you ready an Istari character for the cost of a single neutral resource and a discard, but if you play it right, that discard will add a significant value to your wizard’s Attack Value. Of course, Gandalf’s ability can help you choose the best time to take that action. Imagine finding a six-cost Beorn (Core Set, 31) on the top of your deck that you can discard to ready Gandalf and give him six extra points to his Attack Value until the end of the phase! Are you excited yet? That was only three of the different cards in the box! We’ll take a look at some of the other cards in the next preview article when we look at the expansion’s three new scenarios. Thanks, Caleb! The Road Darkens allows you to join Frodo Baggins along some of the darkest moments of his epic journey, but the fact that you’ll be able to call upon the aid of a wizard as powerful as Gandalf means that there’s still hope for Middle-earth. Gandalf, his staff, Flame of Anor, and all the other thematic cards from The Road Darkens are now starting their own epic journey to retailers everywhere, so head to your favorite local retailer today to pre-order your copy! ... Source: A Wizard Is Never Late (http://www.fantasyflightgames.com/edge_news.asp?eidn=4974)
Title: FFG:Draw Their Fire
Post by: RSSFeeder on 08 August 2014, 09:00:03
Draw Their FireAnnouncing the Second Force Pack in the Rogue Squadron Cycle
“I owe the Outrider the best. She’s brought me home when any other ship would have scattered me across space.”
–Dash Rendar Fantasy Flight Games is proud to announce Draw Their Fire, the second Force Pack in the Rogue Squadron cycle for Star Wars™: The Card Game! Draw Their Fire offers more support for the main theme of the Rogue Squadron cycle: ace pilots and the starships they fly. With the new pilot (X) keyword, your Pilot units can command iconic fighters and capital ships in massive interstellar dogfights, while a new fate card brings the tension of flying starfighters to your edge battles. You’ll find the relentless Fighters of Black Squadron, pilot experimental starships such as the TIE defender, or help Qu Rahn defend the secrets of the Valley of the Jedi within Draw Their Fire. 
Sometimes, facing your enemy head-on leads only to defeat. If you need combat tricks and ways to evade your opponent’s defenses, look no further than the Smugglers and Spies of the galaxy. In Draw Their Fire, you’ll find new ways for your smugglers to escape any Imperial blockades. Make Your Escape  The objective set begins with The Daring Escape (Draw Their Fire, 731) objective. This objective offers two resources to help you afford the best starships and pilots for your smuggling operations. To find the pilots willing to run an Imperial blockade, however, you’ll have to visit a Spacer Cantina (Draw Their Fire, 734). Within this cantina’s walls, you’ll find dozens of pilots – both those who only claim to be the best, and those who truly are the best. Once you find the pilot you want to hire, the Spacer Catina not only provides a resource to pay their fee, it also reduces by one the cost and pilot cost of the first Pilot card you play each turn. If you have a covert job to run, the Spacer Cantina is where you’ll find your pilot. The objective set begins with The Daring Escape (Draw Their Fire, 731) objective. This objective offers two resources to help you afford the best starships and pilots for your smuggling operations. To find the pilots willing to run an Imperial blockade, however, you’ll have to visit a Spacer Cantina (Draw Their Fire, 734). Within this cantina’s walls, you’ll find dozens of pilots – both those who only claim to be the best, and those who truly are the best. Once you find the pilot you want to hire, the Spacer Catina not only provides a resource to pay their fee, it also reduces by one the cost and pilot cost of the first Pilot card you play each turn. If you have a covert job to run, the Spacer Cantina is where you’ll find your pilot.
This objective set also includes a copy of Stay on Target (Draw Their Fire, 702), one of two new fate cards included in the Rogue Squadron cycle. Playing this card in your edge battle contributes two Force icons to your total, and it also allows you to put a Pilot card into play from your hand or discard pile as an enhancement on a friendly Vehicle unit. Dropping a pilot into a ship in the midst of battle can quickly turn the tide of combat, making Stay on Target an invaluable addition to any deck focused on piloting Vehicles. One Pilot you may choose to slip in with Stay on Target is Dash Rendar’s Droid and co-pilot, LE-BO2D9 (Draw Their Fire, 732), or “Leebo.” Leebo is a skilled mechanic and pilot, and with him at the controls, any starship moves faster. While Leebo is attached to a Vehicle as a Pilot enhancement, you may remove the enhanced unit from the engagement immediately after it resolves a strike, allowing you to fire quickly and escape before your opponent can shoot you out of the sky. Combined with a unit like the Blockade Runner (Edge of Darkness, 323), LE-BO2D9 can prove a nightmare for any dark side player to handle.  Although Leebo can pilot any Vehicle, he’s at his best in Dash Rendar’s own ship: the Outrider (Draw Their Fire, 733). The Outrider is a YT-2400 light freighter, massively modified for additional speed and weapon power, making it deadly in combat. The true power of the Outrider, however, lies in its Action, which reads, “During an engagement, focus a Pilot card attached to this unit to have this unit participate in the engagement on your side.” By focusing the Pilot of the Outrider, you can bring this unit into an engagement suddenly, even after your opponent’s defending units have focused to strike. Although Leebo can pilot any Vehicle, he’s at his best in Dash Rendar’s own ship: the Outrider (Draw Their Fire, 733). The Outrider is a YT-2400 light freighter, massively modified for additional speed and weapon power, making it deadly in combat. The true power of the Outrider, however, lies in its Action, which reads, “During an engagement, focus a Pilot card attached to this unit to have this unit participate in the engagement on your side.” By focusing the Pilot of the Outrider, you can bring this unit into an engagement suddenly, even after your opponent’s defending units have focused to strike.
The Outrider gains even more maneuverability by pairing it with Leebo. You can focus Leebo to bring the Outrider into an engagement, and once it strikes, Leebo’s Reaction removes it from the engagement, keeping the ship safely out of reach of enemy unit damage. You might even use the Stay on Target fate card in an edge battle to suddenly attach a Pilot to the Outrider, setting your opponent up for a nasty surprise when the Outrider joins the engagement. Of course, not even the Outrider can escape from every possible trap. That’s why this objective set includes Punch It (Draw Their Fire, 735). Whenever a friendly Vehicle unit is targeted by an enemy card effect, you can play Punch It to force your opponent to choose a different eligible target, giving you the chance you need to make another daring escape. Evasive Maneuvers You’ll find plenty of support for your flying aces in the Draw Their Fire Force Pack, whether you escape at the last second with Leebo and the Outrider or enter battle with Black Squadron TIE pilots. Get to the flight deck, and look for Draw Their Fire at your local retailer in the fourth quarter of 2014! ... Source: Draw Their Fire (http://www.fantasyflightgames.com/edge_news.asp?eidn=4975)
Title: FFG:Tempting Fate
Post by: RSSFeeder on 08 August 2014, 17:30:03
Tempting FatePreviewing Light and Dark Fate in Talisman: The Woodland
The sounds of pounding drums and raucous laughter fill your ears. Suddenly, the woods in front of you part to reveal a shadowy glade, crowded with mischievous Piskies, cackling Boggarts, darting Storm Sylphs and other faerie creatures. Seated above them all on a throne of black antlers is King Oberon, smiling at the chaotic revels. Upon seeing you, he speaks with a thundering but amused voice, “Mortals are not often welcome at my court, intruder, but perhaps you may be. It is a question of fate, and the wrong answer may cause you to lose your life.” The Woodland expansion for Talisman 4th Edition opens up for you the realm of the Fae. In this uncouth forest you may discover splendid Objects, acquire helpful Followers, and develop your Strength and Craft. If you have bad luck, however, the mischievous faeries may steal your possessions and cause you to become lost in the woods. The Woodland is governed by its own particular laws: animals possess Craft, paths often shift, and Fate takes on greater significance than ever before. Today’s preview reveals how this expansion transforms the rules for fate both inside and outside of the Woodland region. You will also learn more about the fearsome and spiteful King and Queen of the Fae, Oberon and Titania. All the Fae, but especially their King and Queen, judge you by your fate. Chances are that you will be welcomed by either the King and his court or the Queen and hers – but certainly not by both. 
Light and Dark Fate tokens in Talisman have always had a dark blue side and a gold side, but the color of your fate token made no difference: it permitted you to reroll one of your own die. The Woodland introduces a difference between light fate (the golden side faces up) and dark fate (the blue side faces up). Spending a token of light fate allows you to reroll a die that you rolled, but spending a token of dark fate allows you to force another player of your choice to reroll a die. A character with more light fate than dark is lightbound, and one with more dark than light is darkbound. Equal amounts of dark and light fate make you unbound, and if you are entirely without fate, you are fateless. Many spaces and cards in The Woodland region affect you differently based on your fate, and being lightbound does not necessarily mean that good things will befall you. Unbound characters often go unaffected by cards in The Woodland, but fateless characters must typically resolve the negative effect of a card. Wandering through the Woodland without any fate could quickly sap away your character’s lives.  At the beginning of the game, and when gaining fate outside of the Woodland region, you may choose what color of fate to gain, taking a step towards ultimately becoming lightbound or darkbound. Your choice may not last long inside the Woodland, however, since Events and Strangers in the faerie realm can alter your fate as they please. Perhaps you have mostly light fate when you encounter the Wyrdling. Since you are lightbound, the Wyrdling causes you to lose all of your light fate and forces you to fight it in battle. Having lost all your light fate, you are now either darkbound or fateless. The Storm Sylph, a dark faerie, causes darkbound characters to gain more dark fate and lightbound characters to lose their fate. At the beginning of the game, and when gaining fate outside of the Woodland region, you may choose what color of fate to gain, taking a step towards ultimately becoming lightbound or darkbound. Your choice may not last long inside the Woodland, however, since Events and Strangers in the faerie realm can alter your fate as they please. Perhaps you have mostly light fate when you encounter the Wyrdling. Since you are lightbound, the Wyrdling causes you to lose all of your light fate and forces you to fight it in battle. Having lost all your light fate, you are now either darkbound or fateless. The Storm Sylph, a dark faerie, causes darkbound characters to gain more dark fate and lightbound characters to lose their fate.
The Mask of the Moon, if you are fortunate enough to come upon it, provides some defense against outside manipulation of your fate. This Magic Object enables you to change the color of a fate token once per turn, enabling you to become darkbound If you anticipate encountering Oberon in the future, or unbound if you simply want to pass through the Woodland unscathed. Fell and Wrath The dark Fae have eternally despised humans and tormented them for sport. As ruler of the dark Fae, Oberon shares their contempt, but will occasionally grant favors to a darkbound mortal who may further his own designs. Darkbound characters who encounter Oberon therefore profit from the meeting, gaining one Strength and stealing a Follower or Object from another character. Towards lightbound and fateless characters Oberon is ruthless and cruel, taking away their light fate, a possession, and half of their lives. Similarly Oberon’s Gate and Oberon’s Bow only benefit darkbound characters: Oberon’s Gate allows you, if darkbound, to teleport to any space with a faceup Enemy on it, in any region except for the Inner Region. If you are lightbound or fateless, however, the character to your left chooses where you will move. Oberon’s Bow allows the darkbound to spend a dark fate to take a life from a nearby character. Casting your lot with Oberon and the dark Fae enables you to harm others, but be careful: Oberon won’t protect you against harm or against his own faeries’ mischief. A Spirit of No Common Rate Proud Titania, beautiful and deadly, leads the light Fae. Like all of her subjects, she is innately well-disposed to mortals, generous to her admirers but certain to punish any who offend her. If you encounter her when lightbound, she gives you Spells, Objects, additional Craft, and even Lives. From the darkbound, she takes Spells, Lives, and fate. 
Titania also delights in doing the opposite of her husband, so whatever Oberon does for the darkbound, she seeks to invert or undo. Oberon’s Gate forces a darkbound character to encounter an Enemy; Titania’s Gate sends a lightbound character towards an Object of his choice. Oberon’s Bow allows you to take life from other characters; Titania’s Wand grants you the ability to cast whatever spell is placed upon that card by spending a light fate. The quarrel between the King and Queen is ancient and eternal, and you may get caught in the middle of it. If you can play them off against each other, encountering Titania and Oberon one after the other may make you extremely powerful. If they choose to take their anger out on you, it could entirely consume your fate and your lives. Face Your Fate The new rules for fate introduced in The Woodland can be played in any game of Talisman: use light fate to change the outcome of your own dice rolls, and dark fate to change the dice rolls of other players. Only within the Woodland region, however, can you experience the full effects of light and dark fate. Whether you seek to control your fate, or prefer to give yourself up to fate’s twists and turns, you will find your journey in every region of Talisman enriched by this innovation. Keep checking the minisite for more information about this expansion and pre-order Talisman: The Woodland at your local retailer today! ... Source: Tempting Fate (http://www.fantasyflightgames.com/edge_news.asp?eidn=4976)
Title: FFG:Feral Creatures and Ancient Relics
Post by: RSSFeeder on 09 August 2014, 02:00:02
Feral Creatures and Ancient RelicsPreview the Mythology School of Magic in Bestial Forces
Aviliana’s slippers made no sound as she stalked her quarry down the stone corridor. At the intersection ahead of her, the boggart chittered to itself and shifted the treasure on its shoulders. With a shout of command, Aviliana sprang forward, beating her leathery wings to cover the distance in an instant. The boggart vanished before her clutching fingers. Again. As Aviliana picked herself up, a furious snorting behind her suggested she had bigger problems than catching boggarts. Just when it seemed like your magical duels couldn’t become more chaotic, rampaging minotaurs, trickster genies, and fiery drakes arrive to prove you wrong. The advent of six strange and exotic creatures in the Bestial Forces expansion for Wiz-War makes your battles in the labyrinth more intense than ever. Whether you grant yourself the powers of the beasts, or summon these creatures to do your will, you’ll find new magic in Bestial Forces. 
You’ll find more than just creatures in this expansion, however: three new schools of magic await wizards of every kind. In today’s preview, we’ll explore the Mythology school of magic, and the monstrous beasts and relics you command when you master this school’s spells. Creatures Born of Magic  The creatures from folklore and ancient myths that fill the Mythology school of magic open plenty of new opportunities for claiming victory, whether you steal treasure or fight to vanquish your opponents. You can summon a creature by playing the corresponding Magic card, but a price must be paid. To give life to your creature, you must roll the four-sided die and take damage equal to the result minus one. Any damage you take is added to the creature’s base life, which is found on the right border of its Magic card. Once you’ve taken the damage, the creature is placed adjacent to you on the game board, ready to do your bidding. The creatures from folklore and ancient myths that fill the Mythology school of magic open plenty of new opportunities for claiming victory, whether you steal treasure or fight to vanquish your opponents. You can summon a creature by playing the corresponding Magic card, but a price must be paid. To give life to your creature, you must roll the four-sided die and take damage equal to the result minus one. Any damage you take is added to the creature’s base life, which is found on the right border of its Magic card. Once you’ve taken the damage, the creature is placed adjacent to you on the game board, ready to do your bidding.
To send your wild minion into the maze to do your bidding, you must activate the creature by spending two movement points during your turn. Activating your creature allows it to move throughout the labyrinth, attack other wizards, and defend your treasures. When activated, a creature may move spaces equal to its base move, which is shown on the left border of the corresponding Magic card. A creature can also attack during its activation, either by using an ability shown on its card, or when you cast a creature attack spell. Of course, the creatures you summon possess drastically different abilities. Some creatures are extremely magical in nature, using spells easily. Calling the genie to your side, for example, increases your hand size and allows you to cast spells as if your wizard were in the genie’s space. Alternatively, a boggart cannot attack, but it can carry treasure on your behalf, and its small size and agility make it adept at evading enemy spells. Others are weapons of brute force, unleashed on the other hapless inhabitants of the labyrinth. When you summon a minotaur, it runs wild through the labyrinth, charging any wizard that enters its line of sight. No matter what creature you summon into the midst of your magical duels, it’s certain to make an impact. Relics of the Past You’ll find plenty of new power in this school of magic, in addition to mythological creatures. Bestial Forces introduces a new item type to your arsenal of magical weapons and trinkets: the relic. Relics are items of extraordinary power, granting awe-inspiring abilities to their wielder. Thor’s Hammer gives you a weapon to throw at any obstacle in your way. You can throw Thor’s Hammer at another wizard to deal three damage, or you can use it to destroy a cracked wall or door, allowing you to blast your way through anything that stands in your way. What’s more, Thor’s Hammer always returns to you after being thrown, meaning you can use it again and again.  
Ilmarinen’s Astrolabe, on the other hand, allows you to reroll a die once anytime you roll a die. In addition, this item keeps your maintained spells from counting against your hand size, greatly expanding the amount of spells you can have at your disposal. Another relic, the Eye of Horus, can even keep you from suffering any magical damage, safeguarding you from the vast majority of your opponent’s tricks and spells. While you carry a relic, however, you cannot pick up treasure or another relic. Whether you use your relic to get you safely to your opponent’s treasure, or use it to hunt down your opponents, every relic is sure to have a dramatic impact on your magical battles. Unleash Your Wild Magic No matter which schools of magic you draw upon, Bestial Forces will change your wizard duels forever. Summon your creatures and gather your relics, and join us next week as we explore the fearsome spells within the Draconic school of magic. Preorder Bestial Forces at your local retailer today! ... Source: Feral Creatures and Ancient Relics (http://www.fantasyflightgames.com/edge_news.asp?eidn=4977)
Title: FFG:The Cult of Cthulhu
Post by: RSSFeeder on 09 August 2014, 10:30:03
The Cult of CthulhuA Preview of The Sleeper Below Deluxe Expansion for Call of Cthulhu
“I shall never sleep calmly again when I think of the horrors that lurk ceaselessly behind life in time and in space, and of those unhallowed blasphemies from elder stars which dream beneath the sea, known and favoured by a nightmare cult ready and eager to loose them upon the world whenever another earthquake shall heave their monstrous stone city again to the sun and air.”
–H.P. Lovecraft, The Call of Cthulhu In our last preview of The Sleeper Below deluxe expansion for Call of Cthulhu: The Card Game, we looked at how its new Dormant mechanic will soon give new shape to the nameless, unfathomable horrors that lurk just beyond the edges of human perception. Today, as we continue to tremble with fear at the mere thought of their arrival, we turn our attentions toward the many dark and evil Cultists who dedicate themselves to summoning forth and unleashing these terrors upon the world. As we begin our exploration, developer Damon Stone leads us deep into the Cult of Cthulhu, exploring its origins and its evil intent. Developer Damon Stone on the Cultists of The Sleeper Below  The Cthulhu Mythos describes a cold universe, one that is neither malign or evil but, worse yet, utterly indifferent to the existence of humankind. We are not even pawns being played by vastly superior beings. We are not even considered. As members of the human race, however, we seek to find some sort of meaning in our actions and to feel that we are in some way relevant to the world around us. As we explore these concerns in the face of cosmic horrors and beings so vastly ancient and alien to us that they are like unto gods, the human mind slips, shies away, or shatters. The Cthulhu Mythos describes a cold universe, one that is neither malign or evil but, worse yet, utterly indifferent to the existence of humankind. We are not even pawns being played by vastly superior beings. We are not even considered. As members of the human race, however, we seek to find some sort of meaning in our actions and to feel that we are in some way relevant to the world around us. As we explore these concerns in the face of cosmic horrors and beings so vastly ancient and alien to us that they are like unto gods, the human mind slips, shies away, or shatters.
However, in their attempts to assert control or prove themselves worthy of continued existence, some people choose not to cower in terror or fight against intrusions from beyond. Rather, they choose to serve and bring about the return of the Ancient Ones, even if that means they will serve their new masters only as pets. These are the Cultists of Cthulhu Mythos. Each Cultist has his or her own reason for siding with Cthulhu and his ilk, so we wanted to ensure that the majority of the Cultists in The Sleeper Below would be able to find a home in any Cthulhu deck, not just one dedicated to the Cult. This means that each finds its own ways to contribute to the cause, from the lowly Initiate of Dagon (The Sleeper Below, 1) to the Bone Sculptor (The Sleeper Below, 10), who pillages graveyards for the bone to work his magical craft. However, there are also some Cultists who don’t just serve the Cult, but direct it. These include the likes of the harbinger Gustaf Johansen (The Sleeper Below, 3), who announces the coming tide, and the tortured artist Henry Anthony Wilcox (The Sleeper Below, 13),  who becomes more intractable each time a new member is inducted to the Cult of Cthulhu, even as he inspires them to more terrifying actions. Figures such as these may prove useful in a range of decks, but they derive tremendous benefits from a deck with numerous Cultists. who becomes more intractable each time a new member is inducted to the Cult of Cthulhu, even as he inspires them to more terrifying actions. Figures such as these may prove useful in a range of decks, but they derive tremendous benefits from a deck with numerous Cultists. Meanwhile, the cultists themselves serve a singular purpose, and that is to awaken Cthulhu. While each, in some fashion, makes sacrifices to help prepare the way, there are some more dedicated worshipers, like Fiona Day (The Sleeper Below, 15), who are just as willing to sacrifice the lives of the cultists themselves if it will help further the reach of Cthulhu. Moreover, these Followers of R’lyeh see all who do not serve the Ancient Ones as enemies to be sacrificed under their long knives. With his mind warped by the whisperings from beneath the sea, a single crazed cultist can lead a whole team of investigators along a trail of murder, madness, and mayhem, but in force these cultists are flexible, fierce, and not to be ignored, despite their ravings… Iä! Iä! Cthulhu Fhtagn! Cultish Activities Of course, as is their wont, the Cultists from The Sleeper Below will work to insinuate themselves into as much of the game as possible, and this should be relatively easy for them since Cultist is one of the game’s most wide-spread traits and themes. Within the Cthulhu faction, itself, your Cultists will find numerous opportunities to explore foul Tomes and summon creatures of unfathomable power. Cultists willing to sacrifice themselves to the cause can help you bring into our world such calamitous beings as the Ruinous Star Spawn (The Sleeper Below, 14) and the Ancient One Kassogtha (The Sleeper Below, 18), or their blood may fuel the sorceries of characters like Carl Stanford (Secrets of Arkham, 28).  
Also, since their ultimate aim is to wake the great Cthulhu, you’ll never want to take any Cultist at face value; you should always remain mindful of the greater dangers Underneath the Surface (The Twilight Beckons, 5). In fact, the Cultists from The Sleeper Below give new fuel to cards like Underneath the Surface and, in a way, reinvent them in a new context. Such cards come with truly steep costs, demanding that you sacrifice resources, characters, and card draw. However, these costs are now significantly mitigated by the card draw that Gustaf Johansen provides, the search effect of Summon the Sleeper (The Sleeper Below, 24), and the necromantic powers of the Spell Foul Induction (The Sleeper Below, 31). In the right deck, these cards allow you to have your Cthulhu and your Cultists, too.  
Moreover, since the Cultist trait is so prevalent throughout Call of Cthulhu: The Card Game, many of the cards that you’ll find in The Sleeper Below, like Foul Induction, may grant new strength to decks that also incorporate Cultists from other factions. Who knows what unholy resilience the expansion will add to such Cultists as the Performance Artist (Core Set, 87), Victoria Glasser (Core Set, 82), Corrupted Midwife (Ebla Restored, 51), or even a lowly Dabbler in the Unknown (Core Set, 152)? It’s unclear how much they’ll benefit from the new expansion, but it’s certain that they’ll hear the winds of change howling around them. Pre-Order Your Copy Today The Cult of Cthulhu is gaining in strength, and The Sleeper Below is soon to wake! This seventh deluxe expansion for Call of Cthulhu: The Card Game is coming soon. In fact, Gen Con Indy attendees will find early copies on sale at our booth. If you haven’t already dedicated yourself to the Cult of Cthulhu, it’s not yet too late, even if you’re not headed to Gen Con Indy. Don’t allow yourself to be devoured. Head to your local retailer and pre-order your copy of The Sleeper Below today! Note: The Sleeper Below will not be legal during the Call of Cthulhu: The Card Game 2014 North American Championship Tournament held on Friday, August 15th. It will, however, be legal for the Call of Cthulhu: The Card Game Summer Tournament, which takes place on the afternoon of Saturday, August 16th. ... Source: The Cult of Cthulhu (http://www.fantasyflightgames.com/edge_news.asp?eidn=4978)
Title: FFG:STAR WARS (TM): Armada
Post by: RSSFeeder on 09 August 2014, 19:00:03
STAR WARS (TM): ArmadaA Miniatures Game of Tactical Fleet Battles in the STAR WARS Galaxy
Product image not final. Pending Licensor approval.
“General, there’s a fleet of Star Destroyers coming out of hyperspace in sector four.”
–The Empire Strikes Back Fantasy Flight Games is proud to announce the upcoming release of Star Wars™: Armada, a two-player miniatures game of epic fleet battles in the Star Wars galaxy! Massive Star Destroyers fly to battle against Rebel corvettes and frigates. Banks of turbolasers unleash torrential volleys of fire against squadrons of X-wings and TIEs. Engineering teams race to route additional power to failing shields. Laser blasts and explosions flare across the battlefield. Even a single ship can change the tide of battle. In Star Wars: Armada, you assume the role of fleet admiral, serving with either the Imperial Navy or Rebel Alliance. You assemble your fleet and engage the enemy. Using the game’s unique maneuver tool, you steer your capital ships across the battlefield, even while squadrons of starfighters buzz around them. Then, as these ships exchange fire, it’s your job to issue the tactical commands that will decide the course of battle and, perhaps, the fate of the galaxy. 
The Armada Core Set contains ten unpainted squadrons, three pre-painted capital ships, nearly one hundred cards, an innovative maneuver tool, a range ruler, six command dials, nine custom attack dice, and all the tokens that you need to engage the enemy and battle for the fate of the galaxy!
Space Battles on a Galactic Scale Winning a battle between capital starships requires more than raw firepower. It requires the coordinated activity of hundreds – even thousands – of crew. As a ship’s commanders belt out orders, gunners rain fire upon enemy ships, and engineering teams race to keep their ship’s shields and hull intact, often rerouting power where it’s needed most. Armada allows you to bring one or more of these massive ships to battle, along with whole squadrons of starfighters. To win, you must issue commands, direct your fleet’s movement, coordinate its fire, sustain its defenses, and do all of this while remaining mindful of your battle objective. More than that, you’ll need to master every aspect of the ships in your fleet. You need to become intimately familiar with your ship’s design, its firing arcs, its attacks and defenses, and the way that it uses the game’s unique maneuver tool to set its course. 
The game’s unique maneuver tool. (Product image not final. Pending Licensor approval.)
This maneuver tool is one of the game’s most innovative features and adds a unique feel to the way your capital ships must accommodate for inertia as they maneuver through the stars. 
Using the game’s unique maneuver tool, a Rebel player plots a “3” speed maneuver for his Nebulon-B escort frigate
Capital ships can’t easily vary their speeds or execute hairpin turns like the starfighters that buzz around them. Accordingly, you only use the maneuver tool to maneuver your capital ships. Then, even as it makes it easy for you to set a ship’s course, the game’s maneuver tool lends an element of realism to its pitch and yaw. As an example of how Armada uses its maneuver tool to realistically portray the different ways its capital ships can maneuver, we can consider the differences between the CR90 and the Victory-class Star Destroyer. 
The speed chart for the CR90 (left) alongside that of the Victory-class Star Destroyer (right).
The CR90 is both capable of tighter turns and faster, with a maximum speed of "4" versus the Star Destroyer's maximum speed of "2." At speed "2," while the Star Destroyer can adjust the maneuver tool only one click at the second joint, the CR90 can adjust its course one click at the first join and two clicks at the second. Still, the faster the CR90 flies, the fewer clicks it can adjust its course through the initial range increments. Another important consideration is that capital ships in Star Wars: Armada fire before they move, so when you set your ship’s course, you’re always trying to set yourself up for a good shot in the next round. However, the more powerful your ship, the less nimble it is, and the harder it is to adjust your actions on the fly. Altogether, the maneuver tool and the rules for ship movement work in tandem to force you to always look ahead. Successful fleet admirals excel at planning their attack strategies well in advance of their initial engagements. Capital Ships in Combat Armada balances the awesome scale of the Star Wars galaxy’s ships and space warfare with intuitive ship designs and accessible rules for issuing commands and resolving combat that make for rich, engaging, and highly tactical play experiences. Capital ships are extremely powerful war machines, but they’re also massive and sophisticated vessels that can’t swiftly react to every development in the heat of battle. Accordingly, the key to flying these vessels effectively is learning how to plan ahead. You want to issue your commands in such a way that your crews will be ready to execute them at just the right times. Each of your pre-painted capital ships has a command value, which determines how many commands it will have in its stack at any given point in time. During setup, you secretly build your initial command stack, selecting from any of four different commands, each of which provides a different advantage. Once you have locked your selections, you place the commands in your stack in the order of your choice. Then, during each round of game play, you secretly select and assign a new command to your ship, placing it at the bottom of your command stack, before you reveal the command at the top of your stack and gain its benefits. 
A Rebel player selects a command for his Nebulon-B escort frigate by framing it within his command dial’s fastener (1). Then, he places it at the bottom of his command stack, to be revealed in a future round (2).
You might launch a screen of TIEs to intercept incoming X-wings. You might concentrate your fire on an incoming capital ship. You might scramble to repair your shields. Or if you reveal a command that doesn’t offer an immediate benefit, you can place a token on your ship and save a lesser version of that command’s benefits for later use. Notably, the larger and more powerful your ship, the less quickly it can react to your commands. Most of the more powerful ships, like the Victory-class Star Destroyer, feature higher command values that force you to plan your actions two or more rounds ahead of time. In this way, the command stack doesn't just reflect the various actions your ships can take; it also reflects how swiftly they can adjust to the changing tides of battle. After your ship resolves its command, it can perform up to two attacks. These can be directed against the same target or against different targets. However, these attacks must originate from two different hull sections and can only target ships or squadrons within range of those hull sections’ firing arcs. 
Ships are all divided into four sections, each of which has its own firing arc, shield rating, and attack value. Here, we see a Victory-class Star Destroyer presented next to its base.
The number and type of dice you roll for your attacks depend upon the ship, the hull section from which its attack originates, and the range of the attack. 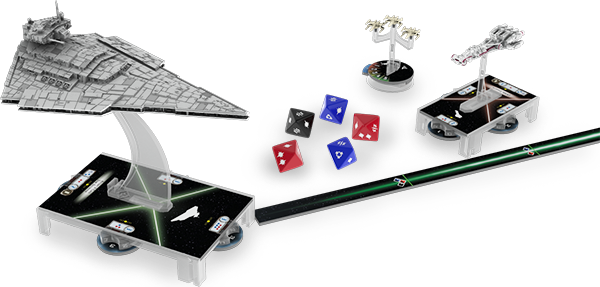
Each of the game’s attack dice presents a different effective range and spread of possible results
Meanwhile, each ship offers a number of defenses from enemy fire. Each ship’s hull is reinforced to withstand enemy fire, though larger ships like the Victory-class Star Destroyer can withstand much more than smaller ships like the Corellian corvette. Meanwhile, each section of your ship’s hull has a shield rating, indicating how many hits its shields can absorb before enemy fire damages the hull directly. Moreover, in the heat of battle, you need to decide when and how to make use of your ship’s defense tokens. With these, you can angle your deflector shields and perform evasive maneuvers to reduce the amount of damage your ship suffers. Squadrons of Starfighters Although Star Wars: Armada is built around the galaxy’s many capital ships, you’ll almost certainly want to fly one or more squadrons of starfighters in your fleet, both to threaten enemy ships and to defend your ships from enemy squadrons. 
An X-wing squadron is shown connected to its base which tracks its remaining hit points (shown here at "5") and whether or not it has activated. Here, the blue tab on the left of the base indicates that the squadron has not yet activated. Once the squadron has activated, the tab is pushed through to the other side and displays its orange end. | | Your squadrons are highly adaptable and flexible collections of starfighters, and only a foolish fleet admiral would overlook the tactical options that they can bring to a battle. While squadrons don’t pack the raw power or resilience of the capital ships they accompany, they come with their own rules for movement and combat that make them far more capable of occupying and threatening the exact portion of the battlefield that you choose. If left unchecked, a swarm of starfighters can tear down even the most massive of capital ships, and while capital ships can return their fire, any shot directed at squadrons is a shot not taken at a larger ship. Furthermore, capital ships don’t use their primary weapons while attacking squadrons; they have to use their anti-squadron armament, which is typically much less effective. Add to this the fact that some squadrons are led by such skilled pilots as Luke Skywalker, who can bypass a capital ship’s shields when he attacks, and you’ll find that squadrons are far more than an afterthought. They’re powerful weapons that skilled fleet admirals will be able to integrate into their larger strategies. Meanwhile, even though the squadrons in Armada aren't pre-painted like the capital ships, they are presented in colors intended to complement their fleets. Winning the Battle to Win the War In addition to its ships and squadrons, Armada shapes your Star Wars battles with twelve different objective cards. Each game uses one of these objectives, which introduces special rules and helps to define the narrative of your battle. Are you tracking down a specific target? Are you contesting a key outpost? Are you trying to intercept key intel? 
Objective cards challenge you to adapt your tactics in each battle
Importantly, the game’s objectives change the ways that you’ll score points in each battle, and they force you and your opponent to adapt your strategies, leading to tremendous replayability. The Enemy Fleet Is Coming into Firing Range Star Wars: Armada is due to arrive at retailers in early 2015, and Rebel and Imperial fleets will then battle for the fate of the galaxy! 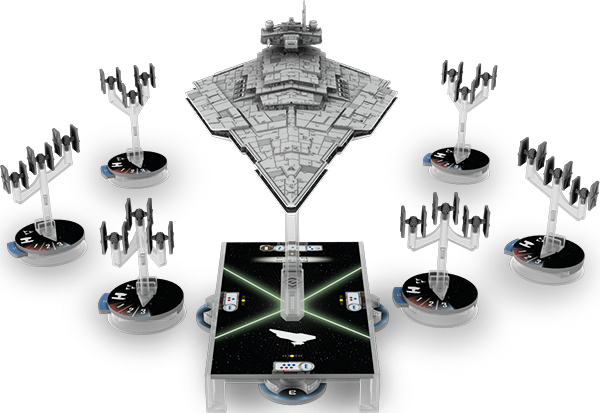
An Imperial fleet heads to battle, led by a pre-painted Victory-class Star Destroyer
In the meantime, you can visit the game’s description page to find more information and keep your eyes open for our upcoming series of previews, announcements of future expansions, and other news. Plus, if you’re headed to Gen Con Indy, you can stop by our booth for a free demo of its epic fleet battles! ... Source: STAR WARS (TM): Armada (http://www.fantasyflightgames.com/edge_news.asp?eidn=4979)
Title: FFG:Blast into Action
Post by: RSSFeeder on 11 August 2014, 22:00:03
Blast into ActionA Preview of the YT-2400 Freighter Expansion Pack for X-Wing (TM)
In the fifth wave of X-Wing™ expansions, the Rebellion gains access to a new large-base starship, the YT-2400. This fast and resilient light freighter comes with thirteen standard weapon emplacement points, making it an extremely customizable vessel, and an attractive option for smugglers, mercenaries, and others looking to fly a heavily armed “transport.” In our earlier previews of the YT-2400 Freighter Expansion Pack, we’ve looked at two of its upgrades, Stay on Target and Dash Rendar. Designed by the 2013 and 2012 World Champions, respectively, these upgrades grant your starships greater freedom to race across the battlefield and unleash fire upon enemy ships from advantageous positions. In addition to these upgrades and the Dash Rendar ship card, which also permits novel movement in the Activation phase, the YT-2400 comes with the barrel roll action, making it the first large ship able to perform this action without an upgrade. Accordingly, in today’s preview, as we take a closer look at this versatile and resilient light freighter, we will focus on what its maneuverability may soon add to your games of X-Wing. 
A 360-degree view of the YT-2400 light freighter.
Swerving Through Space While several of the galaxy’s more talented pilots, like Han Solo, were already able to wrench their large-base starships through barrel rolls thanks to the elite pilot talent, Expert Handling, the YT-2400 makes the action available to all its pilots. Accordingly, the YT-2400 Freighter Expansion Pack introduces the game’s first official rules for using the barrel roll maneuver with large-base ships. When you perform a barrel roll with a large-base starship, instead of placing the narrow edge of the straight “1” template alongside it, you must line up the template’s long edge against the edge of your ship’s base. This rule is also reflected in the game’s official FAQ (pdf, 6.5 MB), and while it limits the amount of forward, backward, and lateral movement that a barrel roll grants your large ships, you’ll find that the barrel roll continues to provide an extremely advantageous freedom of movement, especially when paired with pilots whose high pilot skill values allow them to barrel roll out of enemy firing arcs. In fact, even with this official rule, the YT-2400 and other large-base ships continue to benefit more from the barrel roll – based upon total distance covered – than smaller fighters. 
The above diagram illustrates the amount of forward and lateral movement the TIE interceptor can derive from a barrel roll.
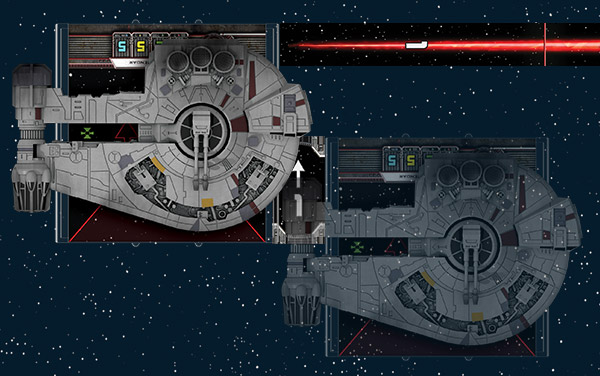
By contrast, when the YT-2400 performs a barrel roll, the edge of its firing arc moves laterally one full range increment and can move nearly half a range increment forward.
While there are a number of advantages inherent to a barrel roll, several upgrades from the YT-2400 Freighter Expansion Pack further enhance the action’s utility. For starters, Lone Wolf rewards you for distancing yourself from other friendly ships.  “When attacking or defending, if there are no friendly ships at Range 1–2, you may reroll 1 of your blank results.” “When attacking or defending, if there are no friendly ships at Range 1–2, you may reroll 1 of your blank results.”
For a mere two squad building points, this elite pilot talent offers one free die reroll every time you attack or defend while you keep your distance from allied ships. Of course, a timely barrel roll or two can help you quickly get into position to activate this card’s effects, even if you begin by flying in formation earlier in the game. Then, it’s worth noting that if one of your most powerful starships is flying all by itself, it’s likely to become a target. Once again, here, the barrel roll action comes in handy. After you see where your opponent’s starfighters are ending their maneuvers, you can roll out of their firing arcs, or even if you can’t roll out of their firing arcs, you may be able to roll to increase the range between your ships. And if you’re able to maintain your distance, other options become available to you. The Outrider Title allows you to equip a turret-mounted cannon like the Heavy Laser Cannon. However, when you upgrade your YT-2400 with the Outrider Title, it can no longer perform primary weapon attacks, and maintaining at least one range increment between you and your foes becomes absolutely critical. Again, this is another situation in which the barrel roll shines. Flying the YT-2400 in Your Rebel Squad Its tremendous maneuverability and its ability to fire a Heavy Laser Cannon in a 360-degree arc can make the YT-2400 a valuable addition to any Rebel squadron, but you’ll still need someone to pilot it.
 |
With a pilot skill value of “7,” Dash Rendar is the most elite of the ship’s pilots, as well as its most notorious. His high pilot skill value allows him to move after most of his enemies will have already activated, and his unique pilot ability allows you him to fly right at an asteroid before taking a barrel roll to get away from it and line up a shot.
|
Moreover, Dash is the only pilot who can voluntarily barrel roll onto one of the new debris cloud tokens. Normally, you can't perform a barrel roll if it would cause you to overlap an obstacle, but Dash's unique ability allows him to ignore that rule, as well as the negative consequences pilots typically suffer for entering a debris cloud:
- He ignores the stress token the debris cloud normally assigns.
- He doesn't need to roll an attack die. Normally, a player rolls one attack die and suffers one critical damage on a
 result. result.
Even more importantly, a ship that is overlapping a debris cloud token during the Combat phase may still perform attacks, meaning that if Dash finds himself outnumbered and flies into a debris cloud to take advantage of the cover it provides, he'll still be able to retaliate.
 |
Like Dash, “Leebo” appears as both a pilot and as a crew member. A Cybot Galactica LE series repair droid, the pilot version of “Leebo” helps to ensure that your ship avoids the nastiest of critical hits. As a crew member, “Leebo” allows his ship to perform a free boost action in exchange for suffering one ion token. This is the first “ion cost” introduced on an upgrade, but at just two squad points, crew “Leebo” is half the price of an Engine Upgrade and frees up the slot for another modification, like Experimental Interface or Counter-measures, both of which also appear in the YT-2400 Freighter Expansion Pack. |
 |
The third and final unique pilot in the YT-2400 Freighter Expansion Pack is Eaden Vrill, Dash Rendar’s former Nautolan co-pilot, and he rolls an extra die whenever he makes a primary weapon attack against a stressed opponent. Naturally, if you’re looking to include Eaden Vrill in your squad, you’ll want to add some means of stressing your opponents. You could wait for your opponent to Push the Limit or perform a Koiogran-turn, but it’s more likely than not that if you’re flying with Eaden Vrill, you’ll also want to equip some of your ships with Flechette Torpedoes. |
Blast into Action! Combined with its barrel roll, turret weapon, and upgrades, the YT-2400’s pilots look to make an immediate impact upon the game’s combats as soon as they drop out of hyperspace.
Keep your eyes open. The YT-2400 Freighter Expansion Pack is coming soon. Head to your local retailer to pre-order your copy today! ... Source: Blast into Action (http://www.fantasyflightgames.com/edge_news.asp?eidn=4980)
Title: FFG:Ruthlessness and Intimidation
Post by: RSSFeeder on 12 August 2014, 06:30:04
Ruthlessness and IntimidationA Preview of the VT-49 Decimator Expansion Pack for X-Wing (TM)
“We shall double our efforts.”
–Moff Jerjerrod In our past previews of the fifth wave of X-Wing™ starship expansions, we’ve looked more closely at the YT-2400 Freighter Expansion Pack, its starship, its pilots, and its upgrades, which include a pair of upgrades designed by the game’s 2012 and 2013 World Champions. Today, we turn our attention to the other side of the Galactic Civil War. While the Rebels are busy recruiting new smugglers and outfitting transport ships with turret-mounted Heavy Laser Cannons, the Imperials are quietly and efficiently preparing to launch their imposing VT-49 Decimator into battle. However, once it arrives to the battlefield, this warship will be anything but quiet! The VT-49 Decimator is the first Imperial vessel to feature a primary weapon that can threaten a full 360-degrees, and it’s designed to crash into battle headlong. 
A 360-degree view of the VT-49 Decimator
Straight Ahead, Guns Blazing The VT-49 Decimator is not a subtle starship. It’s the largest of the starships introduced thus far to standard play, and even though it shares the same size base as the YT-2400, it dwarfs that light freighter, towering above it, just as its top-down silhouette nearly swallows every portion of its base. 
The VT-49 Decimator's maneuver dial | | In battle, the Decimator is a blunt weapon. The warship’s turret weapon allows it to fire at any enemy that gets within range, but its design abandons agility entirely, relying instead upon the strength of its shields and heavily reinforced hull to withstand enemy fire. Even its actions are entirely attack-oriented. The Decimator comes with the focus and target lock actions, but since it has no agility dice to roll on defense, its focus tokens will normally offer rerolls only on your attacks. Moreover, while the fact that the starship employs a turret weapon means that its pilots can fly past enemy fighters and fire at them from outside their arcs, the Decimator is not a nimble ship. Its maneuver dial consists mostly of straight maneuvers and banks. It can perform hard turns only at “2” and “3” speeds, and it has no Koiogran-turn whatsoever. When you fly the Decimator, you’ll likely either try to skirt the edges of the battlefield, circling your foes at distance, or you’ll ram into them with Captain Oicunn, who deals a damage to each enemy ship with which he collides. Skirting the Edge If you’re looking to skirt the edge of the battlefield and exchange volleys with those ships that manage to keep you within their firing arcs, you might want to consider offering the command of your VT-49 Decimator to Rear Admiral Chiraneau or Commander Kenkirk. 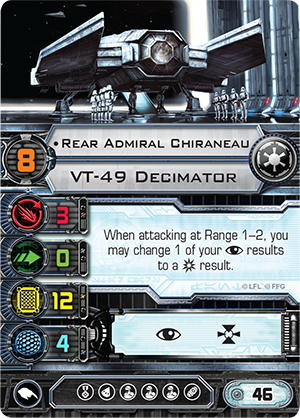 
If you’re looking to keep your Decimator at Range “3” of enemy ships for as long as possible, Rear Admiral Chiraneau is an excellent pilot. While his unique ability doesn’t directly offer him a benefit at Range “3,” it may discourage enemy pilots from closing in on him while they have other targets. Meanwhile, Rear Admiral Chiraneau can call upon any number of upgrades to further reinforce his tactics. Adding an Engine Upgrade to his Decimator, would allow Chiraneau to take advantage of the boost action, an action that’s particularly potent on large-base ships, which gain more total movement out of it than smaller ships. Also, because he can equip an elite pilot talent, Chiraneau gain additional maneuverability through the use of Expert Handling or Daredevil. Or he could simply sacrifice all of those options in favor of a more potent attack. Rear Admiral Chiraneau is one of the best candidates for the Expose upgrade;  when he voluntarily reduces his ship’s agility, he doesn’t actually lose any defense dice. He just gains an attack die. when he voluntarily reduces his ship’s agility, he doesn’t actually lose any defense dice. He just gains an attack die. Of the three unique pilots in the VT-49 Decimator Expansion Pack, Commander Kenkirk is the one most concerned with defense. When his Decimator loses its shields and receives at least one damage card, Kenkirk increases its agility value by one, meaning that it suddenly rolls as many defense dice as the smaller YT-1300. Players looking to take advantage of this late-blooming defense might want to further crew Commander Kenkirk’s Decimator with Ysanne Isard, who grants it a free evade action, and Moff Jerjerrod who can save the ship from suffering the most destructive critical hits. In fact, since Moff Jerjerrod can sacrifice other crew to save the ship from critical hits, his inclusion lends new strength to the inclusion of an Intelligence Agent or Navigator, or even both. The Direct Approach The expansion’s final unique pilot, however, takes an entirely different approach to combat. Captain Oicunn prefers the direct approach. After he executes a maneuver that causes his ship to overlap one or more enemy ships, each of those enemy ships he ends up touching suffers one damage. While most Decimator pilots try to avoid flying their ships within Range “1” of enemy fighters, Captain Oicunn thrives on getting into the thick of action as quickly as possible, and several of the expansion’s upgrades help to further flesh out this hyper-aggressive approach to battle.  Although Captain Oicunn won’t be able to fire at any ships with which his Decimator is in contact (and they won’t be able to fire at him), it’s likely that his tactics will place him within firing range of at least one enemy fighter, especially if he’s slamming into the middle of an enemy formation. In this case, Ruthlessness is an excellent choice for his elite pilot talent. If Captain Oicunn can’t use it to finish off the fighter at which he’s firing, then he should be able to use it to deal a second point of damage to the ship with which he’s collided. You can further enhance this collision-focused strategy by upgrading Oicunn’s Decimator with the Dauntless Title and the Anti-Pursuit Lasers modification from the Lambda-class Shuttle Expansion Pack. Although Captain Oicunn won’t be able to fire at any ships with which his Decimator is in contact (and they won’t be able to fire at him), it’s likely that his tactics will place him within firing range of at least one enemy fighter, especially if he’s slamming into the middle of an enemy formation. In this case, Ruthlessness is an excellent choice for his elite pilot talent. If Captain Oicunn can’t use it to finish off the fighter at which he’s firing, then he should be able to use it to deal a second point of damage to the ship with which he’s collided. You can further enhance this collision-focused strategy by upgrading Oicunn’s Decimator with the Dauntless Title and the Anti-Pursuit Lasers modification from the Lambda-class Shuttle Expansion Pack.
Alternatively, Intimidation costs one squad point less and allows Oicunn to further support his squadmates. This elite pilot talent does less for Captain Oicunn’s starship directly than Ruthlessness, but it may be more effective overall if he’s partnered with a mini-swarm of “Howlrunner” and three Academy Pilots. In this case, you may also wish to swap out your Anti-Pursuit Lasers in favor of the Tactical Jammer modification. With both Intimidation and a Tactical Jammer, Captain Oicunn can both reduce his foe’s defense and obstruct the attacks his enemies fire at his squadmates. Crush the Rebellion Heavily armed and armored, the VT-49 Decimator was one of the galaxy’s most feared Imperial warships, and gaining command of one was seen as a great accomplishment and point of pride for Imperial officers rising through the ranks. 
Soon, you’ll be able to pilot your own VT-49 Decimator into battle and smash into your foes. The VT-49 Decimator Expansion Pack is coming. Head to your local retailer to pre-order your copy today! ... Source: Ruthlessness and Intimidation (http://www.fantasyflightgames.com/edge_news.asp?eidn=4981)
Title: FFG:Healing Runes and Serpent Demons
Post by: RSSFeeder on 12 August 2014, 23:30:03
Healing Runes and Serpent DemonsPreview Andira Runehand and the Medusae from Crusade of the Forgotten
The cult of the Forgotten spreads throughout Terrinoth like infection through a body, and only the efforts of a few noble heroes can stop it from growing further. In the Crusade of the Forgotten Hero and Monster Collection for Descent: Journeys in the Dark Second Edition, you’ll enter this climatic story, whether you swell the ranks of the Forgotten with your monsters or battle against their incursions with your heroes. Like other Hero and Monster Collections, Crusade of the Forgotten adds four heroes and three monster groups, all newly reimagined in the aesthetic of Descent Second Edition. Today, we’ll take a closer look at a hero and a monster group within the Crusade of the Forgotten expansion. Read below to preview the healing prowess of Andira Runehand and the beguiling power of the medusae. 
Contains four heroes, four sorcerers, three medusae, and two golems
Blessed with Power When Andira Runehand first charged headlong into the demonic horde at Silverholt, everyone believed she was a direct sign of divine intervention. Raising her hand and banner high, she scattered the Uthuk Y’llan vanguard without striking a single blow. The rune incised upon her palm was proof of her supernatural gifting, and now, her authoritative teachings fill her companions with courage as they battle the evil cult of the Forgotten. As a Healer for your hero party, Andira has the powers to keep you and your fellow adventurers hale and healthy, while still dealing plenty of damage to any monsters that stand in her way. Andira’s hero ability reads, “Each time a hero within 3 spaces of you suffers 1 or more damage from an attack, the figure that performed the attack suffers 1 damage.” By turning damage back against the foul monsters of the overlord, you can quickly deal more damage to attacking monsters, helping to safeguard nearby heroes. 
Andira’s heroic feat offers another way to heal nearby heroes and vanquish the monsters of the overlord. As an action, Andira may choose a nearby hero and attack a monster. After the attack, the chosen hero recovers twice as much damage as Andira Runehand dealt to the monster. By combining healing and attack in one action, Andira gives your hero party some powerful benefits whenever you fight against the Forgotten and their hideous monsters, such as the medusae. Serpent Demons In times long past, a den of medusae spun a myth that their gaze could turn a living man to stone. Many fools have entered the lairs of these conniving serpent demons, wielding ineffectual shields of glass or stumbling forward with eyes tightly closed, but the deadly hexes of the medusae are easily cast on men who refuse to watch. Now, the medusae employ their magic in the service of the Forgotten, enslaving the innocent and destroying those who oppose them. In battle, the medusae can prove themselves effective ranged combatants, attacking the heroes from afar with ancient and evil magic. Each medusa possesses enough combat dice to strike effectively from outside the reach of the heroes. When you play the overlord, your medusae can use their ranged attacks to harry the heroes, even as your strongest monsters block their way forward.  
As an added bonus, a medusa can inflict a vast variety of conditions on the helpless heroes. Any medusa can inflict the immobilized or poisoned conditions, either wearing a hero down or keeping him from moving during his turn. Master medusae can poison or immobilize heroes, but they can also use their comprehensive knowledge of spells to stun a hero, robbing the hero of an action on his next turn and giving you time to accomplish your goals as the overlord. However you weave the manifold spells of the medusae, you’re sure to impede the heroes as they attempt to undermine the spread of the Forgotten. Join the Fight Whether you plague the heroes from every side with the attacks of the medusae, or heal your compatriots with the power of Andira Runehand, you’ll find the heroes and monster groups you need in Crusade of the Forgotten. Preorder the Crusade of the Forgotten Hero and Monster Collection at your local retailer today! ... Source: Healing Runes and Serpent Demons (http://www.fantasyflightgames.com/edge_news.asp?eidn=4982)
Title: FFG:Download the Final Warhammer Fantasy Roleplay FAQ and Errata
Post by: RSSFeeder on 13 August 2014, 08:00:03
Download the Final Warhammer Fantasy Roleplay FAQ and ErrataThe Warhammer Fantasy Roleplay Line Is Now Complete
In 2009, we debuted the third edition of Warhammer Fantasy Roleplay. This new edition changed the way players experience the Warhammer Fantasy setting and brought new life to the Old World. In the years since its release, we have published a veritable library of Warhammer Fantasy Roleplay products, including twenty expansions, several core products, and even a digital application. Today, we present the final FAQ and Errata, which are available for download on the support page. With these documents, we have fulfilled our vision for Warhammer Fantasy Roleplay, having delivered a complete game experience. Although we've reached the end of our road for Warhammer Fantasy Roleplay, your journey continues. With published campaigns and adventure supplements, such as The Gathering Storm and Lure of Power, along with supplementary material available to help GMs create their own stories, such as the Game Master's Toolkit, we're confident that Warhammer Fantasy Roleplay will continue to provide enjoyment for years to come. A Word from the Developers With the release of the Warhammer Fantasy Roleplay Third Edition core set in 2009, Fantasy Flight Games launched an exciting new adventure in the Old World, both for our players and for ourselves. We'd never worked on a project quite like it before, and most of our players had never played anything quite like it, either. The new format brought on interesting design challenges, and talking those challenges was in itself an exciting and rewarding experience. Our adventure in the Old World has come to a close with the release of this final FAQ update. As you can see, the changes between this and the penultimate version are modest (a few new errata for Hero's Call) and we don't foresee a need to update the document any further. We won't be releasing any new products for Warhammer Fantasy Roleplay 3rd Edition. The design team would like to thank the fans for giving us the opportunity to make this game which we love so much an important part of our lives for so long. We hope you continue to enjoy Warhammer Fantasy Roleplay, and look forward to hearing your stories of playing in the Old World for many years to come. Thanks for playing and, as always, enjoy the game! -Jay, Dan, Michael, Tim, and Chris Thanks! While this foray into the Old World in Warhammer Fantasy Roleplay has concluded, we are huge fans of the Warhammer Fantasy world and would not be surprised if we found ourselves someday crafting new adventures in it. Thank you for your support of Warhammer Fantasy Roleplay. Together, we have crafted countless adventures and forged new paths. We wish you many years of continued enjoyment. ... Source: Download the Final Warhammer Fantasy Roleplay FAQ and Errata (http://www.fantasyflightgames.com/edge_news.asp?eidn=4983)
Title: FFG:The Son of Skywalker
Post by: RSSFeeder on 14 August 2014, 01:00:03
The Son of SkywalkerPreview a Jedi Objective Set from the Between the Shadows Expansion
“I’ll never turn to the dark side. You’ve failed, Your Highness. I am a Jedi, like my father before me.”
–Luke Skywalker, Star Wars: Return of the Jedi In the shadows of the galaxy, many beings find a place to escape unwanted scrutiny. The Between the Shadows expansion for Star Wars™: The Card Game gives you access to the skills of those who lurk in shadow – the Jedi and the Scum and Villainy of the Star Wars universe. Whether you train in the Force with Yoda or take illicit contracts while working for Prince Xizor, you’ll quickly find that the shadows are your closest allies. In Between the Shadows, you’ll find none other than Luke Skywalker – a Jedi and a hero of the Rebellion. When Luke fought Darth Vader in Cloud City, his training was not complete, but by the time they fought again aboard the second Death Star, Luke had gained experience as a Jedi. In today’s preview of Between the Shadows, we’ll take a look at the newest version of Luke Skywalker and his objective set! 
The Power of a Jedi This set begins with the A Hero’s Trial (Between the Shadows, 633) objective, changing the game's normal deployment rules in a fundamental way. As an Action during the conflict phase, you may play an enhancement from your hand if you have A Hero’s Trial as one of your revealed objectives. Surprising your opponent by suddenly playing an enhancement like Shii-Cho Training (Core Set, 122) or Trust Your Feelings (Core Set, 153) can swing an engagement dramatically in your favor. Of course, you need a unit to attach these enhancements to, and you’ll find an exceptional option in the new version of Luke Skywalker (Between the Shadows, 634). This version of Luke features the same combat icons as the Core Set version, but he has gained a Force icon and the Elite keyword, signifying his growing prowess as a Jedi. He has lost the Targeted Strike keyword, but this version of Luke offers you new ways to deal damage. Whenever you attach an enhancement to Luke, you may deal one damage to a target enemy unit, and by discarding an enhancement attached to Luke, you may remove a focus token from him! Combining Luke with the Jedi’s numerous enhancements allows you to destroy any obstacle in your way and A Hero’s Trial allows you to surprise your opponent by playing enhancements on Luke in the midst of battle.  This objective set also includes some new enhancements to power Luke Skywalker. I Am a Jedi (Between the Shadows, 637) can be attached to any Force User unit, and it provides resources equal to the number of enhancements attached to the enhanced unit. If you attach I Am a Jedi to a unit that already has a few enhancements, you can easily improve your total resources for the turn, especially if In You Must Go (Core Set, 76) reduces the cost of your first enhancement. If you use I Am a Jedi to generate three or four resources, it probably won’t completely refresh for the remainder of the game, but if you attach it to Luke, you can focus it for resources, then discard it to remove a focus token from Luke. This objective set also includes some new enhancements to power Luke Skywalker. I Am a Jedi (Between the Shadows, 637) can be attached to any Force User unit, and it provides resources equal to the number of enhancements attached to the enhanced unit. If you attach I Am a Jedi to a unit that already has a few enhancements, you can easily improve your total resources for the turn, especially if In You Must Go (Core Set, 76) reduces the cost of your first enhancement. If you use I Am a Jedi to generate three or four resources, it probably won’t completely refresh for the remainder of the game, but if you attach it to Luke, you can focus it for resources, then discard it to remove a focus token from Luke.
An enhancement naturally suited to Luke Skywalker is Luke’s Lightsaber (Between the Shadows, 636). This enhancement grants two unit damage to the attached Force User or Force Sensitive unit, but its Action ability makes it most deadly in the hands of Luke Skywalker. Luke’s Lightsaber invites you to spend a Jedi resource to attach this enhancement to Luke Skywalker from your discard pile, consistently recurring itself and giving you the means to trigger both of Luke’s abilities again and again. If you can’t destroy all obstacles with Luke Skywalker and his enhancements, this objective set offers some additional tools. The set includes a copy of Heat of Battle (Between the Shadows, 65) and introduces the Speeder Bike (Between the Shadows, 635). The Speeder Bike features two normal tactics icons, as well as the Edge (1) ability. The caveat, however, is that you must destroy the Speeder Bike after you lose an edge battle if it was participating in the engagement. Even with this Forced Reaction, the Speeder Bike promises to be a potent threat that your opponent must find some way to deal with, leaving the way clear for Luke Skywalker to annihilate both units and objectives. There Is Good in Him Luke Skywalker offers the Jedi a powerful way to remove anything that might stand between the light side and victory. In Between the Shadows, you can take advantage of Luke Skywalker and the others who train in the shadows. Pre-order Between the Shadows at your local retailer today! ... Source: The Son of Skywalker (http://www.fantasyflightgames.com/edge_news.asp?eidn=4984)
Title: FFG:The Best Four Days in Gaming
Post by: RSSFeeder on 14 August 2014, 09:30:04
The Best Four Days in GamingCome See Us at Gen Con Indy 2014
Gen Con Indy 2014 starts tomorrow, and those of us at Fantasy Flight Games are looking forward to meeting you during the best four days in gaming! Located in Indianapolis, Indiana, Gen Con Indy is an enormous convention devoted to hobby gaming and its fans. Fantasy Flight Games has attended this illustrious event for the past 17 years, and each experience has been uniquely exciting and accompanied by extensive preparations. We strongly believe in the Gen Con Indy motto of “the best four days in gaming,” and we continually focus every aspect of our interactions toward providing attendees the most exciting experience possible. This year, we’re once again thrilled to contribute to Gen Con’s hundreds of board, card, miniature, and roleplaying game events, and we’re putting our best foot forward with an attractive selection of demos and product debuts at our booth in the exhibit hall. 
Visit Us in the Exhibit Hall We have one of the largest booths in the exhibit hall at Gen Con Indy, and we’ll be there all weekend long, from the first tick of the clock on Thursday morning through the end of the show on Sunday afternoon. You can find us in the exhibit hall at booths 809, 817, 1109, and 1117. Make sure to plan your visit. Then, you can stick around to learn more about our most popular upcoming games. We’ll be running demo tables all weekend for Star Wars™: Armada, Warhammer 40,000: Conquest, XCOM: The Board Game, and more! 
Enjoy Hundreds of Thrilling Events All weekend long, even as we’re offering you hands-on preview experiences with our upcoming games, we’ll be running hundreds of exciting events in the event hall and at our roleplaying tables in room 127. We enjoy a commanding presence in the event hall, where we run hundreds of board game events, along with dozens of tournaments and other events. Our events traditionally sell out quickly, and this year has been no exception. Still, you can find room to participate in a range of events, running the spectrum from competitive to casual. 
Our North American Championship tournaments continue to grow, and this year we’re running events for A Game of Thrones: The Card Game, Android: Netrunner, Call of Cthulhu: The Card Game, Star Wars™: The Card Game, Warhammer: Diskwars, and X-Wing™. There are still a few tickets available for several of these champions, and both Android: Netrunner and X-Wing have grown so large that we’ve split the preliminary rounds into two heats. If you’re looking to join in the second heat for either of these events, you’ll want to show up as early as possible with your generic ticket. Stay Tuned for Updates While we’d love to see each and every one of our fans at Gen Con, we know it’s simply not possible for everyone to attend. If you can’t make your way to Indianapolis, you can still join us in spirit. Check our website each day during the show, as we’ll offer nightly recaps of the days’ events. These video highlights are designed to show you a glimpse of the action and keep you informed of the event’s announcements, releases, tournaments, and other news.
Reminisce about last year’s Gen Con (or see what you missed)
with our four-part recap videos (also available on YouTube).
For now, it’s time to hit the road for Gen Con Indy 2014. Come join us for the best four days in gaming! ... Source: The Best Four Days in Gaming (http://www.fantasyflightgames.com/edge_news.asp?eidn=4985)
Title: FFG:Fresh from Outer Space
Post by: RSSFeeder on 14 August 2014, 18:00:03
Fresh from Outer SpaceThe Cosmic Dominion Expansion for Cosmic Encounter Is Now Available
Cosmic Dominion, the fan-designed expansion for Cosmic Encounter, is now available at your local retailer and in the Fantasy Flight Games online store. Cosmic Dominion introduces thirty new alien races and accompanying flares, a reward deck for allies filled with game-changing cards, and ship markers that allow players to create their own ship variants. Designed for the fans and by the fans, along with of one of the game’s original designers, Peter Olotka, Cosmic Dominion blasts open the possibilities of Cosmic Encounter game play. 
In the announcement for Cosmic Dominion, Peter Olotka and some of the expansion's fan designers – Jefferson Krogh, Bill Martinson, and Jack Reda – shared their insights into the expansion’s unique and collaborative design process. A preview of the expansion’s alien races featured these designers’ comments on their favorite fan-designed aliens and some classic aliens newly revised for Cosmic Dominion. We also announced CosmicCon: an upcoming celebration of Cosmic Encounter to be held in Roseville, MN at the Fantasy Flight Games Center on the weekend of September 19-21. As you prepare for interplanetary adventure, take a peek at the expansion’s reward deck, special ship variants, and two of its many alien races. Interstellar Rewards Cosmic Dominion allows defensive allies to draw rewards from a separate rewards deck containing a variety of enticing cards. From encouraging alliances and multiplying your attack points, to transforming negotiation or allowing a safe retreat from an attack, the cards of the reward deck can wreak havoc with any encounter. Intimidate cards can draw allies towards you or make yourself a more desirable ally. Played facedown before planning, intimidate cards serve main players as an attack card. If you are not a main player, the intimidate card signals that you would like to be an ally in that encounter. A main player allied to you can then use the intimidate card you played instead of his own encounter card. Main players cannot, however, look at their allies’ facedown intimidate cards before making a choice. 
Kicker cards, introduced originally in the Cosmic Incursion expansion, multiply your attack points or the amount of compensation you receive in a negotiation. Unique Negotiate Cards have a variety of effects. If you play Faulty Translator opposite an attack card, you lose the encounter and collect compensation from an opposing ally. Played opposite another negotiate card, it forces you to reach a deal using gestures instead of words, since two aliens seldom speak the same language. Customized Ships Colored ship markers included in Cosmic Dominion allow players to create a single special ship in their fleet. Some ship variants are suggested in Cosmic Dominion, but the possibilities for special ships are as vast as the cosmos itself. You could use the ship marker to create a flagship with three extra attack points in every encounter. Flagships also have a hyperspace drive action, which allows them to speed between colonies, or in and out of encounters, ignoring regular limits on ship movement. Or, you could create a salvage vessel, which allows you to retrieve a card from the discard pile using the salvage vessel’s tractor beam action whenever you like. If you win an encounter with the salvage vessel involved, you can receive two rewards or draw two tech cards, increasing your ability to win future encounters and colonize other planets. 
Alien Invasion Cosmic Dominion brings you face to face with a multitude of aliens, some mischievous, others belligerent, some chaotic, others sly, manipulative, and surprisingly powerful – like the Quartermaster. As the Quartermaster, you regularly supply the rewards to the other players. They may choose which type of reward they want – a ship back from the warp or a card from the reward deck – but the Quartermaster selects which colonies ships return to, or what card a player is dealt. Quartermasters also receive a reward for their hard work whenever their power is used.  
The Yin-Yang alien race seeks to establish cosmic balance. Therefore, as the Yin-Yang you can ally with both sides in an encounter, allowing the defense to prevent a ship from falling into the warp or enabling the offense to receive a reward. If a player does not invite you as an ally, you can give them a Yin-Yang token, causing them to lose ships if they defeat an opponent. By creating equality among the other players, the Yin-Yang can protect their own interests and safely expand the boundaries of their empire. Conquer the Cosmos From new alien races to the tantalizing reward deck, this fan-designed expansion fuels planet-shaking encounters and player innovations. Whether you prefer to intimidate or retreat, take on a whimsical alien personality or invent a new kind of ship, Cosmic Dominion opens up a universe of possibilities for Cosmic Encounter. Download the rules from the Cosmic Encounter support page, make your plans for September’s CosmicCon, and pick up your copy of Cosmic Dominion from a local retailer today! ... Source: Fresh from Outer Space (http://www.fantasyflightgames.com/edge_news.asp?eidn=4986)
Title: FFG:Fight for Your Home
Post by: RSSFeeder on 15 August 2014, 02:30:03
Fight for Your HomeFar Horizons Is Now Available for STAR WARS (R): Edge of the Empire (TM)
“The Jundland Wastes are not to be traveled lightly. Tell me, young Luke, what brings you out this far?”
–Obi-Wan Kenobi Far Horizons, the Colonist sourcebook for the Star Wars®: Edge of the Empire™ Roleplaying Game, is now available at your local retailer and online through our webstore! Filled with new specializations, signature talents, weapons, vehicles, gear, and other equipment, Far Horizons introduces a wealth of new options designed to help you better outfit your Colonist – or any character – for life on the galaxy’s wildest, deadliest, and most exciting planets. Whether you’re looking to ply your skills in the service of a wealthy gangster or you’re looking to tame a planet full of untapped natural resources, Far Horizons provides you with the tools you’ll need to you build and play your character the way you want. It also comes with an extensive collection of background information, adventure seeds, and other information to help Game Masters incorporate Colonists more fully into their campaigns. 
Colonists in Your Campaign Edge of the Empire campaigns are often full of smugglers, bounty hunters, hired guns, and other shady characters. Many of these outlaws are constantly running from their pasts, haunted by the decisions they’ve made and the debts they owe. They may have dabbled in crime in order to build lives for themselves free from the Empire’s oppressive influence, but their crimes have led them too far down the wrong paths. They might find themselves on the run, wanted by the Hutts. They might find themselves blackmailed by politically ambitious ISB agents. Or they might need to figure out how to deal with a Black Sun Vigo who considers them a serious threat to his business.  Still, the Star Wars galaxy is a vast and diverse place, and Edge of the Empire holds room for far more characters than outlaws and con artists. There are a wide range of characters who wish primarily to see what the galaxy has to offer. While they may also have some darker secrets in their pasts, these skilled individuals include your Explorers, Technicians, and Colonists. Events and circumstances beyond their control may lead them down many of the same paths as the game’s other characters, but their skills and interests can spur your campaign toward another whole set of adventures that focus less on blasters and stolen goods and more on tricky social situations and the difficulties and drama inherent in establishing a new life on a hostile planet. Still, the Star Wars galaxy is a vast and diverse place, and Edge of the Empire holds room for far more characters than outlaws and con artists. There are a wide range of characters who wish primarily to see what the galaxy has to offer. While they may also have some darker secrets in their pasts, these skilled individuals include your Explorers, Technicians, and Colonists. Events and circumstances beyond their control may lead them down many of the same paths as the game’s other characters, but their skills and interests can spur your campaign toward another whole set of adventures that focus less on blasters and stolen goods and more on tricky social situations and the difficulties and drama inherent in establishing a new life on a hostile planet.
Even as Far Horizons explores some of the different reasons your Colonists may have first become embroiled in your ongoing Star Wars adventures, it provides GMs some tools to amplify the drama and tension of their social encounters and introduces a variety of twists and revelations that may push the encounters in interesting directions. Furthermore, Far Horizons introduces a number of adventure seeds and payment charts built around the idea of contracted work. It even looks at designing entire campaigns around one or more Colonists, possibly even flipping the traditional campaign model on its head. Centering Your Campaign Around a Homestead You don’t have to haul illicit goods from system to system or chase bounties through the stars in order to find adventure. When you’re running from the Empire or trying to establish a home on one of the galaxy’s wildest or deadliest planets, adventures have a way of coming to you… In a campaign centered around one or more Colonists, you may direct a colonization effort, help a struggling colony, or cast your lot in with a group of like-minded individuals looking to start new lives upon some remote, unsettled planet. In such a campaign, the majority of your adventures might all take place upon the same planet, possibly even within a limited geographical area, and the utility of your group’s starship might be significantly reduced. Accordingly, Far Horizons introduces a set of optional rules that allow players to start an Edge of the Empire campaign with a homestead (or other base of operations) instead of a starship. Over the course of your campaign, you can grow your homestead in size and complexity. You can purchase upgrades like a mechanic’s garage, a landing bay, and advanced security systems. You might even develop your homestead until its influence rivals that of any land baron in the sector. 
Of course, you are bound to encounter obstacles along the way. You may have to fend off raiders, arrange for the illicit shipments of goods to cure strange illnesses, or restore your communications arrays after natural disasters. Perhaps a rival land baron will seek to reassert his dominance. Perhaps you’ll actually establish lives that are both peaceful and prosperous – until one of your characters’ past obligations catches up to him and everything you’ve worked so hard to create is placed at risk. If It Was Easy, Everyone Would Do It… It’s easy to recognize the smuggler’s hardships or the danger inherent in the Hired Gun’s chosen profession; however, the Colonist’s life is just as dangerous and just as full of drama. If it weren’t, then the galaxy would be full of individuals happy to uproot their lives and transplant them on remote, hostile planets outside the Empire’s sphere of influence. Far Horizons ensures that your Colonists – and other Edge of the Empire characters – can develop the talents and find the tools that they need in order to survive and prosper in even the most difficult of situations. Additionally, it helps Game Masters think of new ways to incorporate these characters into their campaigns, or even build entire campaigns around them. In the end, at the Edge of the Empire, a Colonist’s life is never dull. 
Head to your local retailer today to pick up your copy of Far Horizons, or order it online through our webstore! ... Source: Fight for Your Home (http://www.fantasyflightgames.com/edge_news.asp?eidn=4987)
Title: FFG:Live Signals
Post by: RSSFeeder on 15 August 2014, 11:00:03
Live SignalsThe Spaces Between Is Now Available for Android: Netrunner
“Static. Echoes. Degraded bytes… Some say there are residual imprints of old brainwaves that touched on adjacent frequencies. Ghosts, you might call them.”
–Nasir Meidan What lies in the spaces between the data? It’s time to find out. The Spaces Between, the second Data Pack in the Lunar Cycle for Android: Netrunner, is now available at your local retailer and online through our webstore! As the Lunar Cycle re-establishes the game’s cyberstruggles amid the moon’s reduced gravity, recycled air, and corporate-sponsored colonies, it simultaneously re-examines the transience of events and operations. These cards represent a variety of ephemeral processes that occur both in the meat world and the virtual one. Up until now, whenever you or your opponent played one of these cards, its effects would resolve, and it would be immediately discarded. Things have changed. In The Spaces Between, events and operations gain a sort of permanence. Every faction gains a new current, an event or operation that isn’t immediately resolved and trashed. Instead, each current comes with a line of text that ensures it remains in play until another current is played, or until an agenda is either stolen or scored. 
Powering Down While these currents go a long way toward illustrating the alien nature of the game’s new lunar landscape, they’re not the only cards in The Spaces Between that blur the lines between transience and permanence. Corp players gain a number of assets and upgrades, like Sealed Vault (The Spaces Between, 29) and Will-O’-the-Wisp (The Spaces Between, 32), with which they can establish greater control over the game’s tempo.  
These allow the Corp to reopen scoring windows the Runner may have thought he’d closed, and Corps can even use them to reroute a game that had moved into the “end game” stages that favor the Runner. By trashing a Runner’s rig and draining his funds, the Corp can drag a game back into the “mid game” that favors the Corp. Meanwhile, the Runner gains limited-use programs like D4v1d (The Spaces Between, 33) and Cache (The Spaces Between, 37) that start strong but quickly fall apart.  
Such disposable software may offer early, high-tempo advantages, but you’ll need to plan to accommodate their transient natures if you want to come out ahead in the game’s high-stakes cyberstruggles. While an early D4v1d may provide you a shortcut through a strong piece of ice, like Hadrian’s Wall (Core Set, 102), it collapses quickly, splintering into a degraded series of ones and zeroes that have lost their coherence. Accordingly, D4v1d and Cache require planned replacement. You’ll want to overwrite them once they become obsolete. Or better yet, you might want to sell these relics at Aesop’s Pawnshop (Core Set, 47). There, one Runner’s junk is another Runner’s treasure, and you can get credits for even the oddest of old tech. What Lies in the Spaces Between the Data? The lines between transience and permanence have receded in the distance. They’re now almost impossible to make out. Gravity has thinned. You walk through corridors filled with recycled air. You jack into the net with a rig made from recycled parts. A static drones at the very bottom of your consciousness. Is it a Ghost Runner (The Spaces Between, 40), or is it just the echoes of old brainwaves bouncing back and forth across the net? Discover what lies in the spaces between the data. Pick up your copy of The Spaces Between at your local retailer today, or online through our webstore! ... Source: Live Signals (http://www.fantasyflightgames.com/edge_news.asp?eidn=4988)
Title: FFG:Unleash the Construct
Post by: RSSFeeder on 15 August 2014, 19:30:03
Unleash the ConstructThe Skarn Lieutenant Pack Is Now Available for Descent: Journeys in the Dark
Take control of Skarn, the magical guardian of a haunted mansion! The Skarn Lieutenant Pack is now available for Descent: Journeys in the Dark Second Edition, both online through our webstore and at your local retailer. Within this Lieutenant Pack, you’ll find a sculpted figure of one of the overlord’s most deadly lieutenants: Skarn, the magical construct from the Manor of Ravens expansion. Now, you can summon this lieutenant as your agent into any campaign outside of the Manor of Ravens mini-campaign, allowing you to terrorize any region of Terrinoth. In addition to the detailed plastic figure of Skarn, this Lieutenant Pack contains a ten-card Plot deck, allowing you to harness his regenerative power to destroy the heroes.
The Mansion’s Guardian No one truly knows where Skarn originated. Perhaps he was created by the mage Ithyndrus, or perhaps the mage’s death released a power that imbued him with life. Perhaps the ravens of the manor house are somehow responsible for creating Skarn to guard their home. In any case, Skarn is far too dangerous a threat to remain alive. Left unchecked, he will continue to grow, until his size makes him a threat that all of Terrinoth could not overcome. Even at his current size, Skarn is a fearsome foe, using his powers to regenerate and grow even in the midst of battle. Skarn’s health and defense are both formidable obstacles for a group of heroes, allowing him to keep fighting long past the point when a weaker lieutenant would fall before the heroes’ blades. His Thrash ability allows him to attack every figure adjacent to him at once, while his Energy Drain ability allows him to sap the heroes’ energy, limiting their options.
The ten-card Twisted Soul Plot deck included in the Skarn Lieutenant Pack increases Skarn’s regenerative power further, beginning with What Doesn’t Kill. By exhausting this Plot card when one of your monsters takes damage, you can heal that monster and increase its defense, giving your monster a long-lasting advantage. And once a monster has been touched by Skarn’s healing prowess, it is changed forever. Other Plot cards, such as Bitter Rage and Thick Scars, grant increased attack and health to monsters healed by What Doesn’t Kill. Strange and Unknown Plumb the depths of the mysteries surrounding Skarn and the haunted manor with the Skarn Lieutenant Pack! Pick up your copy of this expansion at your local retailer today. ... Source: Unleash the Construct (http://www.fantasyflightgames.com/edge_news.asp?eidn=4990)
Title: FFG:Venture into the Manor
Post by: RSSFeeder on 16 August 2014, 04:00:03
Venture into the ManorManor of Ravens Is Now Available for Descent: Journeys in the Dark Second Edition
A raven winged silently over the two figures approaching the tumbledown mansion. Both moved cautiously, with the economy of motion shown by seasoned adventurers. At the moldering wooden doors of the mansion, the woman swung her warhammer against the doors, and they crumbled to dust at her armored feet. The secrets of the ancient manor lay before them… Do you dare to enter the haunted mansion? Manor of Ravens is now available for Descent: Journeys in the Dark Second Edition, both online through our webstore and at your local retailer! In Manor of Ravens, you’ll join a thrilling journey into a haunted manor, played out across an entirely new mini-campaign. Two new heroes stand beside the defenders of Terrinoth, bringing the Marshal and Bounty Hunter hero classes with them. The overlord gains allies of his own, however, claiming two new monster groups, new classes of Overlord cards, and a servant: the raven flock! 
The Secrets Within In our first preview of Manor of Ravens, we took a closer look at the two new monster groups that await the overlord’s command. As the overlord, you can now call on the bandits of Terrinoth to confront the heroes. Bandits are tough fighters, who don’t hesitate to use unsavory tricks or steal the heroes’ hard-won treasures. Deathly wraiths lurk within the manor itself, eager for living souls to devour. These wraiths can easily strip the spirit from a group of heroes, even inflicting the new Doomed condition to plague a hero’s resolve.
Our second preview focused on the two new heroes that await you in this expansion: the Warrior, Alys Raine, and the Scout, Thaiden Mistpeak. These worthy heroes also exemplify the two new hero classes found in Manor of Ravens. Your Warriors may take on the mantle of a Marshal, enforcing justice across Terrinoth and punishing the wicked for their transgressions. Scouts, on the other hand, can take the Bounty Hunter class, tracking a single monster at a time. Once a Bounty Hunter begins his hunt, nothing can save that monster from meeting its fate at the hunter’s hands.
In our final preview, we turned to guest writer Justin Hoeger for an survey of the new classes of Overlord cards in Manor of Ravens. With the Enchanter class, the overlord can grant powerful, long-lasting benefits to his monster groups. These spells enhance your monsters for much longer than typical Overlord cards, granting long-term effects. The other Overlord class included in this expansion is the Unkindness class, which allows the overlord to summon the raven flock servant! Similar to a hero’s familiar, a servant moves across the battlefield separate from a monster group, attacking the heroes and hindering their efforts. To make matters worse for the heroes, the remainder of the Unkindness class is dedicated to enhancing the power of the raven flock, transforming it into a formidable servant indeed. Face Your Fears Whether you venture boldly forward with the heroes of Terrinoth, or prey on the weak with the overlord’s monsters, you’ll find a haunting new adventure in this expansion. Download the rules from the Descent support page, and pick up your copy of Manor of Ravens at your local retailer today! ... Source: Venture into the Manor (http://www.fantasyflightgames.com/edge_news.asp?eidn=4989)
Title: FFG:The Rebellion Has Been Betrayed
Post by: RSSFeeder on 16 August 2014, 12:30:03
The Rebellion Has Been BetrayedOnslaught at Arda I Is Now Available for STAR WARS (R): Age of Rebellion (TM)
The sounds of alarms cut through the air. Imperial Star Destroyers loom above the horizon. TIE bombers race through the canyon, and the thunder of their bombs reverberates through the corridors of your base. Arda I is no longer safe. The first book-length adventure for the Star Wars®: Age of Rebellion™ Roleplaying Game, Onslaught at Arda I is now available at your local retailer and online through our webstore! Onslaught at Arda I thrusts you and your friends into a rich and action-packed series of struggles against overwhelming Imperial forces. Your situation is desperate, but if you maintain your courage, work together, and use your skills and blasters to good effect, you just might survive… and strike a massive blow against the Empire in the process. At 96 pages, Onslaught at Arda I is full of desperate struggles, tenuous alliances, and large-scale combats against an overwhelming enemy. Moreover, as you fight your way through the adventure’s harrowing battles and delve through its intrigues, you will also encounter optional rules for mass combats and in-depth gazetteers for several new settings that may add new dimensions to your extended Age of Rebellion campaigns. 
Recovering from Disaster In Star Wars: Age of Rebellion, you become a member of the Rebel Alliance, which is vastly outnumbered and outgunned in its war with the evil Galactic Empire. When things go well, your recon missions, intel ops, and guerrilla raids go off without a hitch. When things go well, you play your part to weaken the oppressive Empire, and individuals throughout the galaxy breathe just a little more freely. Things don’t always go well. In Onslaught at Arda I, a traitor reveals the location of your secret Rebel base to the Imperials. You and your companions must aid the base’s evacuation, even as Imperial forces draw near and battles rage all around you. Here, staring into the jaws of defeat, your acts of heroism can still make a difference. The Mass Combat rules in Onslaught at Arda I allow your Game Master to quickly adjust the adventure’s narrative – and the results of the larger battle.
When things don’t go well, the Rebellion relies upon the courage and resourcefulness of its members. Just as Luke Skywalker, Han Solo, and Leia Organa were able to snatch victory out of the jaws of defeat in the original Star Wars trilogy, you, too, will have your chances to make your mark in the Galactic Civil War. As you play your part during evacuation of Arda I and race to find and capture the traitor who exposed the base to the Imperials, Onslaught at Arda I offers you plenty of chances to rise above the moment and help reshape the Rebellion’s fate. After all, it’s easy to play your part when things go well, but how will you fare in the face of disaster? That’s the true measure of a hero. 
Heroes Wanted The Rebel Alliance is outnumbered and outgunned, and it’s reeling from a sudden betrayal. As the Imperials close in upon one of its bases, the Rebellion needs heroes more now than ever. Will you be one of them? Head to your local retailer today to pick up your copy of Onslaught at Arda I, or order it online through our webstore! ... Source: The Rebellion Has Been Betrayed (http://www.fantasyflightgames.com/edge_news.asp?eidn=4991)
Title: FFG:Start Your Inquisition
Post by: RSSFeeder on 16 August 2014, 21:00:02
Start Your InquisitionThe Dark Heresy Second Edition Core Rulebook and GM Kit Are Now Available
“All of thy abilities come through the grace of the Emperor, and you must know that their use reflects back upon Him. Do not disappoint the saviour of all humanity.”
–Morticator Siobhan Reichmyn Take on the mantle of an Acolyte and enter the darkness of the far future! Dark Heresy Second Edition and the Dark Heresy Second Edition Game Master’s Kit are now available, both online through our webstore and at your local retailer. Enter the Askellon Sector
In Dark Heresy Second Edition, you and your friends play Acolytes in the service of an Inquisitor, bound to travel the galaxy and eradicate heresy wherever you find it. Countless dangers threaten the Imperium from every side, and as servants of the Inquisition, you are Mankind’s last line of defense. Failure to confront the evils that await you could mean damnation and destruction for the entire sector.
With the tools provided in this 448-page, full-colour rulebook, you’ll travel for the first time to the Askellon sector. Here, the corrupting influence of Chaos is strongly felt, and you must battle new threats from within, without, and beyond. Whether you exterminate cults, hunt down marauding xenos, or do battle with Daemonic spawn of the Warp, you’ll find the starting point for all your adventures in the Dark Heresy Second Edition core rulebook. Your journeys may take you to the decaying hive world of Desoleum, the cemetery shrine world of Thaur, or the lawless asteroids of Port Aquila. Your adventure may begin with the Dark Pursuits adventure, included in the core rulebook. In this adventure, you must trail smugglers moving deadly xenos artefacts in and out of Hive Desoleum. Whether you start with this adventure or invent your own investigations in another part of the Askellon sector, your guiding principle remains the same: to vanquish heresy wherever it may lurk, for the good of all Mankind. 
Face Your Fears The Dark Heresy Second Edition Game Master’s Kit forms the perfect companion to the Dark Heresy Second Edition core rulebook. This kit includes a GM screen that brings dozens of commonly used stats and rules to your fingertips. In this kit, GMs also find everything they need to create memorable Nemeses for players to battle through overarching storylines that can span entire campaigns. The Dark Heresy Second Edition Game Master’s Kit also includes the Desolation of the Dead adventure, which invites you and your fellow Acolytes to journey deep into Desoleum’s Underhive. There, you must uncover the secret of a xenos relic found at the center of a horrific mass murder, and stop a cult from summoning a Daemon and unleashing hordes of reanimated corpses upon the hive’s inhabitants. This adventure offers another thrilling chapter to your investigations in the Askellon sector Battle Against Heresy
The countless heresies of the 41st millennium lie before you. You and your friends are all that stands between humanity and utter destruction. Create your Acolytes and enter the grim darkness of the far future to vanquish heresy wherever it lurks. Head to the support page for Dark Heresy Second Edition to download PC and GM sheets, as well as a Character Creation supplement. Then, pick your copies of Dark Heresy Second Edition and the Dark Heresy Second Edition Game Master’s Kit at your local retailer today! ... Source: Start Your Inquisition (http://www.fantasyflightgames.com/edge_news.asp?eidn=4992)
Title: FFG:Day One
Post by: RSSFeeder on 17 August 2014, 05:30:08
Day OneWatch a Video Recap of the First Day of Gen Con Indy 2014
Today was the fantastic first day of Gen Con Indy 2014, and as always, Fantasy Flight Games is thrilled to be in attendance. If you're here at the convention, be sure to stop by our booth and demo some of our hottest new releases. For those of you who weren't able to make it to Gen Con Indy this year, you'll find a video recap of Day One on YouTube. You'll get a sneak peek into the demos of new games like XCOM: The Board Game, Star Wars™: Armada, Warhammer 40,000: Conquest, and much more! You'll also get an update on the tournament scene, getting a glance at today's tournaments for Android: Netrunner, Star Wars™: The Card Game, A Game of Thrones: The Card Game, and X-Wing™. Watch all the excitement of Gen Con Day One above! Check back tomorrow night for our recap of Gen Con Indy 2014 Day Two, including a closer look at our newest releases and the hot news from the annual Fantasy Flight Games In-Flight Report. ... Source: Day One (http://www.fantasyflightgames.com/edge_news.asp?eidn=4993)
Title: FFG:Order and Chaos
Post by: RSSFeeder on 17 August 2014, 14:00:04
Order and ChaosAnnouncing the Third Deluxe Expansion for Android: Netrunner
“The real mission? We’re going to save the human race.”
–Jack Weyland Fantasy Flight Games is proud to announce the upcoming release of Order and Chaos, the third deluxe expansion for Android: Netrunner The Card Game! Where is humanity headed? Jack Weyland wants to take us to the stars, but what will be the human cost of his efforts? Order and Chaos pits three new subversive Anarchs against the bleeding edge ice and operations with which the Weyland Consortium intends to safeguard its most far-sighted and futuristic ambitions. With its 165 new cards (three copies each of fifty-five individual cards), Order and Chaos amplifies the high-stakes cyberstruggles between the developers at Weyland Consortium and those destructive Anarchs who would rather see the corporation’s utopian ambitions reduced to ashes than raised to the heavens upon the backs of the downtrodden. Accordingly, you’ll find a slate of new identities, tech, and tools for these factions that enhance their core strengths, even as they permit the exploration of new themes and decks. The Weyland Consortium gains a host of new, advanceable ice, as well as new strategies for protecting their agendas and assets while raking in bundles of quick credits. Anarchs, on the other hand, unleash a plethora of destructive new programs and resources that can tear apart anything a Corp can put together, whether they use them to further their humanitarian efforts or simply vent the pent-up rage of a disenfranchised youth. Finally, Order and Chaos presents fans of every faction with six different neutral cards that they can use to safeguard their servers, evade tags, and advance their economies. 
Bigger. Bolder. Better. In Order and Chaos, the Weyland Consortium looks to expand its business, building upon its industry leadership in construction to piece together taller towers, stronger ice, and the foundations of a space program that aims to take humanity into the stars. Since the game’s Core Set, the Weyland Consortium has established itself as the go-to company for fast money, massive walls, and lethal meat damage. None of that changes in Order and Chaos. In fact, the expansion gives Weyland even more cards to reinforce its competitive advantage in these key categories.
 Several agendas and assets further boost your credit-to-click ratios. While some of these are simply good business, others may represent more of a High-Risk Investment (Order and Chaos, 7). Several agendas and assets further boost your credit-to-click ratios. While some of these are simply good business, others may represent more of a High-Risk Investment (Order and Chaos, 7).
- Meanwhile, Weyland’s engineers have cooked up six different forms of advanceable ice that can seal up servers nice and tight. Simultaneously, they have also developed other technologies, like Satellite Grid (Order and Chaos, 23), that lead to greater returns on your advanced investments.
- Ask a Runner what Weyland does best, and you’re likely to hear less about the Beanstalk and forward-thinking construction techniques and more about, “Scorched Earth.” Over the years, the company has taken a number of PR hits for alleged black ops, and Order and Chaos promises to fuel even more of these rumors with cards like Traffic Accident (Order and Chaos, 22). Runners have more cause than ever to think twice about running against its servers or floating tags.
Furthermore, Order and Chaos adds greater diversity to the Weyland Consortium’s holdings, as it introduces three new identity cards. Like Gagarin Deep Space (Order and Chaos, 2) each of these new identities lays a solid foundation that can support a whole new set of strategies and business tactics. Vengeance. Subversion. Destruction. Most Anarchs are fueled by their hatred for corporate corruption. Some may risk their own lives and livelihoods to champion the oppressed and the downtrodden. And others may simply view running as a means to lash out against a world that chafes them. The three new Anarchs in Order and Chaos approach the game’s cyberstruggles from wildly different positions along this spectrum. Still, they all share an inner fire that eats at them, and they all excel at torching corporate servers, liberating corporate secrets, and exposing corporate lies.  In Order and Chaos, the game’s Anarchs gain new cards that allow them to amplify their assaults against Corporate servers. Whatever the Corps can build, these Anarchs can destroy. You’ll find viruses spawning in all directions, run events that allow you to destroy ice, other events that limit the Corp’s hand size, and a new AI program that’s easily among the game’s most efficient icebreakers. In Order and Chaos, the game’s Anarchs gain new cards that allow them to amplify their assaults against Corporate servers. Whatever the Corps can build, these Anarchs can destroy. You’ll find viruses spawning in all directions, run events that allow you to destroy ice, other events that limit the Corp’s hand size, and a new AI program that’s easily among the game’s most efficient icebreakers.
Though the expansion’s destruction runs rampant, and though all its new Anarch cards may reinforce the faction’s noisy, high-risk approach to running, there is another primal concern that runs beneath all the Runners’ angst and anger. At the root of all the new programs, hardware, and techniques these Runners have developed is the fundamental belief that humans should be humanity’s most important concerns. Humans are not commodities. Accordingly, Edward Kim (Order and Chaos, 28) and Human First (Order and Chaos, 48) arrive to combat the Corps’ use of androids and the ways that they trample vast swaths of humanity underfoot in the name of “progress.” Develop or Destroy? The majority of the cards in Order and Chaos may focus on the Weyland Consortium and the Anarchs, but the expansion has plenty to offer all the game’s factions. You’ll find eighteen neutral cards (three copies each of six different neutral cards), as well as a host of low-influence-cost cards that can readily help any deck renew its focus upon the economic efficiencies underlying the game’s cyberstruggles. With all the expansion’s new cards at their disposal, will the Corps be able to build their walls faster than the Runners can tear them down? We’ll soon learn where humanity is headed next. Order and Chaos is scheduled to arrive at retailers in the fourth quarter of 2014. Until then, visit our Order and Chaos description page for more information, and stay tuned for more previews and other Android: Netrunner news! ... Source: Order and Chaos (http://www.fantasyflightgames.com/edge_news.asp?eidn=4995)
Title: FFG:Mountains of Madness
Post by: RSSFeeder on 17 August 2014, 22:30:03
Mountains of MadnessAnnouncing a New Expansion for Eldritch Horror
“Little by little, however, they rose grimly into the western sky; allowing us to distinguish various bare, bleak, blackish summits, and to catch the curious sense of phantasy which they inspired as seen in the reddish antarctic light against the provocative background of iridescent ice-dust clouds… I could not help feeling that they were evil things – mountains of madness whose farther slopes looked out over some accursed ultimate abyss.”
– H.P. Lovecraft, At the Mountains of Madness Fantasy Flight games is proud to announce Mountains of Madness, the second expansion for Eldritch Horror. Inspired by H. P. Lovecraft’s novella about a Miskatonic University expedition that awoke ancient and deadly creatures, Mountains of Madness opens up to investigators the frozen expanses of Antarctica and releases horrors that have hibernated in the ice for eons. You may find in Antarctica solutions to many perplexing mysteries, but you will also encounter there profoundly disturbing sights and nightmarish new monsters. This expansion features a side board depicting locations throughout Antarctica, from the Miskatonic Outpost to the City of the Elder Things, where numerous and terrifying encounters await you. Two new Ancient Ones, including the very Elder Things that once dominated earth, threaten the end of humanity. Eight more investigators contribute their diverse skills and specialties to the struggle against the Ancient Ones. With their help you may be able to prevent the reawakened Elder Things from rising… or you may fall victim to the horror. 
An Antarctic Expedition The side board featured in Mountains of Madness allows players to follow the trail of the doomed Miskatonic University expedition. Your gateway to remotest Antarctica – and your last point of connection to the rest of the world – is the Miskatonic Outpost, where you can team up with an Antarctic guide or obtain life-saving medical supplies. You can then progress to the devastated Lake Camp where the cold preserves the grisly remains of Professor Lake and his colleagues. There, you may rescue the frightened sled dogs who survived their masters’ slaughter, or perform autopsies on the frozen bodies of the Elder Things. Beyond the immense and foreboding Snowy Mountains lay the megalithic City of the Elder Things and the mythical Plateau of Leng, where the unpredictable, transdimensional shifts of time and space may shatter your sanity. 
Antarctica’s frozen climate makes it one of the most perilous regions of the world. Your Strength and Will may be tested as you are forced to dig through many feet of snow, restrain frightened dogs, or scrape ice off of your frozen airplane. A small mistake – or even sheer bad luck – can result in a Hypothermia Condition. Yet where humans struggle to survive, other creatures dwell comfortably. Innumerable monsters are insensible to the cold, and even animals that seem harmless may turn against you. Giant Penguins, seemingly innocent and friendly at a distance, can eagerly tear you limb from limb before you realize your danger. The Rise of the Elder Things When the first Miskatonic expedition uncovered frozen life forms, as tall as humans but grey, cylindrical, and crowned with starfish-like limbs, they assumed they had found corpses. The sled dogs knew better, and tried unsuccessfully to flee before the hibernating Elder Things woke up. One of two new Ancient Ones introduced in Mountains of Madness, the shrewd and ravenous Elder Things yearn to regain control of the planet that they ruled millions of years before humans walked the earth. 
To defeat the Elder Things, you must search Antarctica’s icy wastelands for clues. Carved pictures in the city’s dark ruins may inform you about these creatures’ technology, culture, and ultimate downfall. The mutilated, dismembered bodies of the Miskatonic University expedition may reveal the Elder Things’ intentions towards humankind, while their tracks through the snow contain information about their shape, movement, and speed. Yet while knowledge may decrease your instinctive terror of the Elder Things, it will not lessen their malice. Diamonds in the Rough The eight investigators introduced in Mountains of Madness offer you intriguing new roles to play as you combat the increasing threat. Whether they earned their chops scouring libraries or fighting crime, practicng law or smuggling liquor, every one of them is equipped to go to the ends of the earth to fight the Ancient Ones. Many have unexpectedly useful skills: you wouldn’t suspect that a professional violinist would be adept at closing Gates, or that a waitress would be an expert in arcane lore. 
Ursula Downs, for example, grew up climbing trees and exploring caves before delving into history, science, and archeology. Having spent years excavating the ruins of forgotten civilizations, she has the Strength to survive difficult climates, the Lore to understand the inscriptions of the Elder Things and the Observation to interpret subtle clues in any landscape. This combination of skills makes her excellently suited for a voyage to Antarctica, a trek through the Amazonian rainforest, or a visit to the archives of Istanbul. Ursula Downs can brave any terror imaginable and strengthen any team of investigators. The Global Threat is Growing Mountains of Madness focuses on Antarctica but leaves no corner of the earth untouched. This expansion spreads the horrors across the world, featuring additional Encounter and Research cards for every location and Gates that allow monsters to spawn in regions not before exposed to such horrors. New Assets, Spells, and Artifacts aid investigators in their struggles against the Ancient Ones. Whether you choose to defend humanity from the Elder Things or their enemy Cthulhu, whether you focus on fighting monsters or learning spells, Mountains of Madness will enhance your experience of Eldritch Horror. Prepare to face prodigious and unprecedented horrors! Check the minisite for more previews, and look for Mountains of Madness at your local retailer in the last quarter of 2014. ... Source: Mountains of Madness (http://www.fantasyflightgames.com/edge_news.asp?eidn=4996)
Title: FFG:Imperial Assault
Post by: RSSFeeder on 18 August 2014, 07:00:02
Imperial AssaultAnnouncing a Board Game of Tactical Combat and STAR WARS (TM) Adventure
Packaging pending licensor approval.
Victory! By destroying the Death Star, the Rebellion has given hope to a galaxy living in fear. The Empire races to recover from their crushing defeat and the loss of their ultimate weapon as the Rebel Alliance works to solidify their advantage. When an Imperial distress beacon begins to broadcast from an remote outpost on Yavin 4, a small team of elite Rebel operatives is dispatched. Their mission: to silence the signal at all costs… Fantasy Flight Games is proud to announce the upcoming release of Imperial Assault, a Star Wars board game of cinematic adventure and tactical combat for two to five players! Imperial Assault casts you and your friends into the climatic events following the Death Star’s destruction above Yavin 4, and offers two full game experiences within the Star Wars universe. In the campaign game, you and up to four other friends play a series of thrilling missions woven together in a narrative campaign, and in the skirmish game, you and your opponent muster your own strike teams and battle head-to-head over conflicting objectives. 
Two Games in One The first game included in Imperial Assault is the campaign game, which allows up to five players to enter the Star Wars universe through a narrative story composed of linked missions. One player commands the armed forces of the Galactic Empire, while up to four others play as heroes of the Rebellion, engaging in covert operations and missions. Both the forces of the Empire and the Rebel heroes gain new skills and items throughout the campaign, allowing characters to develop and grow as the story unfolds.
What Are Ally and Villain Packs?
For more information on Ally Packs and Villain Packs, visit the Imperial Assault description page.
|
|
Imperial Assault offers a completely distinct game experience in the skirmish game. Skirmish missions allow you and a friend to compete in head-to-head, tactical combat. You’ll muster your own teams of Imperial, Rebel, and Mercenary forces, and build decks of Command cards, which you can play to gain an unexpected advantage. Each skirmish mission has its own objectives. Whether you recover lost holocrons, or battle to defeat a raiding party, you’ll find danger and tense, tactical choices in every skirmish. As an added bonus, the Luke Skywalker Ally Pack and the Darth Vader Villain Pack are both included within the Imperial Assault Core Set. You’ll find sculpted plastic figures inside these figure packs alongside new campaign and skirmish missions that highlight Luke Skywalker and Darth Vader within Imperial Assault. 
Lead Your Strike Team Imperial Assault’s campaign game offers you and your friends a narrative campaign with over thirty possible missions. Every mission in Imperial Assault is constructed using some of over fifty double-sided interlocking map tiles, depicting a massive range of Star Wars environments, from the jungles of Yavin 4, to the dusty wastes of Tatooine, to the metallic corridors of an Imperial base. When playing a campaign, one player commands the limitless forces of the Galactic Empire, including stormtroopers, Imperial officers, AT-ST walkers, assorted mercenaries, and iconic villains such as IG-88 and Darth Vader. The power of the entire Empire is at your fingertips as you outwit, entrap, and exterminate Rebels wherever you find them. Whether you hunt down the Rebel scum with Trandoshan mercenaries, or defend strategic strongpoints with the Royal Guard, the forces of the Empire pose a dire threat to the Rebel Alliance. 
Up to four other players oppose the might of the Empire during the campaign game, each playing as an elite Rebel operative and sometimes fighting alongside well-known characters like Luke Skywalker and Han Solo. You might take on the role of a smuggler, a Wookiee warrior, or even a Force user as you strive to defeat the Empire’s schemes. Every hero also features his own Class cards, allowing your character to learn new skills and abilities over the course of the campaign. 
Campaign missions test your skills to the limit as the heroes and the Imperial player battle to dominate the mission with the figures they control. Whenever you activate a figure, you may take two actions. You can move, attack with melee or ranged attacks, open doors, investigate crates for useful items, or rest to recover strain and damage. The actions you choose and the way you execute them are crucial to the success of every mission. For more information on actions, visit the description page, and check back for future Imperial Assault previews. When playing the Rebels, you and your fellow heroes must coordinate your actions and work as a team to defeat the superior numbers of the Imperial player, scorching the air with blaster fire as you strive to complete the mission’s objective. The heroes must move quickly, however, because the Empire’s reserves are limitless. When you play as an Imperial player, every round increases your threat dial. Threat can be spent to replenish squads and summon reinforcements, bringing you closer to crushing the Rebel strike team beneath your armed forces. 
During a campaign mission, only the Imperial player has access to all of the mission’s information, meaning the heroes never know exactly what traps may await. The Droid you’re looking for may be behind a door, but you don’t know if it’s unguarded, or if you’ll see the ominous figure of Darth Vader when you open the door. All is not lost for the brave heroes of the Rebel Alliance, however. Both the heroes and the Imperial player have a chance to prepare for surprises during the campaign by using their experience to learn new skills, and their credits to purchase new weapons and survival gear. Choose Your Missions and Your Gear You’ll find a host of different missions, objectives, enemies, and allies throughout the Imperial Assault campaign. As the campaign progresses, your available missions can change dramatically based on the outcomes of past missions. With the variety of side missions included in Imperial Assault, you’ll never encounter the same campaign twice. You may be captured while investigating an Imperial base, or an old friend may suddenly call in some favors. Whether your mission is stealing data from encrypted Imperial consoles, silencing an Imperial distress beacon, or helping Han Solo settle his debts, every mission puts you in the center of the action in the Star Wars universe. 
An armory of items and class cards for both Imperials and Rebels adds further replayability to your games of Imperial Assault. Whether you’re playing as a smuggler, a renegade, or another hero of the Rebellion, you can continue to grow and gain skills and abilities that match your specialization. You can also earn credits over the course of the campaign to buy items ranging from blaster pistols to vibroaxes, complete with modifications such as a tactical display or a spread barrel. As the heroes gather equipment and experience, the Empire is not idle. Throughout the campaign, the Empire also has the opportunity to enhance its military might, technological superiority, and subversive tactics. Battle Head-to-Head In addition to a campaign of missions, you’ll be able to take on your friend in one of six two-player, head-to-head skirmish missions by mustering your own squads of Imperials, Rebels, or Mercenaries. Each of the skirmish missions included within Imperial Assault thrusts you and a friend into direct combat. 
In a standard skirmish mission, you and your friend separately assemble teams of soldiers with iconic heroes and villains from the classic Star Wars films, and build decks of Command cards to give your warriors unexpected advantages in battle. Between choosing heroes, villains, and squads from three distinct factions, and building a command deck out of dozens of possible command cards, you’ll have plenty of options for customizing your strike force. During the mission itself, you and your opponent battle over conflicting objectives. Whether you’re racing to escape with a deadly T-16 Skyhopper, or collecting contraband for the Hutts, you’ll find high stakes and tense, tactical combat in every Imperial Assault skirmish mission. You’ll be able to learn more about the skirmish game in future previews of Imperial Assault. 
Father and Son As an added bonus, the Luke Skywalker Ally Pack and the Darth Vader Villain Pack are both included in the Imperial Assault Core Set. Each pack contains a sculpted plastic figure, alongside an additional campaign side mission and two new skirmish missions using a common map. Together, these two figure packs give you a total of thirty-two campaign missions and six skirmish missions within Imperial Assault! These packs bring added life to both Luke Skywalker and Darth Vader, and they mark the beginning of Ally Packs and Villain Packs that will expand and support your games of Imperial Assault. Imperial Troops Advancing Imperial Assault offers a wealth of Star Wars action, split across two full games with dozens of missions. Will you lead your elite team of Rebel operatives to the heart of the Imperial plan in the campaign game, or will you compete with a single opponent over crucial objectives in the skirmish game? For more information on gameplay in Imperial Assault, visit the description page and look for previews in coming weeks. Find Imperial Assault at your local retailer early in 2015! ... Source: Imperial Assault (http://www.fantasyflightgames.com/edge_news.asp?eidn=4994)
Title: FFG:Day Two
Post by: RSSFeeder on 18 August 2014, 15:30:03
Day TwoWatch a Video Recap of the In-Flight Report and the Second Day of Gen Con
Today was our second day at Gen Con Indy 2014, and we're ready for plenty more action to come! Gen Con today witnessed this year's annual Fantasy Flight Games In-Flight Report, where several of our newest and most exciting games were announced and introduced to you. What are some of our newest upcoming releases? You'll have to watch the video to find out! You'll also find updates from the Gen Con retail booth, the tournament scene, and the demo tables. Gen Con has been amazing for everyone here so far, and we're excited to see what happens tomorrow! Watch the video recap of Gen Con Day Two above or on YouTube. We've had tons of exciting news so far, and there's still plenty of Gen Con to go! Check back tomorrow night for another video recap of our time at Gen Con Indy 2014. ... Source: Day Two (http://www.fantasyflightgames.com/edge_news.asp?eidn=4997)
Title: FFG:Scum and Villainy
Post by: RSSFeeder on 19 August 2014, 00:00:03
Scum and VillainyAnnouncing the Introduction of the Third X-WING (TM) Faction
“This bounty hunter is my kind of scum, fearless and inventive.”
–Jabba the Hutt Fantasy Flight Games is proud to announce that in the sixth wave of starship expansions for X-Wing™ the galaxy’s Scum and Villainy will join the game's fast-paced space battles as its third faction! The ranks of the Scum and Villainy faction are filled with many of the Star Wars galaxy’s most notorious bounty hunters, pirates, and Black Sun agents. You’ll find such infamous figures as Boba Fett, IG-88, Greedo, and Prince Xizor. These Scum live outside the law, do their best to remain at the periphery of the ongoing Galactic Civil War, and allow no one – no one – to threaten their profits. Whenever Rebel or Imperial forces dare to interfere with their illicit dealings, Scum head to battle, and they do so in some of the best starfighters that money can buy, such as Slave I, IG-2000, and the MandalMotors StarViper-class attack platform. These expensive and technologically advanced starships are further supported by a number of mainstays that have proven their efficiency over the course of numerous battles. 
Four separate expansion packs introduce the galaxy’s Scum to X-Wing:
- Most Wanted Expansion Pack
- StarViper Expansion Pack
- M3-A Interceptor Expansion Pack
- IG-2000 Expansion Pack
These four Wave VI expansions establish the Scum and Villainy faction as a collection of individuals bound by common interests, but ultimately less interested in teamwork and collective victories than personal gain. Accordingly, the faction’s unique pilot abilities encourage different types of squadrons than those commonly employed by Rebel and Imperial players. Moreover, while credits can buy ships, credits can also improve them, and many Scum upgrade their ships with expensive and illicit technologies, several of which are represented by a new type of upgrade, the illicit upgrade,  . As far as the galaxy’s Scum are concerned, if the Empire bothered to make such technology illegal, it must be potent. . As far as the galaxy’s Scum are concerned, if the Empire bothered to make such technology illegal, it must be potent. Most Wanted Expansion Pack How does a new faction enter X-Wing with enough firepower to take the fight to Rebel and Imperial forces? It starts with the Most Wanted Expansion Pack and its slate of thugs, hired guns, pirates, and spice runners, as well as a new version of the galaxy’s most feared bounty hunter, Boba Fett. 
Most Wanted is a collection of ship cards, upgrades, tokens, and dials that allow you to repurpose some of your existing starships for use within the Scum faction. You’ll find support for the Firespray-31, HWK-290, Y-wing, and Z-95 Headhunter. Additionally, you’ll find three starfighter miniatures that have been given alternative paint schemes and re-outfitted for use by the Scum faction: two Z-95 Headhunters and one Y-wing.
- One Y-wing miniature with an alternative, Scum-themed paint scheme
- Two Z-95 Headhunter miniatures with Black Sun paint schemes
- Four Scum faction Firespray-31 ship cards
- Four Scum faction HWK-290 ship cards
- Six Scum faction Y-wing ship cards
- Six Scum faction Z-95 Headhunter ship cards
- Nineteen upgrade cards
- Maneuver dials and tokens for your Scum Firespray-31, HWK-290, Y-wing, and Z-95 Headhunters
So that you can pilot your ships, Most Wanted introduces twenty ship cards, the most for any X-Wing release to-date. It also allows you to upgrade your starships by outfitting them with any of its nineteen upgrade cards, including a host of new Salvaged Astromech upgrades  , modification and Title upgrades for your Y-wings, new secondary weapons (one of which is illicit), and a trio of Scum only crew members that includes the infamous Rodian bounty hunter, Greedo. , modification and Title upgrades for your Y-wings, new secondary weapons (one of which is illicit), and a trio of Scum only crew members that includes the infamous Rodian bounty hunter, Greedo. With all of its ships, pilots, upgrades, dials, and tokens, the Most Wanted Expansion Pack comes with everything that you need to send your Scum into battle and derive a profit from your illegal investments! StarViper Expansion Pack Designed by MandalMotors in direct collaboration with Prince Xizor, the StarViper-class attack platform was one of the most formidable fighters in the galaxy. 
The StarViper Expansion Pack features one pre-painted StarViper miniature, sculpted at 1/270 scale and brought to life in X-Wing as a potent, well-balanced ship that can quickly destroy opposing ships even while evading enemy fire. Dual laser cannons provide the StarViper a primary attack value of three, which is partnered with an agility value of three, shields of one, and a sturdy hull value of four. To these already impressive statistics, the StarViper adds a uniquely loaded maneuver dial and an action bar that features both the barrel roll and boost actions, allowing you to dart about the battlefield with ease. Naturally, you’ll be able to field Prince Xizor in the Virago, the prototype StarViper that he helped design. Outfitted with even more advanced technology than standard StarVipers, the Virago Title allows you to make use of the various system and illicit upgrades, like the Accuracy Corrector and Inertial Dampeners, that appear among the expansion pack’s nine upgrade cards. M3-A Interceptor Expansion Pack The lightest starfighter designed by MandalMotors, the M3-A “Scyk” interceptor featured a weapon mount capable of handling nearly any weapon and a price tag low enough that the Hutt Cartel and Car’das smugglers were enticed to purchase it in large quantities and make it a mainstay of their fleets. 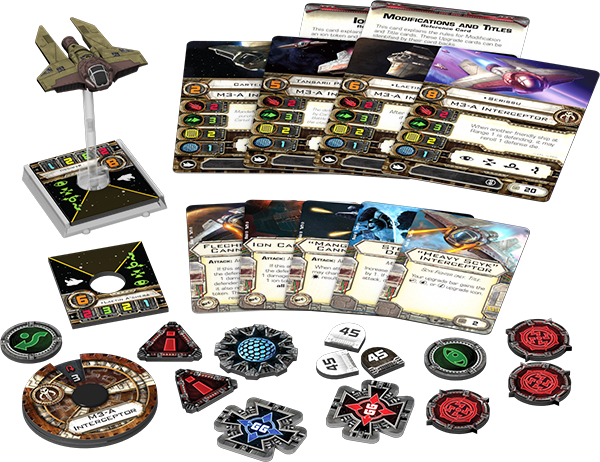
The M3-A Interceptor Expansion Pack includes one M3-A interceptor miniature, which comes pre-painted and sculpted at the game’s standard 1/270 scale. A light and nimble vessel, the M3-A interceptor starts with two attack, three agility, two hull, and one shield. However, the expansion pack’s five upgrades include the “Heavy Scyk” Interceptor Title and no fewer than three cannons, meaning that you’ll find plenty of options for adapting your Scyk to fit the role you want it to play within your fleet. Additionally, the M3-A Interceptor Expansion Pack introduces two unique and two non-unique ship cards, a maneuver dial, and all requisite tokens. IG-2000 Expansion Pack A heavily modified Aggressor assault fighter, IG-2000 was the signature vessel of one of the galaxy’s deadliest bounty hunters, the Assassin Droid IG-88. 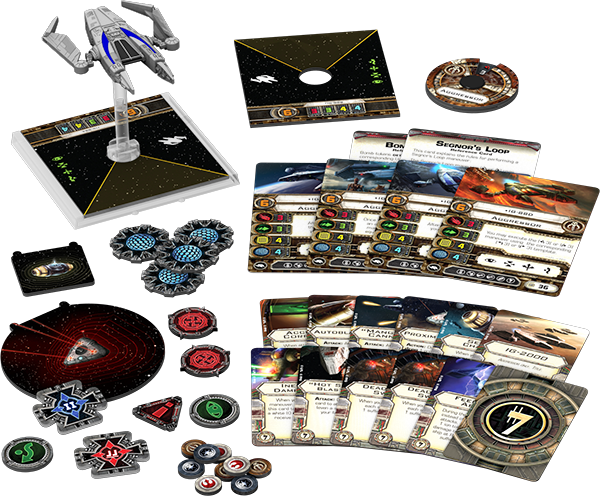
Because IG-88 had no need for life support systems and no reason to fear the gravitational effects of maneuvers that would kill organic pilots, the majority of the space within the IG-2000 was devoted to engines and weapon systems, making the starfighter every bit as fearsome as its ruthless pilot. In X-Wing, the IG-2000 is a powerful, large-base starfighter with three attack, three agility, four shields, and four hull. It can boost, it can evade, it can target lock, it can equip two cannons simultaneously, and it can whip through space at high speeds while performing the demanding Segnor’s Loop maneuver. The IG-2000 Expansion Pack features one carefully detailed and pre-painted IG-2000 miniature at 1/270 scale, along with four ship cards, twelve upgrade cards, a maneuver dial, and all the tokens you need to hunt down your prey and obliterate it. Notably, the IG-2000 Expansion Pack is the first X-Wing expansion that doesn’t feature any non-unique ship cards. Instead, each of its four ship cards represents one of the four identical IG-88 models that share a single mind. They all share the same pilot skill value of “6,” and the non-unique IG-2000 Title upgrade allows you to link their abilities. The more IG-88s you bring into battle, the more lethal they become. Strike from the Shadows “You will never find a more wretched hive of scum and villainy.”
–Obi-Wan Kenobi  Throughout the classic Star Wars trilogy, we catch several glimpses of the galaxy’s Scum and Villainy. We see them in Mos Eisley, gathered aboard the command deck of the Executor, and amassed at Jabba’s palace on Tatooine. They may do their best to remain outside the conflicts of the Galactic Civil War, but they form an integral part of the Star Wars universe, exerting profound influence over the lives of millions, including many of the Rebel Alliance’s greatest heroes. Throughout the classic Star Wars trilogy, we catch several glimpses of the galaxy’s Scum and Villainy. We see them in Mos Eisley, gathered aboard the command deck of the Executor, and amassed at Jabba’s palace on Tatooine. They may do their best to remain outside the conflicts of the Galactic Civil War, but they form an integral part of the Star Wars universe, exerting profound influence over the lives of millions, including many of the Rebel Alliance’s greatest heroes.
Likewise, the galaxy’s Scum and Villainy will soon form an integral part of your X-Wing experiences, exerting a profound effect upon the game’s evolving metagame. How will TIE swarms fare against squads led by IG-88 and the Virago? How will X-wing and B-wing pilots used to the TIE’s limited firepower cope with Scum squads that equip the nimble Scyk with potent laser cannons? What will happen when the Black Sun outbids the Empire for the services of Boba Fett, the galaxy’s deadliest bounty hunter? You’ll soon have the opportunity to explore these situations in your games of X-Wing. The Most Wanted, StarViper, M3-A Interceptor, and IG-2000 Expansion Packs are all scheduled to arrive at retailers in the fourth quarter of 2014. In the meantime, keep your eyes open for previews of these new Wave VI expansions and other X-Wing news! ... Source: Scum and Villainy (http://www.fantasyflightgames.com/edge_news.asp?eidn=4998)
Title: FFG:Day Three
Post by: RSSFeeder on 19 August 2014, 08:30:03
Day ThreeWatch a Video Recap of our Third Day at Gen Con Indy 2014
Today was our third day at Gen Con Indy 2014, and it was undoubtedly one of our best days so far. In today's video recap, you'll get a closer look at each of the separate parts that make up the Fantasy Flight Gen Con experience. You'll get a closer look at the demo tables, including a more detailed look at the tactical fleet battles of Star Wars™: Armada. You'll find out more about what's hot and what's sold out from our retail booth. And finally, you'll learn more about the tournaments for some of Fantasy Flight's Organized Play games, including the debut Worldeater Tournament for Warhammer 40,000: Conquest. Get a closer look at each of these aspects in the video recap below! Experience the fun and excitement of Gen Con Indy Day Three in the video on YouTube. Day Three has drawn to a close, but there's still a whole day of Gen Con to go! Stop by our booth and visit if you're attending Gen Con Indy 2014, and stay tuned for the final video recap tomorrow night. ... Source: Day Three (http://www.fantasyflightgames.com/edge_news.asp?eidn=4999)
Title: FFG:Day Four
Post by: RSSFeeder on 19 August 2014, 17:00:03
Day FourWatch a Video Recap of the Final Day of Gen Con Indy 2014
Today marked the final day of Gen Con Indy 2014, and though we're sad to see the best four days in gaming conclude, we still had a fantastic final day. In today's video recap, you'll find more details on everything that happened on our final day at Gen Con Indy. You'll get a closer look at the gameplay of XCOM: The Board Game and the beta version of our newest Star Wars™ roleplaying game, Force and Destiny. You'll get an update from the tournament scene to learn more about the climatic finals for Android: Netrunner and X-Wing™, as well as the Worldeater Tournament for Warhammer 40,000: Conquest. Watch the video recap below, and start making plans now to join us here next year! Watch the video recap on Gen Con Indy Day Four on YouTube. Thanks for watching our video recaps of Gen Con Indy 2014, and we hope to see you here in person next year! ... Source: Day Four (http://www.fantasyflightgames.com/edge_news.asp?eidn=5000)
Title: FFG:The Lost Realm
Post by: RSSFeeder on 20 August 2014, 01:30:05
The Lost RealmThe Fourth Deluxe Expansion for The Lord of the Rings: The Card Game
“Many evil things there are that your strong walls and bright swords do not stay. You know little of the lands beyond your bounds. Peace and freedom, do you say? The North would have known them little but for us.”
–Aragorn, The Fellowship of the Ring Prepare to face dangers that would freeze the blood of lesser folk… Fantasy Flight Games is proud to announce the upcoming release of The Lost Realm, the fourth deluxe expansion for The Lord of the Rings: The Card Game! Middle-earth is a richly detailed world, full of different lands and peoples and creatures, and their untold stories lie at the heart of The Lord of the Rings: The Card Game, which is set during the seventeen ominous years that follow the events of Bilbo’s birthday party and lead up to Frodo’s departure from the Shire near the beginning of The Fellowship of the Ring. Within the game, we’ve already trekked through the shadows of Mirkwood and the abandoned halls of Khazad-dûm. We’ve fought alongside the heirs of Númenor to turn back the Orcs of Mordor, and we’ve risked our lives to help the White Council find any knowledge and strength that might help forestall the Shadow and Middle-earth’s impending doom. Now, we turn our attentions toward the lands of the North, which at first seem quiet and tame in comparison to the wild roads we’ve traveled. However, the truth is that this peace is purchased at a cost, and a high one at that. Here, the Rangers of the North have dwelt for many generations, ceaselessly roaming the lands and hunting the servants of the Enemy. These noble Dúnedain work in secret, and are often met with scorn by the simple folk they protect. Still, that is the way they would have it, and their countless, secretive efforts come to light with the heroes, player cards, and three new scenarios of The Lost Realm. 
With its 165 cards, The Lost Realm brings new focus to the wilds of the North, where a handful of Rangers tirelessly follow their prey in order to safeguard the quiet and simple lands to their south. As part of this focus, The Lost Realm introduces two new Dúnedain heroes, numerous Dúnedain allies, and a wealth of player cards that reward players for engaging enemies. Additionally, The Lost Realm relates the dangers of the North in nine new encounter sets that you and your friends will use to play through the expansion’s scenarios. These encounter sets also lay the foundation for your future journeys into the Angmar Awakened cycle of Adventure Packs. For more information about how The Lost Realm allows you to confront these perils alongside the Rangers of the North, we turn to lead developer Caleb Grace. Lead Developer Caleb Grace on the Rangers of The Lost Realm “Lonely men are we, Rangers of the wild, hunters – but hunters ever of the servants of the Enemy; for they are found in many places, not in Mordor only.”
–Aragorn, The Fellowship of the Ring The Dúnedain theme in The Lost Realm was inspired by the passage from The Fellowship of the Ring in which Aragorn explains to Boromir how the Rangers of the North have long protected the free peoples of Middle-earth.  These Rangers were the greatest hunters of their time, and their constant vigilance drives the majority of the expansion’s player cards. These Rangers were the greatest hunters of their time, and their constant vigilance drives the majority of the expansion’s player cards. Not only was this a fun theme to explore, it opens a lot of exciting new possibilities in the game. While many of the game’s most successful strategies focus on maintaining a low threat in order to avoid engaging multiple enemies at once, the Rangers work very differently. They actively seek out their foes and gain strength from being engaged with them. One great example of this theme is an ally unlike any other: Dúnedain Hunter (The Lost Realm, 4). Though this Dúnedain ally has attributes typically found on an ally with a cost of four or more resources, he costs zero. That is because the Dúnedain Hunter has a Forced effect that triggers when he enters play: “After Dúnedain Hunter enters play, search the top 5 cards of the encounter deck for a non-unique enemy and put it into play engaged with you. If no enemy enters play by this effect, discard Dúnedain Hunter. Shuffle the encounter deck.” The Rangers were always scouring the hills and woods for signs of the Enemy’s servants, aiming to remove any threat they might pose, and that’s why the Dúnedain Hunter isn’t content to wait for enemies to appear from the encounter deck. Instead, he brings the enemy to you. But why would you want to engage an enemy? Is the reward really worth the risk of engaging an Orc, or Troll, or Nazgûl? If you include enough Dúnedain and Ranger cards in your deck, the answer is “absolutely!” Aside from allowing you to gain a powerful ally without paying any resources, the Dúnedain Hunter’s ability to engage an enemy opens up some amazing combos. 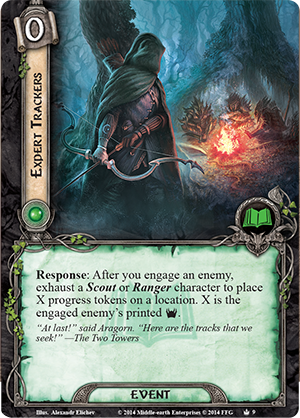 For example, immediately after you put that enemy into play engaged with you, you can exhaust the Dúnedain Hunter to play Expert Trackers (The Lost Realm, 9): “Response: After you engage an enemy, exhaust a Scout or Ranger character to place X progress tokens on a location. X is the engaged enemy’s printed threat strength.” This lore event allows you to track the enemy you just engaged back to its lair, be it the active location or a location in the staging area, and then explore it, potentially well before you’d be able to travel to it. For example, immediately after you put that enemy into play engaged with you, you can exhaust the Dúnedain Hunter to play Expert Trackers (The Lost Realm, 9): “Response: After you engage an enemy, exhaust a Scout or Ranger character to place X progress tokens on a location. X is the engaged enemy’s printed threat strength.” This lore event allows you to track the enemy you just engaged back to its lair, be it the active location or a location in the staging area, and then explore it, potentially well before you’d be able to travel to it.
But that’s not the only advantage the Dúnedain gain from being engaged with enemies. During the same planning phase that you play Dúnedain Hunter and Expert Trackers, you could also play Sarn Ford Sentry (The Lost Realm, 5) and trigger her Response effect: “After Sarn Ford Sentry enters play, draw 1 card for each enemy engaged with you.” The Dúnedain possessed an uncanny ability to observe their quarry without being detected, and in this way they were able to gain knowledge of their enemy’s movements. The Sarn Ford Sentry’s ability represents that knowledge with card draw based on the number of enemies you are engaged with. Even drawing one card can make a huge difference, but with a well-crafted Dúnedain deck, it isn’t difficult to draw three or more cards when the Sarn Ford Sentry enters play. Of course, no one can stay engaged with three or more enemies indefinitely, and it will eventually become necessary to destroy those enemies. That is why The Lost Realm also includes a new Tactics hero who excels at just that – the Chieftain of the Dúnedain, Aragorn (The Lost Realm, 1). 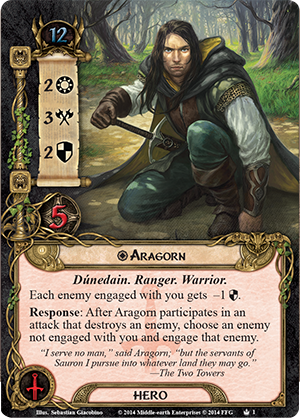 While previous versions of Aragorn have stressed his abilities as a guide and protector, this Tactics version emphasizes his mighty fighting prowess and peerless hunting skills. In the books, few could match Aragorn’s skill at arms. His presence in battle was enough to inspire his companions and intimidate his enemies. This is represented in the first line of his text: “Each enemy engaged with you gets -1 defense.” If you’re going to be engaged with multiple enemies at once, that one-point reduction of their defense can make a big difference when it comes time to deal with them. While previous versions of Aragorn have stressed his abilities as a guide and protector, this Tactics version emphasizes his mighty fighting prowess and peerless hunting skills. In the books, few could match Aragorn’s skill at arms. His presence in battle was enough to inspire his companions and intimidate his enemies. This is represented in the first line of his text: “Each enemy engaged with you gets -1 defense.” If you’re going to be engaged with multiple enemies at once, that one-point reduction of their defense can make a big difference when it comes time to deal with them.
The second line of his text represents his skill as the greatest hunter of his time: “Response: After Aragorn participates in an attack that destroys an enemy, choose an enemy not engaged with you and engage that enemy.” This effect is incredibly versatile in its uses. Is there an enemy in the staging area that is just waiting to pounce once your threat goes up at the end of the round? Use Aragorn to turn the tables on that enemy by engaging it and giving it a penalty to defense, making it that much easier to defeat, potentially within the same Combat phase that you engaged it. Is your teammate engaged with an enemy he can’t handle? Just destroy an enemy engaged with you, and Aragorn can draw that enemy away from your friend’s heroes. Aragorn’s versatility is fitting for a hero who accomplished so many different tasks before and throughout The Lord of the Rings, and it can easily make him the centerpiece of any deck built around the Dúnedain trait. Knowledge of the Enemy What evils will the Dúnedain uncover in The Lost Realm? The expansion’s three scenarios pit your heroes against a rising tide of Orcs, Undead, and even Sorcery. Moreover, the expansion also introduces a number of side quests that your heroes will be able to explore even as they hunt the Dark Lord’s servants throughout the North. You can find more information about the expansion and its Dúnedain, scenarios, and side quests on the expansion’s description page, and we’ll share even more details about The Lost Realm and its cards in an upcoming series of previews. The Lost Realm is scheduled to arrive at retailers early in 2015. Until then, stay vigilant and continue your work to shield Middle-earth’s simpler folk from terrors that would freeze their blood! ... Source: The Lost Realm (http://www.fantasyflightgames.com/edge_news.asp?eidn=5003)
Title: FFG:BattleLore: Command
Post by: RSSFeeder on 20 August 2014, 10:00:06
BattleLore: CommandAnnouncing a Digital App of Tactical Battles in Terrinoth
For a moment it seemed that the tide of war might have turned, but it was only a moment. The Uthuk Y’llan have returned more powerful than ever. They storm throughout Terrinoth, laying waste to our land and massacring our people. With these bloodthirsty demons clamoring at our gates, we place our hope in you, Commander, knowing that you have the knowledge of lore to awaken the Rune Golems and the military talents to lead our forces to victory. This is the last chance to save Terrinoth. You must defeat the Uthuk Y’llan. Fantasy Flight Games is proud to announce BattleLore: Command, a digital game for iOS, Android, and PC, based on the tactical board game BattleLore Second Edition. Take command of the noble Daqan Lords’ army in a single-player campaign to vanquish the vicious Uthuk Y’llan from Terrinoth, or control either army in battles against a friend on the same wireless network. With vividly-realized battlefields and engaging animations, Battlelore: Command brings tactical combat to life. Watch a video trailer of BattleLore: Command above! Formidable Opponents and Challenging Missions The single-player campaign against the Uthuk Y’llan takes you throughout Terrinoth on a series of unique missions, from Hernfar Isle in the middle of the fast-flowing River Lothan, the ancient Tomb of Pelius and the sand-covered Steppes. Depending on the mission, your troops must keep the enemy from burning homes, recover powerful magical artifacts, or stop the massacre of innocent people. You begin a battle by mustering an army particularly suited to the current mission and strategically deploying your forces. In the first battle, the only Daqan units available to you are the Yeoman Archers and Citadel Guards. As the campaign progresses and missions become more difficult, other types of units come into your command: mounted Riverwatch Riders, monstrous Rune Golems made of living stone, and mighty flying Roc Warriors. Every unit has a special ability that may be activated in combat. Yeoman Archers can shoot twice if they do not have to move before firing; Rune Golems can stun the enemy so that it cannot move, attack, or retreat. 
The Uthuk Y’llan army also grows over the course of the campaign. At first, only Blood Harvesters and Viper Legions, mortals transformed by dark magic, terrorize the land. Soon, however, demons come to their side: rabid Flesh Ripper Brutes threaten the Daqan cavalry, the Obscene unrelentingly bludgeon their opponents, and titanic Chaos Lords spread destruction across the battlefield. Of course, the Uthuk Y’llan units also have special abilities in combat: Viper Legions can poison enemy units, Flesh Ripper Brutes unfailingly wound any weakened units they attack. In the multi-player Skirmish mode, you and your friend select a scenario to play and deploy the most powerful armies possible using the full range of units. Each scenario takes place on a different battlefield and has a different victory condition, from utterly destroying your opponent’s forces to merely preventing them from advancing into your territory. The Daqan Lords and the Uthuk Y’llan each possess unique strengths for a commander to utilize – and unique vulnerabilities to exploit. 
Commands, Maneuvers, Tactics, and Lore Combat begins once the armies have been mustered and deployed. Sometimes the enemy advances immediately, other times you will have the opportunity to attack first or take a stronger position. You have a limited set of commands, each governing a different number of units in the three sections of the battlefield. Some commands focus on the left flank, right flank, or the center, others allow allow you to make a line advance, or to move three units of a specific type no matter their location. Plan your movements and positions carefully. You could try to outflank the enemy and ambush them, gang up on an isolated unit, or pull your forces back and wait for a better opportunity. Occupying a building shields a unit from the first hit scored against it, while surrounding an enemy unit enables you to pin them, which deals additional damage beyond any hits you score. Positioning your units close together may prevent them from being pinned, or from having to retreat. A 360 degree view of the battlefield enables you to see your position, and the enemy’s, from any vantage, to zoom in close to forests or strategic chokepoints or pull back and view the entire battlefield at once. 
BattleLore: Command rewards good tactics, but there is a random component to combat. Every unit has a combat value that determines how many “dice” are rolled in an attack. As the combat results are revealed, animations show you the exact effect of the attack: archers take aim and shoot, Flesh Ripper Brutes roar and rear up to attack, retreating units turn and run, slain Rune Golems crumble into lifeless stone and dust. Combat in BattleLore: Command consists of more than blade meeting blade. Lore powers, activated either during an attack or defensively at the end of your turn, endow armies with fantastical abilities. Enchanted Arrows allows Yeoman Archers to hit any target on the battlefield, regardless of distance or obstacles that block line of sight. Stalwart Defenders allows all Daqan units to ignore one damage and one retreat during an enemy turn. The Uthuk Y’llan can use Chaos of Battle to force the Daqan army to move randomly around the field, or Blood Sacrifice to strategically weaken one unit in order to add strength to another. 
Take the Battlefield BattleLore: Command provides an engaging and challenging combat experience, both for expert players of the board game and for players who are entirely new to BattleLore. Its missions will test and develop the tactical skills of any commander, whether leading the Daqan Lords in the defense of their homeland or ravaging Terrinoth with the Uthuk Y’llan. Prepare to command an army in battle against its greatest foe. Look for Battlelore: Command in the App store, Google Play and Amazon Marketplace in the last quarter of 2014. ... Source: BattleLore: Command (http://www.fantasyflightgames.com/edge_news.asp?eidn=5004)
Title: FFG:Follow the Jedi Path
Post by: RSSFeeder on 21 August 2014, 03:00:03
Follow the Jedi PathJoin the STAR WARS (R): Force and Destiny (TM) Beta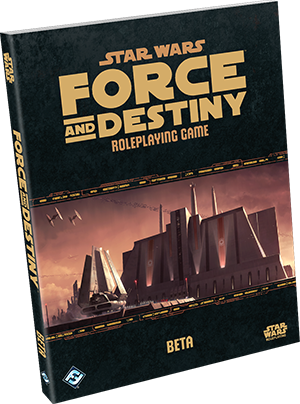
“My ally is the Force. And a powerful ally it is. Life creates it, makes it grow. Its energy surrounds us and binds us. Luminous beings are we... not this crude matter.”
–Yoda Fulfill your destiny as one of the galaxy’s few remaining Force users! You’ll soon have your chance to join the beta test for the Star Wars®: Force and Destiny™ Roleplaying Game. The third of three epic, cross-compatible Star Wars roleplaying systems, Force and Destiny will soon be made available for beta testing through our webstore and participating retailers. 
Inherit the Legacy of the Jedi Knights To encapsulate the operatic grandeur of the Star Wars universe, the Star Wars Roleplaying Game is related across three epic, cross-compatible roleplaying systems. Each system offers a unique approach to the Star Wars universe, each Core Rulebook contains all the information you need to run a full campaign, and all three systems share the same core mechanics, meaning you can easily use materials from all three systems within a single campaign.
You have questions about the beta test? We have answers:
|
|
The first of these installments, Star Wars®: Edge of the Empire™, focuses on the adventures and struggles of those smugglers, scoundrels, colonists, and other characters who live on the fringes of the galaxy, just at the edge of the Empire’s influence. Adventures in the second installment, Star Wars®: Age of Rebellion™, thrust players into the midst of the ongoing Galactic Civil War. As they try to help the rag-tag Rebel Alliance to overthrow the tyrannical Galactic Empire, the heroes may gather intel, rally new recruits, launch surgical strikes, or engage in deadly dogfights. Force and Destiny is the game’s third standalone installment, and allows players to follow in the footsteps of those nigh-mythical guardians of peace and justice—the Jedi Knights. Your characters possess the rare and dangerous ability to touch and use the Force, the energy field that binds and surrounds every living thing. It is up to them whether they use this power to try and fight the forces of injustice and oppression, or if they give into the darkness and temptation within and become agents of evil. Fulfill Your Destiny Lead Developer Sam Stewart offers further insight into the nature of the Force and Destiny roleplaying experience, and a couple of the mechanics that give it shape: “Force and Destiny shares the same ruleset as Age of Rebellion and Edge of the Empire, allowing the three games to be played separately or in concert. Each of the three games are unique, however, thanks to the stories they tell and certain game mechanics that enhance the telling. The Morality mechanic is one of these, and central to the Force and Destiny experience. “Morality is the counterpart to Duty from Age of Rebellion and Obligation from Edge of the Empire. Even so, where Duty and Obligation represent external commitments and relationships, Morality represents a character’s internal struggles. As such, each character keeps track of his own Morality, although it can also affect a character’s relationships with his friends and enemies. 
“Our goal was to create a game mechanic that represents the spiritual battles between good and evil that we see throughout the Star Wars movies. We watch Luke Skywalker struggle with making the right decision, and we see the consequences – both good and bad – of his actions. We also had to relate our game mechanic to the Force, and the balance between light and darkness. “A character’s Morality runs along a track that stretches between one and 100. Higher values represent characters who are more virtuous “paragons” of the Force. Lower values represent characters who may be in danger of falling to the dark side of the Force, or even those who have already embraced evil and joined the darkness. However, a character’s Morality is always in motion. Good characters can fall and become evil, and even the vilest Dark Lord of the Sith may find a chance for final redemption. “We represent this motion using the second part of the Morality mechanic: Conflict. Conflict is what PCs earn during the course of a game session for performing ‘bad’ deeds. They can earn Conflict by using the dark side of the Force to manifest Force powers. They may also earn Conflict by failing fear checks; after all, fear leads to anger, and anger leads to hate. Of course, a PC who does something truly evil, such as murdering innocents, is guaranteed to earn a lot of Conflict! “At the end of each session, each character’s total Conflict is combined with a random modifier. The more Conflict a PC has, the more likely his Morality decreases. The less he has, the more likely that his good deeds may outweigh his bad, and that his Morality will stay the same, or even increase. This was done deliberately, because we wanted to ensure that taking a little Conflict was seen as a reasonable risk by players. Why not use the dark side just once to manifest a crucial Force power, or steal a small item to further the story? Surely, a couple Conflict won’t hurt. “In this way, we’ve turned Morality into a narrative mechanic that rewards players who make principled decisions over the long term, while tempting them with selfish choices in the short term. The very real ramifications of one’s moral choices are key to the experience of playing Force users, and they’re something I think players will find very compelling.” Ready, Are You?  The Jedi are all but extinct. Their legacy is maintained only by a wise master and a young farm boy turned Rebel hero. Is it your destiny to help rebuild the Jedi order? The Jedi are all but extinct. Their legacy is maintained only by a wise master and a young farm boy turned Rebel hero. Is it your destiny to help rebuild the Jedi order?
The Star Wars: Force and Destiny beta is a limited edition, 256-page softcover rulebook, and it includes all the information players and GMs need to begin epic campaigns, full of personal conflicts and Force powers, all set within the Star Wars galaxy and drawing upon one of its most resonant themes. However, it is important to note that some of the elements in this beta are not representative of the final product. Much of the art and background material has been removed to provide a more concise playtesting experience, and some contents may change between the beta and the final product. Keep your eyes peeled for more information about the Force and Destiny beta. Otherwise, as you wait for your chance to get involved, you can learn more about the game from its description page. ... Source: Follow the Jedi Path (http://www.fantasyflightgames.com/edge_news.asp?eidn=5005)
Title: FFG:Dark Wings, Dark Words
Post by: RSSFeeder on 22 August 2014, 04:30:03
Dark Wings, Dark WordsA Dire Message Is Now Available for A Game of Thrones: The Card Game
A scrap of leather fluttered down into her lap. When she read the dry brown words, her black mood grew blacker still. Dark wings, dark words. The ravens never brought her glad tidings.
–George R.R. Martin, A Dance with Dragons A Dire Message, the final Chapter Pack in the Conquest and Defiance cycle for A Game of Thrones: The Card Game, is now available at your local retailer and online through our webstore! You’ll find the conclusion of the Conquest and Defiance cycle in this Chapter Pack, expanding the cycle’s major themes even further. A host of new and powerful prized cards await, as well as vital support cards for multi-House decks. Even as A Dire Message continues these new themes, you’ll also find new, prized versions of iconic characters and locations, including Robert Baratheon, the Iron Throne, and Mad King Aerys. 
Among these new cards, House Martell finds plenty of new ways to outwit their opponents and control enemy characters! Outwit Your Opponent  Unlike the northmen of House Stark, who slay their enemies in battle, or the schemers of House Lannister, who use their intrigues to kneel enemy characters, many of House Martell’s most potent effects use clever tricks to return enemy characters to their owner’s hand. With cards like A Game of Cyvasse (A Change of Seasons, 57) or Ghaston Grey (Forging the Chain, 34), House Martell keeps troublesome characters out of play, and you’ll gain more tricks to continue this theme in A Dire Message. Unlike the northmen of House Stark, who slay their enemies in battle, or the schemers of House Lannister, who use their intrigues to kneel enemy characters, many of House Martell’s most potent effects use clever tricks to return enemy characters to their owner’s hand. With cards like A Game of Cyvasse (A Change of Seasons, 57) or Ghaston Grey (Forging the Chain, 34), House Martell keeps troublesome characters out of play, and you’ll gain more tricks to continue this theme in A Dire Message.
Your first method for returning opposing characters to your opponent’s hand is Locked in a Cell (A Dire Message, 109). This event is prized, and it bears the text, “Any Phase: Kneel 3 influence or kneel a Noble character to choose a character without a crest. Return that character to its owner’s hand.” The versatility of this event is nearly limitless, since you can play it at almost any time. You may wait until your opponent declares only one defender, or play it after he declares a challenge with one attacker. You can even combine Locked in a Cell with Blood Orange Grove (The Champion’s Purse, 30) to target enemy characters that do have a crest! Even with the many tricks and powerful events at the Martells’ disposal, it’s possible that your opponent might still rush past you to build a formidable board of characters. At that point, it’s good to have The Boneway (A Dire Message, 108) in play. Whenever your opponent plays or reveals a prized card, you may trigger The Boneway to have each player choose up to three characters that he controls. All unchosen characters are returned to their owners’ hands. By resetting each player to three characters whenever your opponent plays a prized card, you can ensure that your opponent faces you on equal terms. You may even discourage your opponent from playing prized cards altogether, depriving him of his most powerful tools, and clogging his hand with prized cards. If that happens, Doran Martell (Spoils of War, 10) is sure to help you gain some additional power from your Intrigue challenges. Claim the Throne The coming of A Dire Message marks the thrilling finale of the Conquest and Defiance cycle. Whether you band two Houses together in a single deck, or use your prized cards to establish victory, you’ll find the cards you need in this Chapter Pack. Pick up your copy of A Dire Message at your local retailer today! ... Source: Dark Wings, Dark Words (http://www.fantasyflightgames.com/edge_news.asp?eidn=5006)
Title: FFG:Choose Your Fate
Post by: RSSFeeder on 22 August 2014, 13:00:04
Choose Your FateDarkness and Light Is Now Available for STAR WARS (TM): The Card Game
“There is good in him. I've felt it. He won't turn me over to the Emperor. I can save him.”
–Luke Skywalker, Star Wars: Return of the Jedi Darkness and Light, the final Force Pack in the Echoes of the Force cycle for Star Wars™: The Card Game, is now available at your local retailer and online through our webstore! With this Force Pack, the Echoes of the Force cycle comes to a dramatic conclusion. A long-lost Jedi returns to the Jedi Temple on Coruscant, and C-3PO raises native support on the forest moon of Endor by impersonating a deity. Meanwhile, the Imperial Navy’s Fighters grow stronger and more reliable than ever, and you gain the opportunity to delve into the secrets of Jabba’s palace and the schemes of Salacious B. Crumb. 
On the planet Cularin, however, a new power is rising in the Sith cult. The call of the cult has gone forth, and cultists are gathering to the power of the dark side. Will you join the cult, or work to destroy it? You decide in the Darkness and Light Force Pack. The Believers  Initiation into the cult of the Believers begins with the objective of this set: The Call of the Cult (Darkness and Light, 620). This objective possesses a Reaction that could certainly help you gain an early lead over the light side. When this objective enters play, you immediately set the Balance of the Force to the dark side. If this objective is among your starting objectives, you can advance the Death Star dial two spaces before the light side even has a chance to react. Even if The Call of the Cult appears later in the game, it can help you seize control or tip the balance of power in your favor. Initiation into the cult of the Believers begins with the objective of this set: The Call of the Cult (Darkness and Light, 620). This objective possesses a Reaction that could certainly help you gain an early lead over the light side. When this objective enters play, you immediately set the Balance of the Force to the dark side. If this objective is among your starting objectives, you can advance the Death Star dial two spaces before the light side even has a chance to react. Even if The Call of the Cult appears later in the game, it can help you seize control or tip the balance of power in your favor.
This objective set also offers you two copies of a highly useful Character in the Believer Initiate (Darkness and Light, 622). For only two resources, the Believer Initiate has a fine spread of combat icons, three damage capacity, and even provides a resource! The caveat, however, is that you must sacrifice the Believer Initiate if the Balance of the Force is ever with the light side. The Call of the Cult objective will let you turn the Balance of the Force to the dark side, enabling you to play your Believer Initiates on your first turn of the game. But even their sacrifice can become a tool of the dark side, if you’ve fielded the power of the Executor (Escape from Hoth, 308). You’ll find two copies of a powerful enhancement in this objective set as well, as the dark side offers you the power of Hate (Darkness and Light, 623). This card enhances any Character unit in play, blanking that Character’s printed text box. The versatility of this enhancement is vast, allowing you to neuter many of the light side’s most powerful units, such as Luke Skywalker (Core Set, 92), Chewbacca (Edge of Darkness, 319), or Yoda (Join Us or Die, 568). Enhancements such as Hate would become even more powerful if you could move them from unit to unit, and you’ll find a way to do just that with the Cularin Cultist (Darkness and Light, 621). This unit possesses a valuable  icon, and can be a useful defender. This unit also has a Reaction that reads, “After this unit resolves a strike, move an enhancement from one unit to another eligible unit controlled by the same player.” With the Cularin Cultist’s Reaction, you can move Hate to whatever unit troubles you most at any time. icon, and can be a useful defender. This unit also has a Reaction that reads, “After this unit resolves a strike, move an enhancement from one unit to another eligible unit controlled by the same player.” With the Cularin Cultist’s Reaction, you can move Hate to whatever unit troubles you most at any time. Find a Balance Whether you support the Sith cult on Cularin, fly with the Fighters of the Imperial Navy, or rally the support of the Ewoks, there are plenty of new options in the objective sets in this new Force Pack. Darkness and Light is now available at your local retailer! Pick up your copy today. ... Source: Choose Your Fate (http://www.fantasyflightgames.com/edge_news.asp?eidn=5007)
Title: FFG:Race for the River Crossing
Post by: RSSFeeder on 22 August 2014, 21:30:07
Race for the River CrossingTrouble in Tharbad Is Now Available for The Lord of the Rings: The Card Game
“There are some of us still who go abroad for the gathering of news and the watching of our enemies, and they speak the languages of other lands. I am one. Haldir is my name.”
–J.R.R. Tolkien, The Fellowship of the Ring Trouble in Tharbad, the third Adventure Pack in The Ring-maker cycle for The Lord of the Rings: The Card Game, is now available at your local retailer and online through our webstore! The river town of Tharbad is little more than a collection of dilapidated buildings set amid ruined and crumbling causeways. However, this haven of freelancers and highwaymen is also home to Nalir, the Dwarf with a map to Celebrimbor’s hidden forge, the secrets of which may give the White Council some new strength to fight back against the growing Shadow. Accordingly, Saruman the White has tasked several of Middle-earth’s greatest heroes with recovering those secrets and returning them to Isengard, but they aren’t the only ones who have been sent to find Nalir and his map… In Trouble in Tharbad, Spies and Orcs harry your heroes at every turn. Confronted by their overwhelming hordes, your heroes must find a safe route out of the city and take Nalir with them. The Orcs are howling. It’s time to slip out of The Empty Mug and race for the river crossing. Move swiftly and silently. The chase is on! 
The Chase The Trouble in Tharbad begins with Nalir (Trouble in Tharbad, 68). The Dwarf who sells you the map to Celebrimbor’s hidden forge has unfortunately also made previous arrangements to deliver it to one of Mordor’s spies, Bellach (Trouble in Tharbad, 70). As Bellach shows up to collect the map, Nalir darts for the tavern door, and your heroes follow, using the momentary chaos to slip out into the city’s rundown streets. There, Orcs and spies hunt you down, and the scenario from Trouble in Tharbad begins as a dramatic chase scene. You have limited time to make your way out of the city before Bellach can direct his agents to seal off its exits, and his forces outnumber yours too badly for you to fight your way to freedom. Instead, the order of the day is secrecy. Throughout Double Dealings (Trouble in Tharbad, 66), the scenario’s first quest stage, your heroes are ducking and weaving through Tharbad’s abandoned alleys and crumbling causeways. 
You’re trying to elude the Orcs and spies that are hunting you down, even as you work your way to the river crossing. Mechanically, this translates to a reduction in threat; to slip free from your pursuers, you must reduce your threat to zero. Instead of requiring you to place progress on the quest stage, then, Double Dealings comes with a Forced effect that allows you to reduce your threat: “Forced: After 1 or more progress is placed on this quest, cancel all progress and reduce each player’s threat by an equal amount.” 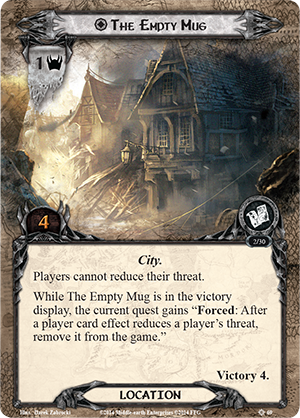 However, if you hope to get out of Tharbad, you’ll first need to put some distance between yourself and The Empty Mug (Trouble in Tharbad, 69), and that means that its Forced effect will be sitting in your victory display: However, if you hope to get out of Tharbad, you’ll first need to put some distance between yourself and The Empty Mug (Trouble in Tharbad, 69), and that means that its Forced effect will be sitting in your victory display:
“Forced: After a player card effect reduces a player’s threat, remove it from the game.” Among other things, this means that Trouble in Tharbad offers Secrecy decks their moment to shine. Not only do they start further along the path to victory, but they will find a built-in quest mechanic to help them reduce their threat and gain the full benefits of their Secrecy discounts. The only problem is that they’ll also have to deal with Nalir, who proves to be an ongoing liability. Because he knows the location to Celebrimbor’s forge, you can’t leave him behind, but you’ll probably wish you could. Nalir also comes with a Forced effect, one that makes him the center of attention wherever he goes: “Forced: At the beginning of the refresh phase, raise your threat by 1 for each player in the game.” The Help Even as your heroes race to escape the Trouble in Tharbad, the Adventure Pack introduces a number of new allies that may come to their aid. Chief among these is the new hero, Haldir of Lórien (Trouble in Tharbad, 56).  Roaming far from his home in Lothlórien, Haldir is a Ranger and Scout who extends the cycle’s exploration of the Silvan trait to new territories. With two Willpower, he can make valuable contributions to your quests, but his Ranged keyword and Combat Action may allow him to make even more valuable contributions to your fellowship’s efforts within the Combat phase. Roaming far from his home in Lothlórien, Haldir is a Ranger and Scout who extends the cycle’s exploration of the Silvan trait to new territories. With two Willpower, he can make valuable contributions to your quests, but his Ranged keyword and Combat Action may allow him to make even more valuable contributions to your fellowship’s efforts within the Combat phase.
“Combat Action: If you have not engaged an enemy this round, exhaust Haldir of Lórien to declare him as an attacker (and resolve his attack) against an enemy not engaged with you. Limit once per round.” Notably, Haldir’s ability allows him to declare an attack against an enemy before it would attack your teammate, and it even allows him to attack an enemy in the staging area. Altogether, it allows Haldir to turn the tables on any foes that would seek to assail your fellowship… like the many Orcs and spies in Tharbad. However, even Haldir’s talents won’t be enough, on their own, to see you safely through the roads of Tharbad. Fortunately, Trouble in Tharbad offers you plenty of other support. There are two Silvan allies, including the Galadhrim Minstrel (Trouble in Tharbad, 63), which can help fetch powerful events like Pursuing the Enemy (Trouble in Tharbad, 60); there’s Gwaihir (Trouble in Tharbad, 59), the great king of the Eagles, and there’s even help from Gondor, as the Herald of Anórien (Trouble in Tharbad, 57) arrives. Better yet, if you feel you’re truly doomed, you can give the Herald “doomed 2” when you play him and bring into play another ally of printed cost two or less. In this way, the Herald even allows you – or a teammate – to recruit allies that don’t match your spheres of influence, expanding your deck-building options by allowing a mono-Leadership deck to recruit powerful allies like Gléowine (Core Set, 62) or Arwen Undómiel (The Watcher in the Water, 58), whose game texts can change how your deck functions. There’s No Time to Lose! There’s no time to lose! Bellach and his horde of Orcs are moving swiftly to seal the city and hunt you down. Trouble in Tharbad is now available at your local retailer and online through our webstore. Pick up your copy today! ... Source: Race for the River Crossing (http://www.fantasyflightgames.com/edge_news.asp?eidn=5008)
Title: FFG:Stay on Target
Post by: RSSFeeder on 23 August 2014, 06:00:07
Stay on TargetAnnouncing an Ace Career Supplement for Age of Rebellion
“Watch your back! Fighters above you, coming in!”
–Wedge Antilles Fantasy Flight Games is proud to announce the upcoming release of Stay on Target, the first career supplement for the Star Wars®: Age of Rebellion™ Roleplaying Game! Stay on Target focuses on the Ace career, expanding it with new specializations, talents, and signature abilities. Simultaneously, it introduces new character options for all players, including new species, starfighters, modifications, and equipment, as well as options for alien mounts. These large beasts feature prominently in one of the book’s new Ace specializations but lend advantages to any combatant who rides them into battle. Additionally, GMs gain new tools to help them incorporate Aces, starfighters, mounts, and rivals into a wide range of exciting and memorable adventures. 
It’s Not Just a Career, It’s a Calling Part of the reason the Ace excels at piloting, driving, and riding is because he views his ride as a means of more than transportation; it becomes a means of expression. More than just about anyone, the Ace can intuitively adjust his actions to account for the presence and limitations of his ride. This is true whether that ride is a single-pilot starfighter, a landspeeder, or a temperamental dewback. Players looking to create an Ace, or to advance an Ace who’s ready for an new challenge, will find plenty of options within Stay on Target. The supplement rounds out the career with three new specializations: Beast Rider, Hotshot, and Rigger. Beast Rider Sometimes, instead of spending credits to adapt vehicles to worlds with extreme environments, the Rebellion finds it easier to call upon the talents of the Beast Rider. Just about anyone can ride a trained mount, but the Beast Rider is the one who can break in wild mounts and train them. Moreover, once he has trained a mount, the Beast Rider can coax it to perform incredible feats, even in the heat of a battle.  Even without a mount, the Beast Rider is an expert survivalist and can prove a great asset to any team looking to confront the Empire in rough and difficult environments. Even without a mount, the Beast Rider is an expert survivalist and can prove a great asset to any team looking to confront the Empire in rough and difficult environments.
Hotshot Where the Ace Pilot uses hard-won skill, technique, and by-the-book tactics, the Hotshot is naturally gifted, overly aggressive, and makes the rest up as he speeds along. For the Hotshot, risk-taking isn’t just a style of flying, it’s a way of life. When he sees a chance, he takes it without blinking. His unpredictable and often irrational behavior, combined with his raw talent and control in the cockpit, makes the Hotshot a lethal adversary and a valuable companion, even if you’re likely to suffer through his bragging about his exploits afterward. Rigger While most Rebel Aces operate standard vehicles maintained by engineering crews, a surprising number bring their own private vehicles with them into a fight. The Rigger doesn’t believe in risking his life from the seat of a stock-class anything, and is always adding, tweaking, and fine-tuning his vehicle not only to achieve the highest performance, but also to bring unexpected surprises with him to the battlefield. While each of these specializations further defines the Ace’s unique relationship with his ride, a pair of signature abilities allow experienced Aces to refine their talents to a degree that others simply cannot match. Recruiting for the Rag-Tag Rebellion While it focuses on the Ace career, Stay on Target nonetheless provides an abundance of materials certain to appeal to other players and GMs. The book introduces a wide array of weapons, armor, vehicles, and starfighters, as well as new Astromech Droids and rules for running Astromechs as NPCs or slotting PC Astromechs into starfighters. 
Additionally, players can choose to build characters from three new playable species: Chadra-Fan, Dressellian, and Xexto. While these species are particularly well-suited to the Ace career, they can just as easily play other roles within the Rebel Alliance, or even within games set within the Star Wars®: Edge of the Empire™ roleplaying system. Finally, as Rebel and Imperial pilots continue to fly their starfighters into engagements across the galaxy, Stay on Target offers Game Masters a range of different advice, insight, and adventure seeds to help incorporate Aces, starfighter battles, and mounts into any Age of Rebellion campaign. You’ll find new ways to think about rivals, and you’ll find ways to work your Aces into any sort of adventure. 
The Stars Are the Limit In Stay on Target, the Rebellion’s finest pilots gain the opportunity to help turn the tides of battle, but to do so they’ll need all the help they can get. Look for this Age of Rebellion rules supplement to enhance your campaign once it arrives at retailers in the fourth quarter of 2014! ... Source: Stay on Target (http://www.fantasyflightgames.com/edge_news.asp?eidn=5009)
Title: FFG:The Power of Dragons
Post by: RSSFeeder on 23 August 2014, 14:30:02
The Power of DragonsPreview the Draconic School of Magic in Bestial Forces
Dauziel chanted slowly, musically, moving his fingers and hands to a relentless, internal rhythm. In a moment the spell was complete, and the stone wall before him crumbled into sand at his feet. Behind the wall lay a treasure chest. Around the chest lay a coiled beast. It awoke, arching its back and rustling its wings before turning a lazy eye towards the intruding wizard. Dauziel started running; the first flames already licking at his cloak. The powers of all creatures are yours to command in Bestial Forces, the second expansion for Wiz-War. Whether you bring creatures into the labyrinth to use as your minions, or channel wild magic through your wizard, you’ll find cards to support both styles of spellcraft in this expansion. In our last preview, we took a closer look at the Mythology school of magic, which features a host of creatures and ancient relics drawn from the wellsprings of antiquity. Today, however, we’ll turn to a school of magic devoted to one creature: the dragon!
Guard Your Hoard The Draconic school of magic offers a host of spells based on the unique powers of a dragon. If there’s one thing dragons excel at, it’s guarding their treasure, and you’ll find new spells to help you do just that in this school of magic. The first spell to help you safeguard your treasure is Treasure Lust. You can maintain this spell over several turns, and as long as it persists, every time you attack a wizard carrying a Relic or a treasure, that wizard must immediately drop it or take three additional damage from the attack! Whether you force your opponent to drop your treasure or deal extra damage, you’ll come closer to winning the game with every attack.  
Another way to keep your opponent from making off with your treasure is by using a Tail Slap. This attack allows you to attack a wizard and deal damage equal to a die roll. The best part, however, is that if your target takes any damage, he must drop a treasure or an item of your choice in his square, allowing you to indulge your draconic urges and steal treasure for yourself. As you jealously hoard your own treasure, you may decide to summon a deadly drake. This creature can be summoned like the creatures in the Mythology school of magic, but you may also summon the drake as a counter spell when another wizard picks up a treasure in your home sector. Summoning the drake as a counter spell places the drake in the other wizard’s square and forces him to drop the treasure immediately. What’s more, treasure in the same square as the drake can never be picked up by another wizard, allowing you to keep your treasures safe as long as the drake lives. Skin to Scales Dragons aren’t just experts at gathering and keeping treasure – they’re also very hard to kill. The Draconic school of magic offers you some of this same protection. You might choose to cast the Dragon Scales spell and harden your skin to impenetrable scales. You can cast this spell on yourself, and while this spell lasts, you are immune to fire damage and reduce all damage that you would take by one, massively increasing your chances of long-term survival in the labyrinthine hallways of Wiz-War.  
You might also take advantage of a dragon’s natural immunities by playing Magic Resistance. You may play this counter spell after you or one of your creatures is attacked. The attacking wizard must give you an energy card from his hand, or the attack is cancelled, granting you some added protection against whatever spells may target you. Of course, even a dragon is wounded sometimes. Thankfully, that’s when you can call upon the regenerative prowess of a dragon’s blood. By playing Regeneration, you or a creature immediately heal one life, and as long the spell has energy, the spell’s target heals one life at the beginning of each of your turns. A Flood of Fire The power of dragons is nearly unmatched, even in the magical world. You can take advantage of that power by harnessing the spells of the Draconic school of magic. There are plenty of other spells in Bestial Forces as well: join us next time to preview the far-reaching power of the Totem school of magic! Preorder Bestial Forces at your local retailer today! ... Source: The Power of Dragons (http://www.fantasyflightgames.com/edge_news.asp?eidn=5010)
Title: FFG:Announcing the 2014 World Championship Schedule
Post by: RSSFeeder on 23 August 2014, 23:00:02
Announcing the 2014 World Championship ScheduleJoin Competitors at World Championship Weekend, November 6-9
Back in April, Fantasy Flight Games announced the dates for the 2014 World Championship Weekend. Today, it is time to announce the highlight of the weekend: the schedule for all World Championships! As November draws closer, hundreds of players around the world have begun to plan their treks to FFG’s hometown in Minnesota. Some will take the bus across town or pile into a car full of friends and drive a couple of hours, but others will be hopping on planes and flying halfway around the world to the Twin Cities. Will you join them and test your skills against the best in the world? If you are looking to attend Worlds or just want to tune in as the action happens, download the schedule now and start sketching out the most important days and times for you. The schedule for each game’s side events will be posted soon. 
World Championships While all your favorite games will be returning, the centerpiece of the 2014 event is the debut of two brand-new World Championships: Warhammer: Diskwars and Warhammer 40,000: Conquest! These two games will be played alongside our perennial mainstays throughout the weekend. 
Preregister Today If you haven’t already, preregister now and solidify your spot among the hundreds of players from around the world coming to Minnesota for the 2014 World Championship Weekend. But don’t wait too long because preregistration closes October 16th! While players can still register on site the day they arrive, the cost will increase to $50. 
More to Come While players can now begin deciding what day is best to arrive, there is a lot more to be announced. Stay tuned in the following months to learn the schedule of side events being run, the prizes that will be given away for all events at the 2014 World Championship Weekend, and more! ... Source: Announcing the 2014 World Championship Schedule (http://www.fantasyflightgames.com/edge_news.asp?eidn=5011)
Title: FFG:The Ring-bearer's Trials
Post by: RSSFeeder on 26 August 2014, 01:30:03
The Ring-bearer's TrialsA Preview of The Road Darkens by Lead Developer Caleb Grace
In the last preview of The Road Darkens Saga Expansion for The Lord of the Rings: The Card Game, I introduced the new Gandalf hero (The Road Darkens, 2) and some of the great player cards that support him. In this article, I’d like to introduce some of the ideas behind each of the expansion’s three scenarios: The Ring Goes South, Journey in the Dark, and Breaking of the Fellowship. Before we look at the scenarios individually, it’s worth noting that their design presented a few unique challenges. First of all, our team settled early on which key story moments we needed to include in this Saga Expansion, but each one had already inspired a popular scenario within the game. The existence of The Redhorn Gate, Flight from Moria, and Journey Down the Anduin meant we would need to find some innovative ways to make these scenarios unique and distinctive, even while drawing from familiar elements. Not only that, but each of the three scenarios takes place in completely different environments and feature a completely different set of enemies and obstacles. 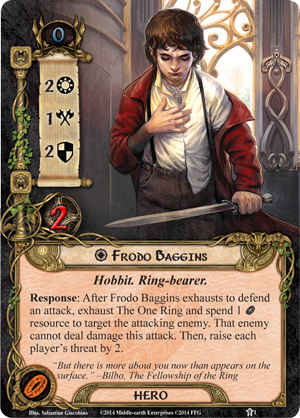 That meant there would be no encounter sets to share between the three scenarios; we would have to build three complete adventures from a limited card pool. Lastly, as The Road Darkens is the follow-up to The Black Riders, it was important that this installment in The Lord of the Rings Saga feel more epic than its predecessor in order to mirror the tone of the book and to satisfy players who had been waiting eagerly for the opportunity to continue their campaigns. It wasn’t ever going to be enough to aim for “just as good” as The Black Riders; the scenarios in The Road Darkens had to surpass them, reaching new heights of challenges and dramatic tension, both as standalone scenarios and as part of campaign mode. That meant there would be no encounter sets to share between the three scenarios; we would have to build three complete adventures from a limited card pool. Lastly, as The Road Darkens is the follow-up to The Black Riders, it was important that this installment in The Lord of the Rings Saga feel more epic than its predecessor in order to mirror the tone of the book and to satisfy players who had been waiting eagerly for the opportunity to continue their campaigns. It wasn’t ever going to be enough to aim for “just as good” as The Black Riders; the scenarios in The Road Darkens had to surpass them, reaching new heights of challenges and dramatic tension, both as standalone scenarios and as part of campaign mode. With all of these challenges on my mind, I confess I felt a little bit like Frodo when he was reluctant to leave the safety of Rivendell and start along the path to Mount Doom. But just as the esteemed Mr. Baggins found depths of courage and wisdom he never knew that he had, I found inspiration that got me excited to work through the challenges and develop what I believe are three very memorable scenarios. Hopefully, after hearing a little bit about each one, you’ll agree. The Ring Goes South The first scenario in The Road Darkens begins with the formation of the Fellowship of the Ring in Rivendell at The Council of Elrond. That chapter of The Fellowship of the Ring is so vital to the rest of The Lord of the Rings, and so interesting to me as a fan, that I wanted to start this scenario with a stage that resembled some of the cooperation and debate that took place at the secret council. So, stage 1B of The Ring Goes South is The Council of Elrond (The Road Darkens, 20), and it reads: “Forced: At the end of the planning phase, each player places the top card of his deck faceup in front of him, in player order, until there are a total of 4 faceup cards between the players. The first player chooses 1 faceup card to play for 0 cost, 1 to add to its owner’s hand, 1 to discard, and 1 to shuffle into its owner’s deck. Then, either shuffle Lust for the Ring into the encounter deck, or raise each player’s threat by 5. Advance to stage 2.” 
Even in a single player game, this effect creates some truly meaningful choices, but it obviously becomes more interesting as you add more players. Depending on the cards the players reveal, this effect can start a lively conversation reminiscent of the debate that took place in the book. It’s entirely possible that you’ll see four players arguing for four different visions for the game, but by the end of this quest stage, you’ll need to make a single decision and share a single vision. Meanwhile, the decision whether you should raise each player’s threat by five or shuffle a burden card into the deck in particular can also become a divisive issue since an additional five threat at the beginning of the game can mean very different things to different decks… especially since this scenario makes it particularly dangerous to engage enemies. Once you depart Rivendell, the rest of The Ring Goes South recreates the first part of the Fellowship’s journey together, from Rivendell to the Doors of Durin, as they try to move secretly through Hollin. But as the Ring-bearer travels along the western edge of the Misty Mountains, he is hunted by Wargs and Crebain in the service of the Enemy. So this scenario has a heavy focus on travel with a theme of being hunted. Each quest stage after the first one shares two identical lines of game text:  “During the travel phase, the players must travel to a location, if able. “During the travel phase, the players must travel to a location, if able.
Forced: After an enemy engages a player, place 1 damage on the active location, if able.”
The first line signifies the urgency of the Fellowship’s travels as they sought to move quickly through lands they feel are being watched. The second effect represents how the Enemy’s creatures close in around them, getting closer and closer to discovering the Ring. As such, placing damage on locations is a very dangerous thing to do. Each location in The Ring Goes South has an effect that will trigger when it is explored. For example, consider Eregion (The Road Darkens, 34): “Forced: When Eregion is explored, the players as a group must discard X allies from play. X is the number of damage here.” Just as it was the Fellowship’s goal to pass through Hollin without encountering any of the Enemy’s servants, the players will also want to avoid engaging enemies and damaging locaitons while playing The Ring Goes South, or effects like Eregion’s may lead to their defeat. Journey in the Dark As I mentioned earlier, one of the biggest challenges we faced with The Road Darkens was figuring out how to present new takes on things we’ve already seen in The Lord of the Rings: The Card Game, such as Moria and the Balrog. However, the Fellowship’s journey through Khazad-dum and their confrontation with the fire demon are just so important to the story that there was simply no way around them. Still, we knew that we needed to approach Journey in the Dark in such a way as to set it apart from previous scenarios and keep it faithful to the book. One of the first things that jumped out at me as I was re-reading The Fellowship of the Ring was how close the Fellowship came to encountering the Balrog by Balin’s tomb. If it wasn’t for a quick retreat and Gandalf’s closing spell, Frodo would’ve come face-to-face with a demon of Morgoth in the Chamber of Mazarbul (The Road Darkens, 51). With no bridge, no abyss, and no way for Gandalf to cast down the beast, that may very well have been the end of Frodo’s quest right there. That realization provided the inspiration for the expansion’s new, exciting, and thematic trip through Moria. When setting up Journey in the Dark, players first set aside The Balrog (The Road Darkens, 44), out of play, and the objective, Doom, Doom, Doom (The Road Darkens, 43) is added to the staging area with ten damage tokens on it.  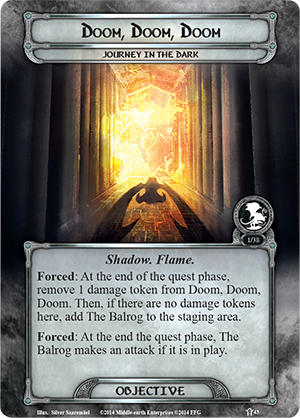
This is significant because Doom, Doom, Doom reads: “Forced: At the end of the quest phase, remove 1 damage token from Doom, Doom, Doom. Then, if there are no damage tokens here, add The Balrog to the staging area.” Just as Gandalf insisted that the Balrog was a foe beyond any of the members of the Fellowship, the enemy put into play by this effect is not something the players want to confront. Not only does The Balrog have some of most intimidating stats ever seen on an enemy card, it also shares its immunity to player card effects with the shadow cards it is dealt. That means players can neither prevent The Balrog from attacking, nor can they cancel its shadow effects.  The Balrog is a truly terrifying enemy, and it’s Indestructible, which means if it takes you too long to advance from stage one, you could end up facing its attacks at each stage of the quest. If you cannot escape from Moria before it enters play, then your one hope is to reach stage three and race across The Great Bridge (The Road Darkens, 50). The Great Bridge has an effect that reads: The Balrog is a truly terrifying enemy, and it’s Indestructible, which means if it takes you too long to advance from stage one, you could end up facing its attacks at each stage of the quest. If you cannot escape from Moria before it enters play, then your one hope is to reach stage three and race across The Great Bridge (The Road Darkens, 50). The Great Bridge has an effect that reads:
“Response: When The Great Bridge is explored, discard a hero from play to deal X damage to The Balrog. X is that hero’s threat cost. Then, The Balrog loses all keywords for the remainder of the game. Any player may trigger this response.” This effect makes it possible to destroy The Balrog. However, triggering it comes at a high price; one player must sacrifice a hero he controls in order to trigger it, and in campaign mode, that hero (as well as any ally version of the character) is lost for the remainder of the campaign. Still, that hero’s sacrifice may prove the only way that the rest of the heroes can escape from Moria. Breaking of the Fellowship The third scenario was the one I was most excited to develop because I knew from the beginning exactly what I wanted it to be about. When you have a scenario called “Breaking of the Fellowship” and it’s based on the part of the novel that sees the Fellowship split into several groups, it should very well do the same thing in the game by sending each player to his own staging area. Of course, we’ve split the players into separate staging areas in previous scenarios like Foundations of Stone, but I knew Breaking of the Fellowship would be different because there would still be a focus of working together to protect the Ring-bearer. In Breaking of the Fellowship, the players make their way down the Anduin river together through stage one until they reach the shore at stage two. There, they are attacked by Uruk-hai, and the Ring-bearer disappears. Then, each player creates his own private staging area and advances to a different stage three. This represents the different members of the Fellowship running off in all directions to look for Frodo. While they’re at different stages, the players each quest and travel separately, and they only make engagement checks against enemies in their staging area. However, unlike the aforementioned Foundations of Stone scenario, the players can still interact with each other by playing cards to support each other or making use of the Ranged and Sentinel keywords. Furthermore, each stage three quest card has a unique effect that triggers when the player at that stage quests successfully. These effects can be used to aid the other players at different stages. For example, Guard the Hobbits (The Road Darkens, 64) reads: “Response: After you quest successfully, choose a player. Ready each of that player’s heroes.” 
This effect can be used to ready your heroes or a teammate’s depending on who you think needs that benefit the most. The players will have to make good use of these effects in order to win Breaking of the Fellowship since the player who discovers the Ring-bearer at stage three will be the only one to advance to stage four, and only that player can help Frodo escape and defeat the scenario. Of course, as the players are trying to help the Ring-bearer, the enemies are also hunting for him. This is represented by cards such as the treachery, Growing Threat (The Road Darkens, 80): “When Revealed: Either move 1 enemy engaged with you to the first player’s staging area, or Growing Threat gains doomed 2 and surge.” Just like the members of the Fellowship all paid a high price to protect Frodo and help him on his way to Mordor, you, your friends, and your heroes will have to undertake real hardships in order to defeat Breaking of the Fellowship. There’s so much more I could say about each of the scenarios in The Road Darkens, and about how the cards in each encounter deck work with the overall theme for that scenario, but I don’t want to ruin all the exciting surprises that await you. Instead, I’m looking forward to hearing how you resolve the different choices you have to make and confront the all-new challenges that these scenarios present! Note: The Road Darkens is scheduled to arrive at retailers next month. In the meantime, watch for our next preview in which Caleb introduces several of the expansion’s many new boons and burdens! ... Source: The Ring-bearer's Trials (http://www.fantasyflightgames.com/edge_news.asp?eidn=5012)
Title: FFG:Gift of the Ethereals
Post by: RSSFeeder on 27 August 2014, 19:30:10
Gift of the EtherealsAnnouncing the Third War Pack in the Warlord Cycle for Warhammer 40,000: Conquest
“I have taken great pains not to laugh at the actions of aliens, nor to weep at them or to hate them, but to understand them.”
–Aun’shi, Tau Ethereal Fantasy Flight Games is proud to announce Gift of the Ethereals, the third War Pack in the Warlord cycle for Warhammer 40,000: Conquest! Fight for the cause of the greater good with the newest Conquest War Pack. This sixty-card expansion offers a full playset of each unit, support, event, and attachment, continuing the main themes of the Warlord cycle and giving you the cards you need to conquer the Traxis sector. In this War Pack, you’ll find more Nurgle units for the armies of Chaos, powerful Eldar Psykers, new battle tactics for the Space Marines, and more. No matter which factions you play, you’re sure to find new cards to swell your armies and revolutionize your warlord’s role forever. 
In addition, this War Pack introduces a new Tau warlord and his signature squad, creating a brand-new style of play for the Tau. Ethereal Majesty  The Tau empire is organized into a series of castes and the Ethereals reign above all. They command the Tau, enacting the precepts of the greater good across the galaxy. At times, they even lead warriors into battle, inspiring them to new heights of greatness and valor. In Warhammer 40,000: Conquest, the Tau can gain powerful benefits from the presence of an Ethereal, such as the new warlord introduced in Gift of the Ethereals. The Tau empire is organized into a series of castes and the Ethereals reign above all. They command the Tau, enacting the precepts of the greater good across the galaxy. At times, they even lead warriors into battle, inspiring them to new heights of greatness and valor. In Warhammer 40,000: Conquest, the Tau can gain powerful benefits from the presence of an Ethereal, such as the new warlord introduced in Gift of the Ethereals.
The Tau’s new warlord in the Traxis sector is the renowned Aun’shi (Gift of the Ethereals, 45). Beloved by his troops for his unflinching courage and devotion, Aun’shi brings new levels of combat power to your other Tau units. While Aun’shi is at a planet, every Tau unit you control at the planet gains the Armorbane keyword, denying your opponent the opportunity to use shields to protect damage. Unfortunately, Aun’shi cannot remain on the front lines forever. He also bears a Forced Reaction that requires him to move to HQ after resolving an attack. Although this ability denies Aun’shi’s overarching benefit to your Tau armies by removing him from the battle, in certain circumstances, it allows him to attack and retreat immediately, rather than simply exhausting to retreat, like other warlords. Aun’shi is aided in his efforts to inspire the Tau by four Ethereal Envoys (Gift of the Ethereals, 46). These units also possess the text, “Forced Reaction: After this unit resolves its attack, move it to your HQ.” Like Aun’shi, each Ethereal Envoy also has the all-important Ethereal trait. Although these Envoys grant no wide-spread bonuses to your Tau units, many abilities on new and upcoming Tau cards are only triggered in the presence of an Ethereal. Sending your Ethereal Envoys to the front lines of battle activates these powerful special abilities.  You can start to reap the rewards of your Ethereals with Aun’shi’s Sanctum (Gift of the Ethereals, 47). By exhausting this support, you can ready a target unit at a planet with one of your Ethereal units. Perhaps the most potent application of this card is to ready a unit freshly arrived from your HQ, allowing it to strike in the first round of combat, rather than waiting for all units to refresh. Alternatively, you could ready a unit after each of your opponent’s units have struck, allowing it to attack without fear of retribution. You can start to reap the rewards of your Ethereals with Aun’shi’s Sanctum (Gift of the Ethereals, 47). By exhausting this support, you can ready a target unit at a planet with one of your Ethereal units. Perhaps the most potent application of this card is to ready a unit freshly arrived from your HQ, allowing it to strike in the first round of combat, rather than waiting for all units to refresh. Alternatively, you could ready a unit after each of your opponent’s units have struck, allowing it to attack without fear of retribution.
You can increase the power of your Ethereals even more with an Honor Blade (Gift of the Ethereals, 48). This attachment may only be attached to an Ethereal unit, which gains the text, “Each other Tau unit you control at this planet get +1 ATK.” Equipping Aun’shi or one of your Ethereal Envoys with an Honor Blade allows your other Tau units to strike harder in combat than ever before. Sometimes, even your Ethereal units can’t be everywhere at once. When you have plenty of units that need the presence of an Ethereal to lead them in battle, you can make use of Ethereal Wisdom (Gift of the Ethereals, 49). You’ll find two copies of this free event in Aun’shi’s signature squad, and by playing it, you grant a Tau unit a raised attack value and the Ethereal trait, allowing the power of the Ethereals to spread throughout the galaxy, raising the zeal of your warriors and drenching your enemies with fear. Into the Traxis Sector Whether you side with the Tau Ethereals, ride with the White Scars, or lead Dark Eldar mercenaries, you’ll find the cards to conquer the Traxis sector in the Gift of the Ethereals War Pack. Lead your armies into battle, and look for Gift of the Ethereals at your local retailer in the fourth quarter of 2014! ... Source: Gift of the Ethereals (http://www.fantasyflightgames.com/edge_news.asp?eidn=5013)
Title: FFG:Retailers: March to War with Conquest Demo Decks
Post by: RSSFeeder on 28 August 2014, 04:00:03
Retailers: March to War with Conquest Demo DecksApply Today for One of Our Warhammer 40,000: Conquest Demo Kits
“We are the slayers of kings, the destroyers of worlds, bringers of ruination and death in all its forms. These things we do in the name of the Emperor and in the defense of Mankind. Let none stay our wrath.”
–Captain Cato Sicarius, Ultramarines 2nd Company U.S. RETAILERS: Apply today to receive a free Warhammer 40,000: Conquest Demo Kit! International retailers should contact their local distributor. | | International retailers should contact their local distributor for details. Since the announcement of Warhammer 40,000: Conquest, player excitement for this new LCG® has grown exponentially. Now, we’re offering retailers throughout the United States and other select regions a new tool to gather armies of fans: our Warhammer 40,000: Conquest Demo Kit. This demo kit is designed to introduce the endless war of Warhammer 40,000: Conquest to new players and fans of other customizable card games. This Demo Kit contains four sets of demo decks, allowing your players to take command of Ork or Space Marine armies as they battle to conquer the Traxis sector. Each Warhammer 40,000: Conquest Demo Kit contains the following components: - Four sets of demo decks (one Space Marine deck, one Ork deck, and seven planet cards included in each set).
- One full-art folder for containing and organizing the information in your kit.
- One sheet of information to help you make the best use of your Demo Kit.
- One demo guide that provides you with both a clear understanding of the game’s fundamental concepts and a structured approach to your demo games.
- One Warhammer 40,000: Conquest rules summary sheet designed for use with the demo decks.
- One promotional Warhammer 40,000: Conquest poster.
Note: Our Warhammer 40,000: Conquest Demo Kit supplies are limited. To increase your chances of receiving one of these kits, apply now!  The Clash of Arms The Clash of Arms
In every game of Warhammer 40,000: Conquest, two players clash over the planets of the Traxis sector. Planets provide crucial resources and card draw, and winning strategic battles on planets brings players closer to victory. Players must deploy their armies throughout the sector and lead them to war with their warlord. A warlord is the heart of an army, but if he is ever slain in battle, that player loses the game! The Space Marine and Ork demo decks included in the Warhammer 40,000: Conquest Demo Kit feature plenty of armies and battle tactics for players to unleash, inviting them to take their first steps along the road to war. March to War Don’t pass up this opportunity to establish your local player base for Warhammer 40,000: Conquest. Join the excitement for Warhammer 40,000: Conquest today and support players near you. Our Warhammer 40,000: Conquest Demo Kit is available to you free while supplies last, so apply now! Note: International retailers should contact their local distributor for inquiries and orders. ... Source: Retailers: March to War with Conquest Demo Decks (http://www.fantasyflightgames.com/edge_news.asp?eidn=5014)
Title: FFG:Retailers: March to War with Conquest Demo Decks
Post by: RSSFeeder on 28 August 2014, 12:30:03
Retailers: March to War with Conquest Demo DecksApply Today for One of Our Warhammer 40,000: Conquest Demo Kits
“We are the slayers of kings, the destroyers of worlds, bringers of ruination and death in all its forms. These things we do in the name of the Emperor and in the defense of Mankind. Let none stay our wrath.”
–Captain Cato Sicarius, Ultramarines 2nd Company U.S. RETAILERS: Apply today to receive a free Warhammer 40,000: Conquest Demo Kit!
International retailers should contact their local distributor.
|
|
International retailers should contact their local distributor for details. Since the announcement of Warhammer 40,000: Conquest, player excitement for this new LCG® has grown exponentially. Now, we’re offering retailers throughout the United States and other select regions a new tool to gather armies of fans: our Warhammer 40,000: Conquest Demo Kit. This demo kit is designed to introduce the endless war of Warhammer 40,000: Conquest to new players and fans of other customizable card games. This Demo Kit contains four sets of demo decks, allowing your players to take command of Ork or Space Marine armies as they battle to conquer the Traxis sector. Each Warhammer 40,000: Conquest Demo Kit contains the following components:
- Four sets of demo decks (one Space Marine deck, one Ork deck, and seven planet cards included in each set).
- One full-art folder for containing and organizing the information in your kit.
- One sheet of information to help you make the best use of your Demo Kit.
- One demo guide that provides you with both a clear understanding of the game’s fundamental concepts and a structured approach to your demo games.
- One Warhammer 40,000: Conquest rules summary sheet designed for use with the demo decks.
- One promotional Warhammer 40,000: Conquest poster.
Note: Our Warhammer 40,000: Conquest Demo Kit supplies are limited. To increase your chances of receiving one of these kits, apply now! The Clash of Arms In every game of Warhammer 40,000: Conquest, two players clash over the planets of the Traxis sector. Planets provide crucial resources and card draw, and winning strategic battles on planets brings players closer to victory. Players must deploy their armies throughout the sector and lead them to war with their warlord. A warlord is the heart of an army, but if he is ever slain in battle, that player loses the game! The Space Marine and Ork demo decks included in the Warhammer 40,000: Conquest Demo Kit feature plenty of armies and battle tactics for players to unleash, inviting them to take their first steps along the road to war. March to War Don’t pass up this opportunity to establish your local player base for Warhammer 40,000: Conquest. Join the excitement for Warhammer 40,000: Conquest today and support players near you. Our Warhammer 40,000: Conquest Demo Kit is available to you free while supplies last, so apply now! Note: International retailers should contact their local distributor for inquiries and orders. ... Source: Retailers: March to War with Conquest Demo Decks (http://www.fantasyflightgames.com/edge_news.asp?eidn=5015)
Title: FFG:Conquer Westeros
Post by: RSSFeeder on 28 August 2014, 21:00:03
Conquer WesterosA New A Game of Thrones: The Card Game Draft Pool Is Now Available
“When Aegon the Dragon stepped ashore in Westeros, the kings of Vale and Rock and Reach did not rush to hand him their crowns. If you mean to sit his Iron Throne, you must win it as he did, with steel and dragonfire.”
–George R.R. Martin, A Storm of Swords Conquer Westeros! Westeros Draft Starters and Draft Packs for A Game of Thrones: The Card Game Draft Play are now available via FFG’s in-house manufacturing. Westeros is a new pool of cards for A Game of Thrones: The Card Game Draft Play, and it challenges players to forge a new vision for the Seven Kingdoms, even as they seek to win the Iron Throne. The Westeros draft experience centers around the Westeros draft pool, a collection of 240 randomized cards, which include a healthy representation of cards drawn from the Living Card Game's two most recently completed cycles, Kingsroad and Conquest and Defiance, as well as no fewer than thirty-four preview cards from the upcoming Wardens cycle. Moreover, the Westeros card pool features ten different “draft format only” cards that ensure your draft experiences will be both truly dynamic and unique. Your trials begin as you build your deck, assembling an army from the pool’s Prized cards, its various Bannermen, its crested characters, and the different plots you’ll wish to hatch from within your Castles. As the draft pool prominently features each of these different themes, the Westeros Draft Starter lays the foundation for your conquest, featuring the beginnings of a solid economic base and a couple of devious plots, the “draft format only” cards, Counting Coppers (Westeros Draft Starter, 10) and Filthy Accusations (Westeros Draft Starter, 11). 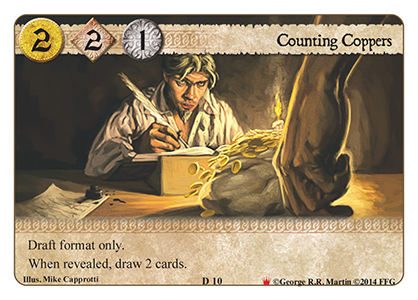 
Then, your ambitions lead you to battlefields across the Seven Kingdoms, into the shadows of King’s Landing alleyways, and into meetings with foreign dignitaries. Numerous conflicts will divide your attentions and force you to spread your forces, but you must master both your challenges and your foes if you wish to win the Iron Throne – and rule Westeros! For more about how Westeros Draft Starters and Draft Packs allow players to participate in an alternative and exciting draft play format for A Game of Thrones: The Card Game, visit our A Game of Thrones: The Card Game Draft Play description page. What Do I Need to Play? Each player participating in a Westeros draft will need to bring two items: a nineteen-card Westeros Draft Starter and one fifty-card Westeros Draft Pack. Draft Starters: The Westeros Draft Starter is a fixed collection of rules and nineteen core cards that include a draft-only agenda, Treaty (Westeros Draft Starter, 1), locations like Kingsroad Inn (Westeros Draft Starter, 9) that help you launch your early economy, and five plots to serve as the spine of your plot deck.  
Cards marked “draft format only” are not legal in standard play.
Importantly, the cards in the Westeros Draft Starter vary from those of the Ice & Fire Draft Starter, and the result is that the Westeros draft experience offers more flexibility with your influence and the recruitment of out-of-House characters, locations, and other cards. All of these Draft Starter cards are clearly distinguished from both the larger A Game of Thrones: The Card Game card pool and the cards in the Westeros Draft Packs, meaning you can easily sort them after your games and prepare for your next draft. Best of all, because Westeros Draft Starters are reusable, you only need one, no matter how many Westeros drafts you play! 
All draft cards are clearly identified by a new icon, and starter pack cards are further distinguished from draft cards by color.
Draft Packs: Westeros Draft Packs are collections of fifty random cards, compiled according to a custom algorithm from a card pool of 240 cards called Westeros. To learn more about how Westeros Draft Packs are created, visit the A Game of Thrones: The Card Game Draft Play description page. All cards found in Westeros draft products, except for those marked “draft format only,” are legal in standard tournament play as soon as they are tournament legal and released within the standard LCG® format. Accordingly, each card from the Wardens cycle will become legal for tournament play once the LCG Chapter Pack in which it is contained goes on sale at retailers. However, because of variations in production color and card-stock resulting from our in-house manufacturing, players using draft cards in tournaments must sleeve their cards with opaque or art sleeves. Fight for Your Vision of the Seven Kingdoms Can you survive the tumultuous challenges of A Game of Thrones: The Card Game Draft Play? Assemble your army, plot your schemes, and make your bid for the Iron Throne with the Westeros draft pool for A Game of Thrones: The Card Game! Pick up your Westeros Draft Starter and Draft Pack today! Note: A Game of Thrones: The Card Game draft products do not serve as a replacement for the standard A Game of Thrones: The Card Game LCG® model. Instead, A Game of Thrones: The Card Game draft products allow players to enjoy the game through an additional format of play. Orders for products printed via FFG's in-house manufacturing may take 10 – 14 days to ship. ... Source: Conquer Westeros (http://www.fantasyflightgames.com/edge_news.asp?eidn=5017)
Title: FFG:Nightmares in the Dwarrowdelf
Post by: RSSFeeder on 29 August 2014, 05:30:03
Nightmares in the DwarrowdelfNightmare Decks Are Now Available for the First Three Dwarrowdelf Scenarios
“It may have been only a trick of the wind in the cracks and gullies of the rocky wall, but the sounds were those of shrill cries, and wild howls of laughter. Stones began to fall from the mountain-side, whistling over their heads […]”
–J.R.R. Tolkien, The Fellowship of the Ring Deep in the Misty Mountains, the Orcs are massing once more. But why are they massing? And who has called them? These are questions that need answering, but the answers lie deep within the heart of the Dwarrowdelf, an underground realm hidden behind treacherous mountain passes and magical doors. As the days grow shorter and the nights grow longer, will you join those heroes bound to explore the Dwarrowdelf and uncover its secrets? Three new Nightmare Decks are now available for The Lord of the Rings: The Card Game! Nightmare Decks for The Redhorn Gate, Road to Rivendell, and The Watcher in the Water allow you to revisit the first three scenarios from the Dwarrowdelf cycle, but recast this time amid the deadly enemies, locations, and treacheries of the game’s Nightmare Mode. 
As with all Nightmare Decks, these expansions each introduce nineteen alternate encounter cards and setup instructions that amplify the trials, tension, and atmosphere of the scenarios they modify. For more specific details, we turn to developer Matt Newman. The Redhorn Gate The encounter cards of The Redhorn Gate Nightmare Deck are focused on increasing the scenario’s atmosphere and theme, while simultaneously providing a new layer of difficulty that should challenge many decks in new ways. Of the nineteen new encounter cards, ten of them have the Snow trait, further enhancing the scenario’s focus on the freezing cold that makes the heroes’ mountain pass a truly perilous journey. These Snow cards are then highlighted by the selection of cards that are removed from the encounter deck during setup, as well as the deadly synergies that are created when you encounter new cards like Caradhras the Cruel (The Redhorn Gate Nightmare Deck, 8) or Icy Cavern (The Redhorn Gate Nightmare Deck, 5).  
As a reminder, The Redhorn Gate forces your heroes to navigate a terrible pass through the Misty Mountains, riddled with effects that decrease their Willpower and that punish them for daring to cross its snowy peaks. At its worst, the scenario destroys any character whose Willpower reaches zero. Accordingly, the new encounter cards in this Nightmare Deck push this theme even further, not just reducing your characters’ Willpower, but also making it harder for you to boost their Willpower. Worse yet, the Orcs of the Misty Mountain are more menacing than ever before, and they come prepared to outflank some of the game’s most popular defenders. Road to Rivendell  If you manage to survive your journey through The Redhorn Gate and its many perils, you’ll face an entirely new set of challenges along the Orc-infested paths to Rivendell. In the Road to Rivendell Nightmare Deck, the Ambush keyword receives several upgrades, the first of which is an effect that ensures that enemies that ambush the players during still contribute their threat to the staging area until the end of the Quest phase. This mechanic is included on the Road to Rivendell Nightmare Mode setup card (Road to Rivendell Nightmare Deck, 1): If you manage to survive your journey through The Redhorn Gate and its many perils, you’ll face an entirely new set of challenges along the Orc-infested paths to Rivendell. In the Road to Rivendell Nightmare Deck, the Ambush keyword receives several upgrades, the first of which is an effect that ensures that enemies that ambush the players during still contribute their threat to the staging area until the end of the Quest phase. This mechanic is included on the Road to Rivendell Nightmare Mode setup card (Road to Rivendell Nightmare Deck, 1):
“Forced: When an enemy with the ambush keyword engages a player during the quest phase, it contributes its threat to the total threat in the staging area until the end of the phase.” This effect, combined with those of the new locations in this Nightmare Deck, like Treacherous Bluffs (Road to Rivendell Nightmare Deck, 7), make being ambushed far more deadly than ever before. What’s worse, the ambushing enemies have received a substantial upgrade, as well, and almost every new enemy triggers a potentially lethal ability when it engages a player. Of course, Road to Rivendell is all about safely escorting Arwen Undómiel to Rivendell, so this Nightmare Deck also introduces cards that target her directly, including a new stage two quest card, Ambush in the Night (Road to Rivendell Nightmare Deck, 2), that will force players to come to the Elf’s rescue! The Watcher in the Water  When it came time to develop the Nightmare Deck for the much beloved scenario, The Watcher in the Water, one crucial idea drove all my design: it’s all about The Watcher (The Watcher in the Water Nightmare Deck, 2). In Nightmare Mode, The Watcher in the Water encounter deck is extremely tight, consistent, and atmospheric, containing only Tentacle enemies and highly thematic locations and treacheries, like Banks of Sirannon (The Watcher in the Water Nightmare Deck, 5) and Pulled Under (The Watcher in the Water Nightmare Deck, 7). When it came time to develop the Nightmare Deck for the much beloved scenario, The Watcher in the Water, one crucial idea drove all my design: it’s all about The Watcher (The Watcher in the Water Nightmare Deck, 2). In Nightmare Mode, The Watcher in the Water encounter deck is extremely tight, consistent, and atmospheric, containing only Tentacle enemies and highly thematic locations and treacheries, like Banks of Sirannon (The Watcher in the Water Nightmare Deck, 5) and Pulled Under (The Watcher in the Water Nightmare Deck, 7).
Additionally, the Nightmare version of this scenario no longer gives players the choice of whether to fight The Watcher or solve the riddle of the Doors of Durin; in this version, you must do both to win. Of course, The Watcher has, itself, changed substantially, with a hefty twenty-one hit points and a thematic effect driven by the setup card: “Forced: When a Tentacle enemy is destroyed, deal 1 damage to The Watcher if it is in play.” This represents the twenty-one tentacles that the Fellowship saw shooting out of the water to grab Frodo and his companions during their journey into Moria. With each Tentacle the players defeat, The Watcher grows weaker, but it has its own ways of regenerating health and protecting its legion of arms from damage. One of the most popular strategies that players traditionally employed to defeat this scenario was to include many “scrying” abilities – abilities that allow the players to look at the top card of the encounter deck, such as Henamarth Riversong (Core Set, 60) or Rumour from the Earth (Return to Mirkwood, 124). Such a tactic allows players to easily solve the Doors of Durin’s riddle, or predict many of the abilities that The Watcher’s Tentacle enemies will trigger. However, in Nightmare Mode, players will find this popular strategy hindered by the Hideous Depths (The Watcher in the Water Nightmare Deck, 6) in which The Watcher resides. Each of these Nightmare Decks offers horrifying new twists on the scenarios they revisit, and I hope you have fun adapting your strategies to face them. With some courage, clever thinking, and perhaps a bit of luck, perhaps you may find the means to prevail over crushing odds and make your way into Moria… Alámenë! Stand Against the Shadow In the East, the Shadow of Mordor grows ever stronger and darker. The Dark Lord’s armies swell, and his influence can be felt throughout all of Middle-earth. As his power grows, so do the challenges of those scenarios recast in the shadows of Nightmare Mode. This makes the need to undertake these quests and stand against the Shadow all the more urgent… even as the quests themselves become ever deadlier. Will you be the one to rise to the challenge? Will you stand against the evils of Mordor? Will you join the heroes gathered to explore the Dwarrowdelf and its secrets? Head to your local retailer today to pick up your copies of The Redhorn Gate Nightmare Deck, Road to Rivendell Nightmare Deck, and The Watcher in the Water Nightmare Deck. Or order your copies online through our webstore. ... Source: Nightmares in the Dwarrowdelf (http://www.fantasyflightgames.com/edge_news.asp?eidn=5018)
Title: FFG:Nightmares in the Dwarrowdelf
Post by: RSSFeeder on 29 August 2014, 14:00:02
Nightmares in the DwarrowdelfNightmare Decks Are Now Available for the First Three Dwarrowdelf Scenarios
“It may have been only a trick of the wind in the cracks and gullies of the rocky wall, but the sounds were those of shrill cries, and wild howls of laughter. Stones began to fall from the mountain-side, whistling over their heads […]”
–J.R.R. Tolkien, The Fellowship of the Ring Deep in the Misty Mountains, the Orcs are massing once more. But why are they massing? And who has called them? These are questions that need answering, but the answers lie deep within the heart of the Dwarrowdelf, an underground realm hidden behind treacherous mountain passes and magical doors. As the days grow shorter and the nights grow longer, will you join those heroes bound to explore the Dwarrowdelf and uncover its secrets? Three new Nightmare Decks are now available for The Lord of the Rings: The Card Game! Nightmare Decks for The Redhorn Gate, Road to Rivendell, and The Watcher in the Water allow you to revisit the first three scenarios from the Dwarrowdelf cycle, but recast this time amid the deadly enemies, locations, and treacheries of the game’s Nightmare Mode.
As with all Nightmare Decks, these expansions each introduce nineteen alternate encounter cards and setup instructions that amplify the trials, tension, and atmosphere of the scenarios they modify. For more specific details, we turn to developer Matt Newman. The Redhorn Gate The encounter cards of The Redhorn Gate Nightmare Deck are focused on increasing the scenario’s atmosphere and theme, while simultaneously providing a new layer of difficulty that should challenge many decks in new ways. Of the nineteen new encounter cards, ten of them have the Snow trait, further enhancing the scenario’s focus on the freezing cold that makes the heroes’ mountain pass a truly perilous journey. These Snow cards are then highlighted by the selection of cards that are removed from the encounter deck during setup, as well as the deadly synergies that are created when you encounter new cards like Caradhras the Cruel (The Redhorn Gate Nightmare Deck, 8) or Icy Cavern (The Redhorn Gate Nightmare Deck, 5).
As a reminder, The Redhorn Gate forces your heroes to navigate a terrible pass through the Misty Mountains, riddled with effects that decrease their Willpower and that punish them for daring to cross its snowy peaks. At its worst, the scenario destroys any character whose Willpower reaches zero. Accordingly, the new encounter cards in this Nightmare Deck push this theme even further, not just reducing your characters’ Willpower, but also making it harder for you to boost their Willpower. Worse yet, the Orcs of the Misty Mountain are more menacing than ever before, and they come prepared to outflank some of the game’s most popular defenders. Road to Rivendell If you manage to survive your journey through The Redhorn Gate and its many perils, you’ll face an entirely new set of challenges along the Orc-infested paths to Rivendell. In the Road to Rivendell Nightmare Deck, the Ambush keyword receives several upgrades, the first of which is an effect that ensures that enemies that ambush the players during still contribute their threat to the staging area until the end of the Quest phase. This mechanic is included on the Road to Rivendell Nightmare Mode setup card (Road to Rivendell Nightmare Deck, 1): “Forced: When an enemy with the ambush keyword engages a player during the quest phase, it contributes its threat to the total threat in the staging area until the end of the phase.” This effect, combined with those of the new locations in this Nightmare Deck, like Treacherous Bluffs (Road to Rivendell Nightmare Deck, 7), make being ambushed far more deadly than ever before. What’s worse, the ambushing enemies have received a substantial upgrade, as well, and almost every new enemy triggers a potentially lethal ability when it engages a player. Of course, Road to Rivendell is all about safely escorting Arwen Undómiel to Rivendell, so this Nightmare Deck also introduces cards that target her directly, including a new stage two quest card, Ambush in the Night (Road to Rivendell Nightmare Deck, 2), that will force players to come to the Elf’s rescue! The Watcher in the Water When it came time to develop the Nightmare Deck for the much beloved scenario, The Watcher in the Water, one crucial idea drove all my design: it’s all about The Watcher (The Watcher in the Water Nightmare Deck, 2). In Nightmare Mode, The Watcher in the Water encounter deck is extremely tight, consistent, and atmospheric, containing only Tentacle enemies and highly thematic locations and treacheries, like Banks of Sirannon (The Watcher in the Water Nightmare Deck, 5) and Pulled Under (The Watcher in the Water Nightmare Deck, 7). Additionally, the Nightmare version of this scenario no longer gives players the choice of whether to fight The Watcher or solve the riddle of the Doors of Durin; in this version, you must do both to win. Of course, The Watcher has, itself, changed substantially, with a hefty twenty-one hit points and a thematic effect driven by the setup card: “Forced: When a Tentacle enemy is destroyed, deal 1 damage to The Watcher if it is in play.” This represents the twenty-one tentacles that the Fellowship saw shooting out of the water to grab Frodo and his companions during their journey into Moria. With each Tentacle the players defeat, The Watcher grows weaker, but it has its own ways of regenerating health and protecting its legion of arms from damage. One of the most popular strategies that players traditionally employed to defeat this scenario was to include many “scrying” abilities – abilities that allow the players to look at the top card of the encounter deck, such as Henamarth Riversong (Core Set, 60) or Rumour from the Earth (Return to Mirkwood, 124). Such a tactic allows players to easily solve the Doors of Durin’s riddle, or predict many of the abilities that The Watcher’s Tentacle enemies will trigger. However, in Nightmare Mode, players will find this popular strategy hindered by the Hideous Depths (The Watcher in the Water Nightmare Deck, 6) in which The Watcher resides. Each of these Nightmare Decks offers horrifying new twists on the scenarios they revisit, and I hope you have fun adapting your strategies to face them. With some courage, clever thinking, and perhaps a bit of luck, perhaps you may find the means to prevail over crushing odds and make your way into Moria… Alámenë! Stand Against the Shadow In the East, the Shadow of Mordor grows ever stronger and darker. The Dark Lord’s armies swell, and his influence can be felt throughout all of Middle-earth. As his power grows, so do the challenges of those scenarios recast in the shadows of Nightmare Mode. This makes the need to undertake these quests and stand against the Shadow all the more urgent… even as the quests themselves become ever deadlier. Will you be the one to rise to the challenge? Will you stand against the evils of Mordor? Will you join the heroes gathered to explore the Dwarrowdelf and its secrets? Head to your local retailer today to pick up your copies of The Redhorn Gate Nightmare Deck, Road to Rivendell Nightmare Deck, and The Watcher in the Water Nightmare Deck. Or order your copies online through our webstore. ... Source: Nightmares in the Dwarrowdelf (http://www.fantasyflightgames.com/edge_news.asp?eidn=5019)
Title: FFG:Conquer Westeros
Post by: RSSFeeder on 29 August 2014, 22:30:03
Conquer WesterosA New A Game of Thrones: The Card Game Draft Pool Is Now Available
“When Aegon the Dragon stepped ashore in Westeros, the kings of Vale and Rock and Reach did not rush to hand him their crowns. If you mean to sit his Iron Throne, you must win it as he did, with steel and dragonfire.”
–George R.R. Martin, A Storm of Swords Conquer Westeros! Westeros Draft Starters and Draft Packs for A Game of Thrones: The Card Game Draft Play are now available via FFG’s in-house manufacturing. Westeros is a new pool of cards for A Game of Thrones: The Card Game Draft Play, and it challenges players to forge a new vision for the Seven Kingdoms, even as they seek to win the Iron Throne. The Westeros draft experience centers around the Westeros draft pool, a collection of 240 randomized cards, which include a healthy representation of cards drawn from the Living Card Game's two most recently completed cycles, Kingsroad and Conquest and Defiance, as well as no fewer than thirty-four preview cards from the upcoming Wardens cycle. Moreover, the Westeros card pool features ten different “draft format only” cards that ensure your draft experiences will be both truly dynamic and unique. Your trials begin as you build your deck, assembling an army from the pool’s Prized cards, its various Bannermen, its crested characters, and the different plots you’ll wish to hatch from within your Castles. As the draft pool prominently features each of these different themes, the Westeros Draft Starter lays the foundation for your conquest, featuring the beginnings of a solid economic base and a couple of devious plots, the “draft format only” cards, Counting Coppers (Westeros Draft Starter, 10) and Filthy Accusations (Westeros Draft Starter, 11).
Then, your ambitions lead you to battlefields across the Seven Kingdoms, into the shadows of King’s Landing alleyways, and into meetings with foreign dignitaries. Numerous conflicts will divide your attentions and force you to spread your forces, but you must master both your challenges and your foes if you wish to win the Iron Throne – and rule Westeros! For more about how Westeros Draft Starters and Draft Packs allow players to participate in an alternative and exciting draft play format for A Game of Thrones: The Card Game, visit our A Game of Thrones: The Card Game Draft Play description page. What Do I Need to Play? Each player participating in a Westeros draft will need to bring two items: a nineteen-card Westeros Draft Starter and one fifty-card Westeros Draft Pack. Draft Starters:The Westeros Draft Starter is a fixed collection of rules and nineteen core cards that include a draft-only agenda, Treaty (Westeros Draft Starter, 1), locations like Kingsroad Inn (Westeros Draft Starter, 9) that help you launch your early economy, and five plots to serve as the spine of your plot deck.
Cards marked “draft format only” are not legal in standard play.
Importantly, the cards in the Westeros Draft Starter vary from those of the Ice & Fire Draft Starter, and the result is that the Westeros draft experience offers more flexibility with your influence and the recruitment of out-of-House characters, locations, and other cards. All of these Draft Starter cards are clearly distinguished from both the larger A Game of Thrones: The Card Game card pool and the cards in the Westeros Draft Packs, meaning you can easily sort them after your games and prepare for your next draft. Best of all, because Westeros Draft Starters are reusable, you only need one, no matter how many Westeros drafts you play!
All draft cards are clearly identified by a new icon, and starter pack cards are further distinguished from draft cards by color.
Draft Packs:Westeros Draft Packs are collections of fifty random cards, compiled according to a custom algorithm from a card pool of 240 cards called Westeros. To learn more about how Westeros Draft Packs are created, visit the A Game of Thrones: The Card Game Draft Play description page. All cards found in Westeros draft products, except for those marked “draft format only,” are legal in standard tournament play as soon as they are tournament legal and released within the standard LCG® format. Accordingly, each card from the Wardens cycle will become legal for tournament play once the LCG Chapter Pack in which it is contained goes on sale at retailers. However, because of variations in production color and card-stock resulting from our in-house manufacturing, players using draft cards in tournaments must sleeve their cards with opaque or art sleeves. Fight for Your Vision of the Seven Kingdoms Can you survive the tumultuous challenges of A Game of Thrones: The Card Game Draft Play? Assemble your army, plot your schemes, and make your bid for the Iron Throne with the Westeros draft pool for A Game of Thrones: The Card Game! Pick up your Westeros Draft Starter and Draft Pack today! Note: A Game of Thrones: The Card Game draft products do not serve as a replacement for the standard A Game of Thrones: The Card Game LCG® model. Instead, A Game of Thrones: The Card Game draft products allow players to enjoy the game through an additional format of play. Orders for products printed via FFG's in-house manufacturing may take 10 – 14 days to ship. ... Source: Conquer Westeros (http://www.fantasyflightgames.com/edge_news.asp?eidn=5016)
Title: FFG:Palace Intrigues
Post by: RSSFeeder on 30 August 2014, 07:00:04
Palace IntriguesPreview the Scenarios of The Last Banquet
My dear Baron, I am flattered by your interest in my wares, but the king naturally has the first selection from my goods. He has such a love of exotic goods, and personally ordered me to bring these silks back from India. Take a look at this jeweled, double-edged dagger, but be careful – it’s very sharp. It‘s my present for the king, to demonstrate how highly I regard him. In fact, I intend to give him the dagger during this very banquet… if you take my meaning.
–The Trader Ambitious courtiers, greedy citizens, and wily servants compete for power in The Last Banquet. In this large-group game, you and your friends take on the roles of guests at a royal banquet where no guest can be trusted and scandal is served hot. Using the actions allowed, players strive to further their faction’s agenda. Whether your goal is noble or nefarious, you’ll need cleverness and guile to triumph at court. Our last preview introduced some of the cunning and deceitful palace personalities you and your friends can play in The Last Banquet. Today, we’ll look at two of the six possible scenarios that shape the game.  
Rival Assassins In A League of Traitors the duke and the baron both seek to kill the king and seize the throne for themselves. Before game play begins, fifteen to twenty-five players separate into three roughly equal factions: the duke’s faction, the baron’s, and the king’s. Whichever faction succeeds in their assassination attempt wins the game, but if the king survives three rounds of play, his faction is victorious. The duke’s faction and the baron’s faction then secretly choose assassins by giving one player either the dagger token or the poison token. The assassin kills the king by sitting next to him at the end of a round and revealing his weapon. If there is an assassin sitting on both sides of him, the king avoids death and another round begins, since neither faction wants to be caught in the act of murder.  
Both the trader and the lady’s maid make ideal assassins. Under the pretense of serving the court, the lady’s maid can use her action to directly approach any royalty or nobility. Similarly, the trader can lure a royal or noble character towards him, as if encouraging that character to look at his costly merchandise. Your faction can avoid suspicion by saving your assassin’s action for the last possible moment. That way, no other character can interfere and separate the assassin from their target.  A Royal Rescue A Royal Rescue
In The Missing Princess, six to ten players work cooperatively to free the princess from the clutches of the traitorous duke who has abducted and imprisoned her. In order to save her, you must defeat the duke’s palace guards, steal their keys, escape from a vicious hound, enter the palace, and find the princess. When you set up your playing area for this scenario, establish a place for the guard tower, where the guards stand watch and keep the keys, one for the gatehouse, and a place between them for the bastion, where you set the princess character card. Male characters, such as the baron, messenger, and king attempt to defeat the guards by moving next to the guard tower. When the four guard tokens are gone, the keys can be liberated. Female characters attempt to get the keys and move into the gatehouse, where they can search for the princess. If you have found the princess at the beginning of your turn, your group wins. The duke begins next to the guard tower, and moves through the other players, switching one place at a time. Whenever a player carrying the keys switches places with the duke, that player has essentially been caught and must return the keys to the guard tower. If the duke moves adjacent to a player in the gatehouse, then your rescue attempt has been foiled, the princess remains captive, and the duke triumphs.  
Take Your Place at the Royal Table The king’s murder and princess’s abduction aren’t the only scandals shaking up this court. In The Count’s Estate, clergy and citizens vie to inherit the best of the deceased man’s land and lavish possessions. If you like ghost stories, you might choose to play The White Maiden’s Lament, in which the king’s dead wife haunts the palace and seeks vengeance against the new queen. Play despicable nobility or trustworthy servants, take on the role of the king or pay him court. The Last Banquet offers a wide variety of roles to play, plots to execute, and knavery to enjoy at your large-group gathering. Prepare to enter the palace gates. Pre-order The Last Banquet from your local retailer today! ... Source: Palace Intrigues (http://www.fantasyflightgames.com/edge_news.asp?eidn=5020)
Title: FFG:X-Wing (TM) Mission Control
Post by: RSSFeeder on 30 August 2014, 15:30:03
X-Wing (TM) Mission ControlShare Missions and Explore the Galaxy with This Free Online Tool
“Stand-by alert. Death Star approaching. Estimated time to firing range, fifteen minutes.”
–Star Wars: A New Hope Inspired by the dramatic space battles of the original Star Wars trilogy, X-Wing™ allows players to wage fast-paced, squad-based dogfights between Rebel and Imperial starfighters. Flexible squad-building rules allow tremendous potential for customization; even with just a few ships, you hold a wide range of options with the game’s many pilots and upgrades. Now, your X-Wing experience becomes even more personalized and customizable with the release of X-Wing Mission Control! X-Wing Mission Control is a free online resource that allows you to design and share new X-Wing missions. 
Build and share custom X-Wing missions with Mission Control!
Recreate Famous Battles or Imagine Your Own! Coordinate a daring assault run along the Death Star trench, confront the Rebel fleet outside of Endor, or dodge asteroids in pursuit of the Millennium Falcon. X-Wing Mission Control’s custom editor allows you to easily create any play scenario you can imagine, whether it’s drawn from the Star Wars trilogy or completely unique. Simply select the size of your play area and define the ships you wish to permit. You can create mission-specific squad-building rules, or you can identify any number of specific ships and upgrades. If you use Mission Control to track your collection, it will even identify any mission components not included in your X-Wing collection. Furthermore, Mission Control’s custom editor easily allows you to select components from all available X-Wing products. Will you try to break through the Imperial blockade with your GR-75 medium transport? Will you invent a mission to hunt down a powerful Imperial prototype starfighter? Shifting your focus from harrowing dogfights to large, tactical battles is as simple as dragging a ship to the map or removing it. 
A screenshot of Mission Control’s map editor.
With Mission Control’s toolset, you’ll quickly create maps, define terrain elements, and add deployment zones, as well as any helpful mission-specific rules. Expand Your Galaxy  Once you’ve created a scenario, you can download it to the Mission Control database. Mission Control allows you to publish your missions so that players around the world can download and enjoy them. All of Mission Control’s user-generated missions are free to access, and you can even vote for your favorites. Once you’ve created a scenario, you can download it to the Mission Control database. Mission Control allows you to publish your missions so that players around the world can download and enjoy them. All of Mission Control’s user-generated missions are free to access, and you can even vote for your favorites.
With its database of published missions, X-Wing Mission Control allows you to enjoy a whole galaxy’s worth of fan-created Star Wars drama! All Wings Report In X-Wing has quickly grown to become one of the biggest and best-loved miniatures games around the world. Simultaneously, its growth has been accompanied by that of an enthusiastic and welcoming worldwide community. Now that X-Wing community gains another tool with which to express itself. Are you a part of the X-Wing community? Share your ideas and your love of the game. Explore X-Wing Mission Control today, and see what this free online tool has to offer you! Please note: Mobile devices are not supported at this time. Currently, the X-Wing Mission Control beta is only compatible with Safari, Chrome, and Firefox web browsers. We invite all users of the Mission Control open beta to offer feedback or report technical issues by posting on our forums. ... Source: X-Wing (TM) Mission Control (http://www.fantasyflightgames.com/edge_news.asp?eidn=5021)
Title: FFG:Sins of Askellon
Post by: RSSFeeder on 31 August 2014, 00:00:23
Sins of AskellonA Designer Diary for Dark Heresy Second Edition
“Gather tears for the sins of ye fathers, O children of Askellon.”
–Saint Valerius, Introit to the Apocrypha Askellios Recently, we released Dark Heresy Second Edition, a new roleplaying game that casts players as Acolytes in the service of an Inquisitor amidst the grim darkness of the far future. In every game, you face the horrors of the Warp-stained Askellon sector, striving to buy humanity more time. The darkness of the Askellon sector has never been explored before Dark Heresy Second Edition. Today, Andy Hoare, a leading author at Black Library and one of the major authors in Dark Heresy Second Edition, discusses the game’s new setting: the dark and ancient Askellon sector. 
Andy Hoare on the Askellon Sector in Dark Heresy Second Edtion The Askellon sector is an entirely new sector of the Imperium, departing from the Calixis Sector of Dark Heresy, the Koronus Expanse of Rogue Trader, the Jericho Reach of Deathwatch, the Screaming Vortex of Black Crusade and the Spinward Front of Only War. Although this sector is new, it is still subtly linked to the regions of the Imperium that you may have experienced before. Players steeped in the lore of the Calixis Sector and its connected regions may recall scattered mentions of some other locations – the Scelus and Ixaniad Sectors, the “Dread” Madrigal Sector, and an unnamed region bluntly labelled “Access Denied.” This once-forbidden sector is the region in which Dark Heresy Second Edition is set, and the reason for its ominous designation quickly becomes clear to Game Masters and players that dare to enter. 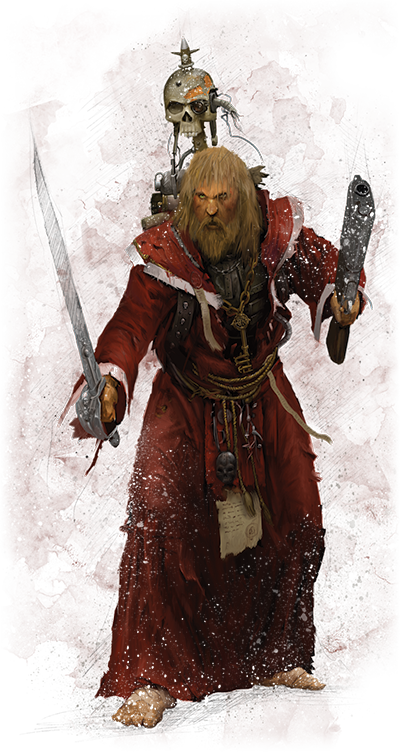 The Askellon sector has been marked “off limits” even by the great Navigator Houses. Ravenous data-phages slowly work their way through Imperial archives, redacting the region from stellar maps. The reason for this is simple—a seemingly endless Warp Storm, called the Pandaemonium, roars through the Askellon sector. This tempest exists on a huge scale that may one day even rival the Maelstrom and the Eye of Terror. The Askellon sector has been marked “off limits” even by the great Navigator Houses. Ravenous data-phages slowly work their way through Imperial archives, redacting the region from stellar maps. The reason for this is simple—a seemingly endless Warp Storm, called the Pandaemonium, roars through the Askellon sector. This tempest exists on a huge scale that may one day even rival the Maelstrom and the Eye of Terror.
Because of this, the Askellon sector is doomed, but not to a swift, glorious, or merciful death. The region and its people have courted damnation since the very earliest days of human settlement in this sector. Countless legends describe the earliest days of Askellon, but few can be trusted. Some stories claim that the colonists of the first worlds were damned before they arrived; others say the settlers were helplessly fleeing some great calamity or betrayal. These first core worlds clung together through the terrors of the Age of Strife, so that when the Great Crusade finally cast out the shadows of Old Night, Askellon stood as one. Tales from those days exist only as mythical legend and consecrated texts, describing the arrival of the Emperor and the galactic war of rebellion in sacred verses. There are manifold tales of glorious conflict and celebration from those dark times, though apocryphal whispers dare to question these events and Askellon’s role in them. Of course, such accusations are not uttered openly, for the Lords of Askellon are all-powerful within their domains, and a formidable history is not a matter for open discussion. Askellon is steeped in damnation, forming a microcosm of the larger Imperium’s fate. The institutions of the Askellon sector are crumbling, its ruling classes are beyond corrupt, its worlds are riven with endless war, and all the while, the enemies of Mankind plot its downfall. Uncounted border systems have been lost to the Pandaemonium and other threats over the millennia, and the Imperium may perhaps turn its back on Askellon once and for all. Many of Mankind’s great pillars regard the sector as lost already, so when a high adept of the Adeptus Terra passes away, none replace him. Worst of all, the League of Black Ships has been erratic at best when scouring the sector for psykers. All of Askellon seethes with Warp energies that threaten to draw the questing coils of the Pandaemonium onwards. Upon these cursed stars falls the inscrutable eye of the Inquisition. Few Inquisitors operate openly in Askellon: to do so would be to court a repeat of the internecine conflict known as the Vaxi Atrocity that burned an entire sub-sector and saw dozens of Inquisitors and their indentured armies clash for no benefit, save that of the dark gods. An uneasy truce holds rival Inquisitors at a distance, but their wars grind on, fought by proxy through their Acolytes, even as they struggle to uncover a fraction of the crimes attributed to the Lords of Askellon. Those sworn to an Inquisitor’s service have their duties to perform, even as the sector crumbles around them. 
There are those who would abandon Askellon and its masters to their fate, allowing them to be consumed by the ravening Warp. But others fear that this course of action would allow a daemonic incursion of unprecedented scale. If this invasion occurred, the worlds of an entire sector would be transformed into the domains of Daemons, and the fall of the Imperium brought even closer. Only the bold servants of the Inquisition are willing to lay down their lives to avert this dire fate, even as the Lords of Askellon invent new sins in a sector seething with the darkest heresies known to Mankind. Enter the Askellon Sector Thanks, Andy! The doom of the Askellon sector may be certain, but there are still those of the Inquisition who will fight to the death before they see more of the Imperium slip into eternal night. Take your place among that heroic number as you make your investigations and battle for the fate of the Askellon sector! Dark Heresy Second Edition is now available online through our webstore and at your local retailer. ... Source: Sins of Askellon (http://www.fantasyflightgames.com/edge_news.asp?eidn=5022)
Title: FFG:Attack on Echo Base
Post by: RSSFeeder on 31 August 2014, 08:30:03
Attack on Echo BasePreview the Struggles of STAR WARS (TM): Empire vs. Rebellion
“General, prepare your troops for a surface attack.”
–Darth Vader, Star Wars: The Empire Strikes Back In June, we announced Star Wars™: Empire vs. Rebellion, a two-player card game of tense strategic battles and clever bluffing that places you in command of the Galactic Empire or the Rebel Alliance during the Galactic Civil War. Each turn, you must influence key events in your favor by using the resources, iconic characters, and overarching strategies at your disposal. In today’s preview, we’ll take a closer look at a game round, giving an example of a struggle over a memorable event from the classic Star Wars films: the Empire’s attack on Echo Base. 
Walkers Incoming A round of Empire vs. Rebellion begins by revealing the top card of the event deck. In this case, the contested event is Attack on Echo Base. The faction that claims victory in this event expands their power through the galaxy and gains the victory point and influence rewards shown in the upper right-hand corner of the card. The lower left-hand corner shows the event card’s capacity, which limits the number of resource cards, and the objective value, which is the target both Empire and Rebellion strive to reach. The faction that comes closest to the objective value without surpassing it claims victory in the attack on Echo Base, claiming Hoth for the Empire or the Rebellion. In this example, Phil controls the Rebel Alliance and Sara leads the Galactic Empire. Before they play cards in the struggle, however, they each choose a strategy card. Strategy cards give both players a secret way to affect the struggle, and they are kept secret until the end of the struggle, when both strategies are revealed and take effect.  At this point in the game, Sara has already seen Phil’s Deception strategy. This strategy allows the player who would lose the event to win the event instead. Phil can’t choose this strategy again until he plays each of his remaining strategies, so Sara decides that the Direct Assault strategy is the best choice for this struggle. This strategy increases the resource value on her resource cards by two when determining victory. At this point in the game, Sara has already seen Phil’s Deception strategy. This strategy allows the player who would lose the event to win the event instead. Phil can’t choose this strategy again until he plays each of his remaining strategies, so Sara decides that the Direct Assault strategy is the best choice for this struggle. This strategy increases the resource value on her resource cards by two when determining victory.
Phil, on the other hand, wants to control how Sara plays in a future round. With this in mind, he chooses the Infiltration strategy. This strategy allows Phil to choose Sara’s strategy card in the next round, potentially helping him to lock her into a certain play style. After both players choose a strategy, the struggle phase and the attack on Echo Base begin. Imperial Troops Enter the Base On a player’s turn, he has four options. He can bring more resources to bear on the struggle by playing a new card from the top of his deck, he can exhaust a card to trigger its power, he can spend influence to ready a card, or he can pass. After completing one of these options, the turn passes to the other player. The struggle continues until both players pass consecutively. Sara begins the Empire’s assault on the secret Rebel base by drawing the top card of her resource deck and playing it, revealing a Recon resource card with a resource value of three. The turn then passes to Phil, who also chooses to play the top card of his deck, revealing Chewbacca! Chewbacca is one of the Rebel Alliance’s eight unique character resource cards. He possesses a resource value of six while ready, and by triggering his power, Phil may exhaust up to two of Sara’s resource cards. 
On her next turn, Sara takes advantage of her Recon resource card, exhausting it to trigger its power. Sara has the option to look at the top two cards of any resource deck, discarding one of the two cards and replacing the other. Sara decides that she would rather filter her opponent’s cards. Upon looking at the top two card’s of Phil’s resource deck, she finds a Recon resource card with a value of two, and a Military resource card with a value of five. She discards the two resource, leaving the five-value resource. By leaving Phil with a high resource card on top of his deck, she can push him closer to overshooting the event’s objective value. Phil takes his turn next, playing the top card off of his deck and revealing the Military resource card with a value of five. Together with Chewbacca, this puts Phil’s total resource value at eleven – a total greater than the Attack on Echo Base objective value of nine. If the event ends with Phil’s resource value higher than the objective value, Phil automatically loses the event, leaving Sara and the Galactic Empire in control of Echo Base. 
Sara has no ready resource cards, so she chooses to play the top card of her deck, revealing a The Force resource card with a value of two. This brings her revealed resource total to five, or seven with the hidden bonus from the Direct Assault strategy. The turn passes to Phil, and he triggers Chewbacca’s power, which serves the dual purpose of exhausting Sara’s The Force resource and lowering his own resource value to six. On Sara’s next turn, she decides that filtering her own future cards may be her best chance of winning the event. To that end, she spends an influence to ready her Recon resource card, preparing her to use its power again. Phil wants to prevent Sara from reusing her Recon resource, however, so on his turn, he exhausts his Military resource card to discard her Recon resource card. Sara plays another new card on her turn, revealing a Diplomacy resource card with a resource value of three. Unfortunately, the special text of Attack on Echo Base states that Diplomacy cards’ power can’t be used during this struggle, making the power of Sara’s newest card useless. 
At this point, Phil sees that Sara has a total resource value of five, while he has a resource value of six. He doesn’t want to play another card for fear of going over the event’s objective value, so he chooses to pass. Sara, however, knows that her chosen strategy card adds two to her resource value, bringing her to a total of seven. Because Phil passed on his last turn, Sara also passes, and the struggle ends. Both players reveal their strategies, and Sara’s Direct Assault strategy brings her resource value closer to the objective value than Phil’s, bringing victory to the Galactic Empire! Sara claims the event and the spoils of victory – two victory points and one influence. The first player to seven victory points in Empire vs. Rebellion claims dominion over the galaxy. Although the Galactic Empire was triumphant in the Attack on Echo Base, the Rebel Alliance will make its stand on separate planets and continue the fight for freedom across the galaxy. The First Transport Is Away Star Wars: Empire vs. Rebellion is a climatic game expanding the narrative of the ongoing war between the Galactic Empire and the Rebellion. You hold the power to relive moments from the classic movies and change the course of iconic events, but you’ll need every resource at your disposal to claim victory in the Galactic Civil War. Preorder Empire vs. Rebellion at your local retailer today! ... Source: Attack on Echo Base (http://www.fantasyflightgames.com/edge_news.asp?eidn=5023)
Title: FFG:Sins of Askellon
Post by: RSSFeeder on 02 September 2014, 20:00:03
Sins of AskellonA Designer Diary for Dark Heresy Second Edition
“Gather tears for the sins of ye fathers, O children of Askellon.”
–Saint Valerius, Introit to the Apocrypha Askellios Recently, we released Dark Heresy Second Edition, a new roleplaying game that casts players as Acolytes in the service of an Inquisitor amidst the grim darkness of the far future. In every game, you face the horrors of the Warp-stained Askellon sector, striving to buy humanity more time. The darkness of the Askellon sector has never been explored before Dark Heresy Second Edition. Today, Andy Hoare, a leading author at Black Library and one of the major authors in Dark Heresy Second Edition, discusses the game’s new setting: the dark and ancient Askellon sector.
Andy Hoare on the Askellon Sector in Dark Heresy Second Edtion The Askellon sector is an entirely new sector of the Imperium, departing from the Calixis Sector of Dark Heresy, the Koronus Expanse of Rogue Trader, the Jericho Reach of Deathwatch, the Screaming Vortex of Black Crusade and the Spinward Front of Only War. Although this sector is new, it is still subtly linked to the regions of the Imperium that you may have experienced before. Players steeped in the lore of the Calixis Sector and its connected regions may recall scattered mentions of some other locations – the Scelus and Ixaniad Sectors, the “Dread” Mandragora Sector, and an unnamed region bluntly labelled “Access Denied.” This once-forbidden sector is the region in which Dark Heresy Second Edition is set, and the reason for its ominous designation quickly becomes clear to Game Masters and players that dare to enter. The Askellon sector has been marked “off limits” even by the great Navigator Houses. Ravenous data-phages slowly work their way through Imperial archives, redacting the region from stellar maps. The reason for this is simple—a seemingly endless Warp Storm, called the Pandaemonium, roars through the Askellon sector. This tempest exists on a huge scale that may one day even rival the Maelstrom and the Eye of Terror. Because of this, the Askellon sector is doomed, but not to a swift, glorious, or merciful death. The region and its people have courted damnation since the very earliest days of human settlement in this sector. Countless legends describe the earliest days of Askellon, but few can be trusted. Some stories claim that the colonists of the first worlds were damned before they arrived; others say the settlers were helplessly fleeing some great calamity or betrayal. These first core worlds clung together through the terrors of the Age of Strife, so that when the Great Crusade finally cast out the shadows of Old Night, Askellon stood as one. Tales from those days exist only as mythical legend and consecrated texts, describing the arrival of the Emperor and the galactic war of rebellion in sacred verses. There are manifold tales of glorious conflict and celebration from those dark times, though apocryphal whispers dare to question these events and Askellon’s role in them. Of course, such accusations are not uttered openly, for the Lords of Askellon are all-powerful within their domains, and a formidable history is not a matter for open discussion. Askellon is steeped in damnation, forming a microcosm of the larger Imperium’s fate. The institutions of the Askellon sector are crumbling, its ruling classes are beyond corrupt, its worlds are riven with endless war, and all the while, the enemies of Mankind plot its downfall. Uncounted border systems have been lost to the Pandaemonium and other threats over the millennia, and the Imperium may perhaps turn its back on Askellon once and for all. Many of Mankind’s great pillars regard the sector as lost already, so when a high adept of the Adeptus Terra passes away, none replace him. Worst of all, the League of Black Ships has been erratic at best when scouring the sector for psykers. All of Askellon seethes with Warp energies that threaten to draw the questing coils of the Pandaemonium onwards. Upon these cursed stars falls the inscrutable eye of the Inquisition. Few Inquisitors operate openly in Askellon: to do so would be to court a repeat of the internecine conflict known as the Vaxi Atrocity that burned an entire sub-sector and saw dozens of Inquisitors and their indentured armies clash for no benefit, save that of the dark gods. An uneasy truce holds rival Inquisitors at a distance, but their wars grind on, fought by proxy through their Acolytes, even as they struggle to uncover a fraction of the crimes attributed to the Lords of Askellon. Those sworn to an Inquisitor’s service have their duties to perform, even as the sector crumbles around them.
There are those who would abandon Askellon and its masters to their fate, allowing them to be consumed by the ravening Warp. But others fear that this course of action would allow a daemonic incursion of unprecedented scale. If this invasion occurred, the worlds of an entire sector would be transformed into the domains of Daemons, and the fall of the Imperium brought even closer. Only the bold servants of the Inquisition are willing to lay down their lives to avert this dire fate, even as the Lords of Askellon invent new sins in a sector seething with the darkest heresies known to Mankind. Enter the Askellon Sector Thanks, Andy! The doom of the Askellon sector may be certain, but there are still those of the Inquisition who will fight to the death before they see more of the Imperium slip into eternal night. Take your place among that heroic number as you make your investigations and battle for the fate of the Askellon sector! Dark Heresy Second Edition is now available online through our webstore and at your local retailer. ... Source: Sins of Askellon (http://www.fantasyflightgames.com/edge_news.asp?eidn=5022)
Title: FFG:Clandestine Cultists and Secret Orders
Post by: RSSFeeder on 03 September 2014, 04:30:03
Clandestine Cultists and Secret OrdersA Preview of The Sleeper Below Expansion for Call of Cthulhu: The Card Game
“My uncle blamed his old age, Wilcox afterward said, for his slowness in recognising both hieroglyphics and pictorial design. Many of his questions seemed highly out-of-place to his visitor, especially those which tried to connect the latter with strange cults or societies.”
–H.P. Lovecraft, The Call of Cthulhu In Call of Cthulhu: The Card Game, immense and terrifying creatures lie dormant in deathless slumber hundreds of fathoms beneath the surface of the ocean. Other unfathomable creatures, the inhabitants of extra-dimensional worlds just beyond the edges of our own, can reach across time and space to influence the dreams of artists, lunatics, and other visionaries. While the vast majority of humanity remains blissfully ignorant of these strange creatures, there are a handful who recognize their existence, and the ways in which they respond to this knowledge are as varied as the nature of humanity itself. Many of them go mad, unable to process the ramifications of such terrifying realities. Some recognize the existence of these creatures as threats to humanity and its continued existence, and they work to ensure that these  creatures will never fully enter the human realm. Some try to exploit their knowledge for power, offering themselves as servants or seeking the means to control these alien powers that they can’t even fully understand. creatures will never fully enter the human realm. Some try to exploit their knowledge for power, offering themselves as servants or seeking the means to control these alien powers that they can’t even fully understand. Finally, a good number of these individuals elect to congregate with others who share their knowledge and interests. They seek greater strength in numbers and form secret societies or cults. And with the upcoming release of The Sleeper Below deluxe expansion, these Societies will begin to more fully impact the struggles of Call of Cthulhu. In our previous previews of The Sleeper Below, we’ve looked at the expansion’s new Dormant mechanic and the ways in which its many new characters lend strength and flavor to the Cult of Cthulhu. However, while the majority of The Sleeper Below is dedicated to the slumbering Cthulhu and his cult, the expansion also bolsters each of the game’s other factions. One of the chief ways in which it does so is through the introduction of new Society characters, each of which costs six resources but plays for less if your opponent has won any stories. Societies in The Sleeper Below Each of the eight Society characters in The Sleeper Below represents a group of similarly minded individuals who are bent upon secretly advancing their own agenda, whether that agenda be to defend humanity’s interests, seize control of humanity, or summon forth the Great Old Ones. It makes sense, then, that these Societies are more skillful and capable than nearly every individual character within the game. Each Society comes with six skill and a mix of five struggle icons. They’re all unique, and at six cost, they’re all quite expensive. Of course, high-cost characters come with some inherent benefits, such as the ability to bypass Negotium Perambulans in Tenebris (Dunwich Denizens, 80) and a higher degree of protection from such cost-based events as from Pushed into the Beyond (Touched by the Abyss, 109) and Deep One Assault (Core Set, 56). 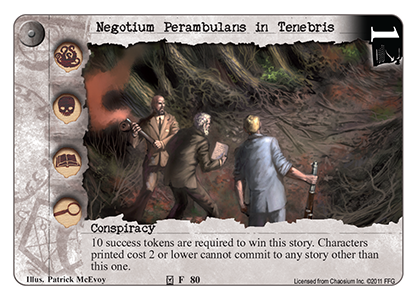
Still, games of Call of Cthulhu are often won or lost before players are able to build a single domain up to six resources, so there’s no guarantee you’ll be able to pay any Society character’s full six cost. However, each Society also comes with a shared effect; the cost to play any Society is reduced by two for each story card in an opponent’s won pile, and they each come with powerful game effects, many of which can quickly turn a game on its head. In the end, then, each of these Society characters appears to offer a potential late-game swing. The further you find yourself behind, or the closer you get to the end of a close game, the more impactful they become. This is true, but there’s more to these complicated Societies than just a late-game push. Their abilities and subtypes can engender a good variety of mid-game combination plays. To Preserve Order  While the Ancient Ones and their worshippers seek to sow chaos throughout the world, some Societies, like the US Archaeological Society (The Sleeper Below, 44) seek to thwart the Ancient Ones and preserve order. Or at least a form of order. While the Ancient Ones and their worshippers seek to sow chaos throughout the world, some Societies, like the US Archaeological Society (The Sleeper Below, 44) seek to thwart the Ancient Ones and preserve order. Or at least a form of order.
Each Society character in The Sleeper Below has two subtypes, the first of which is Society, and the second subtype can tell you a lot about how you might be able to put the character’s talents to good use. For example, the US Archaeological Society’s Explorer subtype allows it to benefit from a wide range of synergies with other Explorers like Roald Ellsworth (Seekers of Knowledge, 4) and Brette Wulffsen (Seekers of Knowledge, 5). Moreover, even as the US Archaeological Society allows you to search for Lost Civilizations each time you place a success token at a story where it is committed, the Lost Civilization Ultima Thule (Seekers of Knowledge, 26) allows you to commit the US Archaeological Society to stories as early as your first Story phase. The US Archaeological Society isn’t the only group looking to maintain order in The Sleeper Below. The Criminals of the Hip Sing Tong (The Sleeper Below, 53) intend to make sure no unexpected evils interfere with their profits, The Peel Association (The Sleeper Below, 40) protects mankind by stripping its foes of the ability to use some of its most valuable resources,  and H.O.S.T. (The Sleeper Below, 49) continues to promote its own order. and H.O.S.T. (The Sleeper Below, 49) continues to promote its own order. Notably, H.O.S.T. doesn’t gain as much as some of the other Societies from its secondary subtype, Independent, but it certainly doesn’t lack for interactions with other cards. In fact, once it comes into play, H.O.S.T. is one of the Societies most likely to change the nature of a game. Its action reads: “Action: Return a Lodge character to your hand. Then, draw 1 card. Limit 3 times per turn.” In combination with other Lodge characters like Nathan Wick (Written and Bound, 13) and Lord Jeffrey Farrington (The Order of the Silver Twilight, 18), H.O.S.T. can even help you recover and snatch victory from the brink of defeat. And it’s Independent subtype? That offers you a bit of protection in the form of 607 Walter Street (Kingsport Dreams, 39), which ensures that even The Plague Stone (Terror in Venice, 32) won’t be able to permanently disrupt the Order’s secret ambitions. To Sow Chaos Of course, if the forces of humanity can have their Societies, then so can the Ancient Ones and their followers. All four of the mythos factions gain Society characters whose second subtype is Cultist, and that means that they give each of the mythos factions new tools they can use to extract benefits from all of the other Cultist-themed effects in The Sleeper Below, not to mention the rest of the Call of Cthulhu card pool. This likely means that players looking to make full use of these new mythos Society characters may explore decks that partner cards from two or more factions. If they do, a maddening array of possible combinations awaits them. For example, aligning the Cult of Cthulhu with the Sons of Carcosa (The Sleeper Below, 42) and other Cultists dedicated to Hastur would dramatically increase the impact of a Harbinger of Insanity (Murmurs of Evil, 27). 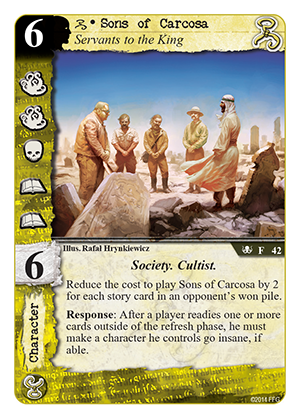 
Alternatively, were Cthulhu’s Cultists to join forces with those of Shub-Niggurath, the event Even Here She Dwells (Never Night, 80) could provide you a massive burst of early card draw, and The Shepherds (The Sleeper Below, 46) would allow you to resource some of your most powerful characters early on but still retain access to them later in the game.  
Finally, the Guardians of the Gate (The Sleeper Below, 55), a Society dedicated to Yog-Sothoth, may posses the most game-changing of all the new Societies’ abilities, but their lack of Combat icons makes them vulnerable in the story phase. Even a lowly Black Dog (Words of Power, 29) could destroy them… That is until the Society coordinates its efforts with the Cult of Cthulhu and gains access to such powerful items as the Horrific Statuette (The Sleeper Below, 20).  
And in a well-crafted Cultist deck, the draw limitations imposed upon both players by the Guardians of the Gate might begin to appear truly one-sided once you make use of Unaussprelichen Kulten (The Sleeper Below, 25), Servant to the Elder Things (Lost Rites, 77), and Speak to the Dead (Whispers in the Dark, 20). Choose Your Cause While it is primarily dedicated to Cthulhu and his followers, The Sleeper Below lends considerable strength to each of the game’s factions, and the expansion’s eight new Society characters are certain to find their way into a wide array of new decks. Will you join with other individuals dedicated to the promotion of order? Or will you help call the earth to ruin? The time to decide draws near. The Sleeper Below is coming. Head to your local retailer to pre-order your copy today! ... Source: Clandestine Cultists and Secret Orders (http://www.fantasyflightgames.com/edge_news.asp?eidn=5024)
Title: FFG:A Word from the Developers
Post by: RSSFeeder on 03 September 2014, 13:00:15
A Word from the DevelopersUpdates Will Begin After the Beta Is Available at Retailers
Hello, Force and Destiny Beta testers! Thank you for joining the beta test for Star Wars®: Force and Destiny™. We’re pleased that so many of you already managed to pick up advanced copies of the Beta Rulebook from Gen Con and contribute to the discussions on our forums. While these early conversations have already generated a lot of useful feedback, we will not be starting the update process quite yet. Before we start making any large changes or updates, we want to make sure that all testers have a chance to have their voices heard. Because of this, we will be waiting for the copies of the Beta to be available in stores before we start posting updates. Once everyone has had a chance to play the game and share opinions about the book, we can make the most informed decision about what changes to make. Once the Beta copies are widely available, we expect the beta process will run roughly eight to ten weeks, depending on the level of feedback and number of changes we need to implement. You can discuss changes with other beta testers on our public forum which can be found at www.fantasyflightgames.com/forceanddestinybeta. You can also submit feedback to us directly at forceanddestinybeta@fantasyflightgames.com. Throughout the beta process, we will be reviewing your feedback and developing updates, which we will post regularly. These updates will include changes to the rules, potential additions we are considering, and direct requests to focus additional testing on certain parts of the book. We plan on posting our first beta update on Tuesday, September 9th, and we will ask you to focus your attention toward some specific areas of the game. Thanks for your participation! We look forward to hearing feedback and making Force and Destiny the best game it can possibly be. ... Source: A Word from the Developers (http://www.fantasyflightgames.com/edge_news.asp?eidn=5026)
Title: FFG:The End of the World
Post by: RSSFeeder on 03 September 2014, 21:30:03
The End of the WorldAnnouncing a New Roleplaying Game Line of Horror and Survival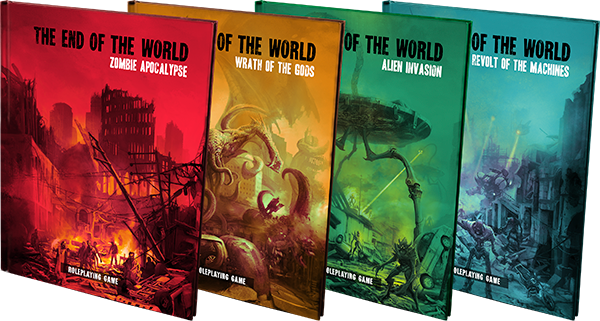
“Shoot it in the head – that works in the movies!”
–A survivor who’s about to be very disappointed Fantasy Flight Games is proud to announce the upcoming release of The End of the World series, a new roleplaying game line of horror and survival in humanity’s last days! Four books make up The End of the World roleplaying game series. Each of these four books offers a different apocalyptic genre and experience. The first book in the series, Zombie Apocalypse, challenges you to face hordes of undead that rise and stalk the earth, hungry for the flesh of the living. The series continues with Wrath of the Gods, pitting players against a pantheon of supernatural foes intent of destroying humanity. Ranging from the Mayan apocalypse to Cthulhu, the gods return to exact terrible vengeance in this book. The third installment in the series is Alien Invasion, giving you the opportunity to battle unknown life forms from beyond our galaxy. You may face a species of conquering warriors, or aliens too small to see with the naked eye. Finally, Revolt of the Machines invites you to match wits against artificial intelligence. When our technology develops consciousness, even normal people will need to battle technology in every form. Each of these books offers a complete self-contained experience, although they share the same rules system. No matter which apocalypse you want to explore, you’ll find unending horror and adventure in this roleplaying series. 
Better Me than You In the majority of roleplaying games, you take on the persona of a fictional character – ranging from a elven thief to a half-orc war-mage to a human soldier, and beyond. The End of the World line changes all of this by inviting you to play as yourself amidst the tumult of the world’s ending! You’ll use your own physical, mental, and social attributes to create yourself as an in-game character, allowing you to come as close as you (safely) can to experiencing the apocalypse first-hand. In addition to your chosen attributes, you can represent yourself more accurately by imagining positive and negative features. For example, you may have the Long-distance Runner positive feature, but you may also cope with the Extremely Nearsighted negative feature. Another character may have the Natural Leader positive feature, but this could be tempered by the Wants Revenge negative feature. Since you’re playing yourself in every game of The End of the World, your starting gear is also limited to what you can find close at hand when you sit down to play the game. You could start with a cell phone, but how long will it stay charged? Who knows how long the cash in your wallet will be accepted as viable currency in light of the world’s ending? You might want a good shotgun to defend yourself, but that could mean venturing out of your friend’s apartment. Kitchen knives might be your only available weapons for defending yourself against hordes of ravenous zombies or conquering aliens. The Beginning of the End 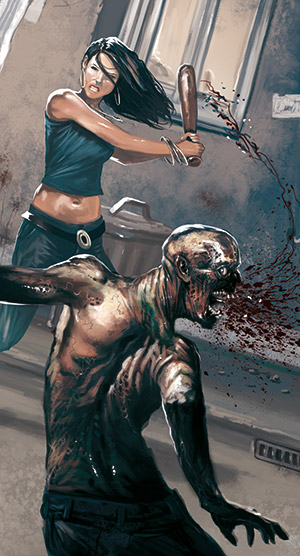 The world can end in countless ways, and in each of The End of the World books, there are five different scenarios for you to experience. Because these scenarios function like different campaign settings within the same theme, you can enjoy all of these scenarios time and time again. Although each book’s scenarios share the titular theme, there’s plenty of room for variation within the genre. In Zombie Apocalypse, for example, every scenario varies in the origin of the zombies, the government’s response, the timeline of the apocalypse, the ways you can kill the zombies, and countless other details, both large and small. The apocalypse may start with an outbreak of disease, or a sudden earthquake that releases a once-dormant parasite. The world can end in countless ways, and in each of The End of the World books, there are five different scenarios for you to experience. Because these scenarios function like different campaign settings within the same theme, you can enjoy all of these scenarios time and time again. Although each book’s scenarios share the titular theme, there’s plenty of room for variation within the genre. In Zombie Apocalypse, for example, every scenario varies in the origin of the zombies, the government’s response, the timeline of the apocalypse, the ways you can kill the zombies, and countless other details, both large and small. The apocalypse may start with an outbreak of disease, or a sudden earthquake that releases a once-dormant parasite.
Of course, even the panic and terror of the apocalypse can’t last forever. Eventually, you’ll have to cope with the aftermath. Each scenario features a post-apocalypse, illustrating how some semblance of order returns in the shattered aftermath of the apocalypse. No matter how humanity has adapted in order to survive, life in the post-apocalypse is completely different from life before. The post-apocalypse is just as dangerous as the apocalypse itself, presenting entirely different challenges and threats to whatever remains of you and your haggard band of survivors. Aliens may enslave the nations, or Norse gods may return to earth to enact the cataclysmic battles of Ragnarök. Because of the flexible apocalypse/post-apocalypse scenario structure, your adventures at the end of the world can vary widely in length. Whether you play a single session that ends in gruesome death for every player, or begin a campaign that stretches from apocalypse to post-apocalypse and beyond, every scenario takes you straight to the terror and adventure of the apocalypse. For more on the The End of the World experience, we turn to the game’s developer, Tim Flanders. Developer Tim Flanders on the End of the World For the last several months, I’ve had the pleasure of working on something a little different – a series of roleplaying games called The End of the World, which begins with Zombie Apocalypse. Each game in The End of the World series covers five thematically linked scenarios that bring the world as we know it to a dramatic end. The four books in The End of the World are each dedicated to a beloved apocalypse genre that has inspired countless movies, books, comics, and stories. You can experience these apocalypses with any tone, whether you choose to play a light and humorous version of the end times, or embrace the horror that surrounds the end of life as we know it. Obviously, the first book, Zombie Apocalypse, covers the much-loved brain-eating undead. One of the great things about starting with this particular form of the apocalypse is the amazing depth of narrative and sheer quantity of media on the subject. The amount of material available for inspiration is nearly endless, and I think the scenarios we’ve included in this book sum up the most exciting elements of the genre. Game Masters will be able to dive headlong into their favourite themes and tropes from zombie horror. In this book, we’ve got everything from shambling, brain-hungry undead to tireless, sprinting rage zombies. There are infections, radiation, parasites, and even voodoo magic! 
Of course, the other major theme that runs through the entire game line is that the players get to explore and experience these world-ending events as themselves. This is, hands down, the most exciting part of this game for me. The idea of playing through an apocalyptic (and eventually post-apocalyptic) scenario with my friends, in my home town, definitely adds a pretty unique thrill to the game. I think people are going to be very excited about this new game line we’re working on, and I can’t wait to hear what kinds of stories your group comes up with as you make your way through The End of the World! The End Is Nigh Thanks, Tim! The day of the dead rising is quickly approaching. It’s up to you to ensure that you survive the apocalypse. For more information on the other books in The End of the World line, visit the description page. Prepare for hordes of zombies to end the world with the release of Zombie Apocalypse in the fourth quarter of 2014, and look for the rest of the books in The End of the World series to be released at a later date! ... Source: The End of the World (http://www.fantasyflightgames.com/edge_news.asp?eidn=5027)
Title: FFG:The End of the World
Post by: RSSFeeder on 04 September 2014, 06:02:06
The End of the WorldAnnouncing a New Roleplaying Game Line of Horror and Survival
“Shoot it in the head – that works in the movies!”
–A survivor who’s about to be very disappointed Fantasy Flight Games is proud to announce the upcoming release of The End of the World series, a new roleplaying game line of horror and survival in humanity’s last days! Four books make up The End of the World roleplaying game series. Each of these four books offers a different apocalyptic genre and experience. The first book in the series, Zombie Apocalypse, challenges you to face hordes of undead that rise and stalk the earth, hungry for the flesh of the living. The series continues with Wrath of the Gods, pitting players against a pantheon of supernatural foes intent of destroying humanity. Ranging from the Mayan apocalypse to Cthulhu, the gods return to exact terrible vengeance in this book. The third installment in the series is Alien Invasion, giving you the opportunity to battle unknown life forms from beyond our galaxy. You may face a species of conquering warriors, or aliens too small to see with the naked eye. Finally, Revolt of the Machines invites you to match wits against artificial intelligence. When our technology develops consciousness, even normal people will need to battle technology in every form. Each of these books offers a complete self-contained experience, although they share the same rules system. No matter which apocalypse you want to explore, you’ll find unending horror and adventure in this roleplaying series.
Better Me than You In the majority of roleplaying games, you take on the persona of a fictional character – ranging from a elven thief to a half-orc war-mage to a human soldier, and beyond. The End of the World line changes all of this by inviting you to play as yourself amidst the tumult of the world’s ending! You’ll use your own physical, mental, and social attributes to create yourself as an in-game character, allowing you to come as close as you (safely) can to experiencing the apocalypse first-hand. In addition to your chosen attributes, you can represent yourself more accurately by imagining positive and negative features. For example, you may have the Long-distance Runner positive feature, but you may also cope with the Extremely Nearsighted negative feature. Another character may have the Natural Leader positive feature, but this could be tempered by the Wants Revenge negative feature. Since you’re playing yourself in every game of The End of the World, your starting gear is also limited to what you can find close at hand when you sit down to play the game. You could start with a cell phone, but how long will it stay charged? Who knows how long the cash in your wallet will be accepted as viable currency in light of the world’s ending? You might want a good shotgun to defend yourself, but that could mean venturing out of your friend’s apartment. Kitchen knives might be your only available weapons for defending yourself against hordes of ravenous zombies or conquering aliens. The Beginning of the End The world can end in countless ways, and in each of The End of the World books, there are five different scenarios for you to experience. Because these scenarios function like different campaign settings within the same theme, you can enjoy all of these scenarios time and time again. Although each book’s scenarios share the titular theme, there’s plenty of room for variation within the genre. In Zombie Apocalypse, for example, every scenario varies in the origin of the zombies, the government’s response, the timeline of the apocalypse, the ways you can kill the zombies, and countless other details, both large and small. The apocalypse may start with an outbreak of disease, or a sudden earthquake that releases a once-dormant parasite. Of course, even the panic and terror of the apocalypse can’t last forever. Eventually, you’ll have to cope with the aftermath. Each scenario features a post-apocalypse, illustrating how some semblance of order returns in the shattered aftermath of the apocalypse. No matter how humanity has adapted in order to survive, life in the post-apocalypse is completely different from life before. The post-apocalypse is just as dangerous as the apocalypse itself, presenting entirely different challenges and threats to whatever remains of you and your haggard band of survivors. Aliens may enslave the nations, or Norse gods may return to earth to enact the cataclysmic battles of Ragnarök. Because of the flexible apocalypse/post-apocalypse scenario structure, your adventures at the end of the world can vary widely in length. Whether you play a single session that ends in gruesome death for every player, or begin a campaign that stretches from apocalypse to post-apocalypse and beyond, every scenario takes you straight to the terror and adventure of the apocalypse. For more on the The End of the World experience, we turn to the game’s developer, Tim Flanders. Developer Tim Flanders on The End of the World For the last several months, I’ve had the pleasure of working on something a little different – a series of roleplaying games called The End of the World, which begins with Zombie Apocalypse. Each game in The End of the World series covers five thematically linked scenarios that bring the world as we know it to a dramatic end. The four books in The End of the World are each dedicated to a beloved apocalypse genre that has inspired countless movies, books, comics, and stories. You can experience these apocalypses with any tone, whether you choose to play a light and humorous version of the end times, or embrace the horror that surrounds the end of life as we know it. Obviously, the first book, Zombie Apocalypse, covers the much-loved brain-eating undead. One of the great things about starting with this particular form of the apocalypse is the amazing depth of narrative and sheer quantity of media on the subject. The amount of material available for inspiration is nearly endless, and I think the scenarios we’ve included in this book sum up the most exciting elements of the genre. Game Masters will be able to dive headlong into their favourite themes and tropes from zombie horror. In this book, we’ve got everything from shambling, brain-hungry undead to tireless, sprinting rage zombies. There are infections, radiation, parasites, and even voodoo magic! Of course, the other major theme that runs through the entire game line is that the players get to explore and experience these world-ending events as themselves. This is, hands down, the most exciting part of this game for me. The idea of playing through an apocalyptic (and eventually post-apocalyptic) scenario with my friends, in my home town, definitely adds a pretty unique thrill to the game. I think people are going to be very excited about this new game line we’re working on, and I can’t wait to hear what kinds of stories your group comes up with as you make your way through The End of the World!
The End Is Nigh Thanks, Tim! The day of the dead rising is quickly approaching. It’s up to you to ensure that you survive the apocalypse. For more information on the other books in The End of the World line, visit the description page. Prepare for hordes of zombies to end the world with the release of Zombie Apocalypse in the fourth quarter of 2014, and look for the rest of the books in The End of the World series to be released at a later date! ... Source: The End of the World (http://www.fantasyflightgames.com/edge_news.asp?eidn=5027)
Title: FFG:Craft Your Totems
Post by: RSSFeeder on 04 September 2014, 14:30:03
Craft Your TotemsPreview the Totem School of Magic in Bestial Forces
Callista had fought unearthly creatures before she took her place in the magical labyrinth. Who vanquished the minotaur of Alexandria, if not her? Who defied the wraiths beneath Olympus, if not her? But this creature was something different. She could feel the totems’ power throbbing through the labyrinth, prodding at her with inhuman malevolence. And the guardian of the totems was closing in. She turned her head, only to see the ghostly snake, the guardian, emerging from the stone wall, its fangs dripping spectral venom. Unleash the creatures into your wizard duels with Bestial Forces expansion! Soon, you’ll be able to summon minotaurs, genies, boggarts, and more, bringing new levels of wild magic to your games of Wiz-War.
There’s plenty of new magic to tantalize new wizards in Bestial Forces. Our first preview illustrated the Mythology school of magic, including plenty of creatures and relics from ancient myths. The second preview focused on the school of magic devoted to just one creature: the mighty dragon! Today, however, we’ll explore the sector-spanning prowess of totems with the Totem school of magic. In addition, the rules (pdf, 2.1 MB) for Bestial Forces are now online. Download the rules and prepare to learn the secrets of the creatures! Wood, Stone, Spirit You’ll find six unique Totem creations within this school of magic, and although their exact effects can vary, all Totems share a few things in common. These creations can only be placed in an empty square adjacent to the casting wizard, and they last as long as you choose to maintain the spell. Although the range for creating one of these Totems is limited, its effects extend to everything in its sector. This potency comes at the cost of fragility: these Totems requires only one damage or one crack to destroy.  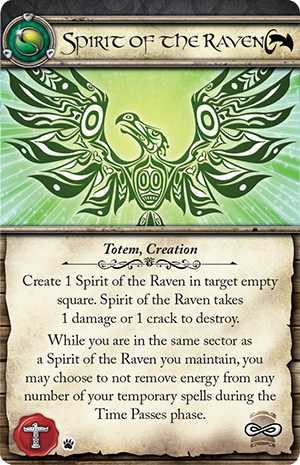
One of the Totems you’ll find in this school of magic is the far-sighted Spirit of the Owl. While you cast a spell in the same sector as your Spirit of the Owl totem, you have line of sight to all objects, wizards, and creatures in your current sector, allowing you to target anything that dares enter your domain. Another potent protection for your own sector could be the Sprit of the Serpent Totem. Whenever another wizard enters or starts his turn in the same sector as your Spirit of the Serpent, his speed is reduced by one and he takes one point of magical damage. Yet another Totem grants your temporary spells infinite energy! While you stay in the same sector as your Spirit of the Raven, you may choose not to remove energy from any number of your temporary spells during your Time Passes phase, allowing you to maintain them as long as you wish. Strength in Numbers As more totems are created, the power of other cards in this school of magic increases. This school of magic introduces a new energy card with Spiritual Infusion. The energy value of Spiritual Infusion is equal to one plus the number of Totem cards in play. As more Totems enter play, the energy level of Spiritual Infusion can quickly skyrocket, even reaching as high as fourteen energy – enough power to kill a wizard in one hit with some spells.  
You’ll gain another powerful ally with the addition of the Totem Spirit. This creature is also a Totem, and its ethereal nature allows it to move through both walls and doors. In addition, the Totem Spirit may attack any adjacent wizard or creature, inflicting magical damage equal to the total number of Totems in play, including the Totem Spirit itself. In a labyrinth packed with Totems, the Totem Spirit’s attacks could prove deadly.  Finally, you’ll sometimes need more than the inherent abilities of your Totems to defend your treasures. By casting Wrath of the Ancestors when a wizard picks up a treasure in your home sector, you force that wizard to take magical damage equal to two plus the number of your maintained Totem spells, punishing anyone foolish enough to trifle with your treasures. Finally, you’ll sometimes need more than the inherent abilities of your Totems to defend your treasures. By casting Wrath of the Ancestors when a wizard picks up a treasure in your home sector, you force that wizard to take magical damage equal to two plus the number of your maintained Totem spells, punishing anyone foolish enough to trifle with your treasures.
Call Upon the Spirits Tap the power of the totems and the other schools of magic included in Bestial Forces. Bestial Forces will soon be available at your local retailer! Prepare to unleash a host of creatures into your wizard duels by downloading the rules from the Wiz-War support page. ... Source: Craft Your Totems (http://www.fantasyflightgames.com/edge_news.asp?eidn=5028)
Title: FFG:The End of the World
Post by: RSSFeeder on 04 September 2014, 23:00:03
The End of the WorldAnnouncing a New Roleplaying Game Line of Horror and Survival
“Shoot it in the head – that works in the movies!”
–A survivor who’s about to be very disappointed Fantasy Flight Games is proud to announce the upcoming release of The End of the World, a new roleplaying game line of horror and survival in humanity’s last days! Four books make up The End of the World roleplaying game line. Each of these four books offers a different apocalyptic genre and experience. The first book, Zombie Apocalypse, challenges you to face hordes of undead that rise and stalk the earth, hungry for the flesh of the living. The line continues with Wrath of the Gods, pitting players against a pantheon of supernatural foes intent of destroying humanity. Ranging from the Mayan apocalypse to Cthulhu, the gods return to exact terrible vengeance in this book. The third installment in the line is Alien Invasion, giving you the opportunity to battle unknown life forms from beyond our galaxy. You may face a species of conquering warriors, or aliens too small to see with the naked eye. Finally, Revolt of the Machines invites you to match wits against artificial intelligence. When our technology develops consciousness, even normal people will need to battle technology in every form. Each of these books offers a complete self-contained experience, although they share the same rules system. No matter which apocalypse you want to explore, you’ll find unending horror and adventure in this roleplaying game.
Better Me than You In the majority of roleplaying games, you take on the persona of a fictional character – ranging from a elven thief to a half-orc war-mage to a human soldier, and beyond. The End of the World line changes all of this by inviting you to play as yourself amidst the tumult of the world’s ending! You’ll use your own physical, mental, and social attributes to create yourself as an in-game character, allowing you to come as close as you (safely) can to experiencing the apocalypse first-hand. In addition to your chosen attributes, you can represent yourself more accurately by imagining positive and negative features. For example, you may have the Long-distance Runner positive feature, but you may also cope with the Extremely Nearsighted negative feature. Another character may have the Natural Leader positive feature, but this could be tempered by the Wants Revenge negative feature. Since you’re playing yourself in every game of The End of the World, your starting gear is also limited to what you can find close at hand when you sit down to play the game. You could start with a cell phone, but how long will it stay charged? Who knows how long the cash in your wallet will be accepted as viable currency in light of the world’s ending? You might want a good shotgun to defend yourself, but that could mean venturing out of your friend’s apartment. Kitchen knives might be your only available weapons for defending yourself against hordes of ravenous zombies or conquering aliens. The Beginning of the End The world can end in countless ways, and in each of The End of the World books, there are five different scenarios for you to experience. Because these scenarios function like different campaign settings within the same theme, you can enjoy all of these scenarios time and time again. Although each book’s scenarios share the titular theme, there’s plenty of room for variation within the genre. In Zombie Apocalypse, for example, every scenario varies in the origin of the zombies, the government’s response, the timeline of the apocalypse, the ways you can kill the zombies, and countless other details, both large and small. The apocalypse may start with an outbreak of disease, or a sudden earthquake that releases a once-dormant parasite. Of course, even the panic and terror of the apocalypse can’t last forever. Eventually, you’ll have to cope with the aftermath. Each scenario features a post-apocalypse, illustrating how some semblance of order returns in the shattered aftermath of the apocalypse. No matter how humanity has adapted in order to survive, life in the post-apocalypse is completely different from life before. The post-apocalypse is just as dangerous as the apocalypse itself, presenting entirely different challenges and threats to whatever remains of you and your haggard band of survivors. Aliens may enslave the nations, or Norse gods may return to earth to enact the cataclysmic battles of Ragnarök. Because of the flexible apocalypse/post-apocalypse scenario structure, your adventures at the end of the world can vary widely in length. Whether you play a single session that ends in gruesome death for every player, or begin a campaign that stretches from apocalypse to post-apocalypse and beyond, every scenario takes you straight to the terror and adventure of the apocalypse. For more on the The End of the World experience, we turn to the game’s developer, Tim Flanders. Developer Tim Flanders on The End of the World For the last several months, I’ve had the pleasure of working on something a little different – a roleplaying game called The End of the World, which begins with Zombie Apocalypse. Each book in The End of the World covers five thematically linked scenarios that bring the world as we know it to a dramatic end. The four parts of The End of the World are each dedicated to a beloved apocalypse genre that has inspired countless movies, books, comics, and stories. You can experience these apocalypses with any tone, whether you choose to play a light and humorous version of the end times, or embrace the horror that surrounds the end of life as we know it. Obviously, the first book, Zombie Apocalypse, covers the much-loved brain-eating undead. One of the great things about starting with this particular form of the apocalypse is the amazing depth of narrative and sheer quantity of media on the subject. The amount of material available for inspiration is nearly endless, and I think the scenarios we’ve included in this book sum up the most exciting elements of the genre. Game Masters will be able to dive headlong into their favourite themes and tropes from zombie horror. In this book, we’ve got everything from shambling, brain-hungry undead to tireless, sprinting rage zombies. There are infections, radiation, parasites, and even voodoo magic! Of course, the other major theme that runs through the entire game line is that the players get to explore and experience these world-ending events as themselves. This is, hands down, the most exciting part of this game for me. The idea of playing through an apocalyptic (and eventually post-apocalyptic) scenario with my friends, in my home town, definitely adds a pretty unique thrill to the game. I think people are going to be very excited about this new game line we’re working on, and I can’t wait to hear what kinds of stories your group comes up with as you make your way through The End of the World!
The End Is Nigh Thanks, Tim! The day of the dead rising is quickly approaching. It’s up to you to ensure that you survive the apocalypse. For more information on the other books in The End of the World line, visit the description page. Prepare for hordes of zombies to end the world with the release of Zombie Apocalypse in the fourth quarter of 2014, and look for the rest of the books in The End of the World game line to be released at a later date! ... Source: The End of the World (http://www.fantasyflightgames.com/edge_news.asp?eidn=5027)
Title: FFG:The End of the World
Post by: RSSFeeder on 05 September 2014, 07:30:03
The End of the WorldAnnouncing a New Roleplaying Game Line of Horror and Survival
“Shoot it in the head – that works in the movies!”
–A survivor who’s about to be very disappointed Fantasy Flight Games is proud to announce the upcoming release of The End of the World, a new roleplaying game line of horror and survival in humanity’s last days! Four books make up The End of the World roleplaying game line. Each of these four books offers a different apocalyptic genre and experience. The first book, Zombie Apocalypse, challenges you to face hordes of undead that rise and stalk the earth, hungry for the flesh of the living. The line continues with Wrath of the Gods, pitting players against a pantheon of supernatural foes intent of destroying humanity. Ranging from the Mayan apocalypse to Cthulhu, the gods return to exact terrible vengeance in this book. The third installment in the line is Alien Invasion, giving you the opportunity to battle unknown life forms from beyond our galaxy. You may face a species of conquering warriors, or aliens too small to see with the naked eye. Finally, Revolt of the Machines invites you to match wits against artificial intelligence. When our technology develops consciousness, even normal people will need to battle technology in every form. Each of these books offers a complete self-contained experience, although they share the same rules system. No matter which apocalypse you want to explore, you’ll find unending horror and adventure in this roleplaying game.
Better Me than You In the majority of roleplaying games, you take on the persona of a fictional character – ranging from a elven thief to a half-orc war-mage to a human soldier, and beyond. The End of the World line changes all of this by inviting you to play as yourself amidst the tumult of the world’s ending! You’ll use your own physical, mental, and social attributes to create yourself as an in-game character, allowing you to come as close as you (safely) can to experiencing the apocalypse first-hand. In addition to your chosen attributes, you can represent yourself more accurately by imagining positive and negative features. For example, you may have the Long-distance Runner positive feature, but you may also cope with the Extremely Nearsighted negative feature. Another character may have the Natural Leader positive feature, but this could be tempered by the Wants Revenge negative feature. Since you’re playing yourself in every game of The End of the World, your starting gear is also limited to what you can find close at hand when you sit down to play the game. You could start with a cell phone, but how long will it stay charged? Who knows how long the cash in your wallet will be accepted as viable currency in light of the world’s ending? You might want a good shotgun to defend yourself, but that could mean venturing out of your friend’s apartment. Kitchen knives might be your only available weapons for defending yourself against hordes of ravenous zombies or conquering aliens. The Beginning of the End The world can end in countless ways, and in each of The End of the World books, there are five different scenarios for you to experience. Because these scenarios function like different campaign settings within the same theme, you can enjoy all of these scenarios time and time again. Although each book’s scenarios share the titular theme, there’s plenty of room for variation within the genre. In Zombie Apocalypse, for example, every scenario varies in the origin of the zombies, the government’s response, the timeline of the apocalypse, the ways you can kill the zombies, and countless other details, both large and small. The apocalypse may start with an outbreak of disease, or a sudden earthquake that releases a once-dormant parasite. Of course, even the panic and terror of the apocalypse can’t last forever. Eventually, you’ll have to cope with the aftermath. Each scenario features a post-apocalypse, illustrating how some semblance of order returns in the shattered aftermath of the apocalypse. No matter how humanity has adapted in order to survive, life in the post-apocalypse is completely different from life before. The post-apocalypse is just as dangerous as the apocalypse itself, presenting entirely different challenges and threats to whatever remains of you and your haggard band of survivors. Aliens may enslave the nations, or Norse gods may return to earth to enact the cataclysmic battles of Ragnarök. Because of the flexible apocalypse/post-apocalypse scenario structure, your adventures at the end of the world can vary widely in length. Whether you play a single session that ends in gruesome death for every player, or begin a campaign that stretches from apocalypse to post-apocalypse and beyond, every scenario takes you straight to the terror and adventure of the apocalypse. The End of the World roleplaying game was originally invented by Álvaro Loman and Jose M. Rey. Additional development and design for the American edition was done by our very own Andrew Fischer and Tim Flanders, and for more information on The End of the World experience, we turn to Tim Flanders. Tim Flanders on The End of the World For the last several months, I’ve had the pleasure of working on something a little different – a roleplaying game called The End of the World, which begins with Zombie Apocalypse. Each book in The End of the World covers five thematically linked scenarios that bring the world as we know it to a dramatic end. The four parts of The End of the World are each dedicated to a beloved apocalypse genre that has inspired countless movies, books, comics, and stories. You can experience these apocalypses with any tone, whether you choose to play a light and humorous version of the end times, or embrace the horror that surrounds the end of life as we know it. Obviously, the first book, Zombie Apocalypse, covers the much-loved brain-eating undead. One of the great things about starting with this particular form of the apocalypse is the amazing depth of narrative and sheer quantity of media on the subject. The amount of material available for inspiration is nearly endless, and I think the scenarios we’ve included in this book sum up the most exciting elements of the genre. Game Masters will be able to dive headlong into their favourite themes and tropes from zombie horror. In this book, we’ve got everything from shambling, brain-hungry undead to tireless, sprinting rage zombies. There are infections, radiation, parasites, and even voodoo magic! Of course, the other major theme that runs through the entire game line is that the players get to explore and experience these world-ending events as themselves. This is, hands down, the most exciting part of this game for me. The idea of playing through an apocalyptic (and eventually post-apocalyptic) scenario with my friends, in my home town, definitely adds a pretty unique thrill to the game. I think people are going to be very excited about this new game line we’re working on, and I can’t wait to hear what kinds of stories your group comes up with as you make your way through The End of the World!
The End Is Nigh Thanks, Tim! The day of the dead rising is quickly approaching. It’s up to you to ensure that you survive the apocalypse. For more information on the other books in The End of the World line, visit the description page. Prepare for hordes of zombies to end the world with the release of Zombie Apocalypse in the fourth quarter of 2014, and look for the rest of the books in The End of the World game line to be released at a later date! ... Source: The End of the World (http://www.fantasyflightgames.com/edge_news.asp?eidn=5027)
Title: FFG:Become a Daimyo
Post by: RSSFeeder on 05 September 2014, 16:00:02
Become a DaimyoAge of War Is Now Available
“The Way of strategy is the Way of nature. When you appreciate the power of nature, knowing the rhythm of any situation, you will be able to hit the enemy naturally and strike naturally.”
–Miyamoto Musashi Gather your loyal armies and rise to become the supreme ruler of Japan in Age of War, a fast-paced dice game of feudal conflicts for two to six players, now available at your local retailer and online through our webstore! Besiege the Castles of Japan  Created by world-renowned game designer Reiner Knizia, Age of War invites you to become a daimyo in a period of warring states. To establish your dominion over Japan, you must wage war against rival daimyos, conquering castles and uniting the region’s clans under your banner. At the end of the game, whichever player has garnered the most support from the Japanese clans becomes the next ruler of Japan! Created by world-renowned game designer Reiner Knizia, Age of War invites you to become a daimyo in a period of warring states. To establish your dominion over Japan, you must wage war against rival daimyos, conquering castles and uniting the region’s clans under your banner. At the end of the game, whichever player has garnered the most support from the Japanese clans becomes the next ruler of Japan!
On every turn in Age of War, you must muster your loyal soldiers and march against a castle. At the beginning of the game, the fourteen castles stand independent, but as the game progresses, daimyos quickly seize these castles and the support of the clans. Each castle has a number of lines on it, called battle lines. To successfully conquer the castle, you must use your soldiers to fill each of these battle lines. Your attack on a castle begins when you roll seven custom dice to see what soldiers answer your call to war. You may gather infantry, archers, cavalry, and daimyos loyal to your cause. Using the results on your dice, you must fill one of the besieged castle’s battle lines. If you successfully complete a battle line, you place the dice you used on the castle and reroll your remaining dice to press the attack forward. 
If you fail to complete a battle line on a roll, however, your attack is brutally thrown back. You must remove a die from your dice pool to represent your casualties, and reroll the remaining dice to regroup and continue your assault on the castle. Completing all of a castle’s battle lines allows you to conquer the castle and add it to your play area. The castle’s point value also counts towards your total number of points. But just because you’ve conquered a castle doesn’t mean it’s safe. Every player can attack his opponents’ castles as well as unclaimed castles. Besieging one of your opponent’s castles works the same way as besieging an unclaimed castles, but you must also complete the red battle line in the upper left corner of the castle card. The Power of the Clans Castles may provide physical strongholds, but Japan’s true solidarity comes from its clans. If you wish to become the supreme daimyo, you’ll need to unite the clans under your rule. The clans vary widely in size and prestige – the Shimazu clan has only one castle, while the mighty Oda clan holds four castles. Completely uniting a clan is the only way to keep your castles safe from the depredations of other daimyos. When you conquer the last castle belonging to a clan, you may turn that clan’s castle cards facedown, meaning that no other player can attempt to besiege them. 
The clans provide more benefits than just security for the daimyo they serve, however. A united clan is worth more points than a clan spread and separated. For example, the Mori clan has two castles: Takahashi and Gassantoda. Apart, these castles are each worth two points. But if you conquer both of these castles, the Mori clan is worth five points! Conquering entire clans is crucial, because when the last unconquered castle is captured, the game ends and the player with the most points claims victory. Rise to Victory To become the ruler of all Japan, you’ll need a keen tactical mind and an unbreakable will. Muster your loyal armies, prepare for battle by downloading the rules from the Age of War support page, and pick up your copy of Age of War at your retailer today! ... Source: Become a Daimyo (http://www.fantasyflightgames.com/edge_news.asp?eidn=5029)
Title: FFG:Forgotten Gods
Post by: RSSFeeder on 06 September 2014, 00:30:02
Forgotten GodsAnnouncing the First Supplement for Dark Heresy Second Edition
Valatine Lewin was good. Few knew of her, but those who did ensured she always had work. She had been Faceless many times before, smuggling Eldar trinkets, silver devices of unknown origin, and even fresh Ork teef from battles along the Stygies Cluster. The Faceless Trade never ended; the voracious appetite for the outré and forbidden meant that there would always be people like her to whet it. Fantasy Flight Games is proud to announce Forgotten Gods, the first book-length adventure for Dark Heresy Second Edition! Even a moment of heresy left unchecked can damn millions of lives in the terrifying future of Dark Heresy Second Edition. You must strive to forestall this grisly fate by serving as an Acolyte of an Inquisitor, the last bastion between Mankind and the eternal corruption of Chaos. In this book-length adventure, your talents and skills are put to their greatest test, as you investigate proscribed artefacts of deadly power and battle a cult whose heresies reach far into the Askellon sector’s past. 
Uncover the Faceless Trade Mankind was not always such a powerful force in the galaxy. Long before the first humans achieved consciousness, ancient gods ruled the stars and spaces between them. In Forgotten Gods, your fears are about to be realised. A cult has hired the smugglers of the Faceless Trade to bring them forbidden artefacts, and they plot to use the power of these artefacts to reawaken a god from the time before Man. As a devoted servant of the Emperor, you cannot allow this heresy to occur. Your adventure begins as you track down the smugglers of the Faceless Trade on the hive planet of Desoleum. You must investigate the scene of a vicious altercation, before following the trail of the smugglers and the artefacts. From the packed slums of the hive city, your journey takes you across the galaxy, from trekking through the Desoleum’s wastelands, to dining with a Rogue Trader aboard his ship, to walking the foreboding and bone-strewn cemetery world of Thaur. Your investigations may span the Askellon sector, but your purpose remains the same: destroy the heresies surrounding the Faceless Trade, and prevent the reawakening of unimaginable evil. For more on the adventure and the other features you’ll find within Forgotten Gods, we turn to developer Tim Huckelbery. 
Developer Tim Huckelbery on Forgotten Gods Forgotten Gods is our first book-length adventure for Dark Heresy Second Edition, and we're happy to show off more of the Askellon Sector in it! In this adventure, Acolytes travel the wastelands surrounding Hive Desoleum, voyage aboard a Rogue Trader vessel, and explore the foreboding shrine world of Thaur.  This adventure continues the storyline begun in the Dark Heresy Core Rulebook, where the Dark Pursuits adventure started your investigations into the dangerous xenos artefacts that pollute Hive Desoleum. These artefacts are undoubtedly linked to countless horrible deaths, and several different groups battle to control them for profit, worship, or worse. Your investigations into the smuggling of these proscribed items continued in the events of Desolation of the Dead, the adventure included in the Dark Heresy Game Master's Kit. This adventure continues the storyline begun in the Dark Heresy Core Rulebook, where the Dark Pursuits adventure started your investigations into the dangerous xenos artefacts that pollute Hive Desoleum. These artefacts are undoubtedly linked to countless horrible deaths, and several different groups battle to control them for profit, worship, or worse. Your investigations into the smuggling of these proscribed items continued in the events of Desolation of the Dead, the adventure included in the Dark Heresy Game Master's Kit. Within the Forgotten Gods adventure, the Acolytes seek to end the smuggling of the so-called Faceless Trade in heretical relics before a deadly cult uses the alien items to reawaken long-dead gods that ruled the Askellon sector before Mankind was sentient. Along the way, you may run into several familiar faces from your earlier adventures – some of whom are not at all pleased to see you again. Players who’ve already enjoyed the Dark Pursuits or Desolation of the Dead adventures before playing Forgotten Gods can develop their existing relationships, but Forgotten Gods can be played without having already experienced the two previous adventures. Overall, this trilogy of adventures makes for a grand mix of fast-paced chases, explosive shootouts, and dangerous explorations that puts your Acolyte’s mettle to its greatest test yet. Exploring the Universe Each of the locations explored within the book has plenty of background information included, so a Game Master can extend the adventure to explore even more of the setting, or bring the Acolytes back for new investigations after the events of Forgotten Gods have concluded. Every location, whether a Rogue Trader ship or the shrine world of Thaur, includes adventure seeds for side investigations and opportunities to seek out and combat the countless threats and unknown evils that lurk just out of sight. There are always more heresies to be found! Forgotten Gods also offers new options for Acolyte creation. Each of the three major locations explored in this book includes rules for using that location as an Acolyte's home world, so new players can craft characters hailing from these vastly different parts of the Imperium. Alternatively – Emperor forbid – a player can use this information to create a new Acolyte should his existing character not survive their climatic adventures in Forgotten Gods! To Thaur and Beyond Thanks, Tim! A new adventure awaits within the pages of Forgotten Gods. You and your fellow Acolytes must journey across the Askellon sector, exploring new locales and facing terrifying odds. If you hope to vanquish future heresies, you must face the darkness that lurks in the past.
Look for Forgotten Gods at your local retailer in the fourth quarter of 2014! ... Source: Forgotten Gods (http://www.fantasyflightgames.com/edge_news.asp?eidn=5030)
Title: FFG:CosmicCon Is Almost Here!
Post by: RSSFeeder on 06 September 2014, 09:00:03
CosmicCon Is Almost Here!Come Celebrate Cosmic Encounter the Weekend of September 19-21
CosmicCon, a celebration for Cosmic Encounter fans, is only two weeks away! Presented by Future Pastimes and taking place at the Fantasy Flight Games Center in Roseville, MN, CosmicCon lets fans connect with game designers, play Cosmic Encounter and all its expansions, and share their own Home Brew designs. Stellar Connections Throughout the weekend, the game’s original designers, Bill Eberle and Peter Olotka, will be present playing Cosmic Encounter, discussing game design, and interacting with fans. You can also chat with Bill Martinson, Jack Reda and Jefferson Krogh, fan designers of the recently released Cosmic Dominion expansion, and Fantasy Flight alumni designers Kevin Wilson and Jay Little. Via Skype, you’ll be able to interact with Hugo award-winning author (and Cosmic Encounter fan) David Brin, as well as Richard Garfield, a longtime player of Cosmic Encounter and designer of Magic: The Gathering. Fan designers of the alien races in Cosmic Dominion will also be skyping in, and Tom Vasel of The Dice Tower will be on hand interviewing gamers throughout the convention. 
Games and Competitions Of course, there will be lots of chances to play Cosmic Encounter, from a newbie table where you can learn the game to a day-long tournament where you can demonstrate your supremacy. All the expansions and numerous variants will also have their own tables. You can compete against designers, change aliens every round, or simply try out an expansion you’ve never played before. The competition goes beyond the game table. As a registered attendee you can enter the alien design contest judged by Cosmic Dominion designers Bill Martinson, Jack Reda, and Jefferson Krogh. Or, you can show off your own Home Brew creations in the Gaming Center glass display cases, and compete to win a prize for the best Home Brew! 
Design. Connect. Play. Display. Win! You can buy tickets and find more information, including a complete schedule and design contest rules, here on the CosmicCon website. Make your travel plans, pack your Home Brews, and come out to Roseville for a weekend full of interstellar fun! ... Source: CosmicCon Is Almost Here! (http://www.fantasyflightgames.com/edge_news.asp?eidn=5031)
Title: FFG:Fantasy Flight Games is Now Hiring
Post by: RSSFeeder on 06 September 2014, 17:30:24
Fantasy Flight Games is Now HiringWe Are Currently Accepting Applications for Three PositionsFantasy Flight Games, leading hobby-market publisher of board games, card games, roleplaying games, and other tabletop games, is now hiring for three positions: Details for each position can be found in the pdf documents linked above. To apply for any of these positions, follow the instructions listed below. Please do not call or visit. - Hobby Market Sales Associate: Submit a cover letter with salary requirements and resume to HumanResources@fantasyflightgames.com; under the subject line “Hobby Market Sales Associate” no later than end of business day Friday, September 12, 2014.
- Game Center Line Cook: Submit your application (pdf, 106 KB) to HumanResources@fantasyflightgames.com; under the subject line “Game Center Line Cook” no later than end of business day Friday, September 12, 2014.
- Temporary Warehouse Associate: Submit your application (pdf, 106 KB) to HumanResources@fantasyflightgames.com; under the subject line “Temporary Warehouse Associate” no later than end of business day Friday, September 19, 2014.
Our offices are located in Roseville, Minnesota, a suburb of the Twin Cities of Minneapolis and St. Paul. Candidates not already living within commuting distance must be willing to relocate. Fantasy Flight Publishing, Inc. is an equal opportunity employer committed to a diverse work force and a work environment free from discrimination. ... Source: Fantasy Flight Games is Now Hiring (http://www.fantasyflightgames.com/edge_news.asp?eidn=5032)
Title: FFG:A Meeting with Destiny
Post by: RSSFeeder on 07 September 2014, 02:00:04
A Meeting with DestinyPreview Paths and Destinies in Talisman: The Woodland
At last you reach the heart of the Woodland, an eerie and unsettling expanse of dry earth, decaying stumps, and scorched trees. Far beyond, you glimpse a forest filled with sunlight – the forest you left when you entered this strange and haunted realm. You run towards those fields, only to find your path suddenly blocked by a crowned faerie clothed in black robes and spiderwebs, terrifying and beautiful. “Foolish mortal,” she hisses. “Did you think you could escape without meeting your destiny?” Journey through a treacherous and enchanted forest in The Woodland, an expansion for Talisman Revised 4th Edition. In the realm of the Fae, you will encounter capricious faeries, powerful relics, talking animals, and shifting trees. You may be randomly transported across the region by mists, turned into a toad, or blessed by the faeries’ queen. In today’s preview, we will explore the Path Cards and Destiny Cards introduced in this expansion. The routes through the Woodland are winding and changeable, but whoever follows a path to its end gains a destiny to guide the rest of their journey. 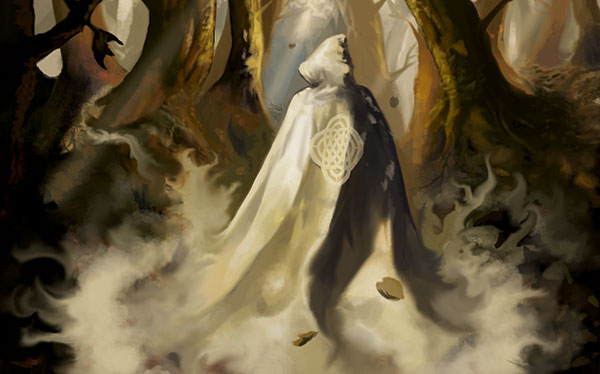
The Chosen Path Upon entering the Woodland, you must choose a Path from one of three laid out before you. Paths give your character abilities and limitations that last as long as you remain in the Woodland. They also determine what happens when you reach the Meeting with Destiny space at the Woodland’s center. 
A Path can provide both advantages and disadvantages. The Warrior’s Path offers extra strength during battle, but requires you to fight the nightmarish Queen Mab in psychic combat in order to gain a Destiny. The Secret Path allows you to evade creatures with a Strength or Craft higher than five, but an unknown Enemy awaits you at the Meeting with Destiny space. The risky Path of Folly forces you to subtract one from every die result, which may benefit you or cause you serious harm. Either way, it promises you a Destiny if you manage to survive your tumultuous journey. The Woodland is an unpredictable place and may force you to suddenly change your Path. If you encounter a Faerie Trod, you must discard your Path and choose another. At the Crossroads, a roll of the dice determines whether you switch Paths or continue on your current one. No matter which Path you choose to take, no matter what happens to you along it, they all lead towards a meeting with destiny. 
Fate and Destiny If you follow your Path to its end and overcome whatever challenge awaits you in the heart of the Woodland, you earn a Destiny that will shape your journey through Talisman. Destiny is a powerful force that transcends even death. If a character is killed, any Destinies that character possessed are passed on to the next character which that player takes up. And while you can choose your path, you cannot choose your destiny. 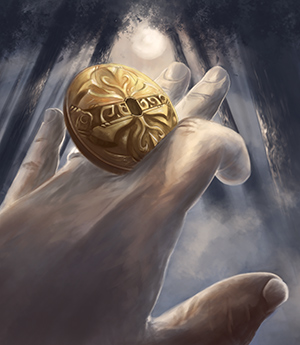
Your destiny is inextricable from your fate, and all destinies increase your fate value by one. As our second preview mentioned, The Woodland introduces a difference between light and dark fate: spend light fate to reroll a die that you rolled, dark fate to force another player to reroll a die. Destinies are also light and dark. Light destinies allow you to easily replenish light fate and focus on strengthening your character. Dark ones keep you supplied with dark fate and encourage you to hinder and harm others. If your destiny is The Enlightened, a light destiny, you can replenish one light fate whenever a character casts a Spell. In turn, you can spend a light fate in order to draw a spell, so that your fate is inextricably linked to the mystic arts. The Wealthy turns your light fate into gold, and gives you light fate whenever another characters gains gold. With The Immortal, the lives of your character and others are tied to your dark fate: when others heal or gain a life, you are rewarded with a dark fate that you may then spend to prevent your own loss of life. The Dreaded allows you to replenish dark fate whenever you win in combat, and use it to take other characters’ lives. The ability to transform fate into gold, Spells, lives, or even Strength and Craft constitutes a remarkable advantage. A destiny could mean the difference between victory and defeat in combat, between receiving a talisman and missing your chance, or between acquiring the Crown of Command and languishing in the outer region of the realm. 
Take the Path To Destiny Your journey through the Woodland may be perilous and meandering, but if you can survive the faeries’ whims, you will gain the unique and wondrous Destiny that awaits you at the wood’s end. Are you prepared to follow your Path into the innermost depths of the Woodland towards Destiny? Learn more on the Talisman minisite, and look for Talisman: The Woodland at your local retailer soon! ... Source: A Meeting with Destiny (http://www.fantasyflightgames.com/edge_news.asp?eidn=5033)
Title: FFG:Gifts to Aid You on Your Journeys
Post by: RSSFeeder on 08 September 2014, 20:30:03
Gifts to Aid You on Your JourneysA Preview of The Road Darkens by Lead Developer Caleb Grace
“The Sword of Elendil was forged anew by Elvish smiths, and on its blade was traced a device of seven stars set between the crescent Moon and the rayed Sun, and about them was written many runes; for Aragorn son of Arathorn was going to war upon the marches of Mordor.”
–J.R.R. Tolkien, The Fellowship of the Ring In our earlier previews of The Road Darkens Saga Expansion for The Lord of the Rings: The Card Game, lead developer Caleb Grace revealed the identity of its new hero and provided an overview of its three action-packed scenarios. However, as a Saga Expansion, The Road Darkens offers you an experience that goes well beyond its 165 cards and three scenarios; it allows you to continue along your road to Mordor and Mount Doom! As with each The Lord of the Rings Saga Expansion, The Road Darkens immerses you in selected events drawn straight from the novels. You can play through any scenario individually, or you can link them together in Campaign Mode. In Campaign Mode, these scenarios allow you to appreciate the perils and hardships faced by Frodo and his companions even more fully. Each scenario becomes part of a much larger, fantastic narrative arc, and the decisions you make in one scenario carry throughout all the rest. If you slip the One Ring onto your finger at any point, the decision may come back to haunt you all the rest of your days… Today, Caleb turns our attention to several of the new cards that heighten the connections between The Road Darkens and the other The Lord of the Rings Saga Expansions. Lead Developer Caleb Grace on the Boons in The Road Darkens One of the things that made The Lord of the Rings: The Road Darkens particularly exciting for the design team was that it was our first opportunity to expand on the Campaign Mode that we introduced in The Black Riders Saga Expansion. The idea of Campaign Mode is that it links all the different The Lord of the Rings Saga Expansion scenarios into one epic adventure in which your every decision matters. To make this happen, Campaign Mode introduced three new card types to the game: boons, burdens, and campaign cards. Boons represent those things that provide the heroes with advantages along their travels, be they items, allies, or skills. Burdens can represent any type of persistent evil that harries the heroes on their way. And campaign cards are double-sided cards that serve to place each scenario within the larger campaign. They often include additional Setup instructions on the front side for use when playing a scenario in Campaign Mode, as well as Resolution effects on the reverse side that describe the outcome of the adventure. As you might expect, The Road Darkens introduces more of each of these types of cards, adding new advantages and perils to your campaign. It features eight new boons, seven burdens, and three new campaign cards (one for each scenario), and I am happy to share that the boons in this Saga box are all truly iconic! Between the Fellowship’s separate stays in Rivendell and Lothlórien, they received some very memorable boons. After all, it’s not every day that the sword that cut the One Ring from Sauron’s hand is reforged and renamed. When Elrond presented Anduril to Aragorn before the Company set out from Rivendell, you knew the blade was going to be something truly powerful. Now, you will also have your opportunity to wield Anduril (The Road Darkens, 14)!  When we were adapting what could possibly be the most legendary sword in fantasy fiction, we wanted to make sure it was nothing short of awesome. So we came up with an ability worthy of Elendil’s legacy: When we were adapting what could possibly be the most legendary sword in fantasy fiction, we wanted to make sure it was nothing short of awesome. So we came up with an ability worthy of Elendil’s legacy:
“Attached hero gets +1 Willpower, +1 Attack, and +1 Defense.
Response: After an attack in which the attached hero defended resolves, exhaust Anduril to target the enemy that just attacked. Declare attached hero as an attacker against that enemy (and resolve the attack).” As a The Lord of the Rings fanboy, I love so many things about this card, but the aspect that I might love best is the way that it just naturally combos with the Core Set Aragorn (Core Set, 1). Aragorn can take full advantage of its various attribute boosts by questing for three Willpower during the Quest phase, using his ability to ready himself, and defending an enemy attack with three Defense Strength during the Combat phase. Then, after resolving the enemy attack, he can trigger Anduril’s Response to counter-attack with four Attack Strength. Better yet, when Aragorn wields Anduril, the fact that he has the Sentinel keyword doesn’t just mean that he can defend against enemies engaged with your teammate, it also allows him to use Anduril’s Response to attack those enemies! Anduril’s ability was partly inspired by the Response effect we had developed earlier for Sting (The Hobbit: Over Hill and Under Hill, 20). Although not of the same lineage as Anduril, Sting is nonetheless a legendary blade in its own right, and the Treasure card we created is one of which we’re particularly proud. In fact, the design team liked that ability so much that we brought it back for the new Sting boon (The Road Darkens, 11)!  It made sense to the design team to keep its original ability since the blade was handed down from Bilbo to Frodo. It also helps to create a sense of continuity in The Lord of the Rings: The Card Game. Even more, it’s such a cool effect: It made sense to the design team to keep its original ability since the blade was handed down from Bilbo to Frodo. It also helps to create a sense of continuity in The Lord of the Rings: The Card Game. Even more, it’s such a cool effect:
“Attached hero gets +1 Willpower, +1 Attack, and +1 Defense.
Response: After attached hero exhausts to defend an attack, discard the top card of the encounter deck. Deal damage to the attacking enemy equal to the discarded card’s threat strength.” The original idea for the card came from the transforming effect it had on Bilbo Baggins. The first time Bilbo had to use the elven dagger to defend himself, he discovered a fierce courage that he never knew he had. Interestingly, the blade seemed to have the same effect on his nephew, Frodo, who found himself leaping at a cave troll in Moria and stabbing it in the foot just in time to chase it away! (By the way, we happen to believe that Magali Villeneuve did a magnificent job of capturing this moment on the art for the card!) The boon version of Sting is meant to capture the fierce and unexpected effect the blade has on Hobbits. It’s possible to declare the attached Hobbit as a defender against an enemy with three Hit Points and discard a card with three Threat Strength from the top of the encounter deck in order to destroy it before its attack even resolves! It’s also possible that the Response will deal no damage. However, in that case, the additional point of Defense Strength can still help prevent the attached Hobbit from taking too much damage. One of my favorite things to do with Sting is actually to attach it to Sam Gamgee (The Black Riders, 2). His ability to ready after engaging an enemy with higher engagement cost than your threat means that he can quest for four Willpower and later be used to defend or attack. I particularly like this combo since it was Sam who wielded Sting in Shelob’s Lair and the Tower of Cirith Ungol. Two other Treasure cards make a comeback in The Road Darkens: Mithril Shirt (The Road Darkens, 12) and Glamdring (The Road Darkens, 13)!  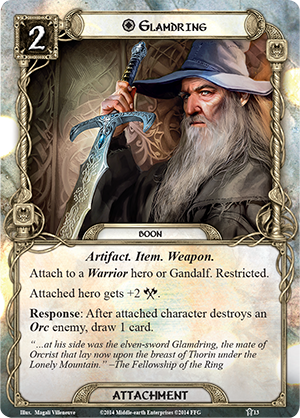
These iconic artifacts have retained their original effects as well, though they may have an even greater impact in your adventures in The Lord of the Rings Saga Expansion since you’ll be able to use them for fifteen more scenarios! One of the coolest things about each of these four boons is that you earn them before you even set out from Rivendell in the first scenario, The Ring Goes South. But that’s okay because your heroes are going to need them to deal with some of the trouble they will face on their way! Time to Leave The Last Homely House The time has nearly come to set forth from The Last Homely House. The Road Darkens is due to arrive at retailers late next week. However, as you wait, keep your eyes open for our final preview, in which Caleb reveals some of the new burdens that may haunt you along your journeys! ... Source: Gifts to Aid You on Your Journeys (http://www.fantasyflightgames.com/edge_news.asp?eidn=5034)
Title: FFG:Find a Rebellion Day Event Near You
Post by: RSSFeeder on 09 September 2014, 05:00:03
Find a Rebellion Day Event Near YouParticipate in a Global Event for STAR WARS (R): Age of Rebellion (TM)
This September 13th is Rebellion Day, and it’s your chance to participate in the exciting Star Wars®: Age of Rebellion™ adventure, Rescue at Glare Peak! Rescue at Glare Peak is a special introductory Age of Rebellion adventure designed specifically for the event, and it challenges you and your friends to complete a daring rescue mission while the fate of the galaxy hangs in the balance.
The Rebel Alliance needs all the heroes it can get. Will you be one of them? Find a Rebellion Day event near you! What Is Rebellion Day? Taking place worldwide on September 13th, FFG’s Rebellion Day is a special event designed to build upon the burgeoning excitement and community for the Star Wars: Age of Rebellion Roleplaying Game. The highlight of Rebellion Day is Rescue at Glare Peak. Designed for two to five players, Rescue at Glare Peak allows you and your friends to assume the roles of heroic Rebel agents who must work together to rescue a pair of Rebel pilots who have crash-landed on the planet Trivar II. Four different pre-generated characters introduce several of the many careers, specializations, skills, and talents of Age of Rebellion. Your group will be able to take on the roles of an Ithorian Engineer, a Bothan Spy, a Human Commander, and a Duros Soldier. These are talented characters, but you’ll still need to make good use of all their tricks, talents, and technology in order to succeed at your mission!
What Is Star Wars: Age of Rebellion? Age of Rebellion is the second of three epic, fully cross-compatible Star Wars roleplaying systems by Fantasy Flight Games. It thrusts players directly into the ongoing Galactic Civil War between the evil Empire and the rag-tag Rebel Alliance. Woefully outnumbered and outgunned by the Empire and its vast military might, player characters may undertake any of a wide variety of missions. They may perform reconnaissance, engage in guerrilla warfare, or recruit citizens from across the galaxy. At the core of FFG’s Star Wars roleplaying mechanics are its custom dice. Designed to enhance a heavily narrative roleplaying system, these dice combine symbols for success and failure with symbols for “threat” and “advantage.” As a result, players may succeed at their actions but still earn “threat,” or fail but still “advantages.” These results encourage stunning plot twists, and every roll of the dice encourages additional storytelling. Take Your Stand for Galactic Freedom Whether you’re a new recruit or a grizzled veteran of the Galactic Civil War, Rebellion Day is your chance to take your stand for galactic freedom! Join other Age of Rebellion players and celebrate Star Wars roleplaying by banding together to tackle the challenges of Rescue at Glare Peak. This adventure is full of fantastic Star Wars action, high stakes, and dramatic twists, and it’s running on Saturday, September 13th. Consult our list of participating retailers today, and make your plans to attend! ... Source: Find a Rebellion Day Event Near You (http://www.fantasyflightgames.com/edge_news.asp?eidn=5035)
Title: FFG:New Dice Bags Coming Soon
Post by: RSSFeeder on 10 September 2014, 06:00:34
New Dice Bags Coming SoonFour Dice Bags Designed For Our Warhammer: 40,000 Themed Products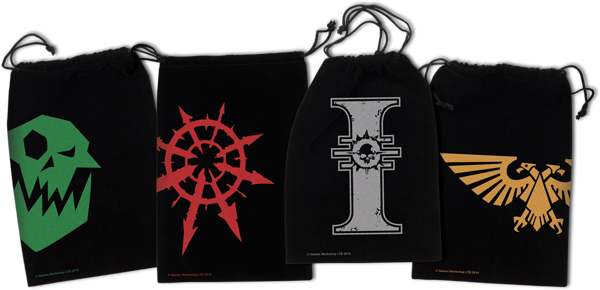
Fantasy Flight Games is proud to announce the upcoming release of four different Warhammer: 40,000 themed Dice Bags for Fantasy Flight Supply! Made specifically to help keep track of all of your Fantasy Flight Games Warhammer: 40,000 product accessories, including dice, tokens, and cards for:  Escape the Warp Escape the Warp
The seductive influence of Chaos can strike when you least expect it, so it’s vitally important to keep your essentials close at hand. Fantasy Flight Supply is committed to providing you the best materials to protect, customize, and enhance your games and gameplay experience. Each Dice Bag provides players with convenient and durable means to transport your necessary battle components. Of course, you must pick sides. With these Dice Bags you can choose from an Ork, an Inquisitor, the Imperial Aquila, or the Chaos Star. Crafted with a blend of polyester and nylon, each bag features a polypropylene draw string, and measures 6.25” by 9” (15.9 cm by 22.9 cm). Safeguard Your Resources Warhammer: 40,000 Dice Bags offer you the tools you need to protect your game components and keep your attention on the roleplaying, board game, or card game at hand. Look for Warhammer 40,000 themed Dice Bags at your local retailer in the fourth quarter of 2014! ... Source: New Dice Bags Coming Soon (http://www.fantasyflightgames.com/edge_news.asp?eidn=5036)
Title: FFG:STAR WARS (R): Force and Destiny (TM) Beta Update #1
Post by: RSSFeeder on 10 September 2014, 14:30:03
STAR WARS (R): Force and Destiny (TM) Beta Update #1News From the Developers of the Force and Destiny Beta
Hello Force and Destiny™ beta testers, We’re excited to present the first week of beta updates (pdf, 237 KB) for Force and Destiny! Since a good number of people are still procuring copies of the beta at this point, this first round of early updates focuses on some minor rules changes and simple corrections. We’ve clarified the wording of Improved Parry and Reflect, and we reintroduced lightsabers’ immunity to the Sunder quality. However, we have also introduced an option for those of you who want to be able to destroy an opponent’s lightsaber.  As more of you are able to get into playtesting in earnest, we’d like to direct the coming week’s playtesting to two aspects of the game: new species and the Morality mechanic. The six new species in Force and Destiny are intended to mesh well with the core experiences of the game, but also be used by anyone playing Edge of the Empire™ or Age of Rebellion™. Meanwhile, our intention for Morality is to provide an interesting and evocative way to track a character’s tendencies towards good or evil. Over the coming week, we want you to let us know what you think of these elements. Thanks for all your hard work! ... Source: STAR WARS (R): Force and Destiny (TM) Beta Update #1 (http://www.fantasyflightgames.com/edge_news.asp?eidn=5037)
Title: FFG:Evasive Maneuvers
Post by: RSSFeeder on 10 September 2014, 23:00:03
Evasive ManeuversAnnouncing the Third Force Pack in the Rogue Squadron Cycle
“Sir, the possibility of successfully navigating an asteroid field is approximately 3,720 to one.”
–C-3PO, Star Wars: The Empire Strikes Back Fantasy Flight Games is proud to announce Evasive Maneuvers, the third Force Pack in the Rogue Squadron cycle for Star Wars™: The Card Game! You’ll find plenty in Evasive Maneuvers that continues the main themes of the Rogue Squadron cycle. Whether you prefer to scramble your Fighters or command massive Capital Ships, you’ll find cards to support your affiliation in the ten new objective sets (two copies each of five unique sets) included in this Force Pack. Not everything is focused on tense dogfights and interstellar space battles, however. In Evasive Maneuvers, you can also hide from the Empire with an ancient Jedi, interrogate prisoners with the Sith, or hire a deadly assassin in a dusty cantina on Tatooine. 
The Eater of Luck In Star Wars: The Card Game, winning edge battles is almost always in your best interest. Not only does it grant you the opportunity to strike first, it also activates all of your units’ edge-enabled combat icons. This all changes with the Scum and Villainy objective set from Evasive Maneuvers, which rewards you for approaching edge battles in a much more unusual manner. By planning your attacks strategically, you’ll be able to lose the edge battle and still gain some dramatic benefits. This objective set begins with The Eater of Luck (Evasive Maneuvers, 763). This objective has a powerful Reaction that triggers whenever you lose an edge battle as the attacker, allowing you to capture the top card of each opponent’s deck at this objective. If you lose an edge battle to capture cards with The Eater of Luck, you’ll be able to activate plenty of other abilities later, such as Slave I (Edge of Darkness, 390) or Relentless Pursuit (Knowledge and Defense, 566).  Losing the edge might be a dramatic setback for some units, but never for the deadly Assassin and Mercenary, Dannik Jerriko (Evasive Maneuvers, 764). Dannik Jerriko’s own combat icons are edge-enabled, but that hardly matters, because this Anzati also bears the text, “While this unit is attacking, resolve edge-enabled icons on friendly units as if you had the edge.” Not only do you resolve Dannik Jerriko’s combat icons as if you have the edge, but if he’s attacking, then every friendly attacking unit benefits from his ability. With the help of Dannik Jerriko, even units like Greedo (Edge of Darkness, 370) can become reliable combatants. Losing the edge might be a dramatic setback for some units, but never for the deadly Assassin and Mercenary, Dannik Jerriko (Evasive Maneuvers, 764). Dannik Jerriko’s own combat icons are edge-enabled, but that hardly matters, because this Anzati also bears the text, “While this unit is attacking, resolve edge-enabled icons on friendly units as if you had the edge.” Not only do you resolve Dannik Jerriko’s combat icons as if you have the edge, but if he’s attacking, then every friendly attacking unit benefits from his ability. With the help of Dannik Jerriko, even units like Greedo (Edge of Darkness, 370) can become reliable combatants.
Of course, Dannik Jerriko needs some backup of his own, which he receives with two copies of the Advosze Mercenary (Evasive Maneuvers, 765). This unit is also a Mercenary and while it’s attacking, it gains an edge-enabled unit damage for each other attacking unit. If you attack with a large force led by Dannik Jerriko, Advosze Mercenaries can quickly become a force to be reckoned with. This objective set concludes with some quick ways for you to manipulate edge battles and recover from losing any edge battles that you do lose. It includes a copy of the Supporting Fire (Evasive Maneuvers, 433) fate card, allowing you or an ally to place a non-fate card from hand into your edge stack, manipulating your total edge icons after you’ve seen your opponent’s cards. This objective set also includes a Gamble: Calculated Wager (Evasive Maneuvers, 766). By playing this free event after you lose an edge battle, you may return one card in an edge stack to its owner’s hand, allowing you to reclaim a crucial card from a lost cause. For example, you could use a fate card such as Seeds of Decay (Knowledge and Defense, 514) to focus your opponent’s key attacker, while still losing the edge battle. Playing Calculated Wager restores your Seeds of Decay to your hand, allowing you to use it again in a future battle. Outwit Your Opponent You’ll uncover a host of cards in Evasive Maneuvers that give you ways to trick your opponent. Whether you intentionally lose edge battles with Dannik Jerriko, hide in the shadows with Vima-Da-Boda, or lead from the front in the Capital Ship Independence, you’ll find the cards you need in this Force Pack. Look for Evasive Maneuvers at your local retailer in the first quarter of 2015! ... Source: Evasive Maneuvers (http://www.fantasyflightgames.com/edge_news.asp?eidn=5038)
Title: FFG:A Time for Wolves
Post by: RSSFeeder on 11 September 2014, 07:30:15
A Time for WolvesAnnouncing the Fourth Chapter Pack in the Wardens Cycle
“My lords, with your leave, I propose to travel to the Vale and there woo and win Lady Lysa Arryn. Once I am her consort, I shall deliver you the Vale of Arryn without a drop of blood being spilled.”
–Littlefinger Fantasy Flight Games is proud to announce the upcoming release of A Time for Wolves, the fourth Chapter Pack in the Wardens cycle for A Game of Thrones: The Card Game! While the Seven Kingdoms of Westeros were rocked by war, the lords and ladies of the Vale remained aloof and apart, separated from the tumult by steep mountains and treacherous mountain passes. Now, as the cards in A Time for Wolves explore the power struggles of the war’s aftermath, they find the lords and ladies of King’s Landing hatching new schemes and seeking new political alliances. A new king sits the Iron Throne, but the crown is vulnerable. Thus, in A Time for Wolves, we find some of the realm’s most ambitious lords and ladies casting their gaze toward the Eyrie and House Arryn, eager to reinforce their strength with that of the Vale. A Time for Wolves introduces sixty new cards (three copies each of twenty different cards) that ensure House Arryn and the Vale will soon make a massive impact upon A Game of Thrones: The Card Game. You’ll find no fewer than five cards with the House Arryn trait, including such notable characters as Petyr Baelish (A Time for Wolves, 77), Alayne Stone (A Time for Wolves, 71), and Lysa Arryn (A Time for Wolves, 76). Furthermore, as part of the Wardens cycle, A Time for Wolves adds more strength to decks that feature characters who cost four or more, more trait-based synergies, more interactions with the game’s Castle plots, and more “limited response” abilities for you to trigger. 
New Strength for the Creature Trait One of the cards in A Time for Wolves that adds to the focus that the Wardens cycle places upon trait-based synergies is the Chapter Pack’s namesake plot, A Time for Wolves (A Time for Wolves, 80). 
Designed by 2012 North American Overall Champion Dan Seefeldt, A Time for Wolves offers a respectable three gold, three initiative, and one claim. But its highlight is that it introduces a powerful, new search effect that can add strength and utility to a wide variety of decks:
- Creatures are at the hearts of the vast majority of all Winter and Summer decks, and they can use A Time for Wolves to search for White Raven (The Winds of Winter, 24) or Black Raven (A Song of Summer, 2). Of course, these decks most often run another search plot, A Time for Ravens (A Change of Seasons, 59), but adding A Time for Wolves to such a deck gives it an extra edge in a seasons battle. At the very least, it can allow you to fetch a Carrion Bird (A Song of Summer, 16), which remains one of the game’s most efficient and effective characters.
 In A Game of Thrones: The Card Game, Dragons all share the Creature subtype, meaning that A Time for Wolves has a plenty to offer House Targaryen. Whether you search for the Shadows-crested hatchlings from the Queen of Dragons deluxe expansion, the one-cost hatchlings from the Defenders of the North and Brotherhood Without Borders cycles, or the new three-cost versions from A Hidden Agenda, this plot can help you quickly assemble a full strike force of Drogon, Rhaegal, and Viserion. In A Game of Thrones: The Card Game, Dragons all share the Creature subtype, meaning that A Time for Wolves has a plenty to offer House Targaryen. Whether you search for the Shadows-crested hatchlings from the Queen of Dragons deluxe expansion, the one-cost hatchlings from the Defenders of the North and Brotherhood Without Borders cycles, or the new three-cost versions from A Hidden Agenda, this plot can help you quickly assemble a full strike force of Drogon, Rhaegal, and Viserion.
- The plot may also lead to some unexpected twists in deck designs, spurring the introduction of various Creatures, such as Warhorses, into archetypes that wouldn’t previously had made use of them. For example, Lannister decks based around the extra Intrigue challenges granted by The Power Behind the Throne (Lions of the Rock, 48) might add A Time for Wolves and one or two copies of Andal Charger (A Poisoned Spear, 104) so that Cersei Lannister (Lions of the Rock, 6), or another character capable of winning Intrigue challenges while attacking by itself, could carve the cards of your choice out of your opponent’s hand.
However, as you might expect, A Time for Wolves provides the greatest boost to House Stark. Excepting the neutral version of Ghost (Core Set, 137), every Direwolf in the game has given its unwavering support to Stark, and in decks that run one or more Direwolf cards, A Time for Wolves is more than a search effect; it’s also a free card play.
- Notably, in a deck with Direwolves, A Time for Wolves is a free card play in the Plot phase. If you suspect that your opponent is about to play Valar Morghulis (Core Set, 201), you can reveal A Time for Wolves to pull Nymeria (Core Set, 2) out of your deck and attach it to your most important House Stark character.
- In fact, since A Time for Wolves lets you play any Direwolf, not just characters, you can accelerate your Direwolf attachment decks by fetching Shaggydog (Lords of Winter, 3) or Grey Wind (Lords of Winter, 2) and bringing it immediately into play.
 Finally, there is the House Stark version of Ghost (The Wildling Horde, 61), which multiplies the impact of one of the Starks’ strongest characters, Meera Reed (Tourney for the Hand, 2). When she comes out of Shadows, Meera Reed can blank the text box of any non-plot card until the end of the phase, or if it is Winter, she can blank the text boxes of two different cards. This ability is just as powerful as it sounds, and it can single-handedly render your opponent’s biggest threats impotent. However, Meera’s ability to blank cards only triggers when she comes out of Shadows, and even though she can return to Shadows as a Response whenever a Stark character leaves play, a cunning opponent isn’t going to direct any Military challenges at you or otherwise help you remove Stark characters from the table until Meera is headed for the dead pile. This is where Ghost comes into play or, rather, uses its ability to leave play. Once you have both Meera and Ghost on the table, you gain the ability to blank your opponent’s cards turn after turn, bringing Meera out of Shadows, returning Ghost to your hand, returning Meera to Shadows, and playing Ghost again in your next Marshaling phase. Finally, there is the House Stark version of Ghost (The Wildling Horde, 61), which multiplies the impact of one of the Starks’ strongest characters, Meera Reed (Tourney for the Hand, 2). When she comes out of Shadows, Meera Reed can blank the text box of any non-plot card until the end of the phase, or if it is Winter, she can blank the text boxes of two different cards. This ability is just as powerful as it sounds, and it can single-handedly render your opponent’s biggest threats impotent. However, Meera’s ability to blank cards only triggers when she comes out of Shadows, and even though she can return to Shadows as a Response whenever a Stark character leaves play, a cunning opponent isn’t going to direct any Military challenges at you or otherwise help you remove Stark characters from the table until Meera is headed for the dead pile. This is where Ghost comes into play or, rather, uses its ability to leave play. Once you have both Meera and Ghost on the table, you gain the ability to blank your opponent’s cards turn after turn, bringing Meera out of Shadows, returning Ghost to your hand, returning Meera to Shadows, and playing Ghost again in your next Marshaling phase.
Because of all of the different tricks and tactics that it can promote, A Time for Wolves adds new strength to the Wardens cycle and its focus on trait-based decks, and it is likely to soon earn its place among the game’s most versatile Champion cards. Anything Is Possible In A Time for Wolves, the heads of House Arryn begin to extend their reach beyond the Vale, making their first moves in the ongoing game of thrones and their bid for the Iron Throne. Still, the question remains: Whose side will they take? As neutral characters, the members of House Arryn can add their strength to any House. Will they side with the Direwolves of House Stark or the Dragons of House Targaryen? Will Lysa Arryn lend her support to Renly and his Rainbow Guard, or will she help House Martell and its Sand Snakes claim vengeance against House Lannister? Twelve unique characters and locations lend new direction to a wide range of strategies, and anything is possible. A Time for Wolves is scheduled to arrive at retailers late in the fourth quarter of 2014. ... Source: A Time for Wolves (http://www.fantasyflightgames.com/edge_news.asp?eidn=5039)
Title: FFG:Feel the Conflict
Post by: RSSFeeder on 11 September 2014, 16:00:03
Feel the ConflictThe Force and Destiny Beta Rulebook Is Now Available
“Anger… fear… aggression. The dark side of the Force are they. Easily they flow, quick to join you in a fight. If once you start down the dark path, forever will it dominate your destiny.”
–Yoda Use the Force, but use it wisely. In the Star Wars®: Force and Destiny™ Roleplaying Game, you become one of the galaxy’s few remaining Force users – one of the few individuals capable of reaching out and touching the power that shares the fate of the galaxy. You will be hunted by the Empire and mistrusted by wary individuals who think of Jedi as the forgotten followers of a hokey religion. You will be forced to draw upon the Force to defend yourself and the lives of innocents. And you will be tempted by the dark side. Will you be able to withstand the dark side and its lures? Will you fulfill your destiny and help to reestablish the Jedi Order? The time has come to master your feelings. The Star Wars®: Force and Destiny™ Beta rulebook is now available at your local retailer and online through our webstore! Pick up your copy today, and then contribute your feedback to help make Force and Destiny the best possible roleplaying experience for Force users in the Star Wars galaxy. Force and Destiny at Gen Con Indy 2014 The Force and Destiny Beta already made its debut at Gen Con Indy 2014. Attendees were able to both pick up early copies of the Beta rulebook and sit down with the game’s developers for demos and full-length game sessions. The developers were encouraged by the enthusiastic initial response and have offered to share some of what they saw as the weekend’s highlights: Andrew Fischer“The reaction to Force and Destiny on the Exhibit Hall floor was fantastic. I was running demos that ran twenty to thirty minutes, and it was exciting to see people jump in and start using the Force and dueling with lightsabers after just a few minutes. 
Players learn how to use their characters’ talents and Force powers during a demo.
“One of the most exciting things for me to see was all the imaginative ways that people used their characters’ different powers to their advantage. One had the Misdirect power which allowed her to trick her opponents’ senses, causing them to see (or not see) certain things. Some players used this ability to hide themselves from view, while others created multiple illusionary copies of themselves, and still others caused Stormtroopers to see each other as enemies.” Dan Clark“I ran the Lost Legacies adventure for Force and Destiny four times over the course of the wekened. Three of those sessions ended with the explosive decompression of a derelict Jedi starship. Apparently, adding lightsabers to a derelict ship is a recipe for disaster. (Or maybe it’s just that Player Characters plus lightsabers plus anything is a recipe for sessions full of explosions.) 
Players enjoy themselves during a session at Gen Con.
“What impressed me the most was the way the players really engaged with the Morality system. Many of them voluntarily took Conflict when they played into their emotional weaknesses and made in-character decisions based on their emotional traits. It was great to see perfect strangers engage so fully with their pre-generated characters.” Max Brooke“One of the best things about running Force and Destiny sessions at Gen Con was that it gave me the chance to watch players interact with Morality and Conflict. In Force and Destiny, these mechanics represent the temptations of the dark side of the Force and your struggles to resist the lure of easy power. It was interesting to see how these drove the decisions people made for their characters. “Some players worked hard to avoid the accumulation of Conflict, and they took the high road at all times, even letting their characters fail to manifest their powers when they rolled dark side results on the Force die. Others were more willing to make compromises to get results, and a few players actively chose to have their characters pursue power and Conflict almost every chance they got!
Morality lies at the heart of the Force and Destiny roleplaying experience.
“Given how important the internal struggle between good and evil is within Star Wars, it was awesome to see different characters playing this iconic battle out in their own individual ways.” You Must Learn Control Master your emotions, or give into the temptations of the dark side. Either way, the power of the Force lies within reach. 
The Star Wars: Force and Destiny Beta rulebook is now available at your local retailer and online through our webstore. The Beta is your chance to get into the action along with the first wave of players and to help us ensure that the final Force and Destiny system will be the best possible roleplaying expression of the Force and the legacy of the Jedi. Join the Beta today, and help rebuild the Jedi Order! ... Source: Feel the Conflict (http://www.fantasyflightgames.com/edge_news.asp?eidn=5040)
Title: FFG:2015 Call of Cthulhu LCG Store Championships
Post by: RSSFeeder on 22 September 2014, 22:30:05
2015 Call of Cthulhu LCG Store ChampionshipsApply by October 3rd to Host a Store Championship
Are You a Retailer? Apply today to host a Store Championship!
| | Fantasy Flight Games is proud to announce the 2015 Call of Cthulhu: The Card Game Store Championships. Applications have been posted and are now online! Retailers are invited to apply now for next year’s Store Championship season, running from January 1st through March 31st. Store Championship events are competitive tournaments held at a local level and serve as the first step toward our annual World Championships each November. If you are a United States retailer or tournament organizer interested in hosting a 2015 Store Championship event, fill out our online application form before October 3rd 23:59 CST (Central Standard Time) to be considered. If you are a retailer outside of the United States, please contact your distributor to apply to host a Store Championship or ask questions. International applications must be submitted before October 3rd 23:59 CST (Central Standard Time) to be considered. How Do Store Championships Fit into Organized Play? Our championship events are a series of events that start on a local scale (Store Championships) and grow all the way into the pinnacle of international play (World Championships) over the course of each year. While players do not have to participate in each event, the competition becomes fiercer, the prize pool becomes larger, and the events become bigger with each championship. Store Championships are the event that kicks it all off. 
Unlike an event run with our seasonal Tournament Kits or a special event like the Android: Netrunner Chronos Protocol Tour, each championship feeds into the following event. The winner of each Store Championship receives a first-round bye at the Call of Cthulhu: The Card Game Regional Championship of their choice; the winner of each Regional Championship receives a first-round bye at their National Championship; and the winner of each National Championship receives a first-round bye at the Call of Cthulhu: The Card Game World Championship! What Does Competitive Level Mean? When we updated the tournament rules in April, we included a new section in each game’s rules document. This section outlines a way of defining and categorizing the various tournaments run throughout the year in order to give players a better idea of what to expect when heading to a tournament. Tournaments can be classified as a casual, competitive, or premier tournament. Store Championships are competitive-level events. From the Call of Cthulhu: The Card Game tournament rules: Competitive events require players to have general knowledge of a game’s rules. While experienced players will come to these events to compete for prizes, players should not be punished for their lack of understanding in the finer points of Call of Cthulhu LCG rules. Players can come to these events expecting a consistent experience from store to store. This tier includes Store Championships and unique, one-off events such as the X-Wing™ Wave 4 Assault at Imdaar Alpha event or the Android: Netrunner Chronos Protocol Tour. For more information on the three tiers of tournaments, check out each game’s tournament rules on our website. Store Championship Prizes While many players will come to Call of Cthulhu: The Card Game Store Championships in hopes of receiving the Regional Championship bye awarded to the winner, there are other exclusive prizes up for grabs. Each kit contains enough prizes for the top 32 players. - Champion: The winner receives a Store Championship plaque and a card granting one first-round bye at a Regional Championship of the player’s choice.
- Top Four: The top four players each receive one Top 4 playmat (plus one for the judge/TO).
- Top Eight: The top eight players each receive one deck box (plus one for the judge/TO).
- Top Thirty-Two: The top thirty-two players each receive one alternate art card (plus one for the judge/TO).

Apply Now United States retailers can apply today by completing the online application form for a chance to host some of the bravest investigators in your area. If you are approved, you will be contacted with instructions for purchasing your Store Championship Kit. International retailers should contact their local distributor. Don’t hesitate! The application server will be unplugged on October 3rd 23:59 CST (Central Standard Time), closing applications for the 2015 Store Championships. ... Source: 2015 Call of Cthulhu LCG Store Championships (http://www.fantasyflightgames.com/edge_news.asp?eidn=5043)
Title: FFG:2015 A Game of Thrones LCG Store Championships
Post by: RSSFeeder on 23 September 2014, 07:00:03
2015 A Game of Thrones LCG Store ChampionshipsApply by October 3rd to Host a Store Championship
Are You a Retailer? Apply today to host a Store Championship!
| | Fantasy Flight Games is proud to announce the 2015 A Game of Thrones: The Card Game Store Championships. Applications have been posted and are now online! Retailers are invited to apply now for next year’s Store Championship season, running from January 1st through March 31st. Store Championship events are competitive tournaments held at a local level and serve as the first step toward our annual World Championships each November. If you are a United States retailer or tournament organizer interested in hosting a 2015 Store Championship event, fill out our online application form before October 3rd 23:59 CST (Central Standard Time) to be considered. If you are a retailer outside of the United States, please contact your distributor to apply to host a Store Championship or ask questions. International applications must be submitted before October 3rd 23:59 CST (Central Standard Time) to be considered. How Do Store Championships Fit into Organized Play? Our championship events are a series of events that start on a local scale (Store Championships) and grow all the way into the pinnacle of international play (World Championships) over the course of each year. While players do not have to participate in each event, the competition becomes fiercer, the prize pool becomes larger, and the events become bigger with each championship. Store Championships are the event that kicks it all off.
Unlike an event run with our seasonal Tournament Kits or a special event like the Android: Netrunner Chronos Protocol Tour, each championship feeds into the following event. The winner of each Store Championship receives a first-round bye at the A Game of Thrones: The Card Game Regional Championship of their choice; the winner of each Regional Championship receives a first-round bye at their National Championship; and the winner of each National Championship receives a first-round bye at the A Game of Thrones: The Card Game World Championship! What Does Competitive Level Mean? When we updated the tournament rules in April, we included a new section in each game’s rules document. This section outlines a way of defining and categorizing the various tournaments run throughout the year in order to give players a better idea of what to expect when heading to a tournament. Tournaments can be classified as a casual, competitive, or premier tournament. Store Championships are competitive-level events. From the A Game of Thrones: The Card Game tournament rules: Competitive events require players to have general knowledge of a game’s rules. While experienced players will come to these events to compete for prizes, players should not be punished for their lack of understanding in the finer points of the A Game of Thrones: The Card Game rules. Players can come to these events expecting a consistent experience from store to store. This tier includes Store Championships and unique, one-off events. For more information on the three tiers of tournaments, check out each game’s tournament rules on our website. Store Championship Prizes While many players will come to A Game of Thrones: The Card Game Store Championships in hopes of receiving the Regional Championship bye awarded to the winner, there are other exclusive prizes up for grabs. Each kit contains enough prizes for the top 32 players. - Champion: The winner receives a Store Championship plaque and a card granting one first-round bye at a Regional Championship of the player’s choice.
- Top Four: The top four players each receive one Top 4 playmat (plus one for the judge/TO).
- Top Eight: The top eight players each receive one deck box (plus one for the judge/TO).
- Top Thirty-Two: The top thirty-two players each receive one alternate art card (plus one for the judge/TO).

Apply Now United States retailers can apply today by completing the online application form for a chance to host some of the most valorous knights in your area. If you are approved, you will be contacted with instructions for purchasing your Store Championship Kit. International retailers should contact their local distributor. Don’t hesitate! The application server will be unplugged on October 3rd 23:59 CST (Central Standard Time), closing applications for the 2015 Store Championships. ... Source: 2015 A Game of Thrones LCG Store Championships (http://www.fantasyflightgames.com/edge_news.asp?eidn=5044)
Title: FFG:2015 Star Wars: The Card Game Store Championships
Post by: RSSFeeder on 23 September 2014, 15:30:03
2015 Star Wars: The Card Game Store ChampionshipsApply by October 3rd to Host a Store Championship
Are You a Retailer? Apply today to host a Store Championship!
| | Fantasy Flight Games is proud to announce the 2015 Star Wars™: The Card Game Store Championships. Applications have been loaded and are now online! Retailers are invited to apply now for next year’s Store Championship season, running from January 1st through March 31st. Store Championship events are competitive tournaments held at a local level and serve as the first step toward our annual World Championships each November. If you are a United States retailer or tournament organizer interested in hosting a 2015 Store Championship event, fill out our online application form before October 3rd 23:59 CST (Central Standard Time) to be considered. If you are a retailer outside of the United States, please contact your distributor to apply to host a Store Championship or ask questions. International applications must be submitted before October 3rd 23:59 CST (Central Standard Time) to be considered. How Do Store Championships Fit into Organized Play? Our championship events are a series of events that start on a local scale (Store Championships) and grow all the way into the pinnacle of international play (World Championships) over the course of each year. While players do not have to participate in each event, the competition becomes fiercer, the prize pool becomes larger, and the events become bigger with each championship. Store Championships are the event that kicks it all off.
Unlike an event run with our seasonal Tournament Kits or a special event like the X-Wing™ Wave IV Assault at Imdaar Alpha event, each championship feeds into the following event. The winner of each Store Championship receives a first-round bye at the Star Wars: The Card Game Regional Championship of their choice; the winner of each Regional Championship receives a first-round bye at their National Championship; and the winner of each National Championship receives a first-round bye at the Star Wars: The Card Game World Championship! What Does Competitive Level Mean? When we updated the tournament rules in April, we included a new section in each game’s rules document. This section outlines a way of defining and categorizing the various tournaments run throughout the year in order to give players a better idea of what to expect when heading to a tournament. Tournaments can be classified as a casual, competitive, or premier tournament. Store Championships are competitive-level events. From the Star Wars: The Card Game tournament rules: Competitive events require players to have general knowledge of a game’s rules. While experienced players will come to these events to compete for prizes, players should not be punished for their lack of understanding in the finer points of Star Wars: The Card Game’s rules. Players can come to these events expecting a consistent experience from store to store. This tier includes Store Championships and unique, one-off events. For more information on the three tiers of tournaments, check out each game’s tournament rules on our website. Store Championship Prizes While many players will come to Star Wars: The Card Game Store Championships in hopes of receiving the Regional Championship bye awarded to the winner, there are other exclusive prizes up for grabs. Each kit contains enough prizes for the top 32 players. - Champion: The winner receives a Store Championship plaque and a card granting one first-round bye at a Regional Championship of the player’s choice.
- Top Four: The top four players each receive one Top 4 playmat (plus one for the judge/TO).
- Top Eight: The top eight players each receive one deck box (plus one for the judge/TO).
- Top Thirty-Two: The top thirty-two players each receive one alternate art card (plus one for the judge/TO).
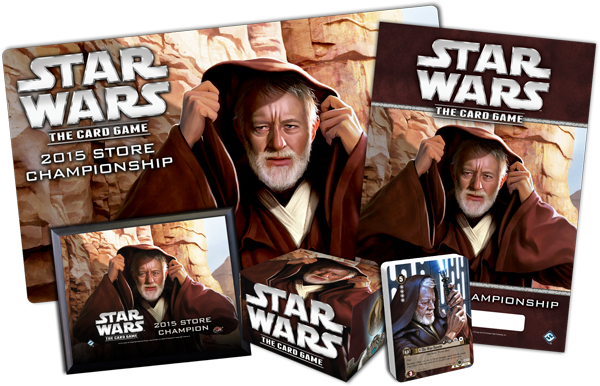
Apply Now United States retailers can apply today by completing the online application form for a chance to host some of the most decorated heroes in your area. If you are approved, you will be contacted with instructions for purchasing your Store Championship Kit. International retailers should contact their local distributor. Don’t hesitate! The application server will be unplugged on October 3rd 23:59 CST (Central Standard Time), closing applications for the 2015 Store Championships. ... Source: 2015 Star Wars: The Card Game Store Championships (http://www.fantasyflightgames.com/edge_news.asp?eidn=5045)
Title: FFG:2015 Warhammer: Diskwars Store Championships
Post by: RSSFeeder on 24 September 2014, 00:00:03
2015 Warhammer: Diskwars Store ChampionshipsApply by October 3rd to Host a Store Championship
Are You a Retailer?
Apply today to host a Store Championship!
|
|
Fantasy Flight Games is proud to announce the 2015 Warhammer: Diskwars Store Championships. Applications have been loaded and are now online! Retailers are invited to apply now for next year’s Store Championship season, running from January 1st through March 31st. Store Championship events are competitive tournaments held at a local level and serve as the first step toward our annual World Championships each November. If you are a United States retailer or tournament organizer interested in hosting a 2015 Store Championship event, fill out our online application form before October 3rd 23:59 CST (Central Standard Time) to be considered. If you are a retailer outside of the United States, please contact your distributor to apply to host a Store Championship or ask questions. International applications must be submitted before October 3rd 23:59 CST (Central Standard Time) to be considered. How Do Store Championships Fit into Organized Play? Our championship events are a series of events that start on a local scale (Store Championships) and grow all the way into the pinnacle of international play (World Championships) over the course of each year. While players do not have to participate in each event, the competition becomes fiercer, the prize pool becomes larger, and the events become bigger with each championship. Store Championships are the event that kicks it all off.
Unlike an event run with our seasonal Tournament Kits or a special event like the X-Wing™ Wave IV Assault at Imdaar Alpha event, each championship feeds into the following event. The winner of each Store Championship receives a first-round bye at the Warhammer: Diskwars Regional Championship of their choice; the winner of each Regional Championship receives a first-round bye at their National Championship; and the winner of each National Championship receives a first-round bye at the Warhammer: Diskwars World Championship! What Does Competitive Level Mean? When we updated the tournament rules in April, we included a new section in each game’s rules document. This section outlines a way of defining and categorizing the various tournaments run throughout the year in order to give players a better idea of what to expect when heading to a tournament. Tournaments can be classified as a casual, competitive, or premier tournament. Store Championships are competitive-level events. From the Warhammer: Diskwars tournament rules: Competitive events require players to have general knowledge of a game’s rules. While experienced players will come to these events to compete for prizes, players should not be punished for their lack of understanding in the finer points of Warhammer: Diskwars rules. Players can come to these events expecting a consistent experience from store to store. This tier includes Store Championships and unique, one-off events such as the X-Wing™ Wave 4 Assault at Imdaar Alpha event or the Android: Netrunner Chronos Protocol Tour. For more information on the three tiers of tournaments, check out each game’s tournament rules on our website. Store Championship Prizes While many players will come to Warhammer: Diskwars Store Championships in hopes of receiving the Regional Championship bye awarded to the winner, there are other exclusive prizes up for grabs. Each kit contains enough prizes for the top 32 players.
- Champion: The winner receives a Store Championship plaque and a card granting one first-round bye at a Regional Championship of the player’s choice.
- Top Four: The top four players each receive one Top 4 range ruler (plus one for the judge/TO).
- Top Eight: The top eight players each receive one deck box (plus one for the judge/TO).
- Top Thirty-Two: The top thirty-two players each receive one alternate art card (plus one for the judge/TO).

Apply Now United States retailers can apply today by completing the online application form for a chance to host a battle for the Old World in your area. If you are approved, you will be contacted with instructions for purchasing your Store Championship Kit. International retailers should contact their local distributor. Don’t hesitate! The application server will be unplugged on October 3rd 23:59 CST (Central Standard Time), closing applications for the 2015 Store Championships. ... Source: 2015 Warhammer: Diskwars Store Championships (http://www.fantasyflightgames.com/edge_news.asp?eidn=5047)
Title: FFG:2015 Warhammer 40,000 LCG Store Championships
Post by: RSSFeeder on 24 September 2014, 08:30:03
2015 Warhammer 40,000 LCG Store ChampionshipsApply by October 3rd to Host a Store Championship
Are You a Retailer? Apply today to host a Store Championship!
| | Fantasy Flight Games is proud to announce the 2015 Warhammer 40,000: Conquest Store Championships. Applications have been loaded and are now online! Retailers are invited to apply now for next year’s Store Championship season, running from January 1st through March 31st. Store Championship events are competitive tournaments held at a local level and serve as the first step toward our annual World Championships each November. If you are a United States retailer or tournament organizer interested in hosting a 2015 Store Championship event, fill out our online application form before October 3rd 23:59 CST (Central Standard Time) to be considered. If you are a retailer outside of the United States, please contact your distributor to apply to host a Store Championship or ask questions. International applications must be submitted before October 3rd 23:59 CST (Central Standard Time) to be considered. How Do Store Championships Fit into Organized Play? Our championship events are a series of events that start on a local scale (Store Championships) and grow all the way into the pinnacle of international play (World Championships) over the course of each year. While players do not have to participate in each event, the competition becomes fiercer, the prize pool becomes larger, and the events become bigger with each championship. Store Championships are the event that kicks it all off.
Unlike an event run with our seasonal Tournament Kits or a special event like the Android: Netrunner Chronos Protocol Tour, each championship feeds into the following event. The winner of each Store Championship receives a first-round bye at the Warhammer 40,000: Conquest Regional Championship of their choice; the winner of each Regional Championship receives a first-round bye at their National Championship; and the winner of each National Championship receives a first-round bye at the Warhammer 40,000: Conquest World Championship! What Does Competitive Level Mean? When we updated the tournament rules in April, we included a new section in each game’s rules document. This section outlines a way of defining and categorizing the various tournaments run throughout the year in order to give players a better idea of what to expect when heading to a tournament. Tournaments can be classified as a casual, competitive, or premier tournament. Store Championships are competitive-level events. From FFG tournament rules: Competitive events require players to have general knowledge of a game’s rules. While experienced players will come to these events to compete for prizes, players should not be punished for their lack of understanding in the finer points of a game’s rules. Players can come to these events expecting a consistent experience from store to store. This tier includes Store Championships and unique, one-off events. For more information on the three tiers of tournaments, check out each game’s tournament rules on our website. Store Championship Prizes While many players will come to Warhammer 40,000: Conquest Store Championships in hopes of receiving the Regional Championship bye awarded to the winner, there are other exclusive prizes up for grabs. Each kit contains enough prizes for the top 32 players. - Champion: The winner receives a Store Championship plaque and a card granting one first-round bye at a Regional Championship of the player’s choice.
- Top Four: The top four players each receive one Top 4 playmat (plus one for the judge/TO).
- Top Eight: The top eight players each receive one deck box (plus one for the judge/TO).
- Top Thirty-Two: The top thirty-two players each receive one alternate art card (plus one for the judge/TO).

Apply Now United States retailers can apply today by completing the online application form for a chance to host one of the most epic battles in your area. If you are approved, you will be contacted with instructions for purchasing your Store Championship Kit. International retailers should contact their local distributor. Don’t hesitate! The application server will be shutdown on October 3rd 23:59 CST (Central Standard Time), closing applications for the 2015 Store Championships. ... Source: 2015 Warhammer 40,000 LCG Store Championships (http://www.fantasyflightgames.com/edge_news.asp?eidn=5048)
Title: FFG:Announcing 2015 Store Championships
Post by: RSSFeeder on 24 September 2014, 17:00:03
Announcing 2015 Store ChampionshipsRetailers: Apply by October 3rd to Host a Store Championship
Are You a Retailer? Apply today to host a Store Championship!
| | Fantasy Flight Games is excited to announce the first major tournament season of our 2015 Organized Play schedule: Store Championships! Apply by October 3rd 23:59 CST (Central Standard Time) to join hundreds of other stores around the world in hosting a Store Championship for players in your area. Due to the success of Store Championships last year, we are expanding Store Championships to three months in 2015. The 2015 Store Championship season will run from January 1st to March 31st, allowing stores more flexibility in their scheduling and players more chances to play in a local event larger than their weekly tournament night. If you are a retailer outside of the United States, please contact your distributor to ask questions and apply to host a Store Championship. International applications must be submitted before October 3rd 23:59 CST (Central Standard Time) to be considered. 
What Are Store Championships? Store Championships were introduced in 2014 as an additional stage in FFG’s Organized Play Program and were a resounding success. Added to the same structure that includes premier-level events such as Regional, National, and World Championships, Store Championships are competitive-level events available to every store. These store-based events provide all players an arena to compete against other local players, share stories, and vie for the title of Store Champion. Bragging rights are not the only thing on the line at Store Championships. The winner of each event will receive one bye at a Regional Championship of his or her choice. In addition, players that finish well in the event will receive a playmat, set of tokens, or other prizes depending on their standing at the end of the tournament. The top 32 players will each receive an alternate art card. What Games Are Supported? Store Championships are the centerpiece of FFG’s Organized Play in local stores and attract players from all around the local area. Each store that is approved to host a Store Championship will have the opportunity to purchase an event kit containing prizes and support for hosting your event. Follow the links listed below to see what’s included in each kit and apply to host a Store Championship for each game. 
Are You a Player? If you’re a player, you can do your part by telling your favorite local game store about Store Championships. If you’re interested in taking a more active role in bringing Organized Play events to your store, here are some other ways you can promote Fantasy Flight OP: - Encourage your friends to join you and play at your favorite local game store
- Ask your favorite local game store if you can post a sign-up sheet for upcoming events
- Offer to run demos
- Volunteer your services as tournament organizer or judge
The exclusive items and alternate art cards included in these kits are only available at 2015 Store Championships, so be sure to talk with your local retailer about applying to host a Store Championship. Apply Today Retailers, apply today by completing the United States online application form for the chance to host enthusiastic players in your area. International retailers should contact their local distributor to apply. Don’t miss out! Store Championship applications close October 3rd at 23:59 CST (Central Standard Time). ... Source: Announcing 2015 Store Championships (http://www.fantasyflightgames.com/edge_news.asp?eidn=5049)
Title: FFG:Let the Feast Begin!
Post by: RSSFeeder on 25 September 2014, 01:30:02
Let the Feast Begin!The Last Banquet is Now Available
All the guests were gossiping and laughing as they poured into the great hall. The bard, meanwhile, stood by the high table with the jester, trying to sneak food without getting caught. As she reached out for some olives, the door creaked open and the baron appeared. All commotion ceased and everyone turned to stare at him. The jester whispered to the bard, “I wonder who invited him? The Baron hasn’t spoken to the king since the queen was killed last year. She was the Baron’s sister, you know. Well, well, well. This will be a very entertaining meal.” Our large-group game of courtly intrigue, The Last Banquet, is on sale now at your local retailer and in our online store! In The Last Banquet, you and your friends take on the roles of guests at an opulent royal feast. Perfectly suited for parties and large gaming events, the game accommodates groups of six to twenty-five players. Using your character’s actions and words, you must work with other players to achieve your team’s goal, which may be to deliver a secret message, rescue the kidnapped princess, or seat your team’s assassin by the king’s side. 
Sneaky Servants and Ambitious Nobility Our first preview introduced you to some of the court personalities invited to the banquet and their devious means of getting ahead at court. Each character has an individual set of actions and words to accompany them. We saw how the mischievous jester can create chaos by forcing players to switch characters, turning the abbot into the merchant, or the princess into the king. We also looked at the ambitious duchess’ dangerous gossip-mongering, which she uses as a pretense to physically lure her allies and her enemies closer. But what about the king himself? Sitting on the throne both empowers him and makes him vulnerable. In more than one scenario his life is at stake. His actions allow him to either switch places with another player or change the direction that the scepter is passed, which reverses the order in which players take their action. When you play the king, you must decide how to use those actions to avoid assassination, discover your enemies and protect the royal family. 
Deadly Plots and Royal Rivalries You begin the game by choosing, as a group, which scenario to play – we took a detailed look at two of the scenarios, A League of Traitors and The Missing Princess in our second preview. You might select the titular scenario and try to murder the king at his own feast (or save the king from death), or play Spies and Courtiers, in which the baron works to secretly deliver a scandalous message to the king, and the duke’s faction seeks to prevent the message from being delivered. You could play an ambitious merchant, using any means necessary to take over a dead nobleman’s luxurious estate, or a vengeful ghost who has come to dinner in order to kill her sister the queen. Once the scenario has been chosen, players select characters, divide into factions, and strategize before taking their places. Be careful where you sit at the beginning of the game, since that affects when you can take your action, but be prepared to switch places several times in a given round. You never know who you’ll end up sitting next to– it could be a resentful cup-bearer, a flirtatious duchess, a loquacious wizard or a gracious queen! 
Dinner is Served! With six different cloak-and-dagger scenarios and twenty-five palace personalities to choose from, every banquet at the royal court will be a unique experience.The palace gates are open and your place at the royal table is ready! Download the rules from the support page and pick up your copy of The Last Banquet today! ... Source: Let the Feast Begin! (http://www.fantasyflightgames.com/edge_news.asp?eidn=5050)
Title: FFG:Unleash the Creatures
Post by: RSSFeeder on 25 September 2014, 10:00:04
Unleash the CreaturesBestial Forces Is Now Available for Wiz-War
Prepare to release a host of magical creatures into your wizard duels! Bestial Forces is now available for Wiz-War, both at your local retailer and online through our webstore. In this new expansion for Wiz-War, you’ll uncover three new schools of magic, each offering an array of new spells and arcane devices for you to control and master. You’ll find much more than new spells and cantrips in this expansion, though. Six new creatures enter the magical labyrinth, ranging from a mischievous boggart to a rampaging minotaur. Each of these creatures are yours to command when you tap into these Bestial Forces.
New Schools, New Magic Our first preview of Bestial Forces examined the Mythology school of magic. This school offers you four of the six creatures introduced in this expansion, along with plenty of powerful new spells to cast. You may summon a genie to enhance your spell-casting prowess, allowing you to make more magical attacks, or you may lure a wizard or creature into your trap with Embrace of Jorogumo. This school of magic also introduces a new type of item: Relics. These are special items with highly effective powers, but while carrying a Relic you cannot pick up a treasure or another Relic, forcing you to choose between treasure and your Relic in the midst of your magical duels.  
The second preview turned to the Draconic school of magic – the school devoted entirely to the many aspects that make up the mighty dragon. You may cast spells to defend your treasure against intruders, or summon a drake to safeguard your possessions. This school of magic even allows you to take on the persona of a dragon. You may breathe fire at your opponents, take flight on scaly wings, or even cast Raking Talons, which gives you the ability to deal damage or seize treasure or an item from another wizard! Most recently, we explored the Totem school of magic in Bestial Forces. This school of magic introduces the Totems, a new form of creation spell that grants powerful effects to an entire sector. You might use Totems to defend your home sector, or to speed you on your way to stealing your opponent’s treasure. The best part about your Totems, however, is that they power other spells in the Totem school of magic. Cards like Spiritual Infusion and Primal Scream ensure that your opponents learn to respect the power of the Totems. Call Upon the Creatures With new creatures and new schools of magic, the Bestial Forces expansion provides all the wild magic you need for your wizard duels in the magical labyrinth. Download the rules from the Wiz-War support page and pick up your copy of Bestial Forces at your local retailer today! ... Source: Unleash the Creatures (http://www.fantasyflightgames.com/edge_news.asp?eidn=5051)
Title: FFG:Hold Together
Post by: RSSFeeder on 25 September 2014, 18:30:02
Hold TogetherFour STAR WARS (TM) Dice Bags Are Now Available
“The Force is what gives the Jedi his power. It’s an energy field created by all living things. It surrounds us and penetrates us. It binds the galaxy together."
–Obi-Wan Kenobi Four new Star Wars™ Dice Bags from Fantasy Flight Supply are now available at your local retailer and online through our webstore! Ensure that your dice and game components remain bound together. No matter which side you favor in the Galactic Civil War or if your inner conflict lures you toward the light side or the dark, you’ll find these Dice Bags perfect for protecting your custom dice or components for any of our Star Wars games: Bolster Your Defenses "A Jedi uses the Force for knowledge and defense."
–Yoda Fantasy Flight Supply is committed to providing you the best materials to protect, customize, and enhance your games. To that end, each Star Wars Dice Bag provides a handy, durable, and thematic means to transport your Star Wars game components:
- Galactic Empire. Order your components as you would order the galaxy. Nothing shall escape your grasp!
- Stormtrooper. Keep your dice and tokens in a dice bag adorned with the Stormtrooper’s iconic white helmet, and you will always be ready for battle!
- Boba Fett. You always have a few tricks up your sleeve… and in your dice bag.
- Rebel Alliance. To topple the Empire and win the fight for galactic freedom, you’ll need to safeguard your resources and make good use of every single one of them.
Star Wars Dice Bags are all crafted with a durable blend of polyester and nylon, feature a polypropylene draw string, and measure 6.25” by 9” (15.9 cm by 22.9 cm), enough space to carry bundles of dice and large enough for nearly everyone to reach inside with ease. This means each bag nicely performs double duty as a repository not only for your dice and tokens but also for other game components like your X-Wing asteroids and your Star Wars: The Card Game Death Star dial. Stylish and Secure Storage "You hear me, baby? Hold together!"
–Han Solo Star Wars Dice Bags give you a handy and thematic way to safely transport all your Star Wars game components as the fight for the galaxy rages on. Pick up yours today at your local retailer or online through our webstore! ... Source: Hold Together (http://www.fantasyflightgames.com/edge_news.asp?eidn=5052)
Title: FFG:New Location. New Rules.
Post by: RSSFeeder on 26 September 2014, 03:00:03
New Location. New Rules.First Contact Is Now Available for Android: Netrunner
“Less gravity. Fewer worries. Life is good in Heinlein!” Welcome to the moon, a strange and alien place. From the moment you first set foot, you notice the gravity is different, the air distinctly smells recycled, and though you can’t quite put your finger on it, you know the rules feel different… First Contact, the third Data Pack in the Lunar Cycle for Android: Netrunner, is now available at your local retailer and online through our webstore! With its sixty cards (three copies each of twenty different cards), First Contact shakes up the contests between Corp and Runner by introducing three new region upgrades, mythic ice, new traps, resources, and a new Anarch identity, all of which continue to enhance the cycle’s exploration a new meat space – the moon. 
For the different Corps and Runners invested in the game’s high-stakes cyberstruggles, the moon presents a wide range of unique challenges, risks, and rewards. In fact, if it’s your first time in Heinlein, you might think the rules are altogether different. Of course, they’re not different. Nor have they broken, but in the moon’s reduced gravity, they bend quite nicely. Running on the Moon  Everyone knows how you conduct a run. You build an icebreaker suite and crunch your way through ice subroutines, you do your legwork and bypass security measures by logging directly into the servers, or you charge straight ahead and hope the ice you crash into won’t kill you before you redirect your run and catch the Corp with its defenses down on another server. These are well-established facts. We’ve had thousands upon thousands of runs, and these are how they happen. Everyone knows how you conduct a run. You build an icebreaker suite and crunch your way through ice subroutines, you do your legwork and bypass security measures by logging directly into the servers, or you charge straight ahead and hope the ice you crash into won’t kill you before you redirect your run and catch the Corp with its defenses down on another server. These are well-established facts. We’ve had thousands upon thousands of runs, and these are how they happen.
…Except, of course, if you’re Quetzal (First Contact, 52). Then, you slip into Corp servers with little more than a program like Paintbrush (Double Time, 108) and a set of e3 Feedback Implants (Trace Amount, 24). The only Runner to this point to feature a built-in ability to break an ice subroutine, Quetzal forces the Corp to adapt quickly or risk coughing up its most valuable secrets. Most ice that force the Runner into hard stops during the early game are provided by barrier ice such as Paper Wall (Mala Tempora, 59) and Bastion (Creation and Control, 26). Quetzal punches big holes in most of these. In fact, the Corps would be forced to think about abandoning barrier ice altogether were it not for the fact that Quetzal can only use her ability once per turn. Thus, it’s still possible to build a wall that can block this free spirit… as long as it’s two walls thick. They Know Who You Are Of course, it’s not just the Runners who want to play by their own rules. After all, the Corps built Heinlein, and they run it. They own it, and they know who you are. In First Contact, NBN gains two cards that further position it as the leading name in consumer data collection and targeted messaging.  
First of all, so long as it remains rezzed, The News Now Hour (First Contact, 45) prevents the Runner from playing any currents. These strange new events first appeared in The Spaces Between and remain in play – and in effect – until the Corp plays its own current or scores an agenda. By removing the Runner’s ability to play currents, NBN lends greater resilience to its own. So long as The News Now Hour is broadcasting, the Runner can’t trash NBN’s currents except by stealing an agenda or first running on The News Now Hour and trashing it before, finally, playing its own current. Why does this matter? If NBN can establish an undisputed control of the airwaves, it can fill them with currents like Manhunt (First Contact, 46), which can cause massive headaches for Runners hoping to avoid tags… Of course, Runners who don’t pay to dodge the tags or ditch them risk suffering a whole lot more than the loss of a couple credits. They might find their bank accounts closed, or they might learn that the oft-used Scorched Earth policy (Core Set, 99) isn’t limited just to Earth. Once You Make Contact, You’re in up to Your Teeth In Heinlein, you can find pretty much anything you’d dream to find, but there are also plenty of things that might find you. Will you be the hunter or the prey? Will you play by your opponent’s rules, or will you play by your own? The stakes shot up as soon as you set foot on the moon. Head to your local retailer today to pick up your copy of First Contact, or order it online through our webstore! ... Source: New Location. New Rules. (http://www.fantasyflightgames.com/edge_news.asp?eidn=5054)
Title: FFG:Lords of Nal Hutta
Post by: RSSFeeder on 26 September 2014, 11:30:03
Lords of Nal HuttaAnnouncing a Hutt Space Sourcebook for Edge of the Empire
Fantasy Flight Games is proud to announce the upcoming release of Lords of Nal Hutta, a Hutt Space sourcebook for the Star Wars®: Edge of the Empire™ Roleplaying Game that allows you and your friends to escape the oppressive rule of the Empire and engage in devious schemes with the galaxy’s slimiest and most notorious gangsters: the Hutts. Name your vice: gambling, luxury, spice, or beauty, perhaps? Whatever your pleasure, you can find it in abundance in Hutt Space, provided you’re willing to pay. Smugglers, freelancers and mercenaries flock to the galaxy’s many Hutt-controlled hives of scum and villainy to fulfill their depraved desires or make a quick profit. Opportunity is abundant, but it comes at a perilously steep price. Anyone who flies Hutt Space lanes and hauls their questionable cargo must continuously ask themselves how far they’re willing to go in the name of cold, hard credits. In the 144 pages of Lords of Nal Hutta, Game Masters can find all the information they need to bring the most corrupt and lawless stretch of the galaxy to life. The book places everything you need to base a campaign in this infamous region at your fingertips, including information on over a dozen planets and their history, people and culture, points of interest and plot hooks, as well as local creatures and challenges. For more information on the details of Hutt Space, we turn to Lead Developer, Max Brooke. Lead Developer Max Brooke on the Land of the Kajidic “This book expands considerably on Hutt Space in the Star Wars roleplaying game, giving players and GMs the resources and support to tell countless new stories in locations like Nal Hutta, Nar Shaddaa, Toydaria, Kintan, and more! 
“In addition to information about the environments and inhabitants of Hutt Space, Lords of Nal Hutta contains facts about the Hutt kajidics that hold sway there, describing these clans along with their influential members, alliances, rivalries, and histories. The allegiances and squabbles between the various kajidics, as well their interactions with the Galactic Empire and the Rebel Alliance, can make for extremely exciting stories, especially for the smugglers, fringers, and other Edge of the Empire characters who find themselves trapped in the middle! Hutt Space is full of opportunities for an ambitious individual to get incredibly rich—or to lose everything to a Hutt scheme. “To help bring all of this setting information into your games, Lords of Nal Hutta has a plethora of player resources and a set of modular encounters related to Hutt Space. You’ll find rules for playing four new species native to the region: the rugged and adaptable Nikto, the cybernetic mercenaries known as Ganks, the adept and prideful Sakiyans, and the mighty Hutts themselves. The book also features weapons, equipment, starships, and vehicles from Hutt Space to help the GM and players immerse themselves and their characters in the region. Further, the modular encounters included in this book give GMs ways to easily seed trips to Hutt Space into their adventures or even to run full campaigns within this murky hive of galactic iniquity.” Residents of the Rim Along with a detailed overview of the most prominent figures in Hutt Space Lords of Nal Hutta also includes a wealth of new options for character creation. 
Players now have four more species options:
- Sakiyans are unparalleled killers in the galaxy. Their predatory skill is unmatched, but protecting and defending their families and prides are their top priorities. While most show little to no interest in leaving their homeworld, Saki, those who do leave quickly become renowned as bounty hunters and assassins, finding their skills in high demand among the Hutt kajidics. Sakiyans are also noted for their distinct lack of humor as well as their intellectual and problem-solving abilities; they rarely take kindly to being proven wrong.
- Niktos are hardy, stoic creatures known for being slaves to the Hutts. Reptilian humanoids with tough, leathery skin and standing roughly the height of an average human, the Niktos are a product of the environment of their harsh home planet, Kintan. All five of the Nikto sub-species are commonly found throughout Hutt Space and the Outer Rim. Most of them operate somewhere between illegal and immoral–doing dirty work for their powerful and devious employers.
- A feared and mysterious species of mercenaries in the employ of the Hutts, the Ganks are among the most bloodthirsty killers in Hutt Space. Fur-laden carnivorous bipeds, they are clad from head to toe in high-tech battle armor, and are rarely seen in the flesh by non-Ganks. At their best as faceless thugs and enforcers, Ganks are almost exclusively bounty hunters, assassins, and bodyguards for Hutts and others willing to pay cold, hard credits for their unseemly services.
- Hutts are large, slow-moving, long-living gastropods with remarkable physical and mental strength. Hutts can be found in nearly any profession, though the most infamous Hutts in the galaxy tend to be gangsters and crime lords. The massive slug-like creatures live for hundreds of years, and though they are slow, they are still physically powerful in their own right. Hutts also retain a great deal of societal power from the influence of the Hutt kajidics.
Black Market Wares The infamous black markets that litter the seedy underbelly of Hutt Space offer virtually any armaments imaginable, offering everything from the small but powerful blasters of the Hutts to the bizarre tensor rifles of the Sakiyans and the deadly cortosis staves of the Morgukai. Accordingly, Lords of Nal Hutta contains profiles for a wide range of new weapons, armor, and gear, even exotic weapons that spew acid and poison gas. 
The wealth of new gear extends far beyond weaponry, though, most notably including some cybernetic favorites of the Ganks. On Nar Shaddaa it is easy to find a back alley doctor willing to replace a limb or implant an artificial device, but only if you’ve got the credits. Dangerous Opportunities Lords of Nal Hutta also includes five unique modular encounters that range in length from a thirty minute interlude to a full session’s worth of content. Each is designed to require a minimum of preparation on the part of the Game Master and can be used to help fill out a game with new and exciting locations, prevent disruption in your campaign during an unexpected turn of events, serve as a guide for a one-shot session, or even comprise a series of adventures in their own right. 
Engage with the Hutt clans and kajidics as slimy allies or wretched foes, strike a deal with a weapons dealer in Nar Shaddaa, or hunt for spice in the swamps of Toydaria. The options are vast and the choice is yours. Welcome to Nal Hutta In Hutt Space, so long as your crew has the guts, the gear, and the luck to pull it off, you can make a lot of quick credits while working for or against the Hutts. The Empire’s limited presence means that once your characters earn their credits, they’ll also find plenty of opportunities to get their hands on some of the most obscure and dangerous gear on this side of the galaxy. 
Whether the Hutts become your friends or foes, Lords of Nal Hutta gives you the chance to interact with the slimiest and most devious creatures in this infamous corner of the galaxy. This setting sourcebook for Edge of the Empire is scheduled to arrive in the fourth quarter of 2014. Until then, keep your eyes open for more announcements, previews and other news about the Star Wars: Edge of the Empire Roleplaying Game. ... Source: Lords of Nal Hutta (http://www.fantasyflightgames.com/edge_news.asp?eidn=5053)
Title: FFG:Jump to Subspace
Post by: RSSFeeder on 26 September 2014, 20:00:03
Jump to SubspaceA Preview of the Rebel Aces Expansion Pack for X-Wing (TM)
Hunched over inside an escape pod, a Rebel operative holds a high-ranking Moff at gunpoint. “I know it’s cramped in here; quit complaining. I don’t have much faith in this thing’s life support, so stop using up all the oxygen.” The Rebel operative tries the comms again. “Come in Dagger Squadron, do you read me? Dagger Squadron?”
–from the “Jump to Subspace” mission The Rebel Aces Expansion Pack for X-Wing™ is scheduled to arrive at retailers late next week! In our previous previews, we have focused on what its new A-wing and B-wing pilots and upgrades bring to X-Wing. We’ve seen how the expansion has increased the A-wing’s versatility, granting Rebel commanders the choice to use their A-wings as lightning-quick missile platforms or treat them with Chardaan Refits in order to make them more efficient, ship-to-ship dogfighters.
A 360-degree view of the Rebel Aces A-wing.
We’ve also see how the expansion’s ace B-wing pilots may encourage commanders to fly their B-wings out of formation and explore all-new uses of this powerful starfighter.
A 360-degree view of the Rebel Aces B-wing.
Today, we’ll turn our attention away from the different options that the Rebel Aces Expansion Pack makes possible and look at the challenges that confront its ace pilots in the expansion’s new mission, Jump to Subspace. Mission Briefing Jump to Subspace offers you a golden opportunity to test all the new options available to your A-wings and B-wings. In this new mission, the Rebel Alliance must move quickly to rescue an operative that has captured a high-ranking Imperial Moff. However, it won’t be an easy task. They’re both cramped inside a damaged escape pod that has gone adrift inside an asteroid belt, and its thrusters are failing. As you head into the mission’s setup, the Rebellion’s situation gets even worse. Its starships arrive on the scene, deployed at opposite edges of the asteroid belt, and find that Imperial forces have also arrived and are ready for battle. Accordingly, your Rebel pilots must coordinate their efforts carefully to withstand the Imperial assault even as they work to jump-start the escape pod’s thrusters and guide it safely away from the asteroid field. 
If the Rebels can successfully shepherd the escape pod off the Rebel edge of the map, they win. It won’t be easy, though, because even while the Rebels begin the scenario with more available squad points than the Imperials, the Imperial player can call reinforcements to continue pressing the attack. As a result, the Rebellion’s aces find themselves battling against the clock and a limitless swarm of Imperial TIEs, and the mission gains a sense of tremendous urgency. Finally, the mission demands that you learn how to fly your A-wing and B-wing. Its unique rules require the Rebel player to field both an A-wing and a B-wing, at least one of which must be unique, so you’ll be guaranteed plenty of chances to make great use of the A-wing’s tremendous speed and to have your B-wing launch brutal volleys of laser fire at Imperial forces. Fly with the Rebellion’s Finest! Only ace pilots were granted the right to fly prototypes for the Rebel fleet, but their efforts benefitted everyone dedicated to the cause of galactic freedom.  Soon, you’ll be among those benefitting from their efforts when you fly the A-wing and B-wing from Rebel Aces. You can learn how best to pilot them and put them through their paces in the new mission, Jump to Subspace. Then you can outfit them for Standard Play with the expansion’s new upgrades and continue to fight for the fate of the galaxy. Soon, you’ll be among those benefitting from their efforts when you fly the A-wing and B-wing from Rebel Aces. You can learn how best to pilot them and put them through their paces in the new mission, Jump to Subspace. Then you can outfit them for Standard Play with the expansion’s new upgrades and continue to fight for the fate of the galaxy.
You’ll soon have your chance to fly with the best, so it’s time to start mastering these challenging starfighters… The Rebel Aces Expansion Pack arrives at retailers late next week! ... Source: Jump to Subspace (http://www.fantasyflightgames.com/edge_news.asp?eidn=5055)
Title: FFG:Fantasy Flight Games Is Now Hiring
Post by: RSSFeeder on 27 September 2014, 04:30:02
Fantasy Flight Games Is Now HiringApply for the Position of Temporary Warehouse Associate TodayFantasy Flight Games, leading hobby-market publisher of board games, card games, roleplaying games, and other tabletop games, is now hiring for the following position: Temporary Warehouse Associate (pdf, 116 KB)
- Details can be found in the pdf document linked above.
- To apply for this position, please submit your application (pdf, 106 KB) to HumanResources@fantasyflightgames.com; under the subject line “Temporary Warehouse Associate” no later than end of business day Friday, September 26, 2014.
- Please do not call or visit.
Our offices are located in Roseville, Minnesota, a suburb of the Twin Cities of Minneapolis and St. Paul. Candidates not already living within commuting distance must be willing to relocate. Fantasy Flight Publishing, Inc. is an equal opportunity employer committed to a diverse work force and a work environment free from discrimination. ... Source: Fantasy Flight Games Is Now Hiring (http://www.fantasyflightgames.com/edge_news.asp?eidn=5056)
Title: FFG:Battle Training
Post by: RSSFeeder on 27 September 2014, 13:00:03
Battle TrainingWatch our Warhammer 40,000: Conquest Video Tutorial
Warhammer 40,000: Conquest will soon be available! In just a few weeks, you’ll be able to join the war for the Traxis sector, command iconic warlords, and lead your armies into battle. Every game of Warhammer 40,000: Conquest pits you against another player in an interplanetary battle for dominance. Each turn, you must strategically command your armies, balancing present battles against the need for resources and potential future engagements. Seven factions await your command in the Warhammer 40,000: Conquest core set, ranging from the cunning Space Marines, to the ferocious Orks, to the mysterious Eldar. Today, you have the chance to start your battle training by watching our video tutorial of Warhammer 40,000: Conquest! Warhammer 40,000: Conquest Video Tutorial This video tutorial of Warhammer 40,000: Conquest teaches the game’s core concepts and turn structure as it guides you through a sample round, illustrating the four phases, game set-up, and deckbuilding. 
Click the image above to begin the video tutorial of Warhammer 40,000: Conquest, or watch it on YouTube!
You can also find the video tutorial located on the support page of the Warhammer 40,000: Conquest minisite, along with the rules to the game. ... Source: Battle Training (http://www.fantasyflightgames.com/edge_news.asp?eidn=5057)
Title: FFG:STAR WARS (R): Force and Destiny (TM) Beta Update #2
Post by: RSSFeeder on 27 September 2014, 21:30:03
STAR WARS (R): Force and Destiny (TM) Beta Update #2News From the Developers of the Force and Destiny Beta
Hello Force and Destiny™ beta testers, We’re very pleased to present the second week of beta updates (pdf, 296 KB) for Force and Destiny! As more people are able to start getting into playtesting, we have made a few changes to character creation to which we’d like to draw your attention. First, some species’ starting stats and special abilities have changed, with the Zabrak getting the biggest modification. In addition, we’ve made some modifications to group starting resources. Both the Holocron and the Mentor options now have been clarified to better spell out the mechanical benefits that they provide to groups. We’d love to know what you think of these tweaks. Finally, we’ve added a couple of new Adversary profiles. One concern we had was that players didn’t have enough opponents armed with lightsabers to square off against the PCs. The Fallen Apprentice and Fallen Master fill that very dangerous role. Please throw a Master and an Apprentice at your group of Player Characters and see how they do (or add more than one Apprentice if your group has five or more players). It’s worth noting that because these opponents are saber-wielders, they should be pitched against Knight level PCs or PCs who have access to lightsabers and have spent at least 100 xp beyond creation. As we move forward with our playtesting, our next focus is on the careers and specializations. We already anticipate some changes on these, but we still want to hear your thoughts on them. We’re particularly interested in the following points:
 Theme: Do the talent and skill choices in each specialization mesh with the description of that specialization? Theme: Do the talent and skill choices in each specialization mesh with the description of that specialization?
- Interest: Are there any specializations that seem particularly dull or uninteresting? The specialization may be mechanically sound yet fail to be engaging, such as a tree with nothing but Toughened and Grit. We want to make sure that all of the specializations are exciting.
- Mechanical Balance: Are there any specialization trees that offer a clear advantage to taking them? What about ones with clear disadvantages?
Also, since these update topics are fairly involved, we plan to post our next errata update two weeks from now, not next week. As always, thanks for all your hard work! ... Source: STAR WARS (R): Force and Destiny (TM) Beta Update #2 (http://www.fantasyflightgames.com/edge_news.asp?eidn=5058)
Title: FFG:Hernfar Guardians and Warband of Scorn
Post by: RSSFeeder on 28 September 2014, 06:00:06
Hernfar Guardians and Warband of ScornAnnouncing Two Army Pack Expansions for BattleLore Second Edition
The Berserkers kept coming, slashing at anything they could reach and leaving guards, archers, horses, even the Battlemages bleeding severely in their wake. Bright light shone through the Rune Golems’ stone bodies marking their wounds. The commander knew it was time to turn the tide of battle, to save his troops, Hernfar Isle, and Terrinoth. He whispered a few words under his breath and immediately heard the clanging of metal. Slowly, steadily, immense and shining automatons marched out of the trees and into the fray. The Uthuk stabbed and slashed at them, and then began to panic as they realized their weapons could not harm these armored, inhuman soldiers. Fantasy Flight Games is proud to announce two upcoming Army Pack expansions for BattleLore Second Edition. Stand your ground against chaos and destruction with the Daqan army in Hernfar Guardians, or lacerate your opponents and lay waste to the land with the demonic Uthuk Y’llan units of the Warband of Scorn. 
In each Army Pack you will find four new unit types for BattleLore Second Edition and two army cards that allow you to quickly deploy complete Daqan or Uthuk Y’llan armies composed entirely of the new units. Additional infantry units – the Daqan Citadel Guards or the Uthuk Blood Harvesters – are also included, along with a complete alternate deck of lore cards, new terrain tiles, and scenario cards. Choose one of the suggested armies or combine the new units with ones from the core set – either way, you’ll command a force of unprecedented might and tactical capabilities. Fearless Defenders With Hernfar Guardians, mages, knights, and automatons come under your command to fight in the Daqan army. The Citadel Lancers, horsemen armed with double-headed poleaxes, trample supported enemy units that otherwise would stand firm. Siege Golems, larger and stronger than Rune Golems, are ranged units with a combat value of four and a range of up to six– greater than any other ranged unit on the field. Their immense size also allows them to ignore other units when determining line of sight. Send them forward early in the game to thin out the enemy line, or deploy them behind infantry to support an attack. For the first time in BattleLore Second Edition, Caster units enter the conflict. These ranged infantry units fight using spells instead of physical force, their power granting them a range up to three and a combat value of three. Fighting for the Daqan Lords are Greyhaven Battlemages, scholars of the most powerful and arcane magics. Their lore results allow you to both gain a point of lore and draw a lore card. The Battlemages bring with them the Ironbound: indomitable and enchanted automatons with a combat value of four and the ability to ignore one point of damage each combat round. As automatons, they do not need to be commanded the way living troops do. Instead, you can spend a lore to order them, enabling them to fight in every round as long as you have the lore to spend. 
Bloodthirsty Demons As the warriors of Terrinoth unite to defend their homeland, the Uthuk Y’llan gain darker infernal powers and more vicious demonic allies in Warband of Scorn. Once men, the Grotesque and Berserkers have little humanity left in them and seek only to stain the ground crimson with Daqan blood.The monstrous Grotesque can use their Lacerate ability to Bleed target units, so that the unit rolls one fewer die in combat as long as they keep bleeding. The Berserkers’ Deranged ability allows you to reroll one die in every combat roll, making them an unpredictable and vicious threat for the Daqan. The Uthuk Y’llan gain Caster units as well: the fiendish Blood Sisters, who can Syphon target units to regain health, and cast Blood Magic to bleed their own units in order to harm their enemies. Following them are creeping, insectlike Doombringers. The terrifying presence of these creatures Immobilizes nearby units so that you cannot move them, while the Doombringers themselves can Burrow, ignoring movement restrictions imposed by terrain or other units. Send a Doombringer into the middle of Daqan cavalry to freeze them in place before they can charge forward, then annihilate them before they can fight back. 
Changing Terrain Hernfar Guardians and Warband of Scorn feature additional terrain tiles that allow you to adjust the battlefield landscape according to your will. You deploy these terrain tiles as if they were army units, and must factor them into your deployment cost. Both the Daqan Lords and Uthuk Y’llan gain Barricades that block movement or damage units that move across them. The Daqan also have Crystal Spires: any Daqan unit atop a Crystal Spire during combat can roll one additional die. Similarly, the Uthuk Y’llan can now create Blood Fields, where their units can recover one point of health at the start of your turn. Each Army Pack includes five scenario cards that incorporate the new terrain tiles, offering your army unique advantages and challenges. In Behind the Lines, your Daqan troops are encouraged to fight their way deep into enemy territory. If you’re commanding the Uthuk Y’llan, the Blood-Stained Forest scenario gives you incentives for sending your Blood Sisters to occupy forest hexes in the middle of the battlefield. 
Command and Fight Hernfar Guardians and Warband of Scorn both contain the units necessary to deploy a complete army, with two suggested deployment options and everything you need to use these units and terrain tiles in battle. For example, with the units included in Hernfar Guardians you can deploy either the Hernfar Guardians army, which is centered around the Citadel Lancers and a Siege Golem, or the more infantry-heavy Tranlon’s Raiders army. Future previews will provide more detail about the strengths and tactical capabilities of the suggested armies. You can also combine units from the Army Packs with those from the core set to muster an army designed for the battle at hand and customized to fit your strengths as a commander. Similarly, you can substitute the lore decks included in the Army Packs for the lore deck from the core set, or mix cards from both decks to create the lore deck that gives your army the greatest tactical advantages. Whether you command the bloodthirsty and savage Uthuk Y’llan or the noble and fearless Daqan Lords, these Army Packs offer you myriad tactical options. Choose your battlefield and your army, and prepare to fight with these formidable military units. You are in command. Look for Hernfar Guardians and Warband of Scorn in the first quarter of 2015. In the meantime, watch the Battlelore Second Edition minisite for in-depth previews and further information. ... Source: Hernfar Guardians and Warband of Scorn (http://www.fantasyflightgames.com/edge_news.asp?eidn=5059)
Title: FFG:Draft to Victory
Post by: RSSFeeder on 28 September 2014, 14:30:03
Draft to VictoryA Guest Article on Draft Play for A Game of Thrones: The Card Game
Draft play has long allowed players to experience the excitement of competing to form a deck of cards from a limited card pool. Recently, our in-house manufacturing has allowed us to bring draft play to your battles for the Iron Throne in A Game of Thrones: The Card Game. For those who have never drafted, a draft begins with each player purchasing a Draft Starter and a Draft Pack. Players open their randomized Draft Packs simultaneously and look at the top ten cards. Each player chooses one card to “draft,” and passes the remaining nine cards to his neighbor. Drafting and passing continues, changing directions with each new group of ten cards, until the Draft Packs are depleted. Once all cards are drafted, players construct decks using their drafted cards and the cards in their Draft Starter and play a series of games against other players in the draft. Today, guest writer Jonathan Andrews, an avid player of A Game of Thrones and a co-host of the Beyond the Wall podcast, shares his strategies for drafting in A Game of Thrones: The Card Game! 
Jonathan Andrews on A Game of Thrones Drafts Drafting presents a unique challenge to both new and veteran players of A Game of Thrones: The Card Game, forcing you to build your deck from a very limited card pool. As a drafter, there are a couple key concepts to remember while choosing your cards:
- onclick="window.open(this.href,'','resizable=yes,location=no,menubar=no,scrollbars=yes,status=no,toolbar=no,fullscreen=no,dependent=no,width=300,height=418,status'); return false" href="http://www.fantasyflightgames.com/ffg_content/agotlcg/guest-articles/cards/the-red-viper-draft.png">
 Know the cards. You can probably find a list of the cards in the draft online, and you’ll want to read them, memorize them, and make sure you understand how they interact. This information lets you play better during games, and it gives you an idea of what decks are possible to create with the limited card pool. You’ll need to steer clear of concepts or deck ideas that the card pool can’t support. Trying to build a characterless deck in a draft is probably a bad idea. Know the cards. You can probably find a list of the cards in the draft online, and you’ll want to read them, memorize them, and make sure you understand how they interact. This information lets you play better during games, and it gives you an idea of what decks are possible to create with the limited card pool. You’ll need to steer clear of concepts or deck ideas that the card pool can’t support. Trying to build a characterless deck in a draft is probably a bad idea.
- Pick up the bombs. A bomb is a very powerful card that’s hard for your opponent to deal with. If your opponent can’t answer your bomb quickly, it can easily win you the game. The Red Viper (Westeros Draft Set) is a great example of a bomb.
- When unsure of what to draft, don’t forget the B.R.E.A.D. acronym. This means that, as a general rule, you want to pick cards in this order: Bombs, Removal, Efficient characters, Attachments, and Dregs
- Good drafting makes your deck consistent while maximizing the use of your powerful cards. This means you want to keep the majority of your deck to one or two Houses. Any more Houses than this and you risk destroying your cost curve and setup. It’s also important to balance your deck’s power with its consistency. A good general rule is that a standard draft deck of forty cards should have twenty-two characters, nine resource locations and nine other cards, including attachments, events, and non-resource locations.
Advanced Draft Strategies There are a number of advanced strategies that players can use while drafting that may not be readily apparent to new drafters. Some of these strategies are listed below: Signaling is the act of passing or receiving a group of cards with a very clear ideal pick. Signaling can help you or another player choose a House that no one close to you is drafting. It’s normally best to avoid drafting the same House as neighboring players to ensure that you and they all build better decks. Fighting your neighbors over a single House’s key cards renders everyone’s decks less potent. If you’re passed a clear signal, not taking it can be risky, since the player passing to you now believes you’re playing a certain house (since they sent a signal), and they may try to avoid playing that House themselves. The signals you send and receive give you an idea of which Houses other players are drafting, informing your choices in the early rounds of the draft. 
Cutting off means preventing a player from seeing any worthwhile cards from a given House. This is generally done by aggressively taking these cards yourself. Of course, sometimes there will be too many worthwhile cards of a single House and you won’t completely cut a player off. The desired result, however, is to influence other players to cement themselves into a different House than you, so that in later draft rounds they pass over plenty of top cards in your House of choice. Of course, the ultimate value of this strategy depends heavily on the amount of worthwhile cards for your chosen House in later rounds of the draft. Long-ranging means making decisions based on cards you hope will be passed back to you when a group of cards comes back around the circle. In most drafts, you’ll see the last few cards from your first card groups again, allowing you to plan ahead somewhat. Although the cards that return to you are generally weaker cards, it’s important to have a sense of what might return. Knowing that a card you want is generally unpopular, for example, may justify taking another card, since the unpopular card will likely return. Long-ranging is more useful and reliable the fewer players drafting, since you’ll need to predict fewer picks. Hate-drafting refers to taking cards without the intention of playing them. Players normally do this to prevent another player from using a powerful card. For example, if a card group contains nothing for your House, but it does contain Balon Greyjoy (Westeros Draft Set), you may choose to hate-draft. Hate-drafting isn’t very profitable, since it is generally better to increase the strength of your own deck than try to hurt another player’s deck. In the games that you play after the draft, everyone enjoys the advantage you create by hate-drafting, but only you pay the price. Generally, the best time to hate-draft is if a card specifically counters your deck and there is virtually nothing for your deck in the card group. 
Adapting means making decisions early in the draft to keep your options open, rather than sending a clear signal and confining yourself to a certain House. Players tend to do this by selecting neutral or multi-House cards early in the draft. The idea behind adapting is that you will have a chance to sense the climate of the draft before choosing a House, reducing the risk that you’ll be stuck in one House while great cards from another keep turning up. The downside to this is that you normally have to take sub-optimal picks early. Players tend to use adapting when their first few card groups have strong neutral cards or no strong cards at all. They can then continue to keep their options open until the second or third card groups. I hope you have the chance to put these advanced draft strategies to use in your next draft for A Game of Thrones: The Card Game! Conquer the Iron Throne Thanks, Jon! Draft play offers a unique and exciting way to experience A Game of Thrones: The Card Game. There are now two draft pools for A Game of Thrones: The Card Game: the Ice and Fire draft pool and the new Westeros draft pool. Practice your strategies and gain the Iron Throne at your next draft! Look for more A Game of Thrones strategy articles in coming months. ... Source: Draft to Victory (http://www.fantasyflightgames.com/edge_news.asp?eidn=5060)
Title: FFG:Draft to Victory
Post by: RSSFeeder on 28 September 2014, 23:00:02
Draft to VictoryA Guest Article on Draft Play for A Game of Thrones: The Card Game
Draft play has long allowed players to experience the excitement of competing to form a deck of cards from a limited card pool. Recently, our in-house manufacturing has allowed us to bring draft play to your battles for the Iron Throne in A Game of Thrones: The Card Game. For those who have never drafted, a draft begins with each player purchasing a Draft Starter and a Draft Pack. Players open their randomized Draft Packs simultaneously and look at the top ten cards. Each player chooses one card to “draft,” and passes the remaining nine cards to his neighbor. Drafting and passing continues, changing directions with each new group of ten cards, until the Draft Packs are depleted. Once all cards are drafted, players construct decks using their drafted cards and the cards in their Draft Starter and play a series of games against other players in the draft. Today, guest writer Jonathan Andrews, an avid player of A Game of Thrones and a co-host of the Beyond the Wall podcast, shares his strategies for drafting in A Game of Thrones: The Card Game!
Jonathan Andrews on A Game of Thrones Drafts Drafting presents a unique challenge to both new and veteran players of A Game of Thrones: The Card Game, forcing you to build your deck from a very limited card pool. As a drafter, there are a couple key concepts to remember while choosing your cards:
- Know the cards. You can probably find a list of the cards in the draft online, and you’ll want to read them, memorize them, and make sure you understand how they interact. This information lets you play better during games, and it gives you an idea of what decks are possible to create with the limited card pool. You’ll need to steer clear of concepts or deck ideas that the card pool can’t support. Trying to build a characterless deck in a draft is probably a bad idea.
- Pick up the bombs. A bomb is a very powerful card that’s hard for your opponent to deal with. If your opponent can’t answer your bomb quickly, it can easily win you the game. The Red Viper (Westeros Draft Set) is a great example of a bomb.
- When unsure of what to draft, don’t forget the B.R.E.A.D. acronym. This means that, as a general rule, you want to pick cards in this order: Bombs, Removal, Efficient characters, Attachments, and Dregs
- Good drafting makes your deck consistent while maximizing the use of your powerful cards. This means you want to keep the majority of your deck to one or two Houses. Any more Houses than this and you risk destroying your cost curve and setup. It’s also important to balance your deck’s power with its consistency. A good general rule is that a standard draft deck of forty cards should have twenty-two characters, nine resource locations and nine other cards, including attachments, events, and non-resource locations.
Advanced Draft Strategies There are a number of advanced strategies that players can use while drafting that may not be readily apparent to new drafters. Some of these strategies are listed below: Signaling is the act of passing or receiving a group of cards with a very clear ideal pick. Signaling can help you or another player choose a House that no one close to you is drafting. It’s normally best to avoid drafting the same House as neighboring players to ensure that you and they all build better decks. Fighting your neighbors over a single House’s key cards renders everyone’s decks less potent. If you’re passed a clear signal, not taking it can be risky, since the player passing to you now believes you’re playing a certain house (since they sent a signal), and they may try to avoid playing that House themselves. The signals you send and receive give you an idea of which Houses other players are drafting, informing your choices in the early rounds of the draft.
Cutting off means preventing a player from seeing any worthwhile cards from a given House. This is generally done by aggressively taking these cards yourself. Of course, sometimes there will be too many worthwhile cards of a single House and you won’t completely cut a player off. The desired result, however, is to influence other players to cement themselves into a different House than you, so that in later draft rounds they pass over plenty of top cards in your House of choice. Of course, the ultimate value of this strategy depends heavily on the amount of worthwhile cards for your chosen House in later rounds of the draft. Long-ranging means making decisions based on cards you hope will be passed back to you when a group of cards comes back around the circle. In most drafts, you’ll see the last few cards from your first card groups again, allowing you to plan ahead somewhat. Although the cards that return to you are generally weaker cards, it’s important to have a sense of what might return. Knowing that a card you want is generally unpopular, for example, may justify taking another card, since the unpopular card will likely return. Long-ranging is more useful and reliable the fewer players drafting, since you’ll need to predict fewer picks. Hate-drafting refers to taking cards without the intention of playing them. Players normally do this to prevent another player from using a powerful card. For example, if a card group contains nothing for your House, but it does contain Balon Greyjoy (Westeros Draft Set), you may choose to hate-draft. Hate-drafting isn’t very profitable, since it is generally better to increase the strength of your own deck than try to hurt another player’s deck. In the games that you play after the draft, everyone enjoys the advantage you create by hate-drafting, but only you pay the price. Generally, the best time to hate-draft is if a card specifically counters your deck and there is virtually nothing for your deck in the card group.
Adapting means making decisions early in the draft to keep your options open, rather than sending a clear signal and confining yourself to a certain House. Players tend to do this by selecting neutral or multi-House cards early in the draft. The idea behind adapting is that you will have a chance to sense the climate of the draft before choosing a House, reducing the risk that you’ll be stuck in one House while great cards from another keep turning up. The downside to this is that you normally have to take sub-optimal picks early. Players tend to use adapting when their first few card groups have strong neutral cards or no strong cards at all. They can then continue to keep their options open until the second or third card groups. I hope you have the chance to put these advanced draft strategies to use in your next draft for A Game of Thrones: The Card Game! Conquer the Iron Throne Thanks, Jon! Draft play offers a unique and exciting way to experience A Game of Thrones: The Card Game. There are now two draft pools for A Game of Thrones: The Card Game: the Ice and Fire draft pool and the new Westeros draft pool. Practice your strategies and gain the Iron Throne at your next draft! Look for more A Game of Thrones strategy articles in coming months. ... Source: Draft to Victory (http://www.fantasyflightgames.com/edge_news.asp?eidn=5061)
Title: FFG:Grievous Wounds
Post by: RSSFeeder on 29 September 2014, 07:30:03
Grievous WoundsA Preview of The Road Darkens by Lead Developer Caleb Grace
“Frodo threw himself down, and lay on the ground shivering. His left arm was lifeless, and his side and shoulder felt as if icy claws were laid upon them. The trees and rocks about him seemed shadowy and dim.”
–J.R.R. Tolkien, The Fellowship of the Ring Some wounds do not heal quickly. Some wounds cut at your soul as much as they cut at your flesh. They weary you. They weigh you down. And even if they heal, they may leave scars. Your body may still ache at their memories. Some of these wounds may not be physical at all; they may be spiritual – the hollow ache of losing a loved one, the bitter sting of betrayal. In The Lord of the Rings Saga Expansions for The Lord of the Rings: The Card Game, these are the types of wounds represented by the game’s burdens. Like boons, which reward you for your successes, burdens can take a variety of forms. In The Black Riders Saga Expansion, we saw burdens appear as treachery cards and an objective card with a setup penalty. Now, as we eagerly await the release of The Road Darkens Saga Expansion, lead developer Caleb Grace reveals some of the new burdens we might receive and offers some insight into their development. Evils Not Easily Remedied In our last preview of The Road Darkens, we looked at some of the box’s exciting boon cards. In this final preview for the second The Lord of the Rings Saga Expansion, I want to look at a few of the burden cards with which you will soon have to contend. I’ll start by walking you through the creation of one of my favorite burden cards, Grievous Wound (The Road Darkens, 88).  When designing a burden card, I like to start with a significant event from the book. In this case, we start with the time that Frodo was stabbed by an Orc spear. For a moment, the readers were led to believe that the Ring-bearer had died and the quest was in real jeopardy. This moment of peril took place in Moria, so it was an easy choice to introduce this burden in the expansion’s second scenario, Journey in the Dark. When designing a burden card, I like to start with a significant event from the book. In this case, we start with the time that Frodo was stabbed by an Orc spear. For a moment, the readers were led to believe that the Ring-bearer had died and the quest was in real jeopardy. This moment of peril took place in Moria, so it was an easy choice to introduce this burden in the expansion’s second scenario, Journey in the Dark.
After choosing the moment I want to represent, and determining where it will appear, the next step is to answer a few key questions that will give the burden its core identity:
- What type of card will the burden be?
- What effect will it have?
- How will the players earn it?
This is definitely one of the most challenging stages of the design process for burdens, and arriving at the answer to each of those questions is a little process of its own. What Type of Card Will the Burden Be?First of all, the card type is determined primarily by its function. In the case of Grievous Wound, I knew that it would need to attach to a hero so that it could physically remind players that the hero was hurt. I could have made it a treachery that attached to a hero as part of its “When revealed” effect, but I wanted Grievous Wound to have Setup instructions. Adding the burden to the staging area at the beginning of each scenario would ensure that it would impact the players’ decisions throughout their games, so we gave Grievous Wound the objective card type. What Effect Will the Burden Have?The next step was to determine its effect. Matt and I have mentioned in previous articles how we draw heavily from the text in order to merge card effects with theme, and I feel that Grievous Wound is a good example: “Forced: After a hero takes damage, if Grievous Wound is unattached, attach to that hero. (Counts as a Condition attachment with the text: ‘Forced: After attached hero exhausts, deal 1 damage to it.’)” This effect was inspired by the passage from The Fellowship of the Ring that follows after Frodo was stabbed: “Well, it did not skewer me, I am glad to say,” said Frodo; “though I feel as if I had been caught between a hammer and an anvil.” He said no more. He found breathing painful. That moment stood out to me because it showed that Frodo was still flesh and blood underneath his mithril shirt. The spear thrust may have been thwarted by his hidden coat of mail, but the blow was still powerful enough to injure him. As a result, he found it difficult to exert himself, and that’s what I wanted the burden to convey by dealing one damage to the attached hero each time he or she exhausts. How Do Players Earn the Burden?The last decision to make is the most difficult: How do the players earn the burden? The answer to this question can be almost anything, but there are some parameters that we use to help decide. It should be easier to earn a burden than to avoid it; otherwise, we lose a lot of good tension. Trying to avoid the burden should also make the scenario more challenging. Since most players will avoid taking burdens whenever they can, they should have to work harder to that end. Since each burden is introduced in a specific scenario, earning a burden should also tie into the theme of that scenario. In a previous article, I talked about how in Journey in the Dark, you’re racing through Moria to escape without confronting The Balrog (The Road Darkens, 44) – or, at the very least, not until you’ve made your way to the last quest stage. I also revealed that, if you do encounter The Balrog, the only way to destroy it is to sacrifice a hero at The Great Bridge (The Road Darkens, 50). As a result, many players probably just assume that it would always be better to run from The Balrog rather than lose a hero in campaign mode. Well, that is a valid option, but it comes at a price. The resolution on the campaign card for Journey in the Dark reads: “The first player must choose one of the burden treachery cards (Pursued by the Enemy or Shadow of Fear), and one of the burden objective cards (Grievous Wound or Overcome by Grief) to add to the Campaign Pool. If The Balrog is still in play, the first player must choose all 4 burden cards instead. The chosen burdens have been earned by the players.”  
The two sides of the Journey in the Dark campaign card
Just as the Fellowship paid a high price to escape from Moria, and was forever altered by the experience, you cannot defeat Journey in the Dark in campaign mode without earning a couple of burdens. However, if The Balrog is left alive, the dangers of your quest increase, and you earn all four of the burdens. I find this choice particularly interesting because defeating The Balrog to avoid earning two burdens also means sacrificing a hero. Not only is that thematic, but it also has real significance in campaign mode where losing a hero makes it impossible to use that character in any subsequent scenarios. When you consider the burdens that you can earn and you think about having to deal with them for the rest of the campaign, it should cause you to seriously consider which hero you might be able to part with in order to avoid that fate. Hopefully, wrestling with that decision will create a fun and memorable moment in your The Lord of the Rings campaign! The Council Is Still in Session With its new boons and burdens, The Road Darkens Saga Expansion gives weight not only to its own scenarios but to all The Lord of the Rings Saga Expansion scenarios to follow. Accordingly, you’ll want to think carefully about how you can best make use of your boons and what steps you might be able to take to suffer as few wounds and evils as possible.
Meanwhile, these concerns have also been weighing heavily upon the minds of Frodo Baggins (The Road Darkens, 1) and his companions. While we had anticipated that The Road Darkens would be at retailers this week, the different members of the Council of Elrond have been unable, thus far, to agree on the course of action to take in order to ensure that Isildur’s Bane should never again fall into the hands of Sauron, the Dark Lord of Mordor. These deliberations have taken longer than expected as one man is currently arguing that Frodo’s ring should be taken to Minas Tirith and used against the power of Mordor. While we wait for the debate to conclude and The Road Darkens to arrive, we will post updates and spoilers on our Facebook page, starting tomorrow with a look at the expansion’s new Boromir ally. ... Source: Grievous Wounds (http://www.fantasyflightgames.com/edge_news.asp?eidn=5062)
Title: FFG:Sorcery and Stone
Post by: RSSFeeder on 29 September 2014, 16:00:03
Sorcery and StonePreview a Hero and a Monster Group from Crusade of the Forgotten
Battle the threat of a rising cult in Crusade of the Forgotten, the third Hero and Monster Collection for Descent: Journeys in the Dark Second Edition! In this Hero and Monster Collection, you’ll find four heroes, two golems, three medusae, and four sorcerers previously only available through the first edition of Descent. Alongside these figures, which feature completely reimagined artwork and figure sculpts, you’ll encounter two brand-new quests, Crusade of the Forgotten and Shadowside Watch. In our last preview, we examined the beguiling magics of the medusae and the healing power of Andira Runehand. Today, we turn to the arcane spells of Astarra and the stony strength of the golems!
Master of the Arcane In each generation, a few brilliant minds provide small contributions to the growth and establishment of rune magic. The decades of dedication necessary for this task never interested Astarra, who preferred a quicker, more direct path. Even after being expelled from the University of Greyhaven for knowing far more than she should, Astarra continued to develop her gift by seeking out Runemasters who would share their secrets. Now, she turns her strange magics to battling the sorcerers of the Forgotten, hoping to learn new secrets when she tests her might against them. Astarra is an accomplished mage, adept at using many kinds of magic, but her special passion is teleportation and magical movement. In your quests, you’ll find that Astarra can move much further and faster than seems possible. Her hero ability can be used once per round, and it allows you to spend one movement point to remove Astarra’s figure from the map and place her in an empty space adjacent to a hero within three spaces. Not only does this allow you to cover distances faster than ever, it also allows you to bypass troublesome terrain, or leap to the aid of a beleaguered hero. 
Astarra’s heroic feat gives you more options for moving around the map in a hurry. This heroic feat can be used at the start of your turn to move every nearby figure one space. This feat can be used in conjunction with Astarra’s ability to give her better options for teleporting, but it can also be used to move monsters, shoving them away from the heroes or bringing them close enough for the heroes to quickly dispatch them. Carved of Runic Stone Relics of a previous age, many golems now wander free from any masters. Their rune-forged bodies having long outlasted any ancient bonds. Many upstart mages seek to manipulate a golem’s minute intelligence, but their illusions of control are swiftly crushed by the golem’s temperamental whims. Only a truly seasoned mage can master these magical constructs. Unfortunately for the people of Terrinoth, the sorcerers that lead the Forgotten are nothing if not seasoned. In battle, golems are fearsome opponents. Though slow and ponderous, their strength is prodigious, and they are nearly impossible to topple. Many a foolish hero has blunted his weapon attempting to cleave the living stone that forms a golem. Every golem has the Ironskin ability, meaning that it is immune to Pierce and all conditions. In addition, every golem can spend a surge to deal more damage, adding to their already massively powerful combat dice.  
Master golems are even more difficult to bring down. They share the Ironskin ability with other golems, but they have even more health and can surge for more damage than minion golems. In addition, your master golems have the Unmovable ability, allowing them to ignore any game effects that would force it to move. Once a master golem has taken a stand, no power in Terrinoth can shift it from its place. The Forgotten Are Coming The cult of the Forgotten poses a potent threat to everyone in the realm. Whether you oppose their machinations with Astarra’s magic, or serve the cult of the Forgotten with unmovable golems, you’ll find the heroes and monster you need in this Hero and Monster Collection. Look for Crusade of the Forgotten at your local retailer soon! ... Source: Sorcery and Stone (http://www.fantasyflightgames.com/edge_news.asp?eidn=5063)
Title: FFG:Announcing Arkham Nights 2014
Post by: RSSFeeder on 30 September 2014, 00:30:03
Announcing Arkham Nights 2014Join Us October 17-18 in Roseville, Minnesota
Fantasy Flight Games is proud to be hosting Arkham Nights 2014 on October 17-18 at our Games Center in Roseville, Minnesota! Arkham Nights is two days dedicated to celebrating your favorite games of Lovecraftian horror. This year features the old and the new, including Arkham Horror, Call of Cthulhu: The Card Game, Elder Sign, Eldritch Horror, and Mansions of Madness. 
All of our games will be available to play across Friday and Saturday, along with unique opportunities for both veterans and newer players. In addition to all of the games and special events this year, we will be previewing the Eldritch Horror expansion Mountains of Madness, providing players with the opportunity to play the game before it arrives in stores! Discover a New World Arkham Nights offers two nights full of terror, fun, and new experiences. Throughout the event, attendees can participate in any of the scheduled, open, or learn-to-play events alongside other fans of Cthulhu-themed horror. Players will have the chance to meet and play with the designers for many of the games throughout Friday and Saturday, including special guests Richard Launius, Kevin Wilson, Corey Konieczka, and Nikki Valens! Arkham Nights 2014 will also feature two Call of Cthluhu: The Card Game tournaments, the epic 18-player scenario for Arkham Horror: To the Barricades!, and more. Don’t miss out on your chance to experience FFG’s exploration of Lovecraft’s twisted mind.  
Preregister for Exclusive Arkham Nights Relics Register before October 10th and get a bag of horrors, including alternate dice for Arkham Horror and Eldritch Horror, one dice bag for your favorite Lovecraftian games featuring the comet symbol from Eldritch Horror, alternate art domain cards for Call of Cthulhu: The Card Game, and an exclusive Ancient One card for Elder Sign! 
Only those who preregister will get these otherworldly treasures, so make sure to register before October 10th. Then mark October 17-18 on your calendar and get ready for an event full of entertainment and fright! Stay tuned for the schedule of events coming shortly. ... Source: Announcing Arkham Nights 2014 (http://www.fantasyflightgames.com/edge_news.asp?eidn=5065)
Title: FFG:Nightmares in the Depths of Moria
Post by: RSSFeeder on 30 September 2014, 09:00:04
Nightmares in the Depths of MoriaNightmare Decks Are Now Available for the Complete Dwarrowdelf Cycle
“There came a great noise: a rolling Boom that seemed to come from depths far below, and to tremble in the stone at their feet. They sprang towards the door in alarm. Doom, doom it rolled again…”
–J.R.R. Tolkien, The Fellowship of the Ring Having survived a harrowing encounter with the nightmarish Watcher in the Water, several of Middle-earth’s greatest heroes throw open the Doors of Durin. Before them lie the countless dark and deadly caverns of Khazad-dûm, which was once a rich and mighty Dwarven kingdom and now lies abandoned, though not entirely unoccupied. Within its depths dwell masses of Orcs and other, older, and fouler things, including an ancient and terrible evil, a demon of smoke and flame, the Balrog… Set aside your fears, and venture forth on one of the greatest of all quests – this time in Nightmare Mode! Nightmare Decks are now available for the final three scenarios in the Dwarrowdelf cycle for The Lord of the Rings: The Card Game: 
As with every Nightmare Deck, these new Nightmare Decks allow you to revisit three of your favorite scenarios recast with deadlier enemies, darker locations, and more terrifying surprises. You can pick up your copies today at your local retailer or online through our webstore, or you can read on as developer Matt Newman reveals some of the terrors these Nightmare Decks will soon visit upon you! The Long Dark In The Long Dark scenario, the heroes are trying to find their way through Moria’s many dark corridors, and its Nightmare Deck focuses on the scenario’s locate tests. As the heroes attempt to navigate the endless caverns and halls of Khazad-dûm, locate tests represent their efforts to maintain their bearings, and if your heroes fail them, locate tests trigger all of the Lost effects in play, meaning the impact of your locate tests depends largely on the number of Lost effects in play. To this end, the scenario’s Nightmare Deck ensures there will always be at least one Lost effect in play, because the setup card introduces one that remains perpetually in effect:  “Lost: The first player must choose and discard an ally in play.” “Lost: The first player must choose and discard an ally in play.”
No matter where you are or what enemies or locations are present, you always face the danger of losing an ally in the depths of Moria. This simple change keeps the pressure on you to succeed at every single locate test and makes each of them more tense and challenging. Several other new cards also punish the heroes for failing locate tests, such as the Trapdoor Spider (The Long Dark Nightmare Deck, 3), which jumps out from its hiding place and preys upon the helpless. Also, because one popular strategy for defeating this quest focuses on drawing tons of cards and building up a huge hand that would never fail a locate test, I introduced cards such as Sentinel of the Deep (The Long Dark Nightmare Deck, 4) to force players to adapt. Altogether, this Nightmare Deck introduces enough revamped encounter cards and punishing Lost effects that players should find the Nightmare Mode version of this scenario both tough and rewarding. Foundations of Stone This unique and much-beloved scenario forced players to do something they’d never before done in The Lord of the Rings: The Card Game – split the party. In Nightmare Mode, you’ll find a host of new cards that further interact with this unique element of the quest. For example, Giant Cave Centipedes (Foundations of Stone Nightmare Deck, 3) can weave their way from your play area to that of another player, or from your ally’s play area to yours.  
Even worse, in the unknown depths of Moria, there live creatures with no names, ancient as the world itself. The Foundations of Stone Nightmare Deck introduces two new Nameless enemies for your party to discover and fight, as well as a terrible location they call their home, the Nest of Horrors (Foundations of Stone Nightmare Deck, 6). This scenario is also unique in that it has two separate encounter decks. It starts off tamely before literally washing your characters away into the underground rivers where the players are forced to split up and find each other again. The Foundations of Stone Nightmare Deck contains new cards for both of these two encounter decks, meaning that it doesn’t just hit them harder in the underground rivers; it also does a better job of wearing down your heroes before splitting them up. This makes for a challenging and engaging scenario from start to finish. Shadow and Flame  I am very excited for players to get their hands on the Nightmare Deck for Shadow and Flame, one of my personal favorite scenarios in The Lord of the Rings: The Card Game! I am very excited for players to get their hands on the Nightmare Deck for Shadow and Flame, one of my personal favorite scenarios in The Lord of the Rings: The Card Game!
One of the challenges our team faced as we designed the Nightmare Deck for this scenario was figuring out a way to make your fight against Durin’s Bane tougher and even more epic without simply restricting all your favorite tricks and tools. I wanted to make sure that you would truly feel the weight and impact of each of the Balrog’s attacks, and I wanted to give the Balrog a variety of different attacks and maneuvers it could perform on each attack, making it feel every bit like the nightmarish incarnation of an awesome, dynamic, and responsive boss enemy. To that end, half of the cards added in this Nightmare Deck are treachery cards with the Attack trait, which are shuffled into a separate “Balrog deck” during setup. These cards have no encounter effects other than devastatingly powerful shadow effects, and they are only ever dealt as shadow cards to the Balrog. However, every time the Balrog attacks, you’re in for a world of hurt! Even as they add new flame to Durin’s Bane, many of these new shadow effects also counter popular strategies that players have used to find victory in Shadow and Flame.
- Do you like to stack defensive items on a powerful defender, along with Burning Brand? Beware the Balrog’s Blazing Grip (Shadow and Flame Nightmare Deck, 4), which can render such a character defenseless.
- Do you prefer to play cheap allies you can use to defend against the Balrog? Watch out for Morgoth’s Bidding (Shadow and Flame Nightmare Deck, 5), which will make you regret that decision.
 
Beyond these Attack cards, there are also new locations and enemies you can face during the nightmare version of this quest, such as the new Servant of Flame (Shadow and Flame Nightmare Deck, 7), who will make you think twice about who to attack during the combat phase. The scenario’s objective remains the same: find a way to defeat this creature of flame and shadow, and escape Moria with your lives. But to paraphrase Gandalf, this may be a foe beyond any of you, and I look forward to hearing about your experiences fighting this nightmarish version of Durin’s Bane. Alámenë! Your Quest Through the Dwarrowdelf Comes to an End One way or another, these three new Nightmare Decks allow you to finish your quest through the Dwarrowdelf in style. Will you get lost in the labyrinthine mines of Moria? Will you be devoured by the nameless things that dwell in depths better left untouched? Will you tremble, falter, and fall in battle against Durin’s Bane, one of the most powerful and fearsome creatures in all of Middle-earth? Or will you somehow find the strength, the courage, and the will to survive? Can you find your way out of Khazad-dûm and report back to Rivendell? Complete your quest with these three new Nightmare Decks, now available at your local retailer and online through our webstore! ... Source: Nightmares in the Depths of Moria (http://www.fantasyflightgames.com/edge_news.asp?eidn=5066)
Title: FFG:Nightmares in the Depths of Moria
Post by: RSSFeeder on 30 September 2014, 17:30:04
Nightmares in the Depths of MoriaNightmare Decks Are Now Available for the Complete Dwarrowdelf Cycle
“There came a great noise: a rolling Boom that seemed to come from depths far below, and to tremble in the stone at their feet. They sprang towards the door in alarm. Doom, doom it rolled again…”
–J.R.R. Tolkien, The Fellowship of the Ring Having survived a harrowing encounter with the nightmarish Watcher in the Water, several of Middle-earth’s greatest heroes throw open the Doors of Durin. Before them lie the countless dark and deadly caverns of Khazad-dûm, which was once a rich and mighty Dwarven kingdom and now lies abandoned, though not entirely unoccupied. Within its depths dwell masses of Orcs and other, older, and fouler things, including an ancient and terrible evil, a demon of smoke and flame, the Balrog… Set aside your fears, and venture forth on one of the greatest of all quests – this time in Nightmare Mode! Nightmare Decks are now available for the final three scenarios in the Dwarrowdelf cycle for The Lord of the Rings: The Card Game:
As with every Nightmare Deck, these new Nightmare Decks allow you to revisit three of your favorite scenarios recast with deadlier enemies, darker locations, and more terrifying surprises. You can pick up your copies today at your local retailer or online through our webstore, or you can read on as developer Matt Newman reveals some of the terrors these Nightmare Decks will soon visit upon you! The Long Dark In The Long Dark scenario, the heroes are trying to find their way through Moria’s many dark corridors, and its Nightmare Deck focuses on the scenario’s locate tests. As the heroes attempt to navigate the endless caverns and halls of Khazad-dûm, locate tests represent their efforts to maintain their bearings, and if your heroes fail them, locate tests trigger all of the Lost effects in play, meaning the impact of your locate tests depends largely on the number of Lost effects in play. To this end, the scenario’s Nightmare Deck ensures there will always be at least one Lost effect in play, because the setup card introduces one that remains perpetually in effect: “Lost: The first player must choose and discard an ally in play.” No matter where you are or what enemies or locations are present, you always face the danger of losing an ally in the depths of Moria. This simple change keeps the pressure on you to succeed at every single locate test and makes each of them more tense and challenging. Several other new cards also punish the heroes for failing locate tests, such as the Trapdoor Spider (The Long Dark Nightmare Deck, 3), which jumps out from its hiding place and preys upon the helpless. Also, because one popular strategy for defeating this quest focuses on drawing tons of cards and building up a huge hand that would never fail a locate test, I introduced cards such as Sentinel of the Deep (The Long Dark Nightmare Deck, 4) to force players to adapt. Altogether, this Nightmare Deck introduces enough revamped encounter cards and punishing Lost effects that players should find the Nightmare Mode version of this scenario both tough and rewarding. Foundations of Stone This unique and much-beloved scenario forced players to do something they’d never before done in The Lord of the Rings: The Card Game – split the party. In Nightmare Mode, you’ll find a host of new cards that further interact with this unique element of the quest. For example, Giant Cave Centipedes (Foundations of Stone Nightmare Deck, 3) can weave their way from your play area to that of another player, or from your ally’s play area to yours.
Even worse, in the unknown depths of Moria, there live creatures with no names, ancient as the world itself. The Foundations of Stone Nightmare Deck introduces two new Nameless enemies for your party to discover and fight, as well as a terrible location they call their home, the Nest of Horrors (Foundations of Stone Nightmare Deck, 6). This scenario is also unique in that it has two separate encounter decks. It starts off tamely before literally washing your characters away into the underground rivers where the players are forced to split up and find each other again. The Foundations of Stone Nightmare Deck contains new cards for both of these two encounter decks, meaning that it doesn’t just hit them harder in the underground rivers; it also does a better job of wearing down your heroes before splitting them up. This makes for a challenging and engaging scenario from start to finish. Shadow and Flame I am very excited for players to get their hands on the Nightmare Deck for Shadow and Flame, one of my personal favorite scenarios in The Lord of the Rings: The Card Game! One of the challenges our team faced as we designed the Nightmare Deck for this scenario was figuring out a way to make your fight against Durin’s Bane tougher and even more epic without simply restricting all your favorite tricks and tools. I wanted to make sure that you would truly feel the weight and impact of each of the Balrog’s attacks, and I wanted to give the Balrog a variety of different attacks and maneuvers it could perform on each attack, making it feel every bit like the nightmarish incarnation of an awesome, dynamic, and responsive boss enemy. To that end, half of the cards added in this Nightmare Deck are treachery cards with the Attack trait, which are shuffled into a separate “Balrog deck” during setup. These cards have no encounter effects other than devastatingly powerful shadow effects, and they are only ever dealt as shadow cards to the Balrog. However, every time the Balrog attacks, you’re in for a world of hurt! Even as they add new flame to Durin’s Bane, many of these new shadow effects also counter popular strategies that players have used to find victory in Shadow and Flame. - Do you like to stack defensive items on a powerful defender, along with Burning Brand? Beware the Balrog’s Blazing Grip (Shadow and Flame Nightmare Deck, 4), which can render such a character defenseless.
- Do you prefer to play cheap allies you can use to defend against the Balrog? Watch out for Morgoth’s Bidding (Shadow and Flame Nightmare Deck, 5), which will make you regret that decision.
Beyond these Attack cards, there are also new locations and enemies you can face during the nightmare version of this quest, such as the new Servant of Flame (Shadow and Flame Nightmare Deck, 7), who will make you think twice about who to attack during the combat phase. The scenario’s objective remains the same: find a way to defeat this creature of flame and shadow, and escape Moria with your lives. But to paraphrase Gandalf, this may be a foe beyond any of you, and I look forward to hearing about your experiences fighting this nightmarish version of Durin’s Bane. Alámenë! Your Quest Through the Dwarrowdelf Comes to an End One way or another, these three new Nightmare Decks allow you to finish your quest through the Dwarrowdelf in style. Will you get lost in the labyrinthine mines of Moria? Will you be devoured by the nameless things that dwell in depths better left untouched? Will you tremble, falter, and fall in battle against Durin’s Bane, one of the most powerful and fearsome creatures in all of Middle-earth? Or will you somehow find the strength, the courage, and the will to survive? Can you find your way out of Khazad-dûm and report back to Rivendell? Complete your quest with these three new Nightmare Decks, now available at your local retailer and online through our webstore! ... Source: Nightmares in the Depths of Moria (http://www.fantasyflightgames.com/edge_news.asp?eidn=5067)
Title: FFG:Alien Intelligence
Post by: RSSFeeder on 01 October 2014, 02:00:04
Alien IntelligenceA Closer Look at XCOM: The Board Game's Unique Companion App
The signal was already breaking up. UFOs over Europe, Africa, and… The early warning system went offline. Despite the limited intel, there was no time to lose. The Commander deployed the Interceptors, praying they were headed where they were needed most. There was another alert. The systems revealed an invasion force headed for the base, and then… nothing. The signal was dead. The satellite network was down. XCOM would have to fight blind… The alien invasion has already begun! The initial response to our announcement of XCOM: The Board Game has been positively overwhelming. Our demo tables were packed at Gen Con Indy, then again at PAX, and fan sites have since set the net abuzz with news and reviews about both the game and its use of a free digital companion app. Why does XCOM make use of a digital companion, and what does it add to the game? These are the questions we’ll address today, as we launch headlong into the first of our series of previews.
Researching New Technology In XCOM: The Board Game, one to four players work together as department heads of the elite military organization XCOM. It is up to you and your friends to thwart a full-scale alien invasion. This invasion is controlled by the app. Our goal was that XCOM’s digital companion app would allow us to create a gameplay experience that would go well beyond what would be feasible without it. Accordingly, it is an integral part of the game and drives your play experience. It controls the alien invasion, coordinates hidden information, adds to the game’s tension, distinguishes player roles, and promotes a fully cooperative experience. Moreover, the app, which is available for free as both a downloadable app and an online tool, teaches you the game, guides you through each turn, and serves as your rules reference, one that is always immediately at hand. 
XCOM’s digital app compresses a wealth of information into an easily digestible format. Furthermore, it keeps the game’s rules immediately at hand. You can learn about the active action simply by clicking on it, and the menu button allows you to access the full rules in just two quick clicks.
Coordinating the Alien Invasion Each round is divided into two phases, the timed phase and the resolution phase. Throughout the timed phase, the app creates alerts that pop up onscreen and indicate which actions the players need to take. You may need to place UFOs on the board, assign scientists to research new technologies, or choose which global crisis your team will address. Whenever an alert pops up, it is accompanied by a limited window of time within which your team can act.

The app alerts your team to an impending crisis. |
|
After the app triggers the last of these real-time alerts in the timed phase, you enter the untimed resolution phase. In the resolution phase, you are no longer pressed by time limitations, but you face new tensions as you roll dice and push your luck to resolve your research, missions, and global defense. Even in the resolution phase, the app guides you through your turn sequence. Then, at the end of the phase, you input the results of your efforts, the app calculates the aliens’ next tactics, and the next timed phase begins. By handling all the calculations for the alien invasion plan, the app greatly streamlines the game, and by serving as your timer, the app also helps to amplify the game’s tension. However, the app does far more than reduce your setup time and track the progress of each round’s timed phase. Those elements are useful, but they don’t truly indicate how the app characterizes your experience. Promoting a Fully Cooperative Game Experience XCOM: The Board Game is a fully cooperative (or solo) gameplay experience, and this is one important element of the gameplay experience that the app enables. XCOM’s app handles all of the hidden information for the aliens, directing the deployment of each round’s UFOs and enemies, as well as the number of crises that you and your team are forced to resolve. These decisions are made semi-randomly, based upon the game’s invasion plan, its difficulty level, and your ability to deal with the invasion from round to round. In fact, the app’s ability to respond to your actions means that XCOM permits an experience that’s more intelligent than a deck of cards, without requiring a player to assume the role of the aliens. It’s thematically important that the players in XCOM are all working together to save humanity from the onslaught of a strange and unknown alien menace, but it’s also important for the game’s mechanics. The app introduces two innovative game elements that are critical to your XCOM experience: forecasts and scrambled communications. Forecasts appear during the timed phase, flashing across your screen as yellow transmissions, and they give you advanced warning of the alien invasion plan for the round before UFOs appear in orbit or enemy strike teams arrive at your base. The information that these forecasts provide is almost always accurate, but the fullness of its intelligence depends upon how well you can maintain your satellite network. In fact, if too many aliens remain in orbit, your satellite network will deteriorate to the point where you might lose your forecasts altogether. 
An example of how the app can forecast the arrival of UFOs. The forecast on the left indicates the future arrival of four UFOs (marked in yellow): two in orbit, one in Europe, and one in Australia. The alert on the right shows the arrival of three of these UFOs. Because forecasts rarely lie, we can generally expect that the UFO forecasted to arrive in Europe will arrive later in the round.
This brings us to the idea of scrambled transmissions, which contribute to one of the most remarkable aspects of the XCOM experience. In XCOM: The Board Game, the app doesn’t just play the role of your rival, it’s also your “game manager.” It teaches you the rules in its tutorial mode and then continues to serve as your one-touch rules reference. However, it also prompts you to act. In fact, there is no turn sequence listed in a rulebook because the app manages your turns, and while you’ll recognize the basic patterns of your turns – receiving forecasts, deploying resources, tracking alien movements, and responding to global crises – there is no one, single turn sequence. Instead, the app tracks the order in which events occur and weighs your team’s actions each turn, and if the aliens are outpacing your satellite network, the app will start scrambling your transmissions, forcing you to deploy your Interceptors before you know where the UFOs are appearing in orbit. You may even have to deploy soldiers to your mission and base before you have any idea what the aliens have planned for the turn. 
Here, we see an example of how scrambled transmissions can impact your ability to successfully resist the alien invaders. The screenshot on the left depicts the sort of information you should receive while your satellite network is doing its job; we see that our alert history twice detected UFOs before we had to deploy our Interceptors. The screenshot on the right, however, introduces a nightmarish situation; we are forced to deploy our Interceptors near the very beginning of the round, well before we have any idea where the aliens intend to land their UFOs. We are fighting blind.
The Central Officer

The Central Officer is responsible for four different aspects of the game. Two of these relate directly to the quality of information that your team receives from the app. |
|
The threat of scrambled transmissions, once again, is another element that adds to the game’s uniquely satisfying cooperative play. XCOM: The Board Game features four asymmetric roles, which players divide between themselves at the beginning of each game. One of these roles is the Central Officer, the XCOM department head responsible to manage both the app and XCOM’s satellite network. Managing the App The first of the Central Officer’s listed duties reads: “Communication – relay information from the app” At first glance, this duty may appear deceptively straight-forward, but the app isn’t just a digital hourglass. It’s a resource that the Central Officer can manage, and the fact that scrambled transmissions can quickly devastate your efforts means that his role is absolutely vital. The app has a pause function, and your group has a limited amount of pause time that it can spend each round. This pause time varies according to the game’s difficulty, but it’s also a resource that you can manage carefully in order to ensure that it’s available when you need it most. You can use it to check forecasts or discuss strategies, but if you overuse your pause time, it will run out. Then, you’ll be forced to make your future decisions in shorter windows of time. However, if you complete your earlier, simpler tasks more quickly, the Central Officer can start to bank your pause time for when the invasion hits in full force later in the game. The fact that the Central Officer controls this pause function means, then, that he’s largely responsible for how much time your group can spend deliberating the merits of different strategic choices. Since each alert opens a limited action window, players can’t spend a long period of time to reach a group consensus about the optimal response, and this means that the multi-player format for XCOM truly encourages each member of the group to carry his or her full weight and focus on a limited set of tasks, rather than trying to manage the whole organization. In turn, the fact that you’re asked to focus so closely on your own tasks and tactics means that you better appreciate your role’s specific challenges, and you gain a greater replay value when you switch roles and tackle another whole set of challenges. Of course, you’re still a team, and the app’s pause function will let you work together in those moments when you really need to craft your strategies as a group, but the timer and the Central Officer help to ensure that those moments merely punctuate your game experience. They don’t define it. 
Your pause time is a variable resource that you will want to manage carefully in order to buy the time you need for your group to reach a consensus during the game’s most critical decisions.
Managing XCOM’s Satellite Network In addition to managing the app, your Central Officer must also manage XCOM’s network of satellites. He can focus on attacking UFOs in orbit in order to keep your signals strong and your forecasts clear. Or he can jam the invaders’ signals to confuse UFOs hovering over the earth’s continents. When these efforts succeed, the UFOs leave the continents but return to orbit. Of course, once they’re in orbit, those UFOs then threaten to scramble your transmissions. Thus, the Central Officer must constantly weigh the importance of maintaining clear transmissions against the importance of luring alien UFOs away from the Earth. 
The more UFOs in orbit, the greater the chance they will scramble your transmissions.
All told, the Central Officer serves your XCOM team as the head of military intelligence, and he’s the member of your group who is most responsible for ensuring that your team can collect the information that you need to formulate a winning plan. Confronting the Alien Menace As you can see, the digital companion app for XCOM: The Board Game is an integral part of the game. It streamlines your game experience, coordinates hidden information, serves as your timer, helps to distinguish player roles, and allows you and your friends to enjoy a truly cooperative experience. Additionally, it keeps the game’s rules close at hand, manages your turn sequence, permits variable difficulty levels, and challenges you to maintain a strong satellite network and clear transmissions. Moreover, the app also includes a tutorial that teaches you the game, meaning that you can dive immediately into the action. All in all, this free digital app is far more than a convenient addition to XCOM: The Board Game, it’s the slimy, green, pulsating heart of the alien invasion. How will you respond to this alien threat? In our upcoming previews, we’ll look at the different roles you can assume as an XCOM department head and the choices with which you’ll have to wrestle as you try to plan your final mission and force the invaders back off our world. ... Source: Alien Intelligence (http://www.fantasyflightgames.com/edge_news.asp?eidn=5068)
Title: FFG:Into the Woods
Post by: RSSFeeder on 01 October 2014, 10:30:03
Into the WoodsTalisman: The Woodland Is Now Available
The Woodland, an expansion for Talisman Revised 4th Edition, is now available at your local retailer and in our online store. For centuries the faeries kept their forested home closed to mortals, but now you can step from the Outer Region of Talisman into their secret and perilous realm. There, paths shift unpredictably, fate can earn you a king’s hatred or a queen’s favor, and, in the heart of the woods, your destiny awaits. 
The Realm of the Fae The Woodland features a corner board depicting a mysterious and uncouth forest, governed by mischievous faeries and inhabited by all ilk of mystical creatures. You may encounter there not only mercurial faeries, but also enchanted animals that fight with Craft instead of Strength, and talking trees eager to share the secrets of the Woodland with you. We explored the landscape of the Woodland and some of the its Places, Events, and Strangers in our first preview. From infamous and mischievous Puck to the old, hunchbacked witch Baba Yaga, the inhabitants of the Woodland are reliably unpredictable, and will decide what to do with an outsider according to their own changeable whims– or according to your fate. 
Light and Dark Fate As discussed in our second preview, The Woodland brings into play a difference between light and dark fate tokens. While fate tokens in Talisman have always had two sides, one golden and one dark blue, only with The Woodland do the sides take on different effects: you can spend a light fate token to reroll one of your own die rolls, or a dark fate token to reroll another player’s roll. Inside the Woodland region, fate takes on an even larger significance. The savage King Oberon, kindly Queen Titania, cruel Queen Mab, and many other faeries will judge you based on the amount of fate you have, and whether you have more light fate or dark fate. Light fate is not in any way better than dark fate, but wandering in the Woodland without any fate at all could doom a character to torment and even death. 
Meandering Paths and Ultimate Destinies Our third preview explored the Paths that guide you through the Woodland and the Destinies that you can gain there. Upon entering the Woodland, you choose one of three Path cards that give your character advantages (and disadvantages) during your journey through the woods. Path cards also determine what foe you encounter in the Meeting with Destiny space in the heart of the Woodland. If you reach that space, and defeat whatever danger awaits you there, you can earn a Destiny to aid your character throughout their journey in Talisman. Brave the Wild Woods The Woodland brings five more characters to the game of Talisman – three of them, the Ancient Oak, the Leywalker, and the Spider Queen, are introduced in our fourth preview. These characters, particularly suited to brave the ever-changing and treacherous Woodland, can thrive and triumph in any region. 
Three game-transforming alternate endings are also included in this expansion. One pits you against either King Oberon or Queen Titania as the two Fae monarchs struggle for dominance, another sends you traveling the far reaches of Talisman to prove your worth, and the last forces you to stand before the Three Fates as they judge whether you are worthy to hold the Crown of Command. If you can withstand the faeries’ whims and find a path through the shifting trees, you may be rewarded with incredible Strength or Craft, powerful Magic Objects and helpful Followers, or a Destiny to guide you in your quest for the Crown of Command. Prepare to venture into the dark, deep, enchanted Woodland. Check out the rules on the Talisman support page, and pick up your copy of The Woodland today! ... Source: Into the Woods (http://www.fantasyflightgames.com/edge_news.asp?eidn=5069)
Title: FFG:Treasures and Monsters and Torchlight
Post by: RSSFeeder on 01 October 2014, 19:00:03
Treasures and Monsters and TorchlightPreview DungeonQuest Revised Edition
Clenching the chalice tight in his hand, Hugo ducked and rolled out of the way just in time to avoid the troll’s giant fist. He stood up again, moved quickly to the left, and swung his sword into the troll’s thick neck and pushed the blade through with all his might, beheading the monster. The dying troll tumbled down to the ground. Hugo turned to leave the room only to find himself at the edge of a bottomless pit. He grabbed onto the walls in order to avoid falling in. And then he realized the chalice was no longer in his hand, but clanging against stone as it tumbled into the abyss. In DungeonQuest Revised Edition, one to four players take on the role of heroes and venture into Dragonfire Dungeon, aiming to steal as much loot as possible and escape before the sun sets and the slumbering dragon inside the dungeon wakes up. Inside the dungeon, you’ll wander maze-like corridors in your search for riches. Any chamber you enter may be filled with gold, booby-trapped with swinging axes, or inhabited by an enraged monster. Deep within the dungeon is a treasure chamber, where the bravest heroes can find unfathomable wealth, but the treasure chamber is where the dragon sleeps, and if she catches you, you may not survive the flames. 
If you’re familiar with DungeonQuest Third Edition, you can find out more about how DungeonQuest Revised Edition is different on the game's description page. Hearkening back to classic editions of the game, DungeonQuest Revised Edition features a streamlined combat system and the Torchlight variation, both discussed in today’s preview, along with other minor changes to improve gameplay. The downloadable conversion guide that can be found on the product support page enables owners of DungeonQuest Third Edition to play using the rules, combat system, and character sheets of the revised edition.

Whether you're just discovering this fast-paced dungeon raiding game, or have long been a fan of other editions, you can learn more by clicking the thumbnail on the right to download the Learn to Play guide for DungeonQuest Revised Edition (pdf, 2.9 MB) from the support page. You will also find there a detailed Rules Reference guide for the game. Monster Fighting Dragonfire Dungeon is an ever-changing and dangerous labyrinth, full of twists, turns, and unexpected challenges. You move through the dungeon by randomly drawing a chamber tile and advancing into that unknown space. Many chambers have specific effects that you resolve the moment you enter them: spider webs might block your path, or the chamber might revolve so that you cannot leave the way you came. Once inside the chamber, you will frequently draw a card to see if you trigger a trap, discover a crypt, encounter a monster, or provoke a wizard’s curse. Your hero’s strength, agility, armor, and luck will frequently be tested in the quest to overcome the dungeon’s traps and obstacles. Sometimes you will move forward unscathed, far more often you will have to fight some sudden threat in order to obtain the treasure you desire. 
Combat in DungeonQuest Revised Edition has been streamlined and sped up from other editions of DungeonQuest. When a monster ambushes a hero, the player on their left draws the monster from the monster deck and governs it in combat, revealing the name of the monster but keeping secret its health and any escape penalty. The players controlling the hero and monster secretly select one of three combat cards which determine whether they use a melee, ranged, or magical attack. Then, they simultaneously reveal the chosen cards to see if their weapons match up, or if your hero is trying to fight magic with fire.   
For example, Hugo the Glorious is ambushed by a skeleton. You select Hero Melee, while the player controlling the skeleton selects Monster Magic. As shown on the Hero Melee card, Hugo deals one wound and suffers none. And, as shown on the Monster Magic card, the monster suffers one wound and deals none. The skeleton is weakened, but since it has a health of three, it continues fighting. At this point Hugo can either try to escape by testing his agility and taking wounds equal to the monsters escape penalty– none, in this case. Or he can continue to fight until the skeleton is slain. Weigh your hero’s agility against the risk of being wounded carefully, for monsters are only one of the dungeon’s many dangers. Catacomb Crawling Some chambers allow you to descend into the catacombs, where even more ghastly threats and treasures await. Down below you may be overrun by a horde of rats or bitten by a venomous spider, or come upon a flying carpet that will ease your journey. One key advantage of going through the catacombs is that you control the direction, of your movement. If you can survive the dangers that lurk there, braving the catacombs may enable you to reach the treasure chamber long before your opponents who navigate the labyrinth above. Moreover, concealed in the catacombs is the most valuable piece of loot in the whole dungeon: the gigantic diamond. Find it, and then find your way out of the dungeon before the dragon wakes up. 
When you descend, you place a travel marker in the chamber where you descended, facing whatever direction you like. At the start of your turn you draw a catacomb card instead of drawing a new tile. If you draw an exit card, you can decide whether to exit back to the dungeon or continue in the catacombs. When you do choose to surface, count the catacomb cards you’ve drawn and move that number of spaces. Then, turn your marker ninety degrees, roll a dice, and move that number of spaces. You may surface in space explored and made safe by other heroes – or you may once more venture into the unknown. Exploring by Torchlight In regular DungeonQuest game play, you have no way of knowing the dangers before you. The Torchlight variation introduced in DungeonQuest Revised Edition allows you to see one step ahead. When you enter a chamber, draw tiles for every possible exit out of that space, so that your immediate options become clearer. In your next turn, move into one of those chambers, draw tiles to see what your options are, and then resolve the effects of the chamber you’re in. You may be able to avoid traps, or to head directly towards the treasure chamber rather than being led away by the labrynthine corridors. Or, you may simply have to choose the best of two evils. .png)
The Torchlight Variation gives you increased agency in your journey through the dungeon. It also speeds up the game, since players have some control over where they are going. But Dragonfire Dungeon remains treacherous, and more adventurers find death in its walls than emerge triumphantly with bags of gems. You may avoid a bottomless pit only to be attacked by a lingering shade, or crushed under a ceiling collapse. Fight, Raid, Run! Fight your way towards treasure chamber’s plentiful riches, plunge into the haunted catacombs in search of gold, or seize the first piece of loot you encounter and run for the exit before the sun sets and the dragon stirs. Use the Torchlight variation to peer ahead into the maze of corridors, or experience the thrill of never knowing what chamber you’ll enter next. The surprises and dangers you’ll find in DungeonQuest Revised Edition are as incredible as the riches to be stolen from the dragon’s lair. Pre-order your copy of DungeonQuest Revised Edition today! ... Source: Treasures and Monsters and Torchlight (http://www.fantasyflightgames.com/edge_news.asp?eidn=5070)
Title: FFG:A Game of Thrones Championships in Greece
Post by: RSSFeeder on 02 October 2014, 03:30:03
A Game of Thrones Championships in GreeceAnnouncing the 2014 Greek National Championships
Fantasy Flight Games is pleased to announce the date and location of the first ever 2014 Greek A Game of Thrones: The Card Game National Championships. On September 28th, Fantasy Shop and Kaissa Games will host the A Game of Thrones: The Card Game National Championships! Register today to secure your spot, and prepare to face other passionate players in your favorite game. Talented Players The 2014 Greek National Championships are sure to bring premier A Game of Thrones: The Card Game players in Greece out in large numbers. Compete against the best the country has to offer, and show that you have what it takes to control the throne! On September 28th, Fantasy Shop and Kaissa Games will host the 2014 Greek A Game of Thrones: The Card Game National Championship at Hotel Stratos Vasilikos in Athens, Greece. Those who attend will find a fantastic day of fierce competition and new friendships.
Greek A Game of Thrones: The Card Game players, a full day of fun, excitement, and meeting other passionate players awaits! A Game of Thrones: The Card Game Joust National Championship Where: Hotel Stratos Vasilikos
114 Michalakopoulou
115 27 Athens When: Sunday, September 28th. 11:00 am start. Format: Standard Constructed. Swiss rounds and a single elimination play off. Prizes: The winner will receive a trophy and a first-round bye at the A Game of Thrones: The Card Game European Championships. The winner and runner-up will both receive a Martell messenger bag and plane tickets to the A Game of Thrones: The Card Game European Championships at Stahleck Castle. The top 8 will each receive a playmat, and the top 16 will each receive Martell power tokens. All participants will receive a Beric Dondarrion alternate art card. Contact: +30 6945720350 Registration and Accommodation Players can preregister for both events in person at Fantasy Shop Viktoria or by calling +30 2108231072. Venue details and on-site accommodation can be found on the Hotel Stratos Vasilikos website. Don’t miss out on your chance to show your skills in battle! ... Source: A Game of Thrones Championships in Greece (http://www.fantasyflightgames.com/edge_news.asp?eidn=5071)
Title: FFG:Android: Netrunner Championships in Greece
Post by: RSSFeeder on 02 October 2014, 12:00:03
Android: Netrunner Championships in GreeceAnnouncing the 2014 Greek National Championships
Fantasy Flight Games is pleased to announce the date and location of the first ever 2014 Greek Android: Netrunner National Championships. On September 28th, Fantasy Shop and Kaissa Games will host the Android: Netrunner National Championships! Register today to secure your spot, and prepare to face other passionate players in your favorite game. Talented Players The 2014 Greek National Championships are sure to bring premier players in Greece out in large numbers. Compete against the best the country has to offer, and show that you have what it takes to represent your country in international competition. On September 28th, Fantasy Shop and Kaissa Games will host the 2014 Greek National Championship for Android: Netrunner at Hotel Stratos Vasilikos in Athens, Greece. Players who attend will discover a day filled tough competition and new friends.
Greek Android: Netrunner players, the time to log onto the net and test your skills against Runners and Corps alike approaches! Android: Netrunner National Championship Where: Hotel Stratos Vasilikos
114 Michalakopoulou
115 27 Athens When: Sunday, September 28th. 11:00 am start. Format: Standard Constructed. Swiss rounds and a double-elimination championship bracket. Prizes: The winner will receive a trophy and a first-round bye at the Android: Netrunner World Championship in Roseville, Minnesota. The winner and runner-up will both receive a Tori Hanzo messenger bag. The top 8 will each receive a Tori Hanzo playmat, and the top 16 will each receive a set of agenda tokens. All participants will receive a Noise alternate art card. Contact: +30 6945720350 Registration and Accommodation Players can preregister for both events in person at Fantasy Shop Viktoria or by calling +30 2108231072. Venue details and on-site accommodation can be found on the Hotel Stratos Vasilikos website. Don’t miss out on your chance to prove your Android: Netrunner skills! ... Source: Android: Netrunner Championships in Greece (http://www.fantasyflightgames.com/edge_news.asp?eidn=5072)
Title: FFG:Even Death May Die
Post by: RSSFeeder on 02 October 2014, 20:30:02
Even Death May DieA Preview of The Sleeper Below for Call of Cthulhu: The Card Game
“That is not dead which can eternal lie,
And with strange aeons even death may die.”
–H.P. Lovecraft, The Call of Cthulhu The world is about to change. The Sleeper Below is coming soon, and Call of Cthulhu: The Card Game will never be the same… Cloistered within the dank confines of an Arkham basement, at the base of a building set back among the city’s darkest alleyways, several cultists offer blood sacrifices in a dark ritual dedicated to an ancient and unfathomable being of tremendous power. They seek to wake this terrible entity, hoping to be rewarded with power and the freedom to act wildly amid a world set to ruin, lawless, with its governments shattered, with the very idea of morality severely battered and broken. Likewise, there is a group of sinister cultists living in the wintery darkness of Alaska, north of the Arctic Circle, and its members carve hideous runes into bone and utter foul words in evil chants as they, too, offer themselves to the great Cthulhu. These actions are reflected by those of other cultists in other sects, spread across the globe, all of whom have retained and communicated through the ages the tattered knowledge of a slumbering Ancient One, that will someday awake, and when it awakes, it will shatter human civilization.  Simultaneously, there are professors, police officers, and scientists who have stumbled across these cults, their rituals, and their sinister intents. These unlikely heroes seek to prevent the cults from attaining their goals. There exist, also, a handful of secret societies who have learned of Cthulhu and other elder ones, and they seek to control these powers, even as alien cultures such as the strange Mi-Go, elder things, and Yithians secretly operate within our world, driven by motives utterly incomprehensible to humanity. Simultaneously, there are professors, police officers, and scientists who have stumbled across these cults, their rituals, and their sinister intents. These unlikely heroes seek to prevent the cults from attaining their goals. There exist, also, a handful of secret societies who have learned of Cthulhu and other elder ones, and they seek to control these powers, even as alien cultures such as the strange Mi-Go, elder things, and Yithians secretly operate within our world, driven by motives utterly incomprehensible to humanity.
That fact that all of these different factions enter Call of Cthulhu: The Card Game to pursue their various objectives leads us to the game’s struggles, and within those struggles, each faction plays toward its own strengths. Now, the upcoming arrival of The Sleeper Below will change those struggles significantly, as it not only provides the Cult of Cthulhu with new fuel and new strength to conduct their foul rituals, but it adds two new mechanics. The first of these is the Dormant keyword, which we’ve explored in detail within an earlier preview. The second, however, is something even darker and deadlier; it is the ability to permanently remove cards from the game. Doomed Beyond Death The idea of removing cards from the game was first introduced with the conspiracy The Mage’s Machinations (Terror in Venice, 30), but this first foray into the “remove from game” mechanic was limited in two ways: It only targeted characters, and its removal was temporary. Once the conspiracy was won, the winner would gain control of both characters that had been removed from the game. Now, a few cards in The Sleeper Below give new teeth to the mechanic and, in so doing, define a fate that, to the game’s many characters, is worse than madness, injury, destruction, and even death. After all, death is not always permanent within Call of Cthulhu: The Card Game. Characters who are destroyed or who suffer enough wounds to “die” are placed in the discard pile, but there are many secrets and many powers that can rip a soul out of the discard pile and bring it back into play. Many of these are dark, like Unspeakable Resurrection (Core Set, 119), and they fall under the domains of those hideous powers that threaten humanity. Other effects, like that of Professor Nathaniel Peaslee (Core Set, 24), aren’t quite so dark; they don’t bring subjects back from the dead, altered and ghoulish. They simply cheat death.  
In fact, the game incorporates so many different effects that interact with your discard piles that the use of the discard pile as a second “hand of cards” has become a prominent element of the game. For this reason, characters such as the Stalking Hound (Perilous Trials, 39), Yithian Scout (The Key and the Gate, 15), and Descendant of Eibon (The Terror of the Tides, 75) have become some of the game’s most resilient and pervasive characters, while other characters such as the Lost Oracle (The Key and the Gate, 9) have introduced powerful effects that are extremely hard to cancel. However, in The Sleeper Below, we find some new answers to the questions these cards can raise.
 |
First of all, the Bone Sculptor (The Sleeper Below, 10), is a Cultist who can potentially remove any character from the game, even an Ancient One. Better yet, he allows you to gain control of that character for a phase, meaning that you can potentially use your opponent’s most powerful characters against him.
“Action: Exhaust Bone Sculptor and pay X (minimum of 1) to choose 1 character in any discard pile with a cost of X or lower. Put it into play under your control. At the end of the phase remove it from the game. Limit once per turn.”
The fact that the Bone Sculptor can trigger his ability any time he can exhaust means that he imbues each of your open domains with a profound sense of menace.
|
 |
Next, the support card Even Death May Die (The Sleeper Below, 37) attaches to your opponent’s discard pile. Then, so long as it is attached, you can choose to disrupt your opponent anytime he would place a card into the discard pile. That card is, instead, removed from the game, and you place a success token on Even Death May Die. Because Even Death May Die has the Fated 4 keyword, you can add four success tokens to it before you must place it on the bottom of your deck, but this support, like Snow Graves (At the Mountains of Madness, 15), can severely disrupt a wide range of powerful combinations that rely upon the ability to dip into the discard pile. Unlike Snow Graves, though, Even Death May Die can permanently disrupt some combinations by removing key elements of those combinations from the game, and even if Even Death May Die is later destroyed, your opponent will have no way to regain access to those cards.
|
|
Finally, the third instance of this new mechanic that appears in The Sleeper Below is The Stars are Right (The Sleeper Below, 33). Unlike the expansion’s other two cards that remove cards from the game, The Stars are Right offers this removal as a sort of penalty. If you can’t meet certain conditions by the end of the phase in which you play The Stars are Right, the Dormant character that you bring into play is forever removed from the game:
“Action: Put a Dormant character into play from your hand. At the end of the phase, attach it as a Dormant card at a story where you have no success tokens, otherwise remove it from the game.”
|
Altogether, these cards and the whole “remove from game” mechanic suggests that the Cult of Cthulhu is more powerful than we had ever imagined. Their dark worship of the great devourer has opened a gateway to some realm from which nothing shall ever return – an out-of-play zone in which cards cannot be targeted. There are no interactions with these cards. They are beyond the abyss of Azathoth. They are doomed forever. Gather Your Strength in the Face of Absolute Annihilation How will the proliferation of the “remove from game” mechanic impact the struggles of Call of Cthulhu: The Card Game? The world trembles as its different factions become aware of this impending threat… The Sleeper Below expansion for Call of Cthulhu: The Card Game is coming soon! Stay tuned for word of its official release, as well as a sample deck list that makes good use of the Cult of Cthulhu, the Dormant keyword, and the “remove from game” mechanic. ... Source: Even Death May Die (http://www.fantasyflightgames.com/edge_news.asp?eidn=5073)
Title: FFG:Always Be Ready for Action
Post by: RSSFeeder on 03 October 2014, 05:00:03
Always Be Ready for ActionAnnouncing Seven Specialization Decks for STAR WARS (R): Age of Rebellion (TM)
Fantasy Flight Games is pleased to announce that seven new Specialization Decks for Star Wars®: Age of Rebellion™ are now available at your local retailer and online through our webstore! These decks represent each of the Ace and Commander specializations from the Age of Rebellion Core Rulebook, as well as the universal Recruit specialization: Ace Driver, Ace Gunner, Ace Pilot, Commander Commodore, Commander Squadron Leader, Commander Tactician, and Recruit. Whether you start as a recruit or join the Rebellion as an Ace pilot defecting from the Imperial Navy, the cards from these specialization decks will help you climb effortlessly through the ranks of the Rebel Alliance and make your mark in the Galactic Civil War! Don’t Forget the Details Age of Rebellion Specialization Decks grant quick and convenient access to each character’s talents and abilities, helping you to stay focused and make quick decisions during gameplay. GMs, new players, and experienced players alike will appreciate these handy reference cards.  No matter what your background, your character’s talents are vital as you and your crew deal with whatever surprises come your way. A single talent can make the difference between success and failure, freedom and captivity, and even life and death. Don’t risk letting a talent slip your mind during game play! Each of the twenty cards in these Specialization Decks clearly presents the rules for one of your character’s talents, along with artwork that serves to both color your gaming experience and enhance your memory. No matter what your background, your character’s talents are vital as you and your crew deal with whatever surprises come your way. A single talent can make the difference between success and failure, freedom and captivity, and even life and death. Don’t risk letting a talent slip your mind during game play! Each of the twenty cards in these Specialization Decks clearly presents the rules for one of your character’s talents, along with artwork that serves to both color your gaming experience and enhance your memory.
With Specialization Decks to keep your talents in front of your eyes and at the forefront of your mind, you’ll be able to more easily remember all your character’s important details and important advantages. The first seven Specialization Decks present all the talents for the Ace and Commander careers, as well as those for the Rebel Alliance’s universal Recruit specialization: Recruit
- Any level of involvement in the Empire versus Alliance conflict can get a person embroiled in conflict very quickly. Regardless of your role in the group, knowing how to throw a punch, shoot a blaster, or drive a vehicle can be crucial in the field. It may even mean the difference between life and death. With the Recruit Specialization Deck you can improve your odds and help get your team out of sticky situations.
Ace Driver
- On or above the ground, Drivers become part of the machines they drive. Talented and imaginative enough to attempt maneuvers no design engineer ever intended, the best Drivers appear to move effortlessly through even the most difficult terrain. Keep your cards at hand and your eyes on the road. The Driver Specialization Deck will help keep you steady at the wheel.
Ace Gunner
- For Gunners, the output of a vehicle or ship weapon is the ultimate expression of projected power. They see mastery of such weapons as a way for a single person to show the Empire what it means to fight for freedom. With the Gunner Specialization Deck, you’ll be sure to sharpen your aim and cripple your foes.
Ace Pilot
- Pilots are most in their element when the sounds of their screaming engines reververate throughout their cockpits. Out among the stars, these Aces perform high-speed maneuvers that would send lesser pilots into seizures or unconsciousness. With the Pilot Specialization Deck, you will more easily evade your enemies and race full throttle through the galaxy!

Commander Commodore
- The lives that they’ve chosen place the Rebellion’s Commodores firmly among the stars, with hard ship decks under their feet. Each and every one of them has demonstrated great gifts for strategic thinking and resource management on a large scale. The best Commodores know how to make the most of their resources, and the talents in the Commodore Specialization Deck will allow you to stay calm in tough situations and bolster entire fleets with your commanding presence.
Commander Squadron Leader
- In the Galactic Civil War, Rebel snubfighters and other small vehicles go hammer-and-tongs against the massive Imperial war machine. The technological disparity can be daunting, but the confidence and skill of the Rebellion’s Squadron Leaders inspire pilots to follow them into the worst kinds of hell and back again. Their tactical genius and daring keep their pilots alive. Form ranks and command the field with the Squadron Leader Specialization Deck.
Commander Tactician
- Tacticians are responsible for establishing the ground conditions that will lead to victory in battle. Under their courageous and savvy leadership, just a few Rebel troops with blasters and bombs can disable an Imperial installation or disrupt an entire defensive grid. Lay the foundations for your victories with the Tactician Specialization Deck, and lead your troops out of danger and into glory!
Explore All the Galaxy Has to Offer  Age of Rebellion Specialization Decks don’t replace the talent trees found in the Core Rulebook, but they are excellent tools to help you spend less time reviewing rules and more time battling the evil Galactic Empire! Each card in a Specialization Deck includes a description of a single talent, along with the icons for dice needed to make any relevant checks. Additionally, each Specialization Deck comes with a reference card (shown at right), which details how to use its twenty included talent cards. Age of Rebellion Specialization Decks don’t replace the talent trees found in the Core Rulebook, but they are excellent tools to help you spend less time reviewing rules and more time battling the evil Galactic Empire! Each card in a Specialization Deck includes a description of a single talent, along with the icons for dice needed to make any relevant checks. Additionally, each Specialization Deck comes with a reference card (shown at right), which details how to use its twenty included talent cards.
You never know where your duties might take you next, but you know there’s always another battle and another chance to strike a blow against the evil Galactic Empire. Do your part to remain ready for action at a moment’s notice. The Specialization Decks for the Recruit, Ace Driver, Ace Gunner, Ace Pilot, Commander Commodore, Commander Squadron Leader, and Commander Tactician are available now! ... Source: Always Be Ready for Action (http://www.fantasyflightgames.com/edge_news.asp?eidn=5074)
Title: FFG:Manage Your NPCs With Three New Adversary Decks
Post by: RSSFeeder on 03 October 2014, 13:30:03
Manage Your NPCs With Three New Adversary DecksAdd Color and Conflicts to Your STAR WARS (R) Roleplaying Games
Three new Adversary Decks are now available to add color and conflicts to your Star Wars roleplaying campaign! The galaxy is an incomprehensibly vast place, with more variety than any one being can hope to experience and appreciate during a lifetime. There are thousands upon thousands of inhabitable worlds, filled with hundreds of thousands of intelligent species of every imaginable shape and size. Each of the twenty cards in an Adversary Deck represents an NPC drawn from the Core Rulebooks or other supplements for Star Wars®: Edge of the Empire™, Star Wars®: Age of Rebellion™, or Star Wars®: Force and Destiny™, giving you quick access to a wide range of friends and foes.  Adversary cards ensure that each NPC’s key statistics and information remain readily available, while card art and description text help Game Masters to set the scene and bring these supporting characters to life. Adversary cards ensure that each NPC’s key statistics and information remain readily available, while card art and description text help Game Masters to set the scene and bring these supporting characters to life.
With these cards at your fingertips, you can quickly come up with a Twi’lek Dancer who meets your party at a Corellian cantina, a Hutt Crime Lord who offers your group a chance to smuggle spice and turn a profit, or an Imperial Moff who stops at nothing to hunt your troop of mercenaries through the Core Worlds. Whether you’re a GM or a player who develops an extended network of NPC allies, these cards allow you to create and maintain NPCs with ease. Each of the three available Adversary Decks offers its own distinctive window into the Star Wars galaxy: Scum and Villainy, Imperials and Rebels, and Citizens of the Galaxy. Scum and Villainy On some planets, the criminal underworld is cautious, congregating only in secret. On other worlds, it operates in the open, wielding its influence like a blunt instrument and daring the forces of law and order to oppose it. With the Scum and Villainy deck you can introduce your characters to gangsters, criminals, and outlaws – both notorious and amateur. Smugglers, slicers, arms dealers, hired thugs, and Hutt crime lords all mingle among the gritty congregation of characters that this adversary deck places at your fingertips. Imperials and Rebels Every day, the growing Rebellion threatens the Galactic Empire on new battle fields and political arenas. As their military forces clash throughout the galaxy to win the war for either freedom or oppression, each side must also fight for the hearts and minds of the galaxy’s citizens. Every day, as another reprehensible Imperial action produces new Rebel recruits, many more hope to rise to power through the Imperial ranks. Rebel cell leaders, starfighter aces, Imperial stormtroopers, Imperial Moffs, and Bothan spies are all choosing sides in the fight for the galaxy. The Imperials and Rebels deck will give you access to all levels of authoritarian enforcers and freedom fighters alike. No matter the tides of battle, this deck will prepare you for nearly anyone you might encounter amid the heat of the Galactic Civil War.  Citizens of the Galaxy Citizens of the Galaxy
There is no end to the variety of species and individuals you can meet if you travel far enough from home. Throughout the various sectors of the Galactic Empire and beyond, you’ll find potential allies and enemies waiting around every corner. While other Adversary Decks are better suited to combat NPCs, the Citizens of the Galaxy Adversary Deck allows you to flesh out your campaigns and settings with rich details, oftentimes in ways that can easily transform a random encounter into the start of a fantastic adventure. As your characters wander the galaxy they are sure to run into a variety of individuals, all of whom are bound to have their own needs, desires, and secrets: a physician at a struggling medcenter, a comm operator at the local space station, an aspiring Twi’lek dancer in a slummy cantina, a Lutrillian merchant at the marketplace. These characters may offer vital information, become important allies, or make surprisingly dangerous enemies. A Wealth of Friends and Foes Each Adversary Deck’s twenty NPC cards includes information about the character’s statistics, skills, talents, abilities, and equipment, as well as a description that suggests how that individual might fit in to the Star Wars universe. The Star Wars galaxy is full of adventure and obstacles to be overcome, and these new Adversary Decks are full of creatures you may meet along the way, who seek to either help or hinder your mission. Gain quick access to a wide variety of helpful NPCs today. Head to your local retailer to pick up your Adversary Decks today, or order yours online through our webstore! ... Source: Manage Your NPCs With Three New Adversary Decks (http://www.fantasyflightgames.com/edge_news.asp?eidn=5076)
Title: FFG:STAR WARS (R): Force and Destiny (TM) Beta Update #3
Post by: RSSFeeder on 03 October 2014, 22:00:03
STAR WARS (R): Force and Destiny (TM) Beta Update #3News From the Developers of the Force and Destiny Beta
Hello Force and Destiny™ beta testers, This week, we’re still preparing for next week’s Character Creation update, and since there’s no rules update, I wanted to take the chance to talk a little bit about the beta process. Specifically, I thought I would take a moment to address the changes that are made in the beta updates, and those that we work on separately as we prepare for the finalized Core Rulebook. It’s safe to say that making a Core Rulebook (even one where the basic game rules have already been established) is a long and complex process. Even though we ran Force and Destiny through our alpha playtesting months ago, along with our own internal tests, we’re still tweaking and reviewing items as the beta is ongoing. Of course, at this stage, most of the changes at this stage are based on your feedback. Because we’re still processing earlier feedback and developing new materials, even as we’re receiving your comments, there are scores, even hundreds, of changes between the beta and the final product. Many of these changes are minor; we correct misspelled words, make small tweaks to item prices, and add the additional content that will eventually flesh out the completed Core Rulebook. Putting all of these changes into the beta updates just isn’t feasible, but it's not necessary, either. A lot of these changes aren’t going to change game mechanics, or don’t need to be reviewed by the playtest community. Let's go over our update criteria to show you what I mean.
- Does the change affect mechanics? Proofreading changes seldom make it into the beta updates, simply because they don’t need to be tested. That isn’t to say we’re not eternally grateful to those of you who post in our proofreading feedback forum! We take all your proofreading changes and make sure they're fixed in the final book.
- Is the change reintroducing old content? This comes up a little less often, but is still important. For example, a lot of you made the good catch that the Exhaust Port talent in the Starfighter Ace has no use in the core rules, because no enemy starships have the Massive rule. That’s definitely something we’ll be fixing (probably by adding either a Dreadnaught or a Victory Star Destroyer into the final book). However, we probably won’t add those profiles to the beta test since they’ve already been extensively tested in the Age of Rebellion beta last year.
Sometimes, however, we do add changes to the beta that break these criteria. If a mistake is glaring enough, we may “fix” it in the errata even while we fix it in the actual book, just to reassure everyone that it’s been noticed and addressed. We hate errors as much as you do, and sometimes we correct them early in the process to say, “Don’t worry; that problem’s been fixed.” So that’s some of the thinking that goes into deciding what changes get put in the beta updates, and what changes get saved for the final book. Thanks for reading, and thanks for playing! ... Source: STAR WARS (R): Force and Destiny (TM) Beta Update #3 (http://www.fantasyflightgames.com/edge_news.asp?eidn=5077)
Title: FFG:Controlling the Game - Part I
Post by: RSSFeeder on 04 October 2014, 06:30:03
Controlling the Game - Part IZach Bunn on Board Control in STAR WARS (TM): The Card Game
“Impressive. Most impressive. Obi-Wan has taught you well. You have controlled your fear. Now, release your anger. Only your hatred can destroy me.”
–Darth Vader, Star Wars: The Empire Strikes Back In the tumultuous battles of Star Wars™: The Card Game, controlling your opponent is critical. If you can keep your opponent from establishing a firm presence in the game, your path to galactic dominion is assured. Whether you close off any escape route with the galaxy’s bounty hunters or fool your opponent with a Jedi mind trick, controlling your opponent brings you massive advantages. Today, guest writer Zach Bunn explores how to best control your opponent’s options in Star Wars: The Card Game. 
Zach Bunn on Control in Star Wars: The Card Game As I’ve often said, Star Wars: The Card Game is a very different kind of game. After you play enough card games, you start to see threads of similar ideas, concepts, and methods of winning. What I’ve found extremely appealing about this game, however, is how different its fundamental ideas are from so many other card games I’ve played. Recently, I’ve had plenty of time to really consider what control means in Star Wars: The Card Game, and I’ve realized just how important it is in this game. To put it bluntly, control is the single most important concept in this card game. I’m serious. If you don’t understand how to control your opponent’s options and his units in this game, you’re going to lose to good players almost every time. You Must Learn Control 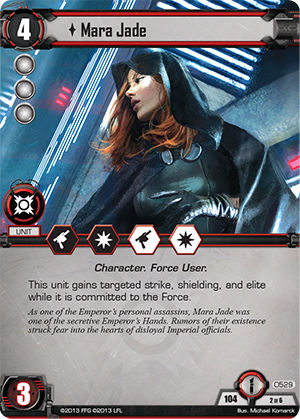 Have you ever encountered a situation in Star Wars: The Card Game where you look across the table and you can’t see a way to do anything beneficial? You can’t win an edge battle, so attacking would be a waste with the units you have. You can’t take the Force or do anything that positively affects your position, other than play a few units. Your opponent might even have units with targeted strike, such as Luke Skywalker (Core Set, 92) or Mara Jade (Lure of the Dark Side, 529), and anything you can play will surely die before your next turn. Have you ever encountered a situation in Star Wars: The Card Game where you look across the table and you can’t see a way to do anything beneficial? You can’t win an edge battle, so attacking would be a waste with the units you have. You can’t take the Force or do anything that positively affects your position, other than play a few units. Your opponent might even have units with targeted strike, such as Luke Skywalker (Core Set, 92) or Mara Jade (Lure of the Dark Side, 529), and anything you can play will surely die before your next turn.
This is a very clear example of your opponent having control of the game. The idea of control is simple. Controlling the game means using the cards at your disposal to actively disrupt your opponent, whether by destroying units, consistently winning edge battles, or neutralizing attacks before they even begin. Of course, it’s possible to win a game and never truly have control, especially when playing as the light side. Inversely, a dark side player can win purely through controlling his opponent’s options, since slowing an opponent and letting the dial tick up ends with a win for the dark side. For a long time, the power of Sith decks was based on their heavy control effects, and they were seen by many as the dominant dark side deck. Building for Control But how do you get to the point where you can control the game? Learning how to achieve control is a critical skill that can greatly increase your win percentage, but before we discuss gaining control, it’s important to discuss what leads to gaining control and what cards you can add to your deck to help gain that control. The largest part of establishing control is, obviously, how you play your cards during the game, but there are two elements you need to include in your deck if you want to be able to seize control.  1. Resources – Having enough resources in your deck is a primary avenue towards gaining control of the game, because the more resources you have in play, the more units and events you’ll be able to afford each turn. Cards like the Deneba Refueling Station (Knowledge and Defense, 555) that remove a focus when you win a Force struggle are fantastic because of their ability to push your resources ahead of your opponent. Developing a resource advantage immediately puts the pressure on your opponent, because you’ll be able to play more than him every turn. The ability to play several units in one turn, or to play units and still have resources for events, is absolutely important. 1. Resources – Having enough resources in your deck is a primary avenue towards gaining control of the game, because the more resources you have in play, the more units and events you’ll be able to afford each turn. Cards like the Deneba Refueling Station (Knowledge and Defense, 555) that remove a focus when you win a Force struggle are fantastic because of their ability to push your resources ahead of your opponent. Developing a resource advantage immediately puts the pressure on your opponent, because you’ll be able to play more than him every turn. The ability to play several units in one turn, or to play units and still have resources for events, is absolutely important.
2. Card draw - In most card games, having access to more cards grants you a huge advantage. In Star Wars: The Card Game, this isn’t less true, but the types of preferable card draw are very specific. Since both players draw to their reserve on their turns, both players often see a similar number of cards and have a similar number of cards in their hand over the course of the game. This means that cards that increase your reserve or reduce your opponent’s reserve, such as The General’s Imperative (Assault on Echo Base, 267) are very important. Card draw outside of the draw phase, such as from Counsel of the Sith (Core Set, 27), can be extremely important as well. The number of cards you see or don’t see affects everything as you try to seize control of the game. If you are able to see more cards than your opponent, you’ll have more potential units and events to play, more cards to use in edge battles, and more access to your all-important resources. You need to get to the cards that will help you disrupt your opponent’s plans, so card draw cannot be underestimated. Seizing Control  Controlling the game and reducing your opponent’s options on a significant level doesn’t happen by accident. It starts with the cards that you put into your deck and ends with how well you use those cards. Grabbing control of the game isn’t complicated in theory, though. You’re trying to actively deny your opponent the conditions he’s built in his deck to create a win. For example, your opponent is probably relying on at least some level of units to win the game. Playing Force Lightning (Core Set, 60) to destroy an exhausted unit can help you control your opponent’s path to victory. Controlling the game and reducing your opponent’s options on a significant level doesn’t happen by accident. It starts with the cards that you put into your deck and ends with how well you use those cards. Grabbing control of the game isn’t complicated in theory, though. You’re trying to actively deny your opponent the conditions he’s built in his deck to create a win. For example, your opponent is probably relying on at least some level of units to win the game. Playing Force Lightning (Core Set, 60) to destroy an exhausted unit can help you control your opponent’s path to victory.
Newer players tend to focus purely on how much damage they can deal to objectives every turn. It might seem harmless, but thinking that way focuses on the short-term, and it won’t lead to victory if you’re playing a good player. Once you shift your focus from dealing as much objective damage as you can to gaining superior positioning and control throughout the game, you’ll begin playing quite differently. You begin to see the long-term game perspective and you learn how to bend it to your goals. In actuality, most games will end before turn six. Though Star Wars can be a short game, giving up long term board positioning early to save or deal a few extra damage to an objective is typically a bad decision. In a lot of games, one player will attack the first turn that he can, while the other player will begin building a board of units, starting to establish control of the game. It may seem that the player who dealt first damage won the exchange, but over the course of most games the player who began establishing control on the first turn is the player who ends up winning. In my next article I’ll showcase an example of control at work and illustrate that sometimes the obvious plays aren’t necessarily the right ones! Until then, may the Force be with you. Zach Battle for the Galaxy Thanks, Zach! Zach Bunn is a Star Wars fanatic, a lead member of Team Covenant, and a member of the winning team from the Star Wars multiplayer tournament held at Worlds. In coming weeks, stay tuned for more Star Wars guest articles from Zach and other writers! ... Source: Controlling the Game - Part I (http://www.fantasyflightgames.com/edge_news.asp?eidn=5078)
Title: FFG:House of Talons
Post by: RSSFeeder on 04 October 2014, 15:00:06
House of TalonsAnnouncing the Fifth Chapter Pack in the Wardens Cycle
“It is too dark to see them, but the steps are there. Too steep and narrow for horses, but mules can manage them most of the way. The path is guarded by three waycastles, Stone and Snow and Sky. The mules will take us as far up as Sky.”
–George R.R. Martin, A Game of Thrones Fantasy Flight Games is proud to announce House of Talons, the fifth Chapter Pack in the Wardens cycle for A Game of Thrones: The Card Game! Stand strong with Renly’s Rainbow Guard, ride the sweeping plains of Essos with the Dothraki, or raid Westeros with the Clansmen of the Vale in this Chapter Pack. The major themes of the Wardens cycle continue in House of Talons, offering more support for trait-based decks, limited responses, and high-cost, iconic characters from A Song of Ice and Fire. Aside from offering support to each of the six Great Houses in A Game of Thrones: The Card Game, House of Talons also includes new characters bearing the House Arryn trait, offering new ways to take advantage of Castle plots. 
Kings of Mountain and Vale Castle plots have been gaining strength throughout the Wardens cycle, rewarding you for planning ahead and patiently playing the long game. These plots offer a variety of powerful effects, but unlike most plots, which offer a benefit for the round in which they are played, Castle plots only trigger their effect when they are placed in their owner’s used pile. The unique timing of these plots makes them very difficult to counter – you can rest assured when you rely on the strength of your Castles.  In House of Talons, you’ll find another Castle plot that offers you a way to build card advantage over the long-term: Kings of Mountain and Vale (House of Talons, 100). After Kings of Mountain and Vale is placed in your used pile, you draw one card and discard one card at random from each opponent’s hand. Developing card advantage is one of the most important aspects of A Game of Thrones: The Card Game, and Kings of Mountain and Vale aids your efforts to seize and maintain card advantage over the course of the game. In House of Talons, you’ll find another Castle plot that offers you a way to build card advantage over the long-term: Kings of Mountain and Vale (House of Talons, 100). After Kings of Mountain and Vale is placed in your used pile, you draw one card and discard one card at random from each opponent’s hand. Developing card advantage is one of the most important aspects of A Game of Thrones: The Card Game, and Kings of Mountain and Vale aids your efforts to seize and maintain card advantage over the course of the game.
Of course, if you’re playing the long game with Castle plots, you need some ways to stall your opponent’s power gain. House of Talons offers some help with Bronze Yohn Royce (House of Talons, 97). This character can help you gain power of your own with his renown keyword, and after a Castle plot is placed in your used pile, you can choose and discard one power from any character. Many decks claim power directly to characters with renown or special abilities. With Bronze Yohn Royce or a character like Melisandre (Core Set, 74) supporting your claim to the Iron Throne, you can start working to slow these decks down, giving you enough time to build your armies and plot your own path to victory. You’ll also find a way to channel your Castle plots into the path to the Iron Throne in House of Talons. You can gain power from your Castle plots by supporting the claim of Robert Arryn (House of Talons, 98). Robert Arryn is free to play, and although he has a power icon, he has zero STR, so his greatest benefit lies in his ability. His text reads, “Response: After a Castle plot card is moved to your used pile, Robert Arryn claims 2 power. (Limit once per round.)” By claiming two power whenever a Castle plot moves to your used pile, Robert Arryn allows you to increase your power intake beyond what you win in your challenges. What’s more, Robert Arryn’s Noble crest means that you can safeguard him (and his power) with The Power of Blood (Core Set, 194). Gather Your Allies In House of Talons, you decide which path to victory you will pursue. You may seek vengeance for past wrongs with the Sand Snakes of Dorne, you may devote yourself to duty and honor with the men and women of House Tully, or you may rely on the impregnable Castles of House Arryn to claim power. No matter which path you choose, you’ll find plenty of cards to support your goals in this Chapter Pack. Look for the House of Talons Chapter Pack in the first quarter of 2015! ... Source: House of Talons (http://www.fantasyflightgames.com/edge_news.asp?eidn=5080)
Title: FFG:Join the Aces
Post by: RSSFeeder on 04 October 2014, 23:30:02
Join the AcesThe Rebel Aces Expansion Pack for X-Wing (TM) Is Now Available
“Proceed with the countdown. All groups assume attack coordinates.”
–Admiral Ackbar The Rebel Aces Expansion Pack for X-Wing™ is now available at retailers everywhere! Featuring one A-wing miniature and one B-wing miniature – both of which boast bold, alternative paint schemes – the Rebel Aces Expansion Pack adds tremendous speed and versatility to your Rebel fleet! In our previews, we’ve looked closely at how the expansion’s unique A-wing and B-wing pilots work in conjunction with its host of new upgrades to allow these high-tech starfighters to fulfill a wider range of roles within your X-Wing squadrons. We’ve also seen how the expansion’s new mission, Jump to Subspace, serves both to highlight these starfighters’ strengths and train you as a Rebel squadron leader. Now, the time has come for you to pick up the expansion’s new pilots, upgrades, and mission and bring them to battle!
Divide and Conquer Rebel Aces makes it easier for your A-wings and B-wings to perform a wider variety of functions within your X-Wing fleets. - In our preview, “A More Versatile A-wing,” we looked at how the expansion’s talented A-wing pilots can dart and weave across the battlefield to get into position for point blank shots against their foes. We also looked at how the new Chardaan Refit and Proton Rockets upgrades allow you to better define the ways in which your A-wings will function in battle, as dedicated dogfighters or as hard-hitting missile platforms.
A 360-degree view of the Rebel Aces A-wing miniature
- Then, in the preview, “B-Wing Expanded,” we explored how the expansion’s new B-wing aces and the B-Wing/E2 modification make it easier for your B-wings to break out of the formations in which they have traditionally flown. The abilities that Keyan Farlander and Nera Dantels bring to battle, along with the talents of the crew that can join them, mean that your B-wings suddenly become some of the game’s most fearsome flankers.
A 360-degree view of the Rebel Aces B-wing miniature
Of course, the mere fact that Rebel Aces adds so many pilots and upgrades means that it bolsters the game with even more possible combinations of ships and upgrades, and as more of these possible combinations become viable at all levels of the game, your Rebel squadrons become less predictable. For example, such unique and highly skilled pilots as Keyan Farlander and Jake Farrell are able to make extremely efficient use of many of the game’s existing elite pilot talents and other upgrades. Here, one of the likeliest options is Opportunist. A squadron built around Opportunist can utilize Jake Farrell’s A-wing as a much harder-hitting starfighter and affords Keyan Farlander consistent opportunities to take full advantage of his unique pilot ability. 
Wes Janson (29)
Veteran Instincts (1)
R5-P9 (3)
Engine Upgrade (4) Keyan Farlander (29)
Opportunist (4)
B-Wing/E2 (1)
C-3PO (3) Jake Farrell (24)
Opportunist (4)
Chardaan Refit (-2) Total Squad Points: 100 In this sample squad, Wes Janson is equipped with Veteran Instincts, Engine Upgrade, and R5-P9 because he’s the enabler. When he attacks, he can strip his target of an evade, focus, or blue target lock token. Accordingly, he can help Keyan Farlander and Jake Farrell trigger their Opportunist upgrades by removing evade or focus tokens from their targets. The Engine Upgrade modification helps ensure that Wes Janson gets his shot each round. With his Engine Upgrade, he can either adjust his firing arc to catch a foe, or he can boost out of an enemy’s firing arc, ensuring that he’ll live to fire another round. Likewise, R5-P9 can keep Wes Janson in the battle by helping him recover his shields, and that means more rounds that you’ll be able to trigger Opportunist for one or two more attack dice. Keyan Farlander may very well be the Rebellion’s most opportunistic ace. Not only does Keyan Farlander gain an extra attack die when he triggers his Opportunist upgrade, he gains a stress token that he can spend to transform all his  results to results to  results. Also, because Opportunist doesn’t require an action, it leave Keyan Farlander free to use his actions to acquire target locks or perform barrel rolls, and this makes his maneuvers harder to anticipate than those of the average B-wing pilot. Combined with the added resilience that C-3PO provides, this unpredictability can help Keyan Farlander emerge victorious from even the most heated of battles. results. Also, because Opportunist doesn’t require an action, it leave Keyan Farlander free to use his actions to acquire target locks or perform barrel rolls, and this makes his maneuvers harder to anticipate than those of the average B-wing pilot. Combined with the added resilience that C-3PO provides, this unpredictability can help Keyan Farlander emerge victorious from even the most heated of battles.
Still, for all that Opportunist offers Keyan Farlander in this squad, it may be even more important an upgrade for Jake Farrell. When he’s able to trigger his Opportunist, Jake Farrell fires off primary attacks worth three dice instead of two. Suddenly, Jake Farrell’s A-wing hits as hard as Luke Skywalker’s X-wing, and the Chardaan Refit upgrade ensures that the two ships are similarly costed, even though Jake Farrell still gains the advantages of his A-wing’s tremendous speed and maneuverability. Thus, while Keyan Farlander is threatening your foe on one flank, Jake Farrell can race around the other flank, performing focus actions to increase the efficiency of his attacks and using his free boost or barrel roll actions to ensure he’s firing from the best possible positions. Of course, it’s worth noting that the lowest pilot skill in this squad is “7,” meaning that you’ll likely be able to eliminate a good number of enemy ships before they even get you in their sights. However, given the increased importance of pilot skill in the evolving X-Wing metagame, it’s worth considering a few possible substitutions to the squad that would have you dodging even more firing arcs and taking down enemy ships just a couple beats earlier. By trading away R5-P9, you gain three squad points, enough to equip Jake Farrell with the A-Wing Test Pilot Title upgrade and Veteran Instincts and leave two free to help you win initiative. In this way, you field a squad with pilot skills of “10,” “9,” and “7,” most likely winning ties on pilot skill, and you can outmaneuver even the trickiest TIE Phantom pilots. Graduate to the Next Level As a rookie pilot, you learned how to fly and fight in formation with your wingmates. However, as you improved in your piloting, you learned how to recognize weaknesses in your enemies’ tactics, and you began to learn how to exploit those weaknesses. Now, as an ace, you might best serve your wingmates by breaking out of formation and punishing your foes for each and every mistake they may make. You might best aid the Rebellion by racing across the battlefield at top speed and pouncing upon unwary TIEs. You’ve learned how to push your ship to the limit, and where others may not know how to react when their ships straining against them, you do. In fact, you know that the ways pilots guide their fighters through the most stressful of its maneuvers are what ultimately separate the aces from the casualties of war. It’s time to test the limits of your A-wings and B-wings. It’s time to put them through their paces, to race them across the battlefield, and to blast through screens of Imperial TIEs. The Rebel Aces Expansion Pack is now available at your local retailer! ... Source: Join the Aces (http://www.fantasyflightgames.com/edge_news.asp?eidn=5081)
Title: FFG:2014 Worlds Tournament Update
Post by: RSSFeeder on 05 October 2014, 08:00:07
2014 Worlds Tournament UpdateAn Explanation of the X-Wing 2014 World Championship Flight Structure
At the end of August, we announced the schedule for all 2014 World Championships at the 2014 World Championship Weekend. To make sure players are as prepared as possible, today’s article outlines the X-Wing™ flight structure players will encounter this year at Worlds. Why the Split Into Two Flights? With the increasing popularity of X-Wing and the space the game requires to play, we will be splitting the tournament into flights to accommodate the large number of expected players for the event.
The flight system is one that we debuted at Gen Con this year and worked well. For the X-Wing World Championship we will be making
a few, small changes to improve the system but keep the overall structure. In short, having two flights allows more players to compete in the tournament. How Will the Flights and Overall Tournament Work? Each flight will accommodate up to 128 players and be run with six Swiss rounds. At the end of six rounds, the top 16 players in each flight will be invited to compete in the Finals on Saturday. The 32 players invited back on Saturday will compete in a top 32 single-elimination format. The final player standing at the end of the day Saturday will be crowned 2014 X-Wing
World Champion! How Do I Reserve My Spot in a Flight? To reserve a spot in one of the flights, you must preregister through our online store. As players register for the 2014 World Championship Weekend, we send out a general survey to each registrant. This survey will include a question asking for your preference on which X-Wing flight you would like to compete in. Once we receive your response, we will reserve a spot for you in your chosen flight. If one of the flights fills completely, we will notify you as soon as possible. If you have already preregistered, you should have already received the survey. If you did not, please contact us at organizedplay@fantasyflightgames.com immediately. The day of each flight, and only if space is available, we will accept any players who did not preregister. We strongly recommend you preregister for the 2014 X-Wing World Championship as we cannot guarantee there will be space if you attempt to register the day of the event. Is There a Difference Between the Two Flights? Other than the flights being on separate days and the fact that different players will end up competing each day, there is no difference between the two flights. Do I Have to Play in Both Flights? No. Players can qualify for the finals on Saturday no matter which flight they play in. Can I Play in Both Flights? A player may compete in both flights only if there is room. However, a player can reserve a spot for himself in only one flight. We will accept players reserved for a different flight only after all other players have had a chance to enter that day’s flight. Players who make the top 16 cut in Thursday’s flight cannot play in Friday’s flight. For example, Karen plays in Thursday’s flight but is unable to make the top 16 cut. She returns Friday morning to try and enter Friday’s flight. 105 players have a spot reserved, and each player checks in on time. 12 other players arrive without a spot reserved in either Thursday’s or Friday’s flight. We register those 12 in the tournament. After all 117 players are registered, we open registration for players like Karen, with space for 11 more players. Karen makes it in! We will also be hosting X-Wing side events both days for those who are not playing in that day’s flight. Keep your eyes on our website! More details on side events will be announced shortly. What if I Have a Bye From a National Championship? Congratulations on winning such a prestigious and challenging event! We are in the process of contacting all
National Champions directly with additional information and the survey. You do not have to preregister for World Championship Weekend, but please fill out the survey when you receive it so that we can reserve a spot for you
in the flight of your choice. 
Preregister Today If you haven’t already, don’t forget to preregister for the 2014 World Championship Weekend. With more people preregistering this year than any year previously, space is sure to be at a premium! If you’re looking to try your hand at piloting in the 2014 X-Wing World Championship, preregistering is even more important. Guarantee which flight you’ll play in and preregister now! ... Source: 2014 Worlds Tournament Update (http://www.fantasyflightgames.com/edge_news.asp?eidn=5082)
Title: FFG:2014 Worlds Tournament Update
Post by: RSSFeeder on 05 October 2014, 16:30:03
2014 Worlds Tournament UpdateAn Explanation of the X-Wing 2014 World Championship Flight Structure
At the end of August, we announced the schedule for all 2014 World Championships at the 2014 World Championship Weekend. To make sure players are as prepared as possible, today’s article outlines the X-Wing™ flight structure players will encounter this year at Worlds. Why the Split Into Two Flights? With the increasing popularity of X-Wing and the space the game requires to play, we will be splitting the tournament into flights to accommodate the large number of expected players for the event.
The flight system is one that we debuted at Gen Con this year and worked well. For the X-Wing World Championship we will be making
a few, small changes to improve the system but keep the overall structure. In short, having two flights allows more players to compete in the tournament. How Will the Flights and Overall Tournament Work? Each flight will accommodate up to 128 players and be run with six Swiss rounds. At the end of six rounds, the top 16 players in each flight will be invited to compete in the Finals on Saturday. The 32 players invited back on Saturday will compete in a top 32 single-elimination format. The final player standing at the end of the day Saturday will be crowned 2014 X-Wing
World Champion! How Do I Reserve My Spot in a Flight? To reserve a spot in one of the flights, you must preregister through our online store. As players register for the 2014 World Championship Weekend, we send out a general survey to each registrant. This survey will include a question asking for your preference on which X-Wing flight you would like to compete in. Once we receive your response, we will reserve a spot for you in your chosen flight. If one of the flights fills completely, we will notify you as soon as possible. If you have already preregistered, you should have already received the survey. If you did not, please contact us at organizedplay@fantasyflightgames.com immediately. The day of each flight, and only if space is available, we will accept any players who did not preregister. We strongly recommend you preregister for the 2014 X-Wing World Championship as we cannot guarantee there will be space if you attempt to register the day of the event. Is There a Difference Between the Two Flights? Other than the flights being on separate days and the fact that different players will end up competing each day, there is no difference between the two flights. Do I Have to Play in Both Flights? No. Players can qualify for the finals on Saturday no matter which flight they play in. Can I Play in Both Flights? A player may compete in both flights only if there is room. However, a player can reserve a spot for himself in only one flight. We will accept players reserved for a different flight only after all other players have had a chance to enter that day’s flight. Players who make the top 16 cut in Thursday’s flight cannot play in Friday’s flight. For example, Karen plays in Thursday’s flight but is unable to make the top 16 cut. She returns Friday morning to try and enter Friday’s flight. 105 players have a spot reserved, and each player checks in on time. 12 other players arrive without a spot reserved in either Thursday’s or Friday’s flight. We register those 12 in the tournament. After all 117 players are registered, we open registration for players like Karen, with space for 11 more players. Karen makes it in! We will also be hosting X-Wing side events both days for those who are not playing in that day’s flight. Keep your eyes on our website! More details on side events will be announced shortly. What if I Have a Bye From a National Championship? Congratulations on winning such a prestigious and challenging event! We are in the process of contacting all
National Champions directly with additional information and the survey. You do not have to preregister for World Championship Weekend, but please fill out the survey when you receive it so that we can reserve a spot for you
in the flight of your choice.
Preregister Today If you haven’t already, don’t forget to preregister for the 2014 World Championship Weekend. With more people preregistering this year than any year previously, space is sure to be at a premium! If you’re looking to try your hand at piloting in the 2014 X-Wing World Championship, preregistering is even more important. Guarantee which flight you’ll play in and preregister now! ... Source: 2014 Worlds Tournament Update (http://www.fantasyflightgames.com/edge_news.asp?eidn=5083)
Title: FFG:Command Your Fleet to Victory
Post by: RSSFeeder on 06 October 2014, 01:00:03
Command Your Fleet to VictoryA Preview of STAR WARS (TM): Armada
“Deploy the fleet so that nothing gets off that system. You are in command now, Admiral Piett.”
–Darth Vader Welcome to our first preview of Star Wars™: Armada! Armada is an epic, two-player miniatures game of large-scale fleet battles set in the Star Wars universe. The time is the height of the Galactic Civil War. As the Imperial Navy’s Star Destroyers move systematically across the galaxy to impose order and crush those who would oppose the evil Galactic Empire, the Rebel Alliance launches its rag-tag fleet of ships and starfighters on daring raids and surgical strikes. Its aim? Weaken the Empire, blow by blow. In Armada, you enter this ongoing conflict as a fleet admiral with either the Imperial Navy or Rebel Alliance. Your ships have come upon the enemy. Conflict is imminent. Thousands of crew race to their battle stations, preparing for massive exchanges of turbolaser fire. Thousands will die, but it is your job to command the fleet to victory. You must overcome your foes. You must achieve your objective. There is no room for failure. Even though Armada is a game of capital ships and starfighter squadrons – with battles on a scale large enough to alter the fate of the galaxy – their outcomes still hinge upon you and your decisions. If you wish to emerge victorious, the first thing you’ll need to do is learn how your ships function in battle. Capital ships aren’t nimble like starfighters. In fact, the larger and more powerful your ships, the more time they take to respond to your commands. You can’t react instantly to threats as they arise. You have to plan for the future. 
The Command Stack You begin each round of Armada by entering the Command Phase and secretly assigning commands to each of your capital ships. To do this, you select one of the game’s four possible commands and lock it into your ship’s command dial. You then place the dial facedown at the bottom of your ship’s command stack. At the end of the Command Phase, a ship’s command stack must always contain a number of facedown command dials equal to its command value. This means that in the game’s first Command Phase, you build full command stacks for all of your ships, assigning them all a number of commands equal to their command values. 
The Nebulon-B escort frigate has a command value of “2,” so the Rebel player assigns two commands to the ship in the first Command Phase.
In the Ship Phase that follows, you and your opponent take turns activating your ships. When you activate a ship, you reveal the top of its command stack, turn the dial faceup and resolve its command or spend the command to gain a matching token. Each command provides a different type of benefit, which we will address in more detail below. For now, it’s just important to note that after you assign commands to your ships in the Command Phase, you reveal one command per ship in the Ship Phase. As the game progresses, you continue to order new commands in each Command Phase, replacing the command dials that were revealed the previous round. These new commands go facedown on the bottom of the command stack, so when you’re assigning commands, you’re always planning for the future. The Four Commands There are four basic commands in Armada. Each command can be resolved for full effect when you reveal your command dial, or it can be spent to assign a command token to your ship. You can assign a number of command tokens to your ship equal to its command value, though you can’t assign more than a single token for a given type of command. While command tokens can then be spent at any appropriate time, the benefits they grant are less than those you gain from resolving the command directly from the dial.  Navigate Navigate
| | A ship can resolve a navigate command during the Ship Phase, after it attacks and as it begins to determine its course. | | Dial: You can increase or decrease your ship’s speed by one, to a maximum of the ship’s top speed or to a minimum of zero. Additionally, you can temporarily increase your ship’s yaw by one click at one maneuver joint (on the maneuver tool). | | Token: You can increase or decrease your ship’s speed by one, as above. |
The game’s unique maneuver tool. (Product image not final. Pending Licensor approval.)
 Squadron Squadron
| | A ship can resolve a squadron command during the Ship Phase, immediately after revealing its command. | | Dial: You can immediately activate a number of squadrons at short or medium range equal to your ship’s squadron value. Each squadron activated in this way can both move and perform an attack. | | Token: You can activate a single squadron as above. |  Repair Repair
| | A ship can resolve a repair command during the Ship Phase, immediately after revealing its command. | | Dial: Gain a number of engineering points equal to your ship’s engineering value. You may then spend these points to repair your ship: 1 point – Move one shield from one of your ship’s hull zones to another hull zone.
2 points – Recover one shield in any one hull zone.
3 points – Discard any one damage card | | Token: Gain a number of engineering points equal to half your ship’s engineering value, rounded up. These may be spent as above. |  Concentrate Fire Concentrate Fire
| | A ship can resolve a concentrate fire command during the Ship Phase, after rolling dice during an attack and before all attack effects have been resolved. | | Dial: Immediately add an extra attack die to your attack. The die must match a die type already in the attack pool. | | Token: You can reroll any one die in your attack pool. | Notably, you can spend a command token for its benefits at the same time that you resolve the same type of command from your dial. For example, you could reveal the concentrate fire command to enhance your attack, adding an extra attack die to your attack pool. You could then also spend a concentrate fire command token to reroll a blank die during the same attack. 
In the Ship Phase, the Rebel player reveals the concentrate fire command for his CR90 corvette. It attacks from its forward arc for two red dice and one blue die. After rolling these dice, the player decides to spend the ship’s concentrate fire command to add a third red die. He rolls a blank, but because the ship happens to have a concentrate fire token, he can spend it to reroll the die. He does, and it generates another two hits!
Alternatively, you could spend a repair token at the same time you reveal a repair command to gain engineering points equal to 150 percent of your engineering value, rounding up any fractions. You can then use these for any combination of repair effects. Since you can’t save any unspent engineering points after resolving a repair command, spending your repair token at the same time you reveal a repair command can open up options not normally available to you. A Victory I-Class Star Destroyer, for instance, could use these repair points to discard two faceup damage cards in a single turn. Of course, you don’t have to spend your command tokens at the same time you reveal a similar command from the dial. You can spend a command token at any time you could resolve the command from your dial, and if your ship has a high enough command value, you could spend several tokens in a single round, potentially activating a squadron, repairing your shields, and rerolling an attack die – all in the same round that you reveal a navigate command on your dial to adjust your speed and course. In this way, the larger ships can make up for their sluggish responses to your commands with massively impactful rounds. And imagine what such a round can do to the morale of an opponent who has spent the better part of the game battering at your Star Destroyer, only to see it recover the majority of its damage and punch a hole through his CR90 corvette with a single direct hit. Devising Your Battle Plan Again, the larger your ship is, and the more that it can do, the more you have to plan ahead. This is also a truth that multiplies as you consider the impact of your commands across the whole of the battlefield: You’re not piloting a single ship, after all; you’re directing the coordinated efforts of an entire fleet. Your initial commands establish the tone for your early rounds; they might even establish the tone of the entire match. If you find your Star Destroyers are drifting out of position in the early rounds, you can issue a navigate command, but you’ll still know that you’re going to have to spend several rounds doing your best to survive and maintain the semblance of an aggressive stance until you can adjust your speed and course. Moreover, when you start building larger fleets, your ships may feature an array of command values, and your command stacks may vary a great deal, even among ships with the same command values. If your fleet contains both a Victory II-class Star Destroyer and a Victory I-class Star Destroyer, you might want to position them both to fire upon the same enemy ship within a single round in an effort to blow it out of the skies. However, this plan might require two different command stacks. Since the Victory II features an armament with both the long and medium range red and blue dice, respectively, you might want it to concentrate fire two rounds in a row. In this case, you can spend the first concentrate fire command to get a token. Then, you resolve the second concentrate fire command directly from the dial. By combining the concentrate fire commands from both the dial and token, you get both the most possible dice and the best possible results. 
Aiming for a third-round barrage of fire, the Imperial player assigns the concentrate fire command to his Victory II-class Star Destroyer for two sequential rounds.
The Victory I replaces the mid-range blue dice with short-range black dice, meaning you’ll need it to draw close to its target in order to unleash its barrage at maximum firepower. Accordingly, you might want to issue it a navigate command the round before it concentrates fire so that it can speed up to be on target. 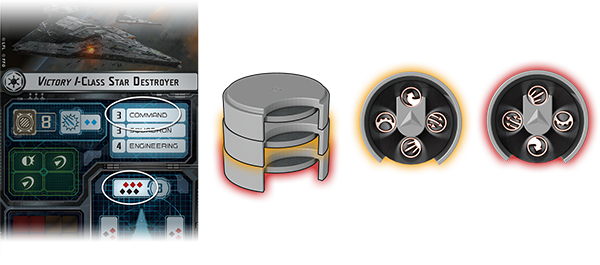
To unleash its most devastating volley on the third round, the Victory I has to get closer to its target than the Victory II does, so the Imperial player assigns it a navigate command on the second round, hoping it will be able to get into position before revealing a concentrate fire command on the third round.
By planning ahead – and responding appropriately to your opponent’s actions – you may be able to build toward a single round in which you unleash a single, devastating hail of fire from both ships. 
Engaging the Enemy No battle plan ever fully survives contact with the enemy, and learning how to adapt to the challenges of combat is another massive part of achieving success in Armada. Accordingly, our next preview will offer a closer look at combat. Brace yourself! ... Source: Command Your Fleet to Victory (http://www.fantasyflightgames.com/edge_news.asp?eidn=5084)
Title: FFG:Your Adventure Begins
Post by: RSSFeeder on 06 October 2014, 09:30:03
Your Adventure BeginsPreview Movement and Actions in The Witcher Adventure Game
“Triss must have sensed it too,” Geralt thought grimly. His witcher medallion twitched on his chest. Some kind of magic nearby, or some creature from another sphere. Either one spelled trouble. So why hadn’t Triss said anything? Their journey to this place had been long and arduous, but now it seemed their adventure was only just beginning. The world of The Witcher lies before you in The Witcher Adventure Game! In this board game for two to four players, you take on the role of an iconic character from the bestselling Witcher novels and video game series. The Witcher Adventure Game challenges you to prove yourself the most renowned hero of the realm by completing quests, but the Continent is filled with danger. You’ll need all your wits and combat skills just to survive another day. Whether you’re playing as the witcher Geralt of Rivia, the sorceress Triss Merigold, the bard Dandelion, or the dwarven warrior Yarpen Zigrin, you’ll need to traverse the vast spaces of the Continent and stay alive while doing so. In today’s preview, we’ll take a closer look at the different actions you can take as you strive to complete quests and claim victory. 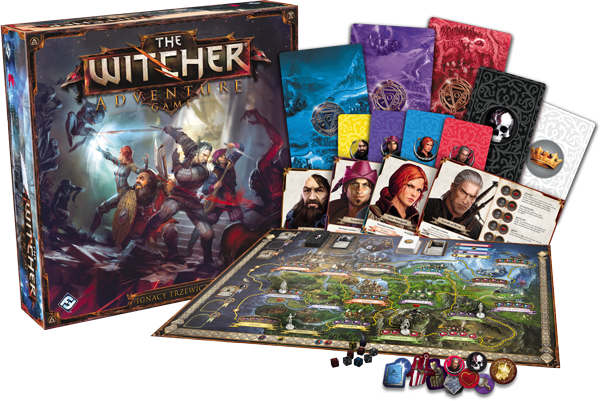
Start Your Travels You have much to accomplish if you wish to become the most famous hero in the land of The Witcher, but you have limited time to do so. Every turn, you can take two actions, allowing you to move through the land, gather the resources to complete quests, and experience the world around you. The first action available to you as a burgeoning adventurer is the travel action. Traveling is your principal means of movement from place to place, and it also allows you to collect leads and other crucial information. When you choose the travel action, you may move your figure along a route connecting two locations. After arriving at a new destination, you receive a lead that matches the color of the lead shown at your destination. Leads are crucial tokens, representing information, important objects, and other items necessary to complete your quest, and they will be explained more fully in a future preview. Some travel routes may take you to sea, which can be an excellent way to cover ground quickly, but it can cost you dearly in gold. You may also use a travel action to move along two consecutive routes, but beware! Extensive travel is dangerous in the world of The Witcher. Moving along two routes with a single travel action forces you to draw a foul fate card, with potentially dire consequences. 
For example, Geralt of Rivia could use a travel action to move from Rivia to Mahakam. Upon arriving in Mahakam, Geralt claims one red lead, which matches the red lead pictured at Mahakam. Because Geralt didn’t move along two routes with his travel action, he does not draw a foul fate card, keeping him safe from some of the dangerous bandits and encounters that fill the Continent. Investigate Events and Develop Your Skills The second action that all heroes can use is investigate. When you choose to investigate, you draw the top card of one of three investigation decks: diplomacy, magic, or combat. These decks can yield beneficial encounters, offering you leads, gold, or other boons. But they also contain setbacks, forcing you to fight for your life, delaying you, or bringing the Continent closer to open war. Whether you come under arcane assault or take on a lucrative contract, your investigations immerse you in the world of The Witcher and help to bring you closer to completing your quests. You may also choose the develop action to enhance your hero’s skills and talents. Selecting the develop action allows you to draw the top two cards from your hero’s unique development deck. These cards can range from potions, to magic spells, to clever companions, to weapons and armor, based on which hero the cards belong to. You choose one of the two cards to keep, and place the other on the bottom of the deck. Once chosen, these development cards provide a long-lasting benefit, enabling you to overcome difficulties that once would have thwarted you. 
Your adventures in the Northern Kingdoms are sure to leave their mark on you. Over time, you will take wounds, both minor and severe. When you suffer a wound, you must place it over a certain action. As long as you bear that wound, you cannot choose that action. Thankfully, you may choose the rest action to heal some of your hero’s wounds, freeing yourself to use those actions once more. In addition to all the actions listed above, each hero also possesses a unique hero-specific action. These unique actions often allow the hero to influence the game in ways that no one else can. We’ll cover each hero’s unique action in later previews, alongside each hero’s special development decks. First Steps on the Path As an example of a turn, Triss Merigold begins her turn in Wyzima. Her current quest requires her to be in Novigrad, but before she moves there, Triss wants to see if she can gain another purple lead. As her first action, Triss chooses to investigate, and she draws the top card from the purple (diplomacy) investigation deck. The card is A Chance to Make Some Coin, and Triss immediately resolves its effects. She gains one purple lead, and keeps the card as a task: during a future turn, she may discard any Valuable Information cards to receive five gold apiece. After investigating, Triss chooses to travel, and she moves along two consecutive routes to Novigrad by way of Oxenfurt. Once there, she receives a lead of any color shown at the destination: red, blue, or purple. Triss takes a blue lead, and then draws a foul fate card, because she moved along two routes with one travel action. She draws and resolves the Illness foul fate card. 
After resolving the foul fate card, Triss must encounter an obstacle. Obstacles occupy different regions of the map, and can include monsters or foul fate. We’ll explain both monsters and foul fate cards in greater detail later. After Triss encounters an obstacle, her turn ends and the next player begins his turn. Enter the World of The Witcher Your greatest quest begins in The Witcher Adventure Game! Can you rise above your opponents to become the most famous hero in the Continent, or will you disappear beneath ravenous monsters and torturous intrigues? Decide your fate and claim notoriety in The Witcher Adventure Game. Preorder The Witcher Adventure Game at your local retailer today! ... Source: Your Adventure Begins (http://www.fantasyflightgames.com/edge_news.asp?eidn=5085)
Title: FFG:For the Greater Good
Post by: RSSFeeder on 06 October 2014, 18:00:03
For the Greater GoodAnnouncing the Eighth Deluxe Expansion for Call of Cthulhu: The Card Game
“It was here that an alliance of Federal inspectors and police, Malone with them, entered the case.”
–H.P. Lovecraft, The Horror at Red Hook Fantasy Flight Games is proud to announce the upcoming release of For the Greater Good, the eighth deluxe expansion for Call of Cthulhu: The Card Game! The world of Call of Cthulhu: The Card Game is full of strange and horrifying creatures, many of which are both evil and powerful in measures beyond human comprehension. Some of these lurk in other dimensions, just beyond the boundaries between our realm and theirs, waiting for any opportunity to enter our world and wreak havoc. Others walk among us, disguised and evil, carefully targeting prey and sacrifices to forward their dark masters’ hideous intents. Still, the vast bulk of humanity knows nothing of these entities, nor of the sinister cults that spring up around them. Instead, they live in blissful ignorance, shielded by the efforts of a handful of government agents and holy orders who have dedicated themselves to rooting out these evils and purging them. For their constant vigilance, these heroic individuals seek no recognition. They won’t even risk drawing attention to their struggles because to do so would be to expose human civilization to the maddening realization that we are threatened on all sides in a universe that doesn’t care. Thus, they commit themselves to their thankless task, placing themselves forever in harm’s way, all For the Greater Good. With 165 new cards (three copies each of fifty-five different cards), For the Greater Good lends new strength to the Agency, its Investigators, Government officials, and secret Hunters. You’ll find a host of new characters, new synergies between Agency subtypes, new gear, and powerful effects designed to renew the authority of law and order in a world tormented by burgeoning chaos. Moreover, as your Agency characters pursue their leads to all ends of the earth, you’ll uncover several new conspiracies, each of which, if investigated, may help you safeguard humanity’s future. 
For the Good of Humanity There are dozens of Government characters in Call of Cthulhu: The Card Game. In fact, it’s among the game’s most populous subtypes; however, there has historically been very little synergy between these Government characters. They suffered from poor communication between their different departments. In For the Greater Good, this changes. Of the expansion’s twenty new Agency characters, nearly half bear the Government subtype. More important, though, is the number of cards that key off of it. By granting an Arcane icon to every Government character, the Military Attaché (For the Greater Good, 15) takes a significant step to compensate for one of the Agency’s notable weaknesses. Then, logistical genius Lt. Wilson Stewart (For the Greater Good, 16) helps you get your Government characters into play more quickly, and By the Book (For the Greater Good, 22) supports your Government efforts by attaching to a story and greatly limiting the impact of any non-Government character committed to it.  
Meanwhile, another Government character, The Foundation (For the Greater Good, 20), arrives to oversee your efforts. It also introduces a new ability, shared by several of the expansion’s cards, that allows you to drain multiple domains to pay its cost. Once in play, The Foundation offers your agents an almost unprecedented measure of protection, allowing you to pay one to cancel any effect that would target one or more of your Agency characters. All told, the Government cards from For the Greater Good provide a new unity of purpose and direction that promise to make the Government subtype one of the game’s most potent. Those Whom the Monsters Fear Even as it expands and empowers the Government subtype, For the Greater Good introduces another subtype, Hunter. If the Government characters’ efforts represent the most efficient tactics that all the various police, military officers, and federal agents can employ, then it’s best to say that methods the Agency’s Hunters employ are far less traditional.  Guided by both science and faith, Hunters bring with them an array of miraculous abilities that alter the game’s basic tenets. Guided by both science and faith, Hunters bring with them an array of miraculous abilities that alter the game’s basic tenets. For example, the Loyal and Heroic Hunter Grete Wagner-Blackwood (For the Greater Good, 12) gains strength from the purity of her faith. Those lacking a similar measure of Loyal devotion to their causes simply cannot face her gaze and stand against her; they lose the strength of all their struggle icons, and their skills fail them, as well. Because her ability is an ongoing passive effect, it cannot be cancelled, and that means even if your opponent adds struggles or changes the nature of their resolution, Grete Wagner-Blackwood will not be dissuaded from her task. Similarly, other Hunters thwart other of your opponent’s expectations. Some can decide whether or not they’ll uncommit from stories, some can disrupt effects that target your characters, and others simply render your Hunters immune to your opponent’s triggered effects. With such effects, these Hunters quickly emerge from For the Greater Good as a potent and thematic set of characters around which you’ll be able to build a wide variety of new deck types. The Global Network Even though the Agency, its new characters, and its new equipment are the undisputed stars of For the Greater Good, the expansion also contains a treasure trove of new characters and support cards that the game’s other factions may use.  For those forces that might not be inclined to pursue the causes of law and order, these new characters and supports represent the seeds of potential new strategies and deck ideas, especially geared toward players who like warping the standard resolution of icon struggles at stories. For those forces that might not be inclined to pursue the causes of law and order, these new characters and supports represent the seeds of potential new strategies and deck ideas, especially geared toward players who like warping the standard resolution of icon struggles at stories.
In Call of Cthulhu: The Card Game, you and your opponent compete to win stories. These stories can represent the unearthing of ancient knowledge, the conquest of an important location, or the acquisition of a powerful relic. To win a story, you need to earn five success tokens, but your efforts to win these success tokens comes with a risk: Your opponent can send characters to challenge those you commit to a story, possibly driving them mad or wounding them. In For the Greater Good, each of the game’s eight factions gain inexpensive support cards that you can attach to a story to tilt the odds of its resolution not-so-subtly in your favor. Combined with a variety of powerful new characters, including a new three-cost Ancient One, these attachments allow you to play to your strengths even as they make the game more dynamic and horrifying. Face to Face with the Darkness “Morgan uncased the big-game rifle on which he relied despite his colleague’s warnings that no material weapon would be of help.”
–H.P. Lovecraft, The Dunwich Horror The elder horrors of Call of Cthulhu: The Card Game may be beings beyond the scope of bullets, knives, and dynamite, but don’t tell that to the Hunters and Government agents of For the Greater Good. Someone has to protect humanity from the forces that assail it, and they are willing to do whatever it takes. Moreover, with the strength of their convictions and their new leadership, they just might succeed! Polish your badges, grab your shotguns, and deputize the bravest and best of all the people close to you. Humanity needs all the help it can get… For the Greater Good is scheduled to arrive at retailers in the first quarter of 2015! ... Source: For the Greater Good (http://www.fantasyflightgames.com/edge_news.asp?eidn=5086)
Title: FFG:Ares Games Acquires the License to Publish Age of Conan
Post by: RSSFeeder on 07 October 2014, 02:30:02
Ares Games Acquires the License to Publish Age of ConanAn Expansion, Adventures in Hyboria, Will Be Launched on Kickstarter
Ares Games is proud to announce that a deal has been signed with Conan Properties International LLC to re-launch and expand the Age of Conan strategy board game. "Conan is a classic property with great stories, and the Hyborian world is a wonderful setting for a board game", commented Roberto Di Meglio, Director of R&D of Ares Games, and one of the game authors. "We think that Age of Conan will be a great addition to Ares' catalog, and we have very exciting plan to develop the game." "We're glad to see a re-launch of this game and that its fans are as excited about this expansion as we are," said Jay Zetterberg of Conan Properties International LLC. The Age of Conan strategy board game, based on the popular character and the world created by R.E. Howard, is designed by the same team who created the popular War of the Ring board game. In Age of Conan up to 4 players take the reins of one of the most powerful Hyborian Kingdoms – Aquilonia, Turan, Stygia and Hyperborea. Using armies, sorcery and intrigue, each Kingdom tries to gain supremacy over the opponents, while Conan – a powerful character striding across lands and completing countless adventures – can switch his allegiance from one Kingdom to the other, while at the same time progressing in his own path from thief to king. The game was launched in the English language in 2009 by Fantasy Flight Games. Since its launch, Age of Conan acquired a faithful fan base, clamoring for the game to be expanded. 
Thanks to an agreement with Fantasy Flight Games, Ares Games has acquired all the remaining inventory of the 1st English edition of the game, and will relaunch it by publishing an expansion – Adventures in Hyboria – with a strong spotlight on Conan himself, giving a new dimension to his role in the game, and adding new elements to give more character and more flavor to each Kingdom. Steve Horvath, SVP of Communications, from Fantasy Flight Games commented: “We are certain that Age Of Conan is in great hands with Ares Games and we are excited to see how they develop the line going forward.” Christoph Cianci, CEO of Ares Games, said: "We are very happy that, thanks to the amicable deal with Fantasy Flight Games, we will be able to offer immediately the current edition of the Age of Conan strategy board game to our customers. We look forward to relaunch this great game with the new expansion. The design elements added by Adventures in Hyboria make the game even more exciting, giving a new depth to the interaction between players and to the adventuring life of Conan." Age of Conan: Adventures in Hyboria will be launched on Kickstarter in October, 2014, and is scheduled for release in Spring 2015.
About Ares Games Ares Games is an Italian board game publisher established in 2011 to create quality hobby products for the international audience. Ares Games is the publisher of the award-winning War of the Ring board game, of the Wings of Glory range of airplane combat games and miniatures, recreating aerial warfare in WW1 and WW2, and more recently of the tactical ship-to-ship miniature game Sails of Glory and the cooperative tactical Sci-Fi miniatures game Galaxy Defenders. Ares Games’ catalog also includes Family Games and Euro Games. For further information, visit their website, www.aresgames.eu, and their Facebook page: https://www.facebook.com/AresGames. ... Source: Ares Games Acquires the License to Publish Age of Conan (http://www.fantasyflightgames.com/edge_news.asp?eidn=5089)
Title: FFG:Worldeater
Post by: RSSFeeder on 07 October 2014, 11:00:04
WorldeaterJeremy Zwirn Recounts the Warhammer 40,000: Conquest Tournament at Gen Con
Gather your armies and battle for the Traxis sector in Warhammer 40,000: Conquest! In this new Living Card Game®, you take on one opponent in interplanetary battles, fielding armies and fighting for the future of the sector. At Gen Con Indy 2014, we hosted the inaugural Worldeater tournament, which was won by none other than Jeremy Zwirn, a World Champion of three other LCGs. Today, Jeremy Zwirn shares his experiences from the tournament, including the choices and strategies that led him to victory. Jeremy Zwirn on the Worldeater Tournament Hello, Warhammer 40,000 fanatics! I had the pleasure of participating in the inaugural tournament at Gen Con Indy 2014 for FFG's newest LCG, Warhammer 40,000: Conquest. After an entire day of epic battles and victories, I was fortunate enough to come out on top and I'd like to share my experience with you. 
Choosing My Factions
The Worldeater tournament at Gen Con had a unique restriction: only cards from one Core Set could be used when constructing your deck. This restriction created a different environment from regular constructed decks: higher cost curves, fewer multi-shield cards, and a higher degree of randomness were all things that I considered when choosing which factions to play in the tournament. Because each faction can be paired with one of two allied factions – resulting in fourteen completely different pairings – there were a lot of intriguing deckbuilding choices.  With only one Core Set, I had to build a 50 card deck out of roughly 56 possible cards, so every card mattered. In the tournament, I played Space Marines allied with Tau, and I was very pleased with how it played: it provided great depth and consistency, both of which I value highly in a deck. Captain Cato Sicarius (Core Set, 1) has a great resource-generating ability and his signature pack is full of solid cards. Combat tricks can win battles and Space Marines has a good selection of them: Drop Pod Assault (Core Set, 24), Eager Recruit (Core Set, 20), Indomitable (Core Set, 25), and Veteran Brother Maxos (Core Set, 19) all provided the surprise factor. Sicarius's Chosen (Core Set, 8) was definitely great all day – more on that later. With only one Core Set, I had to build a 50 card deck out of roughly 56 possible cards, so every card mattered. In the tournament, I played Space Marines allied with Tau, and I was very pleased with how it played: it provided great depth and consistency, both of which I value highly in a deck. Captain Cato Sicarius (Core Set, 1) has a great resource-generating ability and his signature pack is full of solid cards. Combat tricks can win battles and Space Marines has a good selection of them: Drop Pod Assault (Core Set, 24), Eager Recruit (Core Set, 20), Indomitable (Core Set, 25), and Veteran Brother Maxos (Core Set, 19) all provided the surprise factor. Sicarius's Chosen (Core Set, 8) was definitely great all day – more on that later.
Splashing Tau gave me inexpensive units like Vash'ya Trailblazer (Core Set, 153), Earth Caste Technician (Core Set, 157), and Vior'la Marksman (Core Set, 151). These units, along with neutral units Void Pirate (Core Set, 170) and Rogue Trader (Core Set, 171), allowed me to deploy multiple units on the first turn and win or prevent my opponent from winning several command struggles. Two copies of Experimental Devilfish (Core Set, 161) were valuable both for their high attack and for their ability to ready after committing to a planet, keeping pressure on my opponents. Fire Warrior Elite (Core Set, 154) is a stellar card that helped protect strong but fragile units, like the Devilfish. Tau complemented Space Marines well with a low unit curve and enough command icons to win command struggles.  
Eating the World The sold-out Worldeater tournament had 96 participants and featured six rounds of play before cutting to the Top 8. Space Marines, Astra Militarum, and Eldar were well represented while the Orks and Tau were less so. On the day, I battled against every faction but Orks and Tau. Sicarius's Chosen was my MVP; he picked off low-health units like Void Pirates or lured important units away from the first planet before a crucial battle. Pulling a Vicious Bloodletter (Core Set, 85) away from the first planet before he decimated my units with Area Effect 3 was amazing. I played several truly intense and epic games against challenging and friendly opponents. My games were full of tough decisions and tense situations which gave me a very satisfying experience. After a grueling eleven-hour day, the most important piece of advice I would give is: choose your battles wisely. Many games were essentially decided when one player made a suboptimal choice and committed their warlord to the wrong planet. 
In one game, my opponent had a couple mediocre units at the first planet and both of us had only a warlord in HQ. With only one icon, the planet wasn’t crucial for either of us to win the game, but I decided to fight for it anyway. I deployed a Blood Angels Veterans (Core Set, 15) and a Tactical Squad Cardinis (Core Set, 13) there and we both committed our warlords there. Having the initiative at a battle with several units is a huge advantage. In this instance, my opponent had initiative, and I quickly realized my mistake. My Blood Angels Veterans was destroyed and I wasted a couple cards with shields trying to salvage a bad situation. I retreated with little to show for the battle and gave my opponent the momentum to take control of the game. I poorly chose to fight for a planet that I should have conceded to my opponent, and I paid for it. Luckily, he also made a mistake later on by committing his warlord and two units in HQ to the second planet, preparing for next turn instead of further defending the first planet. I sent my warlord to the first planet and played an Eager Recruit to win the planet and the game.
During another game, I quickly fell behind and lost the first two planets to my opponent's aggressive start. At the beginning of the third turn, I realized I needed to go all in at the first planet. Although my opponent wouldn't immediately win if he claimed the planet, I could prevent either of us from winning via planets until the last turn of the game if I won the battle there. I deployed several strong units to the first planet, and since I had initiative, my opponent committed his warlord elsewhere and let me have it without a fight. From that point on, I focused on protecting my warlord and winning the final planet by saving several key cards, like Daring Assault Squad (Core Set, 16), until the last turn. If I hadn't pushed so hard to win the third planet of the game, I would have had my back against the wall and given my opponent several chances to win the game (which I’m sure he would’ve done). Even though I depleted all of my resources and had few cards remaining in my hand, I chose the right time to battle and was able to buy myself enough time to recuperate for the epic final battle.
Warhammer 40,000: Conquest is a highly strategic and tactical game and balancing these aspects creates a deeply compelling game experience. Do you focus on winning battles in the present or plan for future conquests by gathering the resources to smash your opponent? Experience will help you decide which to choose and how to command your forces.
Thanks to FFG and Eric Lang for creating another excellent game to add to the outstanding LCGs. I highly recommend giving this game a try and I hope to meet you on a future battlefield!
Claim Your Planets Thanks, Jeremy! Jeremy Zwirn is an avid card gamer and has been a World Champion for three different LCGs. You can look for more Warhammer 40,000: Conquest guest articles from other writers in coming months! ... Source: Worldeater (http://www.fantasyflightgames.com/edge_news.asp?eidn=5090)
Title: FFG:STAR WARS (R): Force and Destiny (TM) Beta Update #4
Post by: RSSFeeder on 07 October 2014, 19:30:03
STAR WARS (R): Force and Destiny (TM) Beta Update #4News From the Developers of the Force and Destiny Beta
Hello Force and Destiny™ beta testers, In this fourth week of the Force and Destiny beta, we have our third round of updates (pdf, 308 KB). Now that people have had some time to build characters and submit feedback, we’re pleased to post some updates on our specializations and talents. Not all of the specializations are seeing changes, but there are some substantial modifications to the Protector, Soresu Defender, and Aggressor, with some minor changes to the Makashi Duelist and Shadow. The Soresu Defender gains Improved Reflect (a potent addition to this highly defensive form) while the Protector gains two ranks of Center of Being.  This means it’s possible to build a Protector that is unlikely to suffer critical injuries. Meanwhile, the Aggressor gets a new talent that lets him inflict additional damage when attacking disoriented targets. Not only does this talent offer nice synergy with his Terrify talent, it also allows him to inflict additional damage with any type of combat check, meaning the Aggressor can make more effective use of blasters, blades, lightsabers, or even his fists. This means it’s possible to build a Protector that is unlikely to suffer critical injuries. Meanwhile, the Aggressor gets a new talent that lets him inflict additional damage when attacking disoriented targets. Not only does this talent offer nice synergy with his Terrify talent, it also allows him to inflict additional damage with any type of combat check, meaning the Aggressor can make more effective use of blasters, blades, lightsabers, or even his fists. We also made some necessary changes to talents such as Duelist’s Training, and added some clarifying language for talents that specify Lightsaber (characteristic) combat checks. A Word on Morality One thing we’d like to mention is that a lot of you have expressed opinions about the option of starting with a lower Morality, specifically that the assumption is that starting with a lower Morality is strictly “bad,” and it should come with a beneficial tradeoff or not be an option at all. However, when we came up with these starting options, one of our design goals was to not assume that everyone would want to play light side Force users (even though we’d like to think most of you play “good guys”). Instead, we had to assume that some people would want to play dark side Force users, and that this was a perfectly reasonable choice for them to make. In this case, any reduction of Morality in exchange for credits or experience would only be a boon for someone who was going to push his or her Morality as low as possible as fast as possible. For these reasons, we had to assume that any change in starting Morality (whether up or down) would be considered desirable to someone, somewhere, and thus it couldn’t be coupled with additional benefits as well. However, we’ve also revised the status effects for having a low Morality to offer dark side Force users more of a balanced tradeoff for their decisions; they get tougher even as they lose their inner peace.
Looking Forward We look forward to hearing your feedback on this week’s changes, and we continue to welcome your feedback on character creation and specializations in general. Meanwhile, we plan on focusing next week’s update on gear and equipment. Please give us your thoughts on the new gear and items that we have in this book, with particular focus on lightsabers and lightsaber crystals. Once again, thanks again for all your hard work and dedication! ... Source: STAR WARS (R): Force and Destiny (TM) Beta Update #4 (http://www.fantasyflightgames.com/edge_news.asp?eidn=5091)
Title: FFG:Gates of Arkham
Post by: RSSFeeder on 08 October 2014, 04:00:03
Gates of ArkhamAnnouncing the Second Expansion for Elder Sign
Witch-cursed, legend-haunted Arkham, whose huddled, sagging gambrel roofs and crumbling Georgian balustrades brood out the centuries beside the darkly muttering Miskatonic.
–H. P. Lovecraft, The Thing on the Doorstep Fantasy Flight Games is proud to announce the Gates of Arkham expansion for Elder Sign, a cooperative dice game of Lovecraftian horror. 
Gates of Arkham takes the struggle against the Ancient Ones out of the museum and into Arkham, where monsters lurk in darkened alleyways and bystanders become the victims of gang rivalries. In the featured Streets of Arkham game mode, new Arkham Adventures and Mythos decks replace the original Adventure and Mythos decks, sending investigators on adventures throughout the city as four new Ancient Ones threaten to arise. Only by braving the city’s ubiquitous perils can you triumph against the ancient and awakening evil. A City Full of Horrors From its colonial-era founding, Arkham has been a refuge for witches and criminals, and legends suggest that since prehistoric times it has been home to some of the darkest forces imaginable. The turrets of Victorian homes, classical facades of Miskatonic University buildings, and tall booths of Velma’s Diner concealed inhuman horrors long before monsters came alive inside the museum. 
In the Streets of Arkham mode, investigators choose which location in Arkham to visit without knowing what will happen to them inside. Arkham Adventure cards are played facedown, each featuring a specific location on the back. Some locations lure you towards them by offering rewards, such as the chance to regain sanity or gain a unique item. Others make terrible things happen at the stroke of midnight, for example, causing a ravenous Night Gaunt or giant Leng Spider to appear. When an investigator arrives at a location, the card is flipped over to reveal the Adventure. At Hibb’s Roadhouse, you may participate in dark dealings with suspicious figures, or get caught in a police raid on the Sheldon gang. In the Curiositie Shoppe, you may discover a sealed ornate chest from another civilization, or you may arrive to find the door smashed open and a trail of blood leading inside. Once the adventure is revealed, there is no turning back. If you fail in your tasks, other investigators may come to your rescue, or you may find yourself running back out into the streets, drained of sanity and stamina. Success may reveal an elder sign or, at the very least, provide some clue, item, or skill to help you persevere. 
Street Smarts and Occult Knowledge As you navigate Arkham and survive its unpredictable Adventures, you’ll acquire lasting knowledge and enhanced abilities in the form of skills. For example, you may elicit some Occult Knowledge from a Miskatonic University professor. Unlike items, spells, and allies, skills may remain with an investigator as long as he lives, or be sacrificed in a moment of necessity to gain an even greater advantage. Some locations and items give investigators membership in Arkham’s most influential organizations: the ruthless Sheldon gang, a bootlegging syndicate as infamous for their murders as their moonshine, and the Silver Twilight Lodge, an ancient and mysterious organization rumored to practice dark magic in the dead of night. Memberships sometimes allow you to bypass a task and sometimes offer extra rewards, such as an elder sign or an ally, for completing an Adventure. 
Given Arkham’s perils, you may want to play one of the eight new investigators who are well versed in Arkham’s secrets or the bizarre physics of Other Worlds. As a cop, Tommy Muldoon knows Arkham’s criminal underworld as well as the Sheldon gang bosses. More interested in helping others than himself, Tommy can prevent another investigator from losing stamina by giving up his own– and gain some sanity in the process. Being a cop, however, doesn’t prevent Tommy from joining the Sheldon gang or the Silver Twilight Lodge. All secret organization have their police contacts. Unstable Locations and Unexpected Events Gates of Arkham introduces four Ancient Ones who tear at the fabric of space and time as they begin to awaken. One of them is Atlach-Nacha, who is stirring in his transdimensional home and beginning to weave the worlds together, tugging at time and space, sapping the investigators’ sanity and stamina, and causing gates to Other Worlds to open across the city. Gates tie specific locations to Other Worlds, perhaps linking the Miskatonic Library to the Far Side of the Moon, or Velma’s Diner to the cavernous, underworld Vaults of Zin. You cannot visit a location that has a gate without slipping through to the Other World, and you must resolve the Other World adventure in order to seal the gate and return to Arkham. The more open gates in play, the more monsters spawn, and the faster doom approaches. 
Not only do gates breach the physical environment, the awakening Ancient Ones wreck havoc in all aspects of life in Arkham. The social, psychological, and cosmic chaos is represented by Event cards, which many locations force you to draw before you undertaking any tasks. Events create unpredictable conditions that last the length of your Adventure, and may hinder or help you. Overwhelming Fear could cause you to flee from a location in terror, or a sympathetic stranger may come forward and offer you Unexpected Aid. Can you Survive the Streets of Arkham? You never know who or what you’ll encounter among Arkham’s crumbling buildings, desolate squares, and unlit roads. At any moment a tentacle could reach out for you. Around any corner may be the entrance to some Other World. As you scour the city for elder signs, you could become involved in criminal rivalries or clandestine rituals, arrested by the police or lost in the halls of an insane asylum. Only one thing is certain: the Ancient One is regaining strength, and it is up to you and your fellow investigators to save not just the museum, but Arkham and the entire world. Gates of Arkham will appear in stores in the first quarter of 2015. In the meantime, look for further previews of Arkham’s locations, gates, Ancient Ones and investigators on the Gates of Arkham and Elder Sign minisites. Even better, you can demo the expansion at Arkham Nights, our upcoming celebration of Lovecraft-themed games on the weekend of October 17-18 in Roseville, MN. ... Source: Gates of Arkham (http://www.fantasyflightgames.com/edge_news.asp?eidn=5088)
Title: FFG:Zogwort's Curse
Post by: RSSFeeder on 08 October 2014, 12:30:03
Zogwort's CurseAnnouncing the Fourth War Pack for Warhammer 40,000: Conquest
“I meant ta do dat.”
–Old Zogwort Fantasy Flight Games is proud to announce Zogwort’s Curse, the fourth War Pack in the Warlord cycle for Warhammer 40,000: Conquest! Embrace the frenzied power of the Orks with the Zogwort’s Curse War Pack. Now, you can draw on the power of the Waaagh! to conquer the Traxis sector. This expansion continues the major themes of the Warlord cycle, including cards that give greater power and importance to any warlord. In Zogwort’s Curse, you’ll find new cards for every faction, including powerful Vehicles for the Astra Militarum, dark powers for the servants of Chaos, and new Drones for the Tau. No matter which factions you play in Warhammer 40,000: Conquest, there are plenty of beneficial cards in this War Pack. 
You also have the opportunity to gather hordes of snotlings and follow the path of a fearsome Psyker with a new Ork warlord and his signature squad! Blessed by Gork and Mork 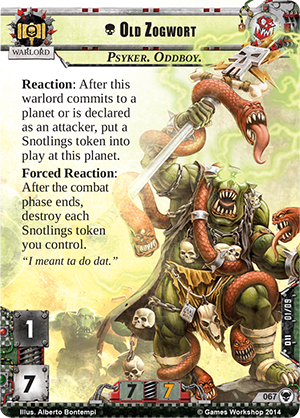 The Orks of the Traxis sector gain a new warlord with Old Zogwort (Zogwort’s Curse, 67). This Ork Psyker taps into vast amounts of power, which he wields to spread the dominion of the Orks and conquer the planets of the Traxis sector. Great power has been known to draw many willing underlings, and that is especially true of Old Zogwort. He bears a Reaction that reads: “After this warlord commits to a planet or is declared as an attacker, put a Snotlings token into play at this planet.” With this ability, Old Zogwort has the potential to create several Snotlings in just one battle. These units can quickly become overwhelming in large numbers, picking away at your opponent’s forces, and forcing him to use attacks to destroy them. The Orks of the Traxis sector gain a new warlord with Old Zogwort (Zogwort’s Curse, 67). This Ork Psyker taps into vast amounts of power, which he wields to spread the dominion of the Orks and conquer the planets of the Traxis sector. Great power has been known to draw many willing underlings, and that is especially true of Old Zogwort. He bears a Reaction that reads: “After this warlord commits to a planet or is declared as an attacker, put a Snotlings token into play at this planet.” With this ability, Old Zogwort has the potential to create several Snotlings in just one battle. These units can quickly become overwhelming in large numbers, picking away at your opponent’s forces, and forcing him to use attacks to destroy them.
Unfortunately, Old Zogwort’s psychic outbursts can prove dangerous to those around him. His Forced Reaction destroys all of your Snotlings tokens at the end of the combat phase. Although your hordes of Snotlings won’t live past the end of a combat phase, they can cause quite a bit of damage during the battles where they can congregate in large numbers. What’s more, Old Zogwort’s signature squad offers plenty of other ways to maximize the amount of Snotlings you control. This signature squad begins with four copies of Zogwort’s Runtherders (Zogwort’s Curse, 68). This unit increases the amount of Snotlings you can gain in a single combat phase even more. Whenever one of Zogwort’s Runtherders takes damage, you can put a Snotlings token into play at its planet. With three HP, you can potentially get three Snotlings from each of Zogwort’s Runtherders before it dies, increasing the numbers of your Greenskin horde.  Zogwort’s Hovel (Zogwort’s Curse, 69) offers another chance to bring more Snotlings into play. Whenever Old Zogwort is declared as a defender and Zogwort’s Hovel is in play, you may put a Snotlings token into play at the same planet as your warlord, swelling his armies of Snotlings to truly unprecedented levels. Your opponent is forced to attack Old Zogwort if he wants to stop the flow of Snotlings, but every attack against Old Zogwort only spawns more Snotlings with Zogwort’s Hovel in play. Zogwort’s Hovel (Zogwort’s Curse, 69) offers another chance to bring more Snotlings into play. Whenever Old Zogwort is declared as a defender and Zogwort’s Hovel is in play, you may put a Snotlings token into play at the same planet as your warlord, swelling his armies of Snotlings to truly unprecedented levels. Your opponent is forced to attack Old Zogwort if he wants to stop the flow of Snotlings, but every attack against Old Zogwort only spawns more Snotlings with Zogwort’s Hovel in play.
The free Wyrdboy Stikk (Zogwort’s Curse, 70) attachment calls still more Snotlings to Old Zogwort’s banner. This Wargear attachment can be attached to any Oddboy unit, such as Old Zogwort or one of Zogwort’s Runtherders. With this attachment, whenever a Snotlings token is destroyed, you may exhaust the Wyrdboy Stikk to put a Snotlings token into play at any planet, giving your Snotlings greater resilience than ever before. In Warhammer 40,000: Conquest, Snotlings can pick even a mighty Space Marine apart if there are enough of them. But Old Zogwort’s signature squad gives your Snotlings a greater purpose as cannon fodder with Launch da Snots (Zogwort’s Curse, 71). This event reads: “Reaction: After an Ork unit you control is declared as an attacker, it gets +X ATK for that attack. X is the number of Snotlings tokens at the same planet as the attacking unit.” With the massive amounts of Snotlings that Old Zogwort can easily amass, Launch da Snots can easily add a truly punishing amount of damage to another unit’s attack, crushing all who stand in the way of Old Zogwort and the power of the Waaagh! Greenskin Assault Whether you gather numberless hordes of Snotlings with Old Zogwort, track down your prey with the Space Wolves, torture your foes with the Dark Eldar, or lead a Vyper Squad attack with the Eldar, you’ll find the cards you need in the Zogwort’s Curse War Pack. Look for Zogwort’s Curse at your local retailer in the first quarter of 2015! ... Source: Zogwort's Curse (http://www.fantasyflightgames.com/edge_news.asp?eidn=5092)
Title: FFG:The Frozen Frontier
Post by: RSSFeeder on 08 October 2014, 21:00:03
The Frozen FrontierPreview the Antarctic Locations of Eldritch Horror: Mountains of Madness
The effect was that of a Cyclopean city of no architecture known to man or to human imagination, with vast aggregations of night-black masonry embodying monstrous perversions of geometrical laws and attaining the most grotesque extremes of sinister bizarrerie.
–H. P. Lovecraft, At the Mountains of Madness Uncover Antarctica’s nightmarish secrets in Mountains of Madness, a side board expansion for Eldritch Horror. In Mountains of Madness, players follow the path of an ill-fated Antarctic expedition that encountered magnificent ruins and unspeakable horrors.You and your fellow investigators must find out what happened to that expedition and prevent the savage creatures stirring in the ice from growing strong enough to enslave– or annihilate– humanity. Today’s preview will prepare you for your exploration of Antarctica by providing a glimpse of the locations you can visit in Antarctica and the terrifying things, from mutilated human bodies to horrific prehistoric carvings, you may find there. The new Outpost, Mountain, and Antarctic Research Encounter cards featured in Mountains of Madness bring to life the gory trail of the previous Miskatonic expedition, the mind-blowing remains of a previous civilization and the harsh conditions of the Antarctic climate. We’ll also introduce some of the human and material Unique Assets that can help you survive in that brutal, frozen land.
The Miskatonic Outpost and Professor Lake’s Camp Your gateway to the farthest reaches of Antarctica is the Miskatonic University outpost, where your expedition will come together and you’ll be equipped with provisions and transportation as you acclimate to the cold. You can reach the outpost from any coastal city by ship or from the Antarctica space on the main game board. Once there, you can use an action to purchase a ship ticket, securing your passage back to Arkham, or attempt to persuade an Antarctic Guide to help you survive the trials that lie ahead. Or, you may meet the only two survivors of the previous Miskatonic expedition, the geologist William Dyer and the graduate student Danforth, and gain their assistance. Lake Camp is the last known location of the group who first explored the region beyond the Snowy Mountains. Moreover, it is the only place in Antarctica where you can Acquire Assets, and the only place where you can find a sled and the dogs to pull it. There, Professor Lake and his colleagues found the frozen remains of ghastly, prehistoric creatures, the Elder Things, whom they – incorrectly – assumed to be dead. There Professor Lake and many others were brutally killed, and the camp has not been altered since their deaths. Inside any tent you may find his dissected corpse preserved by the cold. Any mound of snow may conceal a clue. Any track through the snow may signal where the Elder Things that ravaged the camp went. Be careful, however: it is likely that the creatures, so recently awakened from thousands of years of hibernation, did not go far. They may return from their hiding places to attack– or they may still be in the camp, waiting beneath the snow. 
Snowy Mountains and Frozen Waste From Lake Camp you may follow those mysterious tracks through the snow into the lonely Frozen Waste, where the isolation can drive you insane faster than the cold can freeze your blood. But although you and your company may be the only humans for miles in any direction, you are certainly not alone. Vicious monsters who thrive in the cold have inhabited this desolation for millennia, feeding off each other. And now the ghastly and sapient Elder Things roam the expanses in search of tools, information, and prey. By watching one as it forages, you may learn valuable information about their species– or it may sense your presence and attack. If you prefer to avoid an arduous trek through the Frozen Waste, you can go directly from the Miskatonic Outpost over the so-called mountains of madness themselves, the Snowy Mountains which surpass the Himalayas in height. During your flight over the peaks, you may test your will in order to improve one of your skills. It is not wise to bypass this opportunity. What you find on the other side of the mountains is certain to push you to the limits of your abilities. 
The City of the Elder Things and Beyond As you pass over the Snowy Mountains or through the Frozen Waste, strange, dark, non-Euclidean shapes slowly come into view. It is not until you are in the midst of them that you understand that they are immense buildings, the remains of the Elder Things’ vast city. Among the ruins are stunning murals that tell the story of the Elder Things’ rise and fall, aeons ago. If you can comprehend them, the murals may reveal how to stop these ruthless creatures from rising again. Although the majority of Elder Things have abandoned their city, it is not necessarily uninhabited. A few Elder Things may have lingered along with their shadow-like Shoggoth slaves, ravenous and ready to attack any living thing. Beyond the city is a plateau, higher and even colder than the Frozen Waste. The moment you set foot into it, your consciousness becomes troubled, as if time and space no longer quite cohere. This place is the Plateau of Leng, a transdimensional space connected to the Dreamlands, where all Other Worlds come together. From the Plateau of Leng you could walk into earth’s distant future, or the Lake Camp as it was a week ago, or Arkham as it is in the present. By testing your knowledge of lore, or spending a Clue, you can use the plateau’s uncanny physics to leave Antarctica, move into an Other World, and through a gate back to the earthly region where that gate opened. Or you may choose to linger in the plateau and learn more about the ancient civilization that engineered it.
The Answers Are in the Ice Learning the secrets concealed in the Antarctic ice is well worth the risk of being attacked by a monster, losing your sanity, or catching hypothermia. Only by venturing into the remotest parts of that continent can you find out what happened to Professor Lake’s expedition and how to subdue the evil that they awoke. In future previews, we will take a closer look at the new investigators who may join your expedition and at the bizarre, ferocious Elder Things themselves. We will also be demoing Eldritch Horror and Mountains of Madness at Arkham Nights, a celebration of Lovecraftian games that will take place October 17-18 in Roseville, MN. Pre-order Mountains of Madness from your local retailer today! ... Source: The Frozen Frontier (http://www.fantasyflightgames.com/edge_news.asp?eidn=5093)
Title: FFG:Architect
Post by: RSSFeeder on 09 October 2014, 05:30:03
ArchitectA Look at the World Champion Card in the Up and Over Data Pack
As a Living Card Game®, Android: Netrunner is constantly growing and evolving, and part of that growth is directed by the game’s community. Through events like the Plugged-in Tour and the Chronos Protocol Tour, the game’s developers have interfaced with fans around the world to guide the design of upcoming Runner and Corporate identities. Additionally, FFG awards each year’s Android: Netrunner World Champion the opportunity to work closely with the game’s developers to craft a card that will become part of the game. Today, as we await the upcoming release of Up and Over, we’ll take a look at the first of the game’s World Champion cards. Designed by 2012 World Champion Jeremy Zwirn, Architect (Up and Over, 61) is a sophisticated piece of Haas-Bioroid ice that’s certain to add many new layers of tricks, traps, and efficiencies to the game’s constantly evolving cyberstruggles. Jeremy Zwirn on Designing Architect  Being given the opportunity to design a card is really the coolest prize in gaming! I put a lot of pressure upon myself to design an exciting and memorable first World Champion Card for Android: Netrunner, and I'd like to share the process with all of you. Being given the opportunity to design a card is really the coolest prize in gaming! I put a lot of pressure upon myself to design an exciting and memorable first World Champion Card for Android: Netrunner, and I'd like to share the process with all of you.
My goal was to design an interesting card that players would be excited to use for years to come. After considering and scrapping a number of other ideas, I eventually thought about designing a piece of ice. There's a lot of design space for ice that I felt was ripe for exploration, and I found that inspiring. One question that I found particularly compelling ended up at the center of my design, “What if the Corp could install cards like assets, agendas, and upgrades in the middle of a Runner’s run?” I thought about the mind games one could play by installing a card in a server the Runner was currently running. I also liked the idea that the card might discourage Runners from face-checking ice, but instead of punishing the Runner, it would reward the Corp.
Another thing that I wanted to be sure to add to my card was a measure of variance. I like cards with variance because they provide interesting gameplay and high replayability. Gaining the ability to look at the top five cards of R&D and install one of them creates variance throughout each game. Each time it triggers, you get to ask yourself, “What card do I install?” Do you need more ice to protect your servers, or do you want that San San City Grid (Core Set, 92) to start scoring agendas?  It all depends upon the current game state. Adding a second subroutine that would install a card from Archives or HQ further increased variance and provided even more choices. It all depends upon the current game state. Adding a second subroutine that would install a card from Archives or HQ further increased variance and provided even more choices.
Because I was also looking for something to help counter powerful cards, like the ubiquitous Parasite (Core Set, 12). I had thought about adding the ability, “Architect's strength cannot be lowered.” This would have been an incredibly strong ability, but also one better used elsewhere. Also, it wouldn’t have addressed the confusion that could be introduced if the Corp chose to trash Architect while resolving its first subroutine: Would the second subroutine still resolve if Architect was no longer installed? A much better solution prevented any confusion while helping to counter Parasite; I added the ability, “Architect cannot be trashed while installed.”
Playing with a piece of ice that installs cards feels like you’re creating the blueprint for a set of servers that could best impede the Runner, so the name “Architect” felt natural.
Playing with Architect
Even if you don’t install a card each time the Runner triggers Architect’s first subroutine, knowing the top five cards of R&D is still very helpful; you'll know when R&D is vulnerable and when (and when not) to draw cards. Is an agenda sitting on top of R&D? Then draw it, and make the Runner find it in HQ instead. Is an operation or a piece of ice on top? Leave it and let the Runner run R&D fruitlessly. The knowledge of what’s on top of R&D also helps you plan ahead:
- You can save your credits to play that Restructure (Second Thoughts, 40) that's coming up.
- Or you can draw any crucial cards sitting on top of R&D that you might lose by playing a Power Shutdown (Mala Tempora, 58).

Installing cards during the Runner's turn can also trigger other benefits for the Corp:
- You can gain a credit with Haas-Bioriod: Engineering the Future (Core Set, 54).
- You can draw a card with Near-Earth Hub (Upstalk, 5).
- If the Runner triggers Architect on his last click, you can safely install a three-advancement agenda and score it during your next turn!
 
Architect offers additional synergies with a host of popular cards. Knowing what cards are on top of R&D really helps with cards like Accelerated Beta Test (Core Set, 55), Accelerated Diagnostics (Mala Tempora, 52), and Mutate (Upstalk, 4). If the Runner used an icebreaker during the run, install Will-o-the-Wisp (Spaces Between, 32) with Architect to bury the icebreaker on the bottom of his stack. When Architect is protecting an agenda in a remote server and the Runner goes for it, you can install a card in the server via Architect to trash the agenda and prevent the Runner from stealing it during that run. It's even better if the card you just installed is a Snare! (Core Set, 70).
Acknowledgments
I'd like to thank FFG for giving me this unique opportunity to design a card for Android: Netrunner. I'm excited to contribute to one of my favorite games, and I hope all of you enjoy playing with Architect! Thanks, Jeremy! Architect is certain to inspire a range of new deck designs. Will it feature at the center of your schematics? Or will it support an existing deck? You’ll soon have your chance to play with Architect and the other cards from Up and Over. This Data Pack is due to arrive at retailers later this month! ... Source: Architect (http://www.fantasyflightgames.com/edge_news.asp?eidn=5094)
Title: FFG:Announcing the 2014 Worlds Side Event Schedule
Post by: RSSFeeder on 09 October 2014, 14:00:03
Announcing the 2014 Worlds Side Event SchedulePlay Your Favorite Games All Weekend
2014 World Championship Weekend is just over one month away. To help you plan for these awesome four days of gaming, FFG is pleased to announce the 2014 World Championship Weekend side events schedule! Have you booked travel to the Twin Cities? If not, here are more than a dozen reasons to do so! Do you have your eye on specific main events, but are looking for more games to play? Then download the World Championship Weekend side events schedule (pdf, 2.3 MB) now!
The Call of Cthulhu: The Card Game main event helps kick off World Championship Weekend, but there are more fantastic events Call of Cthulhu fans can participate in throughout the weekend. Friday afternoon contains a tournament featuring the popular Conspiracy format, where players must use only Conspiracy cards provided by FFG in their story deck, and on Sunday, players can get their first taste of the 2014 Winter Tournament Kits with a Call of Cthulhu: The Card Game Winter Tournament.
Fans of Star Wars™: The Card Game have the opportunity to play on both Saturday and Sunday in addition to the main event on Friday. Players looking for a team competition can participate in the Saturday morning 2v2 tournament. Team up with a friend or join a player you meet at Worlds as you play against other two-player teams from around the world. Players looking for more head-to-head action have the option of competing on Sunday and receiving prizes from the brand-new Star Wars: The Card Game Winter Tournament Kit.
We will be holding an A Game of Thrones: The Card Game Winter Tournament on Sunday for players looking to see prizes from our new season of tournament kits for the first time. In addition, we will have prize support available all weekend long for any group of players looking to draft A Game of Thrones: The Card Game. All you have to do is show up with a group, each person already holding their draft packs (which can be purchased at the Fantasy Flight Games Center), and we will give your group a box of prize support! We also have a scheduled time slot on Saturday morning in order to get as many players as possible together at once. This scheduled draft still requires players to bring their own draft packs.
We will be running a X-Wing™ Escalation tournaments on both Thursday, Nov. 6th, and Friday, Nov. 7th, for any players not competing in the main event that day. Join in on the extreme squad building and increasing round times as the tournament continues across four rounds. (For more information on the Escalation format, read our tournament rules.) As with all of our other games, we will also be running a Winter Tournament and debuting our newest X-Wing tournament kit on Saturday.
The debut of the Warhammer 40,000: Conquest World Championships in 2014 brings with it many other awesome opportunities to play the game. On Thursday, we will be hosting a Warmup Tournament, giving players a chance to get their first taste of high-skill competition before the main event. On Sunday, we will host a Winter Tournament using the first-ever Warhammer 40,000: Conquest Tournament Kit!
For players that want to warm up and get some practice in with a new deck before the main event, we will be hosting an Android: Netrunner Winter Tournament on Friday. In addition, just like A Game of Thrones: The Card Game, we will be providing Android: Netrunner prize support for any group that already has draft packs and comes to the registration desk. We also have a scheduled time slot on Thursday morning for those looking to kick off World Championship Weekend with Android: Netrunner! This scheduled draft still requires players to bring their own draft packs.
Warhammer: Diskwars players have side events both before and after the Warhammer: Diskwars World Championship. On Friday, they can compete in an all-out brawl with a 4-Player Battle Royale Tournament, where players will face fierce opponents in a 4-player free-for-all each round. Prove that you’re not only the best, but that you can take on multiple enemies at once! On Sunday, players can participate in the Warhammer: Diskwars Winter Tournament that will debut the new Winter Tournament Kit. 
Preregister Today If you haven’t already, preregister now and guarantee yourself a full four days of gaming at the 2014 World Championship Weekend with players from around the world! If you’re still undecided, don’t wait too long because preregistration closes October 16th. While players can still register on site the day they arrive, the cost will increase to $50. 
Stay Tuned Continue to keep your eyes on our website; there are more articles to come. In the future, we’ll be highlighting the prizes competitors can win during the 2014 World Championship Weekend, including some special Gen Con prizes. We will also be providing articles on what it takes to compete in a major tournament from experienced guest authors. ... Source: Announcing the 2014 Worlds Side Event Schedule (http://www.fantasyflightgames.com/edge_news.asp?eidn=5095)
Title: FFG:Announcing the 2014 Worlds Side Event Schedule
Post by: RSSFeeder on 09 October 2014, 22:30:03
Announcing the 2014 Worlds Side Event SchedulePlay Your Favorite Games All Weekend
2014 World Championship Weekend is just over one month away. To help you plan for these awesome four days of gaming, FFG is pleased to announce the 2014 World Championship Weekend side events schedule! Have you booked travel to the Twin Cities? If not, here are more than a dozen reasons to do so! Do you have your eye on specific main events, but are looking for more games to play? Then download the World Championship Weekend side events schedule (pdf, 2.3 MB) now!
The Call of Cthulhu: The Card Game main event helps kick off World Championship Weekend, but there are more fantastic events Call of Cthulhu fans can participate in throughout the weekend. Friday afternoon contains a tournament featuring the popular Conspiracy format, where players must use only Conspiracy cards provided by FFG in their story deck, and on Sunday, players can get their first taste of the 2014 Winter Tournament Kits with a Call of Cthulhu: The Card Game Winter Tournament.
Fans of Star Wars™: The Card Game have the opportunity to play on both Saturday and Sunday in addition to the main event on Friday. Players looking for a team competition can participate in the Saturday morning 2v2 tournament. Team up with a friend or join a player you meet at Worlds as you play against other two-player teams from around the world. Players looking for more head-to-head action have the option of competing on Sunday and receiving prizes from the brand-new Star Wars: The Card Game Winter Tournament Kit.
We will be holding an A Game of Thrones: The Card Game Winter Tournament on Sunday for players looking to see prizes from our new season of tournament kits for the first time. In addition, we will have prize support available all weekend long for any group of players looking to draft A Game of Thrones: The Card Game. All you have to do is show up with a group, each person already holding their draft packs (which can be purchased at the Fantasy Flight Games Center), and we will give your group a box of prize support! We also have a scheduled time slot on Saturday morning in order to get as many players as possible together at once. This scheduled draft still requires players to bring their own draft packs.
We will be running a X-Wing™ Escalation tournaments on both Thursday, Nov. 6th, and Friday, Nov. 7th, for any players not competing in the main event that day. Join in on the extreme squad building and increasing round times as the tournament continues across four rounds. (For more information on the Escalation format, read our tournament rules.) As with all of our other games, we will also be running a Winter Tournament and debuting our newest X-Wing tournament kit on Saturday.
The debut of the Warhammer 40,000: Conquest World Championships in 2014 brings with it many other awesome opportunities to play the game. On Thursday, we will be hosting a Warmup Tournament, giving players a chance to get their first taste of high-skill competition before the main event. On Sunday, we will host a Winter Tournament using the first-ever Warhammer 40,000: Conquest Tournament Kit!
For players that want to warm up and get some practice in with a new deck before the main event, we will be hosting an Android: Netrunner Winter Tournament on Friday. In addition, just like A Game of Thrones: The Card Game, we will be providing Android: Netrunner prize support for any group that already has draft packs and comes to the registration desk. We also have a scheduled time slot on Thursday morning for those looking to kick off World Championship Weekend with Android: Netrunner! This scheduled draft still requires players to bring their own draft packs.
Warhammer: Diskwars players have side events both before and after the Warhammer: Diskwars World Championship. On Friday, they can compete in an all-out brawl with a 4-Player Battle Royale Tournament, where players will face fierce opponents in a 4-player free-for-all each round. Prove that you’re not only the best, but that you can take on multiple enemies at once! On Sunday, players can participate in the Warhammer: Diskwars Winter Tournament that will debut the new Winter Tournament Kit.
Preregister Today If you haven’t already, preregister now and guarantee yourself a full four days of gaming at the 2014 World Championship Weekend with players from around the world! If you’re still undecided, don’t wait too long because preregistration closes October 16th. While players can still register on site the day they arrive, the cost will increase to $50.
Stay Tuned Continue to keep your eyes on our website; there are more articles to come. In the future, we’ll be highlighting the prizes competitors can win during the 2014 World Championship Weekend, including some special Gen Con prizes. We will also be providing articles on what it takes to compete in a major tournament from experienced guest authors. ... Source: Announcing the 2014 Worlds Side Event Schedule (http://www.fantasyflightgames.com/edge_news.asp?eidn=5097)
Title: FFG:The Stars Are Ready...
Post by: RSSFeeder on 10 October 2014, 07:00:06
The Stars Are Ready...The Sleeper Below Is Now Available for Call of Cthulhu: The Card Game
“Some day he would call, when the stars were ready, and the secret cult would always be waiting to liberate him.”
–H.P. Lovecraft, The Call of Cthulhu Sinister cultists hasten their foul rituals. Investigators race to uncover the unspeakable truths behind the relics they’ve acquired. Far below the surface of the ocean, an ancient evil of unfathomable power lies dormant, waiting for the stars to align. And the stars are coming, now, into alignment… The Sleeper Below expansion for Call of Cthulhu: The Card Game is now available at your local retailer and online through our webstore! 
Terrible Cthulhu and his secret cult are the undisputed stars of The Sleeper Below. Roughly two-thirds of the expansion’s 165 cards (three copies each of fifty-five individual cards) are dedicated to the game’s Cthulhu faction, and even as they greatly bolster a number of synergies among the game’s Cultists, they introduce a new Dormant mechanic, which adds horrifying new layers of intrigue to your struggles. Cards with the Dormant keyword can play facedown to a story, and they can then be played for free when that story is won. This means that winning a story isn’t always so good as it used to be; your victory can potentially rouse a Hunting Wendigo (The Sleeper Below, 16) or even wake dead Cthulhu (The Sleeper Below, 19). For a more complete picture of all that The Sleeper Below adds to Call of Cthulhu: The Card Game, you can read our previews:
- In “The Terrors That Lie Dormant,” we illustrate how the expansion and Cthulhu faction make use of their new Dormant cards to compound your story struggles with all new layers of madness.
- In “The Cult of Cthulhu,” we look at how the expansion and its numerous Cultist characters greatly enhance the Cult of Cthulhu, and the Cultist subtype, in general.
- In “Clandestine Cultists and Secret Societies,” we look at how the other factions hope to respond to the growing menace that Cthulhu and his secret cult present. New Societies that grant each faction the means to recover from early setbacks.
- Finally, in “Even Death May Die,” we explore how the game further develops a mechanic that removes cards from the game and makes us increasingly aware of a fate worse than death and the discard pile.
For now, though, we offer you another small taste of the terrible power that Cthulhu grants his disciples… Fueled by the Sacrifices of the Faithful “In his house at R’lyeh dead Cthulhu waits dreaming.”
–H.P. Lovecraft, The Call of Cthulhu In the dark and distant corners of the world, in back alleys and shadowed tenements, the Cult of Cthulhu has slowly gained strength through its sacrifices, preparing for that horrible day when it would be able to rouse its wretched master, the great Cthulhu, from his long slumber. To illustrate the cult’s growing power and influence, we present a sample deck built from one Core Set, one copy of The Sleeper Below, and a single copy of Never Night, the fourth Asylum Pack in the Ancient Relics cycle. 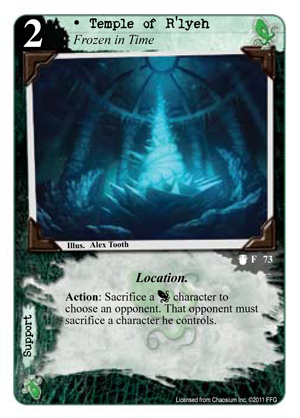 Characters (32): Characters (32):
1x Asuilaak
3x Bone Sculptor
2x Cthulhu, The Sleeper Below
1x Fiona Day
1x Followers of R’lyeh
3x Gustaf Johansen
2x Henry Anthony Wilcox
1x Hunting Wendigo
1x Ian Hardaway
3x Initiate of Dagon
1x Innsmouth Troublemaker
1x Kassogtha
1x Keeper of the Golden Path
1x Lord of the Silver Twilight
3x Mariner
3x Obsessive Zealot
1x Ocean Crawlers
 3x Watcher of Signs 3x Watcher of Signs
Supports (9):
1x Irem
1x Sword of Y’ha-tallo
3x Temple of R’lyeh (Never Night, 73)
3x Twisted Acropolis
1x Unaussprelichen Kulten Events (9):
1x Deep One Assault
1x Eldritch Nexus
3x Foul Induction
1x From the Depths
1x Get it Off!
1x Political Demonstration
1x Sacrificial Offerings Total Cards: 50 This deck uses the Temple of R’lyeh, Gustaf Johansen (The Sleeper Below, 3), and a veritable horde of Cultists to remove your opponent’s characters from the board, win stories, and rouse such Dormant evils as the Hunting Wendigo, Lost Civilization of Irem (The Sleeper Below, 27), and Cthulhu, himself. The Temple of R’lyeh is your key card, as it allows you to sacrifice one of your numerous Cthulhu characters in order to force your opponent to sacrifice a character. Then, because your characters are mostly inexpensive, and because you have three copies of Twisted Acropolis (The Sleeper Below, 22), you should be able to outpace your opponent’s board position. 
Simultaneously, Gustaf Johansen provides you the key to additional card draw, aided in part by Unaussprelichen Kulten (The Sleeper Below, 25), and should you ever start to run low on characters, you can play Foul Induction (The Sleeper Below, 31) to retrieve as many as six characters from your discard pile, thanks to the fact that the Initiate of Dagon (The Sleeper Below, 1) is a Cthulhu Cultist that costs exactly zero. As your Cultists continue to force the sacrifice of every character your opponent plays to the table, you should be able to continue advancing your nefarious plots unopposed, grabbing two or more success tokens at each story, each turn. Victory will quickly be yours, Cthulhu will rise from the deep, and the frail threads of human civilization will be torn asunder! We Are Not Alone “There was a secret which even torture could not extract. Mankind was not absolutely alone among the conscious things of earth, for shapes came out of the dark to visit the faithful few. But these were not the Great Old Ones. No man had ever seen the Old Ones. The carven idol was great Cthulhu, but none might say whether or not the others were precisely like him.”
–H.P. Lovecraft, The Call of Cthulhu The most horrifying truth realized by the characters of H.P. Lovecraft’s eerie fiction is that we are not alone. Humanity is not the only sentient life in the universe. We live on a tiny planet hurtling the vast emptiness of space, surrounded by billions of uncaring stars and rocks. Simultaneously, other entities travel unobserved to our world to pursue their own alien agendas. Some of these may be relatively harmless, but many seek to destroy or devour us. Those who become aware of these terrors most often go mad, but some steel their minds and act to shield humanity from these threats. Still, others seek to gain power and favor from these unfathomable beings, and in The Sleeper Below, you’ll find those power-hungry characters have pushed the world to a precipice. Will they finally tip us over the edge? The Sleeper Below is now available at your local retailer and online through our webstore! ... Source: The Stars Are Ready... (http://www.fantasyflightgames.com/edge_news.asp?eidn=5102)
Title: FFG:Launch a Crusade
Post by: RSSFeeder on 10 October 2014, 15:30:03
Launch a CrusadeCrusade of the Forgotten Is Now Available for Descent Second Edition
The cult of the Forgotten has grown to uncontrollable levels and now bursts forth upon the realm of Terrinoth! The Crusade of the Forgotten Hero and Monster Collection is now available for Descent: Journeys in the Dark Second Edition, both online through our webstore and at your local retailer. Within this Hero and Monster Collection, you’ll find the monster groups that support the cult of the Forgotten and the heroes you need to quell the rising threat. You’ll uncover thirteen sculpted plastic figures, previously only available in the first edition of Descent, including four heroes, two golems, three medusae, and four sorcerers. You’ll also find two brand-new quests – Crusade of the Forgotten and Shadowside Watch – that allow you to experience the heroes’ battles against the Forgotten firsthand.
Contains four heroes, two golems, three medusae, and four sorcerers.
Stop the Forgotten In past previews of Crusade of the Forgotten, we’ve explored the monsters employed by the sorcerers of the Forgotten and the heroes who dare to stand against this evil. Our first preview introduced Andira Runehand, a gifted Healer with a passion for vanquishing the monsters of Terrinoth. We also looked at the medusae, serpent demons skilled in dark magic and capable of inflicting any number of conditions upon the helpless heroes they beguile. The second preview turned to Astarra, a sorceress and an expert in teleportation and magical movement. With her in your hero party, you can be sure that your heroes will get to wherever they need to be. We also examined the mountainous strength of the golems, ancient creatures drawn from living stone. These beasts are nearly unshakable, and only the most powerful of blades can pierce their rocky hide. Protector of the Innocent You’ll also find Tahlia, a capable Warrior, in Crusade of the Forgotten. There was a time when the slums of Irram became infected with a multitude of strange and wicked cults. The poor were enslaved, the temples closed their doors, and the city rotted from within. Leading a small band of vigilantes, Tahlia stormed basements and back rooms night after night, rooting out the cultists. She passed over the wicked like a shadow, and disappeared into the night before their bodies could hit the ground. She was unable to save her city from its descent into evil, so now she fights the Forgotten to save Terrinoth from a similar fate. 
As a Warrior, Tahlia is most at home in the midst of a fight, and nothing fans her zeal for battle more than defeating the overlord’s monsters. In fact, Tahlia’s hero ability allows her to gain two movement points whenever she defeats a monster, giving her a wide range of motion across the battlefield and bringing her blades closer to other monsters. Tahlia’s heroic feat gives her another chance to slake her thirst for vengeance. Whenever the overlord activates a monster adjacent to Tahlia or moves a monster adjacent to her, you may trigger her heroic feat to immediately attack the monster. After the attack finishes, the monster continues its turn, but if you can slay the monster, you’ll have stopped it from accomplishing whatever dark aim the overlord had in mind. What’s more, killing a monster still grants you two movement points, which you can immediately use to move towards your quest’s objective. Free the Helpless The expanse of Terrinoth lies before you. Will you lead the Forgotten across it with fire and sword, or will you make your stand and defend the people of the realm? Whichever you decide, you’ll find the heroes, monsters, and quests you need in the Crusade of the Forgotten Hero and Monster Collection!
Pick up your copy of Crusade of the Forgotten at your local retailer today! ... Source: Launch a Crusade (http://www.fantasyflightgames.com/edge_news.asp?eidn=5103)
Title: FFG:A Hobbit and His Burden
Post by: RSSFeeder on 11 October 2014, 00:00:02
A Hobbit and His BurdenThe Road Darkens Saga Expansion Is Now Available for The Lord of the Rings
“Rewards!” said Frodo, “I can’t imagine a more severe punishment. You are not thinking what you are saying: condemned to go on this hopeless journey, a reward? Yesterday I dreamed that my task was done, and I could rest here, a long while, perhaps for good.”
–J.R.R. Tolkien, The Fellowship of the Ring The second The Lord of the Rings Saga Expansion is now available at your local retailer and online through our webstore! The adventures of The Road Darkens begin in Rivendell at the Council of Elrond and sweep you along through some of the most dangerous and thrilling encounters from both The Fellowship of the Ring and The Lord of the Rings: The Card Game. Directly inspired by the novel, the expansion’s three scenarios allow you to come as close as possible to walking alongside Frodo Baggins and his companions without finding your name scrawled in the pages. Fight past evil Wargs and the Watcher in the Water to gain entrance to Moria, flee from Cave Trolls and the Balrog, and piece your Fellowship back together after it splinters when Frodo disappears at Amon Hen. Just as J.R.R. Tolkien’s much-beloved fantasy saga is full of noble heroics, powerful villains, and cutting treachery, The Road Darkens races forward, plummeting from tremendous highs to the pits of despair, and then allowing you the chance to fight your way back toward the light. You’ll find new heroes and allies willing to accompany you along the way, and you’ll find new boons and burdens that ensure your every choice carries a meaningful and lasting consequence. 
Continue Your Campaign As a Saga Expansion, The Road Darkens does more with its scenarios than introduce three fun and exciting challenges; it continues the epic narrative that began in The Black Riders Saga Expansion and that will continue in future The Lord of the Rings Saga Expansions, as Frodo and his companions travel closer to the dark lands of Mordor. Accordingly, in Campaign Mode, your struggles are given more weight and consequence by the campaign-specific cards that help bind together the individual chapters of your epic adventure. Campaign cards introduce specific rules for each scenario that only apply in Campaign Mode, and the boons and burdens that you earn in your scenarios are then added to all future scenarios, continuing to help you or haunt you so long as they remain in the campaign pool. This means that even as such powerful weapons as Sting (The Road Darkens, 11) and Andúril (The Road Darkens, 14) can give you strength and support your cause, you may also be haunted by such devastating burdens as Ill Fate (The Road Darkens, 90) or Fallen into Evil (The Road Darkens, 83), either of which has the potential to break your Fellowship, crush your spirits, and end your quest.  Part of your duty to the Ring-bearer, then, is to offer wise counsel, ensuring that you suffer as few burdens as possible and make the best use of the boons you are granted. The closer you draw to Mordor, the more these decisions will matter. Part of your duty to the Ring-bearer, then, is to offer wise counsel, ensuring that you suffer as few burdens as possible and make the best use of the boons you are granted. The closer you draw to Mordor, the more these decisions will matter.
To that end, The Road Darkens introduces several boons that differ in one significant way from those you may have earned in The Black Riders. Like Three Golden Hairs (The Road Darkens, 16), some boons in The Road Darkens are removed from the campaign pool when you use them. Though they introduce some extremely powerful effects, these effects may only be used once. Then they are lost. Thus, these new boons bring additional layers of decision making and drama to your adventures in Middle-earth. You know you’re going to encounter perils and evils at every turn, but what you don’t know is whether or not the current situation is the best one in which to make use of your boons. Taking advantage of the resources at hand may spare you greater burdens in the future, or it may leave you empty-handed at a critical juncture. Using these boons at the appropriate moment may prove the difference between success and failure in your quest. Form Your Fellowship Today Bag End is far behind you. Your life in the Shire is over. The adventures you experienced on the road to Rivendell were only the beginning. Now you must begin the first steps of the rest of your journey to Mordor and Mount Doom. Fortunately, you need not travel your road by yourself. As your saga propels you further forward, The Road Darkens introduces an iconic new hero and several powerful allies. From Gandalf (The Road Darkens, 2) to Galadriel (The Road Darkens, 3), and from Elrond (The Road Darkens, 5) to Boromir (The Road Darkens, 4), these famous characters arrive to lend their strength, offer their wisdom, and help ease your burden.  
Choose your companions wisely, and set forth to retrace the path of the greatest fantasy saga of all time. The Road Darkens is now available at your local retailer and online through our webstore! ... Source: A Hobbit and His Burden (http://www.fantasyflightgames.com/edge_news.asp?eidn=5104)
Title: FFG:Fight, Raid, Run!
Post by: RSSFeeder on 11 October 2014, 08:30:03
Fight, Raid, Run!DungeonQuest Revised Edition Is Now Available
The dragon was sleeping. The dwarf took a few quiet steps towards the pile of jeweled rings and picked up several before looking slowly, anxiously back at the dragon. Still sleeping. He moved slowly towards a tall pedestal where sat an ancient, gilded oil lamp, the kind that magical jinns live inside. Still sleeping. He reached up above his head and fumbled for the lamp only to push it off the pedestal. It clattered onto the stone floor. He looked at the dragon. Still sleeping. He bent over to pick up the lamp, but felt something staring at him. Without turning around, he knew the dragon was awake. DungeonQuest Revised Edition is now available at your local retailer! In DungeonQuest Revised Edition, players take on the roles of heroes who descend into Dragonfire Dungeon searching for loot and adventure. As you make your way through the dungeon’s winding corridors and haunted catacombs towards the treasure chamber, you’ll have to fight monsters, dodge boobytraps, creep past a slumbering dragon, grab some loot, and make it out alive before the sun sets and the doors to the dungeon are sealed, imprisoning anyone remaining inside forever. Whoever emerges with the most valuable treasure– or whoever manages to survive– wins the game. 
Danger Lurks at Every Turn Dragonfire Dungeon is a maze of rooms and corridors that opens up in front of you as you explore it. Whenever you venture into unexplored space, you draw a chamber tile, connect it to the chamber you’re currently in, and move forward: you may find yourself teetering over the edge of a bottomless pit, or tearing your way through spider webs. Once inside a room, you typically draw a dungeon card see what else you encounter: perhaps a passage down to the catacombs, the corpse of an adventurer who didn’t make it out alive, or a ferocious monster. As discussed in the recent preview, combat between heroes and monsters has been sped up and streamlined in DungeonQuest Revised Edition. Different players control the monster and the hero, with the players involved selecting combat cards, playing them facedown, and comparing them to see whether the hero or monster wins the fight. Combat ends when you kill the monster or it kills you– or you can try to escape in order to continue your treasure hunt. 
Let Sleeping Dragons Lie In the center of the dungeon is a massive treasure chamber, filled with heaps of gold, jewels, and valuable, perhaps even enchanted artifacts. The journey there may be winding and difficult, and you may come close to death many times, but inside the treasure chamber you have a chance to grab more loot in a single turn than you could find in a dozen other chambers combined. However, if the massive dragon Kalladra wakes up to find you stealing from her hoard, you will be scorched– or even killed – by the fire of her rage. At the beginning of every turn that you spend in the treasure chamber, you draw a dragon card to see whether Kalladra is sleeping or has awakened. If she is asleep, you may draw two treasure cards, and leave on your next turn. However, if she is awake, you roll two dice and suffer the resulting amount of damage. The victims of her wrath seldom make it out of the dungeon alive. Will the irresistble pull of profound wealth cause you to linger in the treasure chamber, or will the incredible danger have you running for the exit with a single piece of loot in hand? 
Rush for the Gold
Creep through the dark catacombs in order to reach the treasure chamber before anyone else, or search every chamber, slowly amassing loot as you navigate the labyrinthine corridors. Getting the loot is only half the battle: you’ll face many of the dungeon’s dangers, from monsters to trapdoors, on your way back towards daylight. After all, riches can only benefit the living, and only a living hero can win the game. You can download the Learn to Play guide and the Rule Reference for DungeonQuest Revised Edition from the game’s support page. Those of you who own DungeonQuest Third Edition may want to look at the conversion guide (pdf, 567 KB) we’ve created, also available on the support page, which enables you to use the revised rules, combat cards, and character sheets when playing the edition that you have. Pick up your copy of DungeonQuest Revised Edition at your local retailer today! ... Source: Fight, Raid, Run! (http://www.fantasyflightgames.com/edge_news.asp?eidn=5106)
Title: FFG:Begin Your Conquest
Post by: RSSFeeder on 11 October 2014, 17:00:05
Begin Your ConquestWarhammer 40,000: Conquest Is Now Available
The expanses of the Traxis sector lie before you. Deadly warlords and countless legions of armies await your command to bring unending war to the sector’s planets. Embark on the road to interplanetary dominion when you pick up Warhammer 40,000: Conquest, now available at your local retailer! In Warhammer 40,000: Conquest, you command one of seven factions in the grim darkness of the far future. To achieve victory, you must conquer three planets that share a type, demonstrating your utter control of the sector. You need to balance winning battles in the present against the necessity of planning and preparing for future battles, even as you gather additional resources and card draw. The Road to War Our first four previews focused on the different phases of the game. We began with a discussion of deployment, illustrating how you play your units from your hand, sending them to various planets across the sector. The units that you play during the deployment phase form the base of your armies in coming rounds. In the next preview, we turned to the command phase, where you select which planet will receive the daunting military presence of your warlord. The command phase also rewards players for establishing a foothold on planets, granting you more resources and additional card draw. 
The third and fourth previews turned to the main focus of each game round: combat! One preview looked at combat as a whole, giving an overview of attacking and defending alongside the shields, keywords, and abilities that can affect combat in crucial ways. The next preview gave a detailed example of a combat round, illustrating how units attack, use shields, and retreat from battle. Xenos, Heretics, and Daemons After our previews covering the different phases of gameplay, we provided faction overviews of the seven factions included in the Conquest Core Set. Each of these factions has its own unique warlord that reinforces a unique playstyle, allowing the units from each faction to support completely different decks. You may prefer to fight with the Space Marines, proud and resourceful warriors who trigger their most powerful abilities on the field of the battle. Or you may wage war with the Astra Militarum, the armed forces of the Imperium who think nothing of spending millions of lives to claim a single world for the Emperor. The Orks, however, only get stronger as they take damage, introducing massive units who can take a hit and strike back even harder. Chaos forms the fourth faction included in Warhammer 40,000: Conquest. With a myriad direct damage effects, you can quickly drag your opponent under the corruption of the Warp. Players may also turn to the Dark Eldar, a faction that features a host of powerful events that can quickly turn the tide of battle in your favour. The Eldar’s psychic powers and Craftsworlds make them a dangerous, control-based faction. Eldar forces can quickly eliminate your opponent’s options, exhausting enemy units and canceling enemy effects. Finally, the adherents of the Tau empire cut a bloody swath through the battlefield with hyper-advanced technology. These attachments and wargear give you a way to enhance your own unit’s power and defeat your opponent. 
Each of these factions is arranged around an alignment wheel, allowing each faction to borrow cards from adjacent factions, opening the doors for nearly unlimited deckbuilding opportunities. In future expansions for Conquest, two additional factions – the Tyranids and the Necrons – will join the array of playable factions. We also added a video tutorial of Warhammer 40,000: Conquest, offering a visual representation of gameplay. Watch that tutorial below or on YouTube, and download the rulebooks for Conquest from the support page!
Click the image above for a video tutorial of Warhammer 40,000: Conquest!
Lead Your Armies War is inevitable in the darkness of the far future, but only one warlord can attain glorious victory. Begin your onslaught by picking up your copies of Warhammer 40,000: Conquest at your local retailer today! ... Source: Begin Your Conquest (http://www.fantasyflightgames.com/edge_news.asp?eidn=5105)
Title: FFG:Illicit Dealings
Post by: RSSFeeder on 12 October 2014, 01:30:05
Illicit DealingsA Preview of the Scum and Villainy Faction for X-WING (TM)
Recently, we announced that the Star Wars galaxy’s Scum and Villainy will soon join the fast-paced dogfights of X-Wing™ as the game’s third faction. Arriving in the game’s sixth wave of expansions, the Scum and Villainy faction brings to battle a mix of new starships and older starships repurposed for new use. Simultaneously, the faction’s fleet also introduces two new types of upgrades, the illicit upgrade and the Salvaged Astromech upgrade . Along with the mix of ships available to it, as well as the unique talents of its pilots, the faction’s two new types of upgrades go a long way toward defining the distinct play style you’ll soon be associating with the galaxy’s most notorious Scum. In today’s preview, we’ll look at some of these new upgrades and the ways in which they help to reinforce the faction’s identity as the shadiest, most opportunistic, and most self-serving of all X-Wing factions.
Illicit Upgrades It’s no big surprise that the Scum faction is the first to make use of the illicit upgrade. After all, as these upgrades represent the array of technologies that the Empire has chosen to outlaw, they belong to the galaxy’s black markets, and who runs those? The galaxy’s Scum and Villainy. Of the seven different starships introduced to the Scum faction – or reengineered to suit its fleets – all but the Y-wing and M3-A “Scyk” interceptor gain access to the illicit upgrade, though the StarViper-class attack platform only gains access to the upgrade type through the use of the unique Virago Title card.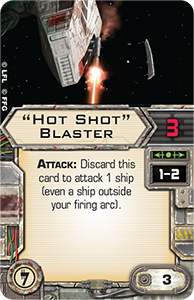 Combined with the fact that it is currently unique to the Scum, its ubiquity makes the illicit upgrade one of the faction’s most defining elements… along with the many dirty tricks it permits. Like the “Hot Shot” Blaster, each illicit upgrade breaks the game’s standard rules with some form of novel, high-impact game effect. The ability to fire at ships outside of your firing arc is always a powerful game effect, but equipping a “Hot Shot” Blaster can also lead to some interesting mind games. Most likely played on a ship, like the Z-95 Headhunter, that costs far fewer squad points than any ship with a turret weapon, the “Hot Shot” Blaster is designed for just one use, but it still forces your opponent to accommodate its threat from the beginning of the game until the moment you fire it. Moreover, the “Hot Shot” Blaster isn’t even the only illicit upgrade that allows you to damage a ship flying outside of your arc. Both the Feedback Array and Dead Man’s Switch allow you to land automatic damage against starships within Range “1,” although, admittedly, both do so at rather steep costs. 
| A Feedback Array allows you to damage any one target within Range “1.” However, to use the Feedback Array, you must forego your attack and receive one ion token. Even though you’d be trading away your attacks for just one damage, that’s a trade in which the value is easy enough to identify. You might find yourself outflanked, lacking a shot altogether; or you might want to land just one more damage on a ship that you’re touching, in order to finally destroy it. The ion token, however, is another matter. Ionized ships are forced to utilize straight speed “1” maneuvers, which leaves them exposed and predictable. Still, there are definitely times even the ion token is an acceptable cost. For starters, if you equip IG-2000 with a Feedback Array, the first ion token won’t ionize your ship. Then, since the Feedback Array costs just two squad points, one might imagine equipping it on up to seven Binayre Pirates who could then simply fly within Range “1” of the target of their choice and obliterate it, no dice required. | | 
| Likewise, the Dead Man’s Switch offers your Scum another way to deal damage without the use of attack dice, though its cost is even steeper than that of the Feedback Array. Only activated when your ship is destroyed, a Dead Man’s Switch deals one point of damage to each ship within Range “1.” This is interesting in a couple of ways. First, it accurately portrays the Scum faction as a collection of vengeful and self-centered individuals, only happy to cooperate so long as the credits continue to flow. Second, it encourages Scum players to fly out of formation, even with its cheapest ships, such as the HWK-290 and the Z-95 Headhunter. And while Dead Man’s Switch might introduce the first ability that would prompt us to rethink these formation-based tactics, our reevaluation is further reinforced by other cards within Wave VI, including the ship card for the Z-95 Headhunter pilot, N’dru Suhlak. | | 
| Finally, there’s more to the illicit upgrade than just the potential to deal damage. They can also allow you to stop your ship in mid-flight. That’s what Inertial Dampeners do, and for just one squad point, this upgrade is bound to give the Scum faction’s most highly skilled pilots a tremendous one-shot advantage in the Activation phase. After all, not only do Inertial Dampeners effectively add a maneuver to your ship’s dial, but they allow you to avoid taking any maneuver that would place your ship in a position that’s worse than the one in which you find it. Would your planned flight path have put you square in the sights of an enemy ship? Hit the Inertial Dampeners and avoid that maneuver. As the game continues to reward pilots with high pilot skill values, Inertial Dampeners provide Scum pilots their own, distinctive means of outmaneuvering their foes. | | Salvaged Astromechs Although the Scum faction’s Y-wing can’t benefit from the illicit upgrade, it is by no means forgotten. The Most Wanted Expansion Pack introduces no fewer than eight different upgrades for Scum Y-wings (many of which the Rebellion can also equip), and of those eight, five share the new Salvaged Astromech upgrade type. Since this upgrade exists currently only among the Scum’s Y-wings, and replaces the standard Astromech upgrade featured by the Rebellion, it helps, once more, to define the faction. So what does it tell us? Among other things, it tells us that the Scum faction can be a bit less orderly and a bit more aggressive than their rivals,  and it once again reinforces the idea that Scum pilots follow their own interests and their own flight paths. and it once again reinforces the idea that Scum pilots follow their own interests and their own flight paths. That isn’t to say, however, that Scum pilots are any less capable than their opponents. They just have their own style, and self-preservation ranks right near the top. Accordingly, for just two squad points, the Salvaged Astromech serves as great insurance against some of the game’s most crippling critical hits, including the devastating Direct Hit. Of course, Direct Hit isn’t the only damage card with the Ship trait. In fact, there are no fewer than ten different damage cards with the Ship trait, and they can cause malfunctions in your secondary weapons, reduce the effectiveness of your primary weapons, limit your ship’s agility, or prevent you from performing actions listed in your ship’s action bar. Any one of those hits could severely hinder your fighter’s effectiveness in combat, and two squad points is a small price to pay for insurance. Yet, though two squad points may be a rather small price to pay to grant your fighter limited immunity from an early crippling blow, you might still elect not to play with Salvaged Astromech simply because you feel other Salvaged Astromech upgrades may better suit your strategy. 
| For example, the Most Wanted Expansion Pack allows you to outfit your Y-wings with a Bomb Loadout, and you might want to complement your Bomb Loadout with the Salvaged Astromech upgrade, “Genius.” If your Y-wing pilot has a lower pilot skill value, “Genius” adds another layer of mind games to your activation phases, forcing your opponent to guess whether or not this is the round that you’re going to deploy your Proximity Mines or drop your Proton Bomb, then guess whether you’ll do so at the beginning of your maneuver or at the end of it. “Genius” can be even more aggravating and aggressive if your Y-wing pilot has a high pilot skill value. Now, your opponent has all the same questions to ask himself, but if your Y-wing moves after your opponent’s ships, you can see exactly what’s going to happen when you drop your bombs. Sure, if you drop them at the end of your maneuver, your Y-wing is going to take the hit, too, but it has five hull and can likely survive the hit. | | 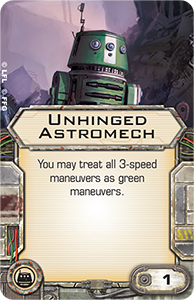
| Less directly aggressive, but still dedicated toward bold tactics and fast maneuvers is the Unhinged Astromech. For just one squad point, this Salvaged Astromech upgrade allows you to treat all your speed “3” maneuvers as green maneuvers, and since the Y-wing’s speed “3” maneuvers include two turns, two banks, and a straight, the Unhinged Astromech essentially reinvents your Y-wing’s maneuver dial, transforming the fighter from a relatively slow and clumsy fighter into a machine that can easily zip around the battlefield, outmaneuvering your foes with ease, just so long as you can do so while consistently flying near top speed. Again, since it’s difficult to imagine that a squadron flying in formation at such high speeds could consistently catch enemy fighters within their firing arcs, the Unhinged Astromech is yet another upgrade that suggests the Scum faction plays best when it flies out of formation and relies upon its individual pilots to make the best possible use of their ships. | | A Collection of Self-Centered Individuals If so many of the Scum faction’s pilot abilities and upgrades discourage flying in formation, how will its squadrons ever compete with the best squadrons that the Imperials and Rebels can bring to battle? The answer is that Scum and Villainy players will have to learn how to make the most of all their dirty black market tricks and toys. The new illicit upgrades and Salvaged Astromech upgrades are likely to feature heavily in Scum squadrons, and we’ll get a better idea of how they’ll help the faction compete with the Imperials and Rebels as we continue our previews of Wave VI and explore more of what the StarViper Expansion Pack, M3-A Interceptor Expansion Pack, IG-2000 Expansion Pack, and Most Wanted Expansion Pack have to offer! ... Source: Illicit Dealings (http://www.fantasyflightgames.com/edge_news.asp?eidn=5107)
Title: FFG:Arkham Nights Is Coming Soon
Post by: RSSFeeder on 12 October 2014, 09:30:23
Arkham Nights Is Coming SoonExperience the Horror October 17-18 in Roseville, MN
Arkham Nights, our annual celebration of Lovecraftian gaming, will take place October 17-18 in Roseville, MN at the Fantasy Flight Games Center. Preregister before October 10 in order to secure your place and receive exclusive souvenirs, or register at the door either day of the event. This year’s celebration features plentiful opportunities to play your favorite games based on the works of H. P. Lovecraft: Arkham Horror, Call of Cthulhu: The Card Game, Elder Sign, Eldritch Horror, and Mansions of Madness. You will also have chances to try out upcoming expansions and meet the designers behind the games.
Old Favorites and New Expansions Savor playing your old favorites, learn a new Lovecraft-themed game, or preview the Antarctic horrors of Mountains of Madness, the upcoming side board expansion for Eldritch Horror. You can even be among the very first to try out Gates of Arkham, the recently-announced expansion for Elder Sign. During these two nights of entertainment and fright you will also be able to meet and play with designers of many of the games featured, including special guests Richard Launius, Kevin Wilson, Corey Konieczka, and Nikki Valens. Two Call of Cthulhu tournaments will take place: an initiation tournament for those new to the mysteries surrounding the Ancient Ones, and a competitive head-to-head tournament for those with extensive experience in struggling against the horror. There will also be opportunities to experience the 18-player Arkham Horror scenario, To the Barricades! You can learn more about the weekend’s events by downloading the schedule here.
Rare Artifacts Every player will have the chance to combat ancient and profound evil, but preregistered attendees will also be able to take home a bit of exclusive merchandise, including alternate art domain cards for Call of Cthlhu, a never-before-seen Ancient One for Elder Sign, gorgeous alternate dice that can be used with Arkham Horror and Eldritch Horror, and a dice bag featuring the Eldritch Horror comet symbol. These unique items will only be available to those who preregister before October 10th (this Friday), but you can also register at the door either day of the event. 
Experience the Horror Directions to the Fantasy Flight Games Center, information about hotel accommodations, and the schedule on the event’s support page. Preregister here, or via the Arkham Nights minisite. We look forward to seeing you at the Fantasy Flight Games Center for a weekend of bone-chilling, thoroughly enjoyable horror! ... Source: Arkham Nights Is Coming Soon (http://www.fantasyflightgames.com/edge_news.asp?eidn=5108)
Title: FFG:A Game of Thrones Championship in Northern Europe
Post by: RSSFeeder on 12 October 2014, 18:00:06
A Game of Thrones Championship in Northern EuropeAnnouncing the 2014 Swedish National Championship
Fantasy Flight Games is pleased to announce the date and location of the first ever 2014 Swedish A Game of Thrones: The Card Game National Championship!
Deckbox is hosting Varberg Morghulis 2014 in October, located in historic Varberg! Taking place on October 17th-18th at the city's most famous landmark, the 13th-century Varberg Fortress, the tournament will gather not only the best players from all over Sweden, but guests traveling from all of Northern Europe. Don't miss out on what's sure to be a memorable tourney! The main event will be the Joust tournament on Saturday, the 17th, while Sunday, the 18th, will offer several side events including a Melee tournament, a draft featuring the new Westeros edition, and a tournament for FFG's brand-new LCG, Warhammer 40,000: Conquest. Register now to secure your place in the tournament! A Game of Thrones: The Card Game Joust National Championship Where: Varberg Fortress, 432 44 Varberg When: Saturday, October 17th to Sunday, October 18th. Tournament starts at 10:30am. Registration begins at 9:30am. Format: Swiss with cut to single elimination. Prizes: The winner receives a trophy and a first-round bye in the European Championships at Stahleck in November. Both finalists will receive Martell backpacks. The top 8 players will receive a playmat, and the top 16 will receive Martell power tokens. Every participant also receives an alternate art Beric Dondarrion card. Additional exclusive prizes will be handed out to all participants, as well as the top player of each house. More Information Further information can be found on the event website or by emailing hello@deckbox.me. Interested players can also visit the event on Facebook. ... Source: A Game of Thrones Championship in Northern Europe (http://www.fantasyflightgames.com/edge_news.asp?eidn=5109)
Title: FFG:Know No Fear
Post by: RSSFeeder on 13 October 2014, 02:30:03
Know No FearPrepare Your Decks for Unending War with Warhammer 40,000 Art Sleeves
“They shall be of iron will and steel sinew. In great armour I shall clad them and with the mightiest weapons they will be armed. They will be untouched by plague or disease; no sickness shall blight them… They are my Space Marines and they shall know no fear.”
–The Emperor of Mankind Fantasy Flight Games is proud to announce the upcoming release of six new, battle-ready, limited edition Fantasy Flight Supply Art Sleeves inspired by the warring factions of Warhammer 40,000: Conquest!  Conquest is the goal, and conflict is inevitable. Soldiers, Space Marines, and Daemons deploy to planets across the Traxis sector and throughout the farthest reaches of space. They wield chainswords, burnas, ion rifles, and lasguns. Death haunts them at every turn, yet they will not retreat. When you join these warriors in battle, you’re going to want two things: a plan and powerful armor. With six different and dramatic designs, our limited edition Warhammer 40,000 Art Sleeves offer powerful protection, serving as a resilient armor for your cards. Conquest is the goal, and conflict is inevitable. Soldiers, Space Marines, and Daemons deploy to planets across the Traxis sector and throughout the farthest reaches of space. They wield chainswords, burnas, ion rifles, and lasguns. Death haunts them at every turn, yet they will not retreat. When you join these warriors in battle, you’re going to want two things: a plan and powerful armor. With six different and dramatic designs, our limited edition Warhammer 40,000 Art Sleeves offer powerful protection, serving as a resilient armor for your cards.
Stand Your Ground Warhammer 40,000: Conquest and your battles for the Traxis sector are full of lasguns, explosions, glorious death, and undying victory. As the Orks embark upon their latest Waaagh! and Daemons spill out of the Warp, you’re going to need more than a few frag grenades and a lightning claw in order to stand your ground. You’re going to need every weapon you can possibly cram into your deck, and then you’re going to need quality defenses. No matter what opposition you face, our Warhammer 40,000 Art Sleeves stand resolute in their mission to protect your cards. Made of clear, 100 micron-thick, non-PVC, acid-free polypropylene plastic, Warhammer 40,000 Art Sleeves are free of damaging chemicals that could corrode your cards. Moreover, their snug cut makes them easy to shuffle and fits Warhammer 40,000: Conquest, all of our other LCGs®, and most other CCGs, as well as any other standard-sized cards (card size: 2 1/2” x 3 1/2”). As durable as these Art Sleeves are, they’re also inspiring. Each reinforces the quality of its defenses with stylish design. Whether you stand alongside the Ultramarines, follow a Tau Ethereal in the pursuit of the Greater Good, or seek to restore the Eldar to their former glory, you can find inspiration from our Warhammer 40,000 Art Sleeves. Six different designs allow you to side with the faction of your choice.
Space Marines | 
Astra Militarum | 
Eldar | 
Chaos Daemons | 
Tau Empire | 
Orks | War has come to the Traxis sector. War is here. Choose your side – and protect your cards – in style with Warhammer 40,000 Art Sleeves! Fantasy Flight Supply is committed to providing you the best materials to protect, customize, and enhance your games. Our Warhammer 40,000 Art Sleeves are scheduled to arrive at retailers everywhere in the first quarter of 2015. ... Source: Know No Fear (http://www.fantasyflightgames.com/edge_news.asp?eidn=5110)
Title: FFG:Attack Run
Post by: RSSFeeder on 13 October 2014, 11:00:04
Attack RunAnnouncing the Fourth Force Pack in the Rogue Squadron Cycle
“The battle station is heavily shielded and carries a firepower greater than half the star fleet. Its defenses are designed around a direct, large-scale assault. A small one-man fighter should be able to penetrate the outer defense.”
–General Dodonna, Star Wars: A New Hope Fantasy Flight Games is proud to announce Attack Run, the fourth Force Pack in the Rogue Squadron cycle for Star Wars™: The Card Game! With Attack Run, you have the chance to relive the climax of Star Wars: A New Hope as the Rebel Alliance makes its desperate attack on the first Death Star. In this Force Pack, you’ll find new Pilot versions of some of the game’s most iconic characters and their starships, including an Imperial version of Darth Vader with his specialized TIE Advanced, and a Rebel version of Luke Skywalker with Red Five. In addition to these, you’ll find Jedi-faction Pilot Keyan Farlander and famed smuggler Platt Okeefe, alongside a new Pilot version of Boba Fett with Slave I. Attack Run also introduces two copies of a entirely new, highly potent, fate card to be found only within this Force Pack. 
Running the Trench Luke Skywalker’s flight through the trenches of the Death Star, pursued by Darth Vader, marks one of the most memorable moments of the Star Wars movies. With this objective set, you’ll be able to recreate that cinematic moment as well as the catastrophic damage that Luke dealt to the Empire.  The set begins with the Running the Trench (Attack Run, 772) objective. This objective provides two resources, and it also bears the “Rebel Alliance affiliation only” restriction, limiting the deck combinations in which you can use this highly effective set. The set begins with the Running the Trench (Attack Run, 772) objective. This objective provides two resources, and it also bears the “Rebel Alliance affiliation only” restriction, limiting the deck combinations in which you can use this highly effective set. The star of this set is Luke Skywalker (Attack Run, 773). This version of Luke bears the same combat icons as two of his past versions, but where Luke truly shines is at the controls of a Vehicle. Luke has the Pilot (3) keyword, allowing you to play him as an enhancement on a friendly Vehicle by paying three resources. When piloting a ship, Luke has a truly potent Interrupt. Whenever the unit that Luke enhances is focused to strike as an attacker, you may discard the top card of an opponent’s deck. Then, you deal damage equal to the discarded card’s printed Force icons to the engaged objective. Free objective damage is always beneficial, but if you discard a commonly played card like Darth Vader (Core Set, 35) or Emperor Palpatine (Core Set, 51), you can destroy an objective in a single hit! Luke’s Interrupt gains even more efficacy with Use the Force, Luke (Attack Run, 776). This free event can be played as an Action to look at the top card of any objective deck or command deck and place that card on the bottom of the deck, if you wish. This card has enormous tactical flexibility, and can be used in any number of ways. Whether you’re altering an objective deck to manipulate upcoming objectives, or filtering your opponent’s command deck to find an optimal target for Luke’s ability, this event gives you new levels of control. Of course, Luke Skywalker needs a ship for his ability to shine, and you’ll find a truly complementary Fighter in this objective set. Red Five (Attack Run, 774) bears a special ability allows you to assign its objective damage to a participating enemy unit rather than targeting the engaged objective.  In some cases, damaging the objective is more important than targeting a specific unit, but if Luke destroyed the targeted objective with his ability, you can make sure Red Five’s objective damage won’t go to waste. In some cases, damaging the objective is more important than targeting a specific unit, but if Luke destroyed the targeted objective with his ability, you can make sure Red Five’s objective damage won’t go to waste. A new, enhancement version of R2-D2 (Attack Run, 775) is also found in the Running the Trench objective set. With this card, Luke’s plucky astromech can now fly into battle alongside him. R2-D2 enhances any friendly Vehicle unit, granting the unit the shielding keyword. While the Vehicle is piloted, R2-D2 becomes even more effective at keeping your starships safe, allowing you to remove a damage from the enhanced unit after you refresh. The final card in this objective set is I Have You Now (Attack Run, 777), one copy of a brand-new fate card included only in Attack Run. This fate card provides only one Force icon to the edge battle, but if you win the edge battle, you may immediately destroy a target participating enemy unit, from a lowly stormtrooper squad to an enormous Star Destroyer. Between I Have You Now and Luke Skywalker, this objective set can pave your way to victory with massive amounts of damage. Man Your Starfighters Whether you draw upon the piloting talents of Luke Skywalker, Darth Vader, Boba Fett, or another Pilot included in this Force Pack, you’ll find plenty of powerful new Vehicles and Pilots to include in your decks. Look for Attack Run at your local retailer in the first quarter of 2015! ... Source: Attack Run (http://www.fantasyflightgames.com/edge_news.asp?eidn=5111)
Title: FFG:The Assault Begins
Post by: RSSFeeder on 13 October 2014, 19:30:03
The Assault BeginsPreview Movement and Combat in Imperial Assault
“Bring em on, I’d prefer a straight fight to all this sneaking around.”
–Han Solo, Star Wars: A New Hope Take your place in the Star Wars saga with Imperial Assault, a board game of tactical combat and adventure for two to five players! Every game of Imperial Assault brings you directly into the action of the classic films, whether you infiltrate secret Imperial bases as Rebel operatives, or use your squads of Stormtroopers and mercenaries to quell the insignificant Rebellion. As we explored previously, two complete games are included within Imperial Assault. In the campaign game, up to four players control heroes of the Rebellion, engaging in a series of thrilling, cinematic missions. Opposite these heroes, one player controls the unlimited resources and power of the Galactic Empire, fielding massive AT-ST walkers, deadly Stormtroopers, mechanical Probe Droids, and more.
Both the campaign game and the skirmish game, as well as the various units for both sides, will be explored in more detail in later previews. Today, we’ll explore how your units in both the campaign game and the skirmish game race between objectives, interact with the mission, and battle your opponent! Make Your Move  In any game of Imperial Assault, you and your opponent alternate activating a figure or group of figures. Each time a figure is activated, it receives two actions to move across the battlefield, attack enemies at range or in melee, interact with objects in the mission, or rest from the strain of battle. Most actions can be used twice in a single activation, but only heroes in a campaign have the ability to attack twice in one activation. In any game of Imperial Assault, you and your opponent alternate activating a figure or group of figures. Each time a figure is activated, it receives two actions to move across the battlefield, attack enemies at range or in melee, interact with objects in the mission, or rest from the strain of battle. Most actions can be used twice in a single activation, but only heroes in a campaign have the ability to attack twice in one activation.
As you lead your Rebel strike team or Imperial squads through a mission, you’ll quickly learn the necessity of movement. Any figure can use a move action to gain movement points equal to the speed listed on the figure’s hero sheet or Deployment card. Each movement point allows your figure to move one space in any direction, and what’s more, you can spend these points at any time during the figure’s activation. This means you can interrupt your figure’s movement with another action, allowing you to fire your blaster before diving for cover, or open a door and keep running. For example, the Imperial player chooses to activate a group of Stormtroopers, and starts the activation by choosing a single Stormtrooper. He begins by taking a move action, which gives the chosen Stormtrooper four movement points. He moves the Stormtrooper one space, then uses his second action to open the adjacent door, removing it from the map. Finally, he continues using the movement points his Stormtrooper gained with its first action, moving three more spaces. 
The Stormtrooper uses a move action to gain four movement points (1), moves one space and opens the door with his second action (2), and spends his remaining three movement points (3). Although movement is usually straightforward, you’re sure to encounter a wide range of terrain in your missions. Every mission in Imperial Assault is constructed out of a series of double-sided, interlocking map tiles that depict a wide range of Star Wars environments. You might venture into a dusty Tatooine cantina, explore a Corellian factory, or battle deadly creatures through the dense jungles of Yavin 4. Wherever you find yourself in the galaxy, the terrain around you is sure to have a potent effect on how you move through a mission. You may need to go well out of your way to avoid difficult or impassible terrain. Fire When Ready!
 Although movement brings you to your objectives, you still need a way to handle your opponents. Whether you’re rescuing captured prisoners or escaping from the clutches of Darth Vader, you’ll quickly find yourself battling those who stand between you and your objective. Although movement brings you to your objectives, you still need a way to handle your opponents. Whether you’re rescuing captured prisoners or escaping from the clutches of Darth Vader, you’ll quickly find yourself battling those who stand between you and your objective. Combat in Imperial Assault is resolved by rolling a number of combat dice. During an attack, both you and your target roll combat dice to determine how much damage is dealt to your opponent. On the combat die, the number of  (damage) rolled determines how much damage may be dealt to the target of your attack. One damage is prevented by each (damage) rolled determines how much damage may be dealt to the target of your attack. One damage is prevented by each  (block) rolled on the defender’s dice. (block) rolled on the defender’s dice. In addition to damage, the attacker may generate  (surge) when he attacks. These symbols are used to trigger special combat abilities, allowing you to deal more damage, pierce armor, recover health, and other powerful effects. A surge can be cancelled by an (surge) when he attacks. These symbols are used to trigger special combat abilities, allowing you to deal more damage, pierce armor, recover health, and other powerful effects. A surge can be cancelled by an  (evade), reducing the attacker’s ability to trigger his special combat abilities. The final die symbol is the (evade), reducing the attacker’s ability to trigger his special combat abilities. The final die symbol is the  (dodge). This symbol only appears on one face of one defense die, but if it is rolled, the defender dodges the attack and sustains no damage! (dodge). This symbol only appears on one face of one defense die, but if it is rolled, the defender dodges the attack and sustains no damage!  
There are two different types of attack that can occur in Imperial Assault. Some figures are armed with melee weapons, only threatening units directly adjacent to them. Others are equipped with powerful blasters and slugthrowers that can fire across rooms at any figure within your line of sight. When making a ranged attack, however, you must ensure that you roll enough accuracy for the attack to hit your target. Many combat dice bear a number alongside the symbols – the total of the numbers shown on your attack dice represents your attack’s accuracy. If your target is seven squares away from you on the battlefield, you must roll a total of at least seven accuracy for your attack to hit. Otherwise, the attack misses and your target takes no damage.
As an example of an attack, a Stormtrooper figure decides to fire at Jyn Odan, who is six spaces away from him. The Imperial player checks that his Stormtrooper has line of sight to Jyn Odan, then both players roll their combat dice at the same time. The Imperial player rolls a blue die and a green die on attack, as shown on the Stormtrooper’s Deployment card, while the Rebel player controlling Jyn Odan rolls a white die, corresponding to the die shown as Jyn Odan’s defense on her hero sheet. 
Both players receive the results shown above: the Stormtrooper has rolled four accuracy, three damage and one surge, whereas Jyn Odan has rolled one block. Ordinarily, the Stormtrooper’s attack would miss, because he needs at least six accuracy to hit Jyn. However, the Imperial player can spend the surge to trigger a surge ability shown on the Stormtrooper’s Deployment card. He triggers an ability that grants the attack two additional accuracy, bringing the total to six accuracy – a hit! One of the three damage rolled is prevented by the single block, and Jyn takes two damage from the Stormtrooper’s attack. Take Command Although moving and fighting are the main focus of your Imperial Assault missions, you’ll find that other actions have plenty to offer. Interacting with objects allows you to open doors, investigate crates, or pick up objects crucial to your mission. If you stand next to a door and take an action to interact with it, the door is opened and removed from the map. No figure can close a door voluntarily, although some game effects may force a door to close. 
Your campaign missions are also sprinkled with a variety of supply crates. By interacting with a crate, a hero can claim its token and draw a card from the Supply deck. These cards offer a host of helpful items for the heroes during a campaign, ranging from grenades to bacta infusions. What’s more, investigating crates grants you additional credits after the mission ends, giving you more buying power for new items and gear, as we’ll discuss in a later preview. Battle for the Fate of the Galaxy The fate of the galaxy rests in your hands with the intense ground battles of Imperial Assault. Whether you complete missions on the orders of Rebel High Command or serve the power of the Galactic Empire, you’ll find Star Wars adventure in Imperial Assault. Check back for more in-depth previews of both the campaign game and the skirmish game in Imperial Assault, and join us next time as we take our first look at the new heroes of the Rebellion included in this game. ... Source: The Assault Begins (http://www.fantasyflightgames.com/edge_news.asp?eidn=5112)
Title: FFG:STAR WARS (R): Force and Destiny (TM) Beta Update #5
Post by: RSSFeeder on 14 October 2014, 04:00:03
STAR WARS (R): Force and Destiny (TM) Beta Update #5News From the Developers of the Force and Destiny Beta
Hello Force and Destiny™ beta testers, This week, we’re bringing you our fourth round of errata updates (pdf, 310 KB) for the Force and Destiny beta, and we’re introducing some changes to weapons and gear. One issue we’ve been hearing a lot about is that Player Characters are having a hard time customizing their lightsabers. This is a fair complaint. Generally, modifying weapons and armor is the purview of tech-focused PCs. However, a Force user’s lightsaber is an intensely personal weapon, and turning it over to someone with a better skill level for some tweaks and added mods feels inappropriate. In addition, we wanted to add rules that emphasize the mystical bond between a Force user and his or her lightsaber crystal. Thus, we introduced a pair of changes: one for modifying any attachments on lightsabers, and one specifically for modifying lightsaber crystal attachments. These new rules “stack” with some of the Artisan’s abilities, so that specialization will still be the best at tweaking a lightsaber to peak performance. However, now all would-be Jedi can enhance and modify their personal weapons to a reasonable extent.  Meanwhile, we want to start looking more closely at adversaries as we prepare for our next update. We have some changes already in mind, but we’d like to hear how the different adversaries play in combat or narrative encounters against your Player Characters. If you use these adversaries in encounters and have some feedback on their performances, please also include the XP level and Careers and Specializations of the PCs involved in the encounter. As we examine the results of an encounter, the nature of the group against whom the adversary is squaring off against is vitally important toward understanding those results. Meanwhile, we want to start looking more closely at adversaries as we prepare for our next update. We have some changes already in mind, but we’d like to hear how the different adversaries play in combat or narrative encounters against your Player Characters. If you use these adversaries in encounters and have some feedback on their performances, please also include the XP level and Careers and Specializations of the PCs involved in the encounter. As we examine the results of an encounter, the nature of the group against whom the adversary is squaring off against is vitally important toward understanding those results.
Thanks everyone, and as always, we look forward to hearing your feedback! ... Source: STAR WARS (R): Force and Destiny (TM) Beta Update #5 (http://www.fantasyflightgames.com/edge_news.asp?eidn=5113)
Title: FFG:The Defenders of Terrinoth
Post by: RSSFeeder on 14 October 2014, 12:00:11
The Defenders of TerrinothPreview the Daqan Army and Combat in BattleLore: Command
Bodies and weapons littered the battlefield. The Daqan troops were fighting the thick rain and pervasive mud as much as they were fighting the unbroken line of Uthuk Y’llan. For a second, the commander feared the war would be lost before he could kindle the signal fires and alert the rest of Terrinoth to the danger. But then he spotted them – an unharmed unit of the Citadel Guard, young men more used to herding sheep than to warfare, but brave and capable of outrunning the demonic Uthuk infantry. “Guardsmen,” he called out. “Come here. I know you have the strength and speed necessary to reach the signal posts. Now you must prove that you have courage as well.” Muster your troops, lead the charge, and go to war in BattleLore: Command, a digital application for iOS, Android, and PC based on the tactical combat board game BattleLore Second Edition. Lead the valiant Daqan army in a single-player campaign to vanquish the vicious and demonic Uthuk Y’llan from Terrinoth, or command either army in skirmishes, playing against the CPU or against a friend on the same wireless network. Whether you have won countless battles in Terrinoth or never before ordered troops into battle, BattleLore: Command provides a challenging combat experience on your digital device. Today’s preview will introduce you to the units composing the Daqan army: farmers armed in order to defend their homes, horsemen specialized in speeding across the battlefield, Rune Golems created to be the sentinels of Terrinoth, and enormous raptors trained to fight. The Backbone of the Daqan Army The people of Terrinoth prefer peace to war, but in a time of danger they readily take up arms to defend their homeland. Farmers, trained and outfitted by the Daqan lords who govern them, become Citadel Guards, the infantry backbone of the Daqan army. The Citadel Guards are melee troops, close-knit groups of soldiers trained to move, defend, and attack as one unified being, armed with poleaxes to slash and stab at the enemy in close proximity, and thick shields to defend against counterattacks. With their determination and their Superior Tactics ability, they often force enemy units they can’t destroy to retreat, allowing the Citadel Guard unit to advance. Citadel Guards are also among the select units in BattleLore: Command that can pursue a retreating unit and attack again. This relentlessness makes them invaluable in battle, capable of taking down not just other infantry, but cavalry, elite units, or even a Chaos Lord in defense of their homeland. 
Hunters skilled in bow and arrow become Yeoman Archers and take aim at the Uthuk Y’llan instead of the wild game they are accustomed to chasing. These ranged units are capable of fighting in melee combat, but are better used to thin out unsuspecting enemies at a distance. If they do not have to move before an attack, they can take a double shot, and slay an entire enemy unit by sending arrows into their hearts. Every unit type has specific values for movement, combat, and health. A unit of Citadel Guards, as you can see above, has a health of three and a movement of two: it can move two hexes at a time, and takes three blows to kill. Combat value represents how many chances a unit has to deal a blow, force an enemy to retreat, or activate a special ability. Results appear as they are generated randomly, so that no battle is decided before it is fought and there is always an element of surprise. 
The Citadel Guard unit has slain part of the enemy unit, caused it to retreat one space
(except that the enemy unit was supported), and earned a point of lore. Vigilant Cavalry Citadel Guards and Yeoman Archers can be quickly mobilized the moment that Terrinoth is attacked and are often first on the field of battle. As they fight for their lives, news spreads to distant lords who send whatever forces they can to help vanquish the threatening enemy. These forces include the Riverwatch Riders, mounted swordsmen who have spent their lives on horseback. Their horses are fearless in battle, ready to gallop through a rain of poisoned arrows or stand firm in the face of hellish and hungry demons. With a greater movement value than any other Daqan or Uthuk Y’llan unit, the Riverwatch Riders excel at rushing behind enemy lines, or occupying a strategic position before the enemy can reach it. Although they only have a combat value of two, they are Vigilant, meaning that no unit they attack can counterattack. 
Riverwatch Riders can also enhance your other units’ strength by flanking enemy units, limiting the enemy’s options for retreat and temporarily increasing the combat value of any friendly units involved in the attack. Supported by Riverwatch Riders, the Citadel Guard have a combat value of four, meaning they are more likely to force the enemy to retreat, or destroy the enemy unit completely. Living Stone and Winged Legends Long ago, the leaders of Terrinoth made sentinels for the land which could be brought to life in a time of serious danger. They shaped clay and stone into hulking giants that could kill a man with a single blow of their fist and gave their creations life using ancient and now forgotten magics. The enchanted runes necessary to resurrect these massive constructs have been handed drown from generation to generation and now, for the first time in memory, there is dire enough need to awaken the Rune Golems. These formidable creatures ignore one retreat during combat, and have the potential to stun their enemies, so that the stunned unit cannot move or attack. Use Rune Golems to create an impenetrable line of defense, protecting a group of unarmed villagers, or send them to isolate and paralyze enemy units while your cavalry speed into Uthuk Y’llan territory. 
The most powerful units of the Daqan army are the Roc Warriors from the mountainous regions in the north. For centuries, the clans dwelling in the crags have bred giant birds of prey known as Rocs and matched them with brave fighters in life-long bonds, so that the human and bird act together in battle. These raptors swoop in and out of the fight, descending to slash the Uthuk Y’llan with their giant, sharp talons and flying away again. Only Roc Warriors have Mobility, which allows them to move both before and after they attack, so that the Uthuk Y’llan don’t get a chance to retaliate. Use Mobility to suddenly strike down a pernicious enemy unit and then pull back to a safe location so the Roc Warrior can attack again, unharmed, next round. 
You Are In Command Driven to defend Terrinoth against the most powerful enemy it has ever known, the forces of the Daqan army fight with the utmost determination, fortitude and valor. They also offer a commander many intriguing tactical possibilities, both offensive and defensive. In BattleLore: Command you can explore the full range of these units’ capabilities in a variety of missions as they fight to keep darkness and chaos out of their land. In our next preview we will examine the bloodthirsty Uthuk Y’llan army, composed of humans corrupted by demonic blood and vicious demons seeking to bleed and ravage whatever they can. In addition, we will explore lore powers– game-changing tools that you can use in the middle of combat to suddenly enhance your army’s capabilities. Finally, in our third preview we will look at the missions of the single-player campaign and the scenarios of the skirmish mode, from Strongholds, in which you must protect your own territory while trying to invade your opponent’s fortress, to Deathmatch, where your sole aim is to eradicate the enemy. BattleLore: Command will appear in the App store, Amazon Marketplace, and Google Play in the fourth quarter of 2014. Meanwhile, check the minisite for further previews and more information. ... Source: The Defenders of Terrinoth (http://www.fantasyflightgames.com/edge_news.asp?eidn=5114)
Title: FFG:The Desperate Defense
Post by: RSSFeeder on 14 October 2014, 20:30:05
The Desperate DefenseHow to Turn Back the Alien Invasion of XCOM: The Board Game
As their transport rumbled into position, the soldiers locked their armor into place and fired up their battle scanners. One last check of their plasma rifles, and they would rush out the door, into the beating heart of the alien invasion. They knew they wouldn’t all make it back, but if they failed, billions more might die. The whole human race might perish. Live or die, there was no turning back… Just in case you thought it was going to be easy to win your war against the alien invaders of XCOM: The Board Game, think about this: There are two ways to lose the game, but only one way to win it… In our last preview, we looked at the game’s free digital companion app. Integral to your XCOM experience, this app allows us to push the game’s design well beyond what would be possible without it. And it coordinates the alien invasion. There are five different invasion plans, which we’ll explore in more depth in a later preview, but all of them share three common elements: UFOs, enemies, and crises. These are the invaders’ weapons as they strike against you. With these weapons, they hope to sow chaos, topple nations, and cause the collapse of human civilization. 
Early military interventions proved ineffectual, and you – and XCOM – are now humanity’s last hope for a successful resistance. It is your job to maintain a semblance of order, to slow the descent into utter panic, and to find a way to strike at the invaders where it counts. These duties drive the game’s victory and loss conditions:
- You lose if two continents fall into panic. Not only does this mean that many hundreds of millions of people are dying, it means that your team loses its funding and XCOM shuts down.
- You lose if your base is destroyed. If your base is destroyed, so are your means of fighting back. And if XCOM can’t fight back, there’s no other power in the world capable of retaliating in any way that doesn’t harm the world more than its invaders.
- You win if you can unlock and complete your scenario’s final mission. Of course, to get to the final mission, you’ll need to protect your base, prevent nations from panicking, and complete other missions that will help you find weaknesses in the aliens’ strategy.

Can you unlock your final mission? Click on the image above to unlock Domination.
Don’t Panic! Because you’ll lose if any two of the six populated continents fall into panic, you’ll need to become familiar with the panic track. As you wage your war against the alien invaders, you’ll need to track the degree to which each continent has fallen into chaos. Time is against you. After all, your team wasn’t fully activated until the world’s military forces had already lost ground to the invaders. Thus, even at the beginning of the game, you’ll find that some of the continents have moved one or more steps along the panic track. Once you start playing, the pressure really starts to build. Each round, the world’s continents each move one step closer toward panic for each UFO in orbit over that continent. As if that’s not enough, the crises you must resolve may also move the world’s continents toward panic. 
While XCOM’s Interceptors are deployed elsewhere, two UFOs sow chaos in Australia, moving it two steps toward panic. Asia has already fallen into panic, so if Australia also collapses, the game is over, and you lose!
It’s almost impossible for you to entirely staunch the spread of panic. The best you can hope for is that you can slow it down, aid those nations that truly need your intervention, and buy yourself just enough time to plan a retaliatory strike. Defend Your Base As you route your Interceptors across the globe to confront the UFOs that threaten to topple the world’s governments, the aliens send a number of enemies to assault your base, hoping to find some way to eliminate you and the threat that your team represents to their grand design. In XCOM: The Board Game, there are nine different types of enemy cards, corresponding to each of the different types of enemies that might assault your base. At the beginning of your game, the app will identify a number of these enemies and instruct you to take all of their cards, including any Elite versions, and shuffle them together to create an enemy deck. These enemies then spawn at your base throughout the game, and if your soldiers can’t eliminate them all, each enemy remaining deals one damage to your base. If your base suffers enough damage, it is destroyed, and you lose. 
Two enemies survive XCOM’s defenses, damaging the base twice.
However, your base defense isn’t all-or-nothing. Even if your base isn’t at risk of being destroyed, you can suffer some very real consequences for letting the enemy strike. Whenever the base damage token advances to a red space, you must resolve the damage ability on the aliens’ invasion plan. 
The damage token advances to a red space, triggering the damage ability on the aliens’ invasion plan. In this example, two UFOs spawn on each continent in the red zone of the panic track.
We will look at base defense in greater detail in a later preview. The Final Mission As UFOs appear in orbit and enemies spawn on your base, you’ll be forced to decide how best to allocate your resources. They are finite, after all, and the key to XCOM: The Board Game is deciding which battles you need to win, and which sacrifices you can afford to make. As much as this is a game of tense struggles against strange and remorseless foes, it is a game of resource management. Interceptors cost money. Soldiers cost money. Scientists cost money. Satellites cost money. And your funds are limited. You need to weigh your options clearly and quickly, even in the face of disaster. 
Your team has thirteen credits… You need to make them count!
But if you can help the world’s governments retain a semblance of order long enough, and if you can keep the enemies from destroying your base and all your work, you just might be able to send a hand-picked unit of soldiers to undertake one final, surgical strike against the aliens that may hit them hard enough that you can turn the tides of war. 
XCOM’s squad leader sends a squad of two assault soldiers and one sniper to attempt the game’s final mission. Both types of soldiers excel at the early tasks, though they may need to push hard to make it through the mission’s third task.
Moreover, you can undertake other missions throughout the game to find weaknesses in the aliens’ invasion plan. By completing these other missions, you reduce the amount of time it takes your analysts to discover the target of your final mission. Both these preliminary missions and the final mission require that you complete a number of tasks, but there’s certainly no guarantee you’ll resolve them successfully on the first attempt, nor on the second, or the third. In fact, there’s a good chance that when you send your best soldiers to a mission, you’re sending them to their doom. 
Open task slots on missions are filled by enemies. Completing this final mission requires that you get one success on the first task, then get three successes on the second task, and finally manage to get one last success on the third task.
Prevail Against Overwhelming Odds The odds of XCOM: The Board Game are stacked against you. There are two ways to lose and only one way to win. By the time your team gets funding, the aliens have already launched their invasion. You need to fight your war on four fronts, but you don’t have enough funding to fight on even footing at each. Out of this situation, you must carve a winning plan. You need to shoot down UFOs to slow the rise of panic. You need to fight for your base. You need to research new tech to gain footing. You need to send soldiers on deadly missions to gain crucial military intelligence. It’s a desperate situation, and it requires bold action. The question is: How far will you push your luck?
In our next preview, we’ll look at the game’s push-your-luck dice mechanics in conjunction with your base defense, the role of the Squad Leader, and the resolution of missions! ... Source: The Desperate Defense (http://www.fantasyflightgames.com/edge_news.asp?eidn=5115)
Title: FFG:Capital Ships in Battle
Post by: RSSFeeder on 15 October 2014, 05:00:03
Capital Ships in BattlePreview the Combats of STAR WARS (TM): Armada
“Move as close as you can and engage those Star Destroyers at point-blank range.”
–Lando Calrissian The battles of Star Wars™: Armada are about as large as battles get. Rebel and Imperial fleets collide above Outer Rim planets or outside of asteroid fields. Star Destroyers and Rebel frigates exchange turbolaser fire as screens of TIEs swarm X-wings and Corellian corvettes. The fate of the galaxy hangs in the balance. As large as the space battles of Armada are, they flow seamlessly over six rounds, each of which is divided into four phases. In our last preview, we looked at the Command Phase and how it forces you to plan for the future, even as you respond to the changing tides of battle. Larger ships are more powerful, though less responsive, and while they’re capable of resolving more commands within a single round, they force you to plan further ahead. A single round of combat may be the culmination of three or four rounds of planning. When the moment comes to fire, then, you’ll want to be sure to make it counts. In today’s preview, we’ll look more closely at the Ship Phase, focusing on ship-to-ship combat and its brutal exchanges of turbolaser blasts and artillery fire.
The Ship Phase In Armada, after you and your opponent have selected all your commands and placed them on the bottom of your ships’ command stacks, you proceed to the Ship Phase, in which you and your opponent take turns activating your ships one at a time. When it’s your turn, you can choose any of your capital ships that has not already activated during the round and activate it. Each activation has three steps: Reveal Command Dial, Attack, and Execute Maneuver. 1. Reveal Command DialOnce you select which of your ships you intend to activate, you reveal the top command from its command stack and place the dial faceup next to your ship. If you want to resolve the command from the dial for its full effect, you can do so at the appropriate time. Otherwise, you can spend the command to gain the matching command token and place it next to your ship. 
The Imperial player reveals a navigate command from the top of a Victory I-class Star Destroyer’s command stack.
2. AttackAfter you reveal your ship’s command dial, your ship can perform up to two attacks, though each must originate from a different hull zone. Each attack can target a single hull zone on an enemy ship or one or more enemy squadrons. We’ll look at how your ship resolves its attacks in more detail below.
Few things in the galaxy are deadlier or more terrifying than direct fire from an Imperial Star Destroyer!
3. Execute ManeuverAfter your ship performs its attacks, it executes a maneuver. Using the game’s articulated maneuver tool, you must move your ship a distance corresponding to its current speed, tracked on its speed dial. Notably, your ship’s movement is based upon its speed. Each ship’s card features a speed chart that indicates the number of steps you can adjust the maneuver tool’s yaw at each joint, and the only way to adjust your ship’s speed is to resolve a navigate command. 
A Nebulon-B frigate uses the game’s maneuver tool to set its course for a four-speed maneuver, adjusting the template one click right at the second joint and two clicks left at the third joint.
After you finish executing your ship’s maneuver, you place its command dial faceup on its ship card, and your opponent can activate a ship. Maximum Firepower As mentioned earlier, each of your ships can perform up to two attacks when it activates, and getting the most out of these attacks is crucial to your success. As a result, it’s vital that you understand how to create the best possible pool of attack dice, anticipate your opponent’s defenses, and learn to position your ships to anticipate their attacks in the next round. The strength of your attack is represented by its pool of attack dice. There are three types of color-coded, eight-sided attack dice, and each corresponds to a different maximum firing range, as indicated on the game’s range ruler. 
Colored icons indicate which types of dice can fire at a given range. All three dice can fire at close range while only the red dice can fire at long range.
 |
Red dice have the longest range, though they are the least accurate. Only five of their sides result in hits ( ) or critical hits ( ) or critical hits ( ), although only two of their sides are blank. The final side has an accuracy ( ), although only two of their sides are blank. The final side has an accuracy ( ) result, which can be used to strip away your opponent’s defenses, which we’ll explore in more detail below. ) result, which can be used to strip away your opponent’s defenses, which we’ll explore in more detail below. |
 |
Blue dice have the second longest range and are the most accurate. They have no blank faces; the faces that don’t result in hits () or critical hits () result in accuracy (). |
 |
Black dice have the shortest range but deal the most damage. While these dice have two blank sides, they also feature multiple sides that combine both hit () and critical hit () results. |
The combination of dice that you roll for an attack against an enemy ship’s hull zone depends upon the hull zone from which your attack originates and is indicated on your ship card. If you choose, however, to have your ship perform an attack against one or more squadrons, it uses a different pool of attack dice. Each ship has an anti-squadron armament that is indicated to the right of its hull value on the ship card, and it uses this pool of dice against squadrons, regardless of the hull zone from which it fires. 
Though the Victory II-class Star Destroyer features a primary attack of six dice from its front firing arc, its anti-squadron armament consists of just a single blue attack die.
It’s also worth noting, at this point, that the different versions of your ships may feature different armaments with different combinations of attack dice. For example, the CR90a Corvette attacks out of its foreward hull zone with two red dice and one blue dice, but the CR90b Corvette attacks from the same hull zone with three blue dice. 
Two of the CR90a’s attack dice can fire at long range while the CR90b is limited entirely to shots at medium or close range.
As you can see, gaining maximum impact from your attacks is a matter of catching your target within the ideal range and firing arc of your most lethal hull zones. You can further enhance the impact of your attacks by adding dice with the concentrate fire command and spending a concentrate fire command token to reroll any unfavorable result. Against this, you’ll want to consider the sort of retaliatory fire that your opponent’s ships might be able to send your way. For example an Imperial admiral in command of a badly damaged Victory I-class Star Destroyer might choose to fire at a CR90b Corvette from long range for only three red dice, rather than plot a course to fire at it from close range for three red dice and three black dice. 
At that longer range, the Victory I is safely out of range of the Corvette (as illustrated above by the first diagram above). However, at shorter range (as illustrated by the second diagram), the Star Destroyer doubles the impact of its attack, but it also makes itself vulnerable to the three medium-range blue dice from the Corvette’s foreward hull zone. If it doesn’t destroy the Corvette, the Corvette might punch through its final defenses and destroy it. Reroute Power to the Forward Deflector Shields Meanwhile, as you batter your opponent’s ships with turbolasers, missiles, and proton torpedoes, your enemy is firing back at you. If you want your ships to survive the battle, you need to make the most of their different defenses. Your ship’s first defenses are its shields. Each hull zone has a shield value, which indicates how much damage its shields can absorb before they fail. 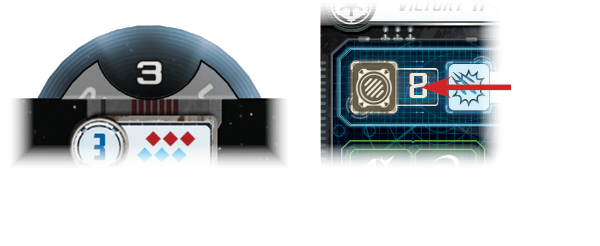
The shield value (left) and hull value (right) of the Victory II-class Star Destroyer.
Hits against a hull zone that has lost its shields deal damage to the ship’s hull. Each ship has a hull value listed underneath its title, and if it suffers damage equal to or greater than its hull, it is destroyed. To prevent your opponent from dealing damage to your hull, then, you need to do more than simply rely upon your shields. Each ship indicates a number of defense tokens that it can use while defending against an attack, and each token allows your ship to perform a different action in response to the attack in order to mitigate its results.
 |
Redirect: When you redirect an attack, you choose one of your hull zones adjacent to the defending hull zone, and you can redirect any amount of the damage dealt to your ship from the defending hull zone to the redirect zone’s remaining shields. |
 |
Evade: A ship with an evade token can spend it to cancel one attack die at long range, or to force an opponent to reroll one attack die at medium range. Against attacks made at close range and distance “1,” the evade token has no effect. |
 |
Halve Damage: A ship with the halve damage token can spend it to halve the damage from a single attack, rounded up. |
These tokens make your defense a matter not only of statistics, but also tactics. Once you use one of these tokens, it is exhausted and turned facedown, displaying its red side. Exhausted tokens aren’t refreshed until the end of the round, so if your ship is exposed to multiple attacks, you need to think carefully about when you want to use one of your defense tokens. 
Once used, a readied defense token (green) is exhausted (red).
It is possible to use an exhausted defense token, but doing so removes it from your ship entirely. You no longer have that defensive option available to you each round. Finally, it’s important to remember that you can use the engineering points you gain from the repair command to repair your ship’s hull or shields. However, you can’t use these points outside of your ship’s activation, so while they may help you recover from the damage you sustain during an attack, they don’t offer you any additional protection during the attack. Moving into Attack Position Even though your ships can each perform two attacks in the Ship Phase, those attacks must originate from different hull zones. Since each of your ship’s hull zones has its own firing arc, and none of these firing arcs overlap, your ship will often need to perform its two attacks against different targets.
 Click on the above thumbnail to download an example attack from the Armada Learn to Play rulebook (pdf, 443 KB). Click on the above thumbnail to download an example attack from the Armada Learn to Play rulebook (pdf, 443 KB).
|
|
Unfortunately, if you direct your attacks against multiple targets, rather than training them all against a single hull zone, the reduction in concentrated firepower may give your foes the time they need to refresh their defense tokens, redirect their shields, repair damage, and brace themselves for multiple additional rounds of combat. This means that you need to coordinate your attacks as much as possible, both by training the weapons from multiple ships against a single hull zone and by setting courses for your ships that leave them in position to target the same, compromised enemy hull zone with attacks from two of their hull zones. Of course, this is easier said than done, especially since you and your opponent are always trading activations. In the end, learning how to coordinate your fleet is something of an art form, and if you can concentrate the fire from multiple ships against a single target, you’re well on your way toward destroying that target and defeating your foe. You Are in Command Now In Armada, you take on the role of fleet admiral, and it is your job to coordinate the actions of the thousands of men and women under your command. As your ships tremble and groan under the barrage of enemy fire, you are the one who must direct their fire, their defenses, and their movement. Can you deliver the commands that will see your side emerge victorious? The battles of Armada are massive, and they’re brutal. Moreover, they’re every bit as much about tactics as they are about raw firepower. We’ll continue our exploration of these tactics in our next preview when we take a closer look at how capital ships make use of the game’s unique maneuver tool and how they interact with obstacles! ... Source: Capital Ships in Battle (http://www.fantasyflightgames.com/edge_news.asp?eidn=5116)
Title: FFG:Fantasy Flight Games Is Now Hiring
Post by: RSSFeeder on 15 October 2014, 13:30:03
Fantasy Flight Games Is Now HiringApply for the Position of Art Coordinator TodayFantasy Flight Games, leading hobby-market publisher of board games, card games, roleplaying games, and other tabletop games, is now hiring for the following position: Details can be found in the pdf document linked above. To apply for this position, please submit a cover letter with salary requirements and resume to HumanResources@fantasyflightgames.com; under the subject line “Art Coordinator” no later than end of business day Friday, October 24, 2014. Please do not call or visit. Our offices are located in Roseville, Minnesota, a suburb of the Twin Cities of Minneapolis and St. Paul. Candidates not already living within commuting distance must be willing to relocate. Fantasy Flight Publishing, Inc. is an equal opportunity employer committed to a diverse work force and a work environment free from discrimination. ... Source: Fantasy Flight Games Is Now Hiring (http://www.fantasyflightgames.com/edge_news.asp?eidn=5117)
Title: FFG:Use Your Talents. Make a Difference.
Post by: RSSFeeder on 15 October 2014, 22:00:02
Use Your Talents. Make a Difference.Six New Age of Rebellion Specialization Decks Are Now Available
“The Empire doesn’t consider a small one-man fighter to be any threat, or they’d have a tighter defense. An analysis of the plans provided by Princess Leia has demonstrated a weakness in the battle station.”
–General Jan Dodonna Fantasy Flight Games is proud to announce that six new Specialization Decks are now available for the Star Wars®: Age of Rebellion™ Roleplaying Game! Available via FFG’s in-house manufacturing, these Specialization Decks provide you quick and easy access to all the talents and abilities from the Diplomat and Engineer careers. This means you will spend less time consulting your blueprints and more time updating Rebel tech, blowing up Imperial shield generators, and convincing the galaxy’s citizens to join the fight for freedom. 
With Age of Rebellion Specialization Decks, you’ll be able to stay focused, think quickly, and aid the Rebel Alliance, even if you find yourself facing a whole squad of Stormtroopers! Every Hero Has a Role to Play In your Age of Rebellion campaigns, as in the classic Star Wars trilogy, the Rebel Alliance relies upon its heroes to step forward, band together, and put their talents toward the cause. Every hero has a role to play. Every hero can make a difference. For example, Luke Skywalker fired the shot that destroyed the Death Star, but he never would have had the chance if it hadn’t been for the contributions of many different, talented individuals. Spies gathered the battle station’s blueprints, Leia Organa transported and delivered them, Rebel engineers analyzed them, Rebel commanders developed the plan of attack, and Luke’s wingmen helped him fly safely along the length of the Death Star trench. Only because all those individuals pooled their talents and played their parts did the Rebel Alliance deal the Empire a massive blow. The Rebellion is outnumbered and outgunned, and if it has any chance of winning the Galactic Civil War, it needs all of its members to shine when their moments arrive. 
Diplomat Ambassador
- As an Ambassador, you seek out others who may lend their aid to the Rebel Alliance and its struggles for galactic freedom. Your arguments help to sway planets, systems, corporations, and other groups, and your successes fuel the Alliance as you spread hope, open access to valuable new resources, and pave the way for a future free of the Empire and its tyranny. There’s no room for you to falter, so the cards in the Diplomat Ambassador Specialization Deck ensure that you enter every negotiation well prepared.
Diplomat Agitator
- The Empire’s main weapon, more effective than all of the incredible firepower at its disposal, is fear. Fear lets it maintain order and authority over the countless beings in its thrall. As an Agitator, you are tasked with helping others overcome that fear, replacing it with anger, courage, or a sense of righteousness – anything that inspires them to rise up, take up arms, reject the tyrannical government that has long oppressed them, and help restore freedom and justice to the galaxy. Your job requires that you tread carefully, and you’ll do well to keep track of all your resources with the Diplomat Agitator Specialization Deck.
Diplomat Quartermaster
- There’s an old military saying, “Empty stomachs make for poor soldiers.” As Quartermaster, it’s your job to keep the Rebellion strong by ensuring your troops get the support they need. Others rely upon you not just for food, but for weapons, ammunition, medical supplies, and everything else. Moreover, you need to do more than just secure these items, you need to get them into the right hands. Managing the flow of all these logistics is a demanding task, but you have it mastered. Plus, you can call upon the Diplomat Quartermaster Specialization Deck to help you further organize your efforts.

Engineer Mechanic
- Mechanics are the gears of the Alliance machine and the grease that makes it run smoothly. Military vehicles, starfighters, artillery, and other machines suffer constant wear-and-tear, and the Rebellion relies upon you to keep them functional for battle. Accordingly, you do everything from minor tune-ups and adjustments to massive overhauls and repairs, most of which you’ll perform in the field in order to best support your unit. There, while explosions erupt all around you and laser blasts ionize the air, the Engineer Mechanic Specialization Deck can be almost as valuable as your tool kit as it helps you focus on the task at hand and complete it as quickly and skillfully as possible.
Engineer Saboteur
- As a Saboteur, your role is nearly anathema to the usual technician’s mentality. After all, you specialize in disrupting and destroying your enemy’s technical and mechanical assets. By denying your enemy the use of its weapons and vehicles, you diminish its capacity to wage war. Of course, your job requires that you get close enough to strike, so you don’t want to leave anything to chance. You need to understand what methods will cause maximum damage and chaos, and you want to have your tools close at hand at all times, including the cards from the Engineer Saboteur Specialization Deck.
Engineer Scientist
 As it operates with just a fraction of the resources and funding of the Empire, the Alliance is constantly forced to find creative solutions to problems. These problems include matters of supply, housing, transport, effective weaponry, defenses, and a host of others. The people they turn to for those creative solutions are those who are trained and driven to identify a need and seek out a technical solution to it – in other words, Scientists like you. Most Scientists prefer to work in labs, but the reality of war is such that even Scientists must sometimes face blaster fire. In such cases, it’s helpful to consolidate your resources, and the Engineer Scientist Specialization Deck can help to keep your talents close at hand, even in the heat of battle. As it operates with just a fraction of the resources and funding of the Empire, the Alliance is constantly forced to find creative solutions to problems. These problems include matters of supply, housing, transport, effective weaponry, defenses, and a host of others. The people they turn to for those creative solutions are those who are trained and driven to identify a need and seek out a technical solution to it – in other words, Scientists like you. Most Scientists prefer to work in labs, but the reality of war is such that even Scientists must sometimes face blaster fire. In such cases, it’s helpful to consolidate your resources, and the Engineer Scientist Specialization Deck can help to keep your talents close at hand, even in the heat of battle.
Always Be Ready for Action You never know where your duties might take you next, but you know there’s always another battle and another chance to strike a blow against the evil Galactic Empire. Do your part to remain ready for action at a moment’s notice. The Specialization Decks for the Diplomat Ambassador, Diplomat Agitator, Diplomat Quartermaster, Engineer Mechanic, Engineer Saboteur, and Engineer Scientist are available now! ... Source: Use Your Talents. Make a Difference. (http://www.fantasyflightgames.com/edge_news.asp?eidn=5120)
Title: FFG:Use Your Talents. Make a Difference.
Post by: RSSFeeder on 16 October 2014, 06:00:08
Use Your Talents. Make a Difference.Six New Age of Rebellion Specialization Decks Are Now Available
“The Empire doesn’t consider a small one-man fighter to be any threat, or they’d have a tighter defense. An analysis of the plans provided by Princess Leia has demonstrated a weakness in the battle station.”
–General Jan Dodonna Fantasy Flight Games is proud to announce that six new Specialization Decks are now available for the Star Wars®: Age of Rebellion™ Roleplaying Game! Available via FFG’s in-house manufacturing, these Specialization Decks provide you quick and easy access to all the talents and abilities from the Diplomat and Engineer careers. This means you will spend less time consulting your blueprints and more time updating Rebel tech, blowing up Imperial shield generators, and convincing the galaxy’s citizens to join the fight for freedom.
With Age of Rebellion Specialization Decks, you’ll be able to stay focused, think quickly, and aid the Rebel Alliance, even if you find yourself facing a whole squad of Stormtroopers! Every Hero Has a Role to Play In your Age of Rebellion campaigns, as in the classic Star Wars trilogy, the Rebel Alliance relies upon its heroes to step forward, band together, and put their talents toward the cause. Every hero has a role to play. Every hero can make a difference. For example, Luke Skywalker fired the shot that destroyed the Death Star, but he never would have had the chance if it hadn’t been for the contributions of many different, talented individuals. Spies gathered the battle station’s blueprints, Leia Organa transported and delivered them, Rebel engineers analyzed them, Rebel commanders developed the plan of attack, and Luke’s wingmen helped him fly safely along the length of the Death Star trench. Only because all those individuals pooled their talents and played their parts did the Rebel Alliance deal the Empire a massive blow. The Rebellion is outnumbered and outgunned, and if it has any chance of winning the Galactic Civil War, it needs all of its members to shine when their moments arrive.
Diplomat Ambassador - As an Ambassador, you seek out others who may lend their aid to the Rebel Alliance and its struggles for galactic freedom. Your arguments help to sway planets, systems, corporations, and other groups, and your successes fuel the Alliance as you spread hope, open access to valuable new resources, and pave the way for a future free of the Empire and its tyranny. There’s no room for you to falter, so the cards in the Diplomat Ambassador Specialization Deck ensure that you enter every negotiation well prepared.
Diplomat Agitator - The Empire’s main weapon, more effective than all of the incredible firepower at its disposal, is fear. Fear lets it maintain order and authority over the countless beings in its thrall. As an Agitator, you are tasked with helping others overcome that fear, replacing it with anger, courage, or a sense of righteousness – anything that inspires them to rise up, take up arms, reject the tyrannical government that has long oppressed them, and help restore freedom and justice to the galaxy. Your job requires that you tread carefully, and you’ll do well to keep track of all your resources with the Diplomat Agitator Specialization Deck.
Diplomat Quartermaster - There’s an old military saying, “Empty stomachs make for poor soldiers.” As Quartermaster, it’s your job to keep the Rebellion strong by ensuring your troops get the support they need. Others rely upon you not just for food, but for weapons, ammunition, medical supplies, and everything else. Moreover, you need to do more than just secure these items, you need to get them into the right hands. Managing the flow of all these logistics is a demanding task, but you have it mastered. Plus, you can call upon the Diplomat Quartermaster Specialization Deck to help you further organize your efforts.
Engineer Mechanic - Mechanics are the gears of the Alliance machine and the grease that makes it run smoothly. Military vehicles, starfighters, artillery, and other machines suffer constant wear-and-tear, and the Rebellion relies upon you to keep them functional for battle. Accordingly, you do everything from minor tune-ups and adjustments to massive overhauls and repairs, most of which you’ll perform in the field in order to best support your unit. There, while explosions erupt all around you and laser blasts ionize the air, the Engineer Mechanic Specialization Deck can be almost as valuable as your tool kit as it helps you focus on the task at hand and complete it as quickly and skillfully as possible.
Engineer Saboteur - As a Saboteur, your role is nearly anathema to the usual technician’s mentality. After all, you specialize in disrupting and destroying your enemy’s technical and mechanical assets. By denying your enemy the use of its weapons and vehicles, you diminish its capacity to wage war. Of course, your job requires that you get close enough to strike, so you don’t want to leave anything to chance. You need to understand what methods will cause maximum damage and chaos, and you want to have your tools close at hand at all times, including the cards from the Engineer Saboteur Specialization Deck.
Engineer Scientist - As it operates with just a fraction of the resources and funding of the Empire, the Alliance is constantly forced to find creative solutions to problems. These problems include matters of supply, housing, transport, effective weaponry, defenses, and a host of others. The people they turn to for those creative solutions are those who are trained and driven to identify a need and seek out a technical solution to it – in other words, Scientists like you. Most Scientists prefer to work in labs, but the reality of war is such that even Scientists must sometimes face blaster fire. In such cases, it’s helpful to consolidate your resources, and the Engineer Scientist Specialization Deck can help to keep your talents close at hand, even in the heat of battle.
Always Be Ready for Action You never know where your duties might take you next, but you know there’s always another battle and another chance to strike a blow against the evil Galactic Empire. Do your part to remain ready for action at a moment’s notice. The Specialization Decks for the Diplomat Ambassador, Diplomat Agitator, Diplomat Quartermaster, Engineer Mechanic, Engineer Saboteur, and Engineer Scientist are available now! ... Source: Use Your Talents. Make a Difference. (http://www.fantasyflightgames.com/edge_news.asp?eidn=5121)
Title: FFG:Strike Team Equipment
Post by: RSSFeeder on 16 October 2014, 14:30:02
Strike Team EquipmentAnnouncing the Imperial Assault Dice Pack
“Your father’s Lightsaber. This is the weapon of a Jedi Knight. Not as clumsy or random as a blaster; an elegant weapon for a more civilized age.”
–Obi-Wan Kenobi, Star Wars: A New Hope Whether you’re leading an elite strike team of Rebel operatives deep into an Imperial base, or concentrating fire on your opponents with a team of Stormtroopers, it’s crucial to keep your full attention on the mission at hand. Focus completely on your Imperial Assault missions with a tool of convenience: extra combat dice! Grab Your Gear Fantasy Flight Games is proud to announce the upcoming release of the Imperial Assault Dice Pack, an accessory for Imperial Assault. The Imperial Assault Dice Pack contains eleven custom combat dice, identical to the dice found in the Imperial Assault Core Set. 
You can keep the focus on your tense missions in the Star Wars universe with these extra dice. Combined with the eleven combat dice from the Core Set, these dice ensure that you can quickly navigate even the most demanding missions. If you ever want more Imperial Assault combat dice, look for the Imperial Assault Dice Pack in the first quarter of 2015! ... Source: Strike Team Equipment (http://www.fantasyflightgames.com/edge_news.asp?eidn=5119)
Title: FFG:Old Friends and Deadly Foes
Post by: RSSFeeder on 16 October 2014, 23:00:02
Old Friends and Deadly FoesAnnouncing Seven New Ally and Villain Packs for Imperial Assault
“Han Solo. I’m captain of the Millennium Falcon. Chewie here tells me you’re looking for passage to the Alderaan system?”
–Han Solo, Star Wars: A New Hope Fantasy Flight Games is proud to announce seven new Ally Packs and Villain Packs for Imperial Assault! You’ll be able to highlight iconic characters from the Star Wars universe in your games of Imperial Assault with these figure packs:
- Han Solo Ally Pack
- Chewbacca Ally Pack
- Rebel Troopers Ally Pack
- Rebel Saboteurs Ally Pack
- General Weiss Villain Pack
- Royal Guard Champion Villain Pack
- IG-88 Villain Pack
Like the Luke Skywalker Ally Pack and the Darth Vader Villain Pack included in the Imperial Assault Core Set, these new figure packs contain detailed plastic figures to replace the tokens provided in the Core Set. These figures can be used in both the Imperial Assault campaign game and the skirmish game, and every Ally Pack and Villain Pack offers you new missions for both games. Of course, every Ally Pack and Villain Pack offers far more than just a plastic figure. A new side mission that you can weave into any campaign is included in every figure pack, along with two new skirmish missions that share the same map. Villain Packs offer new Agenda cards for the Imperial player, Ally Packs introduce new Reward cards for the heroes to gain in a campaign, and all figure packs contain new Command cards for building your Command decks in a skirmish. Command cards, Agenda cards, and Reward cards will all be explored in greater depth in future Imperial Assault previews. 
Heroic Allies Ally Packs invite you to battle alongside iconic heroes from the Star Wars universe. With the Han Solo Ally Pack, you gain access to a sculpted plastic figure of Han Solo, infamous scoundrel and smuggler. You now have the chance to work with Han Solo in any adventure. You’ll find yourself fighting to repel Imperial boarders from the Millennium Falcon in a new campaign side mission. Alternatively, you may enter the Corellian underground to engage in a skirmish, whether you’re rooting out local troublemakers or seizing control of an illicit Sabacc table. This Ally Pack also offers six new Command cards for your skirmish games: cards like I Make My Own Luck allow you to seize control of the initiative for a round. 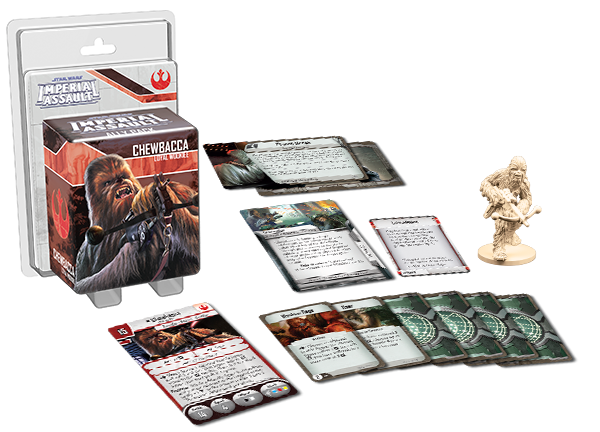
The Chewbacca Ally Pack offers you a detailed figure of Chewbacca, Han Solo’s co-pilot, compatriot, and fellow smuggler. This noble Wookiee can fight alongside the heroes of the Rebel Alliance in any campaign or skirmish mission, including the three included in this expansion. In a new campaign side mission, you must prevent the Empire from capturing and enslaving helpless Wookiees on Kashyyyk. You may also join Chewbacca for two skirmishes in an Imperial labor camp – you can engineer the escape of a vital prisoner, or infiltrate the facility and secure it for your own faction. New Command cards like Adrenaline grant your Wookiees additional health and greater power in any skirmish missions. 
In the Rebel Troopers Ally Pack, you’ll find three sculpted plastic Rebel Trooper figures for use in any campaign and skirmish missions. These fearless soldiers of the Rebellion are ready to lay down their lives to defend its ideals, and the new missions included in this figure pack give you the chance to join the fight for freedom. Journey to a Geonosis foundry for two skirmish missions that challenge you to attack your opponent’s power generators or capture a powerful, experimental weapon. Or, play a new campaign side mission that forces you to download critical data before Imperial Stormtroopers overrun the Rebel Troopers’ position. Six new Command cards bring new options to your skirmish missions with incendiary specializations like Grenadier. 
The Rebel Saboteurs Ally Pack brings you new, explosive allies – two Rebel Saboteurs. These figures can be integrated into any Imperial Assault campaign or skirmish game, and they come with their own missions for you to pursue. You may take a break from the main course of the campaign to help these saboteurs destroy a prototype starship. On the other hand, your skirmishes may lead you into the wilderness of Endor as you struggle to recover deadly hazardous materials or use sonic resonators to sabotage your opponent’s position. New Command cards like Hide in Plain Sight ensure that your Spies stay hidden until they arrive at their objective. 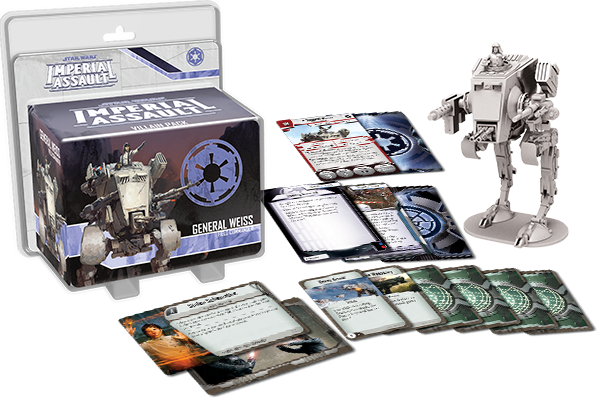
Dastardly Villains You can also turn to the dark side with Imperial Assault Villain Packs. Embrace the power of the Galactic Empire with the General Weiss Villain Pack. This pack contains the pieces to construct a standard AT-ST or General Weiss’s heavily modified assault walker, both of which tower above the battlefield and strike fear into the hears of the Rebels. New missions are also included within this expansion. During a campaign, you may lure the foolish heroes into a deadly forest ambush. While playing the Imperial Assault skirmish game, your missions might lead you to a derelict Imperial research lab in search of schematics, or you may be stranded on a planet and forced to use the facility’s communications array to reestablish contact with your allies. Meanwhile, new Command cards like Heavy Armor keep your Vehicles fully functional during an enemy attack. 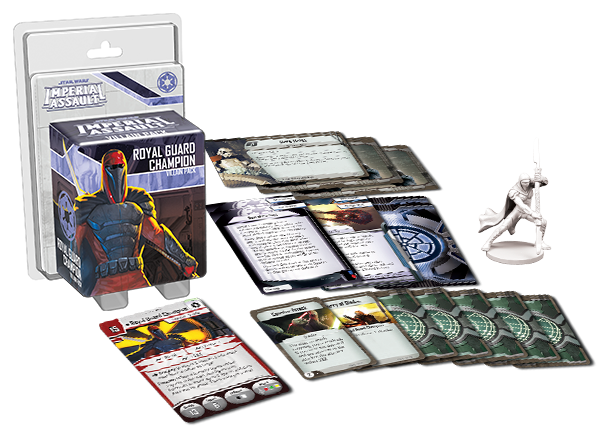
You can showcase your most vicious battle tactics with the Royal Guard Champion Villain Pack. With a detailed figure representing a fearsome champion of the Emperor’s Royal Guard, this figure pack brings new terrors to members of the Rebel Alliance. Lie in wait for the heroes during a campaign and tempt them to take on a side mission to upload a virus into an Imperial datacenter. Alternatively, you may face your opponents in a Kuat space station, whether you’re attempting a risky data heist or trying to intercept a key transmission before your opponent. No matter which skirmish you deploy the Royal Guard Champion in, Command cards like Flurry of Blades ensure that his deadly skills are used to their full advantage. 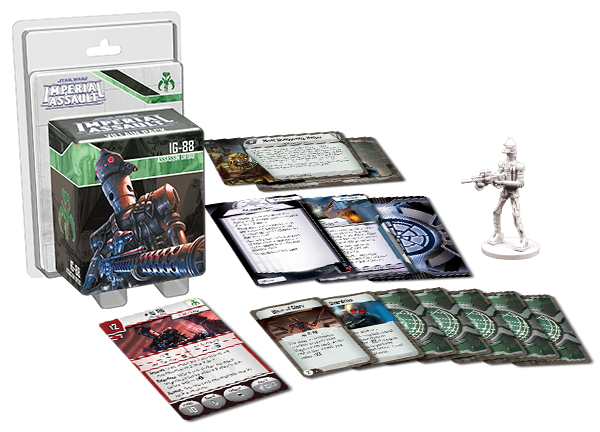
Another Villain Pack offers you the chance to begin a hunt for your opponent’s characters with IG-88. This deadly assassin and bounty hunter comes to life with a sculpted plastic figure. You may interrupt the heroes’ campaign by leading a Droid revolution against your biological oppressors. Or, in your skirmish missions, your units can enter the shifting junkyards of Ord Mantell, whether you’re hunting down a bounty or gathering crucial salvage before the junkyard’s defenses reactivate. If you muster an army of Droids in a skirmish, cards like Overdrive grant them more actions than ever before. 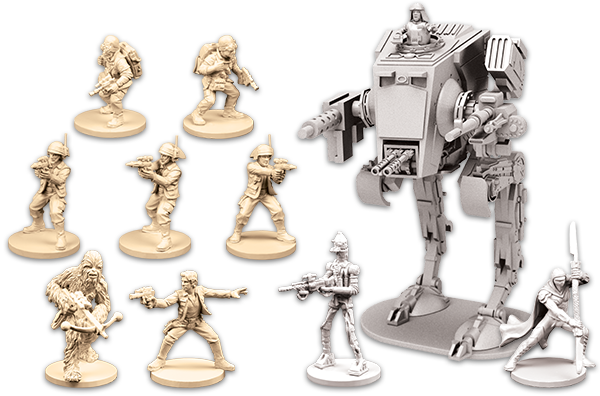
New Adventures Await No matter which Ally Packs and Villain Packs you use, you’ll be able to greatly enhance your campaigns and skirmishes within Imperial Assault. Look for these figure packs in the first quarter of 2015, and keep watching the Imperial Assault minisite for more in-depth previews of the campaign game and the skirmish game! ... Source: Old Friends and Deadly Foes (http://www.fantasyflightgames.com/edge_news.asp?eidn=5118)
Title: FFG:The Anarch Way
Post by: RSSFeeder on 17 October 2014, 07:30:03
The Anarch WayAn Android: Netrunner Strategy Article by Guest Writer El-ad David Amir
“A parasite here. A parasite there. And time to watch the servers die.”
–Noise Android: Netrunner is a two-player Living Card Game® of high-stakes, cat-and-mouse cyberstruggles. One player assumes the role of an executive in one of the world’s largest megacorps, tasked with defending its most valuable business secrets against the other player, the Runner, a talented hacker who seeks to access and steal the secrets of the Corp’s agendas. Each agenda is worth a number of points, and the first player to score or steal seven agenda points wins the game. Based on the classic Netrunner collectible card game by Richard Garfield, Android: Netrunner received a number of updates before it was brought into the world. One of those updates was the addition of factions within the Corp and Runner sides, as well as different identity cards for each of those factions. These factions add new layers of personality and impose restrictions upon deck-building that, ultimately, spur a greater degree of creativity and variety in deck design. Likewise, each faction’s identity cards present a unique array of abilities that offer variations upon the faction’s core strengths. In today’s strategy article, guest writer El-ad David Amir explores the core strengths of one of these Runner factions, the Anarch faction, and he looks at the tactical diversity its identity cards offer as you explore your Anarch options. 
No Rules Runners in the world of Android: Netrunner all belong to one of three factions: Anarch, Criminal, or Shaper. When you build a deck, one of the first decisions you’ll need to make is which of the three to join. The game’s influence system allows a limited measure of flexibility, but it also ensures that each faction has its own character. Shapers are renowned for their efficiency and originality. Criminals are notorious for their events and daring acts of aggression. Anarchs? Anarchs have no rules, dude. Chill out. Maybe burn the world while you’re at it. Make some sysop’s day miserable for bonus points. Whereas both Shapers and Criminals are defined primarily by the motives that spur them forward, Anarchs are defined primarily by their opposition to the existing order. Anarchy, see? They don’t need to share some Runners code or moral impulse. They just need to rebel against the established order and break some rules. Maybe all the rules. At their most effective, Runners don’t just break the rules of society, they erode its very foundation. Let’s start with the Anarch identities, which introduce different ways to force the Corp into situations where formerly safe decisions suddenly become risky. Leaving high trash-cost assets in the open is a recipe for disaster against Whizzard (What Lies Ahead, 1). Reina Roja (Mala Tempora, 41) makes it painful for the Corp to rez even its cheapest, early-game ice.  
The latest newcomer to the Anarch faction, Quetzal (First Contact, 52), is an aggression powerhouse, potentially invalidating a third of the Corp’s ice. And when it faces Edward Kim (Order and Chaos, 28), one of three Anarchs from the upcoming Order and Chaos expansion, the Corp stands to lose any operations it doesn’t use; he can trash the first operation he accesses each turn. When there’s a red identity on the table, you know that something basic about the game is going to be slightly twisted. 
The next rule to fly out the window is the resilience of certain cards. All Runners can steal agendas and pay to trash assets, but Anarchs can trash anything and everything they touch. The prime example for this pernicious ability is Parasite (Core Set, 12), a virus that slowly eats away at an ice’s strength, eventually devouring it. Whether the Corp relies on large, expensive ice to tax the Runner or sets up cheap barriers to block the Runner’s path, it is sure to rue the moment that Parasite hits the table. It’s not just Parasite, though. Wherever it goes, the faction leaves wanton destruction in its wake, blasting cards from the Corp’s hand with Imp (What Lies Ahead, 3), Hemorrhage (Fear and Loathing, 82), and Demolition Run (Core Set, 3). In fact, Anarchs can nuke a whole remote with a single Singularity (Double Time, 101). Such ruthless assaults can come from any angle. The Corp is never free from danger. Finally, there is another, ultimate form of destruction. Anarchs are able to throw the Corp into disarray and win the game by completely burning down R&D, a strategy known as “decking.” If the Corp needs to draw a card and cannot, it loses the game. The perfect identity for this strategy is Noise (Core Set, 1), who can “mill” cards straight from R&D into archives just by installing viruses. Any virus will work, not just Anarch viruses, and this makes Cache (The Spaces Between, 37) a true treasure trove for the Hacker Extraordinaire. Another powerful card that supplements the milling strategy is Data Leak Reversal (Future Proof, 103), which translates clicks directly into milled cards. By transforming the battle field, Anarchs put the Corp on a very tight clock. Use Your Influence Unfortunately, all of this wonderful mayhem comes at a price, as Anarchs lack the discipline and organization of other Runner factions. They have neither the powerful tutoring that Shapers possess nor the various back channels that Criminals have developed, such as Inside Job (Core Set, 21) and Sneakdoor Beta (Core Set, 28). As a result, their influence is often dedicated to importing tools that address their lack of consistency. Even Anarchs need icebreakers to run, and Special Order (Core Set, 22), Test Run (Cyber Exodus, 47), and Self-modifying Code (Creation and Control, 46) are three cards that can help Anarchs fetch the right program at the right time. Quality Time (Humanity’s Shadow, 87) and Express Delivery (Honor and Profit, 33) help them dig through their decks for gems, and Wyldside (Core Set, 16) is a welcome watering hole for any troublemaker.  
To make the best out of the tools at hand, they might utilize Clone Chip (Creation and Control, 38) or Scavenge (Creation and Control, 34); losing two cards to Imp hurts, losing four or six is devastating. Anarchs’ many tricks are like pieces of a puzzle, and a with little help from the Shapers and Criminals, Anarchs can combine them to form a magnificent picture of sheer pandemonium. What’s Your Core Processor? What could serve as the core of a characteristic Anarch deck, then? There are all sorts of variations, but most of them are built from a few archetypal packages. One option is to rely on Parasite as the central ice breaking tool. Because such a deck doesn’t rely on a sensitive suite of breakers, the Runner can afford “facechecking” pieces of ice by running them with nothing on the table. Once the Corp rezzes the ice, the Anarch then uses Parasite in conjunction with Datasucker (Core Set, 8) to blow them up: 
Running Parasite as your key “breaker”? Try three Parasite plus three Datasucker, three Déja Vu (Core Set, 2), two Djinn (Core Set, 9), and two Crypsis (Core Set, 51).
Another idea is to go all gung-ho on Noise’s milling ability. Wyldside fuels your hand while Aesop’s Pawnshop (Core Set, 47) keeps the credits flowing. Once the Corp’s Archives accumulate a nice pile of face down cards, run it to find a treasure trove of agendas: 
Noise aims for the “mill” with a heavy collection of viruses, including three Wyldside, three Aesop’s Pawnshop, three Cache, three Gorman Drip (Opening Moves, 5), three Datasucker, and three Lamprey (Upstalk, 14).
The popular “Anatomy of Anarchy” build adopts Account Siphon (Core Set, 18), the most powerful weapon in the Criminal arsenal, and turns the tags it generates into an advantage through Data Leak Reversal: 
The “Anatomy of Anarchy” – three Account Siphon, three Same Old Thing (Creation and Control, 54), three Data Leak Reversal, three Joshua B. (Cyber Exodus, 42), and three Fall Guy (Double Time, 106).
Finally, Quetzal takes the faction in a new direction through her deceptively straightforward – and incredibly powerful – ability. With the following core, even if the Corp manages to find their code gates and sentries before you can send them to Archives with Keyhole (True Colors, 61), you still have an arsenal of AIs to get through key servers: 
Quetzal can unlock Corp servers with a decidedly different set of cards: three Overmind (Honor and Profit, 53), three Knight (Mala Tempora, 43), three Pawn (Opening Moves, 2), three Deep Red (Mala Tempora, 42), three Scheherazade (Second Thoughts, 22), three Keyhole, and two e3 Feedback Implants (Trace Amount, 24).
There are endless options for the Runner to pursue in Android: Netrunner, but the key is that you never want to play by the Corp’s rules. Anarchs certainly don’t. They smash their way through the world using a big hammer and a generous serving of gasoline. Thanks, El-ad! As El-ad notes, Anarchs thrive on chaos, and they have a plethora of tools with which they can burn down anything the Corp takes the time to build. However, the cyberstruggles of Android: Netrunner require more than blunt force; they require timing, as well. We’ll see more about this in other faction overviews, and we’ll see more of what the Anarchs can bring to the table in our previews of the upcoming Order and Chaos deluxe expansion. ... Source: The Anarch Way (http://www.fantasyflightgames.com/edge_news.asp?eidn=5122)
Title: FFG:STAR WARS (R): Force and Destiny (TM) Beta Update #6
Post by: RSSFeeder on 17 October 2014, 16:00:03
STAR WARS (R): Force and Destiny (TM) Beta Update #6News From the Developers of the Force and Destiny Beta
Hello Force and Destiny™ beta testers, This week’s updates (pdf, 313 KB) focus on Chapter X: Adversaries. One of our major changes involves the IG-100 Magnaguard; its power level was a little too high for the role we wanted it to fill, so we toned down the stats a little bit. We also added silhouettes to every creature that’s not silhouette “1,” though we only list silhouettes if they’re not silhouette “1,” which is the same silhouette as Player Characters. Now Pathfinders will find it easier to adopt animal friends from some of the available options. We’re going to keep the spotlight on the Adversaries chapter for one more week. We’ll also be focusing our internal testing on Adversaries this week, so this is the best time to submit your feedback. What Feedback Is Most Helpful? Please remember when submitting feedback on adversaries to use the following guidelines:
- Do not change the profiles of the adversaries during your games. If you change the profiles by modifying characteristics, skills, gear, or talents, then we have no idea if the original profile is balanced or useful.
 Include the composition of your player characters. Information about your group’s species, careers, specializations, and XP level are sufficient. We need to know what kind of PCs are going up against the adversaries in order to tell if the results are an aberration or expected. For example, a Fallen Master will butcher his way through a group of social-specced PCs, but may get soundly and quickly defeated by a group of lightsaber wielders. If all we learn is that the Fallen Master “TPKed” a group, we don’t know if the adversary is broken or working as intended. Include the composition of your player characters. Information about your group’s species, careers, specializations, and XP level are sufficient. We need to know what kind of PCs are going up against the adversaries in order to tell if the results are an aberration or expected. For example, a Fallen Master will butcher his way through a group of social-specced PCs, but may get soundly and quickly defeated by a group of lightsaber wielders. If all we learn is that the Fallen Master “TPKed” a group, we don’t know if the adversary is broken or working as intended.
- Details help. If something about an adversary seems slightly off-balance or broken, please feel free to elaborate and explain your position. Every little bit of information helps!
Thanks again, everyone, and we look forward to your feedback next week! ... Source: STAR WARS (R): Force and Destiny (TM) Beta Update #6 (http://www.fantasyflightgames.com/edge_news.asp?eidn=5123)
Title: FFG:Heroes of the Rebellion
Post by: RSSFeeder on 18 October 2014, 00:30:02
Heroes of the RebellionPreview Two Heroes from Imperial Assault
“General Solo, is your strike team assembled?”
–General Crix Madine, Star Wars: Return of the Jedi Immerse yourself in Star Wars adventures that you create with Imperial Assault, a miniatures game of tactical ground combat for two to five players. You’ll take up arms alongside the Alliance or the Empire in the midst of the Galactic Civil War. Whether you take potshots at Stormtroopers or pilot a massive AT-ST walker, Imperial Assault pulls you into the tension and excitement of the classic Star Wars films. Within Imperial Assault, you’ll find two complete game experiences. The first is a campaign game, allowing you and up to four friends to play as heroes in an elite Rebel strike team or command the legions of the Empire. Either way, you’ll tell a cinematic tale that stretches across a series of missions. The other game is a skirmish game that invites you and a friend to muster your forces and battle head-to-head over conflicting objectives.
In our last preview, we explored movement and combat in Imperial Assault. These actions make up the heart of gameplay, and are shared by both the campaign game and the skirmish game. As we move forward, previews will focus on either the campaign game or the skirmish game within Imperial Assault. Today, we turn our attention fully to the campaign game as we preview heroes in the campaign, and two heroes in particular: the valiant commander and the sly smuggler. Heroic Endeavors In an Imperial Assault campaign game, the Rebel players aren’t just any characters – they’re heroes of the Rebellion! To reflect this, heroes are the only figures that can use more than one action to attack, but they also have access to certain special abilities and actions. Heroes in a campaign can push their own limits by taking on strain. Many special abilities require the hero to suffer strain in order to trigger the ability. A hero may also suffer a strain to gain a movement point twice per activation. By using strain to gain movement points, you can conserve your actions for other tasks, such as attacking or interacting with the mission. Even strain has its limits, however. A hero cannot suffer strain beyond his endurance, which is shown on his hero sheet. Fortunately, there’s a way for heroes in a campaign to remove strain by using an action to rest. Resting removes strain tokens equal to the hero’s endurance, freeing the hero to take strain once more. In addition, if you have fewer strain tokens than your endurance when you rest, any remaining endurance heals damage. For example, Jyn Odan has an endurance of four. If she chooses to rest when she has two strain, she removes two strain and two damage. You can even rest when you have no strain and recover only wounds! Resting is vital to keep your heroes in the fight, but it also consumes crucial actions, giving the Imperial player more opportunities to concentrate fire and bring you down. 
Jyn Odan takes a rest action, and with an endurance of four, she removes two strain and two damage.
Defeating a hero is also more difficult than defeating an ordinary soldier. Each hero has a health listed on his hero sheet, and when the hero takes damage equal to his health, rather than being defeated, he is wounded and flips over his hero sheet. A wounded hero loses a special ability and his speed, endurance, and attributes decrease. If a wounded hero again takes damage equal to his health, his grievous wounds force him to withdraw, and he is removed from the mission. The Commander Gideon Argus, a seasoned Alliance commander, is just one of the heroes you may play over the course of an Imperial Assault campaign. Well-trained in battlefield tactics, Gideon Argus possesses a fierce intellect and the sangfroid to command calmly in the heat of battle. Argus may not deal the decisive blow, but his squadmates never get far without his guidance. Gideon Argus’s hero sheet displays a variety of information about the hero, including his two abilities. The Command ability can be triggered by spending an action and suffering two strain, and it allows Gideon Argus to choose a friendly figure within three spaces. That figure interrupts Argus’s turn to move or attack, allowing you to position the members of your squad or coordinate a decisive attack at the opportune moment. 
Gideon Argus can also draw upon his years of experience with his Disabling Shot ability. Whenever Argus attacks with a ranged weapon, he may spend a surge to inflict the stunned condition on his target. If a figure is stunned, it cannot attack or exit its space, and must spend an action to remove the stunned condition. By stunning your opponent’s figures, Gideon Argus can hamper the Imperial plan, even as Gideon’s commands allow other heroes to maneuver and attack in concert.  
Gideon Argus’s Class cards allow his already formidable leadership skills to grow even more potent. Called Shot allows Gideon to grant a surge to himself or another hero attacking a target in Gideon’s line of sight, while For the Cause! allows Gideon to suffer a strain to focus a friendly attacking figure. Other Class cards enhance the power of Argus’s Command ability. Air of Command grants more health and allows Argus to choose any friendly figure in his line of sight with his Command ability. Masterstroke, one of Gideon Argus’s most expensive Class cards, allows him to immediately use Command again after using it, doubling his ability to lead other heroes. The Smuggler After building a reputation on smuggling and gunfighting, Jyn Odan pledged her skills to the Rebel Alliance. She’s fast on the draw and light on her feet, and she’s left more than a few Stormtroopers watching helplessly as her ship blasts out of orbit. In your Imperial Assault campaigns, Jyn Odan might be just the hero you need to run rings around Imperial troops. Jyn Odan bears two innate abilities that frame her gunslinging talents. The first ability is Quick Draw. By suffering two strain at the beginning of a hostile figure’s activation, Jyn Odan can perform an attack with a Pistol that targets the activated figure, potentially dropping an enemy before he even takes an action. Being a crack shot is one thing, but even that can be useless if you don’t have a way to escape enemy blaster fire. Thankfully, Jyn Odan also has the Opportunist ability. Whenever she attacks, if her target suffered damage, she may move one space, allowing her to get behind cover or set up another shot. 
Jyn Odan’s Class cards enhance her already prodigious skills. Quick As A Whip allows Odan to move one space immediately after an attack against her, giving her more opportunities to escape from harm or prepare for her next attack. The Sidewinder Class card gives her even more movement by allowing her to move up to two spaces after resolving an attack – an ability that stacks with the extra movement from her Opportunist ability.  
Jyn Odan’s gunfighter talents also benefit from her Class cards. Gunslinger allows Odan to trigger any of her Pistols’ surge abilities when she attacks with a Pistol. In addition, she can suffer a strain and exhaust Gunslinger to apply an extra surge to her attack results, giving her even more options for Pistol attacks. Jyn can pull off seemingly impossible shots with Trick Shot, a card that allows her to draw line of sight for a ranged attack from any space within three spaces of her actual location. Muster Your Squad Call upon the talents of Gideon Argus and Jyn Odan, or use another hero included in Imperial Assault in your campaigns. We’ll preview two more heroes from Imperial Assault in a future preview, but join us next week when we examine how your heroes grow and change throughout the campaign, gaining experience and credits. Pre-order Imperial Assault at your local retailer today! ... Source: Heroes of the Rebellion (http://www.fantasyflightgames.com/edge_news.asp?eidn=5124)
Title: FFG:Controlling the Game - Part II
Post by: RSSFeeder on 18 October 2014, 09:00:03
Controlling the Game - Part IIZach Bunn on Regaining Control in STAR WARS (TM): The Card Game
“Control, control, you must learn control.”
–Yoda, Star Wars: Return of the Jedi Light side and dark side clash in a struggle that shakes the galaxy in Star Wars™: The Card Game. To claim victory, you must build your forces, strategically plan your attacks, and overthrow your opponent’s plans. Controlling your opponent’s options and controlling the flow of the game is crucial to achieving your final victory. In Zach Bunn’s last guest article, he established some principles for gaining control in Star Wars: The Card Game. Today, he continues to expand upon those ideas and provides an example of a game where he lost control and exploring how he could reclaim it. 
Zach Bunn on Regaining Control In my last article, I laid the foundation for a definition of control in Star Wars: The Card Game, and I even claimed it was the most important concept in the game! I want to continue the discussion of board control, but this time I want to show a very real and practical example of board control at work. Below is an image of the board state during a game I played as the light side against Matt Wehner in the finals of the 2014 Star Wars: The Card Game Regional Championships in Independence, Missouri. As you can see in the image below, Matt has board control in spades. 
It’s the first game in the match. Some important things to note:
- The dark side has destroyed one objective, the light side has destroyed none.
- The Death Star dial is at five.
- The Balance of the Force is currently with the light side.
- The dark side has the following objectives in play: Counsel of the Sith (Core Set, 27) with four damage, Fall of the Jedi (Core Set, 99) with one damage, and Imperial Command (Core Set, 73) with no damage.
- The dark side has four resources open, one of which is on Counsel of the Sith
- The dark side has the following units in play: Darth Vader (Core Set, 35) committed to the Force and focused, a focused Mara Jade (Lure of the Dark Side, 529) with Mara Jade’s Lightsaber (Lure of the Dark Side, 531) attached, and a ready Imperial Shadow Guard (Lure of the Dark Side, 530).
- The light side has the following objectives: Questionable Contacts (Core Set, 69), Wookiee Life Debt (Edge of Darkness, 318), and Along the Gamor Run (Knowledge and Defense, 552).
- The light side player has five open resources with the following cards in hand: Chewbacca (Edge of Darkness, 319), Millennium Falcon (Edge of Darkness, 332), Saboteur (Edge of Darkness, 329), Hired Hands (Knowledge and Defense, 554), Wookiee Warrior (Edge of Darkness, 320), and Twist of Fate (Edge of Darkness, 157).
- It’s the light side player’s turn, in the deployment phase.
In this scenario, what do you do as the light side player? What’s the correct play in this scenario where your opponent definitely has control of the board? Your answer provides some strong insight into your view of control! Here are the top two options, as I see it. The Quick and Easy Path  The first option is to play the Millennium Falcon. With enough resources in play for the dark side player to pay for a Force Lightning (Core Set, 60), you attack Counsel of the Sith first and destroy it. You can then trigger the Reaction on the Millennium Falcon and bring a different unit into play. The first option is to play the Millennium Falcon. With enough resources in play for the dark side player to pay for a Force Lightning (Core Set, 60), you attack Counsel of the Sith first and destroy it. You can then trigger the Reaction on the Millennium Falcon and bring a different unit into play.
If you decide to put Chewbacca into play, you probably need to attack because Mara Jade with her Lightsaber attached has enough unit damage to clear Chewbacca from the board without him triggering his Reaction. With Chewbacca, you probably want to attack Fall of the Jedi, hopefully bringing it to four damage. The only other real option for bringing a Character into play with the Millennium Falcon is the Hired Hands. Playing the Millennium Falcon and bringing in Chewbacca or the Hired Hands might be tempting if you’re focusing purely on dealing maximum damage, but it abdicates any chance of regaining control of the board. Whether you put Chewbacca or the Hired Hands into play, either unit will be destroyed by your opponent before the beginning of your next turn. The Path to Control The option that, in my opinion, allows you to start moving back towards control is as follows: Play the Wookiee Warrior, the Saboteur, and the Hired Hands, in that order. You’ll need to use the Saboteur to destroy Mara Jade’s Lightsaber if you want to have a chance at having units on the board next turn.  The key rule during the conflict phase is that you don’t want to attack with the Wookiee Warrior, but keep it safe from a potential Force Lightning. The protect keyword that Wookiee Life Debt grants to your Wookiee Warrior is the only thing that might maintain your board and give you better options next turn. The best attack in this case is to send the Hired Hands against Counsel of the Sith. Your opponent may block with the Imperial Shadow Guard or not, but the Wookiee Warrior’s protection can ensure that the Hired Hands destroys the objective. If you win the edge or your opponent doesn’t block, you can use the Hired Hands’s tactics icons to focus Mara Jade, who is no longer elite. The key rule during the conflict phase is that you don’t want to attack with the Wookiee Warrior, but keep it safe from a potential Force Lightning. The protect keyword that Wookiee Life Debt grants to your Wookiee Warrior is the only thing that might maintain your board and give you better options next turn. The best attack in this case is to send the Hired Hands against Counsel of the Sith. Your opponent may block with the Imperial Shadow Guard or not, but the Wookiee Warrior’s protection can ensure that the Hired Hands destroys the objective. If you win the edge or your opponent doesn’t block, you can use the Hired Hands’s tactics icons to focus Mara Jade, who is no longer elite.
Depending on whether your opponent blocked or not, you can either attack with the Saboteur or hold it back for the Force struggle. In the Force phase, you trigger Along the Gamor Run and commit the Wookiee Warrior and the Saboteur, keeping the Force and drawing a card from Along the Gamor Run. The dial goes to six, and you have two pretty annoying blockers on the board with a four-card hand. You also have Along the Gamor Run in play, so if your opponent decides to attack with Darth Vader, you stand a good chance of keeping the Force again. Regaining Control  In the above example, instead of focusing completely on dealing objective damage and ending up with no units on your next turn, you can destroy an objective, keep the Force, and still have units on the board at the end of your opponent's turn. You also still have the Millennium Falcon and Chewbacca for your next turn, leaving you with a very strong counterattack on your next turn. If you’re fortunate enough to still have the Wookiee Warrior in play on your next turn, the option of playing Millennium Falcon and Chewbacca becomes extremely viable. In the above example, instead of focusing completely on dealing objective damage and ending up with no units on your next turn, you can destroy an objective, keep the Force, and still have units on the board at the end of your opponent's turn. You also still have the Millennium Falcon and Chewbacca for your next turn, leaving you with a very strong counterattack on your next turn. If you’re fortunate enough to still have the Wookiee Warrior in play on your next turn, the option of playing Millennium Falcon and Chewbacca becomes extremely viable.
It’s easy, particularly in Star Wars: The Card Game, to get in the habit of seeing combos like the Millennium Falcon and Chewbacca and assuming they are the best play. Where that decision is going to leave you and your board, however, is often more important than the amount of damage you can deal on your current turn. This LCG isn’t a long game, but it’s made much shorter when one or both players neglect the principles of board control. Keep your eyes and mind open to maintaining board control and I expect your win percentage will increase pretty dramatically. Until next time, may the Force be with you. Zach Reclaim Control Thanks, Zach! Zach Bunn is a Star Wars fanatic, a lead member of Team Covenant, and a member of the winning team from the Star Wars multiplayer tournament held at Worlds. In coming weeks, stay tuned for more Star Wars guest articles from Zach and other writers! ... Source: Controlling the Game - Part II (http://www.fantasyflightgames.com/edge_news.asp?eidn=5125)
Title: FFG:Gather Your Tools
Post by: RSSFeeder on 18 October 2014, 17:30:03
Gather Your ToolsNew FAQ and Tournament Rules are Available for Android: Netrunner
The 2014 Android: Netrunner Organized Play calendar is set for a climax at World Championship Weekend next month. Runners and Corporations alike are reshaping the digital realm and attempting to build newer and better programs that will help them gain ultimate control. Do you have what it takes to push your faction to the fore? A deck isn’t the only thing you need if you’re looking to win your next tournament. Expand your toolbox by checking out the new FAQ (pdf, 2.5 MB) and tournament rules (pdf, 6.1 MB).  
These changes will go into effect on October 20th, 2014. A Word from the Developer Greetings Android: Netrunner players! This new FAQ covers all cards released through the First Contact Cycle Pack, including cards like Nasir Meidan (Upstalk, 17), The Foundry (The Spaces Between, 21), and Crisium Grid (First Contact, 48). The game term “use” has also been defined. There is no new card errata. In the tournament rules, the only change is that All That Remains will not be legal for the World Championships next month. We want to make sure that the competitive environment is as fair as possible and all players have access to new releases. The Up and Over Cycle Pack will be legal at the World Championships. If you have any questions about card interactions in that pack, please use the “Rules Question” link at the bottom of each page on this website to submit your question. Hope to see you at Worlds, and always be running! Lukas Litzsinger
Lead Designer Thanks Lukas! Don’t be surprised by the newest tech at your next tournament. Check out the the new FAQ and tournament rules, and be ready for whatever you encounter on your next run. ... Source: Gather Your Tools (http://www.fantasyflightgames.com/edge_news.asp?eidn=5126)
Title: FFG:Become a Master of Secrets
Post by: RSSFeeder on 19 October 2014, 02:00:04
Become a Master of SecretsNew FAQ and Tournament Rules are Available for A Game of Thrones: The Card Game
The 2014 A Game of Thrones: The Card Game Organized Play season is building to a crescendo. When the world is at its most chaotic, it is those who plan ahead that will come out unscathed. Will you use your knowledge to gain an advantage over your foe? Or will you fall by the wayside, just another pretender to the throne? Knowledge can be just as important as armor or a sword; be sure to read the new FAQ (pdf, 2.2 MB) and tournament rules (pdf, 1.5 MB) before heading out to your next tournament.  
These changes will go into effect on October 20th, 2014. A Word from the Developers Hello A Game of Thrones players! The 2014 World Championships are just about a month away, and in anticipation of the event we bring you a new FAQ and tournament rules update in an effort to make the environment as competitive and enjoyable as possible. For new card errata, this update includes four items. The first is an adjustment to Harrenhal (Ancestral Home, 78), which prevents people from getting more than three uses out of the card by taking advantage of the moribund timing rules. This brings the card to a place that is much more intuitive to many players and makes the decision of when to actually invest in using one of its three cancels more interesting and significant. You can no longer simply save one use with the knowledge that you can abuse the card’s moribund state during the next Valar. Next, we have adjusted The Brave Companions (Ancestral Home, 79) so that their text works in conjunction with FAQ entry 3.24, which defines the characteristics of facedown attachments; there is no functional change here, the entry simply establishes that the card text is consistent with the rules entry. Finally, we have given “House X only” restrictions to Daenerys Targaryen (Ancestral Home, 76) and to Asha Greyjoy (Where Loyalty Lies, 70). This latter errata also opens the door to remove Asha from the joust restricted list. In the rules content section, the most significant new entry is the introduction of the copy limit. Over the past couple tournament seasons, we have observed a number of powerful combo decks that, through clever cycling engines, are able to repeatedly play the same card or set of cards in a single phase until a victory condition is gained. To check the “instant-win” potential of these decks, the copy limit establishes that a player cannot play more than three copies (by title) of each card in each phase. There have been a number of players asking for a “three times per phase per ability trigger limit” to be added to the game, and while we investigated such a limit in playtesting, the final decision was that the “copy limit” solution introduced in this document was less intrusive, and carried less overhead bandwidth in moment-to-moment play, while still providing an important check against these instant-win decks.  The Joust restricted list is being updated, with two new cards being added and two cards being removed. Bran Stark (Core Set, 13) has emerged as a particularly effective means of rapidly cycling through River plots, and he is being added to the list to break up the potential of using him in conjunction with Crossing the Mummer’s Ford (Spoils of War, 20). Wheels Within Wheels (A Dire Message, 107) has also had a large impact on the metagame, and it has been added to the list to protect the relative balance between the Lannisters and the other great Houses. Coming off the list, we have the aforementioned Asha Greyjoy (Where Loyalty Lies, 70), who should give a nice boost to the House of the Kraken, and Westeros Bleeds (Core Set, 176), which, with the release of new cancel and protection effects, can now re-enter the metagame as a non-restricted card. The Joust restricted list is being updated, with two new cards being added and two cards being removed. Bran Stark (Core Set, 13) has emerged as a particularly effective means of rapidly cycling through River plots, and he is being added to the list to break up the potential of using him in conjunction with Crossing the Mummer’s Ford (Spoils of War, 20). Wheels Within Wheels (A Dire Message, 107) has also had a large impact on the metagame, and it has been added to the list to protect the relative balance between the Lannisters and the other great Houses. Coming off the list, we have the aforementioned Asha Greyjoy (Where Loyalty Lies, 70), who should give a nice boost to the House of the Kraken, and Westeros Bleeds (Core Set, 176), which, with the release of new cancel and protection effects, can now re-enter the metagame as a non-restricted card.
In order to make the environment as exciting as possible, four new cards are being added to the Melee restricted list. Daenerys Targaryen (Queen of Dragons, 22) has been the centerpiece to a strong, stable Melee Dragon presence for years, and the release of the new event card By Sword or By Guile (A Dire Message, 114) pushes this deck over the edge in the Melee environment. Each of these cards is now being added to the Melee restricted list. Melisandre’s Favor (The Horn That Wakes, 63) is also being added, to increase the opportunity cost of using this powerful card in the format when stealing power-laden characters and closing out games. And finally, we are adding Harrenhal (Ancestral Home, 78) to the list to check its prominence in an environment where it can be even more frustrating to combat. The tournament rules document contains a pair of new entries that document procedures for dealing with an illegal deck and with illegal game states that are discovered during the course of a game. With this update, we now hope that the table is set for a feast of epic games at this year’s World Championships. Looking forward to seeing you there! Nate French
Damon Stone
Fantasy Flight Games 
Thanks Nate and Damon! Don’t let yourself arrive at the 2014 World Championships unprepared. Download the new FAQ and tournament rules today so you’ll be ready as you ride into battle. ... Source: Become a Master of Secrets (http://www.fantasyflightgames.com/edge_news.asp?eidn=5127)
Title: FFG:Unearth Lost Knowledge
Post by: RSSFeeder on 19 October 2014, 10:30:03
Unearth Lost KnowledgeA New FAQ is Available for Call of Cthulhu: The Card Game
The 2014 Call of Cthulhu: The Card Game season will be at its zenith next month at the 2014 World Championship Weekend. Are you prepared for the dangers that await? Can you survive the horde of unspeakable horrors that will be unleashed upon the world? Study the new FAQ (pdf, 1.0 MB) to unlock precious knowledge for your struggle ahead. There will be no changes to the tournament rules at this time. You can find the current version of the tournament rules (pdf, 3.0 MB) in its usual spot on the Call of Cthulhu: The Card Game website.  
These changes will go into effect on October 20th, 2014. A Word from the Developers Iä Fhtagn Call of Cthulhu Players! This FAQ update is focused on adjusting the state of the metagame in order to create a more interesting and fresh environment. Since the release of the The Key and the Gate Deluxe Expansion we have seen the tournament scene flush with variations of a very fast and explosive deck that uses Yithians paired with Interstellar Migration (The Key and the Gate, 37) in order to force your opponent to discard his entire deck. This deck has been warping the tournament format since its inception and we have decided to trim it back so that other decks can grow and flourish, thereby reinvigorating the tournament environment and overall making the game more fun for everyone. In order to do this, we have restricted the following cards: Lost Oracle (The Key and the Gate, 9), Studying the Void (The Key and the Gate, 35), Yithian Scout (The Key and the Gate, 15), Nikola Tesla (The Key and the Gate, 4), and Speak to the Dead (Whispers in the Dark, 20). In addition, the card Interstellar Migration (The Key and the Gate, 37) remains on the restricted list and has received errata that only allows it to be triggered during the story phase and limits a player from triggering it more than once per phase. We make none of these changes lightly, but due to the nature of LCGs, we sometimes have to take a very direct approach to ensure the metagame remains fresh and vibrant and doesn’t revolve completely around one or two decks. During recent premier-level events, it became quite evident that many players had grown weary of the Ythian metagame, and we hope that this update reinvigorates the environment for Worlds. We look forward to seeing you next month! Brad Andres and Damon Stone Thanks Brad and Damon! With so much new knowledge, the world is sure to shift in new ways. Download the new FAQ and tournament rules today, and stay ahead of those you will face at your next tournament. ... Source: Unearth Lost Knowledge (http://www.fantasyflightgames.com/edge_news.asp?eidn=5128)
Title: FFG:Lead the Way
Post by: RSSFeeder on 19 October 2014, 19:00:03
Lead the WayNew FAQ and Tournament Rules are Available for Star Wars(TM): The Card Game
The 2014 Star Wars™: The Card Game Organized Play season has been full of fierce battles and heroic deeds, and the 2014 World Championship is sure to push the galactic conflict even further. Those who train and prepare will be most fit to lead their troops when the next battle begins. Prepare yourself to lead the way by reading the new FAQ (pdf, 5.7 MB) and tournament rules (pdf, 1.3 MB) and staying up to date on the latest changes.  
These changes will go into effect on October 20th, 2014. A Word from the Developers Hello Star Wars: The Card Game players! With the World Championship approaching, we are providing an update to the FAQ and tournament rules for players looking to attend, as well as those playing elsewhere. The only update to the tournament rules document is the Authorized Cards section to state that the Between the Shadows expansion will not be legal for the World Championship event.  In the FAQ, we have issued a pair of small balance errata. The metagame for the 2014 North American Championship at Gen Con was overwhelmingly driven by two objective sets: Along the Gamor Run (Knowledge and Defense, 552) and May the Force Be With You (Join Us or Die, 567). The vast majority of successful light side decks included one or both of these objectives, and the dark side metagame emerged as a reaction to these sets. In the FAQ, we have issued a pair of small balance errata. The metagame for the 2014 North American Championship at Gen Con was overwhelmingly driven by two objective sets: Along the Gamor Run (Knowledge and Defense, 552) and May the Force Be With You (Join Us or Die, 567). The vast majority of successful light side decks included one or both of these objectives, and the dark side metagame emerged as a reaction to these sets.
For Along the Gamor Run (Knowledge and Defense, 552) we are limiting this objective set to a single copy per objective deck. The Hired Hands from this objective set were proving to be more resilient than originally intended, and having four copies of them in a player’s deck provided a very demoralizing game experience for the dark side player. The May the Force Be With You (Join Us or Die, 567) objective has received the addition of “Limit once per turn.” in order to keep the light side player from being able to attack with all his units and then free up multiple solid defenders going into the dark side player’s turn. With both of these changes, we hope to see a more engaging metagame for both sides of the Force at the Star Wars: The Card Game 2014 World Championship! Nate French
Erik Dahlman
Fantasy Flight Games 
Thanks Nate and Erik! In the chaos of battle, true leaders reveal themselves. Will you be one of them? Set yourself up for victory by downloading and reading the new FAQ and tournament rules now. ... Source: Lead the Way (http://www.fantasyflightgames.com/edge_news.asp?eidn=5129)
Title: FFG:Become a Hero
Post by: RSSFeeder on 20 October 2014, 03:30:02
Become a HeroNew FAQ and Tournament Rules are Available for X-Wing (TM)
The 2014 X-Wing™ World Championship is almost upon us! Will you gain glory and recognition from Rebels and Imperials alike? Or will you be just another ship silhouette painted on your enemy’s hull? Whether you’re planning on joining us for Worlds or going to play in your local game night, reading the new FAQ (pdf, 7.1 MB) and tournament rules (pdf, 4.1 MB) can help you prepare. For those participating in larger scale battles, the Epic tournament rules (pdf, 4.8 MB) remain unchanged.  
These changes will go into effect on October 20th, 2014. A Word from the Developers Hello pilots! This time around in the FAQ we have a couple of errata, a couple of rules clarifications, and a few minor rules changes. The tournament rules feature one minor change that will allow tournament organizers to manage pairings more easily, as well as make each match more competitive by pairing players to opponents with similar Margin of Victory records. Both of the errata come from the new YT-2400 Expansion Pack: Lone Wolf and Stay on Target. This resolves some confusion about whether a ship is considered at Range 1 of itself (it is) and whether Stay on Target can be used abusively in tandem with Navigator (it can’t). The rules clarifications and changes affect a few corner cases that will not come up often
for most players. The first rules clarification has to do with values being increased and
decreased by different game effects, which has become relevant with the introduction of the VT-49 Decimator and its agility value of “0.” The other clarification is tied to a rule change around Autoblaster and the distinction between “dice results” and “hit or evade results.”
We’ve also simplified Proximity Mines and changed the way stationary maneuvers and overlapping interact. Additionally, the new FAQ provides answers to questions surrounding Dash Rendar, Keyan Farlander, Push the Limit, Experimental Interface, and what happens if a ship overlaps both an asteroid and a debris cloud. Thanks for continuing to support this great game, and we hope to see you this November for the 2014 World Championship Weekend! Happy hunting,
Frank Brooks and Alex Davy 
Thanks Frank and Alex! Don’t get caught with an enemy on your tail! Download the FAQ, tournament rules, and Epic tournament rules now, and be prepared for your next dogfight. ... Source: Become a Hero (http://www.fantasyflightgames.com/edge_news.asp?eidn=5130)
Title: FFG:Gain New Weapons
Post by: RSSFeeder on 20 October 2014, 12:00:03
Gain New WeaponsA New FAQ is Available for Warhammer: Diskwars
The 2014 Warhammer: Diskwars World Championships are closing in, and war threatens. No army would miss an opportunity for battle, but don’t run mindlessly into combat. Doing so may lead to defeat and fates much worse
than death. Take a moment to read the new FAQ (pdf, 742 KB) and gather your wits for your next tournament. There will be no changes to the tournament rules at this time. You can find the current version of the tournament rules (pdf, 2.2 MB) in its usual spot on the Warhammer: Diskwars website.  
These changes will go into effect on October 20th, 2014. A Word from the Developers Greetings Warhammer: Diskwars players!  We have updated only the FAQ document. There are no changes to the tournament rules at this time. In the FAQ you will find clarifications on several different disks and cards, including the Bloodcrushers, Shield of Saphery, and Dark Majesty. In addition, Heinrich Kemmler has received errata for clarity. Instead of reinforcing up to three Skeletons, Kemmler places up to three of them following all the rules of reanimate. This was always the intended use of the disk. We have updated only the FAQ document. There are no changes to the tournament rules at this time. In the FAQ you will find clarifications on several different disks and cards, including the Bloodcrushers, Shield of Saphery, and Dark Majesty. In addition, Heinrich Kemmler has received errata for clarity. Instead of reinforcing up to three Skeletons, Kemmler places up to three of them following all the rules of reanimate. This was always the intended use of the disk.
May the Old World quake with the fury of war, and we hope to see you at Worlds! Michael Gernes & Lukas Litzsinger Thanks Michael and Lukas! The Old World contains all sorts of warriors. Make sure you’re one who studies by reading the new FAQ and current tournament rules so that you can crush your enemies! ... Source: Gain New Weapons (http://www.fantasyflightgames.com/edge_news.asp?eidn=5131)
Title: FFG:A Dictate to Follow
Post by: RSSFeeder on 20 October 2014, 20:30:03
A Dictate to FollowTournament Rules are Now Available for Warhammer 40,000: Conquest
Warhammer 40,000: Conquest is now on sale, and players all around the world have begun waging war while exploring FFG’s newest LCG. For those looking for competition beyond the safety of their own homes, the tournament rules are now online! Whether you’re setting up a fun tournament with friends or running an event at your local game store, be sure to check out the tournament rules (pdf, MB) first. You can find the current tournament rules, along with the game’s rules documents, on the support page of the Warhammer 40,000: Conquest website. 
The Warhammer 40,000: Conquest tournament rules are effective immediately. The Traxis Sector contains many dangers, visible and hidden. Do you have what it takes to conquer this newly discovered corner of the Warhammer 40,000 universe? ... Source: A Dictate to Follow (http://www.fantasyflightgames.com/edge_news.asp?eidn=5132)
Title: FFG:Mind the Details
Post by: RSSFeeder on 21 October 2014, 05:00:05
Mind the DetailsUpdated FAQ and Tournament Rules Are Now Available
It is time to once again release a new rules update as the season, and the year, begins to culminate in the biggest event of the year: the 2014 World Championship Weekend! Using the feedback and results from around the world collected during National Championships and other tournaments, we have updated the FAQ and tournament rules documents for all of our competitive games. All changes from today’s announcement will go into effect on October 20th, 2014. Looking Back While we update tournament rules and FAQs regularly to give players the best possible experience, the end of the year is a great time look back on what we’ve seen in 2014. Most notably, the year has been marked by large updates to how Android: Netrunner, Star Wars™: The Card Game, and X-Wing™ tournaments are run. While these changes were large, the tournaments for all three games are now in a much better place. Today’s update brings with it small changes to each of our FAQs and a few of the tournament rules documents. Despite the size of the changes, it is important players are up to date with the current FAQs and tournament rules. Knowing the details may be the difference between glorious victory and crushing defeat. Get yourself up to speed with these new changes by clicking on the links for your favorite games below and reading what the developers have to say: 
Not Just For Tournaments While the changes today are smaller than some of our updates this year, that doesn’t mean only tournament players should pay attention. In each document, you’ll find answers to many of the most commonly asked questions and rulings. Whether you’re looking to compete in a World Championship or play in a casual game night at your local store with friends, the updated FAQs and tournament rules offer clarity and structure that will give you a better play experience. ... Source: Mind the Details (http://www.fantasyflightgames.com/edge_news.asp?eidn=5133)
Title: FFG:Power for the Future
Post by: RSSFeeder on 21 October 2014, 13:30:54
Power for the FutureUp and Over Is Now Available for Android: Netrunner
“Unlimited Energy. Reasonable Prices.” Up and Over, the fourth Data Pack in the Lunar Cycle for Android: Netrunner, is now available at your local retailer and online through our webstore! Throughout the first half of the Lunar Cycle, we’ve seen the Corps and Runners of Android: Netrunner jolted by their transit to the moon. At first, everything appeared to be different. There was reduced gravity, recycled air, lag times, and wave fields. The Corps came first, the early game could become the late game, and the late game could become the early game all over again. On the moon, ghostly echoes of signals transmitted long ago acquire a sort of permanence and interfere with new data. Lunar ice mutates, changing from barrier to code gate, and back again. Powerful trace attempts destroy hardware even when they fail, and Runners have begun to unlock fragments of the legendary source code. Now, as both sides scramble over each other, seeking to adjust to the new environment, they realize there is one truth that remains perpetually inviolable: Credits are king. In Heinlein as elsewhere, you still need credits to advance your agendas, to assemble your rig, to rez your ice, and to power your breakers. Without credits, you’re just a shell that’s waiting to be shattered. That’s why nearly all of the sixty new cards of Up and Over (three copies each of twenty different cards) present new economic efficiencies that you can use throughout the cyberstruggles you wage in this new lunar environment. 
Reduce. Reuse. Rebuild. One of the most interesting and game-changing new economy cards is the Weyland Consortium identity, Blue Sun (Up and Over, 68). Of course, an identity is far more than just another economy card, but Blue Sun’s motto is “Unlimited energy. Reasonable prices.” It begs us to explore its economic potential.  The first thing we realize is that Blue Sun’s motto is no empty boast. The energy plant specializes in nuclear fusion, and its special ability allows you to return a rezzed card to HQ to gain credits equal to the card’s rez cost. Immediately, it transforms the effects of an asset like Adonis Campaign (Core Set, 56) into something more akin to a reusable operation. If you install Adonis Campaign and wait to rez it until the Runner has expended his last click, then on your next turn you can gain three credits and return Adonis Campaign to your hand to regain the four credits you just spent to rez it. You can them repeat this play as often as you want, provided the Runner doesn’t access your Adonis Campaign and spend three credits to trash it. The first thing we realize is that Blue Sun’s motto is no empty boast. The energy plant specializes in nuclear fusion, and its special ability allows you to return a rezzed card to HQ to gain credits equal to the card’s rez cost. Immediately, it transforms the effects of an asset like Adonis Campaign (Core Set, 56) into something more akin to a reusable operation. If you install Adonis Campaign and wait to rez it until the Runner has expended his last click, then on your next turn you can gain three credits and return Adonis Campaign to your hand to regain the four credits you just spent to rez it. You can them repeat this play as often as you want, provided the Runner doesn’t access your Adonis Campaign and spend three credits to trash it.
However, your investments into Blue Sun also offer additional dividends as the identity adds misdirection to raw economy. When you bounce a card to your hand and then install a card, you’re daring the Runner to believe that you’ve just reinstalled the card you recycled, and you’re challenging the Runner to calculate his next run based upon that information. Let’s explore the idea of this recycled asset once again, but now you replace the Adonis Campaign with a Snare! (Core Set, 70). You install it, then take it back to your hand to gain zero credits, but now the Runner knows you have a Snare!. You both know that you’re using your Snare! as a bluff, so once you install your next facedown card into an unprotected remote server, the question is whether or not the Runner will run on it. Blue Sun is one of very few Corp cards that allow you to play this sort of shell game, sharing some carefully selected information in order to divert attention from other information. Pressurized Atmospheres Blue Sun is just one of the many cards from Up and Over that allow you to play with your economic efficiencies in new and interesting ways. Each of the other Corps gain their fair share, as do the Runners.  However, the efficiencies that the cards from Up and Over promote differ from those developed while the game was still back on Earth. They aren’t simple marketing campaigns like Adonis Campaign or five-for-nine investment strategies like Hedge Fund (Core Set, 110). They offer efficiencies rooted in the variable interactions between Corp and Runner. Like Architect (Up and Over, 61) and Reversed Accounts (Up and Over, 67), the economic strategies permitted by Up and Over are devious and aggressive, and they’re perfect for cyberstruggles originating within the moon’s pressurized atmosphere. However, the efficiencies that the cards from Up and Over promote differ from those developed while the game was still back on Earth. They aren’t simple marketing campaigns like Adonis Campaign or five-for-nine investment strategies like Hedge Fund (Core Set, 110). They offer efficiencies rooted in the variable interactions between Corp and Runner. Like Architect (Up and Over, 61) and Reversed Accounts (Up and Over, 67), the economic strategies permitted by Up and Over are devious and aggressive, and they’re perfect for cyberstruggles originating within the moon’s pressurized atmosphere.
Whether you’re protecting Corporate servers or trying to burrow through them, you need credits. In Up and Over, you’ll find new ways to collect, new ways to dig for them, new ways to Inject (Up and Over, 73) them into your system, and new ways to bleed them from your opponent. After all, in the game of data, credits are king. Up and Over is now available. Pick up your copy today! ... Source: Power for the Future (http://www.fantasyflightgames.com/edge_news.asp?eidn=5134)
Title: FFG:Announcing the 2014 World Championship Schedule
Post by: RSSFeeder on 21 October 2014, 22:00:02
Announcing the 2014 World Championship ScheduleJoin Competitors at World Championship Weekend, November 6-9
Update: Preregistration for the 2014 World Championship Weekend closes on Thursday, October 23rd. Register now to guarantee a spot in your favorite tournament and join us for the largest event of the year! Back in April, Fantasy Flight Games announced the dates for the 2014 World Championship Weekend. Today, it is time to announce the highlight of the weekend: the schedule for all World Championships! As November draws closer, hundreds of players around the world have begun to plan their treks to FFG’s hometown in Minnesota. Some will take the bus across town or pile into a car full of friends and drive a couple of hours, but others will be hopping on planes and flying halfway around the world to the Twin Cities. Will you join them and test your skills against the best in the world? If you are looking to attend Worlds or just want to tune in as the action happens, download the schedule now and start sketching out the most important days and times for you. The schedule for each game’s side events will be posted soon.
World Championships While all your favorite games will be returning, the centerpiece of the 2014 event is the debut of two brand-new World Championships: Warhammer: Diskwars and Warhammer 40,000: Conquest! These two games will be played alongside our perennial mainstays throughout the weekend. 
Preregister Today If you haven’t already, preregister now and solidify your spot among the hundreds of players from around the world coming to Minnesota for the 2014 World Championship Weekend. But don’t wait too long because preregistration closes October 16th! While players can still register on site the day they arrive, the cost will increase to $50.
More to Come While players can now begin deciding what day is best to arrive, there is a lot more to be announced. Stay tuned in the following months to learn the schedule of side events being run, the prizes that will be given away for all events at the 2014 World Championship Weekend, and more! ... Source: Announcing the 2014 World Championship Schedule (http://www.fantasyflightgames.com/edge_news.asp?eidn=5011)
Title: FFG:An Advanced Guide to A-Wings
Post by: RSSFeeder on 22 October 2014, 06:30:03
An Advanced Guide to A-WingsAn X-Wing (TM) Strategy Article by Guest Writer Neil Amswych
“Yes! I said closer! Move as close as you can and engage those Star Destroyers at point-blank range.”
–Lando Calrissian It’s a good time to fly A-wings in X-Wing™! The recent release of the Rebel Aces Expansion Pack has added a great deal of power and versatility to the Rebellion’s lightning-quick interceptor. You can now outfit your A-wing with a Chardaan Refit to make it a more efficient dogfighter, or you can outfit it with the highly efficient Proton Rockets to launch a devastating alpha strike. Meanwhile, the Title card A-Wing Test Pilot allows your A-wing pilots to draw upon as many as two elite pilot talents at the same time, adding all sorts of new combinations and creative wrinkles to your squad building. Today, guest writer Neil Amswych (aka “The Tusken Tactician”), one of the A-wing’s leading advocates and the author of “A Guide to A-Wings,” picks up where he left off in that earlier article and explores some of the new, advanced strategies and squad builds now permitted by the release of Rebel Aces.
The Tusken Tactician’s Advanced Guide to A-Wings Okay class, pay attention! As always with our training presentations, what we say here today may save your life. This final presentation is our biggest so far, which is why we have brought all our A-wing pilots together. As you will know, our enemies have grown stronger and more agile. Now, as we conduct our missions, we contend not only with TIE fighters, but also with TIE phantoms and TIE defenders. We have received intel about forthcoming threats such as the VT-49 Decimator and bands of smugglers and bounty hunters who have also begun to engage our fighters. We will, of course, keep you informed of any developments. For now, as we confront these new threats, it’s vitally important that you know your ships and your roles. 
A 360-degree view of the starfighter miniature from the A-Wing Expansion Pack
Prototype Pilots Prototype Pilots, I cannot overstate how important your role has become. Many of you will have noticed that your ships have been modified. The Chardaan Shipyards have been busy refitting many of our A-wings, especially yours. This is because the refit is going to help you attack and stay alive as you focus on disrupting and distracting opposing ships. We’re trying to concentrate our ordnance on Green Squadron Pilots wherever possible since they can really Push the Limit when it comes to missile accuracy. However, your role in disrupting enemy craft, and drawing attention away from bigger ships, is essential. For example, if you master your formations, you can even discourage TIE phantom pilots from decloaking, though this will involve teamwork, planning, and some careful flying around asteroids. Despite the fact that your refitted ships give you new advantages in dogfights, you will no doubt have heard of the heavy losses sustained by the squadron of Prototype Pilots that was caught by the enemy on a training run without the support of other ships. The problems that squad faced were twofold; by themselves, your A-wings lack sufficient firepower to quickly eliminate tougher foes, and a number of Imperials have been going through a new training regimen that we have codenamed, “Predator.” With this training, these Imperials have been particularly effective against our X-wing Rookie Pilots, but the training makes them just as deadly to you Prototype Pilots. Therefore, we currently believe that you Prototype Pilots are far more effective while flying as support for other craft. If you look over here, you’ll see the designs for a squadron we are considering sending to the Bakura system sometime in the near future: 
Prototype Pilot (17)
Chardaan Refit (-2) Prototype Pilot (17)
Chardaan Refit (-2) Nera Dantels (26)
Veteran Instincts (1)
Flechette Torpedoes (2)
Flechette Torpedoes (2)
Munitions Failsafe (1)
Fire Control System (2) Eaden Vrill (32)
R2-D2 (4) Total Squad Points: 100 Okay, okay, settle down. It’s very funny, I know. Some pilots just need turrets to find a shot. That’s why they don’t fly A-wings, right? But if I can get back to what I was saying, we can see that in squads like these, Prototype Pilots running interference allow the big weapons commanded by Nera Dantels and Eaden Vrill to hit the enemy even harder. If you fly well, you will draw away enemy firepower away from their ships, and the hope is, of course, that you will evade it and then strike from close range. It is this kind of supporting role that we believe will allow you Prototype Pilots to be a major part of our success in the future. Green Squadron Pilots You have gone through a punishing training regimen, and your ships have been updated to allow you to use more of your talents than ever before. As former A-Wing Test Pilots, you will be able to Push the Limit of your ships and yourselves, allowing you particularly to Outmaneuver your enemy, and we strongly encourage you to do so. Your firepower may be limited, but some of you will receive training in our own “Predator” program to ensure that your shots are more accurate than ever, allowing you to focus on attack and to evade enemy shots without having to get a target lock on your opponent. Still, you Predator traineees may not need to push your A-wing to the limit if you can Outmaneuver your target. Plus, your unique training should also teach you to be more of an Opportunist with your shots. We have found this to be extremely effective when your opponent can’t focus or evade, such as when Wes Janson has forced their hands by firing first in his X-wing or after a Prototype Pilot may have run interference. Yes, yes, calm down boys! Green Squadron Pilots, we encourage you as you enter the final part of your training to really diversify your talents. While we strongly encourage you to learn the basics of your craft, you are free to personalize your training as you wish. For example, you may wish to learn to harness that Adrenaline Rush that I know you all feel when flying an A-wing to really gain an Expert Handling of your craft so that you can become maneuverable in a way we’ve never before seen. Or you may wish to concentrate more on heavier or more effective firepower, using some of the training methods I’ve just mentioned or, perhaps, by bringing in support ships such as Jan Ors in her HWK-290. 
Green Squadron Pilot (19)
Chardaan Refit (-2)
A-Wing Test Pilot (0)
Push the Limit (3)
Outmaneuver (3) Green Squadron Pilot (19)
Chardaan Refit (-2)
A-Wing Test Pilot (0)
Push the Limit (3)
Outmaneuver (3) Green Squadron Pilot (19)
Chardaan Refit (-2)
A-Wing Test Pilot (0)
Push the Limit (3)
Outmaneuver (3) Jan Ors (25)
Nien Nunb (1)
Ion Cannon Turret (5) Total Squad Points: 100 Flying with Other Ships Of course, the recent introduction of the TIE phantom causes all of us concern. When cloaked, it is extremely difficult to hit, which is why we are very pleased to bring to you Proton Rockets, which can punch a hole through any cloaked Phantom. I want those of you who are going to be carrying Proton Rockets to get to know Kyle Katarn and Garven Dreis. Jake Farrell, I’ll be coming to you later, but you should get to know them, too. These two pilots will help you focus your shots and maintain your focus on defense as well. 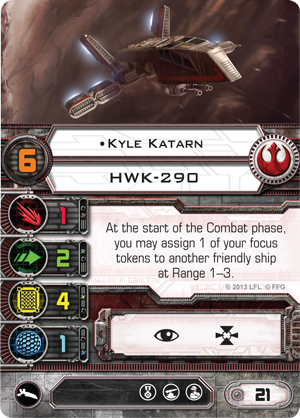 
In fact, all of our HWK-290 pilots can be very helpful for all of you A-wing pilots. Our Rebel Operatives might ionize a target to enable you to easily Outmaneuver it, Roark Garnet can help you claim a shot on a TIE phantom before it can cloak, Kyle Katarn can help you fire your Proton Rockets, and Jan Ors can aid those of you who want greater firepower on your ships. Get to know these pilots in the mess hall, and try to get them to fly with you. The A-Wing Hall of Fame There’s a growing number of pilots whom we are entering into the A-wing Hall of Fame, and I want to introduce you to them if you haven’t met them already. Gemmer Sojan, where are you? Ah yes, right at the back… How unlike you! Gemmer here likes to fly right into the thick of things, charging through enemy lines, or flanking and then boosting round the back to fire up close and personal. We have found that when we attach a Stealth Device to his ship, he can evade nearly any enemy attack. And we’ve actually been taking advantage of his talents in a squadron that we’ve codenamed “So Near Sojan.” In this squadron, Gemmer and the HWK-290s will stay with Biggs Darklighter during the opening approach. Gemmer will then charge forward while the HWK-290s flank, leaving opposing ships with attacks from many differing directions. 
Gemmer Sojan (22)
A-Wing Test Pilot (0)
Push the Limit (3)
Chardaan Refit (-2)
Stealth Device (3) Rebel Operative (16)
Ion Cannon Turret (5) Rebel Operative (16)
Ion Cannon Turret (5) Biggs Darklighter (25)
Experimental Interface (3)
R2-F2 (3) Total Squad Points: 99 Notably this squad makes use of the Experimental Interface, and once it’s completed, the Experimental Interface is going to help our cause significantly, particularly because in tandem with another pilot acting as Squad Leader, A-wing pilots will no longer need to Push the Limit all the time. We eagerly await this technology. 
Gemmer Sojan
A-Wing Test Pilot (0)
Outmaneuver (3)
Chardaan Refit (-2) Prototype Pilot (17)
Chardaan Refit (-2) Garven Dreis (26)
R2-D6 (1)
Adrenaline Rush (1) Luke Skywalker (28)
Experimental Interface (3)
Squad Leader (2) Total Squad Points: 99 This brings us to Arvel Crynyd. Yes, you all know Arvel. No pilot likes to fly closer to his foes than this guy. Arvel has now undergone training similar to that you Green Squadron Pilots have received, and he will now also be able to Push the Limits of his ship, allowing him to Stay on Target much more often. We believe that this training may help him to become far more useful in squads. Failing that, we’re teaching him how to fly even more aggressively – to bring a sense of Intimidation to those enemies with which he’s always playing chicken. We expect this training to be complete in only a few months. Once Arvel learns how to Stay on Target, we are hoping to send him to battle in the following squadron, which we have codenamed “Arvel On Target.” 
Arvel Crynyd (23)
A-Wing Test Pilot (0)
Stay on Target (2)
Chardaan Refit (-2) Roark Garnet (19) Kyle Katarn (21)
Blaster Turret (4)
Recon Specialist (3) "Dutch” Vander (23)
Ion Turret (5) Total Squad Points: 100 This is a rare synergy build and we have yet to see how functional it will be, partly because Roark Garnet is so good at helping others, but almost completely useless with his primary weapon. Nonetheless, if the formation works, Arvel can race at an enemy ship, acquire a target lock on it, and then focus his fire before anyone else can respond. This is perhaps the deadliest that Arvel has ever been. Who knows, one day he may even end up taking out a Super Star Destroyer! Okay, okay, calm down! Stranger things have happened. The Best of the Best There has been much talk around the barracks of our two star pilots, Jake Farrell and Tycho Celchu. Jake has proven to be a remarkable and slippery pilot, boosting or barrel rolling his way out of his opponent’s firing arcs almost at will. Having flown an extraordinary number of sorties, he relies upon his Veteran Instincts to fire early, even firing before TIE phantoms can recloak, and he can also Outmaneuver almost all enemy pilots. In Jake’s newest squadron, which we’ve given the codename of “Anchorman,” Jake flies behind the big hitters, under the protection of Biggs Darklighter. At the opportune moment, he surges forward and wreaks havoc: 
Jake Farrell (9)
Chardaan Refit (-2)
A-Wing Test Pilot (0)
Veteran Instincts (1)
Outmaneuver (3) Biggs Darklighter (25) Garven Dreis (26) Blue Squadron Pilot (22) Total Squad Points: 99 Our final pilot you surely all know… Tycho Celchu. Nice of you to join us, sir! Tycho is a shining example of the benefits of our rigorous training regimen, and he is now an absolute force to be reckoned with. Like Jake, he is now able to use his Veteran Instincts to respond to the movements of almost all enemy craft. One volley of Proton Rockets from this guy and you could see a TIE phantom downed in one shot. Still, he often flies without ordnance, capitalizing on his ability to handle even the most stressful situations by Pushing the Limit of his craft and displaying his expert handling of barrel rolls. 
Tycho Celchu (26)
A-Wing Test Pilot (0)
Push the Limit (3)
Expert Handling (2)
Chardaan Refit (-2) Rookie Pilot (21) Biggs Darklighter (25) Roark Garnet (19)
Ion Cannon (5) Total Squad Points: 99 Again, when the Experimental Interface is completed, Tycho believes he can fly his A-wing through battles in ways that are more daring than you could possibly imagine: 
Tycho Celchu (26)
Experimental Interface (3)
A-Wing Test Pilot (0)
Push the Limit (3)
Expert Handling (2)
Chardaan Refit (-2) Rookie Pilot (21) Biggs Darklighter (25) Rebel Operative (16)
Ion Cannon (5) Total Squad Points: 99 Pilots, you are now a force to be reckoned with. TIE phantom and TIE defender pilots will fear you. Decimators will be torn to shreds by your Proton Rockets. This is the time of the A-wing. This is your time. Now man your fighters… and may the Force be with you! ... Source: An Advanced Guide to A-Wings (http://www.fantasyflightgames.com/edge_news.asp?eidn=5135)
Title: FFG:A Champion's Perspective: Warhammer: Diskwars
Post by: RSSFeeder on 22 October 2014, 15:00:03
A Champion's Perspective: Warhammer: DiskwarsA Tournament Report by 2014 North American Champion Francois Fressen
After Gen Con wrapped up in August, we contacted the winners of the North American Championships and asked each player to write a short summary of their experience and their strategies. As World Championship Weekend approaches, we will be posting articles each week so players can learn how to best prepare for their next large tournament, as well as begin readying themselves for the biggest FFG event of the year! We start our series with 2014 Warhammer: Diskwars North American Champion Francois Fressen sharing how he arrived at his tournament-winning army list and highlights from a few of his games. I am a data scientist in healthcare and an astrophysicist at Harvard. I live in Boston with my wife and our two young children. I used to play international board game competitions in high school and college, but now I mainly spend time playing solo and theorizing about games when my little ones are sleeping. This hypothetical testing turned useful earlier this year when I realized I could attend Gen Con in August. Theorizing has way more flavor when there is a tournament I can imagine myself attending! On Preparing for the Tournament This game has had a hold on me since its first announcement. It takes the best of both worlds: the great concept of disk flipping as a smart and elegant alternative to miniatures and cardboard grids, and the flavor of Warhammer’s world. This combines with FFG’s game design dedication to make a fair, fast-paced, highly strategic and thematic game.  While testing, I realized that the game played surprisingly well solo by choosing potentially appropriate action cards on both sides and then randomly selecting which card to play from among those. The first list that emerged from my tests featured Karl Franz, Alarielle the Radiant, and their respective faction’s siege range weapon. It was only late in my tests that Teclis and his Sun Dragon got my preference over Alarielle. As my list changed, the factions remained Empire and Elves, but the focus became much more mobile and aggressive. While testing, I realized that the game played surprisingly well solo by choosing potentially appropriate action cards on both sides and then randomly selecting which card to play from among those. The first list that emerged from my tests featured Karl Franz, Alarielle the Radiant, and their respective faction’s siege range weapon. It was only late in my tests that Teclis and his Sun Dragon got my preference over Alarielle. As my list changed, the factions remained Empire and Elves, but the focus became much more mobile and aggressive.
I was unable to find an army list with Orcs or Dwarfs that could convincingly challenge this list. But interestingly, some other solid contenders emerged from my tests: an Empire army focusing on priests, a Chaos army with two Bloodthirsters and their versatile action cards, and a Vampire Counts army with Zombie Dragons and Tomb Banshees. These three armies all managed to pull several victories against my well-trained Order army, but Karl and Teclis had the edge overall. On my North American Championship Army List Regiment 1 Regiment 2 Reserve Regiment I did not really consider the Dark Elves, Skaven, Wood Elves, and Lizardmen factions introduced in Hammer and Hold and Legions of Darkness, as they don’t have access to elite units yet. I consider elite units both a flavorful and necessary component of most lists. However, the Empire is an exception to this requirement for me, as it can include two Knights Panther units which stand very close to the elite status for me. With that in mind, I added Marienburg Swordsmen and Talabheim Greatswords to two Knights Panther units to complete Karl Franz’s regiment. Teclis’s support consists of a mighty Sun Dragon, two very solid Militia Spearmen, and one important High Mage. My command cards covered the four initiative keywords in order to have my actions harder to read by my opponent: Speed of Asuryan, Shield of Saphery, Arcane Attack, and Rally. Three of these cards relied entirely on Teclis and the High Mage. The reliance is a bit risky, but I felt the reward was worth it. I think it is the number of synergies in this list that made it a good choice for me. Although an army usually benefits from having its two regiments sharing the same faction, it looked like the respective support that my two regiments offered to each other either enhanced their strengths or covered their vulnerabilities. Here are the most noteworthy combinations: - Speed of Asuryan on Teclis with Karl Franz’s ability and the second action of Speed of Asuryan allows a “run, hit, remove the activation token, hit again, and run again” sequence of actions.
- Teclis and the High Mage’s arcane resistance protect them from the unstable nature of Arcane Attack.
- A charging Knights Panther pinning several units is a good target for the Sun Dragon’s fire thanks to the Panther’s physical resistance.
- Rally shines in this army list where it can provide additional early reach to very aggressive units.
- The High Mage provides backup for magic command cards in case Teclis bites the dust and a much needed arcane resistance to my Knights Panther.
On the 2014 North American Championship I did not get initiative in any of my games, but I did get the benefit of choosing the scenario card, and battling on my own terrain. This helped because my terrain was not favorable to ranged armies and did not provide much fortification against my cavalry’s impact abilities. I got an early edge in several games, being able to claim a few wounds and disks as soon as turn one thanks to the extra mobility provided by my command cards. Overall, I faced a combination of the base set armies, but surprisingly no Vampire Counts armies. My training games against the Counts had been the most unpredictable, and I had expected them to be in at least a few army lists.  The most intense situation in the tournament came as I faced an entirely ranged army. I exposed Teclis on turn one without the protection of my Shield of Saphery command card, as I was tempted to use his magic to burn a unit of Militia Archers. The following turn, Teclis was in a perfect position to use Arcane Attack and Rally, but another vengeful Militia Archers and the fearsome Helblaster Volley Gun combined to wound Teclis twice. I had lost my centerpiece on the second action sequence of the game. My Knights Panther surprisingly dodged more arrows than my overconfident hero, and they eventually turned the tide in an uphill battle and saved my troops from an early doom. The most intense situation in the tournament came as I faced an entirely ranged army. I exposed Teclis on turn one without the protection of my Shield of Saphery command card, as I was tempted to use his magic to burn a unit of Militia Archers. The following turn, Teclis was in a perfect position to use Arcane Attack and Rally, but another vengeful Militia Archers and the fearsome Helblaster Volley Gun combined to wound Teclis twice. I had lost my centerpiece on the second action sequence of the game. My Knights Panther surprisingly dodged more arrows than my overconfident hero, and they eventually turned the tide in an uphill battle and saved my troops from an early doom.
On the Final Match In the final match, I faced a High Elf army featuring a variety of ranged units and two Sun Dragons. The deciding factor for this game was probably having the appropriate resistances for the different damage sources my respective troops were facing as the state of the battlefield evolved. I decided not to challenge my opponent’s Sun Dragon in the middle of the field, as I did not want to test my luck against its Shield of Saphery. Instead, I accepted a few unit exchanges to create an early advantage until I was able to pin most of the opposing units and decide how to deploy my reserves to claim the battle. Afterthoughts The Warhammer: Diskwars tournament was the first event I registered for at Gen Con, and the experience has made me eager for other tournaments and to see new expansions featuring the factions recently introduced. I now hope to foster local tournament scenes, and Warhammer: Diskwars will be the game I have in my bag at future conventions. I don’t think there are many other ‘miniature’ games this deep, where you can fit your entire army in your wallet! 2014 World Championship Weekend Thanks, Francois! Francois’ story shows that you don’t always need a group of friends to prepare for a tournament. Check back in the coming weeks to hear stories from other North American Champions, and if you haven’t already, register for FFG’s 2014 World Championship Weekend, and join us next month for your chance to gain fame in your favorite game! ... Source: A Champion's Perspective: Warhammer: Diskwars (http://www.fantasyflightgames.com/edge_news.asp?eidn=5136)
Title: FFG:The Galaxy's Most Wanted, Part One
Post by: RSSFeeder on 22 October 2014, 23:30:04
The Galaxy's Most Wanted, Part OneA Preview of the Most Wanted Expansion Pack for X-Wing (TM)
“This bounty hunter is my kind of scum, fearless and inventive.”
–Jabba the Hutt Recently, we kicked off our previews of the sixth wave of X-Wing™ expansion packs with a look at its different upgrades, which go a long way toward providing the Scum and Villainy faction with its own, distinctive personality. Its ships don’t permit quite the same swarms or nimble, high-risk piloting as the Empire’s, nor do they work quite as well in formation as the rugged and resilient ships that the Rebellion’s squad leaders most often favor. Instead, the galaxy’s Scum operate best when its squadrons’ individual pilots are left to their own devices and given license to purchase the deadliest and dirtiest upgrades available on the black market. This generalization holds true even when we look at what the Most Wanted Expansion Pack offers the faction as it reintroduces two of the game’s pre-existing starfighters, repainted and re-outfitted to better suit the faction’s self-centered aces.
By repurposing some of your existing starships, the Most Wanted Expansion Pack kick starts your Scum faction with enough firepower that it can immediately take the fight to Rebel and Imperial forces. It comes with enough new ship cards and upgrades to field a whole fleet’s worth of the galaxy’s most fearsome thugs, hired guns, pirates, and spice runners. It also comes with three pre-painted miniature starfighters, one Y-wing and two Z-95 Headhunters. Each of these feature identical sculpts to their Rebel counterparts, but they feature markedly different paint schemes. The expansion’s Z-95 Headhunters feature a white and black paint scheme and wing markings that indicate they belong to the notorious Black Sun organization. 
A 360-degree view of the Most Wanted Z-95 Headhunter
The expansion’s Y-wing, meanwhile, features its own gritty, Scum-themed paint scheme, one that evokes the ship’s durability. 
A 360-degree view of the Most Wanted Y-wing
Though these starfighters look quite different than their Rebel counterparts, they feature the same stats and the same maneuver dials. So what sets them apart within the Scum faction? The Most Wanted Expansion Pack transforms them by pairing them with unique pilot abilities and upgrades. The Scum’s Z-95 Headhunter  As a ship, the Z-95 Headhunter is the same within the Scum faction as it is within the Rebellion. Except for one thing: The Scum’s Z-95 Headhunter gains access to the illicit upgrade () and all the different tricks it introduces, including the ability to use a “Hot Shot” Blaster once per game to attack a ship outside of your firing arc. As a ship, the Z-95 Headhunter is the same within the Scum faction as it is within the Rebellion. Except for one thing: The Scum’s Z-95 Headhunter gains access to the illicit upgrade () and all the different tricks it introduces, including the ability to use a “Hot Shot” Blaster once per game to attack a ship outside of your firing arc.
By itself, the illicit upgrade adds enough tricks to Scum pilots such as the Black Sun Soldier and Binayre Pirate to distinguish them from the Rebellion’s Bandit Squadron Pilot and Tala Squadron Pilot, but Most Wanted pushes the distinction between the Scum and Rebel Z-95s even further with the introduction of two unique Z-95 aces who epitomize the faction’s self-serving tendencies. Whereas the Rebellion’s top Z-95 Headhunter pilot, Airen Cracken, exemplifies his faction’s philosophies by passing free actions to his wingmates during the Combat phase, the Scum pilot Kaa’to Leeachos hordes actions for himself. At the start of the Combat phase, he can steal a focus or evade token from any of his wingmates at Range 1–2. Depending on how you see it, this means that Kaa’to Leeachos effectively has a built-in Push the Limit, without the squad point cost or stress token, or it means that he’s leaving another of your Scum pilots high and dry each round. Of course, both are true in their own way, but it’s noteworthy, either way, to point out that if you put Kaa’to Leeachos in the right squad and formation, his ability grants him access to an evade token that his action bar doesn’t normally offer. It also means that he can grab a focus token even after performing a Koiogran-turn. 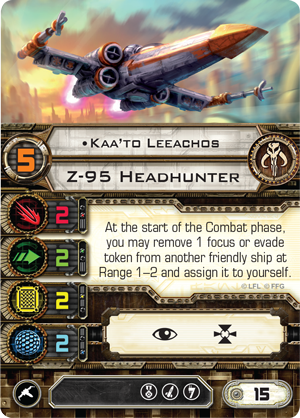 
Meanwhile, N’dru Suhlak very likely represents the best example of how the Scum faction’s individualistic pilots demand the freedom to fly their fighters however they want, unimpeded by such irritating distractions as tactical formations, rules of engagement, or the legality of their upgrades. So long as there are no other friendly ships within Range 1–2 of N’dru Suhlak while he’s attacking, he gains an extra attack die. This means that while N’dru Suhlak is flying solo, he can hit as hard as a non-unique TIE interceptor or X-wing, but for fewer squad points and with a higher pilot skill. The Scum’s Y-wing  Just as the illicit upgrade helps to distinguish the Scum faction’s Z-95 Headhunters from the Rebellion’s, the Salvaged Astromech upgrade () begins to separate Scum Y-wings from their Rebel counterparts. Just as the illicit upgrade helps to distinguish the Scum faction’s Z-95 Headhunters from the Rebellion’s, the Salvaged Astromech upgrade () begins to separate Scum Y-wings from their Rebel counterparts.
As mentioned in an earlier preview, “Illicit Dealings,” the Salvaged Astromech upgrade replaces the standard Astromech upgrade featured by the Rebellion and helps to reinforce the idea that the Scum faction is a bit less orderly and a bit more aggressive than their rivals. Additionally, it reinforces the idea that Scum pilots follow their own interests and their own flight paths. We saw a couple of these Salvaged Astromech ugprades in “Illicit Dealings,” but they didn’t fully illustrate how the Most Wanted Expansion Pack transforms the Y-wing. Rather, the Salvaged Astromechs that we saw merely hinted at the many new roles the Y-wing will be able to play within the Scum faction. While at one squad point the Unhinged Astromech may be a good bargain for Syndicate Thugs looking to race around the battlefield at full tilt with an Ion Cannon Turret, more aggressive pilots may prefer to equip R4 Agromechs in order to acquire target locks each time they spend focus tokens to perform attacks with equipped Blaster Turrets. Finally, because there are times that you won’t need to modify your attack dice so much as you’ll wish you could modify your target’s defense dice, Most Wanted introduces the unique Salvaged Astromech R4-B11. Notably, a couple of the expansion’s unique Y-wing pilots partner exceedingly well with these last two Salvaged Astromechs. Kavil, for one, rolls an extra attack die whenever he attacks a ship outside of his firing arc and partners very well with the R4 Agromech. 
Equipped with a Blaster Turret and R4 Agromech, Kavil offers your Scum fleet a consistently modified attack of four dice, so long as he can find a target at Range 1–2 outside of his primary firing arc.
On the other hand, the expansion’s second unique Y-wing pilot, Drea Renthal, is less likely to need the target lock granted by the R4 Agromech since she can simply receive a stress token to acquire a new target lock whenever she spends one. This means she’s far more likely to equip R4-B11 as she guns her ship straight at the enemy fleet, firing torpedoes with abandon. Alternatively, if her Y-wing has the BTL-A4 Y-wing Title, she can attack twice in the same round, once with her primary weapon and once with a turret. Furthermore, if she wishes, she can spend target locks to modify every die roll in the whole sequence. If Drea Renthal spends her target lock to modify her first attack roll, she can receive a stress token to acquire a new target lock, which she can then spend to modify the defender’s results. After that, she can receive a second stress token to acquire a new target lock on the same opponent or a new one, and she can then attack that opponent with a turret weapon, such as the Autoblaster Turret, modify the attack dice, take another stress token, acquire another target lock, and modify her target’s defense dice. However, since she’ll then be buried in stress tokens and her BTL-A4 Y-wing Title will prevent her from firing against opponents outside of her primary firing arc, Drea Renthal may wish to consider equipping a Bomb Loadout, perhaps carrying a Proton Bomb to discourage any would-be pursuers from trying to outflank her in order to claim free shots at Range “1.” 
Drea Renthal with an extremely aggressive thirty-two point build.
Pure Aggression and Reckless Abandon In many ways, the unique pilots and the upgrades in the Most Wanted Expansion Pack serve to define the sort of high-risk, high-reward tactics that the Scum and Villainy faction’s self-interested pilots might employ in their pursuit of bounty or their defense of their profit base. Still, many of the expansion’s upgrades, such as the Bomb Loadout and BTL-A4 Y-wing Title, can also play on ships outside of the Scum faction, and it’s possible that as the galaxy’s Scum enter the game’s heated battles, we may very well see a number of Rebels and Imperials adopting some of their tactics. In the meantime, stay tuned for more previews of the Wave VI expansions for X-Wing. We’ll continue with our second preview of Most Wanted, exploring some of the ship cards and upgrades for the other ships it makes playable within the Scum faction – the HWK-290 and Firespray-31! ... Source: The Galaxy's Most Wanted, Part One (http://www.fantasyflightgames.com/edge_news.asp?eidn=5138)
Title: FFG:Blood, Fury, and Chaos
Post by: RSSFeeder on 23 October 2014, 08:00:03
Blood, Fury, and ChaosPreview the Uthuk Y'llan Army and Lore Powers in BattleLore: Command
Rage was in his demon-tainted blood. It coursed hot through his veins, fueling his thirst for more blood, for destruction, for death. It made him fearless, sharpened his senses, quickened his movements. He laughed at the nervous soldiers he could see across the field, imagined his scythe slicing their heads off, blood spattering on the ground, on their armor, on his skin. He could almost taste it. Soon the battle would begin. Soon he would litter the field with mutilated, dismembered corpses. Soon the nearby village would burn while he feasted upon slaughtered livestock and listened to the screams of the dying. He was Uthuk Y’llan. He lived for war. In BattleLore: Command, a digital application for iOS, Android, and PC, the Daqan lords and determined villagers of Terrinoth take on the most vicious enemy they have ever encountered: the Uthuk Y’llan, barbarians from the eastern steppes, eager to ravage the land and massacre its people. Take charge of either army in skirmishes against a friend on the same wireless network or against the CPU, or command the Daqan army in a single-player campaign to save your homeland from the bloodthirsty hordes that threaten it. Our last preview looked at the various units and tactical strengths of the Daqan army, as well as looking at how combat works in the app. Today’s preview focuses on the Uthuk Y’llan army, a force of humans corrupted and deformed by demon blood fighting alongside malicious and hellish creatures. Whether defending Terrinoth against the invading Uthuk Y’llan army in the campaign mode, or deploying their demonic units against your opponent in the skirmish mode, you will need to understand their capabilities in order to triumph in battle. We will also look at lore powers in BattleLore: Command, which are specific and sudden advantages in battle, from increasing a unit's combat value to infesting the battlefield with swarms of poisonous insects. Used at the right moment, lore can put victory in your hands or save you from fast and bitter defeat. 
Demon Blood and the Viper’s Bite The core of any Uthuk Y’llan army are the Blood Harvesters, humans drawing extraordinary strength and terrible bloodlust from the demon blood they consume. These infantry units match the Citadel Guard with a movement value of two, and combat value and health of three, but surpass them in anger: the Rage ability increases the combat value of a Blood Harvester unit if it is weakened, their ferocity increasing with every blow they take. Blood Harvesters also value the enemy’s death over their own lives: their Frenzy ability allows them to deal a blow to an enemy unit by sacrificing themselves. The ranged counterpart to the Blood Harvesters are the Viper Legion, archers whose arrows can poison the enemy in addition to slaying them outright. A poisoned unit can be harmed not only by a hit result in combat, but also by a lore result, doubling your odds of dealing damage to it. The poison doesn’t wear off either, but endures until the enemy commander spends two lore points to dispel it. 
Nasty, Brutish, and Massive Where other armies might have cavalry and elite forces, the Uthuk Y’llan have demons bred for war, their viciousness and hatred cultivated for centuries. The most revolting of these demons are the Obscene, ravenous, bulging creatures who can only move one space at a time – unless they smell the enemy nearby. Then, their craving for blood draws them adjacent to the enemy unit. Although slow, the Obscene are nevertheless deadly: they have a combat value of four, enough to wipe out a unit of Rune Golems or Citadel Guard. 
The Uthuk Y'llan can also deploy packs of fiendish Flesh Ripper Brutes to tear down enemy cavalry. What these beasts lack in size, they make up for in speed and ferocity. With a movement value of three, these charging, chomping hunters can rise towards unsuspecting enemy units. Their sharp senses can smell the fresh blood of a wounded soldier, luring them to prey upon the weak: their Bloodthirst combat result deals a point of damage to an already weakened unit. Moreover, their Pursue ability is more effective than that of the Citadel Guards, allowing them to chase an enemy two spaces instead of one, or destroy one unit and then move two spaces towards new prey. The most fearsome of all Uthuk Y’llan units is the Chaos Lord, a horned, clawed monster that towers over the battlefield. The moment that enemy troops catch sight of him, they struggle to control their terror. With a combat value of four and a health value of six, he can survive more blows than any other unit in the game. Being Immoveable, he can ignore one retreat result in combat, remaining in place in order to counterattack. With a single, earthshaking roar he can chase enemy units away: his Terrifying ability allows him to force enemies to retreat twice, wrecking your opponent’s strategies and wreaking havoc among his troops. 
Combat Spells and Sudden Strikes Battle is more than just a test of a army’s capabilities, however. A commander may have a new tactical insight, or find an unforeseen opportunity to exploit the enemy’s weakness. In Terrinoth, moreover, magic is used in battle: to paralyze the enemy, guide arrows around obstacles, or bring a weakened unit back to life, for example. The lore powers in BattleLore: Command represent these various combat advantages, from sudden bravery to blood sacrifice. Playing a lore power costs a certain amount of lore points, which you accumulate both through combat results and at the start of each turn, when you also gain a new lore power. Use them during your combat turn for an offensive boost that the enemy can’t anticipate, or play them defensively to shield your units against the enemy’s onslaught. 
Each army possesses a different and unique set of lore powers. The Uthuk Y’llan derive their lore powers from dark, demonic magics and from their insatiable rage. Blood Sacrifice allows you to steal the health of one unit in order to give that health to another. Chaos of Battle undoes the enemy’s movement phase by magically compelling the ordered units to move randomly, possibly sending a weakened unit straight into a group of ravenous Flesh Ripper Brutes, or moving a group of Rune Golems away from the unit that they intended to attack. A unit filled with the Fury of Y’llan has their combat value increased by three, as the unmitigated rage in their blood drives them to new levels of savagery. 
Many of the Daqan lore powers come from the determination of the troops. Valor and Vengeance, for example, enhances the combat value of a single unit, as if it were suddenly spurred on to achieve greater glory than its fellows. Assault makes it almost certain that your units will do terrible damage to the enemy that turn, indicating the commander’s decision to throw his army unreservedly into an attack. Portal, one of the magical Daqan lore powers, can transport a unit to a strategically significant location against the rules of movement, or pull back a surrounded unit so that it can survive to fight again. Command and Fight Use demonic magic to thwart your opponents efforts or inspire your brave troops to do noble deeds on the battlefield. Channel the unquenchable rage and fury of the Uthuk Y’llan into the destruction of Terrinoth’s defenders or lead the Daqan army in a battle to save their homeland from a cruel and ruthless invading force. Each army has its own particular tactical strengths and weaknesses and each needs a shrewd commander to guide it to victory. Check the BattleLore: Command minisite for future previews and more details. The game will be available soon in the App store, Amazon Marketplace, and on Google Play. ... Source: Blood, Fury, and Chaos (http://www.fantasyflightgames.com/edge_news.asp?eidn=5139)
Title: FFG:STAR WARS (R): Force and Destiny (TM) Beta Update #7
Post by: RSSFeeder on 23 October 2014, 16:30:03
STAR WARS (R): Force and Destiny (TM) Beta Update #7News From the Developers of the Force and Destiny Beta
Hello Force and Destiny™ beta testers, In this week’s update (pdf, 317 KB), we introduce more changes to some of our fearsome (and not so fearsome) adversaries. Although some of these changes are minor, a couple profiles saw some major modifications to decrease or increase their effectiveness:
- The Imperial Assassin sees his offensive potential decrease slightly. Pairing his high Agility with a disruptor rifle made for a profile that was a bit too readily tailored for killing Player Characters.
- Meanwhile, the Fallen Master is getting a bit of an upgrade; he gains the Improved Reflect talent. With his high Reflect ability – and now Improved Reflect – the Fallen Master is a dangerous ranged combatant even if he doesn’t have a ranged weapon. PCs may have to close to engage him if they want to take him on, which is just what the Fallen Master wants!
- Similarly, the Inquisitor now has the Improved Parry talent as one of his optional selections. Improved Parry makes the Inquisitor brutal in close combat, since it combines nicely with his three ranks in Adversary. However, it does leave him with one key vulnerability: the inability to protect himself from ranged attacks with Reflect. The GM should always make sure the main nemesis has a vulnerable point, after all! However, to ensure the Inquisitor wasn’t too terrifying in close combat, we toned down his Intimidating Presence ability slightly. We didn’t want him to guarantee Improved Parries for every hit he suffered.

Finally, we made a small addition to the Terrify talent. Taking this talent now gives you Conflict at the start of each session. You may be wondering why we added this new game effect, and also why we only added it to one talent in the book. The answer to the first question is that this is a concept we want to explore in the future, and we want to start establishing it as a possibility now. The answer to the second question is that we don’t want to guarantee that a specialization makes someone fall to the dark side, so we want to be judicious in the number of these talents we add, especially to a single specialization. That’s it for this week. Let us know how these adjustments play out in your games. We look forward to hearing your feedback! ... Source: STAR WARS (R): Force and Destiny (TM) Beta Update #7 (http://www.fantasyflightgames.com/edge_news.asp?eidn=5140)
Title: FFG:Rewards for Your Service
Post by: RSSFeeder on 24 October 2014, 01:00:10
Rewards for Your ServicePreview Side Missions, Experience, and Items in a Campaign
“Well, look at you! A General, huh?”
–Han Solo, Star Wars: Return of the Jedi Enter the Star Wars universe with the thrilling campaigns and skirmishes of Imperial Assault, a tactical board game of cinematic missions for two to five players. You can find two full games within Imperial Assault. The campaign game invites you and up to four friends to take part in a gripping narrative that pits a small strike team of Rebel heroes against the massive military power of the Imperial player. You’ll also uncover the tactical conflict of the skirmish game, which allow two players to muster their own forces and battle head-to-head over conflicting objectives. Whether you play the campaign game or the skirmish game, you’re sure to experience the Star Wars galaxy like never before. In our most recent preview, we explored two of the heroes that you can play over the course of the campaign. In future previews, we’ll examine the skirmish game, as well as the various rewards and threatening options available to the Imperial player as he commands countless Stormtroopers, vehicles, and villains to crush the insignificant Rebellion. Today, however, we’ll turn our attention to the missions these heroes may choose to undertake, and the experience and items they collect along the way!
Take to the Field The campaign included in the Core Set of Imperial Assault is split between story missions and side missions. Story missions form an overarching plot that reaches across the campaign – the Core Set campaign tells the story of a scheme to exterminate the entire Rebel Alliance with one fell blow. The outcome of a story mission directly influences the next available story mission, meaning that the events of your campaign will change and shift based on the actions of the heroes and villains you control. Side missions fill in the spaces between story missions, as Rebel High Command gives your strike team other missions and your characters’ personal obligations require attention. At certain points in the campaign, the heroes must choose a side mission to undertake. In most circumstances, two side missions, drawn randomly from the Side Mission deck are available for the heroes to choose.  
Before a campaign begins, the Rebel players must construct the deck of Side Mission cards. Four gray Side Mission cards are randomly included in the Side Mission deck, representing unique opportunities for the Rebel Alliance to take advantage of, including ripe Imperial targets or planets ready for rebellion. Successfully completing these missions grants the heroes a specific Reward card that may prove useful in future missions. The heroes must also include the red Side Mission cards that correspond to the heroes in the campaign. For example, if Gideon Argus participates in the campaign, the Friends of Old side mission must be included in the Side Mission deck. These side missions bring old debts and duties to the fore, and successfully completing a hero-specific side mission grants that hero a special Reward card that greatly increases his efficacy. The final step in building the Side Mission deck is for the heroes to select four green Side Mission cards. These side missions allow the heroes the chance to fight alongside an iconic Star Wars character, including Luke Skywalker, Han Solo, or Chewbacca. If the heroes successfully complete one of these mission, they may even call upon that character as an ally in other missions. Our Just Rewards The Imperial Assault campaign game offers you and your fellow players the chance to command a strike team in a series of missions that spans the Galactic Civil War. Of course, as your team embarks on mission after mission, they gain experience in their chosen area of expertise, whether leadership, stealthy movement, or use of the Force. And naturally, you’ll get paid for your hard work as well. A steady influx of credits ensures that your gear and weapons are always top-notch. Of course, if the Imperial player defeats you and achieves his objective first, he’ll receive the majority of the rewards. At the end of each mission in the campaign, the heroes collect a number of rewards. Some missions offer a special Reward card that can provide powerful bonuses, but experience and credits are much more common rewards. Heroes individually gain experience that can be spent to purchase new Class cards. Every hero in Imperial Assault has an individual deck of Class cards, each of which offers new abilities. Some of these cards are relatively inexpensive for just one experience point, but more powerful Class cards, such as Gunslinger, can cost more. We looked at two heroes’ Class cards in our previous preview, and as we explore more heroes in future previews, we’ll examine their Class decks as well. While experience invites your heroes to increase their skills, credits allow you to purchase new weapons and equipment. At the end of many missions, a number of credits are delivered to the heroes for purchasing new items. Credits can also be earned through your actions during the mission. Whenever a hero is next to a supply crate, he may use an action to claim the crate token and draw a card from the Supply deck. These cards offer a variety of helpful tools, including an Emergency Medpac or Valuable Goods, but each crate token that you claim is worth fifty additional credits at the end of the mission, giving you the chance to purchase even more equipment. Weapons, Armor, Equipment Once you’ve received your experience and credits, you have the chance to spend them both before you begin a new mission. The Imperial player also has the chance to spend his rewards, which we’ll cover in a future preview. When spending experience, all of your hero’s Class cards are available at once – you can purchase any of them, provided you have the requisite experience. Item cards, on the other hand, are arranged in three separate tiers. As the campaign progresses, you’ll gain access to new tiers of Item cards, giving you the opportunity to buy more and more effective weapons, armor, and gear. In most cases, when you purchase items, the top six Item cards are revealed from the deck. You and your fellow heroes can spend your credits to purchase any number of these items, provided you can afford the cost.  
Item cards give you the chance to customize your hero’s weapons and capabilities. As the campaign goes on, you can switch between a variety of weapons. A hero who starts with a ranged weapon may decide to use a melee weapon as well, or outdated weapons may be phased out once the campaign progresses. A DL-44 or a Vibroblade may be an excellent weapon for your first missions, but later on, a Sporting Blaster or a Force Pike proves more effective. In addition, you have the option to modify your weapons and make them truly your own. Many weapons display a number of arrows in the bottom right-hand corner of the card, which signifies the number of modifications that weapon can take. You may add a Shock Emitter to your melee weapon, for example, or an Overcharger to your blaster. You’ll find more than weapons at your disposal in the Item deck. In a mission, every hero can carry two weapons into battle, but he can also carry one piece of armor and up to three equipment items. A Combat Coat can make the difference between life and death when blaster bolts are flying, and stocking up on equipment like a Portable Medkit or Extra Ammunition keeps you and your weapons fully functional. Two Steps Ahead Your heroes have the chance to choose new missions, hone their skills, and purchase new items in every Imperial Assault campaign. Join us for our next preview as we look at two more heroes you can play as over the course of a campaign. Pre-order Imperial Assault at your local retailer today! ... Source: Rewards for Your Service (http://www.fantasyflightgames.com/edge_news.asp?eidn=5141)
Title: FFG:2014 Worlds Tournament Update
Post by: RSSFeeder on 24 October 2014, 09:30:04
2014 Worlds Tournament UpdateAn Explanation of the X-Wing 2014 World Championship Flight Structure
Update: World Championship Weekend preregistration closes on Thursday, October 23rd. If you have not registered for the 2014 X-Wing™ World Championship yet, we strongly recommend signing up for the second flight. Preregister now to guarantee your spot. We will accept walk-ins the day of each flight but only if there is room remaining. If you do not preregister, we cannot guarantee you entrance in the 2014 World Championships. At the end of August, we announced the schedule for all 2014 World Championships at the 2014 World Championship Weekend. To make sure players are as prepared as possible, today’s article outlines the X-Wing™ flight structure players will encounter this year at Worlds. Why the Split Into Two Flights? With the increasing popularity of X-Wing and the space the game requires to play, we will be splitting the tournament into flights to accommodate the large number of expected players for the event.
The flight system is one that we debuted at Gen Con this year and worked well. For the X-Wing World Championship we will be making
a few, small changes to improve the system but keep the overall structure. In short, having two flights allows more players to compete in the tournament. How Will the Flights and Overall Tournament Work? Each flight will accommodate up to 128 players and be run with six Swiss rounds. At the end of six rounds, the top 16 players in each flight will be invited to compete in the Finals on Saturday. The 32 players invited back on Saturday will compete in a top 32 single-elimination format. The final player standing at the end of the day Saturday will be crowned 2014 X-Wing
World Champion! How Do I Reserve My Spot in a Flight? To reserve a spot in one of the flights, you must preregister through our online store. As players register for the 2014 World Championship Weekend, we send out a general survey to each registrant. This survey will include a question asking for your preference on which X-Wing flight you would like to compete in. Once we receive your response, we will reserve a spot for you in your chosen flight. If one of the flights fills completely, we will notify you as soon as possible. If you have already preregistered, you should have already received the survey. If you did not, please contact us at organizedplay@fantasyflightgames.com immediately. The day of each flight, and only if space is available, we will accept any players who did not preregister. We strongly recommend you preregister for the 2014 X-Wing World Championship as we cannot guarantee there will be space if you attempt to register the day of the event. Is There a Difference Between the Two Flights? Other than the flights being on separate days and the fact that different players will end up competing each day, there is no difference between the two flights. Do I Have to Play in Both Flights? No. Players can qualify for the finals on Saturday no matter which flight they play in. Can I Play in Both Flights? A player may compete in both flights only if there is room. However, a player can reserve a spot for himself in only one flight. We will accept players reserved for a different flight only after all other players have had a chance to enter that day’s flight. Players who make the top 16 cut in Thursday’s flight cannot play in Friday’s flight. For example, Karen plays in Thursday’s flight but is unable to make the top 16 cut. She returns Friday morning to try and enter Friday’s flight. 105 players have a spot reserved, and each player checks in on time. 12 other players arrive without a spot reserved in either Thursday’s or Friday’s flight. We register those 12 in the tournament. After all 117 players are registered, we open registration for players like Karen, with space for 11 more players. Karen makes it in! We will also be hosting X-Wing side events both days for those who are not playing in that day’s flight. Keep your eyes on our website! More details on side events will be announced shortly. What if I Have a Bye From a National Championship? Congratulations on winning such a prestigious and challenging event! We are in the process of contacting all
National Champions directly with additional information and the survey. You do not have to preregister for World Championship Weekend, but please fill out the survey when you receive it so that we can reserve a spot for you
in the flight of your choice.
Preregister Today If you haven’t already, don’t forget to preregister for the 2014 World Championship Weekend. With more people preregistering this year than any year previously, space is sure to be at a premium! If you’re looking to try your hand at piloting in the 2014 X-Wing World Championship, preregistering is even more important. Guarantee which flight you’ll play in and preregister now! ... Source: 2014 Worlds Tournament Update (http://www.fantasyflightgames.com/edge_news.asp?eidn=5082)
Title: FFG:The Blue Is Calling
Post by: RSSFeeder on 24 October 2014, 18:00:03
The Blue Is CallingAnnouncing the Final Chapter Pack in the Wardens Cycle
It was cold in the cell, the wind screamed night and day, and worst of all, the floor sloped. Ever so slightly, yet it was enough. He was afraid to close his eyes, afraid that he might roll over in his sleep and wake in sudden terror as he went sliding off the edge. Small wonder the sky cells drove men mad. Some previous tenant had written on the wall in something that looked suspiciously like blood, the blue is calling.
–George R.R. Martin, A Game of Thrones Fantasy Flight Games is proud to announce The Blue Is Calling, the final Chapter Pack in the Wardens cycle for A Game of Thrones: The Card Game! The Eyrie rests high above the lands of the Vale, home to House Arryn. The words of their House are “As High As Honor,” but despite this noble declaration, there are still horrors to be found in the Eyrie. The sky cells and their jailor have driven men mad with terror, and in The Blue Is Calling expansion, you can turn this mindless fear against your opponents with new House Arryn characters and attachments. You’ll find new ways to pursue the Iron Throne beyond the bounds of the Vale with the sixty new cards (three copies each of twenty distinct cards) included in this expansion. The Blue Is Calling brings the Wardens cycle and its focus on House Arryn to a triumphant conclusion and expands the possibilities for your other trait-based decks, including Baratheon’s Rainbow Guard, Greyjoy’s Raiders, Lannister’s Clansmen, and more. You may race with the Dothraki across the plains of Essos, plot revenge with the Sand Snakes, or solidify your hold on the Eyrie with the unorthodox prisons of House Arryn. 
The Sky Cells For the first time in A Game of Thrones: The Card Game, The Blue Is Calling gives you the chance to condemn your opponent’s characters to the terror and imminent death of the Eyrie’s prisons. Sky Cell (The Blue Is Calling, 119) is a free attachment that you can attach to any character with a printed cost of three or lower. As soon as you imprison one of your opponent’s characters in a Sky Cell, his mind begins to succumb to madness: the controller of a character with Sky Cell attached must select his next plot card at random. The ramifications of a random plot selection can easily change the course of the game. A plot like The Power of Blood (Core Set, 194) could be wasted by using it at an inopportune moment, but revealing Rule by Decree (Core Set, 206) or Valar Morghulis (Core Set, 201) at the wrong time may completely ruin your opponent’s position.  Once the madness of a Sky Cell has begun to fester in the consciousness, there is only one escape: a step outwards, into the blue! A player with a Sky Cell attached to one of his characters can take an action during the marshaling phase to kill the attached character. This character cannot be saved, forcing your opponent to choose between being able to play that character for the rest of the game, or being forced to choose his plots at random as long as the character lives. Since you can target characters as powerful as Daenerys Targaryen (Ancestral Home, 76) or Ser Edmure Tully (The Champion’s Purse, 32) with the Sky Cell, you can be certain that you’ll give your opponent some very difficult choices whenever you play it. Once the madness of a Sky Cell has begun to fester in the consciousness, there is only one escape: a step outwards, into the blue! A player with a Sky Cell attached to one of his characters can take an action during the marshaling phase to kill the attached character. This character cannot be saved, forcing your opponent to choose between being able to play that character for the rest of the game, or being forced to choose his plots at random as long as the character lives. Since you can target characters as powerful as Daenerys Targaryen (Ancestral Home, 76) or Ser Edmure Tully (The Champion’s Purse, 32) with the Sky Cell, you can be certain that you’ll give your opponent some very difficult choices whenever you play it.
The sky cells can drive your opponent mad with terror, and the brutish jailor who oversees them can be equally dangerous to your opponent’s plans. In this Chapter Pack, you gain access to Mord (The Blue Is Calling, 118). Mord has one Strength and a military icon, but his most effective use can be found in his Response, which reads, “After you win dominance, choose a character with printed cost 3 or lower. Shuffle that character into its owner’s deck unless its controller moves 1 gold from his or her gold pool to Mord.” By preying upon your opponent’s characters, you may quickly deprive him of expendable servants, forcing him to put his more valuable characters into danger. Shuffling characters back into your opponent’s deck also denies him the chance to recur them from the dead or discard piles with tricks like Melisandre’s Scheme (Reach of the Kraken, 9). The only way for your opponent to escape this fate is to pay a bribe, moving one of his gold dragons from his gold pool to Mord. Gold on Mord can be spent as though it were in your gold pool, granting you an additional source of income that cannot be taken in the taxation phase. Into the Blue You can enact the justice of House Arryn and turn the sky cells against your opponent with the cards included in The Blue Is Calling. Expand the plots of the Arryns and claim the Iron Throne in this expansion and the other Chapter Packs in the Wardens cycle! Look for The Blue Is Calling in the first quarter of 2015. ... Source: The Blue Is Calling (http://www.fantasyflightgames.com/edge_news.asp?eidn=5142)
Title: FFG:Across the Askellon Sector
Post by: RSSFeeder on 25 October 2014, 02:30:03
Across the Askellon SectorPreview the Forgotten Gods Adventure for Dark Heresy Second Edition
In Dark Heresy Second Edition, you are an Acolyte in the service of the Inquisition, battling unfathomable evils as you struggle to keep the Imperium from utter corruption. Threats may arise from within, without, or beyond… And sometimes, the greatest threats come from the distant past. We recently announced the Forgotten Gods book-length adventure, which pits you and your team of Acolytes against the Faceless Trade, smugglers of proscribed artefacts, whose wares may awaken an ancient evil. Your investigations will take you across the Askellon sector, through strange and unknown locales. Today, Tim Cox, the writer of the Forgotten Gods adventure, shares his thoughts on designing the key locations of the book. Tim Cox on the Forgotten Gods Adventure After writing Dark Pursuits, the adventure contained in the Dark Heresy Second Edition Core Rulebook, I was more than a little excited to dive into Forgotten Gods, the first book-length adventure for the new edition! Like Dark Pursuits and Desolation of the Dead, the adventure included in the Dark Heresy Game Master’s Kit, Forgotten Gods explores the central themes of Dark Heresy, as the Acolytes explore hidden threats and expose even greater dangers to the Askellon sector, striving against overwhelming odds to stem the rise of darkness. 
This time, the investigation of the xenos artefacts takes the Players Characters from the depths of the hive to the wastelands surrounding it, before leading them off-planet entirely. Players may have learned a great deal about the hive city of Desoleum in prior Dark Heresy adventures, but I’m really excited for them to see more of the strange locations and cultures in the Askellon sector. Over the course of this adventure, they’ll visit two radically different locations – the Rogue Trader vessel, Oath Unspoken, and the shrine world of Thaur, a blessed planet devoted to cemeteries. I had a lot of fun developing both locations and coming up with unique details to set them apart. Each location has a truly distinct atmosphere that brings these places to life. Into the Void  To get from Desoleum to Thaur, the Acolytes must journey aboard the Oath Unspoken. The journey through the Warp is much more than a path from point A to point B, however. Any passage through the nightmarish unreality of the Immaterium is a great undertaking, and even a relatively short Warp journey is a matter of weeks. One entire chapter of the adventure takes place aboard the Oath Unspoken, as the PCs continue their investigation into the artefact smugglers and the identities of their mysterious customers. Like any voidship, the Oath Unspoken is massive, much more akin to a location than a vehicle, a home to millennia of culture and secrets. To get from Desoleum to Thaur, the Acolytes must journey aboard the Oath Unspoken. The journey through the Warp is much more than a path from point A to point B, however. Any passage through the nightmarish unreality of the Immaterium is a great undertaking, and even a relatively short Warp journey is a matter of weeks. One entire chapter of the adventure takes place aboard the Oath Unspoken, as the PCs continue their investigation into the artefact smugglers and the identities of their mysterious customers. Like any voidship, the Oath Unspoken is massive, much more akin to a location than a vehicle, a home to millennia of culture and secrets.
Here, you’ll find a gazetteer with information about the shipboard culture and notable locations aboard the Oath Unspoken, from the Corpse-Holds to the Navigator’s Sanctum, but you’ll also discover more of the Rogue Traders’ role in the Askellon sector. Specifically, readers will learn of the great trade war between the Anzaforr and Surena dynasties, and how the two families have undertaken penance in the decades since. Of course, any benefits to their power bases as a result of services offered to the Ecclesiarchy or the Imperial Navy are surely incidental! One ship area the PCs will likely visit is the Drunnels, a large open-deck marketplace that takes up an entire cargo hold and a large portion of the surrounding corridors and chambers. The Drunnels showcases the fact that the Oath Unspoken is much more than a mere ship, and its peculiar customs have developed over thousands of years. Aboard a Rogue Trader’s vessel, it is perhaps no surprise that the importance of trade and negotiation has filtered down to even the lowliest crew-serfs. In the Drunnels, haggling is a way of life. An elaborately ritualised form of negotiating is required for any transaction, from acquiring information or lodgings to merely catching a glimpse of a performance by the Cirque Commercia. Unwary Acolytes might even find themselves entering into unintended bargains! Planet of the Dead After travelling aboard an ancient voidship, the arrival on Thaur could be a shock for the Acolytes. The PCs were unlikely to see even a single leaf on Desoleum, but now the steel corridors of hive and voidship are now replaced by vast, dense forests and ancient, crumbling mausoleums. This sparsely populated, largely low-tech world offers a distinct contrast to Hive Desoleum and the Oath Unspoken! Thaur is home to the graves of the sector’s greatest heroes and most revered saints, with monuments and tombs built from the bones of pious citizens. On this planet the dead are more important than the living. Every division of the Eulogus Askelline – the planet’s governing body and Ecclesiarchy diocese – is committed to the task of caring for and honouring the deceased, from the poor who scrimp and save their entire lives to be buried here, to powerful nobility, war heroes, and saints. 
I really enjoyed coming up with the details of the Eulogus Askelline’s beliefs and various branches, as it incorporates Thaur’s governance, religion, defence force, and more. In particular, I’m quite fond of the Ossuarian Custodians, the monastic guardians of the Great Ossuria and the ancient and mysterious catacombs that descend far beneath Thaur’s surface. From defending against tomb robbers to repairing crumbling bone-work statues, they see to the preservation of the ossuaries that house Thaur’s most esteemed residents. Unlike the Mournful Guard who watch over the surface, the Custodians carry specialised and deadly weaponry – and they do not look kindly upon intruders. Experience Askellon I hope players enjoy exploring the Askellon sector further in Forgotten Gods as they uncover and defeat an ancient threat to the Imperium. For me, one of the best parts of Warhammer 40,000 is the interesting and bizarre worlds that make up the Imperium. Even within the world classifications – hive world, forge world, shrine world, and so on – there’s no standard, and Dark Heresy offers the opportunity to explore this diversity in depth. I think players and GMs will find the wastelands of Desoleum, the Oath Unspoken, and Thaur to offer many exciting roleplaying opportunities, whether you sit down to a formal dinner with Lord-Captain Aristide Anzaforr or push through the tangled forests of Thaur to search for the grave of a god. But remember – wherever you go, there are always new heresies! Thanks, Tim! Can you stop the Faceless Trade before their artefacts awaken unspeakable corruption within the Askellon sector? Unless you act, an ancient evil will rise to prominence once more. Gather your fellow Acolytes, and purge this heresy before it can spread! Pre-order Forgotten Gods at your local retailer today! ... Source: Across the Askellon Sector (http://www.fantasyflightgames.com/edge_news.asp?eidn=5143)
Title: FFG:Enter the Marshes
Post by: RSSFeeder on 25 October 2014, 11:00:03
Enter the Marshes The Nin-in-Eilph Is Now Available for The Lord of the Rings: The Card Game
“The ground now became damp, and in places boggy and here and there they came upon pools, and wide stretches of reeds and rushes filled with the warbling of little hidden birds. They had to pick their way carefully to keep both dry-footed and on their proper course. At first they made fair progress, but as they went on, their passage became slower and more dangerous.”
–J.R.R. Tolkien, The Fellowship of the Ring A treacherous swamp lies before you. A horde of Orcs trails behind you… The Nîn-in-Eilph, the fourth Adventure Pack in The Ring-maker cycle for The Lord of the Rings: The Card Game, is now available at your local retailer and online through our webstore! After escaping the ruins of Tharbad, several of Middle-earth’s greatest heroes must quickly find their way through the treacherous swamp waters of the Nîn-in-Eilph as they race toward the location of Celebrimbor’s abandoned forge. Free from the Orcs they faced in Tharbad, the heroes must now contend with other dangers. The swamp is treacherous and filled with deadly predators. 
There Is No Time to Lose Your heroes have no time to spare as they navigate through the Nîn-in-Eilph. Their rations are limited, the insects that infest the swamp drain their energy more every day, and the Orc hordes that chased them out of Tharbad will be on their trail. Though your heroes see no immediate trace of them, nor of the spy who commanded them, the longer you spend in the swamp, the greater the chances are that you may be caught. Accordingly, as The Nîn-in-Eilph challenges you to find your way through the swamp, each of its quest stages uses the Time X mechanic to compel your heroes forward. There are three different quest cards for stage two, and there are three different quest cards for stage three. When you first set foot into the Nîn-in-Eilph, you choose your quest two stage at random. Then, once you complete stage two, you proceed through the swamp to a random stage three. However, should you fail to successfully complete one of these quest stages before its Time effect triggers, you get lost and must start following a new path forward at a random quest card of the same stage. 
Then, if you get lost, each quest card at stages two and three shares the same “When revealed” text, “When revealed: Raise each player’s threat by 1.” Each moment that you spend lost in the swamp is another moment lost to the Dark Lord’s agents. Moreover, each section of the Nîn-in-Eilph imposes its own penalties upon your travels. For example, if you arrive at A Forgotten Land (The Nîn-in-Eilph, 97), you cannot play more than one card each round. 
The result is that you must commit yourself fully to your quest so that you can push through a stage before you get lost. Even your successful efforts, though, are not without dangers. An Ancient Marsh-dweller (The Nîn-in-Eilph, 103) lurks somewhere in the swamp, hunting prey close to your eventual destination. Thus, even as your journeys lead you closer to your goal, they lead you closer to this deadly predator. Do Not Search in Vain “My search would have been in vain, but for the help that I had from a friend: Aragorn, the greatest traveller and huntsman in this age of the world.”
–Gandalf, The Fellowship of the Ring The deadly swamp of The Nîn-in-Eilph may present you a host of unforeseen obstacles, but it also presents you a number of new tools to face them, several of which tie closely to Aragorn’s talents as a leader and ranger.  While many of the new player cards from the Adventure Packs in The Ring-maker cycle focus on developing the Silvan trait, there are many, also, that explore different ground. In The Nîn-in-Eilph, we find two new, unique Title attachments, both of which reflect aspects of Aragorn’s character: Wingfoot (The Nîn-in-Eilph, 92) and Defender of the West (The Nîn-in-Eilph, 93). While many of the new player cards from the Adventure Packs in The Ring-maker cycle focus on developing the Silvan trait, there are many, also, that explore different ground. In The Nîn-in-Eilph, we find two new, unique Title attachments, both of which reflect aspects of Aragorn’s character: Wingfoot (The Nîn-in-Eilph, 92) and Defender of the West (The Nîn-in-Eilph, 93).
Wingfoot offers a thematically appropriate response to the challenges of the swamp, as it reflects Aragorn’s expert talents as a tracker, as demonstrated in The Two Towers when he tracked two Hobbits and a pack of Uruk-hai for many leagues. In Wingfoot, we see his peerless talent and his tireless devotion given shape in the form of a readying effect: “Response: After attached hero commits to a quest, name enemy, location, or treachery. If a card of the named type is revealed during this quest phase, ready attached hero.” Wingfoot combines nicely with Henamarth Riversong (Core Set, 60) and several Secrecy cards, such as Risk Some Light (Shadow and Flame, 136) and Ithilien Lookout (The Dunland Trap, 8). Even if you don’t draw a card that allows you to look at the top of the encounter deck, your odds of naming the right type of card increase as you add more players to the game and reveal more cards each quest phase. This makes Wingfoot one of the many cards from The Nîn-in-Eilph that subtly reward the different interactions available in multiplayer games.  Defender of the West, on the other hand, is less subtle in its multiplayer rewards. This Title attachment is inspired by the scene in The Fellowship of the Ring in which Aragorn swears his aid to Frodo: “If by life or death, I can save you, I will.” Defender of the West, on the other hand, is less subtle in its multiplayer rewards. This Title attachment is inspired by the scene in The Fellowship of the Ring in which Aragorn swears his aid to Frodo: “If by life or death, I can save you, I will.”
Defender of the West attaches to a unique, non-objective ally and gives control of that ally to the first player, meaning that the ally then travels from player to player so long as both it and Defender of the West remain in play. As a cooperative game, The Lord of the Rings: The Card Game offers players a great variety of ways to interact with each other and lend each other support. Your characters with the Sentinel keyword can defend against enemies engaged with your teammates, and your Ranged characters can attack those enemies. A wide range of triggered effects, such as that on Gléowine (Core Set, 62), allow you to choose the effect’s beneficiary. Still, there are always circumstances in which the first player might need the help of a powerful ally like Beorn (Core Set, 31), who doesn’t have an ability or keyword that allows him to lend his assistance across the table. In such cases, Defender of the West can save you. If you were to send Beorn to the first player, he could defend attacks for your teammate, or he could attack for as much as eight Attack Strength. In fact, given Beorn’s whopping six hit points, and the fact that Defender of the West allows the attached ally to absorb damage from undefended attacks, Beorn might even be able to absorb an undefended attack before retaliating and single-handedly destroying an enemy. Alternatively, you might play Defender of the West on an ally like Erestor (The Long Dark, 77) just so that he can offer his counsel (and card cycling ability) to each player, in turn. Lead Your Fellowship Out of the Swamp You can take advantage of Wingfoot, Defender of the West, the Ranger hero Mablung (The Nîn-in-Eilph, 84) and the other player cards from The Nîn-in-Eilph to meet the challenges of its scenario in multiplayer games, or you can brave the swamp on your own. Either way, you must hurry. The Dark Lord’s power is growing, his agents are afoot, and the White Council is counting on you to recover whatever secrets lie hidden in Celebrimbor’s abandoned forge. The Nîn-in-Eilph is now available at your local retailer and online through our webstore. Pick up your copy today! ... Source: Enter the Marshes (http://www.fantasyflightgames.com/edge_news.asp?eidn=5144)
Title: FFG:The Haunted Few
Post by: RSSFeeder on 25 October 2014, 19:30:02
The Haunted FewPreview the Investigators of Mountains of Madness
We might have known from the first that human curiosity is undying, and that the results we announced would be enough to spur others ahead on the same age-long pursuit of the unknown…
– H. P. Lovecraft, At the Mountains of Madness In the Mountains of Madness expansion for Eldritch Horror, a savage prehistoric species that once ruled earth is awakening again in Antarctica, its primal stirrings unleashing disorder and terror across the globe: monsters assault workers in the streets of Tokyo, gates open in the heart of Africa, and cultists perform ritual sacrifices in the cold American heartland. It will take an international effort to stop the spreading horror that threatens human civilization. War must be waged on multiple physical, intellectual, and psychic fronts, not only in the coldest parts of Antarctica, but in London’s secret libraries and Arkham’s dimly lit restaurants, in lavish Australian parlors and the busy oceanfront marinas of Bombay. Today’s preview introduces you to four of the investigators who have dedicated their lives to combatting the horror. Whether by making the long voyage deep into Antarctica and over the snowy Mountains of Madness, using political influence to facilitate the expedition, or scouring dusty and cryptic tomes of ancient lore for answers, each investigator is willing to do everything in his or her power to prevent the Ancient Ones from awakening, or die trying. 
Urban Legends “Never lose track of the exit or the merchandise,” the infamous Finn Edwards tells his men. Having spent most of the 1920s running bootlegged whiskey down from Canada to the decadent cities of the East Coast, Finn has never lost track of either and has never been caught. But now he’s gotten caught up in something far more dangerous than smuggling liquor. The merchandise is far more controversial and delicate than anything he’s touched before, and there is no exit. 
The skills that made Finn excellent as a bootlegger make him invaluable in the struggle against the Ancient Ones. He can move people as well as goods, using an action to move himself and/or another investigator one space along a ship or train path. Or, he can use Whiskey to help someone regain sanity. Finn begins the game with the Cat Burgler asset, allowing him to roll one die to gain an item or trinket from the reserve, and is immune to effects that might cause him to lose his burgled possessions. He also begins the game with a Task set for him: a Courier Run to a certain city on a secret errand. Similar to Spells and Conditions, Task Assets must be flipped over when they are completed – only when Finn reaches the assigned destination will he understand what he came there for. For years, patrons eating coffee and pie at Velma’s Diner in Arkham were served by Agnes Baker, a quiet, hardworking waitress with a faraway glint in her eyes. But recently Agnes was flooded with memories of a past life as a sorceress in the ancient realm Hyperborea, and is now driven to understand the arcane ideas and images flashing through her psyche. These memories gave her more than curiosity: Agnes knows an incantation strong enough to defend her against the most vicious monsters, and carries with her a Profane Tome that can keep her sanity intact in the face of danger. 
Long nights waiting tables have made Agnes the opposite of frail. With a health of seven, she can withstand harsh conditions and brutal attacks. In a dire emergency, she can also spend a health to add two dice when resolving a lore test as part of a spell. Not only will Agnes go to any length to solve the mysteries surrounding her identity, but she possesses the fortitude to withstand Antarctica’s climate, and the arcane understanding to bring its darkest secrets into the light of day. Higher Laws Since the dawn of human civilization, it has been recognized that beautiful music flows in accordance with the fundamental laws of the universe. Internationally renowned violinist Patrice Hathaway knows this more viscerally than anyone: when she plays, the notes connect her with other consciousnesses, even other worlds. Terrified by her experiences, she will do anything to prevent those consciousnesses from further awakening, and to shut our world off from the bleak and horrifying others that she has glimpsed. When she uses her transcendent music to close a Gate, therefore, she gains a clue and a Focus. 
Introduced for the first time in Mountains of Madness, Focus tokens can be acquired using an action and spent to reroll a die when resolving a test. Patrice, however, can use an action to spend a clue and a focus to improve a skill, perhaps increasing her knowledge of arcane lore, perhaps enhancing her influence or her powers of observation. She also enters the game with a Banishment spell, which allows her to use her lore to overcome any monsters that stand between her and the Gates that she is inexorably drawn to. George Barnaby devoted his life to justice, working tirelessly over the course of his legal career to prosecute anyone responsible for human suffering, grateful every day that his own life was calm and safe– until his retirement. Having been too much in court to see the world, he embarked on a voyage around the world with his wife, only to return from buying breakfast one day to find her dead in their boat, surrounded by occult symbols. Now he seeks justice for his wife’s murder, but the answers to this mystery cannot be found in any legal brief, and this enemy is far too powerful to be brought into a courtroom. 
As a former lawyer, George has a lot of influence and can use it to prevent other investigators from going into debt or becoming Detained. The concentration that helped him untangle complicated legal texts aids him in the search for answers: once per round, he can spend a Focus to add one to the result of a die when resolving a test. He joins the struggle against the Ancient Ones with an Investment, which he can cash in during reckoning to provide funding for your investigation, or even for an Antarctic expedition. He also carries a Pocket Watch to prevent him from becoming delayed unless it is advantageous. George Barnaby’s retirement is over. He will not rest until justice has been done. 
United in the Search for Truth Once you have fought off a monster’s grasping tentacles, felt an Elder Thing’s mind probing yours, or found yourself awake in another universe, you cannot return to the innocent life you had before. The only hope is to solve the mysteries that now surround your existence and to defeat the forces of darkness that spawn monsters and splice open the boundaries between worlds. The investigators of Mountains of Madness may come from wildly different backgrounds and adhere to conflicting ideologies, but they are irrevocably united by their experiences of profound horror and by the drive to wipe such things off the face of the earth. The question is, once immersed in this struggle, can you endure the horror long enough to emerge victorious? Our next preview will acquaint you with the two new Ancient Ones featured in Mountains of Madness so that, armed with that knowledge, you can plot your first movements in the battle against them. You can also find more information on the Mountains of Madness and Eldritch Horror minisites. Pre-order Mountains of Madness from your local retailer today! ... Source: The Haunted Few (http://www.fantasyflightgames.com/edge_news.asp?eidn=5145)
Title: FFG:Pushing Deeper into Danger
Post by: RSSFeeder on 26 October 2014, 04:00:03
Pushing Deeper into DangerA Look at the Resolution Phase of XCOM: The Board Game
It was Carnival in Rio, but you couldn’t tell. The city was a ghost of itself, mostly silent, except for the faint blare of distant car alarms and the crackle of nearby fires. Smoke choked the night skies. Somewhere in the ruins, the aliens were hiding, setting their trap. That fact made the team nervous, but it was their job to spring the trap. The science division needed a body… XCOM: The Board Game is divided into two phases: the timed phase and the resolution phase. These phases are not intended to replicate the strategic and tactical dimensions of the acclaimed computer game series, but they do lend a familiar call-and-response structure to your game rounds. Much has already been made of the timed phase. We’ve offered closer looks at the game’s digital companion app and how it generates tension by forcing you to respond to the alien invaders’ three-pronged attack in real-time. Additionally, players and reviewers who participated in demos at Gen Con Indy and PAX have contributed their own insights into the nature of the app and the tough decisions that you’re forced to make quickly with limited information. They have also addressed how these elements work together to forge an XCOM experience that is every bit as intense and compelling as it is unique. Less has been said about the resolution phase. This isn’t because it’s any less interesting or vital to your game. It’s simply because, even though the app still guides you through your actions, the resolution phase isn’t as immediately tied to the app. The timer is turned off. You’re not receiving any new alerts. All the intel you need to make your decisions is openly available on the table. The pressure, however, doesn’t ease off for a second.
Humanity’s Survival Is at Stake After you’ve closed the last of the app’s alerts from the timed phase, the timer shuts off, and the app prompts you to move through the various steps of the resolution phase. Here, you try to research the new technologies to which you’ve committed your science staff, you combat UFOs, you use your satellites to deal with UFOs hovering in orbit, you defend your base, and you conduct the missions to which you’ve assigned your soldiers. Of course, each task is loaded with significance, instilled by the fact that humanity depends upon your successes, and your failures have very real consequences: Research As your Chief Scientist researches new technologies, they grant special abilities that greatly empower the different XCOM heads. For example, when you engineer a Blaster Launcher, the Squad Leader can exhaust it to place a success on any enemy that has a heavy soldier assigned to it. Likewise, by unlocking the secrets of Elerium, you allow the Commander to add two credits to your Emergency Funding each round.  
These technologies and others create powerful advantages that add up as the game goes on, and they’re necessary. You start the game outmatched, looking to combat a foe who has already established a presence across the globe and sown panic among the world’s nations. Each round that you don’t successfully research new technology is another round that you’re almost certain to fall further behind. Orbital Defense The Central Officer, meanwhile, needs to use XCOM’s satellite defense network to destroy UFOs in orbit. He needs to eliminate these UFOs in order to maintain clear lines of communication, as we saw in an earlier preview. He also needs to eliminate these UFOs because if he can’t eliminate all of them, the nations begin to panic, and you must advance your least panicked nation or nations one space along the panic track for every UFO remaining in orbit. 
After the Central Officer resolves the team’s orbital defense, three UFOs remain in orbit. The team advances the two least panicked continents, Africa and North America, along the panic track. Then, there are three continents all at the lowest stage of panic: Africa, Asia, and North America. Forced to advance a continent one more space along the panic track, the team decides to advance Asia.
Global Defense While the Central Officer is combating UFOs in orbit, the Commander oversees your team’s global defense efforts, directing XCOM’s Interceptors in their battles with UFOs. UFOs that your team don’t eliminate each elevate the levels of chaos and fear throughout the continents over which they hover, and you have to advance each continent a number of spaces along the panic track, equal to the number of UFOs flying over it.
After the Commander resolves the team’s global defense, two UFOs continue their invasion of Australia, forcing the continent forward two steps along the panic track.
Base Defense and Missions More than anyone else, the Squad Leader has his hands full during the resolution phase. As Squad Leader, you are responsible for both the defense of your base and the completion of the game’s various missions, including your scenario’s final mission. This means you’ll have plenty of tasks to resolve each round. Each enemy counts as a task, and each mission features three different tasks, at least one of which will be an enemy. You need to defeat these enemies and complete these missions to prevent damage to your base and advance your team toward its final mission. As with the other tasks, yours come with consequences for your failure. Should you fail to destroy the enemies that assault your base, your base suffers one damage for each remaining enemy. Should you fail to complete your mission, you almost certainly stall your advancement to the final mission by one game round.
Your final mission, like all missions, features three tasks, including at least one enemy. To complete a mission, you must successfully resolve all of its tasks.
Thus, with all these objectives and consequences at stake, your resolution phase begins with a sense of urgency. You don’t just want to research those Battle Scanners; you feel a real need to get them to your troops. You know if you don’t eliminate the UFOs hovering over Asia, the whole continent will come within a hair’s breadth of utter panic. After suffering damage to your base in an earlier round, you’ll feel your back against the wall, knowing that you need time to win the war, and you can’t afford to allow any enemies to disrupt your plans. Are You Willing to Pay the Price? All the different tasks that you’ll undertake in the resolution phase use the same, mechanically simple push-your-luck dice system, yet to say that these tasks all feel the same is misleading. Even more, to say that the decisions you make while you undertake these tasks are as simple as the mechanics they employ is to grossly misinterpret their nature. 
XCOM: The Board Game comes with four blue XCOM dice and one red enemy die.
To complete any task in XCOM: The Board Game, you roll a pool of six-sided dice, aiming to score a number of success results indicated by the task. Some of the game elements that introduce tasks, such as enemies, leave play at the end of the round, but if the task you’re undertaking is of the majority that don’t leave play, you can save your successes from round to round. You build your pool of dice by committing resources to them. During the timed phase, when you are prompted to allocate your scientists to different research projects, you’re setting yourself up for the resolution phase. Likewise, as your team deploys your Interceptors and assigns your soldiers to base defense and the current mission, your preparing for combat. For each scientist assigned to a specific research task, for each Interceptor in battle over a specific continent, or for each soldier assigned to battle an enemy, you add one blue XCOM die to the pool of dice you use to attempt that task in the resolution phase. 
Because there are two Interceptors assigned to global defense in North America, the Commander adds two blue XCOM dice to his dice pool, as well as one red enemy die, which is added to every task’s dice pool.
One other die is automatically added to the dice pool for each task: a single red enemy die. Each task has a threat level that starts at “1,” and each time you attempt that task, the threat increases by one. This is important because if you don’t immediately succeed on a task, you can choose to push harder, committing your soldiers, scientists, or Interceptors more fully to the job. When you push, then, you reroll all the dice in your pool, both the XCOM dice and the enemy die. However, even as the game’s dice system encourages you to make multiple attempts at your tasks, there are prices to be paid whenever your result on the enemy die fails to exceed the task’s threat. 
After each roll at a task, its threat increases.
If you fail to score a result on the enemy die that exceeds the current threat while you’re performing research, all the scientists assigned to the task are turned facedown, exhausted, and cannot attempt research on the next turn. Even worse, if you fail to exceed a task’s threat level during your global defense, base defense, or mission, the Interceptors and soldiers that you have assigned to those combats are lost, and you lose the ability to use those soldiers later in the game. This means you have to build more Interceptors or recruit more soldiers, but adding to your forces once again requires that you spend more credits – credits which are in short supply. Thus, at some point, you have to decide if you can cut your losses at a task. Partial successes might have to suffice. For instance, if you assign three Interceptors to defend Europe from three UFOs and destroy two of those UFOs before the task’s threat level rises to “3,” you may decide to let Europe move one step along the panic track rather than risk all three of your Interceptors just to take down one last UFO. Yet, partial successes are also partial failures, and small advances along the panic track quickly add up. The Squad Leader 
The Squad Leader has three primary responsibilities, each of which demands he think carefully about how to use his soldiers. | | More than any of XCOM’s department heads, the Squad Leader needs to be comfortable making hard decisions in the heat of battle. When you play as Squad Leader, you are constantly sending your soldiers into lethal combats, and you have to coordinate more of these events each round than your fellow department heads. Whereas your colleagues are each responsible for a single aspect of the war effort each round, you need to conduct both the defense of your base and push toward the completion of missions. Additionally, both these responsibilities often require multiple tasks. Every mission requires three tasks, and your base may come under siege by as many as three enemies. Worse yet, some of those enemies, like a Thin Man, can spawn new enemies in their locations when they’re destroyed, meaning that you may have to defeat four or more enemies, in order to successfully defend your base defense. Finally, whereas as the Chief Scientist sees the threat level reset to “1” between each research project, and the Commander sees the threat level reset to “1” between engagements over different continents, your threat level does not reset between the different tasks in your base defense or between the different tasks of your mission. In other words, to complete any given mission in a single turn, you need to attempt at least one task while the threat level hovers at a fairly menacing “3,” and the odds are good that you’ll see your threat level rise even higher than that. Accordingly, you’re constantly forced to make hard decisions. Will you risk the lives of the men and women you’ve assigned to your base defense or a mission, or will you pull them back to regroup and allow the aliens to retain another foothold for their invasion? Engaging the Enemy As Squad Leader, you don’t just face more tasks each resolution phase than your colleagues, your tasks are more complex. Enemies require that you score a certain number of successes to defeat them, but they also limit the number of soldiers that you can assign to a combat. Each enemy features a number of skills, some of which may be bordered in gold to show that they are specialized. You can only assign one soldier per enemy skill icon, and each soldier needs to own a skill icon that matches the icon to which he or she is assigned. 
Fortunately, your soldiers are among the world’s best trained, and there are ways that you can increase the number of dice you roll for your tasks. - If a soldier who is specialized in a skill, as indicated by the gold border on that soldier’s skill, is then assigned to an enemy’s specialized skill, that soldier adds an extra die to your pool.
- If the Commander inducts one of your soldiers into Officer Training during the timed phase, that soldier becomes elite by the end of the round and adds an extra die to any task to which he or she is later assigned.
- The Chief Scientist may be able to provide your troops with other advantages by researching technologies such as Run & Gun and Battle Scanners. In fact, the Chief Scientist can help you guarantee a number of successes with technology like the Blaster Launcher.
The fact that your soldiers interact with tasks in specific ways means that you might have decisions to make during task resolution beyond simply commanding your soldiers to push further forward or fall back. For example, you may assign a squad of four soldiers to your base defense: one heavy, one sniper, and two support, one of whom is elite. 
The Squad Leader assigns one heavy, one sniper, and two support soldiers to base defense. One of the support soldiers is elite. (Click on the above image to view a larger version.)
This squad may have to gun through two Sectoids before confronting a Cyberdisc. Let’s imagine, for the sake of this example, that your squad manages to come face to face with the Cyberdisc as the threat level hits “3.” You go all-in on your first attack, placing an assault soldier on your Run & Gun and a sniper on your Battle Scanners. You assign your best squad to confront the Cyberdisc, sending the heavy, the sniper, and your elite support soldier. You’d use your Blaster Launcher, too, but you already exhausted it to destroy a Thin Man. 
As the Squad Leader builds the task’s dice pool, he adds three XCOM dice (orange) when he assigns his elite support soldier to an enemy skill that matches his specialized skill, he adds one XCOM die (purple) when he assigns his sniper to a second enemy task, and he adds one XCOM die (green) when he assigns his heavy soldier to the third and final enemy task. Wanting to complete the task in one, final push, he places an assault soldier on Battle Scanners to treat all the enemy’s skills as though they were specialized; this means that his heavy and sniper now match specialized skills with their specialized skills, and the Squad Leader adds two more XCOM dice to his pool. Finally, he places a sniper on Run & Gun to add an eighth XCOM die. (Click on the above image to view a larger version.)
Despite your massive assault, the Cyberdisc’s defenses prove too tough to crack. You roll eight XCOM dice but score only two successes. The Cyberdisc survives, and the threat level rises to “4.” Now, your next attempt to destroy the enemy is as likely as not going to require the sacrifice of your soldiers. 
The Squad Leader’s pool of eight XCOM dice yield only two successes, failing to destroy the Cyberdisc. Still, the enemy die is an “8,” which is higher than the previous threat of “3.” The threat advances to “4,” the Cyberdisc remains, the soldiers are still available, and the Squad Leader faces a tough choice in the heat of battle. (Click on the above image to view a larger version.)
What do you do? - One option is to commit your best forces one more time and hope for the best. Still, while you’re likely to destroy the enemy, there’s a real chance you’ll lose your best troops. If you lose your elite support soldier, you’ll lose his extra die, and if you lose your heavy, you’ll lose the ability to utilize your Blaster Launcher in future rounds.
- Another option is to pull back and seal off the section of your base with the Cyberdisc in it. You suffer one point of damage to your base, but your soldiers live.
- A third option is to assign a different group of soldiers to finish off the Cyberdisc. If your heavy and your elite support soldiers are the ones who are most valuable for future defenses, you can pull them back and assault the Cyberdisc with your sniper and non-elite support soldier. Perhaps they’ll finish it off. Perhaps they’ll die. Perhaps both sides will perish in a massive explosion.
As Squad Leader, you need to be able to make these types of tough calls. The men and women who form XCOM’s elite infantry put their lives in your hands, but you can’t shy away from sending them into danger. All of humanity is at stake. If you can push hard enough at the right times, and if your teammates can give you the tech and funding and time that you need, then maybe – just maybe – you can get the intel you need to launch one final, decisive mission and save humanity. Prepare to Face the Invasion The Squad Leader may be the department head responsible for conducting XCOM’s final strike, but he’ll never get the chance if you can’t get your whole team to work together. In our next preview, we’ll take a look at the Commander and explore how, as Commander, you must take the lead in your team’s efforts against the alien invaders. ... Source: Pushing Deeper into Danger (http://www.fantasyflightgames.com/edge_news.asp?eidn=5146)
Title: FFG:Set Your Course
Post by: RSSFeeder on 26 October 2014, 12:30:04
Set Your CourseA Preview of STAR WARS (TM): Armada
“That is the system. And I’m sure Skywalker is with them. Set your course for the Hoth system.”
–Darth Vader The Star Destroyers are on their way. Star Wars™: Armada is coming! Imperial Star Destroyers and TIE squadrons go head to head with Rebel corvettes, frigates, and X-wings in this epic miniatures game of tactical fleet battles. In our first previews, we’ve seen how Armada clearly differentiates its massive and explosive battles from the sort of lethal, fast-paced skirmishes waged between fighter squadrons. We explored the ways that the game’s command stacks add personality to the game’s different ships and force you to plan for the future. Then, we took a closer look at how your capital ships can attack your enemies, and we identified the different defenses they can use against incoming fire. Today, we look at how your ships make use of the game’s unique maneuver tool and how they interact with obstacles. We’ll also address some of the tactical implications that follow.
Hit and Run In Armada, your capital ships both attack and move during the Ship Phase. To review, once you enter the Ship Phase, you and your opponent take turns activating your ships, starting with the player who has initiative. When you activate a ship, you reveal its command dial, perform up to two attacks, and then move.
- Reveal Command Dial
- Attack
- Execute Maneuver
Among other things, this means that you’re always setting your course to set yourself up for the next round’s attack, rather than setting a course to set yourself up for an attack in the same round. Accordingly, you have to consider where your opponent’s ships have already moved, where the unactivated ships are likely to move, and which ships are likely to activate first in the coming round. It doesn’t do you any good to line up all your guns at a single enemy ship if your opponent will just choose to have it activate first, attack you at close range, and then fly away. That said, you’ll always have a good idea of your opponent’s possible courses. You both use the same maneuver tool, your opponent’s ships have speed charts that are open information you can reference at any time, and each ship in the game has its current speed visibly locked into its speed dial. What you won’t know until your opponent activates a ship is whether or not that ship has been assigned the navigation command and can adjust its speed and bearing more than the open information would suggest.
The game’s unique maneuver tool. (Product image not final. Pending Licensor approval.)
Thus, the game’s movement is yet another element that plays into the importance of making far-sighted, tactical commands. When you set your ship’s course, even though you know the exact location of every ship on the battlefield, you are never lining up an immediate attack. Instead, you are always anticipating the future, taking your best guess at how the battle will look by the time your ship next activates. Charting Your Course To set a ship’s course, you begin by resetting the maneuver tool so that all of its joints are straight. Then your ship’s speed indicates how far it will travel along the maneuver tool. At each joint, you can click the tool left or right a number of times away from the center position as indicated by your ship’s speed chart.
The speed charts for the CR90 corvette (left) and the Victory II-class Star Destroyer (right).
Each column on the speed chart corresponds to the speed number at the bottom of the column and shows the number of times that each joint can be clicked while your ship travels at that speed. The rows on your ship’s speed chart correspond to the joints on the maneuver tool. The row directly above the speed number relates to the first joint, the second row relates to the second joint, and so forth. An “I” indicates that the joint can be clicked once in either direction, while an “II” means it can be clicked twice. Meanwhile, a “–” means the maneuver tool must remain straight at that joint. Of course, if you have revealed a navigate command, you can choose to adjust one of the maneuver joints by an additional click. 
A Rebel player plots a “3” speed maneuver for his Nebulon-B escort frigate, adjusting the second joint one click to the right and adjusting the third joint two clicks to the left.
When you set your ship’s course, you are allowed to use the maneuver tool to measure your ship’s possible positions before you commit to the move. Flying Through Obstacles “Asteroids do not concern me, Admiral. I want that ship, not excuses.”
–Darth Vader There may be times that your relentless pursuit of your foes may lead you into obstacles, and there may be times that your opponent’s superior firepower may prompt you to seek cover. In either case, it’s handy to understand how Armada deals with obstacles and collisions. There are three types of obstacles in the Armada Core Set: asteroid fields, debris fields, and space stations. Each interacts with your capital ships and squadrons in a different fashion.
 |
Asteroid Field
A ship that moves overlaps this obstacle receives one faceup damage card. Squadrons are unaffected.
|
 |
Debris Field
A ship that overlaps this obstacle suffers two damage on any hull zone. Squadrons are unaffected.
|
 |
Station
At the end of a ship’s movement, if it overlaps a station, it may discard one of its faceup or facedown damage cards. At the end of a squadron’s movement, if it overlaps the station, it may recover one hull point.
|
Additionally, obstacles can obstruct attacks, as can capital ships. In our last preview, we showed how you build a pool of dice for each your ship’s attacks based on the hull zone from which it’s firing, the range at which it’s firing, and whether or not you have revealed the concentrate fire command to add a die. However, obstacles and capital ships that fly between your ship and its target can also impact your dice pool. Not only must your target be within the range and firing arc of the hull zone from which you choose to launch your attack, you must have line of sight to the hull zone you want to target. To determine whether or not you have line of sight, you trace a straight line from your hull zone’s yellow targeting point to the targeting point of the defending hull zone. If this line is traced through any hull zone on the defending ship other than the defending hull zone, you do not have line of sight to that hull zone and must declare another target. If you do not have another valid target, you lose the opportunity to perform the attack. 
From the Star Destroyer’s front hull zone, the Imperial player has clear line of sight to the Rebel player’s X-wing squadron, as well as the CR90’s front and left hull zones. However, the Star Destroyer does not have a valid shot at the CR90’s rear hull zone since the line of sight first passes through the CR90’s left hull zone.
If you have line of sight, but that line traces across another ship or an obstacle, your attack is obstructed. Whenever your ship is obstructed, you roll one less die of your choice. 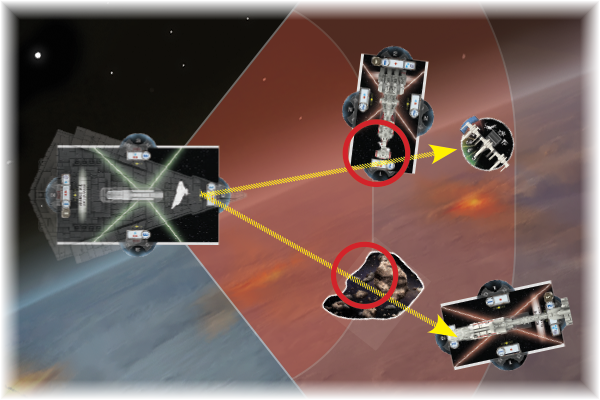
The Star Destroyer’s attacks are obstructed against the X-wing squadron and the lower CR90.
Naturally, this presents keen admirals a wide range of tactical options. As they try to take flanking positions, weaker Rebel ships may race around obstacles so that the more powerful Imperial Star Destroyers cannot find unobstructed attacks. Alternatively, an Imperial player, knowing that his opponent will want to focus fire on a damaged Star Destroyer, may commit other Star Destroyers to position between the Rebel fleet and their intended target. In this way, even though the Imperial player loses a die from his damaged Star Destroyer’s attack, that loss might just be one of six dice, whereas the Rebel player is likely to have each of its attacks cut by a third. Collisions While you follow one set of rules whenever your ship overlaps an obstacle, you follow another set of rules whenever your ship would collide with another ship or one or more starfighter squadrons. First of all, it’s worth remembering that you always have the opportunity to measure your movement before you move. Thus, if your initial course would force your ship to overlap another ship or squadron, you can adjust your course. However, in some circumstances, you may still find it impossible to avoid a collision, or you may find it advantageous to ram into your opponent’s ship. 
When the Rebel player sees that the course he wanted to set for his CR90 corvette would cause it to overlap the Imperial player’s Star Destroyer, he can either adjust the maneuver tool at its first two joints or suffer the consequences of the collision.
Whenever your ship’s final position would overlap another ship, it cannot finish its movement normally. Instead, you temporarily reduce its speed by one increment and attempt to execute your ship’s movement at the reduced speed. If reducing your ship’s speed by one still wouldn’t permit a legal movement, you continue to decrease your speed by one increment and attempt to move until your ship can legally finish its movement or until its speed is temporarily reduced to “0,” in which case it does not move. After resolving this movement, your ship and the closest ship that it overlapped both receive one facedown damage card. 
The Rebel player decides to have his CR90 corvette collide with the Imperial player’s Star Destroyer. He reduces the corvette’s speed by one so that both ships have clear shots at each other from their front hull zones, and then both ships suffer one facedown damage.
On the other hand, if your ship’s final position would cause it to overlap one or more squadrons, you complete your ship’s movement normally and move any overlapped squadrons out of the way. Then, your opponent places all of the overlapped squadrons next to your ship so that their bases are touching its base. Move to Attack Position “They’re moving to attack position!”
–Captain Needa Movement in Armada isn’t just a matter of picking a part of the battlefield and flying to it. It’s all a part of the flow of battle. You have tactical options at every turn, and it’s up to you, fleet admiral, to make the most of them, turning the battle in your favor. Next: We look at the rules for squadrons and the role they play in your fleet! ... Source: Set Your Course (http://www.fantasyflightgames.com/edge_news.asp?eidn=5147)
Title: FFG:Quest in the Darkness
Post by: RSSFeeder on 26 October 2014, 21:00:03
Quest in the DarknessPreview Quests in The Witcher Adventure Game
Prince Ellander’s firstborn son has been transformed into a monster. With great sadness, the Prince requests that you put his son out of his misery. What a delicate position you have found yourself in… The world of The Witcher is filled with devious opponents and unknowable dangers. No matter where you venture, you may need to fight for your life at any moment. Yet you must face these dangers and more to become the most renowned hero in the Continent and claim victory in The Witcher Adventure Game! Your quests lie at the heart of The Witcher Adventure Game. To prove yourself a true hero, you must complete quests across the Continent and gain victory points provided by these adventures. In our last preview, we looked at the different actions that you use to travel and experience the world of The Witcher. Today, we’ll explore your goals by examining quests in greater detail!
A World of Adventure Your quests in The Witcher Adventure Game may take any number of forms. You may need to battle a fearsome monster, study the ancient mysteries of magic, or resolve a diplomatic crisis without incident. Depending on which hero you play, you’ll have a natural inclination towards a certain category of quest. Geralt of Rivia, a hardened witcher and fighter, naturally handles combat quests more easily than quests that require delicate social interactions.  At the beginning of every game of The Witcher Adventure Game, you draw two cards from the quest deck shown on your hero sheet. You must choose one of these two quest cards to take on. Quests are difficult tasks for any aspiring hero, and they are divided into several parts: the main quest, side quests, and a support quest. To complete a main quest and claim its victory points, you must go to a specific location in the Continent and spend resources known as proof. For example, Geralt could choose the Of Dwarven Make quest card. To complete the main quest, Geralt must be in Mahakam and he must use a blue proof and a red proof to collect the materials for a new sword and convince a smith to forge the blade. Completing this quest grants Geralt the victory points listed on the right border of the card: twelve victory points in this case. At the beginning of every game of The Witcher Adventure Game, you draw two cards from the quest deck shown on your hero sheet. You must choose one of these two quest cards to take on. Quests are difficult tasks for any aspiring hero, and they are divided into several parts: the main quest, side quests, and a support quest. To complete a main quest and claim its victory points, you must go to a specific location in the Continent and spend resources known as proof. For example, Geralt could choose the Of Dwarven Make quest card. To complete the main quest, Geralt must be in Mahakam and he must use a blue proof and a red proof to collect the materials for a new sword and convince a smith to forge the blade. Completing this quest grants Geralt the victory points listed on the right border of the card: twelve victory points in this case.
Every main quest requires some amount of proof to complete, and this proof is obtained by trading in leads – resources you may obtain from traveling and investigating strange occurrences throughout the land. Although all heroes gain leads in the same ways, the amount of leads you need to exchange for a specific type of proof varies from hero to hero. Geralt of Rivia is adept at combat, but cautious and careful diplomacy isn’t his preferred means for resolving issues. To reflect this, Geralt can convert three red leads to one red proof, but he needs seven purple leads to exchange for a single purple proof. Other heroes have different specialties. Triss Merigold relies on her magical prowess, meaning she needs only three blue leads to convert to one blue proof. Once you’ve gathered the necessary leads from your travels and adventures, you can exchange them for proof at any point during your turn. To complete your main quest, you must gather proof and reach the location specified by your quest card. Some quests may even require you to do battle with a fearsome monster from another sphere, but even in these cases, you must gather proofs to complete other aspects of the quest. We’ll explore combat and monsters in greater detail in a future preview. After the main quest is completed, you immediately gain the listed main quest victory points and resolve the consequences. But even successfully resolving a main quest can have unfortunate consequences. When the Of Dwarven Make main quest is completed, you immediately draw one beneficial good fortune card and receive two gold, but you receive no sword: the dwarven smith swindles you and escapes with your treasure. Regardless of the consequences, quests are your path to gain victory points and impact the course of events in the Northern Kingdoms. When a player successfully completes three main quests, the game ends and the player with the most victory points wins! 
A Fork in the Road Of course, your quest consists of far more than the main quest. You may choose to search for special materials, or perhaps you’ll seek out training or information not easily available. These concerns make up the side quests associated with your quest. Side quests may require you to visit a specific location, spend additional leads, defeat a monster, or complete some other task. Completing a side quest may take you off the beaten path, but it brings you a few more points, adding to your renown and bringing you closer to victory in The Witcher Adventure Game. On the Of Dwarven Make quest card, for example, there are two side quests. The first requires you to travel to Dol Blathanna in search of rare oils, while the other asks you to battle a monster to collect its fangs. These side quests can be completed in any order, and whenever you complete one, you gain three victory points. 
Although your goal in The Witcher Adventure Game is to prove yourself the most renowned hero of the Continent, you can often benefit yourself by aiding another hero in their quest. Each quest card offers a support quest that you may complete if you’re at the same location as another player. Support quests offer points both to the player completing the support quest and the player who holds the quest, so you’ll need to carefully consider if completing a support quest is worth the benefit it gives to your opponent. In our example, Geralt’s Of Dwarven Make quest has a support quest that asks the supporting hero to spend three red leads. If Yarpen Zigrin moves to Geralt’s location and spends three red leads, helping Geralt fetch ore from monster-infested mines, Yarpen claims six victory points for completing the support quest, and Geralt receives three victory points. Yarpen claims more victory points than Geralt for the support quest, but when playing the game, you must evaluate the benefits of completing support quests that help a leading player. Start Your Quest The quests that await you in the world of The Witcher are your chance to prove yourself the greatest hero in the realm. Join us next week when we examine monsters and the obstacles you may face, and preorder The Witcher Adventure Game at your local retailer today! ... Source: Quest in the Darkness (http://www.fantasyflightgames.com/edge_news.asp?eidn=5148)
Title: FFG:Announcing the 2014 World Championship Schedule
Post by: RSSFeeder on 27 October 2014, 22:30:04
Announcing the 2014 World Championship ScheduleJoin Competitors at World Championship Weekend, November 6-9
10/27/2014 Update: Preregistration for the 2014 World Championship Weekend is now closed. Players can still register onsite starting at 6pm on Wednesday, Nov. 5th if there is room available. If you did not preregister, we cannot guarantee you entrance in the 2014 World Championships. Back in April, Fantasy Flight Games announced the dates for the 2014 World Championship Weekend. Today, it is time to announce the highlight of the weekend: the schedule for all World Championships! As November draws closer, hundreds of players around the world have begun to plan their treks to FFG’s hometown in Minnesota. Some will take the bus across town or pile into a car full of friends and drive a couple of hours, but others will be hopping on planes and flying halfway around the world to the Twin Cities. Will you join them and test your skills against the best in the world? If you are looking to attend Worlds or just want to tune in as the action happens, download the schedule now and start sketching out the most important days and times for you. The schedule for each game’s side events will be posted soon.
World Championships While all your favorite games will be returning, the centerpiece of the 2014 event is the debut of two brand-new World Championships: Warhammer: Diskwars and Warhammer 40,000: Conquest! These two games will be played alongside our perennial mainstays throughout the weekend.
Preregister Today If you haven’t already, preregister now and solidify your spot among the hundreds of players from around the world coming to Minnesota for the 2014 World Championship Weekend. But don’t wait too long because preregistration closes October 16th! While players can still register on site the day they arrive, the cost will increase to $50.
More to Come While players can now begin deciding what day is best to arrive, there is a lot more to be announced. Stay tuned in the following months to learn the schedule of side events being run, the prizes that will be given away for all events at the 2014 World Championship Weekend, and more! ... Source: Announcing the 2014 World Championship Schedule (http://www.fantasyflightgames.com/edge_news.asp?eidn=5011)
Title: FFG:2014 Worlds Tournament Update
Post by: RSSFeeder on 28 October 2014, 07:00:02
2014 Worlds Tournament UpdateAn Explanation of the X-Wing 2014 World Championship Flight Structure
10/27/2014 Update: Preregistration for the 2014 World Championship Weekend is now closed. Players can still register onsite starting at 6pm on Wednesday, Nov. 5th if there is room available. If you did not preregister, we cannot guarantee you entrance in the 2014 World Championships. At the end of August, we announced the schedule for all 2014 World Championships at the 2014 World Championship Weekend. To make sure players are as prepared as possible, today’s article outlines the X-Wing™ flight structure players will encounter this year at Worlds. Why the Split Into Two Flights? With the increasing popularity of X-Wing and the space the game requires to play, we will be splitting the tournament into flights to accommodate the large number of expected players for the event.
The flight system is one that we debuted at Gen Con this year and worked well. For the X-Wing World Championship we will be making
a few, small changes to improve the system but keep the overall structure. In short, having two flights allows more players to compete in the tournament. How Will the Flights and Overall Tournament Work? Each flight will accommodate up to 128 players and be run with six Swiss rounds. At the end of six rounds, the top 16 players in each flight will be invited to compete in the Finals on Saturday. The 32 players invited back on Saturday will compete in a top 32 single-elimination format. The final player standing at the end of the day Saturday will be crowned 2014 X-Wing
World Champion! How Do I Reserve My Spot in a Flight? To reserve a spot in one of the flights, you must preregister through our online store. As players register for the 2014 World Championship Weekend, we send out a general survey to each registrant. This survey will include a question asking for your preference on which X-Wing flight you would like to compete in. Once we receive your response, we will reserve a spot for you in your chosen flight. If one of the flights fills completely, we will notify you as soon as possible. If you have already preregistered, you should have already received the survey. If you did not, please contact us at organizedplay@fantasyflightgames.com immediately. The day of each flight, and only if space is available, we will accept any players who did not preregister. We strongly recommend you preregister for the 2014 X-Wing World Championship as we cannot guarantee there will be space if you attempt to register the day of the event. Is There a Difference Between the Two Flights? Other than the flights being on separate days and the fact that different players will end up competing each day, there is no difference between the two flights. Do I Have to Play in Both Flights? No. Players can qualify for the finals on Saturday no matter which flight they play in. Can I Play in Both Flights? A player may compete in both flights only if there is room. However, a player can reserve a spot for himself in only one flight. We will accept players reserved for a different flight only after all other players have had a chance to enter that day’s flight. Players who make the top 16 cut in Thursday’s flight cannot play in Friday’s flight. For example, Karen plays in Thursday’s flight but is unable to make the top 16 cut. She returns Friday morning to try and enter Friday’s flight. 105 players have a spot reserved, and each player checks in on time. 12 other players arrive without a spot reserved in either Thursday’s or Friday’s flight. We register those 12 in the tournament. After all 117 players are registered, we open registration for players like Karen, with space for 11 more players. Karen makes it in! We will also be hosting X-Wing side events both days for those who are not playing in that day’s flight. Keep your eyes on our website! More details on side events will be announced shortly. What if I Have a Bye From a National Championship? Congratulations on winning such a prestigious and challenging event! We are in the process of contacting all
National Champions directly with additional information and the survey. You do not have to preregister for World Championship Weekend, but please fill out the survey when you receive it so that we can reserve a spot for you
in the flight of your choice.
Preregister Today If you haven’t already, don’t forget to preregister for the 2014 World Championship Weekend. With more people preregistering this year than any year previously, space is sure to be at a premium! If you’re looking to try your hand at piloting in the 2014 X-Wing World Championship, preregistering is even more important. Guarantee which flight you’ll play in and preregister now! ... Source: 2014 Worlds Tournament Update (http://www.fantasyflightgames.com/edge_news.asp?eidn=5082)
Title: FFG:The Veteran and the Exile
Post by: RSSFeeder on 28 October 2014, 15:30:03
The Veteran and the ExilePreview Two Heroes from Imperial Assault
“Someone must have told them all about my little maneuver at the battle of Taanab.”
–Lando Calrissian, Star Wars: Return of the Jedi Seize the chance to be a hero of the Rebel Alliance in Imperial Assault! This board game of tactical combat and adventure in the Star Wars universe offers two complete game experiences. The campaign game allows you and up to four friends to play through a gripping narrative story, while the skirmish game invites two players to muster their own forces and battle head-to-head for victory. In a previous preview, we took a closer look at two of the heroes you can play over the course of an Imperial Assault campaign: Gideon Argus, a fearless leader, and Jyn Odan, a fast-moving smuggler. Most recently, we explored the ways that heroes grow and change throughout a campaign, gaining experience and new items, allowing you to customize your hero and make every campaign truly unique. In future previews, we’ll explore the tactical considerations of the Imperial Assault skirmish game and delve deep into the unlimited resources and countless soldiers available to the Imperial player. Today, however, we’ll look at two more heroes of the Rebellion that you can command in the campaign game!
Haunted by the Past Although she is not a fully trained Jedi, Diala Passil is undoubtedly sensitive to the ways of the Force. Training and honing her weapon skills in secret, she has now thrown her lot in with the Rebel Alliance in the hope that she can do her part to overthrow the Empire. Diala Passil has trained with melee weapons, such as her Plasteel Staff, for years, and her expertise gives her abilities that few others can claim. Her Precise Strike ability allows her to suffer two strain after declaring an attack with a melee weapon to choose and remove a die from her target’s defense pool. Many stormtroopers, Imperial officers, and other servants of the Galactic Empire have only one defense die in their defense pool, meaning that Diala Passil’s Precise Strike leaves them helpless. 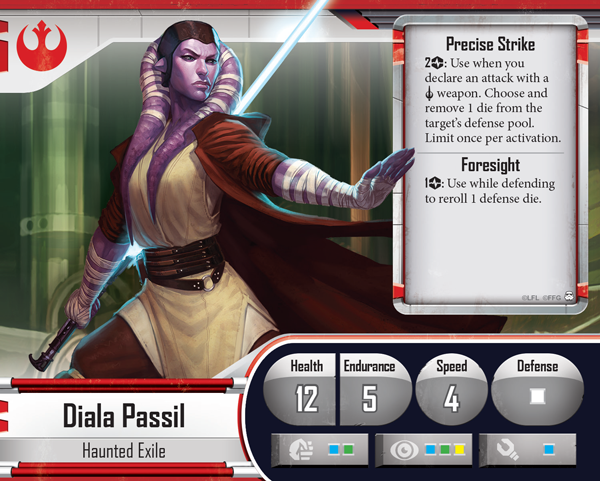
Diala Passil’s affinity for the Force also gives her an unexpected amount of Foresight in combat. She may suffer one strain to use the Foresight ability, allowing her to reroll one defense die. Diala Passil naturally rolls the white defense die, which bears fewer overall block results than the black defense die. The white die, however, is the only die with the dodge result, which causes an attack to miss entirely. With Diala Passil’s Foresight, you can double the chances of rolling a dodge when she is attacked. Diala Passil’s Class cards give her even more tools for calling upon the Force and the training of her long-dead master. Force Throw offers her a variety of useful applications. By suffering two strain and exhausting this card, you may choose another small figure within three spaces of Diala Passil and test Insight. If Diala passes this attribute test, she can push the chosen figure three spaces, forcing it to suffer a damage if it’s hostile. Diala’s Defensive Stance card, on the other hand, gives her a better chance of surviving an attack. While you possess Defensive Stance and use the Foresight ability, Diala automatically applies one block to her defense results. As an added bonus, if an attack targeting her causes no damage, she becomes Focused. Focused is a beneficial condition that adds a green die to the next attack or attribute test your figure performs, giving an extra boost to achieve your goals. 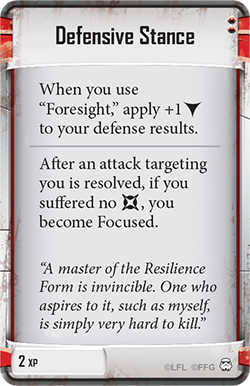 
Diala Passil can deal extra damage in combat with Snap Kick. By exhausting this card after you resolve a melee attack, you can roll a green attack die and deal its damage to an adjacent hostile figure. Not only does Snap Kick deal damage in addition to your normal attack, but your target has no chance to roll defense dice, meaning any damage is unblocked. At the height of her power, Diala Passil’s command of her weapon is truly impressive. Dancing Weapon invites you to take an action and suffer a strain to perform a deadly ranged attack with a melee weapon. With this ability, even faraway foes aren’t safe from Diala Passil’s fearsome attacks. Son of Alderaan A native of Alderaan, Fenn Signis joined the Rebel Alliance at seventeen years old and served two full tours of duty as an exemplary soldier. He was garrisoned at the Rebel base on Arda I when he heard of Alderaan’s destruction by the Death Star. Swearing to avenge his homeworld, Fenn Signis joined a Rebel SpecForces squad, and now, he aims to put his deadly skills to work against the Galactic Empire. Fenn Signis’s fury and skill with arms can quickly fell any Imperial soldier. His Havoc Shot ability allows him to suffer a strain while attacking with any ranged weapon, including the Infantry Rifle that he starts a campaign with. The attack gains Blast 1, allowing him to deal one damage to every figure adjacent to his target. By using Havoc Shot against tightly massed groups of troopers, you can quickly mow through enemy ranks. 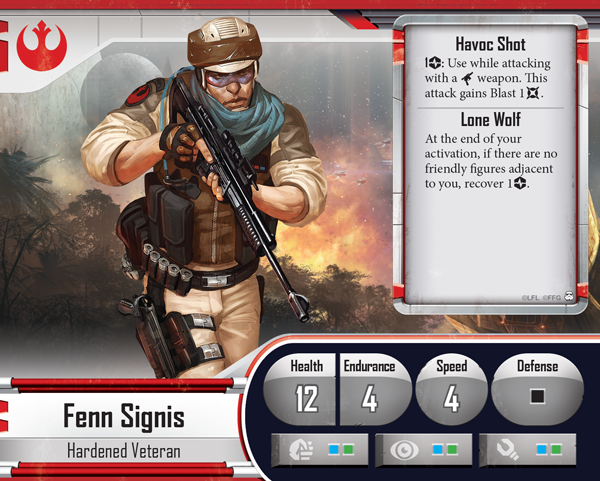
Like every professional soldier, Fenn Signis relies on his comrades, but he also has a powerful independent streak. If Fenn Signis ends his activation with no adjacent friendly figures, you can take advantage of his Lone Wolf ability to recover one strain. By positioning Fenn Signis so that he recovers a strain at the end of his activation, you’ll have more strain to move extra spaces, trigger Havoc Shot, and take advantage of his Class cards. Take Cover is just one of Fenn Signis’s Class cards that requires strain to activate. By suffering a strain and exhausting Take Cover when an attack is declared against you, you can add a white defense die to your defense dice pool. In normal situations, Fenn Signis rolls a black defense die, which can provide more blocks, but has no ability to completely dodge an attack. Adding a white defense die offers that possibility. While Take Cover increases Fenn Signis’s defenses, Weapon Expert increases the potency of his attacks. By suffering a strain when attacking, Fenn Signis can use Weapon Expert to increase his chances of a successful hit and pierce through enemy blocks.  
Fenn Signis gains a way to enhance the power of his Havoc Shot with Suppressive Fire. You can trigger Suppressive Fire whenever you attack using Havoc Shot. Every figure that suffered damage from Havoc Shot must either take an additional damage or become Stunned. Because Havoc Shot has the Blast 1 ability, damage from this attack can quickly spread through a squad of troopers, and Suppressive Fire forces even more damage upon your targets. Superior Positioning helps you set up these potent attacks. As an action, you can suffer a strain to use Superior Positioning, gaining movement points and becoming Focused. Not only that, but Superior Positioning allows you to add a bonus block while you are Focused and defending! Take the Fight to the Empire You may play an Imperial Assault campaign as Fenn Signis, Diala Passil, or another hero, but no matter which hero you play as, you’ll have to contend with the forces of the Galactic Empire before too long. Join us in our next preview, as we take our first look at the terrifying massed forces of the Galactic Empire! ... Source: The Veteran and the Exile (http://www.fantasyflightgames.com/edge_news.asp?eidn=5149)
Title: FFG:Rewards for Your Service
Post by: RSSFeeder on 29 October 2014, 00:00:03
Rewards for Your ServicePreview Side Missions, Experience, and Items in a Campaign
“Well, look at you! A General, huh?”
–Han Solo, Star Wars: Return of the Jedi Enter the Star Wars universe with the thrilling campaigns and skirmishes of Imperial Assault, a tactical miniatures game of cinematic missions for two to five players. You can find two full games within Imperial Assault. The campaign game invites you and up to four friends to take part in a gripping narrative that pits a small strike team of Rebel heroes against the massive military power of the Imperial player. You’ll also uncover the tactical conflict of the skirmish game, which allow two players to muster their own forces and battle head-to-head over conflicting objectives. Whether you play the campaign game or the skirmish game, you’re sure to experience the Star Wars galaxy like never before. In our most recent preview, we explored two of the heroes that you can play over the course of the campaign. In future previews, we’ll examine the skirmish game, as well as the various rewards and threatening options available to the Imperial player as he commands countless Stormtroopers, vehicles, and villains to crush the insignificant Rebellion. Today, however, we’ll turn our attention to the missions these heroes may choose to undertake, and the experience and items they collect along the way!
Take to the Field The campaign included in the Core Set of Imperial Assault is split between story missions and side missions. Story missions form an overarching plot that reaches across the campaign – the Core Set campaign tells the story of a scheme to exterminate the entire Rebel Alliance with one fell blow. The outcome of a story mission directly influences the next available story mission, meaning that the events of your campaign will change and shift based on the actions of the heroes and villains you control. Side missions fill in the spaces between story missions, as Rebel High Command gives your strike team other missions and your characters’ personal obligations require attention. At certain points in the campaign, the heroes must choose a side mission to undertake. In most circumstances, two side missions, drawn randomly from the Side Mission deck are available for the heroes to choose.
Before a campaign begins, the Rebel players must construct the deck of Side Mission cards. Four gray Side Mission cards are randomly included in the Side Mission deck, representing unique opportunities for the Rebel Alliance to take advantage of, including ripe Imperial targets or planets ready for rebellion. Successfully completing these missions grants the heroes a specific Reward card that may prove useful in future missions. The heroes must also include the red Side Mission cards that correspond to the heroes in the campaign. For example, if Gideon Argus participates in the campaign, the Friends of Old side mission must be included in the Side Mission deck. These side missions bring old debts and duties to the fore, and successfully completing a hero-specific side mission grants that hero a special Reward card that greatly increases his efficacy. The final step in building the Side Mission deck is for the heroes to select four green Side Mission cards. These side missions allow the heroes the chance to fight alongside an iconic Star Wars character, including Luke Skywalker, Han Solo, or Chewbacca. If the heroes successfully complete one of these mission, they may even call upon that character as an ally in other missions. Our Just Rewards The Imperial Assault campaign game offers you and your fellow players the chance to command a strike team in a series of missions that spans the Galactic Civil War. Of course, as your team embarks on mission after mission, they gain experience in their chosen area of expertise, whether leadership, stealthy movement, or use of the Force. And naturally, you’ll get paid for your hard work as well. A steady influx of credits ensures that your gear and weapons are always top-notch. Of course, if the Imperial player defeats you and achieves his objective first, he’ll receive the majority of the rewards. At the end of each mission in the campaign, the heroes collect a number of rewards. Some missions offer a special Reward card that can provide powerful bonuses, but experience and credits are much more common rewards. Heroes individually gain experience that can be spent to purchase new Class cards. Every hero in Imperial Assault has an individual deck of Class cards, each of which offers new abilities. Some of these cards are relatively inexpensive for just one experience point, but more powerful Class cards, such as Gunslinger, can cost more. We looked at two heroes’ Class cards in our previous preview, and as we explore more heroes in future previews, we’ll examine their Class decks as well. While experience invites your heroes to increase their skills, credits allow you to purchase new weapons and equipment. At the end of many missions, a number of credits are delivered to the heroes for purchasing new items. Credits can also be earned through your actions during the mission. Whenever a hero is next to a supply crate, he may use an action to claim the crate token and draw a card from the Supply deck. These cards offer a variety of helpful tools, including an Emergency Medpac or Valuable Goods, but each crate token that you claim is worth fifty additional credits at the end of the mission, giving you the chance to purchase even more equipment. Weapons, Armor, Equipment Once you’ve received your experience and credits, you have the chance to spend them both before you begin a new mission. The Imperial player also has the chance to spend his rewards, which we’ll cover in a future preview. When spending experience, all of your hero’s Class cards are available at once – you can purchase any of them, provided you have the requisite experience. Item cards, on the other hand, are arranged in three separate tiers. As the campaign progresses, you’ll gain access to new tiers of Item cards, giving you the opportunity to buy more and more effective weapons, armor, and gear. In most cases, when you purchase items, the top six Item cards are revealed from the deck. You and your fellow heroes can spend your credits to purchase any number of these items, provided you can afford the cost.
Item cards give you the chance to customize your hero’s weapons and capabilities. As the campaign goes on, you can switch between a variety of weapons. A hero who starts with a ranged weapon may decide to use a melee weapon as well, or outdated weapons may be phased out once the campaign progresses. A DL-44 or a Vibroblade may be an excellent weapon for your first missions, but later on, a Sporting Blaster or a Force Pike proves more effective. In addition, you have the option to modify your weapons and make them truly your own. Many weapons display a number of arrows in the bottom right-hand corner of the card, which signifies the number of modifications that weapon can take. You may add a Shock Emitter to your melee weapon, for example, or an Overcharger to your blaster. You’ll find more than weapons at your disposal in the Item deck. In a mission, every hero can carry two weapons into battle, but he can also carry one piece of armor and up to three equipment items. A Combat Coat can make the difference between life and death when blaster bolts are flying, and stocking up on equipment like a Portable Medkit or Extra Ammunition keeps you and your weapons fully functional. Two Steps Ahead Your heroes have the chance to choose new missions, hone their skills, and purchase new items in every Imperial Assault campaign. Join us for our next preview as we look at two more heroes you can play as over the course of a campaign. Pre-order Imperial Assault at your local retailer today! ... Source: Rewards for Your Service (http://www.fantasyflightgames.com/edge_news.asp?eidn=5141)
Title: FFG:The Veteran and the Exile
Post by: RSSFeeder on 29 October 2014, 08:30:03
The Veteran and the ExilePreview Two Heroes from Imperial Assault
“Someone must have told them all about my little maneuver at the battle of Taanab.”
–Lando Calrissian, Star Wars: Return of the Jedi Seize the chance to be a hero of the Rebel Alliance in Imperial Assault! This miniatures game of tactical combat and adventure in the Star Wars universe offers two complete game experiences. The campaign game allows you and up to four friends to play through a gripping narrative story, while the skirmish game invites two players to muster their own forces and battle head-to-head for victory. In a previous preview, we took a closer look at two of the heroes you can play over the course of an Imperial Assault campaign: Gideon Argus, a fearless leader, and Jyn Odan, a fast-moving smuggler. Most recently, we explored the ways that heroes grow and change throughout a campaign, gaining experience and new items, allowing you to customize your hero and make every campaign truly unique. In future previews, we’ll explore the tactical considerations of the Imperial Assault skirmish game and delve deep into the unlimited resources and countless soldiers available to the Imperial player. Today, however, we’ll look at two more heroes of the Rebellion that you can command in the campaign game!
Haunted by the Past Although she is not a fully trained Jedi, Diala Passil is undoubtedly sensitive to the ways of the Force. Training and honing her weapon skills in secret, she has now thrown her lot in with the Rebel Alliance in the hope that she can do her part to overthrow the Empire. Diala Passil has trained with melee weapons, such as her Plasteel Staff, for years, and her expertise gives her abilities that few others can claim. Her Precise Strike ability allows her to suffer two strain after declaring an attack with a melee weapon to choose and remove a die from her target’s defense pool. Many stormtroopers, Imperial officers, and other servants of the Galactic Empire have only one defense die in their defense pool, meaning that Diala Passil’s Precise Strike leaves them helpless.
Diala Passil’s affinity for the Force also gives her an unexpected amount of Foresight in combat. She may suffer one strain to use the Foresight ability, allowing her to reroll one defense die. Diala Passil naturally rolls the white defense die, which bears fewer overall block results than the black defense die. The white die, however, is the only die with the dodge result, which causes an attack to miss entirely. With Diala Passil’s Foresight, you can double the chances of rolling a dodge when she is attacked. Diala Passil’s Class cards give her even more tools for calling upon the Force and the training of her long-dead master. Force Throw offers her a variety of useful applications. By suffering two strain and exhausting this card, you may choose another small figure within three spaces of Diala Passil and test Insight. If Diala passes this attribute test, she can push the chosen figure three spaces, forcing it to suffer a damage if it’s hostile. Diala’s Defensive Stance card, on the other hand, gives her a better chance of surviving an attack. While you possess Defensive Stance and use the Foresight ability, Diala automatically applies one block to her defense results. As an added bonus, if an attack targeting her causes no damage, she becomes Focused. Focused is a beneficial condition that adds a green die to the next attack or attribute test your figure performs, giving an extra boost to achieve your goals.
Diala Passil can deal extra damage in combat with Snap Kick. By exhausting this card after you resolve a melee attack, you can roll a green attack die and deal its damage to an adjacent hostile figure. Not only does Snap Kick deal damage in addition to your normal attack, but your target has no chance to roll defense dice, meaning any damage is unblocked. At the height of her power, Diala Passil’s command of her weapon is truly impressive. Dancing Weapon invites you to take an action and suffer a strain to perform a deadly ranged attack with a melee weapon. With this ability, even faraway foes aren’t safe from Diala Passil’s fearsome attacks. Son of Alderaan A native of Alderaan, Fenn Signis joined the Rebel Alliance at seventeen years old and served two full tours of duty as an exemplary soldier. He was garrisoned at the Rebel base on Arda I when he heard of Alderaan’s destruction by the Death Star. Swearing to avenge his homeworld, Fenn Signis joined a Rebel SpecForces squad, and now, he aims to put his deadly skills to work against the Galactic Empire. Fenn Signis’s fury and skill with arms can quickly fell any Imperial soldier. His Havoc Shot ability allows him to suffer a strain while attacking with any ranged weapon, including the Infantry Rifle that he starts a campaign with. The attack gains Blast 1, allowing him to deal one damage to every figure adjacent to his target. By using Havoc Shot against tightly massed groups of troopers, you can quickly mow through enemy ranks.
Like every professional soldier, Fenn Signis relies on his comrades, but he also has a powerful independent streak. If Fenn Signis ends his activation with no adjacent friendly figures, you can take advantage of his Lone Wolf ability to recover one strain. By positioning Fenn Signis so that he recovers a strain at the end of his activation, you’ll have more strain to move extra spaces, trigger Havoc Shot, and take advantage of his Class cards. Take Cover is just one of Fenn Signis’s Class cards that requires strain to activate. By suffering a strain and exhausting Take Cover when an attack is declared against you, you can add a white defense die to your defense dice pool. In normal situations, Fenn Signis rolls a black defense die, which can provide more blocks, but has no ability to completely dodge an attack. Adding a white defense die offers that possibility. While Take Cover increases Fenn Signis’s defenses, Weapon Expert increases the potency of his attacks. By suffering a strain when attacking, Fenn Signis can use Weapon Expert to increase his chances of a successful hit and pierce through enemy blocks.
Fenn Signis gains a way to enhance the power of his Havoc Shot with Suppressive Fire. You can trigger Suppressive Fire whenever you attack using Havoc Shot. Every figure that suffered damage from Havoc Shot must either take an additional damage or become Stunned. Because Havoc Shot has the Blast 1 ability, damage from this attack can quickly spread through a squad of troopers, and Suppressive Fire forces even more damage upon your targets. Superior Positioning helps you set up these potent attacks. As an action, you can suffer a strain to use Superior Positioning, gaining movement points and becoming Focused. Not only that, but Superior Positioning allows you to add a bonus block while you are Focused and defending! Take the Fight to the Empire You may play an Imperial Assault campaign as Fenn Signis, Diala Passil, or another hero, but no matter which hero you play as, you’ll have to contend with the forces of the Galactic Empire before too long. Join us in our next preview, as we take our first look at the terrifying massed forces of the Galactic Empire! ... Source: The Veteran and the Exile (http://www.fantasyflightgames.com/edge_news.asp?eidn=5149)
Title: FFG:A Champion's Perspective: Call of Cthulhu
Post by: RSSFeeder on 29 October 2014, 17:00:02
A Champion's Perspective: Call of CthulhuA Tournament Report by 2014 North American Champion Tom Capor
As World Championship Weekend approaches, we will be posting articles each week so players can learn how to best prepare for their next large tournament. Whether you’re planning on attending Worlds or following along through our online coverage, these articles are a great insight into how some of the best players of your favorite game prepare for major tournaments. Today, we are joined by 2014 Call of Cthulhu: The Card Game North American Champion Tom Capor. Tom shares how he was able to defend his title a second year in a row despite significant challenges leading up to the 2014 North American Championship. 
Tom Capor on the 2014 North American Championship Ladies, gentlemen, things from beyond time and space, and everyone in between, I welcome you to my Call of Cthulhu: The Card Game Gen Con 2014 tournament report! The 2014 North American Championship stage was set as loyal Cthulhu fans from across the country traveled to Indianapolis, Indiana to compete for the title of North American Champion. It was once again time to defend the title that I have somehow managed to retain since its introduction in 2012. Deciding the Deck “It was only for a moment that I hesitated, for more than curiosity and scientific zeal was driving me on and working against my growing fear."
– Nathaniel Peaslee, Shadow Out of Time by H. P. Lovecraft After a disappointing Regional Championship season where I was unable to earn a bye, I needed to re-evaluate my deck choice. Piloting the infamous Y-Train (a combo mill deck) since its debut at the 2013 North American Championship, I was beginning to have my doubts about whether or not I could continue to pilot it effectively. The math was there; the playtesting results were there. In my opinion, even against its predictability, it was still, by far, the best deck in the format. However, my level of play skill had been heading in a downward spiral since the 2013 World Championship. Time away from the game coupled with sleep deprivation was not helping. I wasn’t on my ‘A-game’ for a long while, and if I wanted to continue to pilot arguably the most demanding deck in the card pool, I needed to get back into shape. With a more strict sleep schedule in place, training regiments designed to focus on increasing precision play, and no surprises from any last-minute FAQ entries, I gained enough confidence to use the deck again. The only question was, what version? In 2013, Yog-Shub was a clear winner with The Festival (The Key and the Gate, 51) and Shub’s support removal. However, without The Festival and Master of the Myths (Into Tartarus, 101), I had to find another way to quickly rifle through my deck. While other options such as Mono-Yog, Yog/Shub, Yog/Silver Twilight were quite viable, the Yog/Cthulhu version gave me my best test results against the broadest field. Y-Train 3.0 Characters: 25 Support: 10 Event: 15  Why Cthulhu for the second faction? Mainly, it was for Flooded Vault (Terror in Venice, 10) and Deep One Assault (Core Set, 56). Having six ways to find Lost City of Pnakotus (The Key and the Gate, 27) was the key. There are other cards that could serve as a substitute, but since Flooded Vault also had the ability to find Frozen Time (The Key and the Gate, 22) and an emergency Snow Graves (At the Mountains of Madness, 15), I couldn't pass up the utility. Deep One Assault’s versatility, while trickier to use than say Thunder In the East (Kingsport Dreams, 34) or Burrowing Beneath (Core Set, 137), proved useful in giving me more options to deal with problematic characters such as Alternative Historian (Seekers of Knowledge, 15). To help fill out the ranks, I called upon an old favorite of mine: Dreamlands Fanatic (In the Dread of Night, 47), usually a ‘free’ character with Fast and an Arcane Icon. Why Cthulhu for the second faction? Mainly, it was for Flooded Vault (Terror in Venice, 10) and Deep One Assault (Core Set, 56). Having six ways to find Lost City of Pnakotus (The Key and the Gate, 27) was the key. There are other cards that could serve as a substitute, but since Flooded Vault also had the ability to find Frozen Time (The Key and the Gate, 22) and an emergency Snow Graves (At the Mountains of Madness, 15), I couldn't pass up the utility. Deep One Assault’s versatility, while trickier to use than say Thunder In the East (Kingsport Dreams, 34) or Burrowing Beneath (Core Set, 137), proved useful in giving me more options to deal with problematic characters such as Alternative Historian (Seekers of Knowledge, 15). To help fill out the ranks, I called upon an old favorite of mine: Dreamlands Fanatic (In the Dread of Night, 47), usually a ‘free’ character with Fast and an Arcane Icon.
The other biggest trick I’ve added since last year was Walk the Path (Written and Bound, 18). Normally a weak utility card against most matchups, it is a critical card for the mirror match. I theorized that I would see a lot of mirror matches at the North American National Championship despite not facing a single one throughout the Regional Championship season. The Big Day Arrives! An amazing turnout for the event! I won’t lie, it brings a smile to my face to know that the game is still growing since its LCG release in 2009. Through the Swiss rounds there were some amazing games with everyone having a lot of fun. Even some new faces like Jonathan Lekse, Shawn Macleod, and Vince Urbonas, managed to gain some valuable experience as they claimed top 8 spots before being eliminated. A cut must be made, a champion must be crowned, and the top 8 had some serious contenders:
- Jonathan Lekse
- Jim Black
- Jeremey Zwirn
- Tom Capor
- Chase Causey
- Vince Urbonas
- Shawn Macleod
- David Boeren
My path would begin against Chase Causey and his Cthulhu/Miskatonic University deck. Chase was hoping to rekindle a bit of the spirit of Research and Destroy, a Cthulhu/Miskatonic Deck popularized by Graham Hill during last year’s European Championship and used by Jim Black to knock me out of the top 8 in the 2013 World Championship. But thanks to my pre-tournament preparation and some adrenaline, I managed to take the game. Next up was David Boeren fresh off his defeat of Jonathan Lekse, who aside from being a good friend of mine, was the top seed in the top 8, went undefeated in the Swiss, and was running a deck nearly identical to my own. David is a powerful player of his own, and you may recognize him from his Elder Things podcast, his 2nd-place finish at the 2012 National Championship (in which he nearly defeated me), or from his constant support of the community via the forums. I was a little nervous. With a little luck from my deck and some well-timed plays, I was able to finesse my way through to the final round! Epic Battle of Ultimate History My final opponent of the day was Jeremy Zwirn! Jeremy is a strong player, the current Cthulhu World Champion, and a former Android Netrunner and Warhammer: Invasion World Champion. And those are just the titles I know about. We were both running the Y-Train, making the match even tighter. Jeremy’s deck was using a more traditional Yog/Shub powerhouse. However, my deck contained Walk the Path, which gave me a pretty sizable advantage going into the
mirror match. The opening moves were pretty tenuous. Compared to a normal game, I had a bad start and did not see any of my engine pieces. What I did have, though, was tons of character removal. So, after a soft opening turn one from Jeremy, and myself not drawing into any combo pieces, I decided to go for a story win! An unconventional move for the deck I was playing, but since I was in no position to use deck discard as my route to victory, my only chance was to force Jeremy off his game as well, and hope that it would force him to do things he wouldn’t normally do. I think for the most part this plan worked. I was able to take and maintain board control, I was able to rack up success tokens, and Jeremy could only cycle a pair of Speak to the Dead (Whispers in the Dark, 20) to fill his discard pile. I wouldn’t be shocked if he had other options, as his hand became massive fairly quickly, but if using Speak to the Dead was his best option, I couldn’t ask for more.  Going into the final turn, I had 2/4/4 success tokens with a Descendant of Eibon (The Terror of the Tides, 75) in play and a massive board presence, an open domain for a Walk the Path, and Deep One Assault that I was using to bluff as a Black Dog (Words of Power, 29) the whole game. Whether or not the bluff actually worked I’ll probably never know, but we both respected the Black Dog the whole game. Regardless, I was threatening to win the game on my next turn, and Jeremy’s deck was getting awfully low. Any lower and he wouldn’t be able to survive a Walk the Path that would eventually copy his trigger of an Interstellar Migration (The Key and the Gate, 37). Without the aid of his second and third Snow Graves, Jeremy was forced to go for the win hoping against all hope that his Snow Graves already on the board would go uninterrupted. Going into the final turn, I had 2/4/4 success tokens with a Descendant of Eibon (The Terror of the Tides, 75) in play and a massive board presence, an open domain for a Walk the Path, and Deep One Assault that I was using to bluff as a Black Dog (Words of Power, 29) the whole game. Whether or not the bluff actually worked I’ll probably never know, but we both respected the Black Dog the whole game. Regardless, I was threatening to win the game on my next turn, and Jeremy’s deck was getting awfully low. Any lower and he wouldn’t be able to survive a Walk the Path that would eventually copy his trigger of an Interstellar Migration (The Key and the Gate, 37). Without the aid of his second and third Snow Graves, Jeremy was forced to go for the win hoping against all hope that his Snow Graves already on the board would go uninterrupted.
After a lot of counting by both of us and Jeremy putting a few final Yithian cards he needed into the discard pile via Studying the Void (The Key and the Gate, 35), Jeremy launched his first Interstellar Migration. I responded with a Deep One Assault to remove his lone Snow Graves. Dismayed, Jeremy knew it was over, but not giving up, he began to look for a way out. Doing anything he could, he pinged me with a Yithian Scout (The Key and the Gate, 15) from his discard pile. Then, it was my turn to make sure I could win the game. After some stressful counting, I did indeed have enough Yithians in my own discard pile to launch my first Interstellar Migration. Counting again to make 400% sure, the game was over. If Jeremy launched a second Migration, I could use my Walk the Path to copy the effect for the win; waiting it out would allow me to win with my second Migration. The Streak is still alive! Counting My Lucky Stars I've been very fortunate over the years to be able to continue to play this amazing game at such a high level. Through the game I have met some awesome people, many of whom I'm lucky enough to call friends, and it is a trend I hope to continue as far into the future as possible. The 2014 World Championship Weekend is Approaching Thanks, Tom! Tom didn’t quit despite a slump in his tournament results. Will you have the courage and passion to continue forward and improve yourself before your next tournament? Check back in the coming weeks to hear stories from other North American Champions, and join us for the 2014 World Championship Weekend in a couple weeks for your chance to gain fame in your favorite game! ... Source: A Champion's Perspective: Call of Cthulhu (http://www.fantasyflightgames.com/edge_news.asp?eidn=5150)
Title: FFG:A Champion's Perspective: Call of Cthulhu
Post by: RSSFeeder on 30 October 2014, 01:30:03
A Champion's Perspective: Call of CthulhuA Tournament Report by 2014 North American Champion Tom Capor
As World Championship Weekend approaches, we will be posting articles each week so players can learn how to best prepare for their next large tournament. Whether you’re planning on attending Worlds or following along through our online coverage, these articles are a great insight into how some of the best players of your favorite game prepare for major tournaments. Today, we are joined by 2014 Call of Cthulhu: The Card Game North American Champion Tom Capor. Tom shares how he was able to defend his title a second year in a row despite significant challenges leading up to the 2014 North American Championship.
Tom Capor on the 2014 North American Championship Ladies, gentlemen, things from beyond time and space, and everyone in between, I welcome you to my Call of Cthulhu: The Card Game Gen Con 2014 tournament report! The 2014 North American Championship stage was set as loyal Cthulhu fans from across the country traveled to Indianapolis, Indiana to compete for the title of North American Champion. It was once again time to defend the title that I have somehow managed to retain since its introduction in 2012. Deciding the Deck “It was only for a moment that I hesitated, for more than curiosity and scientific zeal was driving me on and working against my growing fear."
– Nathaniel Peaslee, Shadow Out of Time by H. P. Lovecraft After a disappointing Regional Championship season where I was unable to earn a bye, I needed to re-evaluate my deck choice. Piloting the infamous Y-Train (a combo mill deck) since its debut at the 2013 North American Championship, I was beginning to have my doubts about whether or not I could continue to pilot it effectively. The math was there; the playtesting results were there. In my opinion, even against its predictability, it was still, by far, the best deck in the format. However, my level of play skill had been heading in a downward spiral since the 2013 World Championship. Time away from the game coupled with sleep deprivation was not helping. I wasn’t on my ‘A-game’ for a long while, and if I wanted to continue to pilot arguably the most demanding deck in the card pool, I needed to get back into shape. With a more strict sleep schedule in place, training regiments designed to focus on increasing precision play, and no surprises from any last-minute FAQ entries, I gained enough confidence to use the deck again. The only question was, what version? In 2013, Yog-Shub was a clear winner with The Festival (The Key and the Gate, 51) and Shub’s support removal. However, without The Festival and Master of the Myths (Into Tartarus, 101), I had to find another way to quickly rifle through my deck. While other options such as Mono-Yog, Yog/Shub, Yog/Silver Twilight were quite viable, the Yog/Cthulhu version gave me my best test results against the broadest field. Y-Train 3.0 Characters: 25 Support: 10 Event: 15 Why Cthulhu for the second faction? Mainly, it was for Flooded Vault (Terror in Venice, 10) and Deep One Assault (Core Set, 56). Having six ways to find Lost City of Pnakotus (The Key and the Gate, 27) was the key. There are other cards that could serve as a substitute, but since Flooded Vault also had the ability to find Frozen Time (The Key and the Gate, 22) and an emergency Snow Graves (At the Mountains of Madness, 15), I couldn't pass up the utility. Deep One Assault’s versatility, while trickier to use than say Thunder In the East (Kingsport Dreams, 34) or Burrowing Beneath (Core Set, 137), proved useful in giving me more options to deal with problematic characters such as Alternative Historian (Seekers of Knowledge, 15). To help fill out the ranks, I called upon an old favorite of mine: Dreamlands Fanatic (In the Dread of Night, 47), usually a ‘free’ character with Fast and an Arcane Icon. The other biggest trick I’ve added since last year was Walk the Path (Written and Bound, 18). Normally a weak utility card against most matchups, it is a critical card for the mirror match. I theorized that I would see a lot of mirror matches at the North American National Championship despite not facing a single one throughout the Regional Championship season. The Big Day Arrives! An amazing turnout for the event! I won’t lie, it brings a smile to my face to know that the game is still growing since its LCG release in 2009. Through the Swiss rounds there were some amazing games with everyone having a lot of fun. Even some new faces like Jonathan Lekse, Shawn Macleod, and Vince Urbonas, managed to gain some valuable experience as they claimed top 8 spots before being eliminated. A cut must be made, a champion must be crowned, and the top 8 had some serious contenders: - Jonathan Lekse
- Jim Black
- Jeremey Zwirn
- Tom Capor
- Chase Causey
- Vince Urbonas
- Shawn Macleod
- David Boeren
My path would begin against Chase Causey and his Cthulhu/Miskatonic University deck. Chase was hoping to rekindle a bit of the spirit of Research and Destroy, a Cthulhu/Miskatonic Deck popularized by Graham Hill during last year’s European Championship and used by Jim Black to knock me out of the top 8 in the 2013 World Championship. But thanks to my pre-tournament preparation and some adrenaline, I managed to take the game. Next up was David Boeren fresh off his defeat of Jonathan Lekse, who aside from being a good friend of mine, was the top seed in the top 8, went undefeated in the Swiss, and was running a deck nearly identical to my own. David is a powerful player of his own, and you may recognize him from his Elder Things podcast, his 2nd-place finish at the 2012 National Championship (in which he nearly defeated me), or from his constant support of the community via the forums. I was a little nervous. With a little luck from my deck and some well-timed plays, I was able to finesse my way through to the final round! Epic Battle of Ultimate History My final opponent of the day was Jeremy Zwirn! Jeremy is a strong player, the current Cthulhu World Champion, and a former Android Netrunner and Warhammer: Invasion World Champion. And those are just the titles I know about. We were both running the Y-Train, making the match even tighter. Jeremy’s deck was using a more traditional Yog/Shub powerhouse. However, my deck contained Walk the Path, which gave me a pretty sizable advantage going into the
mirror match. The opening moves were pretty tenuous. Compared to a normal game, I had a bad start and did not see any of my engine pieces. What I did have, though, was tons of character removal. So, after a soft opening turn one from Jeremy, and myself not drawing into any combo pieces, I decided to go for a story win! An unconventional move for the deck I was playing, but since I was in no position to use deck discard as my route to victory, my only chance was to force Jeremy off his game as well, and hope that it would force him to do things he wouldn’t normally do. I think for the most part this plan worked. I was able to take and maintain board control, I was able to rack up success tokens, and Jeremy could only cycle a pair of Speak to the Dead (Whispers in the Dark, 20) to fill his discard pile. I wouldn’t be shocked if he had other options, as his hand became massive fairly quickly, but if using Speak to the Dead was his best option, I couldn’t ask for more. Going into the final turn, I had 2/4/4 success tokens with a Descendant of Eibon (The Terror of the Tides, 75) in play and a massive board presence, an open domain for a Walk the Path, and Deep One Assault that I was using to bluff as a Black Dog (Words of Power, 29) the whole game. Whether or not the bluff actually worked I’ll probably never know, but we both respected the Black Dog the whole game. Regardless, I was threatening to win the game on my next turn, and Jeremy’s deck was getting awfully low. Any lower and he wouldn’t be able to survive a Walk the Path that would eventually copy his trigger of an Interstellar Migration (The Key and the Gate, 37). Without the aid of his second and third Snow Graves, Jeremy was forced to go for the win hoping against all hope that his Snow Graves already on the board would go uninterrupted. After a lot of counting by both of us and Jeremy putting a few final Yithian cards he needed into the discard pile via Studying the Void (The Key and the Gate, 35), Jeremy launched his first Interstellar Migration. I responded with a Deep One Assault to remove his lone Snow Graves. Dismayed, Jeremy knew it was over, but not giving up, he began to look for a way out. Doing anything he could, he pinged me with a Yithian Scout (The Key and the Gate, 15) from his discard pile. Then, it was my turn to make sure I could win the game. After some stressful counting, I did indeed have enough Yithians in my own discard pile to launch my first Interstellar Migration. Counting again to make 400% sure, the game was over. If Jeremy launched a second Migration, I could use my Walk the Path to copy the effect for the win; waiting it out would allow me to win with my second Migration. The Streak is still alive! Counting My Lucky Stars I've been very fortunate over the years to be able to continue to play this amazing game at such a high level. Through the game I have met some awesome people, many of whom I'm lucky enough to call friends, and it is a trend I hope to continue as far into the future as possible. The 2014 World Championship Weekend is Approaching Thanks, Tom! Tom didn’t quit despite a slump in his tournament results. Will you have the courage and passion to continue forward and improve yourself before your next tournament? Check back in the coming weeks to hear stories from other North American Champions, and join us for the 2014 World Championship Weekend in a couple weeks for your chance to gain fame in your favorite game! ... Source: A Champion's Perspective: Call of Cthulhu (http://www.fantasyflightgames.com/edge_news.asp?eidn=5151)
Title: FFG:Can You Survive?
Post by: RSSFeeder on 30 October 2014, 10:00:03
Can You Survive?Preview Character Creation in Zombie Apocalypse
“We just gotta survive. If we can hole up, we’ll be fine. The government will handle this. I mean, we’re just regular people. What could we possibly do?”
–A survivor who hasn’t quite grasped the situation It’s up to you and your friends to survive the rise of the undead in Zombie Apocalypse, the first book in The End of the World roleplaying line! Future books in this line will pit you against the Wrath of the Gods, an Alien Invasion, and the Revolt of the Machines, but for now, it’s your job to keep yourself safe from hordes of zombies desperately hungry for your brain. In Zombie Apocalypse and every other book in The End of the World line, you’ll find a shared set of rules and five distinct scenarios, each offering a different take on how humanity may enter its final days and continuing through the post-apocalypse, as humanity adapts to a world forever changed. These books also give you the chance to experience the apocalypse in a unique way: as yourself, using your own skills, talents, and equipment! Today, we’ll take a closer look at character creation within Zombie Apocalypse, exploring how to bring an abstracted version of yourself to life. In this preview, I’ll create a character version of myself for a game of Zombie Apocalypse. 
What if I don't want to play as myself?
The character creation rules in Zombie Apocalypse and the rest of The End of the World roleplaying line allow you to create characters very unlike yourself. Instead of creating stats based on your own characteristics, you can simply envision a different person and create a character who embodies the traits and abilities of that person.
|
|
Physical, Mental, Social Before you face the reanimated corpses rising from their graves, you’ll need a way to accurately reflect the characteristics that serve as the basic building blocks of your character. There are six distinct characteristics that help define your character in Zombie Apocalypse and The End of the World roleplaying line. These six characteristics are split into three categories: physical, mental, and social, each consisting of a pair of characteristics. The physical characteristics are dexterity and vitality, the mental characteristics are logic and willpower, and the social characteristics are charisma and empathy. Each of these characteristics receives a number between one and five, which forms the basis for determining your success during a test, as we’ll explore in a later preview. When I begin creating my character – an abstract version of myself – I have ten points to split between the six characteristics. Each characteristic starts at one, and none can be raised higher than five. I start by adding points to my mental characteristics, which I think of as my strongest category. It can be important to consider the differences between the offensive and defensive characteristics within a category when you assign points. In Zombie Apocalypse, logic represents your awareness of your surroundings and your ability to think on your feet, while willpower is your memory and mental resilience. With this in mind, I assign two points to logic and three points to willpower, raising them to three and four, respectively. _Plate.jpg) I split the remaining points between the physical and social categories, ending with a dexterity of two, a vitality of two, a logic of three, a willpower of four, a charisma of three, and an empathy of two. In Zombie Apocalypse, I’m most at home using my mind to outsmart the zombies, rather than facing them in combat or gathering a strong group of other survivors. I split the remaining points between the physical and social categories, ending with a dexterity of two, a vitality of two, a logic of three, a willpower of four, a charisma of three, and an empathy of two. In Zombie Apocalypse, I’m most at home using my mind to outsmart the zombies, rather than facing them in combat or gathering a strong group of other survivors.
After I create the initial characteristics for my character, the group has the chance to vote on the accuracy of the result. For each category, the group secretly votes whether a characteristic should be raised or lowered. In my case, the group determines that one of my physical characteristics should be raised, and I raise my dexterity by one point, giving me a final dexterity of three. What Makes You Different Characteristics form the starting point for building your in-game version of yourself, but that’s not enough to differentiate you from the dozens of others fighting to keep their brains intact and survive another day at the end of the world. What truly sets your character apart from any other are your features – the strengths, weaknesses, special training, insecurities, and quirks that set you apart from everyone else. During character creation, every player thinks of a positive feature and a negative feature for each category. A feature can be nearly anything you can think of – anything that makes you different from other survivors. For my physical category, I have the +Fast Reflexes and -Very Nearsighted features, along with +Well Read and -Easily Startled for mental and +Cheerful Disposition and -Too Proud for social features. Whenever one of these features comes into play in the game, it can add positive or negative dice to a test, as we’ll explore in a later preview. 
The characteristics and features on my character sheet
In addition, because the group voted to raise one of my physical characteristics, I must either remove my positive feature for that category or take on another negative feature. I don’t want to lose my positive feature, so I add the -Gets Hungry Quickly feature to my physical category – a serious drawback in any apocalyptic scenario! Grab Your Gear Your game of Zombie Apocalypse begins with your group sitting down to play a roleplaying game, which means your gear is limited to whatever you may happen to have close to you. My list of gear consists of the objects close to me, and I’ll need to make important decisions about what to bring. I have a backpack and a half-full water bottle with me, as well as my wallet, which has $6.85 in cash. My cellphone has roughly ten hours of battery life left. I need to decide whether or not to take my laptop and its charger – it could prove useful for maintaining communication or gathering information, but it’s heavy and no one knows how long the Internet will keep functioning as more dead rise daily. I also find a welcome surprise in one of my backpack pockets – a fully-functioning compass that I’d forgotten! 
Unfortunately, I don’t have many weapons at this point: I’m limited to a small, folding pocketknife and a pair of scissors. Finding better weapons means venturing out of the office, and it could prove a deadly first outing for me and my coworkers. We don’t have much food at the moment, but the Fantasy Flight Games Center across the parking lot could prove a valuable source of non-perishable food or kitchen knives for weapons… provided other panicking civilians haven’t had the same idea first! Every survivor in the midst of the Zombie Apocalypse is massively different, and between features and characteristics, any player in your group can create a character that reflects himself. You may rely on your skills with making friends to survive, or you may manipulate those you encounter into helping you. Your fight for survival begins wherever you live, from sub-arctic climates to the equator. Zombie Apocalypse gives every player the chance to live (and die) in humanity’s last days! Fight to Survive Your characteristics, your features, and your equipment and gear all form parts of your character as you struggle to survive the impossible danger of Zombie Apocalypse. In our next preview, we’ll turn to rules developer Andrew Fischer for a discussion of how the rules for Zombie Apocalypse developed, including how players complete tasks and fight to survive in the last days of civilization! Pre-order Zombie Apocalypse at your local retailer today! ... Source: Can You Survive? (http://www.fantasyflightgames.com/edge_news.asp?eidn=5152)
Title: FFG:Assembling Your Squadron
Post by: RSSFeeder on 30 October 2014, 18:30:03
Assembling Your SquadronAn X-Wing (TM) Turn Zero Article by 2013 World Champion Paul Heaver
“Keep your eyes open for those fighters!”
–Garven Dreis In his “Turn Zero” articles, reigning World Champion Paul Heaver offers a look at one of the most critical components in mastering the game of X-Wing™… getting started. In previous articles, Paul has addressed how best to place asteroids to complement your strategy, how to place your starships at the start of a game, and how to develop a winning battle plan within an evolving metagame. Today, Paul addresses another crucial step along your path to victory: assembling your squadron. Whether you’re looking to improve your chances at FFG’s 2014 World Championship Weekend or you’re just thinking about the best way to introduce the game to one of your friends, squad building is a critical component of your experience and one that’s best to approach with a solid plan.

2013 X-Wing World Champion Paul Heaver in action during the 2013 finals
2013 X-Wing World Champion Paul Heaver on Building Your Squad The best way to build your X-Wing squad depends on many factors. The first thing you should consider is the event to which you are bringing your squad. Are you headed to a casual game night with some friends, or are you headed to the World Championships? Is your goal to build a thematic squad that recreates the Trench Run or another iconic moments from the movies? It’s not always about winning! I build some of my lists to help me improve my skills with a new ship or upgrade, or to test the choices of another person’s list and see if I agree with them. Speaking of other people’s lists, you shouldn’t be afraid to grab a popular list off of the internet and try it out. I often do this to see if I can fly the squad as well as others have, or if I think I can make the list better. If you are new to the game, grabbing a known list and learning how to play it will help you improve your skills. You don’t have to worry about whether or not you made good build choices, so you can concentrate on visualization and planning. Plus, the experience will help you in the future when you face other players running the same ships; you’ll know what their ships can do, and knowing where your opponent’s ship will end its movement is the first step toward defeating it. However, if you feel you’re ready to design your own squad, it’s an exciting time to do so because there are a lot of viable designs. The X-Wing metagame is moving away from squads that feature swarms of ships firing lots of red dice at their opponents, and elite pilots are finding their way back to the top tables. Even so, the lists with lots of ships are still doing well! This fact further solidifies my opinion that it’s very important to be comfortable with the ships in the list you are playing, and it’s also important to gain knowledge of the ships you’re facing. 
A squad of TIE bombers in action at the 2014 North American Championships
Shore Up Your Defenses I tend to think, first, about how my ships perform defensively, and then I try to maximize my squad’s offense afterward. Defensively, I don’t like to have all my ships share the same weakness. That increases my chances of running into a squad that easily counters mine. Squads work best when you they have multiple parts with different strengths, so that your various parts can cover each others’ weaknesses. For example, the old Rebel swarm of three Blue Squadron Pilots and two Prototype Pilots could tailor its plan of attack to counter TIE swarms and other squads that had many two-die attacks, or they could adjust to counter squads with fewer ships that each attacked for more damage. 
Another example is the TIE phantom. It’s an “arc dodger,” designed to position for attacks against foes that can’t shoot back. Since you know that arc dodgers have a weakness against turreted ships, you shouldn’t pair your phantom with other arc dodgers. Instead, since most turreted ships have high health and low defense, using multiple TIE fighters with your phantom has been proven to shore up its main weakness.
With its ability to cloak and decloak, the TIE phantom excels at slipping out of the firing arcs of fighters flown by pilots with lower pilot skills.
Maximize Your Offense After you diversify and mitigate your weaknesses, you need to maximize your offense. This means trying to squeeze in as many attack dice as possible and making sure you can modify your rolls. It also means that you need to make sure those ships stay alive. You do not want to make your strongest ship the easiest one for your opponent to destroy. You want to give your opponent hard choices; encourage them to make mistakes. This is why unique pilots with offensive abilities tend to be combined with defensive upgrades, such as Wedge Antilles with an Engine Upgrade or Corran Horn with R2-D2. 
Similarly, if your pilots are already hard to kill, you want to boost them with offensive upgrades, such as giving Jake Farrell Outmaneuver and Push the Limit. 
Upgrading Your Squad Once you decide on what ships you want, it’s time to determine upgrades. I always recommend fewer upgrades for beginning players. It’s easier to lose track of things when you have multiple ships, with different pilot abilities and upgrades. Then you may fail to take advantage of the important upgrades for which you’re spending your squad points. When you do use upgrades, it’s easiest to remember their functions if you use the same upgrade on multiple ships or put most of your upgrades on a single elite ship. For example, if you take the previously mentioned Jake Farrell with Push the Limit and Outmaneuver, and then pair it with three Blue Squadron Pilots who each have Fire Control Systems, you are likely to remember to use all of your upgrades correctly. 
Bidding on Pilot Skill Pilot skill is another important consideration. In most cases, the ideal pilot skill value is one higher than whatever your opponent is fielding. But spending squad points to hit that ideal pilot skill is a gambit that can fail if your opponent has pilots with higher skill than yours, or simply doesn’t bother to “bid” on pilot skill and just sticks with the minimum skill levels. Right now, most lists tend towards the extremes of pilot skill, either bidding high with nines and above or going with non-uniques at pilot skills one and two. In this sort of environment, spending squad points for pilots with skill values of four to eight often results in wasted points. Currently, I’d only take pilots in that region if their pilot abilities were extremely useful for my list, such as Biggs Darklighter or “Howlrunner."
Your List Is More Than a Collection of Cards Once you have settled on your list, you’re ready to playtest it to learn how it functions. For smaller, local events, I’m usually happy coming up with a basic three-round opening where my ships don’t collide, and I can point all my weapons in the direction I desire. For larger events, I’ll playtest online and in person multiple times to become familiar with how my ships function together and how I can adapt my strategy to face popular squads so that I can make the right adjustments quickly. Knowing where you want to place your asteroids and your ships at the start is also closely related to the list-building process, and has been covered in previous articles in this series. Thanks, Paul! Whether you follow Paul’s advice or adhere to a squad-building formula of your own devising, you can soon put your squad to the ultimate test in the galaxy’s greatest battles. The 2014 X-Wing World Championships are nearly upon us. We hope to see you this November 6th – 9th in Roseville, MN. But even if you can't join us, you can still be a part of the action by following our livestream on Twitch.tv and supporting your friends. Coverage begins Thursday, November 6th at 9:45 AM CST! ... Source: Assembling Your Squadron (http://www.fantasyflightgames.com/edge_news.asp?eidn=5153)
Title: FFG:STAR WARS (R): Force and Destiny (TM) Beta Update #8
Post by: RSSFeeder on 31 October 2014, 03:00:02
STAR WARS (R): Force and Destiny (TM) Beta Update #8News From the Developers of the Force and Destiny Beta
Hello Force and Destiny™ beta testers, This week’s update (pdf, 323 KB) focuses on Force powers, adding quite a few upgrades and modifications. Some of these are clerical as we tweaked the rules slightly to bring them back in line with Edge of the Empire™ and Age of Rebellion™. Because we made these clerical changes, we also added a lot of minor clarifications to powers. These may not be flashy, but they’ll make them easier to use at the table. However, a few powers got more exciting tweaks. Protect/Unleash saw some big changes. Protect was modified to give more control to the character, and Unleash now does twice as much damage. Also, for you wannabe dark siders out there, Unleash’s mastery upgrade is absolutely brutal. The dreaded Force lightning now well and truly lives up to its reputation! The other power to see some major enhancement is Battle Mediation. We’ve been hearing that this power needed some punch, so we’ve changed its basic ability. Now, instead of adding Advantage to checks, it adds Success.  Very few abilities do this in the game, so Battle Meditation has a unique and very potent role in a party. We also made an interesting change to its range upgrades that we hope you test in your games. Very few abilities do this in the game, so Battle Meditation has a unique and very potent role in a party. We also made an interesting change to its range upgrades that we hope you test in your games. That’s it for this week. For next week, we want to hear how these modified Force powers work in your games. Also, at this stage of the beta, we would like feedback on anything you feel we’ve missed, and we would like to hear how the updates in our beta have affected your game sessions. In-game experiences are very valuable to us, so please send those along! Finally, since we’ve introduced a lot of changes over the last couple weeks, we won’t be posting any update to the errata next week. We want to give you the time to test the latest errata on the tabletop, and get some play experience with these changes. As always, thanks for your continued participation and feedback! ... Source: STAR WARS (R): Force and Destiny (TM) Beta Update #8 (http://www.fantasyflightgames.com/edge_news.asp?eidn=5154)
Title: FFG:The Battlefields of Terrinoth
Post by: RSSFeeder on 31 October 2014, 11:30:03
The Battlefields of TerrinothPreview the Campaign and Skirmishes of BattleLore: Command
The Flesh Ripper Brutes roared and reared at the guard so he sliced at their bellies, blood spilling onto the ground as he killed two with one stroke. A third leapt onto his back, but before it could bite he stabbed the spearpoint of his poleaxe deep into the beast’s mouth. The others ran off in fear. He took a deep breath and looked around. Coming towards him was an ugly, gargantuan demon wielding a scythe as big as a man: Ravos the Ever-Hungry. The guard recognized Ravos and suddenly knew his own death was imminent, but killing Ravos meant saving his homeland, and so he had no choice. Valiant warriors and vicious demons go to war in BattleLore: Command, an application for iOS, Android, and PC. Whether you command the Daqan army in combating the worst threat they have faced for centuries, or lead the ravenous demonic hordes of the Uthuk Y’llan into Terrinoth, BattleLore: Command offers you the chance to fight epic fantasy battles and wield arcane powers in a variety of tactically challenging missions. Today we will look at some of the battles that await you in the app’s single-player campaign mode, and at the different scenarios you can choose to play in the skirmish mode, which pits your army against the computer’s or against the army of a friend on the same wireless network. A Heroic Campaign Baron Frederic looks you in the eye. “You can’t let Kell fall into enemy hands. I know that all you’ve got right now are a few units of young infantry and archers, most of whom have never seen battle before. But under your command, guided by your strategic insight, they can stop the Uthuk Y’llan invasion before advances any further." He paused. "Well, what are you waiting for? Muster your troops. Terrinoth is depending on you." The war begins when the Uthuk Y’llan, who have long been gathering strength in the desert wastelands of the Ru Steppes, invade and occupy Hernfar Isle, a defensive outpost on Terrinoth’s northeastern border in the barony of Kell. As the commander of the Daqan army, your task is to expel them from the land and ensure that they never threaten your people again. In your quest to do so, you’ll encounter a variety of battlefields across Terrinoth, from castles and farms to thick forests and blasted, barricaded deserts. You'll have to win battles with only a few units of infantry and archers, strategically deploy flying Roc Warriors, and learn how to defeat demons that have three times the strength of a group of Rune Golems. You'll have to penetrate enemy lines, take defensive stands, and prevent entire villages from being burned. 
In the beginning of the campaign both armies are still assembling their forces. As the Uthuk Y’llan occupy border settlements and slaughter livestock, you must both protect your people and go behind enemy lines to light the signal fires that will summon the Riverwatch Riders. Before the Roc Warriors will join your army, you must ensure that the mountains clans are safe and chase the Uthuk Y’llan out of the Rookery where the Roc Warriors are trained. In order to bring the Rune Golems to life, you must ransack the Uthuk Y’llan encampment for the stolen rune shards that will animate Terrinoth’s stone sentinels. 
The Uthuk Y’llan are not the only threat to peace in Terrinoth. With the land’s military might focused on defending against the Uthuk invasion, groups of bandits have begun to raid farms and attack caravans. If you can defeat the bandit king, you may be able to convince the bandits to fight alongside your own Daqan forces. But as the campaign progress and your army grows, the Uthuk Y’llan also become more powerful. A powerful demon called Ravos the Ever-Hungry appears in Kell, who leads wandering bands of Uthuk Y’llan that destroy and consume everything in their path, leaving heaps of bones in their wake– all that remains of Ravos’ animal and human victims. Since a commander cannot be on two battlefields at once, some stages of the campaign force you to make difficult choices: do you save the valuable herds that provide a living for the people of Kell, or do you prevent the ancient and powerful energy orbs at the Tomb of Pelius from falling into enemy hands? Do you rescue a group of unarmed villagers held captive by the Uthuk Y’llan, or do you attempt to free Baron Frederic, a powerful leader beloved by his people, before he is sacrificed on a demonic altar? 
Once you have pushed the Uthuk Y’llan army out of Terrinoth you must still defeat them in their own territory. There in the barren expanses of the Ru Steppes you must encounter the blood priestess who masterminded the Uthuk Y’llan invasion, Malaana, whose psyche is so powerful that it could control Baron Frederic’s dreams from hundreds of miles away. Since Malaana takes supernatural strength from the blood rites she practices, it takes ten blows to kill her, which may prove difficult since her dark magic slays soldiers long before they can approach her. Her gargantuan black scorpion protects her, swinging its poisonous tail that can murder a human with one sting. Only slaying Malaana can you ensure that Terrinoth is free from the threat of an Uthuk Y’llan invasion. 
Savage Skirmishes Only few Rune Golems stood between them and the Daqan stronghold, but those could easily be eliminated. The Uthuk Y’llan archers exchanged smiles with bloodstained mouths and let their poisoned arrows fly. One found its target, and the Rune Golem burst apart with a brilliant blue glow, leaving behind only a lifeless pile of rubble and clay. The archers reached for more arrows and took aim again. “Now let us darken the skies.” In the campaign mode, your army, its size, and the units available to you depend on your current mission. In the skirmish mode you can choose whether to play the Daqan army or the Uthuk Y’llan. It’s even possible to pit two armies of the same faction against each other. You can vary the gold limit to alter the size of your army, taking the field with a strike force of a few units or mustering a full army of multiple elite units with the infantry and archers to support them. As you progress in the campaign mode, moreover, you can unlock new units for your army. Once you've defeated them, you can even deploy Ravos the Ever-Hungry and the blood priestess Malaana in your skirmish battles. 
Five different scenarios offer a range of objectives and strategic challenges. In Deathmatch, you have ten rounds to destroy as many of your opponent’s units as possible. In Demolition, the attacker must invade a village and burn down at least four buildings to win. Cross the Line is another invasion scenario, in which the attacking army must fight their way across a river into enemy territory. Gather Power asks you to prevent the enemy from stealing your energy orbs as you send forces out to steal theirs. Similarly, Strongholds challenges you to simultaneously defend your own fortress and invade your opponent’s fortress, compelling you to fight on two fronts at opposite ends of the map. Prepare for War From sneaking through enemy lines to fighting until every last enemy is slain, from defending Baron Frederic’s keep to conquering your opponent’s stronghold, , the missions and scenarios of BattleLore: Command will test and develop the tactical skills of any commander. Are you ready to lead an army into battle against its greatest foe? BattleLore: Command is coming soon to the App Store, Amazon Marketplace, and to Google Play. ... Source: The Battlefields of Terrinoth (http://www.fantasyflightgames.com/edge_news.asp?eidn=5156)
Title: FFG:Get What You Want, When You Want It
Post by: RSSFeeder on 31 October 2014, 20:00:03
Get What You Want, When You Want ItAn Overview of the Shaper Faction by Guest Writer Andrew Grace
Welcome to the second of our faction overview articles for Android: Netrunner! If you’re a new player, you’ve come to the right spot to learn what the Shaper faction is all about. Guest writer Andrew Grace is an avid player in Salt Lake City, where he coordinates the Android: Netrunner league at Game Night Games. He is also a fervent advocate of the game’s Shaper faction. 
Why Go Shaper? My least favorite thing to say as a Runner is “Click Two, I draw a card.” (“That’s a Snare!” rates as a close second, but I try to be a good sport about such things.) Spending clicks to draw cards is the necessary-but-evil byproduct of the open-ended, click-based turn system that keeps Android: Netrunner riveting at every stage of a match. Yet every time I spend a click to draw a card, I’m not spending a click to play a card, and I buy Data Packs to play cards. More to the point, spending a click to a draw a card is Criminally inefficient. If you don’t get the card you want, you’re one click poorer and no strategically richer. So the first reason Shapers are the best faction ever is that they’re the best at giving you the cards you want when you want them. You never have to tell your opponent that you’re spending a click to draw a card and then grimace when you pull your third copy of the sentry breaker you’ve already installed. Shapers are masters of getting what they want – when they want it – for two reasons: card draw and card search.  
Shapers have the cards with the most effective card-drawing mechanics, like Diesel (Core Set, 34) and Quality Time (Humanity’s Shadow, 87). Even as they benefit from the immediate bursts of cards that these events supply, Shapers get to save two influence by running the universally beloved Professional Contacts (Creation and Control, 49) in-faction. “ProCon,” as we efficiency-oriented Shapers call it, turns every click spent drawing a card into two clicks, one for the card and one for the credit. Cards like these not only enable Shapers to get their rigs together in the early game; they can protect your grip against taxing net damage and potentially lethal meat damage as you approach the endgame. But Shapers don’t just rely on drawing more cards; they know how to search for the programs they need with cards like Test Run (Cyber Exodus, 47), Scavenge (Creation and Control, 34), Self-modifying Code (Creation and Control, 46), and Clone Chip (Creation and Control, 38). Self-modifying Code (or SMC) and Clone Chip, in particular, enable you to run fearlessly into unidentified ICE. Whether the Corp rezzes a sentry like Komainu (Honor and Profit, 17) or a barrier like Ice Wall (Core Set, 103), you can search your stack or heap mid-run for the most efficient breaker and continue on your way. The Shapers’ proclivity for recovering cards from their heaps also means they can make optimal use of one-shot programs like Deus X (A Study in Static, 66), Sharpshooter (True Colors, 67), Faerie (Future Proof, 104), and Grappling Hook (Honor and Profit, 45) that offer maximum breaking power for minimal cost. Know More About the Corp Than the Corp Itself All of that card-drawing efficiency pays off when you achieve the vaunted “R&D lock,” in which you successfully access three or four cards from your opponent’s deck each turn, giving you the power to steal agendas before the Corp can feasibly draw them. Shapers excel at accessing cards from R&D and not just because they’re perpetually curious. Even Criminals and Anarchs commonly spend their influence on R&D Interface (Future Proof, 107) and The Maker’s Eye (Core Set, 36) to start locking down their opponents. Shapers can also take advantage of in-faction cards with high influence costs like Indexing (Future Proof, 106), which enables them to look at, and arrange, the top five cards in R&D without accessing them. Combined with R&D Interface or The Maker’s Eye, this wins games for you when you can move two agendas to the top of the deck. It also keeps you alive against the more vicious Jinteki decks by letting you uncover copies of Shock! (True Colors, 73) and Snare! (Core Set, 70) without triggering their ambushes.  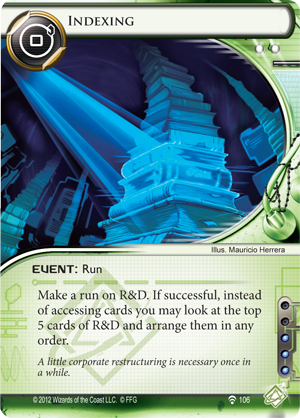
Of course, you can’t really lock down R&D if you have to spend three turns rebuilding your credit pile between each run. This is why Shapers assemble hardware and code programs to make themselves the masters of recurring credits. By installing two or three copies of Cloak (Creation and Control, 41), a Toolbox (Core Set, 41), and a couple of Lockpicks (Opening Moves, 6) before playing your Net Celebrity (The Spaces Between, 38), you can afford to run every turn, especially if you’re gaining another credit or two each turn by talking to your Professional Contacts. Run with the True Angels of New Angeles But my love for Shapers isn’t all about click efficiency and R&D locks. The way I see it, Shapers are the least ambiguous “good guys” in the game. That may not be important to everyone, but I’m the kind of guy who plays Paladins the way they’re meant to be played, by giving my opponents a fair warning before launching a sneak attack and by raising my sword against evil demons on sight no matter how outmatched I am. So yeah, I like to play on the side of the angels, and not only are Shapers pure at heart, they’re happy to let you know about it with cards like Notoriety (Trace Amount, 26) and Net Celebrity that give them benefits when they take credit (as well as credits). Criminals are obviously just in it for the money. They want to get in quietly and get out quickly. So long as they’re making money from a broken system, they’ll never be interested in fixing it. Anarchs make a good show of rejecting the oppressive status quo. But they’ll always be too focused on breaking things apart to recognize the importance of building something new. 
But that’s what Shapers do. They fix things and they build things, and then they show off how awesome their things are. Sure, they can seem a bit conceited — and I’ve seen a lot of Shapers lose games because they were too busy building the perfect rig to stop the Corp from scoring agendas — but look at how affable they are!
- Kate “Mac” McCaffrey (Core Set, 33) is so busy tinkering with codes and chips that she doesn’t have time to make enemies. There’s a reason she graces the art and text of Public Sympathy (Cyber Exodus, 50).
- Chaos Theory (Cyber Exodus, 46) is best friends with a dinosaur-shaped AI, and if that doesn’t warm your heart, you’re broken inside.
- Meanwhile, The Professor (Creation and Control, 29) is that cool teacher who told you the terrible and hilarious things that revered historical figures really did with their time.
- Exile (Creation and Control, 30) appears to get his motivation from a picture of his lost love.
- Rielle “Kit” Peddler (Creation and Control, 28) is so open-minded that she’s prepared to give lines of code civil rights.
- Finally, as I see it, Nasir Meidan (Upstalk, 17) is like a future knight errant on an honest-to-g00ru mythical quest.
When an opponent flatlines my Anarch with a well-timed Scorched Earth (Core Set, 99), I congratulate him on a solid play. When someone destroys my Dinosaurus (Cyber Exodus, 48) with a sneaky Shattered Remains (First Contact, 50), I shed a single tear and swear to the Net that I can fix it, and if I can’t, I’ll build a new rig – better, stronger, faster. 
Thanks, Andrew! Are you one of those Runners who’s less interested in scoring a couple credits than chasing all the latest tech? Then you just might be a Shaper! On the other hand, if you’re not quite certain that Shapers are the Runners that resonate most with your play style, then you can check out El-ad David Amir’s guide to the Anarch faction and keep checking back as we look at the defining elements of the Criminals and the game’s Corp factions. After all, in Android: Netrunner, your faction’s personality isn’t just flavor, it’s a guide to how your deck may function. ... Source: Get What You Want, When You Want It (http://www.fantasyflightgames.com/edge_news.asp?eidn=5157)
Title: FFG:A Champion's Perspective: A Game of Thrones
Post by: RSSFeeder on 01 November 2014, 13:00:03
A Champion's Perspective: A Game of ThronesA Tournament Report by 2014 North American Champion Jonathan Andrews
As World Championship Weekend approaches, we will be posting articles each week with tips for players on how to prepare for their next large tournament. Whether you’re planning on attending Worlds or following along through our online coverage, these articles are a great insight into how some of the best players of your favorite game prepare for major tournaments.
Today, we are joined by 2014 A Game of Thrones: The Card Game North American Champion Jonathan Andrews. Jonathan shares how he prepared for the 2014 North American Championships and how important it is to prepare in a systematic manner. Jonathan Andrews on the 2014 North American Championship Since I covered my Gen Con experience in Alex Hynes and my Game of Thrones podcast, “Beyond The Wall” Episode 29, I thought I would do a little something different and talk about how I prepared for the event. For major events like Gen Con I like to test decks with one or two other people for two reasons; one, it’s hard to for me to playtest alone, and two, a second set of eyes is always great. However, this year I had a problem in that all my normal deck-building partners were not attending this illustrious event. I was a bit disappointed, but I eventually managed to coax Steven Simoni and Aaron Glazer to help me get ready for the event. Practice Like You Mean It  As we playtested, we discovered that Steven and I have very different play styles, which made it impossible for us to agree on a deck. After two months of playing various decks a few times each week, we were no closer to picking a deck for the event. As we playtested, we discovered that Steven and I have very different play styles, which made it impossible for us to agree on a deck. After two months of playing various decks a few times each week, we were no closer to picking a deck for the event.
This was not a wasted effort. In fact, I remember a study from the 1950's I researched for a paper which proved empirically the correlation between practice and performance. The study further determined that not only does the amount of practice affect performance, the quality of practice has an equal, if not greater, impact. How does this relate to playing A Game of Thrones: The Card Game? Players preparing for an A Game of Thrones tournament should practice with their decks using a tournament mindset if they want to perform to the best of their abilities. For example, focusing on every practice game as if it is taking place in a tournament will establish tournament habits in your overall play. This means that when preparing for a tournament, you should maintain a serious and competitive attitude. If you prepare for a tournament in a sloppy, unfocused way, those sloppy, unfocused habits will migrate into your tournament play. Perhaps not immediately—you will be able to focus on the first few games in a tournament—but as the day wears on you will be more inclined to slip into bad habits. It is okay to have a good time, but make sure you take your time and think your actions through just like you would in a tournament setting. This is what my playtest partners and I have always done. We treat all of our playtest games seriously, and we always try to make ‘the correct play.’ These winning habits are key to going far at Gen Con, or any other large tournament. The mental fatigue a player starts to experience in the later rounds is significant, and the more tired you are, the more you begin to operate on ‘autopilot.’ Practice is about programming this autopilot with good habits. Even with all my pre-Gen Con preparations, I experienced this mental fatigue and some poor play in my final game, but I believe that my earlier elimination games were won partially because of all the practice games I had played and all the good habits (i.e. winning habits) I established in those test games. To summarize, playing a ton of games against skilled players who were using the most competitive decks in the metagame was very good for me. Sharpening My Blade  All the practice did not, however, get me any closer to picking the perfect deck, and the tournament was only nine days away. So, I decided to step back and think a bit. I remembered one of the cardinal rules to deck building: all decks have limitations and no deck can do everything. The best you can hope for is to have a deck that is powerful and consistent. A deck does not have to handle every situation, it just needs to be able to beat the common decks you expect to see. All the practice did not, however, get me any closer to picking the perfect deck, and the tournament was only nine days away. So, I decided to step back and think a bit. I remembered one of the cardinal rules to deck building: all decks have limitations and no deck can do everything. The best you can hope for is to have a deck that is powerful and consistent. A deck does not have to handle every situation, it just needs to be able to beat the common decks you expect to see.
With this in mind, I chose to pull out an old Power Behind the Throne (Lions of the Rock, 48) deck that I had built previously and tweak it slightly. My minor tweaks included adding Daenerys Targaryen (Ancestral Home, 76) who could pair with the Game of Thrones (Lions of the Rock, 53) plot to destroy my opponent's board presence, and the addition of a second copy of some of the stronger characters already in the deck.  I decided to take the deck for a test run at a small tournament in Montreal. I chose the tournament because I believe that the Montreal meta is currently one of the most competitive groups in North America. The deck performed great at the tournament, going undefeated, and just like that, my choice for Gen Con was locked in. I decided to take the deck for a test run at a small tournament in Montreal. I chose the tournament because I believe that the Montreal meta is currently one of the most competitive groups in North America. The deck performed great at the tournament, going undefeated, and just like that, my choice for Gen Con was locked in.
With my changes, I believed the deck could beat Stark and Greyjoy easily, and I thought that these two houses would be over represented during the elimination rounds. Boy, was I wrong. Knowledge is a Weapon  Even though I had anticipated the meta incorrectly, all my playtesting gave me a great understanding of the best decks around and a good idea of what could beat them. For example, I knew that opening turn one with Fear of Winter (Beyond the Wall, 40) after kneeling some of my opponent’s key characters before plot choice with events would assure me victory early in Swiss rounds. During the elimination rounds, especially against Martell decks, I knew that a Fear of Winter opening could cause me issues since their Fury of the Sun (Ancient Enemies, 30) plot could be so devastating against my deck. Many of my opponents would also have an answer to Fear of Winter, such as Even though I had anticipated the meta incorrectly, all my playtesting gave me a great understanding of the best decks around and a good idea of what could beat them. For example, I knew that opening turn one with Fear of Winter (Beyond the Wall, 40) after kneeling some of my opponent’s key characters before plot choice with events would assure me victory early in Swiss rounds. During the elimination rounds, especially against Martell decks, I knew that a Fear of Winter opening could cause me issues since their Fury of the Sun (Ancient Enemies, 30) plot could be so devastating against my deck. Many of my opponents would also have an answer to Fear of Winter, such as
Forgotten Plans (Kings of the Storm, 50).
This knowledge allowed me to change my strategy each game and helped me win some games I would not have won otherwise. Thanks to this, I ended up going 10-1 in the Joust, losing only in the finals. With my 1st-place finish in the Melee the day before, I was lucky enough to win the Overall Championship and the chance to design a card! The 2014 World Championship Weekend is Approaching Thanks, Jonathan!
Jonathan took a methodical approach that anyone can replicate when preparing for a major tournament. The combination of quality time, good competition, and analysis is a tried and true approach that can lead to great results.
Check back next week to hear stories from our Star Wars™: The Card Game and X-Wing™ North American Champions. Be sure to tune in to our coverage of the 2014 World Championship Weekend starting Thursday, Nov 6th, as players from around the world battle for prizes, fame, and the right to design a card in their favorite game! ... Source: A Champion's Perspective: A Game of Thrones (http://www.fantasyflightgames.com/edge_news.asp?eidn=5159)
Title: FFG:LCG (R) State of the Union
Post by: RSSFeeder on 01 November 2014, 21:30:04
LCG (R) State of the UnionJoin Us Wednesday, November 5th for a Look at the Direction of Our LCGs
In 2008, Fantasy Flight Games launched the Living Card Game® (LCG) format with A Game of Thrones: The Card Game, followed shortly thereafter by Call of Cthulhu: The Card Game. The decision to introduce this new format did not come without challenges. It took us some time to really hit our stride and learn how best to publish the new format, and it took some time for players to embrace it. Every month, though, sales increased, and the format continued to grow. Fast forward to 2014. The LCG format is bigger and more successful than ever. It has grown to include several other games, including the innovative, co-operative LCG, The Lord of the Rings, and our newest LCG, Warhammer 40,000: Conquest. From humble beginnings, the LCG category has grown to become one of the most important that we have. 
Looking Ahead Now that the 2014 FFG World Championship Weekend is upon us, and because it features so many of the LCGs that have made this category so successful, we thought it would be a great time to give you an update on where your favorite LCGs are at and where they are going. Registration and badge pick up for the World Championship Weekend starts at 4 PM on Wednesday, November 5th. Attendees who have registered and picked up their badges are invited to join us at 6 PM on Wednesday to hear our LCG State of the Union address and participate in the Q&A that follows. We will also be posting the information on our website following the address. Thank you for your support for the LCG category over the past six years, and we look forward to the next sixty! ... Source: LCG (R) State of the Union (http://www.fantasyflightgames.com/edge_news.asp?eidn=5160)
Title: FFG:LCG (R) State of the Union
Post by: RSSFeeder on 02 November 2014, 06:00:03
LCG (R) State of the UnionJoin Us Wednesday, November 5th for a Look at the Direction of Our LCGs
In 2008, Fantasy Flight Games launched the Living Card Game® (LCG) format with A Game of Thrones: The Card Game, followed shortly thereafter by Call of Cthulhu: The Card Game. The decision to introduce this new format did not come without challenges. It took us some time to really hit our stride and learn how best to publish the new format, and it took some time for players to embrace it. Every month, though, sales increased, and the format continued to grow. Fast forward to 2014. The LCG format is bigger and more successful than ever. It has grown to include several other games, including the innovative, co-operative LCG, The Lord of the Rings, and our newest LCG, Warhammer 40,000: Conquest. From humble beginnings, the LCG category has grown to become one of the most important that we have.
Looking Ahead Now that the 2014 FFG World Championship Weekend is upon us, and because it features so many of the LCGs that have made this category so successful, we thought it would be a great time to give you an update on where your favorite LCGs are at and where they are going. Registration and badge pick up for the World Championship Weekend starts at 4 PM on Wednesday, November 5th. Attendees who have registered and picked up their badges are invited to join us at 6 PM on Wednesday to hear our LCG State of the Union address and participate in the Q&A that follows. We will also be posting the information on our website following the address. Thank you for your support for the LCG category over the past six years, and we look forward to the next sixty! ... Source: LCG (R) State of the Union (http://www.fantasyflightgames.com/edge_news.asp?eidn=5161)
Title: FFG:LCG (R) State of the Union
Post by: RSSFeeder on 02 November 2014, 14:30:03
LCG (R) State of the UnionJoin Us Wednesday, November 5th for a Look at the Direction of Our LCGs
In 2008, Fantasy Flight Games launched the Living Card Game® (LCG) format with A Game of Thrones: The Card Game, followed shortly thereafter by Call of Cthulhu: The Card Game. The decision to introduce this new format did not come without challenges. It took us some time to really hit our stride and learn how best to publish the new format, and it took some time for players to embrace it. Every month, though, sales increased, and the format continued to grow. Fast forward to 2014. The LCG format is bigger and more successful than ever. It has grown to include several other games, including the innovative, co-operative LCG, The Lord of the Rings, and our newest LCG, Warhammer 40,000: Conquest. From humble beginnings, the LCG category has grown to become one of most important that we have.
Looking Ahead Now that the 2014 FFG World Championship Weekend is upon us, and because it features so many of the LCGs that have made this category so successful, we thought it would be a great time to give you an update on where your favorite LCGs are at and where they are going. Registration and badge pick up for the World Championship Weekend starts at 4 PM on Wednesday, November 5th. Attendees who have registered and picked up their badges are invited to join us at 6 PM on Wednesday to hear our LCG State of the Union address and participate in the Q&A that follows. We will also be posting the information on our website following the address. Thank you for your support for the LCG category over the past six years, and we look forward to the next sixty! ... Source: LCG (R) State of the Union (http://www.fantasyflightgames.com/edge_news.asp?eidn=5163)
Title: FFG:Darkness Over the Land
Post by: RSSFeeder on 02 November 2014, 23:00:03
Darkness Over the LandPreview Monsters and Foul Fate in The Witcher Adventure Game
“Only Evil and Greater Evil exist and beyond them, in the shadows, lurks True Evil. True Evil, Geralt, is something you can barely imagine, even if you believe nothing can still surprise you. And sometimes True Evil seizes you by the throat and demands that you choose between it and another, slightly lesser, Evil.”
–Andrzej Sapkowski, The Last Wish Enter a world of unlimited adventure in The Witcher Adventure Game! You and up to three other players take on the roles of iconic heroes from the Witcher series, each attempting to gain renown by completing quests and defeating any foe that dares stand in your way. In our first preview, we examined how you move across the Continent, investigating strange occurrences, and gaining leads from your travels. We also explored the various quests that can you may take on, whether freeing an air genie from its servitude or battling a ravenous pack of wolves.
Of course, the world of The Witcher is filled with peril. Today, we examine both the monsters and the foul fate that may plague you in your adventures. Legendary Battles Monsters from other spheres fill the Continent, preying on the innocent and offering a challenge to heroes everywhere. Your adventures across the world of The Witcher will undoubtedly bring you into close contact with a number of terrifying creatures. Fortunately, you have the combat prowess and the skills necessary to vanquish these creatures and safeguard the realm. 
In this game, monsters belong to three classes of increasing difficulty: bronze, silver, and gold. No matter which class a monster belongs to, it can pose a deadly threat to heroes that face it without the proper preparation. To vanquish a monster requires a degree of skill with arms, but you must also consider how you will survive the fight without taking too many wounds. You fight monsters by rolling three battle dice alongside your hero dice. These dice generate swords, shields, and other results that you may then use in conjunction with special abilities from your development cards to battle a monster, destroying the creature and safeguarding you from harm! We’ll take a closer look at each hero’s development deck and the powerful effects within in a future preview. Most monsters bear two numbers: a sword stat that determines how many swords you must roll to destroy the monster, and a shield stat that shows how many shields you must roll to escape the fight unscathed. For example, the kikimore, a silver monster, has a sword stat of four and a shield stat of two. It also has a text box that determines the consequences of your fight, based on your success. 
For example, Geralt may face a kikimore in battle at the end of his turn. He rolls the three battle dice alongside his three hero dice and obtains the results shown above: four swords, one shield, and one ritual. The ritual result has no effect in this battle, but four swords is equal to the kikimore’s sword stat, so Geralt defeats the monster in pitched battle, slaying it and ridding the land of a dangerous creature. Geralt resolves the kikimore’s successful sword effect, claiming one victory point. If Geralt had failed to roll swords equal or greater than the kikimore’s sword stat, the kikimore would have remained in the region to be battles by another hero in the future. Although Geralt slew the deadly kikimore successfully, he did not escape unscathed. He rolled only one shield, which is less than the kikimore’s shield stat of two. Geralt must resolve the kikimore’s failed shield effect, taking one wound for each shield he is short, forcing him to suffer one wound, which he places over one of his actions, preventing him from using that action until the wound is healed. Finally, because Geralt’s sword results equaled the monster’s sword stat, the monster is placed on the bottom of the silver monster stack. Battles can occur in nearly any circumstance. You may be called upon to fight for your life as part of resolving a quest, in addition to gathering the necessary proofs. Alternatively, you may be forced to fight when your investigations turn sour. No matter where you travel in the realm, your combat skills are sure to prove essential to your success and survival. A Fate Most Foul Not every obstacle that befalls you in your adventures is a monster ravening for your blood. You’ll also encounter foul fate tokens across the regions of the Northern Kingdoms, which can bring any number of dangerous events into your journey. When you encounter a foul fate token, you must discard it and draw a foul fate card, resolving the effects on the card. You may encounter Bandits on the open road, or run afoul of Dijkstra’s Henchmen. You might even suffer the ill effects of The Plague or Poison! 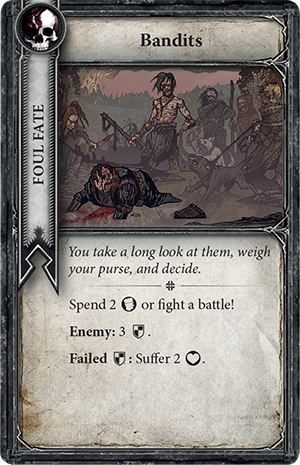 
Foul fate may catch up with you at almost any point in your adventure. Travel across the Continent is dangerous at the best of times, and a long journey only exacerbates these perils. If you choose to move along two routes with a single travel action, you must draw a foul fate card after you move, forcing you to face the consequences of your quick movement. Careful travelers may avoid foul fate cards by moving only one route per travel action, but they find themselves falling behind in the race to influence the outcome of events in the Northern Kingdoms. You may also be forced to take a foul fate token from a variety of effects, including quests, investigation cards, and monsters. When this happens, you must place a foul fate token beside one of the actions on your hero sheet. The next time you choose to execute that action, you remove the foul fate token and draw a foul fate card, resolving its ill effects before you have the chance to complete your action. Face Your Fears The world of The Witcher holds countless adventures and beneficial encounters, but it is also full of unfathomable danger. No matter where you travel, you cannot escape the monsters and foul fate tokens that plague the Northern Kingdoms. Muster your will and prepare to battle against the darkness in The Witcher Adventure Game.
Join us in our next preview to watch a video overview of gameplay and learn the secrets of the realm by downloading the rulebooks! ... Source: Darkness Over the Land (http://www.fantasyflightgames.com/edge_news.asp?eidn=5167)
Title: FFG:The Border War Grows Darker
Post by: RSSFeeder on 03 November 2014, 07:30:04
The Border War Grows DarkerNightmare Decks for The Lord of the Rings: Heirs of Numenor Are Now Available
“He brought tidings of Ithilien and of movements of the Enemy and his allies; and he told of the fight on the road when the men of Harad and their great beast were overthrown: a captain reporting to his master such matters as had often been heard before, small things of border-war that now seemed useless and petty, shorn of their renown.”
–J.R.R. Tolkien, The Return of the King The realm of Gondor presses hard against the Enemy’s western border. From the tallest walls of Minas Tirith, the Men of Gondor who cast their gaze eastward can very nearly see the Dark Lord gathering his strength in the land of Mordor. Gondor and its stalwart Men are the first defense against the Shadow. They are the shield wall that protects all the Free Peoples of Middle-earth, yet as the Enemy’s armies swell with Orcs and Southrons, treason threatens the very heart of Gondor… Now available via FFG’s in-house manufacturing, Heirs of Númenor Nightmare Decks is a single set of three twenty-card Nightmare Decks that allow you to revisit each of the three scenarios from the Heirs of Númenor deluxe expansion for The Lord of the Rings: The Card Game, except in Nightmare Mode, the stakes are greater, the evils stronger, and the treachery runs even deeper. 
Lead Developer Matt Newman on Heirs of Númenor Nightmare Decks Grab your swords and shields, and head to the realm of Gondor… It’s time for the Heirs of Númenor Nightmare Decks! We’ve been hard at work on these new Nightmare Decks, and I am very excited to preview some of the new cards and challenges players will face in these updated Heirs of Númenor scenarios. As always, each of these Nightmare Decks brings its scenario greater challenges, a slightly tweaked strategy, and a renewed focus on the scenario’s atmosphere and themes. Peril in PelargirPeril in Pelargir assaults players right off the bat with a swarm of Brigand enemies, tasked with stealing Alcaron’s Scroll (Heirs of Númenor, 19), the scenario’s centerpiece. Our heroes start with the scroll and must protect it throughout the scenario from the thieves and brigands who seek to steal it for their own nefarious purposes. However, in the original version of this quest, we only need to hold onto the scroll at critical moments, such as to defeat stages two and three. In fact, holding onto the scroll for longer than one round often proved fatal!  The Nightmare version of Peril in Pelargir further explores this theme, reinforcing the importance of the scroll and heightening the tension as the heroes seek to prevent its theft, by adding a new loss condition, which is introduced on the new setup card (Peril in Pelargir Nightmare Deck, 1). First of all, it has two Forced effects: The Nightmare version of Peril in Pelargir further explores this theme, reinforcing the importance of the scroll and heightening the tension as the heroes seek to prevent its theft, by adding a new loss condition, which is introduced on the new setup card (Peril in Pelargir Nightmare Deck, 1). First of all, it has two Forced effects:
“Forced: At the end of the combat phase, if Alcaron’s Scroll is in the staging area, attach it to the enemy in play with the highest [Defense Strength]. “Forced: At the beginning of the refresh phase, if Alcaron’s Scroll is attached to an enemy, place 1 progress on that enemy.” These effects allow the many Brigands that are attacking our heroes to actually accomplish their goal: They can grab the scroll if it is not attached to a hero. This forces the players to defeat that enemy in order to progress. Meanwhile, for each turn that an enemy holds onto the scroll, it gets a progress token. This represents the enemy fleeing from the heroes and escaping their grasp. Finally, the setup card introduces a loss condition should any enemy slip off with the scroll: “If at any point there are 3 or more progress tokens on an enemy, that enemy has escaped with the scroll, and the players lose the game.” In Nightmare Mode, once an enemy takes the scroll, the situation becomes truly desperate, and players must race to defeat that enemy and reclaim the scroll. Should they wait, they risk defeat. Many of the new encounter cards in the nightmare deck add to this tension and explore the concept of a tug-of-war between the players and the encounter deck. Alcaron’s Scroll will be at the center of attention, as our heroes must struggle to reclaim the scroll every time it is stolen from their grasp. When a Harbor Brute (Peril in Pelargir Nightmare Deck, 3) is revealed from the encounter deck, other Brigands will hand him the scroll to defend, as he is much tougher to defeat than his comrades. You must also be quick to recover the scroll once it has been stolen, because cards like They’re Getting Away! (Peril in Pelargir Nightmare Deck, 9) can cause defeat much quicker than you’d expect. Into IthilienThe Nightmare version of Into Ithilien explores the battle and siege keywords first introduced in Heirs of Númenor and alters the dynamic between the quest’s fork in the road at stages two and three. Into Ithilien introduces us to Celador (Heirs of Númenor, 25), one of Faramir’s Rangers ambushing the vicious men of Harad. It is difficult to keep this Ranger alive as wargs and Haradrim constantly assault your party, but if Celador survives stage one, the players are rewarded with the opportunity to proceed directly to stage three. Otherwise, if Celador falls, the players must go to the punishing second stage. However, since stage three does not have the battle or siege keywords, whereas all the other quest stages have one or the other, many players found it easier to craft a deck specifically to defeat battle or siege quests, and they would allow poor Celador to perish so that they would never have to worry about Willpower. Accordingly, the Into Ithilien Nightmare Deck does more than reinforces the quest’s themes; it includes punishing cards that are even worse when the current quest has the battle or siege keyword, such as the Haradrim Marksman (Into Ithilien Nightmare Deck, 3), who changes drastically from one stage to another. Savage Fray (Into Ithilien Nightmare Deck, 9) makes your questing even more unpredictable by shifting the tides of the conflict from battle to siege, or siege to battle.  
If you are unfortunate enough to lose Celador and be forced to advance to stage two, you’ll also face the wrath of one of Harad’s dreaded Mûmak Elite (Into Ithilien Nightmare Deck, 2). For these reasons and more, you will find yourself wanting to safeguard Celador as much as possible, so the Ranger can guide you through Ithilien’s hidden paths and help you avoid the most brutal enemies in the Southron army. The Siege of Cair AndrosThis difficult quest introduced players to three Battlegrounds, locations under attack by Orcs and Haradrim which must be protected at all costs. If you could explore these Battleground locations before they took damage equal to their quest points, you would be rewarded with the removal of one of the quests’s five quest stages. As the enemy’s armies surrounded your heroes and assaulted them on all sides, you were forced with difficult decisions, including the need to make sacrifices to keep these Battlegrounds – or your heroes – alive.  The Nightmare version of The Siege of Cair Andros adds more Battleground locations to the encounter deck, all of which have effects that punish the players if they are destroyed by the enemy. This helps keep the quest tense and difficult even after the scenario’s original three Battleground locations are explored or destroyed, and it keeps each of the encounter deck’s enemies relevant throughout the entire quest. When locations like the Besieged Courtyard (The Siege of Cair Andros Nightmare Deck, 5) and Anduin Wharf (The Siege of Cair Andros Nightmare Deck, 7) are in play, each decision you make can mean the difference between victory and defeat. You may wish to take the archery damage from a Southron Mounted Archer (The Siege of Cair Andros Nightmare Deck, 2) on one of these locations instead of your battered and weary heroes… But how much damage will you risk taking on the locations you are sworn to defend? The Nightmare version of The Siege of Cair Andros adds more Battleground locations to the encounter deck, all of which have effects that punish the players if they are destroyed by the enemy. This helps keep the quest tense and difficult even after the scenario’s original three Battleground locations are explored or destroyed, and it keeps each of the encounter deck’s enemies relevant throughout the entire quest. When locations like the Besieged Courtyard (The Siege of Cair Andros Nightmare Deck, 5) and Anduin Wharf (The Siege of Cair Andros Nightmare Deck, 7) are in play, each decision you make can mean the difference between victory and defeat. You may wish to take the archery damage from a Southron Mounted Archer (The Siege of Cair Andros Nightmare Deck, 2) on one of these locations instead of your battered and weary heroes… But how much damage will you risk taking on the locations you are sworn to defend?
As always, we strive to make each Nightmare encounter more thematic and engaging, in addition to increasing its difficulty. I hope you enjoy the new challenges and twists that the Heirs of Númenor Nightmare Decks offer. Good luck. Gondor is counting on your aid! Alámenë! Stand Against the Nameless Enemy “The Nameless Enemy has arisen again. Smoke rises once more from Orodruin that we call Mount Doom. The power of the Black Land grows and we are hard beset.”
–Boromir, The Fellowship of the Ring In 2012, the Heirs of Númenor deluxe expansion first allowed fans of The Lord of the Rings: The Card Game to explore the lands of Gondor and stand fast against the Shadow of Mordor. Since then, the Shadow has grown in strength, and Gondor is once again in need of heroes. Will you be able to withstand the nightmarish forces the Dark Lord has now assembled? Heirs of Númenor Nightmare Decks are now available! ... Source: The Border War Grows Darker (http://www.fantasyflightgames.com/edge_news.asp?eidn=5168)
Title: FFG:The Border War Grows Darker
Post by: RSSFeeder on 03 November 2014, 16:00:03
The Border War Grows DarkerNightmare Decks for The Lord of the Rings: Heirs of Numenor Are Now Available
“He brought tidings of Ithilien and of movements of the Enemy and his allies; and he told of the fight on the road when the men of Harad and their great beast were overthrown: a captain reporting to his master such matters as had often been heard before, small things of border-war that now seemed useless and petty, shorn of their renown.”
–J.R.R. Tolkien, The Return of the King The realm of Gondor presses hard against the Enemy’s western border. From the tallest walls of Minas Tirith, the Men of Gondor who cast their gaze eastward can very nearly see the Dark Lord gathering his strength in the land of Mordor. Gondor and its stalwart Men are the first defense against the Shadow. They are the shield wall that protects all the Free Peoples of Middle-earth, yet as the Enemy’s armies swell with Orcs and Southrons, treason threatens the very heart of Gondor… Now available via FFG’s in-house manufacturing, Heirs of Númenor Nightmare Decks is a single set of three twenty-card Nightmare Decks that allow you to revisit each of the three scenarios from the Heirs of Númenor deluxe expansion for The Lord of the Rings: The Card Game, except in Nightmare Mode, the stakes are greater, the evils stronger, and the treachery runs even deeper.
Lead Developer Matt Newman on Heirs of Númenor Nightmare Decks Grab your swords and shields, and head to the realm of Gondor… It’s time for the Heirs of Númenor Nightmare Decks! We’ve been hard at work on these new Nightmare Decks, and I am very excited to preview some of the new cards and challenges players will face in these updated Heirs of Númenor scenarios. As always, each of these Nightmare Decks brings its scenario greater challenges, a slightly tweaked strategy, and a renewed focus on the scenario’s atmosphere and themes. Peril in Pelargir Peril in Pelargir assaults players right off the bat with a swarm of Brigand enemies, tasked with stealing Alcaron’s Scroll (Heirs of Númenor, 19), the scenario’s centerpiece. Our heroes start with the scroll and must protect it throughout the scenario from the thieves and brigands who seek to steal it for their own nefarious purposes. However, in the original version of this quest, we only need to hold onto the scroll at critical moments, such as to defeat stages two and three. In fact, holding onto the scroll for longer than one round often proved fatal! The Nightmare version of Peril in Pelargir further explores this theme, reinforcing the importance of the scroll and heightening the tension as the heroes seek to prevent its theft, by adding a new loss condition, which is introduced on the new setup card (Peril in Pelargir Nightmare Deck, 1). First of all, it has two Forced effects: “Forced: At the end of the combat phase, if Alcaron’s Scroll is in the staging area, attach it to the enemy in play with the highest [Defense Strength]. “Forced: At the beginning of the refresh phase, if Alcaron’s Scroll is attached to an enemy, place 1 progress on that enemy.” These effects allow the many Brigands that are attacking our heroes to actually accomplish their goal: They can grab the scroll if it is not attached to a hero. This forces the players to defeat that enemy in order to progress. Meanwhile, for each turn that an enemy holds onto the scroll, it gets a progress token. This represents the enemy fleeing from the heroes and escaping their grasp. Finally, the setup card introduces a loss condition should any enemy slip off with the scroll: “If at any point there are 3 or more progress tokens on an enemy, that enemy has escaped with the scroll, and the players lose the game.” In Nightmare Mode, once an enemy takes the scroll, the situation becomes truly desperate, and players must race to defeat that enemy and reclaim the scroll. Should they wait, they risk defeat. Many of the new encounter cards in the nightmare deck add to this tension and explore the concept of a tug-of-war between the players and the encounter deck. Alcaron’s Scroll will be at the center of attention, as our heroes must struggle to reclaim the scroll every time it is stolen from their grasp. When a Harbor Brute (Peril in Pelargir Nightmare Deck, 3) is revealed from the encounter deck, other Brigands will hand him the scroll to defend, as he is much tougher to defeat than his comrades. You must also be quick to recover the scroll once it has been stolen, because cards like They’re Getting Away! (Peril in Pelargir Nightmare Deck, 9) can cause defeat much quicker than you’d expect. Into Ithilien The Nightmare version of Into Ithilien explores the battle and siege keywords first introduced in Heirs of Númenor and alters the dynamic between the quest’s fork in the road at stages two and three. Into Ithilien introduces us to Celador (Heirs of Númenor, 25), one of Faramir’s Rangers ambushing the vicious men of Harad. It is difficult to keep this Ranger alive as wargs and Haradrim constantly assault your party, but if Celador survives stage one, the players are rewarded with the opportunity to proceed directly to stage three. Otherwise, if Celador falls, the players must go to the punishing second stage. However, since stage three does not have the battle or siege keywords, whereas all the other quest stages have one or the other, many players found it easier to craft a deck specifically to defeat battle or siege quests, and they would allow poor Celador to perish so that they would never have to worry about Willpower. Accordingly, the Into Ithilien Nightmare Deck does more than reinforces the quest’s themes; it includes punishing cards that are even worse when the current quest has the battle or siege keyword, such as the Haradrim Marksman (Into Ithilien Nightmare Deck, 3), who changes drastically from one stage to another. Savage Fray (Into Ithilien Nightmare Deck, 9) makes your questing even more unpredictable by shifting the tides of the conflict from battle to siege, or siege to battle.
If you are unfortunate enough to lose Celador and be forced to advance to stage two, you’ll also face the wrath of one of Harad’s dreaded Mûmak Elite (Into Ithilien Nightmare Deck, 2). For these reasons and more, you will find yourself wanting to safeguard Celador as much as possible, so the Ranger can guide you through Ithilien’s hidden paths and help you avoid the most brutal enemies in the Southron army. The Siege of Cair Andros This difficult quest introduced players to three Battlegrounds, locations under attack by Orcs and Haradrim which must be protected at all costs. If you could explore these Battleground locations before they took damage equal to their quest points, you would be rewarded with the removal of one of the quests’s five quest stages. As the enemy’s armies surrounded your heroes and assaulted them on all sides, you were forced with difficult decisions, including the need to make sacrifices to keep these Battlegrounds – or your heroes – alive. The Nightmare version of The Siege of Cair Andros adds more Battleground locations to the encounter deck, all of which have effects that punish the players if they are destroyed by the enemy. This helps keep the quest tense and difficult even after the scenario’s original three Battleground locations are explored or destroyed, and it keeps each of the encounter deck’s enemies relevant throughout the entire quest. When locations like the Besieged Courtyard (The Siege of Cair Andros Nightmare Deck, 5) and Anduin Wharf (The Siege of Cair Andros Nightmare Deck, 7) are in play, each decision you make can mean the difference between victory and defeat. You may wish to take the archery damage from a Southron Mounted Archer (The Siege of Cair Andros Nightmare Deck, 2) on one of these locations instead of your battered and weary heroes… But how much damage will you risk taking on the locations you are sworn to defend? As always, we strive to make each Nightmare encounter more thematic and engaging, in addition to increasing its difficulty. I hope you enjoy the new challenges and twists that the Heirs of Númenor Nightmare Decks offer. Good luck. Gondor is counting on your aid! Alámenë! Stand Against the Nameless Enemy “The Nameless Enemy has arisen again. Smoke rises once more from Orodruin that we call Mount Doom. The power of the Black Land grows and we are hard beset.”
–Boromir, The Fellowship of the Ring In 2012, the Heirs of Númenor deluxe expansion first allowed fans of The Lord of the Rings: The Card Game to explore the lands of Gondor and stand fast against the Shadow of Mordor. Since then, the Shadow has grown in strength, and Gondor is once again in need of heroes. Will you be able to withstand the nightmarish forces the Dark Lord has now assembled? Heirs of Númenor Nightmare Decks are now available! ... Source: The Border War Grows Darker (http://www.fantasyflightgames.com/edge_news.asp?eidn=5169)
Title: FFG:A 2014 World Championship Weekend Update
Post by: RSSFeeder on 04 November 2014, 00:30:03
A 2014 World Championship Weekend UpdateInformation for Those Attending or Viewing the Events
The 2014 World Championship Weekend is almost here, and it is set to smash old attendance records, with more players preregistered this year than the total number of attendees last year. This year will be an event to remember, filled with passionate players, hard-fought games, laughter, and exciting and exclusive prizes. In addition, representatives from Gen Con will be attending the event and handing out additional giveaways. It all starts Wednesday night with an LCG® State of the Union address. Live Coverage The official Fantasy Flight Games Twitch stream will be active throughout the event, covering games in each of our Championships all day, every day. This year, FFG is taking another large step toward providing fans at home the best event coverage possible; we will have live commentating for every match we show on camera! During breaks between matches, we will have exciting announcements, interviews, and more.    
Each day, viewers can tune into the FFG Twitch channel to see live streaming of their favorite games, including the Finals for every Championship. Almost all matches will be shown in their entirety, allowing viewers to see how a game plays out from start to finish. The crew from Team Covenant will also be joining FFG staff for commentating, interviews, and more. In particular, viewers will want to make sure to tune in Thursday at 12:45pm and 17:30pm CST (Central Standard Time) for important discussions. Event and Tournament Registration Preregistration for World Championship Weekend has closed. Even though space is limited, players can still register onsite starting on Wednesday, Nov. 5th, at 4 pm CST (Central Standard Time). The cost to register onsite is $50. Due to the high volume of players who have preregistered, if the number of players registering onsite would push registration beyond what our fire code allows, we may have to turn away players. All players must register for the tournaments they are participating in an hour before it starts. Tournament registration closes fifteen minutes before each tournament starts. Receiving a badge onsite or answering the survey sent to those who preregistered does not automatically enter you into a tournament. X-Wing™ players who have reserved a spot in one of the X-Wing World Championship Flights must still register for the tournament and bring two squad lists. Side Events Due to the unprecedented number of players attending World Championship Weekend, we will be holding some side events on Thursday, Friday, and Saturday in an auxiliary space one block away from the Fantasy Flight Games Center. This space is an easy 5-10 minute walk from the Games Center, and we will have a shuttle van running between the two locations all three days. All World Championships will remain in the Games Center. 
The auxiliary space is located at 1975 Oakcrest Ave, Roseville, MN 55113
The side event schedule has been updated to represent which games will be located in the auxiliary space. An Event to Remember The 2014 World Championship Weekend will be an event to remember. With a record-setting number of players set to attend, countless events, streaming live coverage with commentators, and no end of prizes, attendees and viewers alike are sure to have a blast. Don’t forget! For those attending, it all kicks off the night of Wednesday, Nov. 5th, with the LCG State of the Union address. For those watching, streaming begins bright and early Thursday, Nov. 6th, with matches of X-Wing Flight One. ... Source: A 2014 World Championship Weekend Update (http://www.fantasyflightgames.com/edge_news.asp?eidn=5170)
Title: FFG:The Galaxy's Most Wanted, Part Two
Post by: RSSFeeder on 04 November 2014, 09:00:03
The Galaxy's Most Wanted, Part TwoA Preview of the Most Wanted Expansion Pack for X-Wing (TM)
“Bounty hunters? We don’t need that scum.”
–Admiral Piett As it turns out, Admiral Piett was wrong about the bounty hunters. The Empire did, in fact, need them, and it was Boba Fett, the most notorious of all bounty hunters, who ultimately located the Millennium Falcon and led Darth Vader to Cloud City, Han Solo, Chewbacca, and Princess Leia. For argument’s sake, though, what might have happened had the Empire not recruited Boba Fett? There’s no shortage of work for talented bounty hunters in the Star Wars galaxy, and there’s no doubt that Boba Fett ranks among the deadliest and most talented of them all. If the Empire hadn’t offered Fett a reward for locating the Falcon, he may have taken different work with a Hutt or with the Black Sun crime syndicate. This is one of the theoretical situations presented by the upcoming Most Wanted Expansion Pack for X-Wing™. With its twenty ship cards, Most Wanted allows you to jump start your own Scum and Villainy faction, partially by calling upon the services of Boba Fett, the galaxy’s most fearsome bounty hunter. In our last preview of Most Wanted, we looked at how the expansion reinvents the Y-wing and Z-95 Headhunter for use within the Scum faction. Not only does the expansion come with one Y-wing miniature and two Z-95 Headhunter miniatures, all given Scum-themed paint schemes, it introduces four new unique pilots for them and a host of upgrades that completely explode pre-existing player expectations for these starfighters and provide them new personalities. Today, we continue our exploration of the Most Wanted Expansion Pack and how its ship cards and upgrades allow you to repurpose several previously released ships as the foundation for your new Scum fleet.
Most Wanted and the Firespray-31 Originally released in the second wave of X-Wing starship expansions, the Firespray-31 has a long and storied history of service to the Empire, but we’ve still only seen a fraction of what the starship brings to the game. In Most Wanted, we find the starship rejuvenated by its induction into the Scum faction, along with a couple of its unique pilots, who are given all-new abilities. We also find a couple of new pilots who help to reinforce the idea that the Firespray-31, like any starship, isn’t just a machine, it’s a nexus of tactical possibilities. Boba FettWithout a doubt, Boba Fett is the most renowned and most feared of all the pilots in the Most Wanted Expansion Pack. He’s clever. He’s resourceful. His ship is loaded with potent weaponry. And whenever there’s a bounty worthy of his attention, he delivers. Of course, much of Boba Fett’s success owes to the ways that he adapts to the task put before him. In the Scum faction, Fett is every bit as task-oriented as he is in the Star Wars saga: “When attacking or defending, you may reroll 1 of your dice for each enemy ship at Range 1.” Whereas the Imperial-aligned Boba Fett can adjust his maneuvers on the fly in order to better track his prey, the Scum faction Fett takes to the battlefield to defend his employers’ interests. They don’t care if he can avoid enemy firing arcs; they want him to eliminate enemy ships as fast as possible. So that’s what he’s going to do. Rather than rely upon all the arc-dodging tricks the Imperial Fett might employ, the Scum faction version of Boba Fett is going to spend as much time as possible at Range 1 of his foes, where combat is deadliest and where his ability gives him a distinct advantage, simultaneously increasing the accuracy of his attacks and his chances of avoiding retaliatory strikes. Meanwhile, it’s worth noting that while the galaxy’s most notorious bounty hunter is bound to see all manner of upgrades, two bear particular attention. Since his Firespray-31 already features solid attack and defense, Outmaneuver is a natural complement to Fett’s pilot ability, allowing him to strip away his opponent’s defenses, and a Recon Specialist ensures that you’ll be able to make use of your results on both offense and defense. Kath Scarlet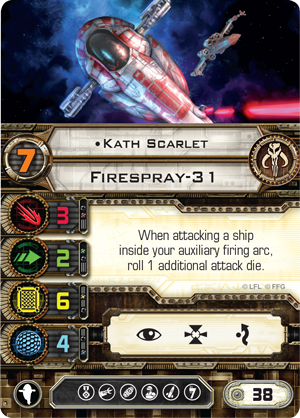 Like Boba Fett, Kath Scarlet gains a new pilot ability as she joins the Scum faction, one geared less toward gaining tactical advantages during combat and more directly geared toward dealing damage. Like Boba Fett, Kath Scarlet gains a new pilot ability as she joins the Scum faction, one geared less toward gaining tactical advantages during combat and more directly geared toward dealing damage.
“When attacking a ship inside your auxiliary firing arc, roll 1 additional attack die.” As potent as it is, Kath Scarlet’s ability is likely more interesting because it promotes a different sort of flying. Most pilots want to do two things as they fly: get out of their enemies’ firing arcs and catch their enemies within their own firing arcs. Ideally, they’ll manage to flank their targets, get behind them, and trail them at a short distance, anticipating their movements as best as possible. Even if you’re facing a squad with turret weapons, weapons with rear arcs, or “Hot Shot” Blasters, getting into position behind your foes still increases your odds that you’ll keep your foes in your sights in subsequent rounds. Kath Scarlet, on the other hand, wants to overshoot her foes in an opening joust and then weave around the battlefield, performing a series of low-speed maneuvers and hard turns that her foes won’t likely expect. She may even adjust these maneuvers by outfitting her ship with an Engine Upgrade. In some situations, she may even perform a calculated Koiogran-turn that places her right in front of her opponent’s ship. While this maneuver would be suicidal in most traditional circumstances, Kath Scarlet has a high enough pilot skill value that she’ll often fire before her foe, and her Scum employers may be willing to pay enough for her to bring an Outlaw Tech aboard her ship so that she can gain a focus token even as she loses the opportunity to perform an action. Emon Azzameen Emon Azzameen, the third of the unique Firespray-31 pilots from Most Wanted, also reflects the Scum faction’s aggressive tendencies. His ability, partnered with that of the Title card for his signature vessel, the Andrasta, makes him arguably the game’s most impactful bomber. Whenever Emon Azzameen drops a bomb, he can use the straight “3” template or either “3” turn template instead of the straight “1” template. Of course, as this is an optional ability, he can still use the straight “1” template if he so desires. This means that his bombs threaten roughly three times as much space as those dropped by other pilots, and that makes it harder for his foes to fly in such a way as to remain safe from them, especially if their pilot skill values are lower than Emon Azzameen’s pilot skill of “6.” Against squads with lower pilot skill values, Emon Azzameen can drop his bombs with unparalleled precision, not just in locations that allow them to score one or two points of damage, but in locations that they may wreak havoc on entire squads. 
A pair of X-wing pilots maneuver carefully in order to remain outside the standard blast radius of Emon Azzameen’s Seismic Charges.

Here, we see how Emon Azzameen’s ability allows him to defy your opponent’s expectations. The X-wing pilots who thought they were safe now suddenly find themselves within the blast radius of Emon Azzameen’s Seismic Charges. He can catch one of the X-wings by dropping his bomb along the straight “3” template, or he can catch both X-wings by using a “3” turn template.
Moreover, since Emon Azzameen’s Andrasta can equip as many as three different bombs, he doesn’t have to worry about whether or not his current chance to drop a bomb is the one, singular, best opportunity that he’ll have in the game. If Emon Azzameen sees the opportunity to bomb his opponents, he takes it. Then, if another, better opportunity comes along, he doesn’t have to regret his first bomb; he can just drop a second. As often as not, your opponent’s likely to run out of hull before a fully loaded Andrasta is going to run out of bombs. Mandalorian Mercenary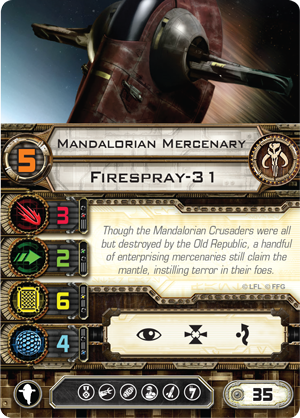 The final Firespray-31 pilot from Most Wanted is the non-unique Mandalorian Mercenary, but if you were to suggest that a non-unique pilot without a unique pilot ability couldn’t help reinforce the faction’s distinctive, aggressive, self-centered approach to the starship, you would be wrong. The final Firespray-31 pilot from Most Wanted is the non-unique Mandalorian Mercenary, but if you were to suggest that a non-unique pilot without a unique pilot ability couldn’t help reinforce the faction’s distinctive, aggressive, self-centered approach to the starship, you would be wrong.
At thirty-five squad points the Mandalorian Mercenary costs two more than the Empire’s Bounty Hunter. For the additional two squad points, the Mandalorian Mercenary offers you two additional points of pilot skill, as well as the elite pilot talent and illicit upgrades. We’ve already seen a wide range of the different tricks that illicit upgrades can bring to the table, and the different advantages that elite pilot talents offer are as numerous as the talents themselves. The trade-off, of course, is that you can’t fly three Firespray-31s in a Scum squad. Whereas dirty tricks are the province of the galaxy’s Scum and Villainy, it’s tremendously difficult to improve upon the Empire’s mechanical efficiencies. The result is that since you’re forced to pay extra for even your most basic Scum Firespray-31, you’re more likely to bring the ship into your squad in order to take advantage of its elite pilots and their talents, or to take advantage of some devious combination of elite pilot talents and illicit upgrades. Scum pilots are less likely to fly a stock Firespray-31; they want to make sure they have multiple tricks on hand. A Support Ship No Longer In X-Wing, the HWK-290 has long played the role of “support ship,” incorporated into Rebel squads for its pilots’ abilities to pass focus tokens, boost other pilots’ pilot skills, and add dice to other ships’ attacks. Additionally, the ship’s limited maneuverability, weak primary attack, and ability to wield a turret weapon almost always dictate that it wields an Ion Cannon Turret, attacking to ionize enemy ships and set them up for kill shots made by X-wings, B-wings, or other more potent attackers. Whenever you see a HWK-290 in a Rebel squad, you can safely bet that it will be flying within “Range 1–3” of its wingmates, because everything that the ship does, it does most effectively while flying within that range of the rest of its squad. 
A 360-degree view of the miniature from the HWK-290 Expansion Pack
The ship’s role will soon change, though, with the release of the Most Wanted Expansion Pack. In Scum fleets, the HWK-290 is no support ship. Its maneuver dial, hull, shields, agility value, and attack value may remain completely unchanged, but its personality receives a radical overhaul. As with most Scum pilots, the expansion’s three unique HWK-290 pilots are every bit as self-serving and self-interested as they are talented. They don’t boost their teammates; they disrupt their rivals. They prey upon them. Moreover, the ship no longer needs to fly within Range 1–3 of its own squad; instead, the ship’s three unique pilots all feature unique abilities that trigger off of proximity to enemy forces. One wants to fly within Range 1–3 of his enemies, while the other two want to fly within Range 1–2 of theirs. Dace Bonearm At twenty-three squad points, Dace Bonearm is the most expensive and, also, the most lethal of the Scum faction’s HWK-290 pilots: “When an enemy ship at Range 1–3 receives at least 1 ion token, if you are not stressed, you may receive 1 stress token to cause that ship to suffer 1 damage.” In many respects, Ion Cannon Turrets are among the best weapons in the game; they can fire in any direction, they attack with three dice, and when they ionize ships, they strip away their maneuverability. The one real downside of the Ion Cannon Turret, however, is that it can only deal a single point of damage – that is, unless you are Dace Bonearm. So long as he remains unstressed within Range 1–3 of an enemy ship, Dace can help you pile on the damage whenever you ionize it. He does this after the Ion Cannon Turret’s text resolves to reduce its initial damage, and he does it without requiring any additional rolls. Palob Godalhi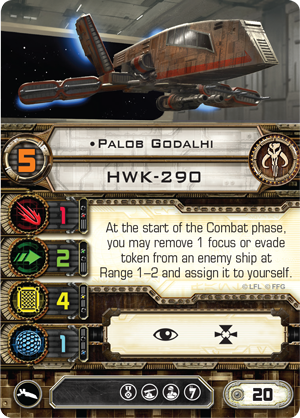 Palob Godalhi is another Scum pilot your foes would be wise to avoid. Whenever he can get within Range 1–2 of an enemy ship, he can steal an evade or focus token from it at the beginning of the Combat phase. Palob Godalhi is another Scum pilot your foes would be wise to avoid. Whenever he can get within Range 1–2 of an enemy ship, he can steal an evade or focus token from it at the beginning of the Combat phase.
This is an ability that is bound to have a massive impact. Most of the time, Palob Godalhi’s ability will serve him at least as well as Push the Limit would, allowing him to perform attacks modified by both target lock and focus tokens. After all, the focus action is the game’s most ubiquitous and, arguably, its most efficient. So if Palob Godalhi flies within Range 1–2 of a number of foes, there’s a very good chance, he can find a focus token on one of them, meaning that he need only perform the target lock action to end up with both tokens. At the same time, the fact that Palob Godalhi can bolster his attacks by stripping a focus token from an enemy means that that enemy is denied a good portion of the defenses it had intended to use to survive Palob Godalhi’s attack in the first place. However, as much as Palob Godalhi’s ability can create some really nasty swings in action efficiency, it is likely to make its greatest impact in another, entirely different fashion – by disrupting your opponent’s intended tactics. While you have Palob Godalhi threatening to steal focus and evade tokens from your opponent’s ships, you’re tempting your opponent to do one of two things (or a combination of both): Either your opponent will select maneuvers he hopes will get his ships outside of Range 1–2 from Palob Godalhi, or he’ll avoid performing focus and evade actions. X-Wing is largely about advantageous positioning, so if your opponent starts selecting suboptimal maneuvers just to avoid Palob Godalhi, that’s a win, and it’s your job to capitalize upon it. Meanwhile, there are only two types of defensive tokens. Evade tokens allow you to cancel one hit or critical hit result; focus tokens allow you to count all of your results as  results, greatly increasing your chances of avoiding hits and surviving multiple attacks. If your opponent stops performing these actions simply to prevent Palob Godalhi from stealing his tokens, then once again, you’ve won a serious advantage. results, greatly increasing your chances of avoiding hits and surviving multiple attacks. If your opponent stops performing these actions simply to prevent Palob Godalhi from stealing his tokens, then once again, you’ve won a serious advantage. Torkhil Mux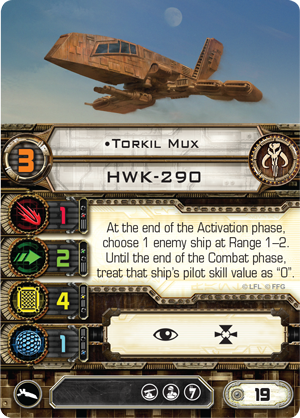 The last of the unique HWK-290 pilots from Most Wanted is Torkhil Mux, and his ability offers yet another reason that the Scum faction is soon bound to shake up the X-Wing metagame. The last of the unique HWK-290 pilots from Most Wanted is Torkhil Mux, and his ability offers yet another reason that the Scum faction is soon bound to shake up the X-Wing metagame.
As 2013 World Champion Paul Heaver notes in his most recent “Turn Zero” article, any points you spend in your squad build toward pilot skill are always implicitly part of a “bid” to fire first and perform your actions with greater knowledge of what your opponent intends to do in the round. Points spent toward pilot skill don’t directly increase the amount of damage your ship can deal, nor do they directly increase its defenses. Thus, the ideal pilot skill is one higher than your opponent’s, a point at which you maximize the impact of winning pilot skill but minimize the number of squad points it costs you to win the bid. When we combine this knowledge with the fact that the game’s unique TIE phantom pilots have pushed winning pilot skill bids toward the extremes of “10” and “11,” we see that Torkhil Mux enters the game as a sort of wild card, throwing the whole bidding process into disarray. When you have Torkhil Mux on the table, all those squad points your opponent just invested into pilot skill are greatly devalued. At just twenty-four squad points, Torkhil Mux can wield an Ion Cannon Turret to ignore your opponent’s arc dodging, and then he can lower an opponent’s pilot skill value to “0” to ensure that pilot fires last… if at all. Unleash Your Aggressive Instincts Altogether, the unique pilots and upgrades that you’ll find in the Most Wanted Expansion Pack are bound to transform the Firespray-31 and HWK-290 into much more aggressive starships within the Scum faction than they are within the Empire and Rebellion. Moreover, when you combine them with the expansion’s other new pilots and upgrades, you get the single greatest infusion of new tactical options and possibilities since the Core Set. There’s no question that Most Wanted is going to help you launch your Scum fleet at full speed; the only question is what set of pilots and tactics you’ll choose to employ. In the meantime, you can share your thoughts about these pilots and upgrades in our community forums, and you can keep an eye to our website for more X-Wing news and announcements. In the coming weeks, we’ll continue to look at the Scum faction, its ships, and its distinctive personality within your X-Wing battles, resuming our Wave VI previews with a look at the StarViper Expansion Pack! ... Source: The Galaxy's Most Wanted, Part Two (http://www.fantasyflightgames.com/edge_news.asp?eidn=5171)
Title: FFG:The Treason of Saruman
Post by: RSSFeeder on 04 November 2014, 17:30:03
The Treason of SarumanAnnouncing a New Saga Expansion for The Lord of the Rings: The Card Game
“Nothing that we have endured of late has seemed so grievous as the treason of Isengard. Even reckoned as a lord and captain Saruman has grown very strong. He threatens the Men of Rohan and draws off their help from Minas Tirith, even as the main blow is approaching from the East.”
–Gandalf, The Two Towers The Fellowship is broken. Of the Nine Walkers that set forth from Rivendell, two have fallen, two have been captured, and two have disappeared, including Frodo Baggins, the Ring-bearer, on whom rest all the hopes of Middle-earth. Still, three remain, three who draw breath and can still draw arms. Led by Aragorn, son of Arathorn, the rightful heir of Gondor, they must do what good they can, even if they must do it without hope… Fantasy Flight Games is proud to announce the upcoming release of The Treason of Saruman, the third The Lord of the Rings Saga Expansion for The Lord of the Rings: The Card Game! With its 165 new cards, The Treason of Saruman introduces three new scenarios that allow you and your friends to immerse yourselves in key events pulled straight from the pages of the first half of The Two Towers. Join Aragorn and the Three Hunters as they pursue a pack of Uruk-hai across the plains. Take up arms against the forces of Isengard at the defense of Helm’s Deep. Steel your will against Saruman and his wizardry as you join the march on Orthanc. Throughout your trials, you’ll visit iconic locations, confront infamous villains, and enjoy game experiences shaped by innovative new mechanics that bring you as close as you can get to the drama of the classic fantasy epic without finding your name in its pages. 
Meanwhile, even though each of the three scenarios in The Treason of Saruman presents a unique and rewarding set of challenges, you can also play them in Campaign Mode, combining them with the scenarios from The Black Riders and The Road Darkens as the three latest chapters in an epic narrative designed to carry you from the Shire to the fires of Mount Doom. In Campaign Mode, every decision you make has far-reaching consequences, and you can earn boons and burdens that stay with you from adventure to adventure. The Treason of Saruman introduces six new boons and five new burdens. A New Leader for Your Fractured Fellowship “Let me think!” said Aragorn. “And now may I make a right choice, and change the evil fate of this unhappy day!” He stood silent for a moment. “I will follow the Orcs,” he said at last.
–J.R.R. Tolkien, The Two Towers The events of The Treason of Saruman take place after the disappearance of Frodo Baggins and The One Ring. Accordingly, the Saga Expansion introduces a new hero to lead the way, a Fellowship sphere version of Aragorn (The Treason of Saruman, 1). 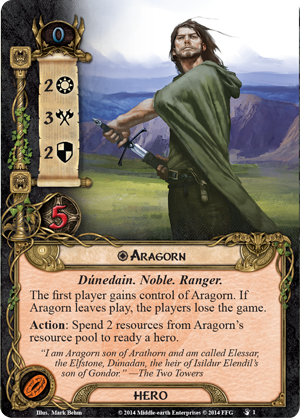 The pivotal character from the first half of The Two Towers, Aragorn takes the lead throughout the expansion’s three scenarios. Like Bilbo Baggins in the two Hobbit Saga Expansions and Frodo Baggins in The Black Riders and The Road Darkens, Aragorn passes along with the first player and must survive in order for you to overcome the forces of Mordor and of Isengard. Unlike the two Hobbits, however, Aragorn is a powerful Dúnedain and Ranger, able both to hold his own in battle and to inspire others. The question that emerges, then, is how much you’ll risk making use of Aragorn’s talents in order to press through the dangers that assail you. The pivotal character from the first half of The Two Towers, Aragorn takes the lead throughout the expansion’s three scenarios. Like Bilbo Baggins in the two Hobbit Saga Expansions and Frodo Baggins in The Black Riders and The Road Darkens, Aragorn passes along with the first player and must survive in order for you to overcome the forces of Mordor and of Isengard. Unlike the two Hobbits, however, Aragorn is a powerful Dúnedain and Ranger, able both to hold his own in battle and to inspire others. The question that emerges, then, is how much you’ll risk making use of Aragorn’s talents in order to press through the dangers that assail you.
Equipped with the Andúril boon from The Road Darkens (The Road Darkens, 14), Aragorn makes an excellent defender, but whenever he defends, one nasty Shadow effect can spell disaster. You risk everything. Even should you face your enemies with more caution, Aragorn’s special ability may help you stand against overwhelming odds: “Action: Spend 2 resources from Aragorn’s resource pool to ready a hero.” In The Treason of Saruman, you may have to do without hope, you may have to do without knowledge of The One Ring and its whereabouts, and you may even have to do without those companions who have fallen along the way. But you will not have to do without guidance. Instead, Aragorn, the son of Arathorn and heir of Isildur, emerges as a peerless leader, one who truly inspires those around him. The Forces of Isengard “The world changes, and all that once was strong now proves unsure. How shall any tower withstand such numbers and such reckless hate? Had I known that the strength of Isengard was grown so great, maybe I should not so rashly have ridden forth to meet it.”
–Théoden, The Two Towers Of course, even a leader so noble as Aragorn is no match for Saruman and all the armies and wizardry he has secretly assembled within the towering walls of Isengard. You will need every hero and every ally you can assemble in order to confront the Uruk-hai, Dunlendings, and enchantments commanded by the former head of the White Council. Though he doesn’t make a personal appearance until the expansion’s third scenario, Saruman’s influence underscores each and every encounter. His Uruk-hai are tough and brutal warriors, he has manipulated the wild men of Dunland toward new heights of fervor and hatred, and he has blanketed the lands within Isengard with powerful enchantments. Saruman’s hands guide each of the three scenarios in The Treason of Saruman, and together they present a vivid picture of just how devious and varied an Istari’s machinations can be. Each presents a new, scenario-specific mechanic that ensures it offers a unique and thematic experience, unlike anything that has come before it.
 In The Uruk-hai, the expansion’s first scenario, you and your friends chase the band of Uruk-hai that is marching your captive friends across the plains of Rohan; as you race to place progress on the scenario’s quest stages, the Uruk-hai push forward to raise the scenario’s “pursuit” value. If the pursuit value ever reaches thirty, the Uruk-hai have successfully taken their prisoners to Isengard, and you lose the scenario. In The Uruk-hai, the expansion’s first scenario, you and your friends chase the band of Uruk-hai that is marching your captive friends across the plains of Rohan; as you race to place progress on the scenario’s quest stages, the Uruk-hai push forward to raise the scenario’s “pursuit” value. If the pursuit value ever reaches thirty, the Uruk-hai have successfully taken their prisoners to Isengard, and you lose the scenario.
- In Helm’s Deep, your heroes and the encounter deck exchange roles! While your heroes join the defense of Helm’s Deep, the scenario’s enemies and its treachery cards lay siege to the quest and any active location.
- Finally, in The Road to Isengard, your heroes march against Saruman himself (The Treason of Saruman, 47), but he’ll test their resolve at every turn. His realm is protected by powerful spells, and his voice can bend the mind. Accordingly, The Road to Isengard adds a third loss condition. Not only do you lose if your threat level reaches fifty or all your heroes are eliminated; you also lose if your hand is reduced to zero cards. And, of course, Saruman has prepared plenty of evil spells to punish those who draw cards and resist his lures.
A Long Road, and Much to Do “We must do without hope,” he said. “At least we may yet be avenged. Let us gird ourselves and weep no more! Come! We have a long road, and much to do.”
–J.R.R. Tolkien, The Fellowship of the Ring The Fellowship has fractured, but there is no time for despair. Instead, you must join Aragorn and the remaining members of the Fellowship for an epic journey through the realms of Rohan and Isengard. You’ll need every bit of help you can get, so The Treason of Saruman introduces thirty-nine new player cards (six new boons and three copies each of eleven different cards) and three renowned heroes, including the Fellowship sphere version of Aragorn. The Treason of Saruman is scheduled to arrive at retailers in the first quarter of 2015. Until then, you can visit its description page for more information and keep your eyes open for additional previews of The Treason of Saruman, its challenges, and its player cards! ... Source: The Treason of Saruman (http://www.fantasyflightgames.com/edge_news.asp?eidn=5172)
Title: FFG:The Threat Beyond
Post by: RSSFeeder on 05 November 2014, 02:00:06
The Threat BeyondAnnouncing the Fifth War Pack in the Warlord Cycle
“My purpose is to destroy the daemonic, and if I must rise to command an entire sector to do so, then so be it.”
–Torquemada Coteaz Fantasy Flight Games is proud to announce The Threat Beyond, the fifth War Pack in the Warlord cycle for Warhammer 40,000: Conquest! As the Warlord cycle approaches its epic conclusion, The Threat Beyond invites you to take on the mantle of an Imperial Inquisitor and exercise the power of the Inquisition with a new warlord for the Astra Militarum. Nowhere is truly safe in the darkness of the far future, but more than most leaders, Torquemada Coteaz has carved out a region of relative stability among the stars. His eternal watchfulness and unflagging zeal have exterminated countless heresies. Now, he turns his gaze to the Traxis sector, eager to bring the order of the Imperium to this newly discovered space. 
The power of the Inquisition stands against dark heresies throughout the Traxis sector, but new cards for every faction also continue the cycle’s main themes, granting more significance to your warlords and how you to choose to use them every turn. With this War Pack, you can fight alongside the Salamanders legion of Space Marines, lead a vicious attack with the Orks, or turn to the excess of Slaanesh with the Chaos faction. The Wargear of the Dark Eldar is yours to command, as are the deadly wraithknights of the Eldar, or the grenadiers of the Tau. Every faction gains new cards as they struggle to conquer the Traxis sector. The Fury of the Righteous  With the introduction of The Threat Beyond, Torquemada Coteaz (The Threat Beyond, 89) offers you a number of distinct advantages, breaking away from standards set by other warlords and forging his own path to victory. Torquemada Coteaz allows you to start the game with both eight cards and eight resources, whereas most other warlords provide seven of each. This extra advantage may seem small, but the options that it brings you can easily shape the entire game. Torquemada Coteaz also bears eight HP on his hale side, more than any other warlord. With the introduction of The Threat Beyond, Torquemada Coteaz (The Threat Beyond, 89) offers you a number of distinct advantages, breaking away from standards set by other warlords and forging his own path to victory. Torquemada Coteaz allows you to start the game with both eight cards and eight resources, whereas most other warlords provide seven of each. This extra advantage may seem small, but the options that it brings you can easily shape the entire game. Torquemada Coteaz also bears eight HP on his hale side, more than any other warlord.
These bonuses come at a cost, however: Torquemada Coteaz has an ATK of zero. Even here, however, Torquemada Coteaz’s resourcefulness can increase his prowess in battle. He bears a Combat Action that reads, “Sacrifice a unit at this planet to give this warlord +3 ATK for its next attack this phase. (Limit once per attack.)” By drawing upon the nigh-limitless manpower of the Astra Militarum, including token units like the Guardsman, Torquemada Coteaz can easily strike for more damage than any other warlord. The units in Torquemada Coteaz’s signature squad live to serve him in battle and enhance his power. The signature squad includes four copies of Coteaz’s Henchmen (The Threat Beyond, 90). This unit can engage in battle on its own, but perhaps its most useful purpose is to support Torquemada Coteaz. Coteaz’s Henchmen has an Interrupt that allows you to ready your warlord when this unit leaves play. Because of this, you can attack with Coteaz’s Henchmen and then sacrifice the Henchmen to ready Coteaz and boost his attack, allowing him to rain the fury of the Inquisition down on his foes.  Expendable Guardsman token units may be ideally suited to fuel Torquemada Coteaz, but they may not always be present when you need to boost Torquemada Coteaz’s attack. Thankfully, that’s where some of the other cards in the signature squad come in. You’ll gain access to a new support, the Formosan Black Ship (The Threat Beyond, 91), which allows you to put two Guardsman token units into play when you sacrifice a non-token unit, giving you more fodder to fling at the enemies of the Imperium. Expendable Guardsman token units may be ideally suited to fuel Torquemada Coteaz, but they may not always be present when you need to boost Torquemada Coteaz’s attack. Thankfully, that’s where some of the other cards in the signature squad come in. You’ll gain access to a new support, the Formosan Black Ship (The Threat Beyond, 91), which allows you to put two Guardsman token units into play when you sacrifice a non-token unit, giving you more fodder to fling at the enemies of the Imperium.
You may also choose to use The Emperor Protects (The Threat Beyond, 93) to save your sacrificed units. By playing this free event when one of your units leaves play from your warlord’s planet, you can return that unit to your hand instead, allowing you to redeploy the unit and continue the onslaught of Torquemada Coteaz and the Astra Militarum. The final card in the signature squad is The Glovodan Eagle (The Threat Beyond, 92). This card is an attachment that can only be attached to your warlord, giving him a permanently raised ATK. Obviously, this can be crucial for giving Torquemada a means to attack even when you don’t have units to sacrifice. However, you can also detach this attachment from your warlord, causing it to become a unit with one ATK and one HP, allowing you to deal more damage after your opponent’s units are exhausted. Then, you can sacrifice it to boost Torquemada Coteaz’s damage. Alternatively, you can take an Action to return this unit to your hand, allowing you to redeploy it next round or use it as a shield card to block up to three damage. The Glovodan Eagle offers an unprecedented amount of versatility, allowing you to command the forces of the Astra Militarum in the best possible way. Confront the Threat Darkness stirs among the stars and planets of the Traxis sector, and only the vigilance of the Inquisition can root out corruption and bring this new sector into the fold of the Imperium. Confront the darkest servants of Chaos in The Threat Beyond and stand triumphant with Torquemada Coteaz! Look for The Threat Beyond at your local retailer in the first quarter of 2015! ... Source: The Threat Beyond (http://www.fantasyflightgames.com/edge_news.asp?eidn=5173)
Title: FFG:Command the Empire
Post by: RSSFeeder on 05 November 2014, 10:30:03
Command the EmpirePreview the Forces of the Empire in Imperial Assault
“Your friends, up there on the sanctuary moon, are walking into a trap, as is your Rebel fleet. It was I who allowed the Alliance to know the location of the shield generator. It is quite safe from your pitiful little band. An entire legion of my best troops awaits them.”
–Emperor Palpatine, Star Wars: Return of the Jedi Take command of highly-trained Stormtroopers and fearless Rebels in Imperial Assault, an upcoming board game of tactical combat and Star Wars adventure for two to five players! Two complete games are available within Imperial Assault: a skirmish game and a campaign game. In the skirmish game, you and your opponent muster custom forces and clash in a head-to-head battle over conflicting objectives. The campaign game, on the other hand, offers you the chance to join an expansive narrative, playing a series of missions that form an overarching story. Whether you play a campaign or a skirmish, Imperial Assault allows you to battle alongside iconic heroes and terrifying villains.
In past previews, we’ve examined the heroes you can play throughout the campaign. Today, however, we turn our attention to just some of the units available to the Galactic Empire: armored Stormtroopers, assault walkers, and even the Dark Lord of the Sith, Darth Vader. Command Your Squads  One of the most ubiquitous signs of Imperial might across the galaxy is the grim white visage of a Stormtrooper. Rebel operatives everywhere have learned to fear the presence of a Stormtrooper – where there’s one, there’s always another. One of the most ubiquitous signs of Imperial might across the galaxy is the grim white visage of a Stormtrooper. Rebel operatives everywhere have learned to fear the presence of a Stormtrooper – where there’s one, there’s always another.
As the Imperial player in the campaign game, you must foil the Rebels and achieve your own mission objectives. Countless squads of Stormtroopers provide you with some of the warriors you need to achieve this goal. Vital information about your Stormtroopers is shown on their Deployment card, shown to the right. At the bottom of the card, you’ll find the Stormtrooper’s listed Health, Speed, Defense, and Attack, and on the upper left-hand side of the card, the number of bars illustrates how many figures make up a Stormtrooper squad: three, in this case. The Deployment card also lists any special abilities that the squad possesses, as well as any surge abilities that can be triggered during combat.
Stormtroopers possess two surge abilities: they can spend a surge in combat to deal an extra damage or gain two additional accuracy. What’s more, all Stormtroopers possess the Squad Training ability. Whenever a Stormtrooper attacks while adjacent to another friendly Trooper, it can reroll an attack die, maximizing your attacks while you keep your Troopers in formation. Even among Stormtroopers, some squads are more experienced or better trained. As you battle to defeat the Rebel scum, you can call upon elite Stormtroopers, which use a different Deployment card. These Stormtroopers feature more Health than traditional Stormtroopers, and their surge abilities are more potent. Elite Stormtroopers still bear the Squad Training ability, but they gain the Last Stand ability, which allows them to become Focused when another Stormtrooper is defeated. To balance these increased abilities, elite Stormtroopers have an increased threat cost, shown in the upper left-hand corner of their Deployment card. We’ll examine threat and the Imperial player’s other tools in greater depth in our next preview. Capable commanders empower your Stormtroopers and the other soldiers of the Galactic Empire to reach greater heights of effectiveness in any mission. You can bring added control to your armies with the help of the Imperial Officer. Imperial Officers have a variety of surge abilities, granting additional damage, accuracy, or the Focused condition to themselves. The Imperial Officer’s true potential, however, lies in the orders he delivers to other soldiers. Every Imperial Officer has the Order ability, which can be triggered as an action and allows a friendly figure within two spaces to perform a free move.  
Elite Imperial Officers take the control of your army to a new level. Aside from improved Health and surge abilities, elite Imperial Officers gain the Executive Order ability. This ability is identical to the standard Order ability, but the figure that you choose may move or attack. With Imperial Officers in your forces, you can coordinate and command your troops much more efficiently, maximizing the amount of damage that you bring to bear against the Rebel troops. Unstoppable Forces One of the Galactic Empire’s most common heavy weapons is the E-Web heavy repeating blaster, a weapon that compromises portability with high-output firepower. You gain access to this powerful weapon with the E-Web Engineer. This figure offers a punishing amount of attack dice, and the Assault ability allows it to perform multiple attacks during each activation. Under normal circumstances, the Imperial player’s figures perform only one attack per activation, but the E-Web Engineer transcends that rule. 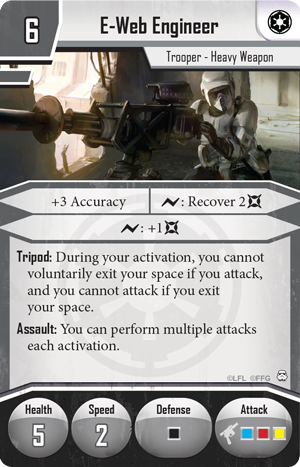 
The E-Web Engineer’s other abilities can prove crucial in a firefight. His surges can be spent to gain additional damage or to recover damage, and the elite E-Web Engineer adds an extra block to all defense rolls and three additional accuracy to any attack. Unfortunately, the E-Web Engineer also has the Tripod ability, which restricts its options for using actions: the E-Web Engineer can either move or attack on a single turn, but not both. The Galactic Empire’s All Terrain Scout Transport, or AT-ST, is another massive heavy weapon that swells the Imperial arsenal. This assault walker offers unparalleled firepower and nigh-impregnable armor, as well as the ability to pierce enemy blocks and spread blast damage onto figures adjacent to its targets. This vehicle even has an on-board Targeting Computer, allowing it to reroll one attack die on each attack. 
An AT-ST is a truly formidable power, but its size brings both benefits and disadvantages. AT-STs have the Massive keyword, which allows them to ignore the restrictions of difficult or impassible terrain. They are unable to enter interior spaces during the campaign, however, and the Awkward ability prevents them from attacking adjacent figures. Maneuvering an AT-ST to produce the most consistent amount of firepower is a full job, even for adept tacticians. 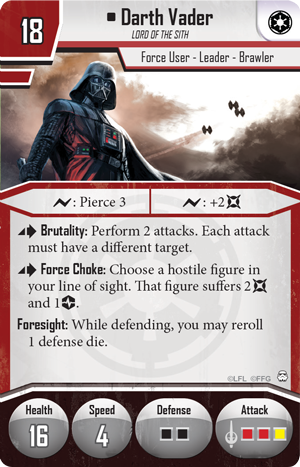 AT-STs are a terrifying presence on the battlefield, but any Rebel would prefer a pair of these walkers to the arrival of Darth Vader himself. In battle, Darth Vader is perhaps the most fearsome foe to ever oppose the heroes of the Rebellion. His skill with a Lightsaber allows his attacks to cleave through flesh and armor alike, causing deadly amounts of damage. Darth Vader’s abilities make him even more dangerous. Brutality allows him to perform two attacks with a single action, threatening two different figures at once. AT-STs are a terrifying presence on the battlefield, but any Rebel would prefer a pair of these walkers to the arrival of Darth Vader himself. In battle, Darth Vader is perhaps the most fearsome foe to ever oppose the heroes of the Rebellion. His skill with a Lightsaber allows his attacks to cleave through flesh and armor alike, causing deadly amounts of damage. Darth Vader’s abilities make him even more dangerous. Brutality allows him to perform two attacks with a single action, threatening two different figures at once.
As a master of the dark side, Darth Vader bears the Force Choke ability, which allows him to force a figure in his line of sight to suffer two damage and one strain. Because this ability doesn’t count as an attack, Darth Vader has the chance to perform up to two attacks with Brutality and still use Force Choke, enabling him to mow down squads of Rebel soldiers with ease. If any warrior is foolish enough to attack Darth Vader, he’ll quickly find a nigh insurmountable challenge. Darth Vader rolls two black defense dice when defending, and his Foresight ability allows him to reroll one of these dice. With a combination of fearsome attacks and stalwart defenses, Darth Vader is more than a match for any Rebel he may face. Lead the Galactic Empire Imperial Assault gives you the chance to command the fearless soldiers, devastating vehicles, and iconic villains of the Galactic Empire. The heroes of the Rebellion may attempt to infiltrate your bases or sabotage your operations, but with the unlimited power of the Empire at your back, you can crush the insignificant Rebels before their mission even begins. There are even more units available to the Galactic Empire in Imperial Assault, including the Emperor’s Royal Guard and mechanical Probe Droids, which will be revealed elsewhere. Soon, we’ll look at the Mercenary units that join the soldiers of the Empire in battle, but next week, we’ll look at the Imperial player’s powers throughout the campaign, including summoning reinforcements with threat, gaining Agenda cards, and purchasing new Class cards. Pre-order Imperial Assault at your local retailer today! ... Source: Command the Empire (http://www.fantasyflightgames.com/edge_news.asp?eidn=5174)
Title: FFG:A Champion's Perspective: Star Wars (TM) LCG
Post by: RSSFeeder on 05 November 2014, 19:00:04
A Champion's Perspective: Star Wars (TM) LCGA Tournament Report by 2014 North American Champion Jonathan Herr
As 2014 World Championship Weekend looms on the horizon, we continue our series of Gen Con wrap-up articles with 2014 Star Wars™: The Card Game North American Champion Jonathan Herr’s explanation of his group’s detailed preparation and how it led the way to him becoming Champion. If you plan on attending a major tournament, such as Nationals or Worlds, Jonathan’s experience provides valuable advice and can help you improve your results. Preparation is Key Approaching a big tournament like the North American Championships at Gen Con or the World Championships at the FFG Event Center can be a daunting task. While many focus on the playing aspect, that’s really only a small fraction of what is needed to place well. The main key to success is in deck development, metagame analysis, and practice. So much goes into planning and preparation that rather than provide a play-by-play tournament report, I wanted to discuss my approach to major tournament prep and how it contributed to my win at Gen Con. Testing Decks  As the final Force Packs prior to the tournament were released, it became clear even in our fun decks that the balance of power had shifted from last year’s tournaments. My playgroup had successfully run the Targeted Sith deck, featuring Darth Vader (Core Set, 35) and Emperor Palpatine (Core Set, 51) with TIE Attack Squadron (Core Set, 147), to good showings the previous Gen Con. (First place at the end of Swiss rounds for me, and Champion for my friend Matt Kohls.) However, with the release of Along the Gamor Run (Knowledge and Defense, 552), as well as May the Force Be With You (Join Us or Die, 567) and Ties of Blood (It Binds All Things, 589), the light side now had the edge over the dark side. As the final Force Packs prior to the tournament were released, it became clear even in our fun decks that the balance of power had shifted from last year’s tournaments. My playgroup had successfully run the Targeted Sith deck, featuring Darth Vader (Core Set, 35) and Emperor Palpatine (Core Set, 51) with TIE Attack Squadron (Core Set, 147), to good showings the previous Gen Con. (First place at the end of Swiss rounds for me, and Champion for my friend Matt Kohls.) However, with the release of Along the Gamor Run (Knowledge and Defense, 552), as well as May the Force Be With You (Join Us or Die, 567) and Ties of Blood (It Binds All Things, 589), the light side now had the edge over the dark side.
We quickly found three dominant light side decks: Deck 1 - 2x A Hero’s Journey (Core Set, 2)
- 2x The Secret of Yavin 4 (Core Set, 144)
- 2x Along the Gamor Run (Knowledge and Defense, 552)
- 2x May the Force Be With You (Join Us or Die, 567)
- 2x Ties of Blood (It Binds All Things, 589)
Deck 2 Deck 3 - 2x A Hero’s Journey (Core Set, 2)
- 2x Questionable Contacts (Core Set, 69)
- 2x Asteroid Sanctuary (Edge of Darkness, 331)
- 2x Along the Gamor Run (Knowledge and Defense, 552)
- 2x May the Force Be With You (Join Us or Die, 567)
These three decks won approximately 70-80% of the time against any dark side deck we threw at them. It quickly became clear that Along the Gamor Run (and likely May the Force Be With You) were going to be present in large numbers at the tournament. We then made a testing matrix that we call The Gauntlet, which took those three decks and tested them against countless dark side variations to get an idea of which dark side deck had the best shot at winning. If a dark side deck was not at least competitive against two of the three light side decks, we would eliminate it from consideration and move on. Of particular difficulty for the dark side was dealing with the swarm of small units that the light side decks could generate. Between Twi’lek Loyalist (Core Set, 15), Hired Hands (Knowledge and Defense, 554), Dagobah Nudj (Join Us or Die, 569), Ewok Companion (It Binds All Things, 591), and cost-reduced vehicles, it was not uncommon for the light side player to play three or more units the first turn. Our traditional dark side deck simply couldn’t keep up, so we had to go back to the drawing board. Final Decks  Although I don’t like to play Scum decks at tournaments due to the lack of consistent blast damage, the faction does offer a multitude of powerful, low-cost units. My playgroup began experimenting with The Tatooine Crash (Edge of Darkness, 380) and The Slave Trade (Knowledge and Defense, 562) to provide cheap units to match the light side player’s ability to drop multiple units first turn. Eventually, I settled on combining these two Scum objective sets with a traditional Sith base to provide the small units to help address the tempo of the current metagame and the unit control that fits my play style. Although I don’t like to play Scum decks at tournaments due to the lack of consistent blast damage, the faction does offer a multitude of powerful, low-cost units. My playgroup began experimenting with The Tatooine Crash (Edge of Darkness, 380) and The Slave Trade (Knowledge and Defense, 562) to provide cheap units to match the light side player’s ability to drop multiple units first turn. Eventually, I settled on combining these two Scum objective sets with a traditional Sith base to provide the small units to help address the tempo of the current metagame and the unit control that fits my play style.
Dark Side Affiliation: Scum & Villainy Objective Sets: Generally, this deck was winning approximately 40-50% of the time in our testing, which was enough to feel comfortable playing it at the tournament against a field of dominant light side decks. This deck was all about board presence. By including the maximum number of Jawa Scavengers (Edge of Darkness, 381) and Galactic Scum (Knowledge and Defense, 564), I could keep up with or even outpace the light side player’s steady stream of cheap units. The Fall of the Jedi and The Emperor’s Web are standard Sith staples and provide both strong units and strong control events including a full complement of Force Chokes (Core Set, 59) and Force Lightnings (Core Set, 60). With eight of the ten objective sets determined, I had only four additional resources, so I wanted to include Counsel of the Sith for the Twist of Fate (Core Set, 171) and the resources, but also wanted The Plan of the Prophetess for the Seeds of Decay (Lure of the Dark Side, 523) and Deadly Sight (Knowledge and Defense, 561). I settled on one copy of each. Given the balance of power in the current metagame, my strategy with the dark side was to simply hang on for as long as possible and slowly win via board presence with my cheap units and strong actions. Surprisingly, Zygerrian Slaver (Knowledge and Defense, 563) proved to be very important. Whenever he hit the board, I was able to clog my opponent’s hand with sub-optimal cards, both during my turn and my opponent’s turn, that I had captured at The Tatooine Crash while simultaneously strengthening my own hand. This also ensured that I won almost all subsequent edge battles and made Galactic Scum into an incredibly effective blocker. Light Side Affiliation: Smugglers & Spies Objective Sets: - 2x A Hero’s Journey (Core Set, 2)
- 2x The Secret of Yavin 4 (Core Set, 144)
- 2x Along the Gamor Run (Knowledge and Defense, 552)
- 2x May the Force Be With You (Join Us or Die, 567)
- 2x Ties of Blood (It Binds All Things, 589)
 This deck revolves around playing cost efficient, strong units and controlling the Force struggle. The objectives Along the Gamor Run and May the Force Be With You in particular allow the light side player to control the Force struggle while simultaneously allowing a more aggressive approach to attacking. Having four ways to play Yoda (Join Us or Die, 568) gives consistent access to one of the light side’s strongest units, and the Hired Hands, with their black blast and white tactics, function as both aggressive objective attackers and strong decoys to distract and lock down stronger units. By adding Ties of Blood to the deck, Leia Organa (It Binds All Things, 590) and Leia’s Command (It Binds All Things, 593) force your opponent to play differently. Often, the threat of Leia’s Command will tempt the dark side player to commit to an attack when they would have been better suited to building board presence or controlling the Force. If you can force the dark side player to attack on his turn, you can deplete his hand in edge battles and strip them of blockers by using the tactics icons on Leia, Yoda, and Hired Hands to lock down defending units. By adding Luke Skywalker (Core Set, 92) to the deck, you provide consistent objective damage as well as targeted strike and a perpetual defender. Rounding out the deck, The Secret of Yavin 4 provides great survivability with Guardian of Peace (Core Set, 109), Lightsaber Deflection (Core Set, 89), and C-3PO (Core Set, 21) to cancel any problematic actions. C-3PO can even be recurred with Hyperspace Marauder (Knowledge and Defense, 553) for extra use. North American Championship At the tournament, our testing really paid off. During Swiss rounds, my light side deck was undefeated and my dark side deck went 5-2, giving me a record good enough to be Swiss champion. During the double-elimination rounds, I knew that seeding would be very important due to the balance of power between light side and dark side. I definitely wanted to play light side as often as possible, and being the top seed, I figured I would be able to have my pick throughout the bracket. Unfortunately, one of my opponents was able to win with his dark side in an earlier round and forced me to play my dark side deck. I lost to him in a tough battle and dropped to the lower bracket. In the lower bracket, I ended up having to play the dark side often, but I was able to win multiple battles in a row to advance to the final match. Final Match Coming from the lower bracket, I had played the dark side more often, so I had to play the light side for the first game. This game was all about establishing board presence and protecting my units. The first turn, my opponent played Darth Vader, signaling I would have a hard time keeping units on the board with his reaction. I responded with a strong first turn with a Hired Hands, Yoda, and Dagobah Nudj. However, he was able to play Force Choke on subsequent turns to clear my board. We then spent several turns trying to establish board presence. He was able to wipe my board several times with Deadly Sight, Force Choke, and Vader’s reaction, but I was able to eventually stabilize with my flurry of low-cost units.  The turning point in the game came when I was able to pull off a timely Leia’s Command to destroy one objective and several of his units. I was then able to perform an alpha strike with all my units at one objective over subsequent turns to pull out the victory. Because I had Guardian of Peace and an Ewok Companion, I was able to shield my units that had black blast damage, ensuring my opponent couldn’t kill or focus down enough of them to prevent the objective from being destroyed even if he won the edge. The turning point in the game came when I was able to pull off a timely Leia’s Command to destroy one objective and several of his units. I was then able to perform an alpha strike with all my units at one objective over subsequent turns to pull out the victory. Because I had Guardian of Peace and an Ewok Companion, I was able to shield my units that had black blast damage, ensuring my opponent couldn’t kill or focus down enough of them to prevent the objective from being destroyed even if he won the edge.
In the second game, we switched sides and I was able to get a fast start playing Galactic Scum, Jawa Scavenger, and Sandcrawler (Edge of Darkness, 382). While not a great aggressive turn, it provided great defensive units to slow the game down. Matt was able to play a Kyle Katarn (Heroes and Legends, 497) first turn and Luke Skywalker second turn, putting some pressure on me, but a well-timed Force Choke with Darth Vader on the board was able to destroy Kyle before he could loop him with Heroes and Legends (Heroes and Legends, 496). I was then able to clear out his board and continue building defensive units to take control of the game. Zygerrian Slaver played an important role in this game, providing ample cards in hand for edge battles while clogging my opponent’s hand with sub-optimal cards to play. The combination of controlling his board while also messing with his hand proved to be too difficult a combination to overcome. Overall, I had a great time at the tournament, and even though the balance of power favored the light side, with extensive planning and testing, I was able to mitigate that advantage and maximize my chances for success. I look forward to seeing all of you at the World Championship! Tune In to Worlds Coverage Thanks, Jonathan! We hope to see you this weekend at the 2014 World Championship Weekend. It is shaping up to be the biggest event Fantasy Flight Games has ever hosted! If you can’t make it to the event, be sure to tune in to our coverage all weekend long on our Twitch stream or on Twitter. © and ™ Lucasfilm Ltd. ... Source: A Champion's Perspective: Star Wars (TM) LCG (http://www.fantasyflightgames.com/edge_news.asp?eidn=5175)
Title: FFG:A New Stage of Growth
Post by: RSSFeeder on 06 November 2014, 03:30:03
A New Stage of GrowthAnnouncing the New Rotation Policy for FFG's Competitive LCGs (R)
In 2008, Fantasy Flight Games made the bold decision to relaunch its customizable card games in the Living Card Game® (LCG) format. It was a decision we did not make lightly, nor did this decision come without risks. We saw too many players burn out on the blind-buy model shared by the many CCGs that were saturating the market. In order to ensure the continued health and stability of our games, we took the gamble and reintroduced A Game of Thrones and Call of Cthulhu as LCGs, even though we knew we risked alienating some fans of the collectible games. The decision, however, has been rewarded many times over. Our sales have increased, and players across the world have come to understand the format and appreciate its advantages. We have sometimes experienced growing pains; the only way to learn how best to publish a new category is to to publish it, and we have learned many lessons along the way. Since we introduced the category, we introduced a Restricted list for competitive play, and we moved away from our early 40-card monthly pack format. Now it is 2014, and the LCG format is bigger and more successful than ever. Our games continue to grow, and the category itself has grown to include several other games, including the revised classic Android: Netrunner and our newest LCG, Warhammer 40,000: Conquest. Indeed, from its humble beginnings, the LCG category has grown to become one of most important that we have. 
Addressing Upcoming Issues As pleased as we are with the LCG format, and as committed as we remain to it, we recognize that it presents an issue that we need to address. No customizable card game can sustain the unrestricted growth of its card pool over an indefinite period of time. Eventually, such growth works against a game’s continued health:
- An overwhelming card pool intimidates and turns away players who may otherwise be interested in the game.
- As a game's card pool grows unchecked, its metagame begins to stagnate, and the game falls apart under its own weight.
- Players aren’t the only people who are impacted by large card pools, and as retailers need to carry more and more products in order to support a game, it becomes harder for them to do so.
At this point, we are publishing five active, competitive LCGs, some of which have reached maturity, and others of which are growing steadily. As we look toward their futures, we are forced to consider the best ways to address the issues that come with their ever-expanding card pools. As much as these game have continued to grow and be successful, we see that their growth will eventually make it increasingly difficult for new players to find their way into the collection and for retailers to support their local play groups. Identifying the Solution: Rotation
What Is Rotation?
Rotation is a term used to describe the systematic retirement of older cards from an LCG’s card pool as newer cards are added.
FFG’s rotation policy is based on the number of monthly expansion pack cycles available at any given time.
|
|
The Living Card Game model is all about growth and evolution. Now, having recognized the problems inherent within the natures of constantly expanding card pools, we are moving forward with the next stage in the growth of our LCGs. In order to ensure the continued health and success of our games, we are introducing a rotation policy for all of our competitive LCGs. Our new rotation policy dictates that the standard card pool, for use in all Organized Play tournaments, will consist of a game’s Core Set, its deluxe expansions, and its latest five to seven cycles of monthly packs. For example, the card pool for Android: Netrunner currently consists of the Core Set, two deluxe expansions, two complete cycles of Data Packs (Genesis Cycle and Spin Cycle), and a third, incomplete cycle of Data Packs (Lunar Cycle). The game’s card pool will continue to grow until the first Data Pack of the eighth cycle is released into circulation, at which point the Genesis Cycle and Spin Cycle and its cards would be removed from the standard card pool, bringing the game back to five complete cycles of Data Packs and one Data Pack from a sixth cycle. 
We invested a great deal of thought into the design of this policy, and we settled upon the number of cycles active in standard play so that each pack will enjoy a long lifespan of three to four years. By cycling out older monthly expansions, we address the issues that present themselves with the unchecked growth of a game’s card pool:
- Rotation encourages new evolutions within the metagame. As older cycles and their core themes and mechanics phase out, their departures open holes within the metagame that will be filled with creative new deck ideas. Power cards will enjoy their time in the spotlight before rotating out, the card pool will remain a more balanced environment, and the restricted and banned lists on our FAQs and Tournament Rules will shrink, rather than grow.
- Rotation makes it easier for new and potential players to enjoy our games. Our rotation policy restricts the size of our oldest LCGs while maintaining growth, evolution, and a card pool mature enough to feature a wide range of dynamic strategies.
- Rotation makes us a better partner to our retailers. Rotation limits the number of packs that retailers need to carry on their shelves in order to grow their local communities.
- Rotation helps us grow our games into new territories and languages, expanding their communities across the world.

Rotation only impacts our LCGs after they have already reached maturity. While the card pools for individual LCGs will vary slightly from that presented by the graph above, you can see that rotation keeps an LCG’s card pool at a healthy, manageable size.
What Does Rotation Mean for My Favorite Game? Because our rotation policy is based upon the number of expansion cycles in print, rather than a number of years or months, and because each of our LCGs features its own publication schedule, rotation impacts each LCG differently. For more about how rotation impacts your favorite LCG, you can visit its website: What About The Lord of the Rings: The Card Game? As a cooperative LCG, rather than a competitive one, The Lord of the Rings: The Card Game is excluded from rotation. Building Toward Success Our Living Card Games are currently healthier than ever. Since we first introduced the LCG model in 2008, we have learned much about what the model offers and how it can work best. Our decision to introduce rotation is yet another step along the path toward creating the best possible gaming environment for our LCG fans. 
All told, rotation is the happy result of years of growth, and we’re thankful that you’ve helped us get to this point. We’re grateful for the support you’ve shown to the LCG model for the past six years, and we look forward all the exciting developments of the next sixty! ... Source: A New Stage of Growth (http://www.fantasyflightgames.com/edge_news.asp?eidn=5179)
Title: FFG:A New Road Forward
Post by: RSSFeeder on 06 November 2014, 12:00:04
A New Road ForwardHow Does Rotation Affect A Game of Thrones: The Card Game?
In 2014, Fantasy Flight Games’ Living Card Game® (LCG) category is the strongest it has ever been, and the continued presence of A Game of Thrones: The Card Game, our longest-running LCG, is a large factor of that success. Since we first introduced the LCG model in 2008, we have learned a lot about how these games function differently than collectible card games, and we’ve taken many steps to apply the lessons we’ve learned. We have established the standard that our monthly expansion packs offer a complete playset of each new card within them. And we have grown our Organized Play programs, introducing restricted lists when necessary to balance the evolving metagames. 
Rotation and A Game of Thrones: The Card Game Early attendees of our 2014 FFG World Championship Weekend had the opportunity to join the leaders of our LCG department for an LCG State of the Union address. In it, we acknowledged the category’s growth and its increased importance to Fantasy Flight Games as a key business category. However, in order to ensure that our LCGs continue to grow and remain healthy, we also looked toward the future. We realized that our LCGs would suffer if we were to let them continue to grow unchecked, so we decided to introduce rotation to the majority of our competitive card games. But certain issues became apparent within A Game of Thrones: The Card Game that could not be solved with the simple introduction of rotation. We want to see this game continue to thrive for another twelve years or even longer. To that end, rather than introducing rotation to the game, Fantasy Flight Games is proud to announce the second edition of A Game of Thrones: The Card Game! The second edition of A Game of Thrones: The Card Game will use rotation like the rest of our LCGs, and the earliest rotation could start for this game is 2019. 
For more information on A Game of Thrones: The Card Game Second Edition, visit the announcement and the minisite description page. What about the First Edition of A Game of Thrones: The Card Game? No rotation will be introduced for the first edition of A Game of Thrones: The Card Game: the entire card pool will remain legal in tournament play. Organized play for the first edition of A Game of Thrones: The Card Game will continue in the form of National and World Championship tournaments through the end of 2015. In addition, both the Westeros and Ice and Fire draft sets will remain in print and continue to see support while the new edition expands. Finally, the Wardens cycle, beginning with Secrets and Schemes, will also be released for the first edition of A Game of Thrones: The Card Game, which will complete the card pool and be the final new releases for the first edition of the game. To hear a unique perspective of the transition from first to second edition, the changes, and our goals, we highly recommend you read Nate French’s open letter to the A Game of Thrones: The Card Game community. ... Source: A New Road Forward (http://www.fantasyflightgames.com/edge_news.asp?eidn=5177)
Title: FFG:When New Programs Overwrite the Old
Post by: RSSFeeder on 06 November 2014, 20:30:03
When New Programs Overwrite the OldWhat Does Rotation Mean for Android: Netrunner?
In 2014, Fantasy Flight Games’ Living Card Game® (LCG) category is the strongest it has ever been, and the astonishing success of Android: Netrunner, introduced in 2012 as our fifth LCG, has been a massive part of the category’s recent growth. Since we first introduced the LCG model in 2008, we have learned much about how these games function differently than collectible card games, and we have taken many steps to apply the lessons we’ve learned. We have established the standard that our monthly expansion packs offer a complete playset of each new card within them. We have grown our Organized Play programs, introducing Restricted lists when necessary to balance the evolving metagames. We have introduced different publication models for our different LCGs. And we have extended our outreach efforts by introducing events like the Plugged-in Tour and Chronos Protocol Tour. As a result, Android: Netrunner and its audience are healthier than ever, and fans have much to which they can look forward. While we are currently plugged into the Lunar Cycle, the next deluxe expansion, Order and Chaos, lies just a short way down the net as do the Data Packs of the upcoming SanSan Cycle. Simultaneously, Android: Netrunner Draft Play continues to thrive, and attendees of the 2014 FFG World Championship Weekend will be among the first to enjoy the game’s third draft pool, System Crash. 
Android: Netrunner is already our largest LCG, and its audience continues to grow. Here we see players from the 2014 North American Championships at Gen Con Indy.
Rotation and Android: Netrunner Our LCG department hosted an LCG State of the Union and addressed those players who arrived early to our World Championship Weekend. In the address, our LCG team acknowledged the category’s growth and its increased importance to Fantasy Flight Games as a key business category. However, in order to ensure that our LCGs continue to grow and remain healthy, we also looked toward the future. We realized that our LCGs would suffer if we were to let them continue to grow unchecked, so we decided to introduce rotation to our competitive card games. For more about rotation and why we’re introducing it to our LCGs, see the article, “A New Stage of Growth.” Our new rotation policy dictates that each game’s standard play environment consists of the game’s Core Set, its deluxe expansions, and its five to seven latest cycles of monthly expansion packs. 1 
| 2
| 3 
| 4
Rotation keeps an LCG's card pool at a healthy, manageable level. | Click on any of the images above to view a larger version. What does this mean for Android: Netrunner? It means that you still have a long time to enjoy all the cards in the game’s card pool. At this point, we are still only in the middle of the game’s third expansion cycle, the Lunar Cycle, and even if our scheduled releases meet with no unforeseen delays, we won’t retire the cards from the Genesis and Spin Cycles until the first Data Pack for the game’s eighth cycle arrives in Spring 2017. 
Moreover, because all the cards from the game’s Core Set and its deluxe expansions will remain available in standard play, along with all the cards from the Lunar Cycle through the game’s seventh cycle, when the Genesis and Spin Cycles do rotate out of standard play, they’ll represent a small fraction of the entire card pool. At that time, their departure won’t impact long-time veterans too much, but the thinning of the card pool will make the game significantly more attractive to newer players and will help prevent the game from breaking down, easing the potential need for any restrictions or bans of existing cards. Rotation will eventually become necessary for the continued health of Android: Netrunner, but it’s not coming anytime soon. You’ll have years to enjoy the cards you currently own, as well as those coming down the line, and we believe this is the solution that best ensures you’ll have many more years to enjoy the cyberstruggles of Android: Netrunner! ... Source: When New Programs Overwrite the Old (http://www.fantasyflightgames.com/edge_news.asp?eidn=5180)
Title: FFG:Beyond the Veil
Post by: RSSFeeder on 07 November 2014, 05:00:03
Beyond the Veil What Does Rotation Mean for Call of Cthulhu: The Card Game?
In 2014, Fantasy Flight Games’ Living Card Game® (LCG) category is the strongest it has ever been, and the continued success of Call of Cthulhu: The Card Game, our second longest-running LCG, is a big part of the reason. Since we first introduced the LCG model in 2008, we have learned much about how these games function differently than collectible card games, and we have taken many steps to apply the lessons we’ve learned. We have established the standard that our monthly expansion packs offer a complete playset of each new card within them. We have grown our Organized Play programs, introducing Restricted lists when necessary to balance the evolving metagames. And we have learned that each of our LCGs works best with its own publication model; specifically, since we have limited our expansions for Call of Cthulhu to fewer, larger deluxe expansions, the game and its audience have enjoyed continual growth. In fact, fans of Call of Cthulhu: The Card Game have much to which they can look forward. In addition to future expansions, Necronomicon Draft Starters and Draft Packs will soon make Call of Cthulhu Draft Play a reality, and the continued growth of FFG’s in-house manufacturing means that we will soon be able to reprint our old cycles of Asylum Packs, starting with the Summons of the Deep cycle. 
Rotation and Call of Cthulhu: The Card Game Recently, early attendees of our 2014 FFG World Championship Weekend had the opportunity to join the leaders of our LCG department for an LCG State of the Union address. In it, we acknowledged the category’s growth and its increased importance to Fantasy Flight Games as a key business category. However, in order to ensure that our LCGs continue to grow and remain healthy, we also looked toward the future. We realized that our LCGs would suffer if we were to let them continue to grow unchecked, so we decided to introduce rotation to our competitive card games. For more about rotation and why we’re introducing it to our LCGs, see the article, “A New Stage of Growth.” Our new rotation policy dictates that each game’s standard play environment consists of the game’s Core Set, its deluxe expansions, and its five to seven latest cycles of monthly expansion packs. Because LCG rotation only retires the oldest cycle of monthly expansions after the first pack of the eighth cycle is introduced to the game, there will be no rotation for Call of Cthulhu: The Card Game. 
There are seven cycles of Asylum Packs for Call of Cthulhu: The Card Game, and we have no plans to add more. The game has moved to a model where it now grows only with deluxe expansions, and this model has proved successful for the game. Accordingly, there will be no eighth cycle of Asylum Packs to retire the Summons of the Deep cycle, and all cards in the current Call of Cthulhu: The Card Game card pool will continue to remain available for standard play. ... Source: Beyond the Veil (http://www.fantasyflightgames.com/edge_news.asp?eidn=5181)
Title: FFG:The Balance of the Force
Post by: RSSFeeder on 07 November 2014, 13:30:02
The Balance of the ForceWhat Does Rotation Mean for STAR WARS (TM): The Card Game?
In 2014, Fantasy Flight Games’ Living Card Game® (LCG) category is the strongest it has ever been, and its success owes a great deal to Star Wars™: The Card Game and its many fans. Since we first introduced the LCG model in 2008, we have learned much about how these games function differently than collectible card games, and we have taken many steps to apply the lessons we’ve learned. We have established the standard that our monthly expansion packs offer a complete playset of each new card within them. We have grown our Organized Play programs, introducing Restricted lists when necessary to balance the evolving metagames. And with both Star Wars™: The Card Game and Warhammer 40,000: Conquest, we have discovered how the LCG model permits and encourages new takes on the classic deck-building model. Since its release in 2012, Star Wars: The Card Game has been a major part of the LCG category’s continued success, and fans of the game have much to which they can still look forward. After the release of two deluxe expansions and two complete cycles of Force Packs, fans can now enjoy the game in standard one-on-one play, as teams of two against two, or by tackling the challenge decks from Balance of the Force. Additionally, we are looking forward to new cards and tactics that will soon be permitted by the upcoming Between the Shadows deluxe expansion and the Force Packs from the Rogue Squadron cycle.
Star Wars™: The Card Game has quickly grown to become FFG’s second largest LCG.
Rotation and Star Wars: The Card Game Our LCG department hosted an LCG State of the Union and addressed those players who arrived early to our World Championship Weekend. In the address, our LCG team acknowledged the category’s growth and its increased importance to Fantasy Flight Games as a key business category. However, in order to ensure that our LCGs continue to grow and remain healthy, we also looked toward the future. We realized that our LCGs would suffer if we were to let them continue to grow unchecked, so we decided to introduce rotation to our competitive card games. For more about rotation and why we’re introducing it to our LCGs, see the article, “A New Stage of Growth.” Our new rotation policy dictates that each game’s standard play environment consists of the game’s Core Set, its deluxe expansions, and its five to seven latest cycles of monthly expansion packs.
1
|
2
|
3
|
4
Rotation keeps an LCG's card pool at a healthy, manageable level.
|
Click on any of the images above to view a larger version. What does this mean for Star Wars: The Card Game? It means that you still have a long time to enjoy all the cards you own and look forward to adding to your decks. At this point, we are just two cycles into the game’s card pool, and that means that barring any unforeseen delays, we expect to retire the cards from the Hoth Cycle and Echoes of the Force cycle only once the first Force Pack for the game’s eighth cycle arrives sometime in Spring 2018. 
Moreover, because all the cards from the game’s Core Set and its deluxe expansions will remain available in standard play, along with all the cards from the Rogue Squadron cycle through the game’s seventh cycle, when the Hoth Cycle and the Echoes of the Force cycle do rotate out of standard play, they’ll represent a small fraction of the entire card pool. At that time, their departure won’t impact long-time veterans too much, but the thinning of the card pool will make the game significantly more attractive to newer players and will help prevent the game from breaking down, easing the potential need for any restrictions or bans of existing cards. Rotation will eventually become necessary for the continued health of Star Wars: The Card Game, but it’s not coming anytime soon. You’ll have years to enjoy the cards you currently own, as well as those coming down the line, and we believe this is the solution that best ensures you’ll have many more years to enjoy your battles for the fate of the Star Wars galaxy! ... Source: The Balance of the Force (http://www.fantasyflightgames.com/edge_news.asp?eidn=5182)
Title: FFG:War Without End
Post by: RSSFeeder on 07 November 2014, 22:00:03
War Without EndWhat Does Rotation Mean for Warhammer 40,000: Conquest?
In 2014, Fantasy Flight Games’ Living Card Game® (LCG) category is the strongest it has ever been, and the much-heralded introduction of Warhammer 40,000: Conquest is the most recent step in the category’s growth. This growth has not come without challenges. Since we first introduced the LCG model in 2008, we have learned much about how these games function differently than collectible card games, and we have taken many steps to apply the lessons we’ve learned. We have established the standard that our monthly expansion packs offer a complete playset of each new card within them. We have grown our Organized Play programs, introducing Restricted lists when necessary to balance the evolving metagames. And with both Warhammer 40,000: Conquest and Star Wars™: The Card Game, we have discovered how the LCG model permits and encourages new takes on the classic deck-building model. As a result, Warhammer 40,000: Conquest has benefitted from an LCG audience that is larger and more knowledgeable than ever. We’re eagerly looking forward to the first Warhammer 40,000: Conquest World Championship Tournament, and the game’s card pool will soon start expanding with the first of our monthly War Packs, The Howl of Blackmane.
The battles for the Traxis sector kicked off at Gen Con Indy 2014 during the Worldeater tournament.
Rotation and Warhammer 40,000: Conquest Our LCG department hosted an LCG State of the Union and addressed those players who arrived early to our World Championship Weekend. In the address, our LCG team acknowledged the category’s growth and its increased importance to Fantasy Flight Games as a key business category. However, in order to ensure that our LCGs continue to grow and remain healthy, we also looked toward the future. We realized that our LCGs would suffer if we were to let them continue to grow unchecked, so we decided to introduce rotation to our competitive card games. For more about rotation and why we’re introducing it to our LCGs, see the article, “A New Stage of Growth.” Our new rotation policy dictates that each game’s standard play environment consists of the game’s Core Set, its deluxe expansions, and its five to seven latest cycles of monthly expansion packs.
1
|
2
|
3
|
4
Rotation keeps an LCG's card pool at a healthy, manageable level.
|
Click on any of the images above to view a larger version. What does this mean for Warhammer 40,000: Conquest? It means that you still have a long time to enjoy all the cards you own and look forward to adding to your decks. At this point, we are still looking forward to the game’s first War Pack. That means that barring any unforeseen delays, we expect to retire the cards from the Warlord cycle only once the first War Pack for the game’s eighth cycle arrives sometime in Fall 2018. 
Moreover, because all the cards from the game’s Core Set and its deluxe expansions will remain available in standard play, along with all the cards from its third cycle through its seventh cycle, when the Warlord cycle and the game’s second cycle do rotate out of standard play, they’ll represent a small fraction of the entire card pool. At that time, their departure won’t impact long-time veterans too much, but the thinning of the card pool will make the game significantly more attractive to newer players and will help prevent the game from breaking down, easing the potential need for any restrictions or bans of existing cards. Rotation will eventually become necessary for the continued health of Warhammer 40,000: Conquest, but it’s not coming anytime soon. You’ll have years to enjoy the cards you currently own, as well as those coming down the line, and we believe this is the solution that best ensures you’ll have many more years to enjoy your battles for the Traxis sector! ... Source: War Without End (http://www.fantasyflightgames.com/edge_news.asp?eidn=5183)
Title: FFG:A Game of Thrones: The Card Game Second Edition
Post by: RSSFeeder on 08 November 2014, 06:30:03
A Game of Thrones: The Card Game Second EditionAnnouncing the Second Edition of the Only Game that Matters
“When you play the game of thrones, you win or you die. There is no middle ground.”
–George R.R. Martin, A Game of Thrones Millions of fans have immersed themselves in the enthralling world of George R.R. Martin’s A Song of Ice and Fire, a world filled with warring kingdoms and deadly intrigues, populated by knights, peasants, kings, and hundreds of other characters. In the distant north, an ancient evil emerges from the icy wastelands beyond the Wall, while on the continent of Essos, the first dragons in centuries have hatched. Despite these wonders and terrors that fill the world, there is only one game that matters to the Houses of Westeros: the game of thrones! For information about the changes between the first and second editions, click here! | | For the past twelve years, players have entered this enthralling world through A Game of Thrones: The Card Game. The rich tapestry Martin has created comes alive in this Living Card Game®, inviting players to take command of a Great House of Westeros and use knights, spies, nobles, and other iconic characters to move and shake the game of thrones. We want to see this game continue to thrive for another twelve years or even longer. To that end, Fantasy Flight Games is proud to announce A Game of Thrones: The Card Game Second Edition, a Living Card Game of cunning plots, iconic characters, and deadly encounters for two to six players! Why a Second Edition? Over the past twelve years, we’ve learned a vast amount while producing A Game of Thrones: The Card Game and our other LCGs. Just as players had to adjust to the format of a Living Card Game, we had to learn how to develop the best LCGs we could. As we learned, certain issues that couldn’t be solved with simple errata or a restricted list became apparent in the first edition of A Game of Thrones: The Card Game. We want this game to continue to grow and succeed for many more years, and now, we want to apply our wealth of knowledge to the creation of a second edition of A Game of Thrones: The Card Game. 
Enter the Seven Kingdoms In A Game of Thrones: The Card Game Second Edition, the warring factions of Westeros await your command, inviting you to engage in a life-or-death struggle. In every game, you select devious plots and challenge your opponents on the field of battle, through back alley intrigue, and in the political arena. Whether you play a against a single opponent, in a game known as a joust, or engage in a battle of three or more players, called a melee, winning challenges against your opponents is the way to victory. Your ultimate goal in A Game of Thrones: The Card Game Second Edition is to gain influence over the greatest seat of power in Westeros: the Iron Throne! To achieve this goal, you must call upon iconic characters, such as Tywin Lannister, Robb Stark, Stannis Baratheon, Daenerys Targaryen, Euron Crow’s Eye, The Red Viper, and dozens of others. You must maneuver the members of your House and your allies in a constant battle to gain power. The first player to claim fifteen power in A Game of Thrones: The Card Game Second Edition wins the game! 
A Devious Plot “He swears he knew naught of the plot. Who can say? The man is half Lannister, half Frey, and all liar.”
–George R.R. Martin, A Clash of Kings In most card games, players use one deck, but in A Game of Thrones: The Card Game Second Edition you must lead iconic characters and simultaneously devise schemes to shape the future. To accomplish this goal, A Game of Thrones: The Card Game Second Edition features two decks: a draw deck and a plot deck. Your draw deck contains the tactical elements of your struggle, including the characters, locations, attachments, and events that you call upon in your struggle to claim the Iron Throne. You can command characters from throughout A Song of Ice and Fire, and you can march forth from the icy walls of Winterfell or muster your armies around Casterly Rock. You may even equip your characters with storied weapons, such as the Valyrian steel blades Ice or Widow’s Wail. The draw deck holds these powerful characters, locations, attachments, and events. This deck is randomly shuffled and players draw their hands from this deck. 
You also possess a seven-card plot deck that is more strategic in nature. A game round in A Game of Thrones: The Card Game Second Edition, like so much of the action in A Song of Ice and Fire, begins with the players plotting and laying plans. Rather than shuffling the cards in your plot deck, you must carefully consider your possible plans and choose a single plot from your plot deck at the beginning of each game round. The best schemers in A Song of Ice and Fire always have plans within plans, and the plots available to you give you the chance to adapt your plans to bring you closer to the Iron Throne! Once you and your opponents have selected plot cards, you simultaneously reveal them. Your plot for a round determines how much gold you can spend on cards, which player starts with initiative, and how powerful your challenges are. Your plot also bears a reserve value, which determines how many cards you can keep in your hand past the end of the round. Plots may also offer powerful effects that can trigger when the plots are revealed or persist to shape the entire game round. You may scorch the earth with a deadly wildfire assault, or call upon all players to support the faith of the Seven. Because you can choose any available plot in your plot deck, you have an incredible amount of tactical flexibility for adapting to the twists and turns of the game. For more information on how plots work, visit the A Game of Thrones: The Card Game Second Edition description page. 
Challenge Your Opponent “A true champion defeats all challengers.”
–George R.R. Martin, A Storm of Swords The plots you devise provide you with gold to marshal new characters, calling lords and ladies, knights and servants, direwolves and dragons to your side in your struggle for the Iron Throne. During the game, you use these characters to attack and defend in a series of challenges. If your opponent is unable to successfully defend himself against your challenges, he must suffer the consequences. Three distinct types of challenges exist in A Game of Thrones: The Card Game Second Edition, and each one punishes your opponent in a different way. Winning a military challenge on the field of battle kills off one or more of your opponent’s characters. Intrigue challenges allow your spies and assassins to reduce your opponent’s options by forcing him to randomly discard cards from his hand. Finally, power challenges allow your most influential characters to move power from your opponent’s faction card to your own faction card. Deciding which challenges to make and which characters to use is an important element of mastering the game. You attack and defend in challenges using the characters you control. Every character in the game has a given amount of Strength, or STR, which determines how powerful that character is in a challenge. Characters also have a number of challenge icons, which determine which challenges the character can participate in. If a character does not have the appropriate challenge icon, it cannot participate in the challenge. For example, Eddard Stark has a STR of five and the military and power challenge icons: although Eddard can bring a large amount of STR to bear on the field of battle or in a power struggle, the twisted intrigues of court are anathema to him. Eddard Stark may have a much higher STR than a simple spy with an intrigue icon, but because Eddard doesn’t have an intrigue challenge icon, the spy can slip by unopposed. Both players have the chance to affect the outcome of the challenge by committing multiple characters with the appropriate icon and by using special abilities and event cards, but after both players have passed on the opportunity to take actions, the player with the highest total STR is victorious! You can find a more detailed discussion of challenges on the description page. 
Enter the Tourney Ground “Give me honorable enemies rather than ambitious ones, and I’ll sleep more easily by night.”
–George R.R. Martin, A Game of Thrones Two distinct game modes are found within A Game of Thrones: The Card Game Second Edition. You can test your skill at arms in a joust, which pits two players against each other in an honorable, one-on-one battle to claim the Iron Throne. Or, you can take on up to five opponents in a ferocious, unpredictable melee with three to six players, opening new levels of intrigue and backstabbing as you make deals and betray allies. A melee game introduces a new layer of player interaction by inviting you and other players to take your place on the king’s Small Council after revealing plots at the beginning of each game round. The Small Council titles that you select offer a host of powerful abilities, but they also come with pre-established allegiances and hatreds. If your chosen title supports another player’s title, you are hindered in your efforts to attack that player, although he is under no such restriction against you. If your title opposes another player’s title, you gain benefits for winning your first challenge against that player! We’ll cover both joust and melee game modes in greater depth in a future preview. 
Fight for Your House “‘Make way,’ Jhogo shouted at the crowd from horseback, snapping his whip, ‘make way, make way for the Mother of Dragons.’”
–George R.R. Martin, A Clash of Kings You’ll find numerous factions to play within A Game of Thrones: The Card Game Second Edition, each offering a host of recognizable characters and a unique playstyle. You may lead the armies of the north with Robb Stark, or scheme in the shadows with Tyrion Lannister. You may muster your fleets on the Iron Isles with Victarion Greyjoy or plot vengeance for past wrongs in the south with Doran Martell. You may even cast your lot with Daenerys Targaryen and her dragons across the Narrow Sea. A starter deck for each faction is included within the Core Set for A Game of Thrones: The Card Game Second Edition, and as you build decks, agenda cards enable you to ally with other factions. You can call upon the allegiance of any other faction when you build a deck: House Stark may call upon the warriors of House Baratheon, or Daenerys Targaryen may embrace an alliance with House Greyjoy. 
Battle for the Iron Throne “It is the one true king of Westeros who stands before you.”
–George R.R. Martin, A Dance with Dragons Your path leads towards the Iron Throne, but only the greatest commanders and most cunning schemers will succeed in reaching their goal. Call the banners of your House and prepare to battle for the future of Westeros in A Game of Thrones: The Card Game Second Edition! Visit the description page for more information on the second edition, read lead LCG developer Nate French’s open letter to the A Game of Thrones community, and watch our website for a series of in-depth previews that will explore the game in detail. Look for A Game of Thrones: The Card Game Second Edition to be released at Gen Con Indy 2015! ... Source: A Game of Thrones: The Card Game Second Edition (http://www.fantasyflightgames.com/edge_news.asp?eidn=5184)
Title: FFG:The Things We Do For Love
Post by: RSSFeeder on 08 November 2014, 15:00:04
The Things We Do For LoveAn Open Letter from Nate French to the A Game of Thrones Community
I played A Game of Thrones: The Card Game for the first time in the Fall of 2002. Little did I know of where that game would lead... As a player in the early years of the game’s CCG era, I quickly discovered an insatiable appetite for all aspects of the game. Building decks, flipping plots, drawing cards, and winning challenges became a focal point of my existence. I couldn’t get enough of it, and was known to drive all about the midwestern states in an effort to find more opportunities to play. I even quit my job in the restaurant industry so I could attend Origins 2003 and play in the Thrones events. (I took a lot of heat at the time, but in hindsight it’s one of the best decisions I ever made.) It was there that I met and traded blows with players like future World Champions John Bruno and Casey Galvan for the first time. That convention was also where I discovered that--in addition to the many joys it offers in play--this game also has a friendly, intelligent, and mature community of players. As addictive as the game can be, this community is even more remarkable. Every time I interact with the community at a major event, I am reminded what an exceptional group of people the game attracts. As a designer, this is the game that launched my professional career when I joined Fantasy Flight Games as a developer in 2006, and I enjoy working on it to this day. I’ve been blessed with the opportunity to work on a number of other wonderful games and settings – Lord of the Rings, Call of Cthulhu, Warhammer, Star Wars – but you can never quite escape the ghost of your first love, and I always find myself coming back to Thrones.
The above is just a brief outline of my own experiences with the A Game of Thrones card game. Outside of those experiences, thousands of other players all over the world have developed their own unique relationships with this game and its community. If you’re reading this, chances are good you are one of these players, and you have your own set of reasons for loving this game. I’m writing this letter because we have that love in common, and I know that if I were in your shoes I would want someone to explain to me, in terms I could understand and relate to, what was going on with the game I cared so much about. A Game of Thrones: The Card Game is one of FFG’s most successful, consistent, and longest running lines. The LCG era alone features more than 70 product titles, all of which are relevant today. The game is currently published in 8 languages (English, French, German, Spanish, Italian, Chinese, Russian, and Brazilian Portuguese) around the world. In 2013 we held our largest ever World Championship tournament, with 138 people competing in the joust event. In 2014, we had our largest ever turnout for the GenCon tournament. Each of the two draft sets was a popular addition among fans. And many of our most devoted tournament players believe that the current environment and metagame are as healthy and engaging (or better) as any time they can remember in the game’s history. In each of these respects, A Game of Thrones is very much alive and well. 
But is it as “alive and well” as it could be? In spite of all the great things I can say about the game, it is--without a doubt--showing its age. With products and expansions dating back to 2008, the size of the competitive LCG card pool is close to 2000 cards, which presents an ever-increasing burden for attracting both retailers and new players to pick up the game. While a detailed rotation policy would address this first issue, it is not the only obstacle facing our game. Over the course of its 12 year run, A Game of Thrones has accumulated a considerable mass of outdated mechanics, a ponderous rules set, and what at times can be some pretty obscure ability templating and language choices. The game also rides upon the back of a core set that is more than 6 years old, was designed before we fully understood the meaning of the LCG experience, and was released as an expansion at the tail-end of the CCG era. Instead of providing an ideal entry point for new players and a solid foundation of useful cards for tournament deckbuilders, this product provides a fragmented experience that does more to hold the game back than it does to showcase its finer aspects. We who love the game have come to accept these truths as a small burden to bear, the quirks that we put up with because we so love the other charms... But does it have to be that way? Considering all of the above, we at FFG found ourselves facing a difficult decision. On one hand, we had the option to hold on tightly to what we had. To put forth a rotation policy that could address the immediate “size of the cardpool” concerns, and see if we could squeeze 2 or 3 more good years out of a game that faced the other challenges described above. The alternative.... Well, what if we were to relaunch the game with a new edition, an overhauled rules set, an improved core set, and some exciting new features? The idea took hold, and as we discussed the possibilities, it became more and more intriguing. Instead of a 3 year plan, we wanted to establish a foundation upon which the game could conceivably thrive for the next 10 years or more. 
Once we decided to move forward with this plan, the first step was to identify the elements that make A Game of Thrones: The Card Game the game that we all love. These are the elements that are the heart and lifeblood of the game, and if these elements were not preserved, it could not be called the same game: - The plot deck. In many ways, the plot deck is the game’s most distinguishing feature, and is frequently the first element that players identify when asked what they like about the game.
- The challenge phase as we know it, featuring the military, intrigue, and power challenges. The challenge phase is the game’s most tactical arena, and is usually the phase in which the most direct conflict between the players occurs.
- Characters are central to the game’s action. George R.R. Martin’s series is heavily character-driven, and the game should be as well.
- Unique characters must die! The discard and dead pile capture this important aspect of the A Song of Ice and Fire novels.
- The game is won by accumulating power on your faction card and on characters you control. A game’s victory condition establishes what a player is trying to do, and this motivation informs a player’s decision making--and thereby his or her experience of the game--in a number of direct and indirect ways.
- The nature of “the flop.” Having the game begin in media res, as opposed to the gradual amping up that defines many card games, enables players to quickly focus on its most engaging elements--the plot phase and the challenge phase--instead of obsessing on early game tricks and development concerns. It also adds to the game’s replay value, by adding more differentiation to the opening of each individual matchup.

From there, we needed to identify the elements that we felt were holding the game back. Each of the following can be trimmed to make the the final product more appealing: - Moribund. If one word encapsulates the layers of confusion and frustration and eye-rolling that are associated with the AGoT timing rules, that word is moribund. Originally released a couple years into the life of the CCG era as a solution to inconsistencies and paradoxes that emerged in the CCG cardpool, “moribund timing” was never an intended part of the game’s design. Rather, these rules were reverse engineered from the cardpool as a practical means of solving fundamental problems the game’s language was having at that time. Because the solution did its job, it stuck, and has been a major sticking point for many players who seek to understand how and why things work the way they do to this day. Re-engineered timing rules will replace “moribund” and thereby make the game far more straightforward and user-friendly.
- Influence was designed during the CCG era as a mechanic to provide players with a persistent resource engine to use throughout a game round, as each player’s gold did not last beyond the marshalling phase. The introduction of persistent gold and the taxation phase made the need for influence obsolete, but as the core set was originally designed as an expansion in the CCG era, influence made its way into the LCG version of the game. With the new edition, influence no longer carries a necessary function, and is being discontinued.
- With the exception of the shadow crest, crests are little more than “glorified traits.” To simplify the game’s learning curve, we are cutting them from the new edition.
- Other timing quirks such as a special class of response (the “save/cancel response”) and the dreaded “passive effect with a trigger” are being cleaned up and re-templated in a more user-friendly manner.
- The first edition suffers from a fair amount of keyword bloat, with far more keywords than a healthy game needs, especially when you are trying to teach that game to new players. In the new edition, we are trimming the excess in this area, and moving forward with a smaller set of the most essential and interesting keywords.

Finally, we identified a number of areas where we felt we had an opportunity to improve the game experience by making a revision or adjustment. These areas are: - The attachment card type. Historically, attachments have been regarded as a “weak” cardtype among competitive players. They harm a deck’s flops, and they have an extra layer of fragility when compared to other cardtypes. In the new edition, we are taking some steps--one of which is making the effect of the “setup” keyword a built in aspect of the attachment cardtype--to make these cards a more viable subset of the card pool.
- The gold curve. With a few outliers, the majority of the cardpool for the first edition lies in the 0 to 5 gold cost range. And most of the cards used in competitive decks lie in the 0 to 3 gold cost range, with only a few key slots in these tournament decks being devoted to higher cost cards. In the new edition, we are stretching the game’s cost curve, so that more gold is available to players and more cost slots are relevant when building decks.
- The draw cap was added to the game in late 2003, as a “band-aid” to rein in abusive draw decks. It’s a functional fix, but is not elegant in that it forces players to keep an untracked memory count of drawn cards throughout the course of each game round. For the new edition, we are doing away with the draw cap and replacing it with a more elegant and dynamic check against abusive card accumulation strategies by adding a reserve value to each plot card that caps its owner’s hand size in the taxation phase.
- Plot deck building. When building a plot deck in the new edition, players are able to run a second copy of any one plot card in the deck. This allows for the construction of more specialized plot decks, and also maintains a bit more in-game uncertainty: the first time a player sees a plot card, that player can no longer eliminate the possibility of seeing that plot again until the used pile cycles around. Some plots--like Valar Morghulis--may be excluded from this option for balance reasons by a “max 1 per plot deck” restriction.
- Treaties. The gold penalty is a clunky means of addressing “faction mixing,” and no treaty or alliance agenda yet printed has felt completely right. A new loyalty mechanic combined with the ability to select a support faction in lieu of another agenda makes combining factions a more balanced and viable option than we have yet experienced.
- The factions. We decided that there was room in the game for more than 6 factions, and are expanding and adjusting the color pie accordingly. (To help narrow your speculation: House Brax will not be a core faction.)
- The new edition also showcases a veritable feast of gorgeous original artwork and striking new graphic design.

With all of these changes and revisions in mind, it should be clear that the two editions of the game are not compatible with one another. This point raises another important question: what about the first edition? I understand that many of you are deeply invested in the first edition cardpool. There is a financial aspect to this investment, but also a very real emotional aspect: you enjoy playing the game with these cards and exploring the dynamic environment and metagame they have formed. I also understand that, as exciting as some of the changes in the new edition may sound, there is a world of difference between playing a card game with a mature, multifaceted environment (such as we now enjoy), and playing a new game with only a few products’ worth of cards (such as we would have upon the launch of the new edition). For these reasons – and because we too love the current cardpool and metagame – we are committed to continued support of the first edition as we make this transition. To that end, FFG will run sanctioned National and World Championship level tournaments for the first edition (as well as events for the new edition) at GenCon 2015 and at next year’s 2015 World Championship Weekend. Tournament kits will be available to support first edition events throughout the 2015 tournament year. This will provide players with an opportunity to continue to enjoy and compete with their first edition cards at sanctioned events while the metagame of the new edition matures. Additionally, just as the CCG era cards remained a popular draft option well into the time frame of the LCG era, the Westeros and the Ice and Fire draft pools will continue to see support at major AGoT events while the new edition expands to a size that can support a draft format of its own. Finally, the Wardens cycle will soon be releasing, as a swan song expansion that completes the first edition cardpool. 
One last question I can anticipate is, “What about the champion cards?” In my opinion, the champion cards are one of the highest honors that can be achieved in our gaming community, and each of these cards functions as a mark of a player’s lasting legacy upon the game. Any champion who has earned the right to design a card for the game but has not yet done so will still be able to design that card for the new edition if he or she so desires. Further, just as we brought the CCG era champion cards forward into the LCG, I will make every attempt--at the appropriate moment for each card--to bring recognizable versions of the first edition champion cards into the new edition. So where does that leave us? The new edition is knee deep in development, and I will be recruiting an external beta playtest group throughout the course of our World Championship Weekend. (If you’re interested, make sure you talk to me!) We will begin previewing the new game in greater detail in late spring/ early summer, and – if there are no unforeseen delays outside of our control – we’re looking forward to the launch of the new core set at Gen Con Indy 2015. In many ways, this new edition is built upon passions we have felt and lessons we have learned over the course of the past 12 years, and I’m looking forward to sharing this product, the quintessential experience of one of my favorite games, with the rest of the world. Nate French
November 2014 Nate French is a Senior LCG Designer at Fantasy Flight Games, and has been involved with the development of A Game of Thrones: The Card Game and other games since 2006. For more information about A Game of Thrones: The Card Game Second Edition, visit the minisite. ... Source: The Things We Do For Love (http://www.fantasyflightgames.com/edge_news.asp?eidn=5178)
Title: FFG:Battle for the Galaxy
Post by: RSSFeeder on 08 November 2014, 23:30:03
Battle for the GalaxySTAR WARS (TM): Empire vs. Rebellion Is Now Available
“This will be a day long remembered. It has seen the end of Kenobi, it will soon see the end of the Rebellion.”
–Darth Vader, Star Wars: A New Hope Side with the Galactic Empire or the Rebel Alliance and battle for the fate of the galaxy in Star Wars™: Empire vs. Rebellion, a card game of skill and deception for two players, now available at your local retailer! The galaxy is torn between two sides in a massive civil war. On one side, the Galactic Empire rules the galaxy, stretching its totalitarian regime across hundreds of planets. Opposing the Empire and the tyrannical rule of Emperor Palpatine are the heroes of the Rebel Alliance. A ragtag coalition of soldiers, politicians, spies, and freedom fighters, the Rebellion strives constantly to rid the galaxy of the Empire’s unrelenting oppression. In Empire vs. Rebellion, you take command of the forces of the Galactic Empire or the Rebel Alliance. Using your military power, diplomatic clout, strategic reconnaissance, and knowledge of the Force, you must best your opponent in a series of events drawn from the classic Star Wars films. Whether you replay the events of the movies or reshape their outcomes in your favor, every game of Empire vs. Rebellion offers you the chance to experience the thrill of the Galactic Civil War. Gather Your Resources To achieve victory in the Empire vs. Rebellion, you must claim several key events by winning a struggle. You must use the resources of your chosen faction included in your deck to overthrow your opponent’s plans. Four different kinds of resources compose both players’ decks: military, diplomacy, recon, and the Force. Each of these cards has a resource value shown in the upper left-hand corner. To win an event, you must bring the total resource value of your resources as close as possible to a target shown on the event card, without surpassing it. Resource cards bear special abilities to help you in your struggles against your opponent. Military resources allow you to discard your opponent’s most useful cards, whereas a diplomacy card can discard one of your own cards, allowing you to modify your total resource value and avoid surpassing your target. Recon resource cards give you the chance to gain vital intel by looking at the top of your deck or your opponent’s. Finally, resource cards that represent the power of the Force allow you to exhaust your opponent’s resources, keeping him from using special abilities. Iconic characters from the Star Wars films introduce their own talents to your struggles over events. Both the Empire and the Rebellion have access to eight characters that they can include in their decks. These characters offer some of the most powerful abilities in the game, and they can boost your resource value significantly.
At the beginning of each struggle in Empire vs. Rebellion, you and your opponent also select strategy cards. These strategy cards can give you a powerful advantage, but they are kept secret until the end of the struggle, giving you the opportunity to trick your opponent or lure him into your trap. After both players finish playing resources in the struggle, strategy cards are revealed before the final victor is determined. For a detailed overview and example of how resource cards, events, characters, and strategies interact in a game of Empire vs. Rebellion, read our past preview. Choose Your Side The struggles of the Galactic Civil War lie before you. Gather your most potent resources, call upon iconic characters, and determine the outcome of key events from the Star Wars saga. Pick up your copy of Empire vs. Rebellion at your local retailer today! ... Source: Battle for the Galaxy (http://www.fantasyflightgames.com/edge_news.asp?eidn=5185)
Title: FFG:Fantasy Flight Games Is Now Hiring
Post by: RSSFeeder on 09 November 2014, 08:00:04
Fantasy Flight Games Is Now HiringApply for the Position of Application Developer TodayFantasy Flight Games, leading hobby-market publisher of board games, card games, roleplaying games, and other tabletop games, is now hiring for the following position: Details can be found in the pdf document linked above. To apply for this position, please submit a cover letter with salary requirements and resume to HumanResources@fantasyflightgames.com; under the subject line “Application Developer” no later than end of business day Friday, November 21, 2014. Please do not call or visit. Our offices are located in Roseville, Minnesota, a suburb of the Twin Cities of Minneapolis and St. Paul. Candidates not already living within commuting distance must be willing to relocate. Fantasy Flight Publishing, Inc. is an equal opportunity employer committed to a diverse work force and a work environment free from discrimination. ... Source: Fantasy Flight Games Is Now Hiring (http://www.fantasyflightgames.com/edge_news.asp?eidn=5187)
Title: FFG:The Valley
Post by: RSSFeeder on 09 November 2014, 16:30:03
The ValleyAnnouncing the First Data Pack in the Upcoming SanSan Cycle
“Better genes for better lives.”
–Jinteki Fantasy Flight Games is proud to announce the upcoming release of The Valley, the first Data Pack in the SanSan Cycle for Android: Netrunner! As it boots up the SanSan Cycle, The Valley transports players deep into the heart of SanSan, the number one place for all the top tech. This American megacity sprawls along the California coastline from San Diego in the south to San Francisco in the north. There, you’ll also find Biotech Valley, most often called just “the Valley,” home to the world’s biggest biotech firms and its most advanced genomic research. Home, additionally, to Jinteki Corporation’s flagship American R&D facility, the J-Plex. With its sixty cards (a complete playset of twenty-two different cards), The Valley explores Biotech Valley and its massive investment into bleeding-edge bioengineering. This is a meatspace heavily colored by genengineering, a highly educated workforce, tech startups, capital investments, and the presence of Jinteki’s J-Plex. You’ll find numerous assets, region ugrades, genetic resources, and a new Jinteki identity. Of course, even in the Valley, you’ll need more than good genes to get by; you’ll also find new programs, ice, and currents for both Corps and Runners. 
Additionally, as the first Data Pack in the SanSan Cycle, The Valley introduces our new LCG® packaging to Android: Netrunner Data Packs. While the packaging is now molded plastic, every Data Pack still contains the full complement of sixty cards. Lead Developer Lukas Litzsinger on the SanSan Cycle The SanSan Cycle is a worthy successor to the Lunar Cycle. We had a lot of fun exploring the moon as a a singular, geographic location, so when the time came to lock in the next cycle, it was something I knew we needed to continue. Like the Lunar Cycle, most of the cards in the SanSan Cycle are inspired by the locations in which they’re set. SanSan is a megacity that stretches along the Californian coast, from San Diego to San Francisco. It is the cradle of high-end tech and a home to beautiful beaches. It is also still recovering from the Big One, the cataclysmic earthquake that opened up the San Andreas fault and redefined America’s western coast. Unlike the Lunar Cycle, and for the first time in the history of Android: Netrunner, each Data Pack in the SanSan Cycle was designed individually before it was integrated into the whole. Each one tells a story about a specific part of SanSan and the people who live in it. You will discover the genetic experimentation of the Valley, dive deep into the criminal elements of the Underway, and experience the sights and sounds of a World Expo.

From a mechanical standpoint, the SanSan Cycle aims to shake up the metagame and force players to adapt. While many of the Corps in Heinlein and other parts of the world have trended toward scoring agendas from HQ with the use of SanSan City Grid (Core Set, 92), the Runners that learned their trade on the streets of SanSan have developed effective counter-measures to this strategy. But even as Runners find ways to slow the Corps down, the Corps get more benefits from scoring agendas, making each installed card all the more important.  This cycle also marks the addition of some extra rules complexity in the form of a double-sided identity, Jinteki Biotech (The Valley, 12). This was not a decision made lightly. We want to make sure that the game remains accessible to players, and one way to do that is by preventing complexity creep. I hope you agree that the small amount of additional rules are worth it when you see how the card functions (keep reading!). Among other things, I believe this identity is proof that, as the game evolves, we will continue to look for ways to bring exciting new concepts to life. It’s also our goal to introduce them in the simplest way possible. This cycle also marks the addition of some extra rules complexity in the form of a double-sided identity, Jinteki Biotech (The Valley, 12). This was not a decision made lightly. We want to make sure that the game remains accessible to players, and one way to do that is by preventing complexity creep. I hope you agree that the small amount of additional rules are worth it when you see how the card functions (keep reading!). Among other things, I believe this identity is proof that, as the game evolves, we will continue to look for ways to bring exciting new concepts to life. It’s also our goal to introduce them in the simplest way possible.
We hope that you enjoy exploring SanSan as much as we enjoyed creating it! Jinteki Biotech The Valley is all about biotech, and there’s no bigger name in the field than Jinteki. Everything in The Valley is influenced in some measure by the corp’s work. Not even those runners who steal from Jinteki, seek to burn it down, or treat it as their playground find themselves immune to the allure of the megacorp’s work in genengineering. For starters, The Valley introduces a new Jinteki identity, Jinteki Biotech, which comes with a unique distribution model within the Data Pack and a unique set of rules. While The Valley still comes with a complete playset of each of its cards, it doesn’t contain three copies of the same Jinteki identity. Instead, The Valley contains three copies each of its nineteen other cards and three different, double-sided versions of Jinteki Biotech. The front of each Jinteki Biotech is identical, and at the beginning of your game, you can swap your Jinteki Biotech for any other Jinteki Biotech. Then, the front text of Jinteki Biotech allows you to spend three clicks to “flip” the card, triggering one of three different back text abilities that trigger “When you flip this identity.”
What effects do each of these Jinteki Biotech identities have? Click on the images above to “flip” the cards and find out.
Jinteki have long been the masters of the Android: Netrunner shell game, and as we draw near their flagship American R&D facility, this identity only reinforces that factional strength. Meanwhile, even as they work against the megacorp on the net, the game’s Runners take advantage of the genetic modifications that Jinteki offers. The Valley introduces no fewer than four different genetic resources that, like Enhanced Vision (The Valley, 5), each provide a unique benefit  the first time each turn you meet its triggering condition. Moreover, if you spend enough time checking into the Gene Conditioning Shoppe (The Valley, 6), you can trigger your genetic resources up to two times each turn. And when you consider that these benefits are introduced at the outset of a cycle designed to slow down the Corp’s fast advance ambitions, it’s a sure bet that they’re going to pay off for some Runner. The question is, will it be you? the first time each turn you meet its triggering condition. Moreover, if you spend enough time checking into the Gene Conditioning Shoppe (The Valley, 6), you can trigger your genetic resources up to two times each turn. And when you consider that these benefits are introduced at the outset of a cycle designed to slow down the Corp’s fast advance ambitions, it’s a sure bet that they’re going to pay off for some Runner. The question is, will it be you? Nature Versus Nurture Even as Jinteki continues its work with Genetic Resequencing (The Valley, 13), The Valley ensures that both Corps and Runners will find ample opportunities for investment, improvement, and new business ventures. Welcome to Biotech Valley. It’s time to invest in your future! The Valley is scheduled to kick off the SanSan Cycle in the first quarter of 2015. ... Source: The Valley (http://www.fantasyflightgames.com/edge_news.asp?eidn=5186)
Title: FFG:A Champion's Perspective: X-Wing (TM), Pt 1
Post by: RSSFeeder on 10 November 2014, 18:30:03
A Champion's Perspective: X-Wing (TM), Pt 1An Article on Preparation by 2014 North American Champion Rick Sidebotham
As we look back on the 2014 World Championship Weekend, we finish our series of Gen Con wrap-up articles with 2014 X-Wing™ North American Champion Rick Sidebotham’s unique preparation and how it affected his results. If you plan on attending a major tournament such as Nationals or Worlds in the future, Rick’s advice can be a valuable tool toward improving your experience and your results. Prepare to Make Your Run Greetings X-Wing players! Because my experience at Gen Con 2014 has been covered in the past, it was really important to me to include some fresh material in this article. Therefore, I’ve decided to share how I prepared for the tournament, how that preparation (or in some cases, lack thereof) affected my performance, and the potential benefits to thinking outside of the box. The Squadron This squadron was not originally built to be flown in a major tournament setting, but rather for an evening of casual play shortly before a Regional Championship earlier this year. At the time, I thought it would be fun to fly a list that included a TIE Phantom, a TIE Interceptor, and a Lambda-Class Shuttle. When I made the decision to try the list at the Kingston, ON Regional Championship, the final pilots and upgrades were based on making the squadron as competitive as possible with those three ships. While fielding a squadron that was fun to fly was my primary motivation, I at least wanted to make sure I had a fighting chance against the most likely competitive combinations I could expect to face. 
- Whisper (32) with, Fire Control System (2), Gunner (5), Advanced Cloaking Device (4), and Veteran Instincts (1)
- Soontir Fel (27) with Push the Limit (3)
- Captain Yorr (24)
Tournament Preparation While I believe the squadron itself is solid, I think the primary reason why I was able to have success with it at both Kingston and the North American Championship was due to my preparation. In preparing for my first-ever X-Wing tournament earlier this year I created a list of the squadron archetypes that I expected to see. Ever since that first tournament, I’ve been adding to the list along the way. So now, whenever I decide to work on a squadron for competitive play, I always refer back to my master list. An abridged version of my list prior to the North American Championship consisted of the following:
Rebel Archetypes |
Imperial Archetypes |
- 4-Ship Un-named (B-Wings/X-Wings)
- 3-Ship Named (B-Wings/E-Wings/X-Wings)
- Named YT-1300 plus Support
- Named YT-1300 plus Z-95 Headhunter Mini-Swarm
- Double YT-1300
- Rebel Swarm (Z-95 Headhunter/A-Wing)
- YT-1300/B-Wing/E-Wing/X-Wing plus Z-95 Headhunter Mini-Swarm
- Biggs
- Board Control (Ion/Stress/ORS Blocking)
|
- TIE Swarm with or without Howlrunner (TIE Fighter/TIE Bomber/TIE Interceptor)
- Double/Triple Firespray-31s
- 3 Lambda-Class Shuttles plus Support/4th Shuttle
- 3-4 “Push the Limit” TIE Interceptors
- Jonus plus Ordinance-Carrying TIE Bombers or HLC TIE Defenders
- TIE Bombers with Bombs
- Super Flankers (Whisper/Echo/Soontir Fel)
- Doom Shuttle (Lambda-Class Shuttle with Darth Vader Crew)
- Board Control (Stress)
|
This was my best educated guess of the potential squadrons I could face. If you decide to do some similar preparation before your next league event or tournament, I encourage you to create a list of your own based on your knowledge
and experience. Once I had an idea of what squadrons I could expect to face, I had to get in some practice playing against them. Between work and family commitments, I was only able to get in about three or so games per week, not nearly enough time to play against everything out there. I decided there were a few steps I could take to streamline the process. 
The first step was to try and figure out a way to put some of these archetypes into larger groups based on the squadron I was fielding. As an example, early in the process, I was able to develop a good general plan for opposing squadrons that came at me in a large block of ships. I generally had success if I could engage in a military pincer with Yorr securing the middle and Whisper and Soontir Fel on each flank. Now, if there was something special within that block of ships, I’d have to modify my tactics accordingly, but having a general plan to deal with a large group of archetypes was a great time-saver for me. The next step I took was applying some priority to what I was going to practice against. I looked for archetypes that I felt I had a smaller chance of facing and then further selected ones from that group that I felt confident my squadron could handle most of the time. This allowed me to eliminate another large portion of my list from the playtest pool. For example, I looked at the Jonus archetype and didn’t think there was a good chance of facing it, and I didn’t think it would give my squadron too many problems if I did. In further prioritizing squadrons for preparation, I looked for those that I felt would be both most difficult for my squadron to face and had a high probability of being represented. Whisper with a mini-swarm, a named YT-1300 with a Z-95 mini-swarm, and Han Solo with Veteran Instincts (making him Pilot Skill 11) plus support were the three squadrons that I playtested against the most. From there, I tried to play each of the remaining semi-unique archetypes at least once. As my playtesting continued, I considered making some tweaks to further overcome some of the squadron’s shortfalls. In the end, I decided those tweaks caused more harm than good. With my squadron finalized, I was ready for the North American Championship! Or so I thought. The North American Championship The format for the North American Championship involved two preliminary flights of up to 128 players. The top 32 of each preliminary flight would move on to the Finals to compete in five rounds of Swiss play before cutting to the top 8 to play in a single-elimination bracket. I had purchased a ticket to play in the first preliminary round and decided that I was going to give it just that one shot, so I had to finish in the top 32! 
My first loss was against a squadron that consisted of Han Solo (with Veteran Instincts and other upgrades, but didn’t include Gunner or Luke) and 4 Z-95’s. This squadron fit into the archetype that I had considered my biggest challenge. I had practiced against it more than anything else and had an overall strategy and some specific in-game tactics that allowed me to win more times than I lost against it. The biggest thing for me was that I couldn’t make a mistake. Of course, I ended up making a number of small mistakes about two thirds of the way through the round. A combination of failing to see a potential block, choosing a maneuver that limited me to one decloak location, and letting emotion cloud my judgment led to my defeat. As hard of a loss as that was, it had confirmed everything I learned in my preparation. My squadron had a very good chance of beating one of its worst matchups, even when piloted by a very skilled player. (My opponent was Matt Baxter who finished in the top 8 overall.) It also confirmed that my squadron is not forgiving.  My second loss came in the very next game. I played against a 2-ship “shield-gaining build” that included Corran with R2-D2 and Luke with R5-P9, in addition to a slew of other upgrades on each. I hadn’t playtested against anything even remotely similar, but I knew what my opponent’s general strategy was going to be. He was going to try and hit hard, and once one of his ships took a bunch of damage, break it off and let it regain shields while occupying my squadron with the other, then switching the two roles once the initial ship had regained its shields. I hoped that having two mobile ships in Soontir and Whisper would allow me to catch the damaged ship and finish it off before turning my attention to the other. My second loss came in the very next game. I played against a 2-ship “shield-gaining build” that included Corran with R2-D2 and Luke with R5-P9, in addition to a slew of other upgrades on each. I hadn’t playtested against anything even remotely similar, but I knew what my opponent’s general strategy was going to be. He was going to try and hit hard, and once one of his ships took a bunch of damage, break it off and let it regain shields while occupying my squadron with the other, then switching the two roles once the initial ship had regained its shields. I hoped that having two mobile ships in Soontir and Whisper would allow me to catch the damaged ship and finish it off before turning my attention to the other.
Well hats off to my opponent, Christian Bush! Even knowing in principal what he was going to try and do, I couldn’t stop it from happening. I had Corran down to one hull but failed to have a move the following turn to take him out. I wasn’t confident that I could accurately guess where he’d be in two turns, so I felt I had no choice but to switch up and go for Luke. I worked on Luke until he was down to one hull when Corran returned and killed Whisper right as time expired. This was my first game against a squadron I hadn’t prepared for, and it ended in a loss.  After a couple wins, I experienced my third loss of the day against a squad that consisted of Whisper with Veteran Instincts, Soontir Fel, and Carnor Jax, all with a number of nasty upgrades. Looking back at my list of archetypes, you won’t see anything like this there. After a couple wins, I experienced my third loss of the day against a squad that consisted of Whisper with Veteran Instincts, Soontir Fel, and Carnor Jax, all with a number of nasty upgrades. Looking back at my list of archetypes, you won’t see anything like this there.
I knew Jax had the potential to be a huge problem. Both Soontir and Whisper rely heavily on focus and evade tokens when they are unable to arc dodge. With my opponent also having Whisper and Soontir, I was either going to lose shooting first or lose the ability to dodge arcs against two ships that were great at reacting. I felt like keeping my focus and evade actions was critical, and my on-the-spot plan was to try and create a pincer such that I could catch Jax in the middle. As our ships maneuvered closer, I was able to engage just as I thought I had wanted, but I was unable to take Jax out. At this point, I realized there was a huge flaw with my plan; if I couldn’t take Jax out next turn, he’d be within range 1 of all three of my ships, not allowing me to take or use the tokens that are so essential to my list. Engaging that way was a huge mistake. I failed to kill Jax the following turn and proceeded to get massacred by my opponent. If I had playtested against Jax at least once, there’s a chance I would have been able to see how devastating Jax could be if he got into the middle of my pincer and lived. I again tip my hat to my opponent, Randy Baker, for handing me my worst loss of the North American Championship. In the end, I finished the preliminary rounds with a 4-3 record. That, combined with my strong margin of victory, allowed me to barely slide into the Finals at 28th out of 32. Not my greatest day of X-Wing, but the most interesting part as I reflect back was the squadrons I lost against and how those squadrons compared to my preparation. Tune In to Worlds Coverage Thanks, Rick!
Be sure to return tomorrow to read how Rick did in the Finals, including an undefeated record on the way to becoming North American Champion! © and ™ Lucasfilm Ltd. ... Source: A Champion's Perspective: X-Wing (TM), Pt 1 (http://www.fantasyflightgames.com/edge_news.asp?eidn=5188)
Title: FFG:The Valley
Post by: RSSFeeder on 11 November 2014, 03:00:03
The ValleyAnnouncing the First Data Pack in the Upcoming SanSan Cycle
“Better genes for better lives.”
–Jinteki Fantasy Flight Games is proud to announce the upcoming release of The Valley, the first Data Pack in the SanSan Cycle for Android: Netrunner! As it boots up the SanSan Cycle, The Valley transports players deep into the heart of SanSan, the number one place for all the top tech. This American megacity sprawls along the California coastline from San Diego in the south to San Francisco in the north. There, you’ll also find Biotech Valley, most often called just “the Valley,” home to the world’s biggest biotech firms and its most advanced genomic research. Home, additionally, to Jinteki Corporation’s flagship American R&D facility, the J-Plex. With its sixty cards (a complete playset of twenty-two different cards), The Valley explores Biotech Valley and its massive investment into bleeding-edge bioengineering. This is a meatspace heavily colored by genengineering, a highly educated workforce, tech startups, capital investments, and the presence of Jinteki’s J-Plex. You’ll find numerous assets, region ugrades, genetic resources, and a new Jinteki identity. Of course, even in the Valley, you’ll need more than good genes to get by; you’ll also find new programs, ice, and currents for both Corps and Runners.
Additionally, as the first Data Pack in the SanSan Cycle, The Valley introduces our new LCG® packaging to Android: Netrunner Data Packs. While the packaging is now molded plastic, every Data Pack still contains the full complement of sixty cards. Lead Developer Lukas Litzsinger on the SanSan Cycle The SanSan Cycle is a worthy successor to the Lunar Cycle. We had a lot of fun exploring the moon as a a singular, geographic location, so when the time came to lock in the next cycle, it was something I knew we needed to continue. Like the Lunar Cycle, most of the cards in the SanSan Cycle are inspired by the locations in which they’re set. SanSan is a megacity that stretches along the Californian coast, from San Diego to San Francisco. It is the cradle of high-end tech and a home to beautiful beaches. It is also still recovering from the Big One, the cataclysmic earthquake that opened up the San Andreas fault and redefined America’s western coast. Unlike the Lunar Cycle, and for the first time in the history of Android: Netrunner, each Data Pack in the SanSan Cycle was designed individually before it was integrated into the whole. Each one tells a story about a specific part of SanSan and the people who live in it. You will discover the genetic experimentation of the Valley, dive deep into the criminal elements of the Underway, and experience the sights and sounds of a World Expo.
From a mechanical standpoint, the SanSan Cycle aims to shake up the metagame and force players to adapt. While many of the Corps in Heinlein and other parts of the world have trended toward scoring agendas from HQ with the use of SanSan City Grid (Core Set, 92), the Runners that learned their trade on the streets of SanSan have developed effective counter-measures to this strategy. But even as Runners find ways to slow the Corps down, the Corps get more benefits from scoring agendas, making each installed card all the more important. This cycle also marks the addition of some extra rules complexity in the form of a double-sided identity, Jinteki Biotech (The Valley, 12). This was not a decision made lightly. We want to make sure that the game remains accessible to players, and one way to do that is by preventing complexity creep. I hope you agree that the small amount of additional rules are worth it when you see how the card functions (keep reading!). Among other things, I believe this identity is proof that, as the game evolves, we will continue to look for ways to bring exciting new concepts to life. It’s also our goal to introduce them in the simplest way possible. We hope that you enjoy exploring SanSan as much as we enjoyed creating it! Jinteki Biotech The Valley is all about biotech, and there’s no bigger name in the field than Jinteki. Everything in The Valley is influenced in some measure by the corp’s work. Not even those runners who steal from Jinteki, seek to burn it down, or treat it as their playground find themselves immune to the allure of the megacorp’s work in genengineering. For starters, The Valley introduces a new Jinteki identity, Jinteki Biotech, which comes with a unique distribution model within the Data Pack and a unique set of rules. While The Valley still comes with a complete playset of each of its cards, it doesn’t contain three copies of the same Jinteki identity. Instead, The Valley contains three copies each of its nineteen other cards and three different, double-sided versions of Jinteki Biotech. The front of each Jinteki Biotech is identical, and at the beginning of your game, you can swap your Jinteki Biotech for any other Jinteki Biotech. Then, the front text of Jinteki Biotech allows you to spend three clicks to “flip” the card, triggering one of three different back text abilities that trigger “When you flip this identity.”
What effects do each of these Jinteki Biotech identities have? Click on the images above to “flip” the cards and find out.
Jinteki have long been the masters of the Android: Netrunner shell game, and as we draw near their flagship American R&D facility, this identity only reinforces that factional strength. Meanwhile, even as they work against the megacorp on the net, the game’s Runners take advantage of the genetic modifications that Jinteki offers. The Valley introduces no fewer than four different genetic resources that, like Enhanced Vision (The Valley, 5), each provide a unique benefit the first time each turn you meet its triggering condition. Moreover, if you spend enough time checking into the Gene Conditioning Shoppe (The Valley, 6), you can trigger your genetic resources up to two times each turn. And when you consider that these benefits are introduced at the outset of a cycle designed to slow down the Corp’s fast advance ambitions, it’s a sure bet that they’re going to pay off for some Runner. The question is, will it be you? Nature Versus Nurture Even as Jinteki continues its work with Genetic Resequencing (The Valley, 13), The Valley ensures that both Corps and Runners will find ample opportunities for investment, improvement, and new business ventures. Welcome to Biotech Valley. It’s time to invest in your future! The Valley is scheduled to kick off the SanSan Cycle in the first quarter of 2015. ... Source: The Valley (http://www.fantasyflightgames.com/edge_news.asp?eidn=5186)
Title: FFG:A Champion's Perspective: X-Wing (TM), Pt 1
Post by: RSSFeeder on 11 November 2014, 11:30:04
A Champion's Perspective: X-Wing (TM), Pt 1An Article on Preparation by 2014 North American Champion Rick Sidebotham
As we look back on the 2014 World Championship Weekend, we finish our series of Gen Con wrap-up articles with 2014 X-Wing™ North American Champion Rick Sidebotham’s unique preparation and how it affected his results. If you plan on attending a major tournament such as Nationals or Worlds in the future, Rick’s advice can be a valuable tool toward improving your experience and your results. Prepare to Make Your Run Greetings X-Wing players! Because my experience at Gen Con 2014 has been covered in the past, it was really important to me to include some fresh material in this article. Therefore, I’ve decided to share how I prepared for the tournament, how that preparation (or in some cases, lack thereof) affected my performance, and the potential benefits to thinking outside of the box. The Squadron This squadron was not originally built to be flown in a major tournament setting, but rather for an evening of casual play shortly before a Regional Championship earlier this year. At the time, I thought it would be fun to fly a list that included a TIE Phantom, a TIE Interceptor, and a Lambda-Class Shuttle. When I made the decision to try the list at the Kingston, ON Regional Championship, the final pilots and upgrades were based on making the squadron as competitive as possible with those three ships. While fielding a squadron that was fun to fly was my primary motivation, I at least wanted to make sure I had a fighting chance against the most likely competitive combinations I could expect to face.
- Whisper (32) with, Fire Control System (2), Gunner (5), Advanced Cloaking Device (4), and Veteran Instincts (1)
- Soontir Fel (27) with Push the Limit (3)
- Captain Yorr (24)
Tournament Preparation While I believe the squadron itself is solid, I think the primary reason why I was able to have success with it at both Kingston and the North American Championship was due to my preparation. In preparing for my first-ever X-Wing tournament earlier this year I created a list of the squadron archetypes that I expected to see. Ever since that first tournament, I’ve been adding to the list along the way. So now, whenever I decide to work on a squadron for competitive play, I always refer back to my master list. An abridged version of my list prior to the North American Championship consisted of the following:
Rebel Archetypes |
Imperial Archetypes |
- 4-Ship Un-named (B-Wings/X-Wings)
- 3-Ship Named (B-Wings/E-Wings/X-Wings)
- Named YT-1300 plus Support
- Named YT-1300 plus Z-95 Headhunter Mini-Swarm
- Double YT-1300
- Rebel Swarm (Z-95 Headhunter/A-Wing)
- YT-1300/B-Wing/E-Wing/X-Wing plus Z-95 Headhunter Mini-Swarm
- Biggs
- Board Control (Ion/Stress/ORS Blocking)
|
- TIE Swarm with or without Howlrunner (TIE Fighter/TIE Bomber/TIE Interceptor)
- Double/Triple Firespray-31s
- 3 Lambda-Class Shuttles plus Support/4th Shuttle
- 3-4 “Push the Limit” TIE Interceptors
- Jonus plus Ordinance-Carrying TIE Bombers or HLC TIE Defenders
- TIE Bombers with Bombs
- Super Flankers (Whisper/Echo/Soontir Fel)
- Doom Shuttle (Lambda-Class Shuttle with Darth Vader Crew)
- Board Control (Stress)
|
This was my best educated guess of the potential squadrons I could face. If you decide to do some similar preparation before your next league event or tournament, I encourage you to create a list of your own based on your knowledge
and experience. Once I had an idea of what squadrons I could expect to face, I had to get in some practice playing against them. Between work and family commitments, I was only able to get in about three or so games per week, not nearly enough time to play against everything out there. I decided there were a few steps I could take to streamline the process.
The first step was to try and figure out a way to put some of these archetypes into larger groups based on the squadron I was fielding. As an example, early in the process, I was able to develop a good general plan for opposing squadrons that came at me in a large block of ships. I generally had success if I could engage in a military pincer with Yorr securing the middle and Whisper and Soontir Fel on each flank. Now, if there was something special within that block of ships, I’d have to modify my tactics accordingly, but having a general plan to deal with a large group of archetypes was a great time-saver for me. The next step I took was applying some priority to what I was going to practice against. I looked for archetypes that I felt I had a smaller chance of facing and then further selected ones from that group that I felt confident my squadron could handle most of the time. This allowed me to eliminate another large portion of my list from the playtest pool. For example, I looked at the Jonus archetype and didn’t think there was a good chance of facing it, and I didn’t think it would give my squadron too many problems if I did. In further prioritizing squadrons for preparation, I looked for those that I felt would be both most difficult for my squadron to face and had a high probability of being represented. Whisper with a mini-swarm, a named YT-1300 with a Z-95 mini-swarm, and Han Solo with Veteran Instincts (making him Pilot Skill 11) plus support were the three squadrons that I playtested against the most. From there, I tried to play each of the remaining semi-unique archetypes at least once. As my playtesting continued, I considered making some tweaks to further overcome some of the squadron’s shortfalls. In the end, I decided those tweaks caused more harm than good. With my squadron finalized, I was ready for the North American Championship! Or so I thought. The North American Championship The format for the North American Championship involved two preliminary flights of up to 128 players. The top 32 of each preliminary flight would move on to the Finals to compete in five rounds of Swiss play before cutting to the top 8 to play in a single-elimination bracket. I had purchased a ticket to play in the first preliminary round and decided that I was going to give it just that one shot, so I had to finish in the top 32!
My first loss was against a squadron that consisted of Han Solo (with Veteran Instincts and other upgrades, but didn’t include Gunner or Luke) and 4 Z-95’s. This squadron fit into the archetype that I had considered my biggest challenge. I had practiced against it more than anything else and had an overall strategy and some specific in-game tactics that allowed me to win more times than I lost against it. The biggest thing for me was that I couldn’t make a mistake. Of course, I ended up making a number of small mistakes about two thirds of the way through the round. A combination of failing to see a potential block, choosing a maneuver that limited me to one decloak location, and letting emotion cloud my judgment led to my defeat. As hard of a loss as that was, it had confirmed everything I learned in my preparation. My squadron had a very good chance of beating one of its worst matchups, even when piloted by a very skilled player. (My opponent was Matt Baxter who finished in the top 8 overall.) It also confirmed that my squadron is not forgiving. My second loss came in the very next game. I played against a 2-ship “shield-gaining build” that included Corran with R2-D2 and Luke with R5-P9, in addition to a slew of other upgrades on each. I hadn’t playtested against anything even remotely similar, but I knew what my opponent’s general strategy was going to be. He was going to try and hit hard, and once one of his ships took a bunch of damage, break it off and let it regain shields while occupying my squadron with the other, then switching the two roles once the initial ship had regained its shields. I hoped that having two mobile ships in Soontir and Whisper would allow me to catch the damaged ship and finish it off before turning my attention to the other. Well hats off to my opponent, Christian Bush! Even knowing in principal what he was going to try and do, I couldn’t stop it from happening. I had Corran down to one hull but failed to have a move the following turn to take him out. I wasn’t confident that I could accurately guess where he’d be in two turns, so I felt I had no choice but to switch up and go for Luke. I worked on Luke until he was down to one hull when Corran returned and killed Whisper right as time expired. This was my first game against a squadron I hadn’t prepared for, and it ended in a loss. After a couple wins, I experienced my third loss of the day against a squad that consisted of Whisper with Veteran Instincts, Soontir Fel, and Carnor Jax, all with a number of nasty upgrades. Looking back at my list of archetypes, you won’t see anything like this there. I knew Jax had the potential to be a huge problem. Both Soontir and Whisper rely heavily on focus and evade tokens when they are unable to arc dodge. With my opponent also having Whisper and Soontir, I was either going to lose shooting first or lose the ability to dodge arcs against two ships that were great at reacting. I felt like keeping my focus and evade actions was critical, and my on-the-spot plan was to try and create a pincer such that I could catch Jax in the middle. As our ships maneuvered closer, I was able to engage just as I thought I had wanted, but I was unable to take Jax out. At this point, I realized there was a huge flaw with my plan; if I couldn’t take Jax out next turn, he’d be within range 1 of all three of my ships, not allowing me to take or use the tokens that are so essential to my list. Engaging that way was a huge mistake. I failed to kill Jax the following turn and proceeded to get massacred by my opponent. If I had playtested against Jax at least once, there’s a chance I would have been able to see how devastating Jax could be if he got into the middle of my pincer and lived. I again tip my hat to my opponent, Randy Baker, for handing me my worst loss of the North American Championship. In the end, I finished the preliminary rounds with a 4-3 record. That, combined with my strong margin of victory, allowed me to barely slide into the Finals at 28th out of 32. Not my greatest day of X-Wing, but the most interesting part as I reflect back was the squadrons I lost against and how those squadrons compared to my preparation. Tune In to Worlds Coverage Thanks, Rick!
Be sure to return tomorrow to read how Rick did in the Finals, including an undefeated record on the way to becoming North American Champion! © and ™ Lucasfilm Ltd. ... Source: A Champion's Perspective: X-Wing (TM), Pt 1 (http://www.fantasyflightgames.com/edge_news.asp?eidn=5189)
Title: FFG:Redouble Your Focus
Post by: RSSFeeder on 12 November 2014, 04:30:03
Redouble Your FocusSeven New Age of Rebellion Specialization Decks Are Now Available
“Stretch out with your feelings.”
–Obi-Wan Kenobi Climb effortlessly through the ranks of the Rebel Alliance with Star Wars®: Age of Rebellion™ Specialization Decks. Seven new Specialization Decks are now available! Available via FFG’s in-house manufacturing, these Specialization Decks each come with twenty talent cards for a single specialization, providing you with quick and easy access to the rules for the talents and abilities from the Soldier and Spy careers, as well as the universal Force-Sensitive Emergent specialization. In the heat of battle, deep in the heart of the Empire, and in the presence of the dark side, these Specialization Decks and their cards allow you to focus your efforts more fully on the challenges at hand. Take aim, press forward with your mission, and draw strength from the power of the Force. Clarity in the Heat of Battle 
The Rebellion relies upon its Soldiers to take up arms and face death while fighting for the cause. Across the galaxy, the Rebellion’s Soldiers take the fight to the Empire on countless battlefields. While many millions of troops simply serve in the rank and file, your Player Character serves a role that’s deeper and more varied, and the Specialization Decks for the Soldier career can help you keep your cool, even as blaster fire erupts all around you. - Commandos are specialists trained to strike the enemy from unexpected directions to do the most damage in the most vulnerable locations. A Commando knows how to find a target, attack it, disable it, survive the aftermath, and find his way home.
- Many think Medics are inherent pacifists. While a Medic might prefer to save a life rather than take it, most realize the necessity of fighting and violence for a greater cause, and are more than ready to strike down an enemy in order to save a comrade.
- When a firefight erupts, the Sharpshooter maintains his composure, takes careful aim, and eliminates threats with ruthless efficiency and lightning speed. Sharpshooters are, simply, the masters of personal-scale ranged combat.
The Right Place at the Right Time 
Spies are Soldiers of a different type. Spies don’t meet the enemy on the battlefield so much as seek out the enemy’s secrets, undo the enemy’s plans, and hinder the enemy’s ability to battle effectively. In the right place at the right moment, a single Spy can save (or destroy) many thousands of lives. Specialization Decks for the Spy career help you simplify your tasks so that you can focus better on performing each one as carefully as possible; after all, everything hinges upon a single, well-timed action. - The Rebellion’s Scouts are experts at slipping into and out of systems unnoticed to provide the Alliance the information it needs to commit its forces to action. They determine where the enemy is, what the enemy is doing, and what the conditions of the area of operations are like.
- Slicers are warriors who go to battle with codes, data packets, lightning-quick programming skills, and the ability to rewire communication networks to unmake the enemy’s plans and reduce its technology to heaps of useless metal, plastic, and wires.
- Infiltrators perform the tasks that most people imagine when they hear the word, “spy.” They excel at placing themselves in the very den of the beast, sneaking and lying to enter undetected. There, they work without backup in the very worst of circumstances to gather valuable intelligence about the enemy and their plans.
My Ally Is the Force 
As Force users have been among those persecuted by the Empire, many of them have come to sympathize with the Rebellion and its goals. Within the ranks of Rebel organizations, Force-sensitive individuals are relatively safe from the Empire and have access to one of the few remaining societies in the galaxy that openly acknowledges and encourages an understanding of the light side of the Force. Still, the galaxy is at war, and even those Force-sensitives who have joined with the Rebellion will likely find themselves drawn into battles with Stormtroopers or other foes. In such situations, the Force-Sensitive Emergent Specialization Deck helps you clear your mind and reach out with your feelings to touch the Force. Hone Your Talents The Galactic Civil War will claim many lives. If you want to be among those who survive and fight to make a difference, you’ll want to give yourself every advantage. In dire situations, you need to be able to trust your talents, your gear, and your companions. You can’t let worries distract you from taking your shot or getting your job done. Hone your talents and tend to your equipment with seven new Specialization Decks for the Soldier and Spy careers, as well as the universal Force-Sensitive Emergent specialization. These Age of Rebellion Specialization Decks are available now. Order yours today! ... Source: Redouble Your Focus (http://www.fantasyflightgames.com/edge_news.asp?eidn=5193)
Title: FFG:System Crash
Post by: RSSFeeder on 12 November 2014, 21:30:03
System CrashThe Third Draft Pool for Android: Netrunner Is Now Available
“Whatever doesn’t kill you makes you stronger. Whatever doesn’t stop your run is very likely going to kill you.”
–g00ru Dial the tension of Android: Netrunner up to eleven with System Crash, the third pool of cards for Android: Netrunner Draft Play! System Crash Draft Starters, Corp Draft Packs, and Runner Draft Packs for Android: Netrunner Draft Play are now available via FFG’s in-house manufacturing! Consisting of 199 randomized cards collated from across the whole network of Android: Netrunner products, System Crash incorporates more than forty cards downloaded from the upcoming Order and Chaos deluxe expansion and SanSan Cycle. When you play System Crash drafts, you’ll be able to add these cards to your rig or HQ before they’re even released in standard LCG® products! In addition to providing fans some sneak peeks at upcoming cards, System Crash introduces new draft play challenges for both Corps and Runners. Your servers are more porous, your rigs are less stable, and every run can result in disaster for one side or the other. Flooded with destructive effects, the System Crash card pool is all about bluffing, timing, and tension. You need to keep your opponent under pressure, but can you afford to keep pressing? 
Constant Pressure In System Crash, Corps and Runners both find themselves under constant pressure. Corps find fewer ice that end the run, but they benefit from a plethora of destructive effects that can trash the Runner’s rig… or simply trash the Runner. Meanwhile, Runners find plenty of ways to trash Corp cards, but fewer consistent breakers. The result is a uniquely harrowing Android: Netrunner experience. - No Safety. With every run, Runners risk having their rigs blow up on them, or suffering massive bursts of net damage. On the other hand, Corporate servers are constantly under assault by programs and events that destroy ice or assets, or even entire servers. In System Crash, every run is full of danger for both parties, and nothing is safe.
- Risk and Reward. There are very few expose effects but many destructive ice, meaning that Runners assume a great deal of risk with every run. Every time, you have to ask yourself, “Is that a three-point agenda, or a trap that will kill me?”
- Targeted Recursion. In System Crash, everything’s constantly at risk of exploding. But for each of your programs or ice that are destroyed, there is also a way to recover it.
For more about how System Crash Draft Starters and Draft Packs allow players to participate in an alternative and exciting draft play format for Android: Netrunner, visit our Android: Netrunner Draft Play description page. What Do I Need to Play? Each player participating in an System Crash draft will need to bring three items: a seventeen-card Draft starter and two forty-card Draft Packs, one each for Corp and Runner. Alternatively, groups with even numbers may split so that half the players draft only Corp cards while the other half drafts only Runner cards. In such drafts, each player only needs the System Crash Draft Starter and a single Draft Booster. Draft Starters: The System Crash Draft Starter is a fixed collection of rules and fourteen utilitarian cards that include a draft-only Corporate identity, The Shadow, and a draft-only Runner identity, The Masque.  
These “Draft format only” identities are not legal in standard play.
Apart from the identities, these cards all differ from those that appear in the Cyber War and Overdrive Draft Starters. Their agendas, icebreakers, and economy cards all place Corp and Runner at constant risk, heightening the tension of your cyberstruggles and ensuring that your System Crash games enjoy a distinctive feel. Additionally, all Draft Starter cards are clearly distinguished from both the larger Android: Netrunner card pool and the cards in the System Crash Draft Packs, allowing you to collect them after your games and prepare for your next draft. Because these Draft Starters are reusable, you only need one, no matter how many System Crash drafts you play! 
All draft cards are clearly identified by a new icon, and starter pack cards are further distinguished from draft cards by color.
Draft Packs: Randomized System Crash Draft Packs for Corp and Runner are compiled according to a custom algorithm from a card pool of 199 cards called System Crash. To learn more about how System Crash Draft Packs are created, visit the Android: Netrunner Draft Play description page. All cards found in System Crash draft products, except for those marked “draft format only,” are legal in standard tournament play as soon as they are tournament legal and released within the standard LCG format. Accordingly, each card from Order and Chaos and the SanSan cycle will become legal for tournament play once the LCG Data Packs in which it is contained goes on sale at retailers. However, because of variations in production color and card-stock resulting from our in-house manufacturing, players using draft cards in tournaments must sleeve their cards with opaque or art sleeves. Running in the Face of a System Crash How quickly can you process the myriad challenges of Android: Netrunner Draft Play? Compile your cards, advance your agendas, and launch your runs in the exciting System Crash draft pool for Android: Netrunner! Pick up your System Crash Draft Starter, Corp Draft Pack, and Runner Draft Pack today! Note: Android: Netrunner draft products do not serve as a replacement for the standard Android: Netrunner LCG® model. Instead, Android: Netrunner draft products allow players to enjoy the game through an additional format of play. Orders for products printed via FFG's in-house manufacturing may take 10 – 14 days to ship. ... Source: System Crash (http://www.fantasyflightgames.com/edge_news.asp?eidn=5195)
Title: FFG:A New Form of Madness
Post by: RSSFeeder on 13 November 2014, 14:30:03
A New Form of MadnessNecronomicon Draft Play Is Now Available for Call of Cthulhu: The Card Game
Find Answers to Your Questions: | | “Of his final death or disappearance (738 A.D.) many terrible and conflicting things are told. He is said by Ebn Khallikan (12th cent. biographer) to have been seized by an invisible monster in broad daylight and devoured horribly before a large number of fright-frozen witnesses. Of his madness many things are told.”
–H.P. Lovecraft, History of the Necronomicon The time has come for daring investigators to blow the dust off the world’s darkest and most forbidding tomes in order to explore their maddening mysteries more deeply than ever. Necronomicon Draft Starters and Draft Packs are now available via FFG’s in-house manufacturing! With Necronomicon Draft Starters and Draft Packs, you and your friends can enjoy the exciting and unique challenges of Call of Cthulhu: The Card Game Draft Play, a new, alternate play format now available for Call of Cthulhu: The Card Game. 
What Is Draft Play? Draft play is like a parallel universe, close to the world of standard Call of Cthulhu game play, but separated by a thin veil. When you enter its reality, though, Call of Cthulhu Draft Play introduces a unique set of challenges, forcing you to build a deck from cards that you select one at a time from a limited number, without full knowledge of the available card pool. Accordingly, you’ll develop strategies for how to select your cards and build your deck. Furthermore, you’ll stretch and adapt to the format’s challenges as you and your friends test your mettle against each other with draft-built decks. For more about how Necronomicon products allow players to participate in an alternative and exciting draft play format for Call of Cthulhu: The Card Game visit our Call of Cthulhu: The Card Game Draft Play description page. What Should I Expect from the Necronomicon Draft Pool? Lead Developer Damon Stone offers this introduction to the Necronomicon draft experience: “The Necronomicon draft pool is an environment in which deep powers long asleep grow restless, as do their monstrous supporters, while at the same time mortal associations marshal their forces to regain control of human destiny. “Within the 240-card draft pool, each faction gains a subset of cards that present numerous interactions with each other, as well as a strong core of utilitarian cards which highlight the faction’s strengths. “Day and Night mechanics are also available, as well as a number of cards from the Dreamlands cycle that interact with them, and these can help create an interesting tug of war. “Two new story cards are included in the Draft Starter, unique to this draft pool, which will help round out a cherry-picked story deck. A Crack in the Ice allows you to remove a troublesome card from the game, potentially changing the game’s whole complexion.

"Rampaging Shaggoth has an ability similar to several other story cards, forcing each player to discard a won story card… However, unlike the past the story cards that featured similar effects, the effect of Rampaging Shaggoth has an important “if able” clause that gives its winner the opportunity to create a one-sided story loss, making this story even more valuable for come-from-behind efforts and increasing its usefulness.
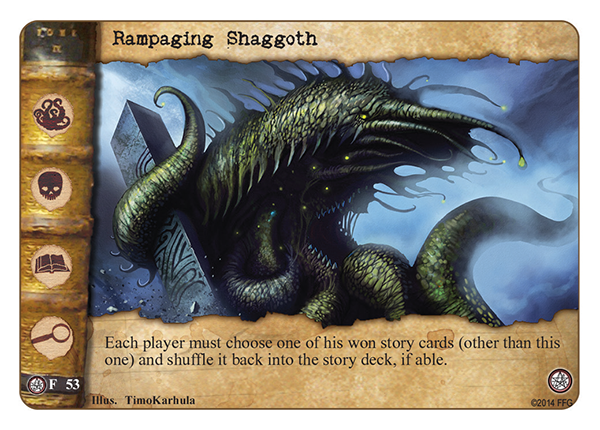
“Finally, since Call of Cthulhu Draft Play features no restrictions on the number of cards you can include by title, and no restricted list, deck-building takes on an entirely new dimension.” What Do I Need to Play? If you want to start a Necronomicon draft with your friends, each player will need to bring two items: a fixed, twenty-card Draft Starter and a randomized Draft Pack. Draft Starters: The Necronomicon Draft Starter is a fixed collection of necessary cards that can be reused any number of times, so you only need to purchase this item once to participate in any number of Necronomicon drafts. Draft Starters contain rules for draft play, some utilitarian neutral cards, and a unique Necronomicon story deck that introduces two new story cards designed specifically for the Call of Cthulhu Draft Play experience. These cards are clearly distinguished from both the larger Call of Cthulhu: The Card Game LCG card pool and the cards in the Necronomicon Draft Packs, allowing you to collect and sort them after each of your games. No matter how many Necronomicon drafts you play, you’ll only ever need one Draft Starter. Draft Packs: The heart of each Necronomicon draft are its Necronomicon Draft Packs, each of which is an unique collection of fifty randomized cards, carefully compiled from a 240-card set called Necronomicon. 
All draft cards are clearly identified by a new icon, and starter pack cards are further distinguished from draft cards.
To learn more about how Necronomicon Draft Packs are created, visit the Call of Cthulhu: The Card Game Draft Play description page. All cards in Necronomicon draft products, excepting the stories, are legal in standard Call of Cthulhu: The Card Game tournament play. However, because of variations in production color and card-stock resulting from our in-house manufacturing, players using draft cards in tournaments must sleeve their cards with opaque or art sleeves. Begin Your Investigations The portals have opened. The Ancient Ones begin to stir from their eons of slumber. Draft play has arrived to Call of Cthulhu: The Card Game! Explore new options and face new challenges in the face of utter insanity. Pick up your Necronomicon Draft Starter and Draft Pack today! Note: Necronomicon draft products do not serve as a replacement for the standard Call of Cthulhu LCG model. Instead, Necronomicon products allow players to enjoy the game through an additional format of play. ... Source: A New Form of Madness (http://www.fantasyflightgames.com/edge_news.asp?eidn=5197)
Title: FFG:Maximum Firepower
Post by: RSSFeeder on 13 November 2014, 23:00:04
Maximum FirepowerAnnouncing the STAR WARS (TM): Armada Dice Pack
“Intensify forward firepower!”
–Admiral Piett Don’t wait until it’s too late to intensify your firepower. The enemy fleet approaches firing range. Squadrons of starfighters race into position. Star Destroyers, corvettes, and frigates raise their shields and ready their weapons. The massive battles of Star Wars™: Armada are soon to begin. As you prepare for the upcoming conflict, you’ll want to make sure your strategy is sound, your ships are in good repair, and you have all the ammunition you need. With the Star Wars™: Armada Dice Pack, you can better concentrate your fire, raining destruction upon your foes. 
Plan for Every Contingency In Armada, you need to learn how to plan ahead. Capital ships are massive war machines that measure hundreds of meters long and can boast crews that number in the thousands. They can’t dart nimbly about the battlefield like the starfighters that accompany them, and successful fleet admirals need to adjust their plans to the realities of their ships. Even so, one of the best ways to ensure that your strategy meets as few impediments as possible is to plan for every possible contingency. While you’re commanding multiple capital ships and directing numerous starfighter squadrons, you don’t need additional surprises or distractions. 
The nine custom dice in the Armada Dice Pack ensure that you’ll be ready for every eventuality. With its three blue, three black, and three red attack dice, you’ll focus less on rolling and more on finding the best possible shot. Fully Armed and Operational As your gunners take their stations, make sure your turbolaser batteries and your quad laser cannons are fully armed. With the Star Wars: Armada Dice Pack, you’ll have all the firepower you need to defeat any foe. 
The Star Wars: Armada Dice Pack is scheduled for release in early 2015, at the same time as the Armada Core Set and the Wave One starship and squadron expansions. ... Source: Maximum Firepower (http://www.fantasyflightgames.com/edge_news.asp?eidn=5191)
Title: FFG:Expand Your Fleet
Post by: RSSFeeder on 14 November 2014, 07:30:03
Expand Your FleetAnnouncing the First Wave of Expansions for STAR WARS (TM): Armada
“The fleet will be here any moment.”
–Leia Organa Fantasy Flight Games is proud to announce the upcoming release of the first wave of Star Wars™: Armada expansion packs! As you launch into Armada and its tactical fleet battles, these expansion packs allow you to customize and expand your fleet. Five of them introduce carefully detailed and pre-painted capital ships, each of which comes with its command dials, ship cards, an array of upgrade cards, and all the tokens and other components you need to deploy it into battle. Meanwhile, the fighter squadron expansion packs each come with eight sculpted squadrons, representing four different types of fighters. You’ll also find eight squadron cards, including one unique card for each type of squadron. Use these expansions to grow your fleet or to tailor it around your favorite strategy. Either way, these ships, squadrons, and upgrades allow you to explore a vast range of tactics and strategies that reach beyond those available in the Core Set. Victory-class Star Destroyer Expansion Pack The largest and most powerful of the starships from the Armada Core Set, the Victory-class Star Destroyer formed the core of the Imperial Navy at the outset of the Galactic Civil War. These ships measure roughly nine-hundred meters in length, sport crews numbering over five-thousand, and feature a dagger-shaped design that allows them to concentrate nearly all their weapons on their forward firing arcs. 
The Victory-class Star Destroyer Expansion Pack bolsters your fleet with one sculpted and pre-painted miniature Star Destroyer identical to the Star Destroyer miniature from the Core Set. It also comes with all requisite tokens and command dials, as well as more than a dozen ship and upgrade cards. The expansion’s two ship cards allow you to outfit your Star Destroyer as either a Victory I or Victory II, and its fourteen upgrades open a wide range of strategic possibilities as they allow you to upgrade your armament, your crew, and even your Star Destroyers themselves. CR90 Corellian Corvette Expansion Pack The first starship to appear in the classic Star Wars trilogy, the CR90 Corellian corvette is a small capital ship of roughly 150 meters that featured prominently in the Rebellion, largely due to its versatility. Often referred to as “blockade runners,” CR90 corvettes can be outfitted to slip through Imperial blockades, haul cargo, serve as trooper carriers, or engage Imperial ships in battle. 
You can add one of these versatile starships to your Rebel fleet with the CR90 Corellian Corvette Expansion Pack. The expansion comes with one pre-painted miniature CR90 corvette, one command dial, all requisite tokens, and ship cards for both the CR90a and CR90b configurations. Additionally, eight upgrades allow you to equip your corvette for battle, including the commander card, Mon Mothma, and the Tantive IV title card. Nebulon-B Frigate Expansion Pack The Nebulon-B frigate was designed for the Imperial Navy by Kuat Drive Yards as a warship that could protect convoys from Rebel starfighters, but it was, ironically, a much more impactful ship within the Rebel fleet. At three-hundred meters long, a single Nebulon-B could boast twelve turbolasters and twelve laser cannons. 
The showpiece of the Nebulon-B Expansion Pack is its detailed and pre-painted Nebulon-B frigate miniature, and the expansion then enhances this ship by supplying all the command dials and tokens you need to fly it, along with ship cards that allow you to build it into your fleet as a fighter escort or as a powerful support ship. Additionally, the expansion’s eight upgrade cards, which include two unique title cards, allow you to further customize your frigate’s role within your fleet. Assault Frigate Mark II Expansion Pack The largest and most heavily armed of the Rebellion’s first Armada starships, the Assault Frigate Mark II is a light warship seven-hundred meters long that sports a crew just under five-thousand and features a considerable armament of fifteen turbolaser batteries, fifteen laser cannons, and twenty quad laser cannons. Designed in secret by Rebel engineers, the Assault Frigate Mark II frequently surprises Imperial admirals with its speed. 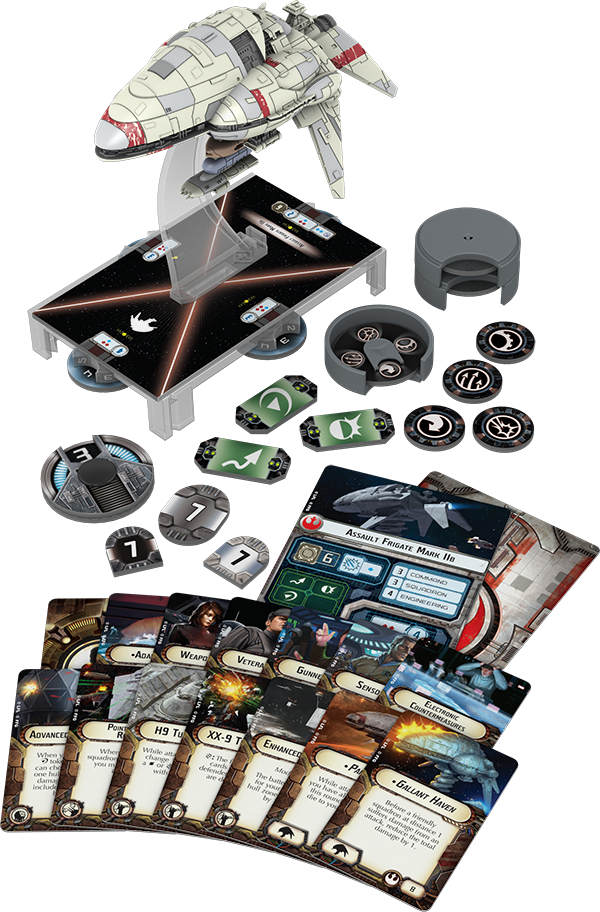
The Assault Frigate Mark II Expansion Pack introduces one fully pre-painted Assault Frigate Mark II starship miniature, along with all the command dials and tokens that you need to bring it to battle. Two ship cards allow you to configure your Assault Frigate Mark II to better fit your fleet, and fourteen upgrade cards allow you to further refine its role within your fleet as you select your crew, upgrade your armament, and assign your commander. Gladiator-class Star Destroyer Expansion Pack Originally designed as an escort for larger Star Destroyers, the smaller Gladiator-class Star Destroyer measures roughly five-hundred meters and proved most effective as a long-range patrol ship deployed to the fringes of the galaxy. There, its brutal armament of turbolasers, concussion missiles, laser cannons, and TIE squadrons allowed it to quickly subjugate any local opposition to the Galactic Empire. 
The Gladiator-class Star Destroyer Expansion Pack introduces one detailed and pre-painted miniature that the expansion’s two ship cards allow you to add to your fleet as either a Gladiator I or Gladiator II. You’ll also find all the command dials and tokens that you need to bring your Star Destroyer to battle, along with ten upgrade cards that can enhance its attacks, allow it to move between attacks, and improve its accuracy. Rebel Fighter Squadrons Expansion Pack Even in the largest of battles, a single pilot can sometimes prove the difference between victory and defeat. Some of the most pivotal battles of the Galactic Civil War have been decided by the Rebellion’s courageous starfighter pilots. 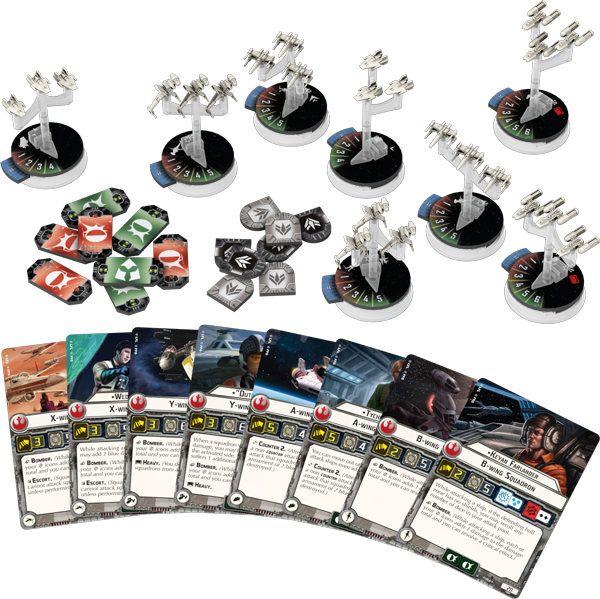
Squadrons play an important role in the tactical fleet battles of Star Wars: Armada. Though they’re dwarfed by the capital ships they accompany, squadrons are not to be ignored; swarms of them can take down even the largest of ships. By adding eight squadrons of A-wings, B-wings, X-wings, and Y-wings to your fleet, including unique squadrons led by such aces as Wedge Antilles and Tycho Celchu, the Rebel Fighter Squadrons Expansion Pack helps to tip the scales in your favor. Imperial Fighter Squadrons Expansion Pack In battle, the Empire deployed swarms of TIEs to neutralize enemy squadrons and safeguard its larger Star Destroyers and their superior firepower. These easily recognizable starfighters were designed for speed and maneuverability, rather than durability, and the aces who flew them through many battles quickly earned intimidating reputations for their combat skill and fanatical loyalty. 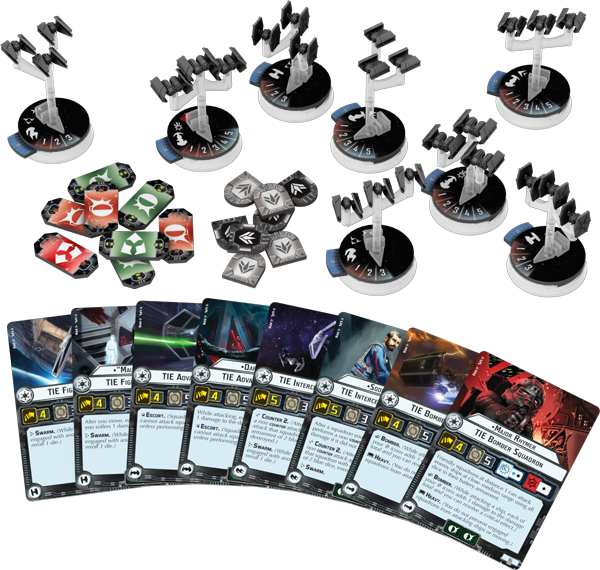
The Imperial Fighter Squadrons Expansion Pack introduces an array of eight starfighter squadrons, evenly split between four different types of fighters. By adding these TIE advanced, TIE interceptor, TIE bomber, and TIE fighter squadrons to your fleet, you’ll be able to swarm your foes, protect your capital ships, and send the Rebellion’s hopes down in flames. A Fleet to Fit Your Tactics Build your fleet, refine your tactics, and expand your Armada battles beyond the Core Set and its myriad possibilities with this first wave of expansion packs. All seven are scheduled to release in early 2015, at the same time as the Armada Core Set. Until then, keep your eyes open for more Armada previews, including previews of its fleet-building rules and the different tactical options presented by the Core Set and Wave One upgrades! ... Source: Expand Your Fleet (http://www.fantasyflightgames.com/edge_news.asp?eidn=5190)
Title: FFG:A Champion's Perspective: X-Wing (TM), Pt 2
Post by: RSSFeeder on 14 November 2014, 16:00:02
A Champion's Perspective: X-Wing (TM), Pt 2An Article on Preparation by 2014 North American Champion Rick Sidebotham
Today, we continue Rick’s Gen Con 2014 tournament report and hear what squads and situations he ran up against on his way to becoming Champion. If you missed yesterday’s article, be sure to read it first! The Finals After barely making it through the preliminary round, I was hoping for some better success in the Finals. As fate would have it, I was able to go 5-0, earning the top seed after five rounds of Swiss, and finish on top in each of my three single-elimination games. Here’s the list of the archetypes I faced during the Finals: - Round 1: Double YT-1300 (Han Solo & Chewbacca)
- Round 2: TIE Swarm (Howlrunner with empty TIE Bombers)
- Round 3: Soontir Fel, Vessery, Lambda-Class Shuttle with Vader Crew
- Round 4: TIE Swarm (Howlrunner with TIE Fighters)
- Round 5: 3 Lambda-Class Shuttles with Bounty Hunter
- Top 8: 3 Lambda-Class Shuttles with Bounty Hunter
- Top 4: TIE Swarm (Howlrunner with TIE Fighters)
- Finals: Double YT-1300 (Lando & Chewbacca)
When looking back at these matchups, the first thing that jumps out at me is that I prepared fairly well for almost all of the archetypes represented. Every player I faced in the Finals was extremely talented, so again, I credit my preparation for much of the success I had. Three of the eight games were against Howlrunner TIE Fighter or TIE Bomber swarms. During my playtesting, I found the pincer to be very effective against these types of swarms. Additionally, I was able to develop a pretty reliable approach path with Whisper that put my opponents in a difficult position. They have to decide to either turn and face him or head toward one of my other two ships. If they turn to face him, I can usually skirt around the edge at range 2-3 with 4 agility, 1 focus, and 1 evade token (very difficult to penetrate with multiple 2-dice attacks) while Yorr and Soontir inflict heavy damage from the flank. If they decide to ignore Whisper, he can easily get to within range 1 of Howlrunner while being outside of most, if not all, enemy arcs. All three of those games went pretty much according to plan. I also had to play two games, back-to-back, against the same opponent fielding 3 Shuttles with a Bounty Hunter. This is a very deadly list in the hands of someone who knows how to use it (which my opponent, Dominic Cairo, definitely did); however, there was one thing I noticed about the list during tournament preparation. The shuttles need to get into proper position early in the game in order to control the board and dominate. Since they typically have a low Pilot Skill and deploy early, multi-Shuttle players learn how to deploy in ways that allow them to react to their opponents’ deployment and early moves so they can gain that critical positioning. 
After realizing this, I developed a plan for asteroid placement that I feel greatly limits their ability to do so. I used this same asteroid placement in both my games, and I believe it was key in keeping my opponent from positioning his ships as he wanted early in the games. Our first game was very close, with me needing to eliminate a ship on the last turn of the game to get the win. In the second game, I altered some of my in-game tactics, allowing for a slightly greater margin of victory. But again, both games were very close, and I feel that without the asteroid placement I had developed during my preparation I could have been in big trouble.  While I didn’t practice against anything too similar to the squadron fielded by my round 3 opponent, it looked familiar. His shuttle and my Soontir chased each other around the board while our other ships mixed it up. I had some really hot attack dice early that limited what my opponent could do with Vessery. On a critical turn, I was able to pull a Koigran turn with Whisper (and Yorr taking the stress) that put him in position to eliminate my opponent’s Soontir. The game was pretty much over from there. While I didn’t practice against anything too similar to the squadron fielded by my round 3 opponent, it looked familiar. His shuttle and my Soontir chased each other around the board while our other ships mixed it up. I had some really hot attack dice early that limited what my opponent could do with Vessery. On a critical turn, I was able to pull a Koigran turn with Whisper (and Yorr taking the stress) that put him in position to eliminate my opponent’s Soontir. The game was pretty much over from there.
My first and last games of the day were both against double YT-1300 builds. They definitely had their differences, with the first one being offensive and the second being defensive, but during my playtesting I was able to come up with some pretty simple conclusions that greatly helped me in how I deal with double YT-1300 builds. Both Whisper (with a focus and an evade token) and Soontir (with two focus and one evade) can on average take two three-dice attacks a turn and typically come out unscathed. It doesn’t matter if those sets come from two different ships or one of the ships with Luke or Gunner, as long as the three-dice attacks don’t become four dice at range 1 or grow into three or four attacks by taking shots from both ships with at least one having Luke or Gunner. There are going to be times when I roll more blanks than normal, but with no opportunity to dodge arcs against turreted ships, I just try to put my ships in the best position I can based on the math. That math pretty much held up in both games. In the first game, I made a mistake that may have ended up helping me in the long run. I had put Whisper within range 1 of Chewbacca and range 2 of Han with Gunner and Marksmanship, but also barely overlapped Yorr with Soontir leaving Soontir without any focus or evade tokens. It took both Han and Chewbacca to kill a defenseless Soontir, but this allowed Whisper to remain safe even though he was too close. The next turn, Chewbacca went down and Han followed a few turns later. In the last match of the day, I didn’t have Gunner/Luke to contend with so I was comfortable getting a lot closer. Once close in, I was able to use a tactic learned in my preparation that involves intentionally bumping Whisper into one of the YT-1300’s so long as I had a shot at the second YT-1300. This tactic works out great as it actually denies my opponent one four-dice attack in exchange for my action (which is typically evade.) I’ll take that trade any day. Looking at the rest of the top 8 finishers, there were definitely some pretty tough lists I didn’t have to face. Any squadron that includes Han Solo with Veteran Instincts is a very tough matchup for my squadron. However, as I went through playtesting, I really felt like these lists could struggle in matchups where using the Elite Pilot Talent (EPT) slot on Veteran Instincts was a waste. By not taking Predator, Push the Limit, Draw Their Fire, or any of the other great EPTs out there I hoped the field would help me weed out all the Pilot Skill 11 Han Solo lists, and it did!   
Thinking Outside of the Box While this article focused mostly on my tournament preparation and the North American Championship, I want to close with this final thought: When deciding what to bring to your next tournament, think outside the box. Most players put in some level of preparation prior to participating in a tournament. The bigger the tournament the greater amount of overall preparation put in by the participants. Out of the 14 games I played at the Championship only two of them were against lists that I hadn’t prepared for, and I lost both of them.
The rest of the top 4 consisted of: - Jeff Berling’s synergetic and defensive double YT-1300 build with Chewbacca and Lando. Creative, unexpected, and very effective in timed tournament games.
- Nick Jones’ classic Wave 1 Howlrunner with TIE Fighter Swarm. With many believing that this and similar builds are no longer effective, Nick was able to show the ability to adapt to and overcome new releases and tactics.
- Paul Heaver’s Han with Veteran Instincts, Biggs, and Tala Squadron Pilot. Successfully combining two squad archetypes and brutal on-the-table tactics to be able to take on just about anything.
I think each of these players fielded squadrons that were outside of what many other participants expected to see, and that, to at least some extent, contributed to their success. I wonder how many participants had prepared to face a squadron consisting of Whisper, Soontir Fel, and Yorr? Thanks for reading. Fly-casual, and don’t be afraid to think outside the box! 
Thanks, Rick!
That wraps up our look back at the X-Wing™ 2014 North American Championship. We hope to see you at next year's Gen Con for the 2015 North American Championship or early next year for our Store Championships! © and ™ Lucasfilm Ltd. ... Source: A Champion's Perspective: X-Wing (TM), Pt 2 (http://www.fantasyflightgames.com/edge_news.asp?eidn=5198)
Title: FFG:Monsters of Primal Myth
Post by: RSSFeeder on 09 December 2014, 08:30:02
Monsters of Primal MythPreview an Ancient One and the Adventures of Mountains of Madness
The things once rearing and dwelling in this frightful masonry in the age of dinosaurs were not indeed dinosaurs, but far worse… They were the makers and enslavers of that life, and above all doubt the originals of the fiendish elder myths which things like the Pnakotic Manuscripts and the Necronomicon affrightedly hint about.
–H. P. Lovecraft, At the Mountains of Madness Eons ago, sentient life forms stronger and more ruthless than mankind ruled the earth. These Elder Things enslaved other species and built a civilization far more advanced than our own. But as earth’s climate changed, the Elder Things lost their power and withdrew to what is now Antarctica, waiting out the millennia for a time when they might rise again. In the Mountains of Madness expansion for Eldritch Horror, that time has come. The Elder Things are awakening, and you must prevent them from retaking control of the world. Today’s preview focuses on the Rise of the Elder Things, one of the two Ancient Ones that you can combat in Mountains of Madness. We will also look at the expansion’s Adventures, which guide your Antarctic expedition and reward you for braving the continent’s terrible conditions and terrifying horrors. 
The Rise of the Elder Things When Professor Lake and the other members of the Miskatonic University expedition found star-shaped, tentacled, and winged creatures in the Antarctic ice, they understood the monumental significance of their discovery, but not the monumental threat these creatures posed. They thought they had found frozen fossils, but instead found living, vicious, and enraged Elder Things. Since then, the Elder Things have only become stronger. There are even reports of them venturing beyond Antarctica. Your struggle against them may therefore take place on multiple fronts: in Antarctica, Arkham, the Heart of Africa, or even in Other Worlds. 
Because the Elder Things are pernicious and persistent creatures, and because the necessary Antarctic journey is an immense undertaking, a larger Mythos deck grants you and your fellow investigators more time to defeat them. To fight their brainwashed Cultists, you must test your knowledge of arcane lore. If you manage to break the power that the Elder Things hold over a Cultist, however, he will join you as an Ally and aid you in your investigation. To quell the Elder Things you must solve four mysteries, one more than is necessary to defeat other Ancient Ones. Your search for answers will certainly lead you south to Antarctica, where you will follow in the footsteps of Professor Lake and his colleagues. You may have to visit the Miskatonic Outpost and defeat a Crazed Elder Thing, so horrifying that seeing it can instantly wreck an investigator’s sanity. To kill it, you’ll need a weapon created by the Elder Things’ ancient enemies, the alien Mi-Go. You may seek clues in the prehistoric City of the Elder Things beyond the Snowy Mountains, fight brainwashed Cultists at Lake Camp, or enter an Other World from Shanghai only to exit it on the icy, transdimensional Plateau of Leng. Or you may end up investigating an international string of mysterious disappearances in cities across the globe, tracking down a rumoured human trafficking circle or investigating a quaint inn where travelers check in, but never leave. If allowed to run free, the Elder Things will use their speed, strength, and vast intelligence to subjugate humans as they have countless other species. By solving their mysteries, you can save the human race. 
The Path of a Doomed Expedition If you are fighting the Rise of the Elder Things as your Ancient One, it is inevitable that some investigator on your team will undertake a journey to Antarctica. Yet such an expedition is still a worthwhile undertaking even if you are fighting Azathoth, Yig, or Cthulhu. If you choose to play with the Antarctica side board, but are battling an Ancient One other than the Rise of the Elder Things, Adventures guide your Antarctic expedition. They compose a three part story, assigning your team of investigators specific tasks and offering substantial rewards for success. At the beginning of the game, you’ll draw an Antarctica I Adventure which will lay the groundwork for your journey to Antarctica. Raising Funds for an Expedition, for example, compels you to go to Arkham and test your influence in order to gain a funding condition and retreat Doom by one. Once the preliminary step is completed, you’ll draw an Antarctica II adventure guiding you on the early stages of your expedition. If you draw Excavating the Elder Things, you'll have to visit Lake Camp and encounter the horrors that Professor Lake unearthed there. Once you’ve performed your research there, an Antarctica III adventure may take you to the City of the Elder Things in order to defeat the Rampaging Shoggoth monster that dwells deep within the ruins. Killing it allows you to advance the active mystery– that could involve placing a clue or Eldritch token on the mystery, or dealing damage to a more fearsome Epic Monster. 
Face What You Fear The cruel and cunning Elder Things will not be satisfied with slaughtering explorers and ravaging outposts. They have global ambitions, and their awakening deep in the ice has global repercussions, from gates opening in the Amazon to cult-related abductions in London. Whether you spearhead a worldwide fight against their rise, or undertake an Antarctic expedition within your struggle against Azathoth or Shug-Niggurath, in Mountains of Madness you must confront the horrors awakened by the Miskatonic University expedition… or else watch as humanity falls under their control. Our next preview will feature the other Ancient One introduced in this expansion, as well as the Prelude cards that introduce a unique starting setup to each game of Eldritch Horror. Pre-order Mountains of Madness from your local retailer today. ... Source: Monsters of Primal Myth (http://www.fantasyflightgames.com/edge_news.asp?eidn=5213http://www.fantasyflightgames.com/edge_news.asp?eidn=5213)
Title: FFG:Fantasy Flight Games to Merge into the Asmodee Group (TM)
Post by: RSSFeeder on 09 December 2014, 17:00:03
Fantasy Flight Games to Merge into the Asmodee Group (TM)A Press Release and Q&A on the MergerFantasy Flight Games is proud to announce an upcoming merger with the Asmodee Group™! Please read below for a press release and a short Q&A on the subject of the merger.  
FANTASY FLIGHT GAMES® TO MERGE INTO ASMODEE GROUP™ Paris, France; Roseville MN, November 17th, 2014. Today, Asmodee – a leading international publisher and distributor – and Fantasy Flight Games – a worldwide recognized hobby games publisher – proudly announced the pending merger of the two companies. The terms of the deal were not disclosed. The Asmodee Group of game companies will gain access to Fantasy Flight Games’ strong sales, operational and marketing infrastructure in North America, as well as Fantasy Flight Games’ almost-20 years of expertise in game development and multi-language game manufacturing. Fantasy Flight Games will benefit from Asmodee’s impressive distribution and marketing reach in Europe, greatly improving its product placement and organized play initiatives across the continent. “I am delighted to welcome Christian and his team to the Asmodee Group,” said Stéphane Carville, CEO of Asmodee Group. “Fantasy Flight Games is a highly reputed publisher within the gaming community. It has demonstrated its ability to create great games and to establish fantastic relationships within the hobby games market and large entertainment companies. Together, we will continue to bring unique, innovative and high-quality games to gamers worldwide.” “Fantasy Flight Games has enjoyed tremendous growth over the last 10 years,” said Christian T. Petersen, CEO and founder of Fantasy Flight Games. “By joining forces with Asmodee, we’ll be able to continue that growth, expand our international marketing capabilities, and create additional career opportunities for our terrific staff. Most importantly, we can do this while staying true to our vision of creating great products for the global hobby games market.” Fantasy Flight Games will continue to operate out of its Roseville, MN headquarters, where its hardworking creative teams will keep creating those ambitious and narrative hobby games experiences for which Fantasy Flight Games has become known. Christian T. Petersen will continue as the CEO of Fantasy Flight Games while also becoming a significant shareholder of the combined entity. No staffing changes are anticipated. Asmodee and Fantasy Flight Games Merger Q&A A few questions related to the Asmodee and Fantasy Flight Games (“FFG”) merger have been anticipated below. How will FFG’s and Asmodee’s product lines be affected? FFG’s new and existing product lines will continue to be developed by FFG and sold under the FFG logo. FFG will stay a fully independent publisher in the Asmodee Group, and intends to keep creating the best games possible. A few of FFG’s products, whose identity may be deemed a better fit under a different Asmodee Group brand, may transition within the group. Similarly, Asmodee’s existing and new products will continue to be developed by Asmodee’s creative staff and/or affiliate studios, and published under the Asmodee, or the independent studios’, logo. Those Asmodee games deemed a great fit for FFG may transition to FFG’s catalog. The Asmodee Group has close business ties with a number of important board game publishers, such as Repos, Matagot, Ystari and others. How will the merger impact those relationships? The union gives Asmodee and its partners access to FFG’s strong logistical and operational presence in North America, as well as access to FFG’s proprietary development tools and manufacturing infrastructure. Beyond those advantages, the identity, product development, marketing (such as website and convention presence) and sales representation of Asmodee’s close publishing partners will be unaffected. FFG has many important intellectual property licenses. How will these be affected, and will other Asmodee partners and affiliates be able to take advantage of those licenses? FFG expects to retain all of its licensing relationships, and will work with both Asmodee and its licensors to extend licensing potential to those parts of the Asmodee Group that makes sense for the overall product strategy and the individual license. How will North American hobby market retailers and distributors be affected by this merger? There are no immediate plans to change any of FFG’s or Asmodee’s hobby market retailer or distributor relationships in North America. Most game retailers outside the U.S.A purchase FFG’s product from international distributors, many of whom translate and publish FFG’s product in their local languages. How will these distributors work with the combined entity? For the foreseeable future, it is anticipated that current and upcoming FFG products will continue to be localized and sold by FFG’s existing international partners. Asmodee intends to work with those same distributors to broaden product availability, marketing presence, and organized play support where possible. When should international players expect to see improvements to FFG’s organized play programs? While incremental progress will happen sooner, players should expect that it will take more than a year for all intended improvements to be implemented. About Fantasy Flight Games and the Asmodee Group
Fantasy Flight Games is a leading hobby games market publisher in the board, card, roleplaying, and miniature game categories. Fantasy Flight Games’ best-known titles include games based on licenses such as Battlestar Galactica, The Lord of the Rings, Sid Meier’s Civilization, and Star Wars, as well as proprietary titles such as Arkham Horror and Descent: Journeys in the Dark. Fantasy Flight Games’ principal executive offices are located at 1995 County Road B-2 West, St. Paul, MN 55113, United States of America. Asmodee Group is a leading international games publisher and distributor with operations located in Europe, the United States, and China. Asmodee’s best known titles, either published or distributed on behalf of key publishing partners, include Ticket to Ride, Splendor, 7 Wonders, Dixit, Takenoko, Abyss, Timeline, Dobble, Jungle Speed, and Werewolves of Millers Hollow. In some European countries, Asmodee also distributes trading card games such as Pokemon, Magic, Yu-Gi-Oh!. Asmodee’s head office is located at 18 rue Jacqueline Auriol, 78041 Guyancourt France.
Asmodee Contact:
CICOMMUNICATION, Marion Felix
felix@cicommunication.com
(33) 1 47 23 90 48
Fantasy Flight Games Contact:
Stephen Horvath, SVP of Marketing and Communications
shorvath@fantasyflightgames.com
... Source: Fantasy Flight Games to Merge into the Asmodee Group (TM) (http://www.fantasyflightgames.com/edge_news.asp?eidn=5212http://www.fantasyflightgames.com/edge_news.asp?eidn=5212)
Title: FFG:Bounty Hunters and Monsters
Post by: RSSFeeder on 10 December 2014, 01:30:02
Bounty Hunters and MonstersPreview the Mercenary Faction in Imperial Assault
“Mos Eisley spaceport. You will never find a more wretched hive of scum and villainy.”
–Obi-Wan Kenobi, Star Wars: A New Hope
Command the massed forces of the Galactic Empire in Imperial Assault, an upcoming miniatures game of Star Wars adventure and combat for two to five players. When you play as the Imperial player, you must crush the upstart Rebellion that plagues the galaxy, and to do that, you can hire the galaxy’s least savory beings to finish the job. Imperial Assault invites you to experience your battles and adventures in two complete games. The campaign game allows you to explore an expanding story, weaving an engaging narrative with story missions and side missions as every character gains new skills and abilities. The skirmish game, on the other hand, offers two players the chance to muster unique armies before doing battle over conflicting objectives in a test of tactical acumen. In past previews, we’ve looked at the might of the Empire in the campaign game. We previewed the Imperial figures and we explored the threat, Class cards, and agendas that the Imperial player can take advantage of. Today, we turn to those who will fight alongside the Empire if the price is right – the Mercenary figures in Imperial Assault! 
Deadly Hunters The Mercenaries of Imperial Assault find skilled fighters in the Trandoshan Hunters. Trandoshans are specially gifted as bounty hunters and brawlers, and many campaign missions find them fighting alongside Stormtroopers and other soldiers of the Empire. Trandoshan Hunters feature a variety of surge abilities that can be triggered during combat. Like the nexu, they can spend a surge to inflict the Bleeding condition on the target of their attack, and they can also use surges to pierce their opponent’s armor and ignore blocks rolled against their attack. Elite Trandoshan Hunters are well-accustomed to the hunt, and they can spend a surge to become Focused, granting an extra green die to their next attack.  
The Trandoshan Hunters’ other abilities reflect their preference for close combat. The Relentless ability lets them inflict a strain when they attack any figure within three spaces, giving you a way to reduce the heroes’ options for movement and triggering special abilities. Trandoshan Hunters are also equipped with Scatterguns. This ability allows them to apply an additional damage when they attack an adjacent figure. Elite Trandoshan Hunters feature an improved version of this ability with the ACP Scattergun, which applies two extra damage to attacks against adjacent figures. Ferocious Monsters Native to the planet Cholganna, the nexu is one of the most feared carnivores in the galaxy. With razor claws, a whipping tail, spines running down its back, and a mouth filled with fangs, the nexu is the consummate predator. In the Imperial Assault campaign game, some of these deadly creatures have been tamed by the Mercenary faction, and they are now used as attack beasts, defending key locations from Rebel spies or other intruders. In battle, nexu are fast and deadly melee combatants with an array of keywords and abilities. All nexu share the Mobile keyword, reflecting their natural agility and familiarity with the wilderness. The Mobile keyword enables a nexu to bypass the movement restrictions of terrain, including allowing entrance to impassible or blocking terrain and ignoring extra movement costs from difficult terrain or spaces containing hostile figures. Nexu also bear the Bleed keyword, meaning that whenever a nexu’s attack causes damage, it inflicts the Bleeding condition. As long as a figure is Bleeding, he must suffer one strain after resolving an action until he uses an action to remove the condition. Nexu also have a variety of ways to increase the amount of damage they deal. They can spend surges to pierce armor or increase damage, and they also have the capability to cleave other targets. If you use the Cleave ability, you may deal the listed amount of damage to another figure adjacent to the nexu. Elite nexu can even cleave two damage without spending a surge!  
Nexu also offer a variety of special abilities that can be triggered outside of combat. The Pounce ability allows you to place the nexu in any empty space within three spaces and immediately perform an attack. This ability gives you tremendous power to traverse the battlefield and suddenly attack a Rebel hero who may have thought himself safe from harm. Nexu are also difficult to pin down with an attack. The Cunning ability grants them an extra block for each evade result they roll on the defense die. Since a nexu rolls the white defense die, it will gain an extra block on half of the attacks made against it. Finally, although nexu are dangerous in combat, they are not truly sentient. The Non-Sentient ability prevents a nexu from interacting with terminals, doors, or other objects in any mission, inviting you to focus them completely on rending your opponents apart. A Mechanical Foe  In Imperial Assault, the Trandoshan Hunters and the nexu are joined by a Droid even more dangerous than them – IG-88, an Assassin Droid. IG-88 is one of the galaxy’s most feared bounty hunters, and any Rebel unfortunate enough to face this Droid in a mission may simply choose to turn and flee. In Imperial Assault, the Trandoshan Hunters and the nexu are joined by a Droid even more dangerous than them – IG-88, an Assassin Droid. IG-88 is one of the galaxy’s most feared bounty hunters, and any Rebel unfortunate enough to face this Droid in a mission may simply choose to turn and flee.
In battle, IG-88 possesses a variety of unique surge abilities provided by his armor, weapons, and programming. First, he applies a constant additional block to every defense and two additional accuracy to every attack, allowing him to shake off more damage and make successful attacks from further away. He can also spend a surge to recover three damage as his internal machinery repairs any damage. Finally, he can unleash the full power of his specialized weaponry by spending a surge to deal two additional damage. IG-88 also offers a variety of powerful abilities in combat. IG-88 can choose any combination of two attack dice for his attack pool with the Arsenal ability. This ability offers IG-88 the opportunity to specifically alter his attack pool based on how close his target is. Two blue dice gives an attack maximum possible range, but you may choose to use two red dice against closer targets to cause the maximum amount of possible damage. IG-88 also bears the Relentless ability, like the Trandoshan Hunters. With this ability, IG-88 will inflict a strain on his target whenever he declares an attack against a nearby figure. Finally, IG-88 has the Assault ability, which lets him make multiple attacks during each activation. Most of the Imperial player’s figures are limited to one attack per activation, but when you command IG-88, you can unleash an unending hail of destruction against your foes. Hire the Mercenaries No matter what mission you command the Mercenaries of the galaxy in, they’ll undoubtedly prove to be a potent asset for the Imperial player. Gather your best hunters, and prepare to exterminate the Rebels forever! In our previews so far, we’ve focused exclusively on the Imperial Assault campaign game. In our next preview, however, we turn to the tense, tactical missions that make up the skirmish game. Check back for our first preview of the Imperial Assault skirmish game and pre-order Imperial Assault at your local retailer today! ... Source: Bounty Hunters and Monsters (http://www.fantasyflightgames.com/edge_news.asp?eidn=5214http://www.fantasyflightgames.com/edge_news.asp?eidn=5214)
Title: FFG:STAR WARS (R): Force and Destiny (TM) Beta Update 10
Post by: RSSFeeder on 10 December 2014, 10:00:03
STAR WARS (R): Force and Destiny (TM) Beta Update 10News From the Developers of the Force and Destiny Beta
Hello Force and Destiny™ beta testers, This week’s playtesting update (pdf, 326 KB) is fairly light. Our primary focus is on some changes to starships and vehicles. Some of these changes are to make some of the ships more durable, while, in one case, the goal is to ensure cross-compatibility with the other Star Wars RPG game lines. As we look forward to the next round of updates, we are interested in hearing more feedback about our new starships and vehicles, especially those with which the PCs can start their games, such as the Pathfinder and G9 Rigger. Make Sure Your Voice Is Heard  By now, it’s probably no surprise that we’re nearing the end of our beta testing process for Force and Destiny. At this stage, we want to encourage anyone with urgent or important feedback to submit it to us as soon as possible. Your time for offering feedback is now limited, and we want you to make sure your voice is heard as we continue refining the Force and Destiny Core Rulebook to make it the best possible system for playing as Force-users in the Star Wars universe. By now, it’s probably no surprise that we’re nearing the end of our beta testing process for Force and Destiny. At this stage, we want to encourage anyone with urgent or important feedback to submit it to us as soon as possible. Your time for offering feedback is now limited, and we want you to make sure your voice is heard as we continue refining the Force and Destiny Core Rulebook to make it the best possible system for playing as Force-users in the Star Wars universe.
We will not have a beta update next week; instead we will spend the next two weeks accumulating feedback from beta testers on any issues you have found in your playtesting that have not yet been addressed. As we wrap up this beta test, we just want to thank you all one more time for all the hard work you’ve put into this. The current version of Force and Destiny is much improved over the version we started testing back in August, and that’s thanks to your diligent efforts. Great work, everyone! ... Source: STAR WARS (R): Force and Destiny (TM) Beta Update 10 (http://www.fantasyflightgames.com/edge_news.asp?eidn=5215http://www.fantasyflightgames.com/edge_news.asp?eidn=5215)
Title: FFG:Android: Archived Memories
Post by: RSSFeeder on 11 December 2014, 03:00:02
Android: Archived MemoriesInsights from the Developers of the Android Universe
Archived Memories is a periodic series of articles in which the developers of the Android universe look at the challenges, processes, and rewards unique to the development of a constantly evolving world set in the far future and deeply rooted in human motives and ambitions. In our last run into Archived Memories, we accessed an interview with Matt Zeilinger, one of the most influential artists working with Android: Netrunner. During his interview, Matt discussed his enthusiasm for getting to work with the game’s very human Runners, who just happen to have some quirks and talents that make them extraordinary. Today, Dan Clark, co-designer of the Android universe, takes another look at what makes these Runners tick. 
Developer Dan Clark on the Android: Netrunner Core Set Runners Early in the design of Android: Netrunner, the runner factions were called “classes,” they had names like “Brute,” “Infector,” and “Ghost,” and they focused on the different ways that runners overcame the challenges before them. The problem was these were thematically too narrow. They begged for new classes, and the game couldn’t support an unlimited expansion of factions. They were all relatively flavorful and could inspire some compelling characters, but they didn’t give us the range we wanted. We tried a handful of solutions to this conundrum before settling on the motivation-based factions that are in the game today. The Anarch, Criminal, and Shaper factions are broad tents, relatively comprehensive, and each capable of hosting a wide variety of interesting runner identities. We were pleased with what the factions offered us, so from there, we had to choose which characters to use as our first entries into each faction. Ji “Noise” Reilly 
Noise first appeared as a murder suspect in the board game, Android.
|
|
Noise is a Heinlein-born g-mod who has been on the wrong side of the law many times, although the charges never seem to stick. He’s young, reasonably handsome, incredibly intelligent, and from a wealthy, respected family. His parent’s weren’t risties, but they were rich enough to afford a brighter future for their child. He should by all rights be living the life of a well-compensated corp tech, programmer, or financier. Instead, he has turned to a life of cybercrime. It’s difficult to tell what motivates someone like Noise, whose mind is enhanced to the point where he may literally be too smart for everyday people to understand. But he does seem to be angry about something, and perhaps his actions are a rebellion against the life his parents and the corporate system chose for him. Created by designer and producer Kevin Wilson, art director Zoë Robinson, and artist Julie Dillon, Noise first appeared in the Android board game as one of the murder suspects. Kevin’s direction for Noise (and for all the suspects) was that he should seem untrustworthy, like someone whom the audience could easily believe was the murderer. He was conceived as a post-punk punk and computer hacker. In short, he was the quintessential runner, before we had any idea that we’d be developing Android: Netrunner. Later, once we started to work on the game, it seemed obvious and inevitable that Noise would return. With his dangerous but unpredictable intellect, not to mention his fashion sense, Noise seemed like a natural fit as the first Runner identity for the Anarch faction.  
Noise from the Android: Netrunner Core Set (left) and the 2014 North American Championship Tournament prize kit (right).
Gabriel Correa Santiago Born in New Angeles and raised off-grid, Gabriel Correa Santiago never had a future as a normal, law-abiding citizen. Disenfrancistos in the undercity of New Angeles, like Gabriel once was, have no obvious path out. With no official IDs, they can’t easily get government assistance or education, not to mention jobs. The jobs they can find are difficult or dangerous, usually illegal, and the pay is awful. Things have only gotten worse with the rise of androids driving wages down. So the fact that Gabriel turned to a life of crime isn’t surprising; what is surprising is that he found he was very good at it. 
When he first appeared in Infiltration, Gabriel Correa Santiago was the “tech expert.”
Gabriel got his start in chip-ripping and PAD-cracking, but it didn’t take him long to start learning the trade and moving on to bigger and better things. He never received formal schooling, but he received a top class education in running from years of on-the-job training and a series of increasingly learned and sinister mentors in both meatspace and on the shadow net. Now Gabriel is one of the most accomplished cybercriminals you’ll find anywhere – not just in New Angeles, but in the solar system. And all this time, he’s never forgotten his first rule: look out for yourself, ‘cuz no one else will. Gabriel Correa Santiago was originally created for Donald X. Vaccarino’s Android: Infiltration card game. I worked on Gabriel with producer Frank Mark Darden, art director Zoë Robinson, and artist Kelley Harris. In that game, each of the criminals had a flavorful role. Mr. White was “the Brains,” for example, and Monica Singh was “the Assassin.” Gabriel was the “Tech Expert,” and at the time that was all he was intended to be. But as our plans for Android: Netrunner took shape, and we realized that we wanted to bring back Noise, it seemed like bringing back Gabe would also make a lot of sense. Once the Criminal faction was finalized, and we realized how perfect and emblematic an example of that faction Gabriel could be, the decision was final. Gabriel got his promotion from “Tech Expert” to world-class runner. That meant that two of our three Core Set Runner identities were recurring characters from prior games. We decided to do something different for our third runner.  
Gabriel Santiago as he appears in the Android: Netrunner Core Set (left) and on the alternate art card that was distributed during the Plugged-in Tour.
Kate “Mac” McCaffrey 
Mac was born and raised in BosWash, the daughter of a single father who more or less raised her in his garage working on increasingly outdated automobiles. He bragged he was the only man in a hundred klicks who could repair a combustion engine, but when Mac tried to follow in his footsteps he told her not to. “This is guy stuff, sweetie,” he said. So began Mac’s lifelong habit of doing everything she was told she couldn’t or shouldn’t do. She rebuilt combustion engines. She played hockey. She modded electronics. She took boxing lessons. She wrote her own code. Anytime some suggested she was too young, or too small, or too female to do something, she threw herself wholeheartedly into it. Somehow, along the way, she became one of the world’s premier cybercriminals and builders of illegal hardware and software. It’s a life that agrees with her, and it lets her meet like-minded friends and explore her own abilities and desires. She probably could use her talents to go legit, but people keep saying that their servers are impenetrable, or that she should watch out because the NAPD might catch her, and Mac is nothing if not stubborn… |

Kate “Mac” McCaffrey is the only one of the three Core Set Runners to make her first appearance in Android: Netrunner. She received an alternate art treatment for the 2013 Season Two Game Night Kit.
|
|
Kate “Mac” McCaffrey was the only Core Set runner created solely for Android: Netrunner. We already had two male runners in Gabriel Santiago and Noise, so we knew we wanted our third runner to be a woman. Given that Noise was a g-mod (genetically modified) and Gabe was a cyborg, we also wanted our third runner to be a “natural,” a normal, unmodified human. From there, we brainstormed a bunch of fun character concepts, trying to find the one that both best encapsulated the Shaper philosophy and would have strong and broad appeal for our audience. One of these other concepts, by the way, later became Chaos Theory, the second Shaper runner. I created Mac with Android: Netrunner designer Lukas Litzsinger, art director Andrew Navaro, and artist Ralph Beisner. She was designed to offer a more hands-on, “earthy” approach to technology, and also an approach that was more joyful. She definitely evokes a mechanic with her toolbelt and goggles, and her name is an homage to classic science-fiction author Anne McCaffrey and modern geek pop culture icons Mac (from Veronica Mars) and Kaylee Fry (from Firefly). Her name was initially Katie McCaffrey, but the design team ultimately decided that it made her sound too young and secondary to her co-stars Noise and Gabriel Santiago, so she now goes by Kate. Thanks, Dan! The Android universe continues to grow with each new Data Pack and deluxe expansion for Android: Netrunner, and its growth, in turn, inspires new cards, including new Corp and Runner identities. In fact, in a future installment of Archived Memories, designer Lukas Litzsinger will look at some of the ways that the personalities of the Android universe inspire and shape the direction of Android: Netrunner. ... Source: Android: Archived Memories (http://www.fantasyflightgames.com/edge_news.asp?eidn=5217http://www.fantasyflightgames.com/edge_news.asp?eidn=5217)
Title: FFG:The Hunt Begins
Post by: RSSFeeder on 11 December 2014, 11:30:03
The Hunt BeginsThe Howl of Blackmane Is Now Available for Warhammer 40,000: Conquest
The deadly conflicts and tactical considerations of the Warlord cycle begin with The Howl of Blackmane, now available at your local retailer! With this War Pack for Warhammer 40,000: Conquest, you can start the hunt for your opponent’s warlord across the planets and battlefields of the Traxis sector. This expansion introduces sixty new cards, including a new warlord for the Space Marines, his signature squad, and three copies each of seventeen other cards. As we explored in the announcement, you now have the chance to embark on a wild hunt with Ragnar Blackmane and his Space Wolves, stalking your opponent’s warlord wherever he may hide until all enemies of the Emperor are destroyed. Of course, you’ll find support for every other faction in this War Pack as well. You may perform noble deeds with the Astra Militarum, or devote yourself to the pestilence of Nurgle with the Death Guard. Eldar Harlequins, Tau Ethereals, and Ork Boyz each join the struggle for the Traxis sector in The Howl of Blackmane. 
Alternatively, if you’re already planning the tortures that await your prisoners, you may turn to the Dark Eldar in search of the tools you need to conquer. A Truly Invigorating Death  You’ll find plenty of cruel Dark Eldar tactics in The Howl of Blackmane, beginning with Visions of Agony (The Howl of Blackmane, 14). This Torture event can be played anytime as an Action, and it allows you to look at your opponent’s hand, immediately giving you vital information concerning what may await your armies in the Traxis sector. Not only that, but you can choose and discard any one card from your opponent’s hand, negating the most potent threat to your plans! A well-timed Visions of Agony can remove a powerful event like Exterminatus (Core Set, 26) or Doom (Core Set, 141) from your opponent’s hand. Or, you could remove a card with a large amount of shields, clearing the way for a punishing attack against your opponent’s warlord. You’ll find plenty of cruel Dark Eldar tactics in The Howl of Blackmane, beginning with Visions of Agony (The Howl of Blackmane, 14). This Torture event can be played anytime as an Action, and it allows you to look at your opponent’s hand, immediately giving you vital information concerning what may await your armies in the Traxis sector. Not only that, but you can choose and discard any one card from your opponent’s hand, negating the most potent threat to your plans! A well-timed Visions of Agony can remove a powerful event like Exterminatus (Core Set, 26) or Doom (Core Set, 141) from your opponent’s hand. Or, you could remove a card with a large amount of shields, clearing the way for a punishing attack against your opponent’s warlord.
The Dark Eldar also gain a heavy-hitting Elite unit with the Uber Grotesque (The Howl of Blackmane, 13). This Creature features a high HP, promising your opponent will have to work to destroy this unit. It also bears the text, “Reaction: After you play a Torture event card, this unit gets +3 ATK until the end of the phase. (Limit once per phase.)” By playing a Torture event like Visions of Agony or Power from Pain (Core Set, 116), you can turn your Uber Grotesque into a monstrous attacker, able to bloody warlords like Captain Cato Sicarius (Core Set, 1) or Zarathur, High Sorcerer (Core Set, 4) in a single blow. In Warhammer 40,000: Conquest, winning command struggles at planets is your most efficient way of gaining new resources and cards. One way to deny your opponent the spoils of victory is to deploy units with more command icons to the contested planet, or commit your warlord to that planet. Archon’s Palace (The Howl of Blackmane, 15) gives the Dark Eldar another tool to strangle your opponent’s resources or card draw. By exhausting this support when your opponent wins a command struggle, you can cancel either the card bonus or the resource bonus of the planet this round! If the planet, like Osus IV or Barlus, only provides a resource bonus or a card bonus, you can keep your opponent from gaining anything by using Archon’s Palace. Join the Hunt The Howl of Blackmane gives you the chance to hunt for your opponent’s warlord in entirely new ways. Whether you charge into battle with Ragnar Blackmane or undermine your opponent’s plans with the Dark Eldar, you’ll find the cards to vanquish your opponent and claim the Traxis sector in this War Pack. Pick up your copy of The Howl of Blackmane at your local retailer today! ... Source: The Hunt Begins (http://www.fantasyflightgames.com/edge_news.asp?eidn=5228http://www.fantasyflightgames.com/edge_news.asp?eidn=5228)
Title: FFG:Start Your Quest
Post by: RSSFeeder on 11 December 2014, 20:00:04
Start Your QuestThe Witcher Adventure Game Is Now Available
Sharpen your blades and prepare your spells: The Witcher Adventure Game is now available at your local retailer and online through our webstore! Enter the Northern Kingdoms and fight to become the most renowned hero in the realm in The Witcher Adventure Game, a board game of crucial quests and desperate battles in the world of The Witcher. In every game, two to four players take on the roles of iconic characters: Geralt of Rivia, Triss Merigold, Dandelion, or Yarpen Zigrin. Only by completing quests, developing your skills, and battling monsters can you gain the renown you need to establish your name and shape the history of the Northern Kingdoms! 
An Epic Journey In past previews, we’ve explored various aspects of The Witcher Adventure Game. Our first preview focused on the actions that you take each turn, which allow you to experience the world of The Witcher. You’ll need to move to follow your quests, but moving can prove dangerous. You can also choose to develop your character and improve your skills or investigate the land around you, discovering helpful information or suffering deadly setbacks. Evil circumstances may even force you to rest from your travels, taking time to recover from your wounds. The second preview examined the way you pursue victory. You must complete quests to win The Witcher Adventure Game, using your military might, your knowledge of magic, or your diplomatic aplomb. Of course, a quest is far more complicated than just a simple objective. Side quests give you other opportunities to earn victory points by completing other tasks, such as spending money, traveling the realm, or slaying monsters. Support quests, on the other hand, give you the chance to temporarily work together with your opponents, granting victory points to both players. 
We also delved deep into the daunting obstacles that stand in your way as you travel throughout the realm. Monsters spill into the Northern Kingdoms from other spheres, and only the greatest of heroes can dispatch them. While fighting a battle, you must roll the battle dice and your hero dice, attempting to slay the beast while protecting yourself from harm. You must use your resources carefully if you wish to successfully attain both goals. Other ills may also befall you as you journey throughout the land. You may be forced to draw a Foul Fate card, which may cause you to become poisoned, or waylaid by bandits! 
Our final two previews explored the four heroes you may play in The Witcher Adventure Game: Geralt the Witcher, Triss the sorceress, Dandelion the bard, and Yarpen the dwarven warrior. Each hero has a distinct style of play and different skills to help him along the way. Geralt, for instance, is a master of combat, whereas Dandelion survives by his wits and his silver tongue. Triss Merigold’s magical skill is unmatched, and Yarpen can command the aid of his dwarven kin. Each of these heroes must complete different quests to achieve victory, making every game of The Witcher Adventure Game unique. The Adventure Begins Your quests in the Northern Kingdoms are about to begin! Learn more by downloading the rules for The Witcher Adventure Game from the support page, and watch the game’s video tutorial on YouTube. Gather renown and prepare for an adventure that will shake the world! Pick up your copy of The Witcher Adventure Game at your local retailer today! ... Source: Start Your Quest (http://www.fantasyflightgames.com/edge_news.asp?eidn=5229http://www.fantasyflightgames.com/edge_news.asp?eidn=5229)
Title: FFG:Wave V Is Now Available
Post by: RSSFeeder on 12 December 2014, 04:30:03
Wave V Is Now AvailableBlast into Action With Two Large New X-Wing (TM) Starships
Fly at full throttle. Blast through asteroids and debris fields. Pummel your foes with big guns. The fifth wave of X-Wing™ starship expansions has arrived! Now available at retailers everywhere, X-Wing Wave V consists of the Rebel YT-2400 Freighter Expansion Pack and the Imperial VT-49 Decimator Expansion Pack. 
Altogether, Wave V introduces two large-base ships, six unique pilots, and a war chest’s worth of new upgrades that include such notable crew members as Dash Rendar, Lando Calrissian, Mara Jade, and Moff Jerjerrod. Additionally, Wave V marks the arrival of the game’s first World Champion cards, Dash Rendar and Stay on Target, and both of its ships come with punishing turret weapons that are bound to obliterate many smaller starfighters in battles across the galaxy! A New Imperial Tactic In several ways, the VT-49 Decimator flies in the face of standard Imperial tactics. It is the first Imperial starship to feature a turret weapon capable of firing in a full 360-degree arc, and where most Imperial starships feature little or no shielding, but demand that their pilots make good use of their tremendous agility, the Decimator has absolutely zero agility. Instead, it features a whopping four shields and twelve hull. Naturally, the result of such a unique ship design is the potential for unique, new squadron designs, and the introduction of the VT-49 Decimator may single-handedly herald the introduction of a new Imperial archetype. 
A 360-degree view of the VT-49 Decimator
The standard by which Imperial squadrons have long been judged is the TIE swarm, a venerable and perennially successful X-Wing squadron archetype whose origins date back to the release of the Core Set and TIE Fighter Expansion Pack. Indeed, it may be the game’s single most important archetype to-date, and it relies upon the same numerical superiority and efficient starfighters that first drew the Empire toward swarm tactics. Apart from “Howlrunner,” who enhances all her wingmates, TIE swarms don’t rely upon famous pilots and their unique abilities. You can just take any non-unique pilot, even one fresh out of the Academy, and sit them in the cockpit. From there, you let the TIE’s natural efficiency take over. With their two attack dice, three agility, and three hull, TIE fighters piloted by Academy Pilots are right near (or at) the top of X-Wing efficiency. They are also extremely limited in their versatility and prone to one-shot obliteration. TIE swarms also tend to get picked apart once skillful players whittle down their numbers and force them to split their fire between multiple targets. When you face a TIE swarm, you more or less know what sort of tricks and tactics you’re going to see over the course of a game. By contrast, the VT-49 Decimator offers an immense amount of customization, both among its pilots and with its upgrades. The abilities of the Decimator’s pilots suggest wildly different tactics. Whereas Rear Admiral Chiraneau gains performs best while keeping his foes at a distance, Captain Oicunn prefers to slam straight into them.  
Similarly, the expansion’s crew members do everything from helping to keep the ship from exploding, like Moff Jerjerrod and Ysanne Isard, to encouraging you to engage multiple foes at Range 1 at the same time, like Mara Jade. Indeed, the Decimator benefits from a vast array of options permitted by its three crew slots, its ability to equip a torpedo and a bomb, and the talents of its three unique pilots, as well as any elite pilot talents they can utilize. Altogether, they mean there’s absolutely no reason that any two Decimators should ever need to pursue the same course of action. Like the TIE phantom, whose pilots have inspired fear in squadrons who may never even face them, the VT-49 Decimator is bound to shake up the X-Wing metagame. It’s not just a powerful, resilient, hard-hitting starship; it’s a threat that the Empire can now wield like a club. 
For more information about the VT-49 Decimator and its upgrades, you can read our preview article, “Ruthlessness and Intimidation.” Fly Where You Want The YT-2400 is a remarkable addition to X-Wing and the Rebel fleet for two key reasons: - It’s the game’s first large-base ship to feature the barrel roll action.
- When equipped with the Outrider Title, the YT-2400 can wield a turret-mounted cannon, but then it becomes the first starship that cannot perform attacks with its primary weapon.

A 360-degree view of the YT-2400
Naturally, these two key component’s of the ship’s identity play off of each other, and they go a long ways toward describing its personality. Piloted most famously by the renowned smuggler Dash Rendar, the YT-2400 is a highly maneuverable vessel that excels at getting safely out of tight places. Its maneuver dial is loaded with banks and turns, including two three-speed turns that it can use to race out of an opponent’s path. 
The YT-2400's maneuver dial. |
|
It makes sense that a smuggler would want to get out of harm’s way, but X-Wing is a game of skirmishes in which you’ll want to get your ships into battle. Here, the YT-2400’s maneuverability and barrel roll make it a fantastic flanker, especially if you equip it with an Engine Upgrade. In such circumstances, the YT-2400 can start on the opposite edge of the table from the rest of your squadron but still rush to their aid when the shots start flying. Meanwhile, if you give your YT-2400 the Outrider upgrade, it can attack with a Heavy Laser Cannon for no fewer than four dice from as far out as Range “3,” and your opponent won’t benefit from any additional defense dice. Of course, as soon as your opponent realizes that his ships are bound to suffer four-dice attacks from your Outrider, he’s likely to send his ships toward it. In fact, anytime you run the Outrider Title your opponent is likely going to aim to get within Range “1” of your YT-2400 so that his attacks will gain extra dice, and yours won’t be able to attack at all. This is where the YT-2400’s barrel roll comes in truly handy. Even with the new barrel roll rules for large ships that the YT-2400 Freight Expansion Pack introduces to the game, a large-base ship like the Outrider can perform a barrel roll to move one complete range increment laterally and nearly half a range increment backward or forward. 
Use your barrel rolls wisely, and your opponent may soon decide to turn his ships back toward the rest of your fleet! Meanwhile, even though its YT-2400 miniature and Outrider Title are the main highlights of the YT-2400 Expansion Pack, there’s plenty more in the box to strengthen your Rebel fleet (or even your Imperial fleet)! - Dash Rendar makes his first appearance in X-Wing as a pilot.
- He also makes his appearance as a unique crew member, designed by 2012 World Champion Doug Kinney.
- The elite pilot talent Stay on Target, designed by 2013 World Champion Paul Heaver, pushes the game further in the direction of unique pilots with high pilot skill values and powerful pilot abilities.
- A handful of other upgrades are also destined to serve as the basis for creative, new squadron designs: Lando Calrissian, Experimental Interface, and Lone Wolf.
For more information about the YT-2400 Freighter Expansion Pack, you can read our previews, “Stay on Target,” “Dash Rendar,” and “Blast into Action.” Go to Battle, Guns Blazing! Conquer the battlefields of X-Wing by harnessing the new ships, tactics, and technology introduced by the YT-2400 Freighter Expansion Pack and VT-49 Decimator Expansion Pack. Be sure to get your copies. Head to your local retailer today! ... Source: Wave V Is Now Available (http://www.fantasyflightgames.com/edge_news.asp?eidn=5227http://www.fantasyflightgames.com/edge_news.asp?eidn=5227)
Title: FFG:The 2014 Holiday Sale Ends December 1st
Post by: RSSFeeder on 12 December 2014, 13:00:02
The 2014 Holiday Sale Ends December 1stTake Advantage of These Seasonal Savings Before They Disappear
It’s not too late to find great gifts for all the gamers in your life! Running through Monday, December 1st, the 2014 Fantasy Flight Games Holiday Sale is your chance to take advantage of fantastic seasonal deals on games of all varieties. This year’s sale features nearly 300 titles, ranging from miniatures games such as Dust Tactics and Dust Warfare to board games like Gears of War to a vast library’s worth of roleplaying books, novels, and art books. Hurry to our webstore now, or read more to learn how you can take advantage of the 2014 Fantasy Flight Games Holiday Sale to launch your friends and family into fantastic holiday adventures! 
The Winter Campaign The year is 1947, and Allied and Axis forces continue to clash on the battlefields of Dust Tactics and Dust Warfare. Our Dust category includes a comprehensive collection of Allied, Axis, and SSU expansions for both games. In a world of alien technology, strange science, and bloody engagements, the soldiers of Dust Tactics and Dust Warfare continue to fight the ongoing battles of World War II with lasers, power armor, and powerful mechs. Both Dust Tactics and Dust Warfare use the same, meticulously detailed miniatures, so your armies for one game can pull double-duty in the other. Additionally, you can find professionally painted troops, mechs, and vehicles in our Dust Premium category. Prepare for your winter campaign in style! 
Our Dust miniatures have been among our hottest items throughout this year’s Holiday Sale. Do you have a miniatures gamer or wargamer in your life? Call in your troops, and win the war! Liven Up Your Festivities If you’re looking to add some excitement to your holidays, Gears of War™: The Board Game might be just the game you want! 
Designed by Corey Konieczka, Gears of War: The Board Game is based on the wildly popular third-person shooter by Epic Games. One to four players take on the roles of COG soldiers cooperating to destroy the Locust horde, and must work together to complete missions against an ingeniously challenging and varied game system. This holiday season, give someone the chance to Roadie Run into cover, spray enemies with blind fire, or rip Locust in half with a Lancer’s chainsaw! Holidays in the Imperium Nothing says “Happy Holidays” like the gift of unending war! This year, you can ring in the holidays with an assortment of roleplaying games set in the grim darkness of the 41st millennium. Choose from dozens of titles for Dark Heresy, Deathwatch, Rogue Trader, Black Crusade, and Only War. Moreover, as you prepare to head into battles across the Imperium, you can do so in style with our Collector’s Editions of Deathwatch and Black Crusade. In either game, you become one of the galaxy’s greatest warriors, fighting tirelessly to save the Empire or bring it to ruin. Few beings can stand against you, but you’ll meet your match in the hefty, stylized, and ornate Collector’s Editions of these core rulebooks. 
Unleash the Imagination Of course, there’s plenty more than Dust, Gears of War, and Warhammer 40,000 roleplaying in this year’s Holiday Sale. You can share laughs and excitement with lighter fare like Rockband Manager and the adventures of The Hobbit Card Game. You can explore the worlds and intrigues of Warhammer Fantasy Roleplay or Anima Roleplaying. You can help your friends to immerse themselves in the settings of their favorite games with novels from the Android, Tannhäuser, and Arkham Horror lines. Or you can simply take advantage of the sale to build your own armies, establish your own civilizations, and confront the forces of Sauron. Act quickly to take advantage of these deals while they last. The 2014 Fantasy Flight Games Holiday Sale ends Monday, December 1st. Visit our webstore now! ... Source: The 2014 Holiday Sale Ends December 1st (http://www.fantasyflightgames.com/edge_news.asp?eidn=5230http://www.fantasyflightgames.com/edge_news.asp?eidn=5230)
Title: FFG:Prep for Battle
Post by: RSSFeeder on 14 December 2014, 07:30:03
Prep for BattleA Designer Diary on Building Armies in an Imperial Assault Skirmish
“We have stolen a small Imperial shuttle. Disguised as a cargo ship, and using a secret Imperial code, a strike team will land on the moon and deactivate the shield generator.”
–General Crix Madine, Star Wars: Return of the Jedi Command iconic characters and soldiers from the Star Wars™ universe in Imperial Assault, a miniatures game of thrilling adventure and tactical conflict for two to five players. In previous previews, we focused on the narrative that emerges as you play through a campaign that pits the heroes of the Rebellion against a single Imperial player. More recently, though, we turned to the heated competition and battles of the skirmish game. Our last preview explored how gameplay changes during a skirmish mission. Today, Paul Winchester, one of the Imperial Assault developers, shares his thoughts on different possibilities for building a finely honed fighting force from any faction included in Imperial Assault. 
Paul Winchester on Building Your Skirmish Mission Army Have you ever wondered what would happen if Han and Chewbacca ran into IG-88 and a slew of other bounty hunters in a Mos Eisley back alley? What if a squad of Stormtroopers found themselves surrounded by vicious creatures like the Nexu? These are the exciting Star Wars battles that can come to life in the Imperial Assault skirmish game! Before a skirmish game begins, you must craft a deadly fighting force by spending up to forty points on units and powerful upgrades, as we explored in our last preview. After mustering an army, you assemble a deck of fifteen Command cards that can enhance your army and give your units an array of special abilities. Once both players have constructed armies and Command decks, the mission begins and players compete to gain forty victory points first by defeating enemy units and completing the mission’s objectives. Each faction offers dozens of powerful combinations of cards and abilities with many different strategies that may lead you to victory. Here, I’ll explore just a few of the opportunities that these three factions bring to the Star Wars battlefield. 
Soldiers of the Empire Each faction in the Imperial Assault skirmish game offers the dilemma of whether your army should include many low-cost units or a few high-powered, high-cost units. This choice has perhaps the most important ramifications in the Imperial faction, which includes the most feared villains and the largest army in the galaxy. For example, with your forty points, you can secure Darth Vader and the Royal Guard Champion for your squad. Both feature large amounts of health, two defense dice, and some of the most powerful attacks available in a skirmish. These terrifying villains can wreak havoc on your opponent’s squad, especially when combined with Command cards like Pummel and good support characters like the Imperial Officer, whose Order ability gives these powerhouses more mobility. Of course, your opponent earns victory points equal to the deployment cost of any units he defeats, so if he manages to defeat Darth Vader, he will receive a substantial reward. 
Your Imperial army could consist of Darth Vader, the Royal Guard Champion, an elite Imperial Officer, and an Imperial Officer.
On the other hand, you could enter the battlefield with squads of Stormtroopers, Imperial Officers, Probe Droids, and E-Web Engineers. While these units are easier to defeat and have weaker attacks than more expensive units, outnumbering your opponent provides two distinct advantages. First, most skirmish missions have objectives that provide victory points as well as terminals that provide you with extra Command cards while you control them. With plenty of Stormtroopers and Imperial Officers on the map, you have more units that you can commit to fulfilling these objectives and claiming terminals. The other main advantage of a large army is that, since activations alternate between you and your opponent, you may have more activations that your opponent. This means that even after your opponent has made all of his activations, you still have half of your army available. Posting a Bounty One of your most valuable resources in a skirmish mission is your Command cards, which offer unique special abilities. In response to the power of these cards, several units from the Mercenary faction help you destroy your opponent’s Command deck by using strain. Whenever a unit would suffer a strain during a skirmish, it suffers a damage unless the unit’s controller discards the top card of his Command deck. Inflicting strain is the calling card of Mercenary units like the merciless bounty hunter IG-88 and the Trandoshan Hunters. Each of these units features the Relentless ability, which forces the target of an attack to suffer a strain in addition to any damage. IG-88 even has the Assault ability, meaning he can attack (and inflict strain with Relentless) twice in one turn. 
A deadly Mercenary strike force may field IG-88, two units of elite Trandoshan Hunters, and two Nexu.
The Mercenary faction also features the ferocious Nexu, whose attack automatically inflicts the Bleeding condition on its target. A Bleeding unit suffers strain for every action it takes other than removing the Bleeding condition, forcing your opponent to delay and heal the condition or push forward and watch his Command deck melt away. As a combined force, the Mercenary faction can bring a massive amount of strain to bear. If this cumulative strain completely depletes your opponent’s Command cards, all strain is automatically counted as damage, massively increasing your damage output and quickly overwhelming your foes. The Rebellion’s Finest When you fight for the Rebel Alliance in Imperial Assault, you may choose to play as the named heroes of the Rebellion, including Luke Skywalker, Han Solo, Chewbacca, and the heroes introduced in the Imperial Assault campaign. But you also have the chance to command the unsung warriors of the Rebellion: Rebel Troopers. These infantry units can be extremely powerful, but they require a great deal of finesse and tactics to be used properly. If you can maneuver your Rebel Troopers into position, they can bring down any target with their Aim ability, which grants extra damage and accuracy if they have not yet moved on their activation. 
The soldiers of the Rebellion may compose an army with Luke Skywalker and Fenn Signis leading three units of Rebel Troopers, and supported by two upgrade cards.
You can enhance your Troopers more with Fenn Signis, one of the new heroes introduced in Imperial Assault. His status as an exceptional Rebel foot soldier is reflected in his powerful attack, his Assault ability, and his ability to give fellow Troopers multiple attacks per round, creating a powerhouse firing squad. Still not enough firepower? Enter Luke Skywalker. In addition to being a powerful combatant in his own right, he can inspire his fellow soldiers to greatness by allowing nearby friendly units to reroll an attack die, giving Rebel troopers extra chances to deal even higher damage. Alternatively, you could craft a strike team of Han Solo, Chewbacca, and Rebel Saboteurs, enabling you to quickly sabotage any enemy plans. Whether you command squads of Rebel Troopers, or lead a team of saboteurs into combat, even the most powerful Imperial villains should fear the Rebellion. Unlimited Options In addition to the strategies inherent to each faction, worlds of possible combinations await when you begin delving deeper into Skirmish Upgrade cards and Command cards. Do you wish your Nexu could attack multiple times per activation? Use the Temporary Alliance card to bring Mercenary units into your Imperial army and enhance them with an elite Imperial Officer. Is your Rebel army having trouble dealing with high-defense units, but you’ve already reached the fifteen-point limit for your Command deck? Make room in your army for Balance of the Force and you can use Maximum Firepower, which lets your Rebel Saboteurs unload their ordnance on a single powerful target. 
The combination of strategy, squad style, Skirmish Upgrades, and Command cards allows for so many different armies that no two skirmishes will ever be the same. The synergies between cards, units, and missions open worlds of tactical options for surging forward to victory. Good luck in your battles and may the Force be with you! Ready Your Troops No matter which factions you play in your Imperial Assault skirmishes, you’ll find a nearly limitless number of possible armies and tactics for you to employ. In our next preview, we’ll turn our attention to two of the central characters of the classic Star Wars trilogy – Luke Skywalker and Darth Vader. We’ll explore the extra missions and cards included in the Luke Skywalker Ally Pack and the Darth Vader Villain Pack that expand both your campaigns and your skirmishes!
Look for Imperial Assault at your local retailer soon. ... Source: Prep for Battle (http://www.fantasyflightgames.com/edge_news.asp?eidn=5236http://www.fantasyflightgames.com/edge_news.asp?eidn=5236)
Title: FFG:Breaker Bay
Post by: RSSFeeder on 14 December 2014, 16:02:15
Breaker BayAnnouncing the Second Data Pack in the SanSan Cycle
“University of the Californias at Breaker Bay has something for everyone. Upload the attached datafile to your simsensie-capable PAD and take the virtual tour now!” Fantasy Flight Games is proud to announce the upcoming release of Breaker Bay, the second Data Pack in the SanSan Cycle for Android: Netrunner! As the SanSan Cycle provides fans of Android: Netrunner a guided tour of the Californias from San Francisco to San Diego, Breaker Bay focuses on the University of the Californias at Breaker Bay. UCBB has a profound impact upon the region as it educates tens of thousands of students every year in over one-thousand majors, minors, and programs from over a dozen dedicated colleges. Here, the faculty can count themselves among the most distinguished in the solar system, and the university regularly competes with Levy University and NeoTokyo Daigaku for the top spot in the NBN Best College and University Rankings. 
Accordingly, the sixty new cards from Breaker Bay (three copies each of twenty different cards) focus on the university’s graduate and undergraduate students, who number among the brightest in the world. We find resources that reflect everything from their living conditions to their parties, and we see some of the actions that the world’s largest megacorps take as they attempt to recruit the best and brightest of them. Of course, there’s a lot to learn, and you’ll find several inspired new pieces of ice, as well as a new Shaper who proves that knowledge is power. A Fast Learner While other students at UCBB may be distracted by beach parties, Corporate recruiters, or tailgating before the big games, Hayley Kaplan (Breaker Bay, 25) is quietly consumed by her passions for learning, technology, and astronomy, all of which she neatly combines in her burgeoning enterprise as a Runner.  Like most Shapers, Hayley Kaplan’s motives are not entirely clear to others, but her methods suggest that she’s interested in using her runs as a means to test the most efficient ways of distilling meaningful and actionable data from the network’s nearly infinite strings of code. Along the way, she uses her knowledge of astronomy and constellations to identify and map particularly intriguing data clusters. Like most Shapers, Hayley Kaplan’s motives are not entirely clear to others, but her methods suggest that she’s interested in using her runs as a means to test the most efficient ways of distilling meaningful and actionable data from the network’s nearly infinite strings of code. Along the way, she uses her knowledge of astronomy and constellations to identify and map particularly intriguing data clusters.
In the game, Hayley Kaplan focuses on these clusters of information by gaining actions that are effectively free. Her ability reads, “The first time you install a card each turn, you may install another card of the same type from your grip (paying its install cost).” And her favorite console, Comet (Breaker Bay, 27), introduces a similar ability, “The first time you play an event each turn, you may play another event (without spending a click) after the first one resolves.” By playing her events in quick succession, and by installing her programs or other cards in little clusters, Haley buys herself valuable clicks with which she can run or procure credits. Of course, the fact is that Haley’s and Comet’s abilities require that you draw into small combinations, and if you hold onto your programs, events, resources, or hardware in a grip of just five cards, you may choke your progress rather than accelerate it. Accordingly, you might consider using Beach Party (Breaker Bay, 31) to increase your hand size and, then, use Game Day (Breaker Bay, 26) to draw into all the events you’ll want to play and all the parts of your rig that you hope to install.  
Prepare Yourself for Future Success No matter your interests, you’ll find that your education at Breaker Bay will help you to become a more well-rounded and successful individual. The computational neuroscience and cybernetics research in Breaker Bay’s NeurotechniCollege is leading to new bioroid neural channeling techniques and applications of brain-machine interface technology. UCBB’s LibArts School fosters learning in such traditional subjects as American, Spanish, social sciences, history, and philosophy, and the Gore School of Network Architecture educates the sysops and cybersec administrators of tomorrow. In Breaker Bay, the students and buildings of UCBB are given form, as are the corporate sponsorships that provide graduate and undergraduate students with hands-on fellowship and internship experiences. Will you intern with Jinteki Biotech? Will you apply for research grant from Haas-Bioroid? Will you take out a student loan from one of the banks in the Weyland Consortium? At UCBB, your future awaits you. Look for Breaker Bay to arrive at retailers late in the first quarter of 2015! ... Source: Breaker Bay (http://www.fantasyflightgames.com/edge_news.asp?eidn=5237http://www.fantasyflightgames.com/edge_news.asp?eidn=5237)
Title: FFG:Best of the Best
Post by: RSSFeeder on 15 December 2014, 09:00:03
Best of the BestThe Specializations, Species, and Signature Abilities of Stay on Target
“Great shot, kid. That was one in a million.”
–Han Solo The Rebellion against the Empire is gaining strength throughout the galaxy. Spearheading the fight are the fearless and expert Aces who dedicate their talents and lives to defying Imperial Rule. It is upon their technical expertise, quick-thinking, fast reflexes, and willingness to risk their lives for freedom that the Rebellion's success depends. Stay on Target, the first career supplement for the Star Wars®: Age of Rebellion™ roleplaying game, gives players numerous new options for creating the Ace characters that the Rebellion needs. Make your Ace extraordinary with the specializations, species, and signature abilities featured in Stay on Target, or choose from these new species and specializations to make your non-Ace character one in a million. 
Risk Has Its Own Rewards Three new specializations are featured in Stay on Target, each allowing you to take your career as an Ace in a different direction. Brave the wilderness as a Beast Rider, make daredevil combat moves as a Hotshot, or take your vehicle to a new level as a Rigger. Able to break, and train almost any creature, a Beast Rider is most at home outdoors with the wind on his face. The Beast Rider specialization adds Athletics, Knowledge (Xenology), Perception, and Survival to the Ace’s repertoire, skills useful for any Ace who might end up stranded on an unfamiliar planet after a crash landing. Beast Riders fit in well with the soldiers and scouts of the Rebel Army, and can prove vital to a team during a ground battle or clandestine raid on an Imperial outpost. Riggers unite engineering ingenuity with an Ace’s quick thinking, allowing them to modify a vehicle’s performance even in the middle of a battle. Constantly tweaking and fine-tuning their vehicles to ensure it can outgun and outrun the Imperials, Riggers tend to be cautious pilots who rely on technological advantages. In addition to Gunnery and Mechanics, Riggers have the bonus career skills Resilience and Knowledge (Underworld). Familiarity with the galaxy’s underworld keeps a rigger supplied with illegal tech, reconnaissance, and even allies who can help him out of a tight spot. 
Hotshots are risk-taking daredevils – naturally gifted, overly confident, and constantly improvising. Their flashy maneuvers can go horribly wrong, but most of the time their Cool, Coordination, and natural abilities in Piloting (Planetary) and Piloting (Space) serve them well in combat. Because of their unrestrained bravery, they tend to dive headfirst into the thickest part of battle, shoot first, and execute mind-blowingly narrow escapes. They are also a bit cocky, liable to brag endlessly about their most astonishing feats to anyone willing to listen. Putting a Hotshot at the head of your vehicle formation is usually a winning move – as long as the Hotshot’s luck holds out. Made for the Fast Lane The Empire is known for its cruelty towards non-human species. So, as the Rebellion grows, many non-humans are joining forces with the Rebel Alliance, seeking freedom from oppression for themselves and their people. Stay on Target introduces three new species, each eminently suited to the Ace career. Descended from mammalian tree-dwellers, the small, furry Chadra-Fan are a gregarious and cheerful bunch with sharp senses and an innate understanding of technology. They fiddle with any device that they encounter, with or without the owner’s permission, which sometimes gets them into trouble, and they have been known to steal pieces of technology they particularly like. Because of their warm demeanor, positive attitude, and mechanical expertise, the Chadra-Fan are welcome in the Rebel Alliance as Engineers and Riggers on starships. Some also serve as Diplomats and Spies, their friendly natures gaining them entrance into even the most selective circles. 
From left to right: a Xexto, a Dressellian, and a Chadra-Fan
Tall, gruff Dressellians have a long tradition of training riding war mounts, making them natural Beast Riders. They are also known for their achievements in music and literature, but the Empire occupied their homeworld before the Dressellians achieved industrial-level technology. Over a decade of guerilla warfare has shaped these gritty outdoorsmen and talented artists into outstanding Soldiers, Spies, and even Gunners. Because of the Empire’s cruelty, Dressellians are wary of outsiders, particularly, humans, and can be difficult to get along with. But once they form friendships, Dressellians prove to be loyal, fierce, and uncompromising allies. Known for being die-hard podracing fans, the six-limbed, two-brained Xexto live for speed and adventure. Their bravery, love of risk-taking, and quick reflexes make them natural Aces, Soldiers, or Spies. The Xexto care neither for the former Republic or for the Empire, and it is rare to find one working outside of the pod-racing circuit, but a few of them have joined the Rebel alliance in order to prove their own courage. Many have been honored for their valor, often posthumously. 
Keep Fighting Stay on Target gives Aces two new signature abilities: This One is Mine and Unmatched Survivablility. Signature Abilities are elite skills that can only be accessed by experienced characters of a specific career, and certain talents must be developed before the signature ability is attained. You can also customize your signature ability by purchasing upgrades, as you can with any talent. This One is Mine allows an you to focus on a single specific target in the middle of a chaotic battle. When piloting a starship or vehicle, you may spend two Destiny Points to lock another ship or vehicle with an equal silhouette into an isolated duel for your lives. For two rounds, no other ship or character can target you while you put everything you’ve got into taking your opponent down. Upgrades include Change Silhouette, which lets you target a wider range of ships, and Evasion, which increases the difficult of all incoming attacks. With Unmatched Survivability, you can keep your ship fighting even after a crippling blow. By spending two Destiny Points, you can keep a crippled ship with a silhouette of three or less running as if it were unharmed for three more rounds. That could be enough time to finish off your enemy and get your ship and crew to safety. If nothing else, it at least increases your chance of survival. You can even make your ship even more invincible with a Durability Upgrade, reducing Critical Hits by ten for each Durability Upgrade you have. 
The Rebel Alliance Wants You Use the species and specializations featured in Stay on Target to create a peerless Ace character, or choose another career and use Hotshot, Rigger, and Beast Rider as non-career specializations. Imagine a Hotshot Xexto Diplomat who became famous as a pod racer, a Chadra-Fan Spy with the technological knowledge of a Rigger, or a Dressellian Soldier who can steal his enemy’s mount and ride it across the battlefield. No matter what planet you come from or what your talents are, the Rebel Alliance can use your help in the galaxy-wide fight against the Empire, and welcomes you within its ranks. In future previews, we’ll look at the beasts, vehicles, and ships of Stay on Target, and learn how to integrate interstellar dogfights into your Star Wars®: Age of Rebellion™ campaign. Check out the Star Wars®: Age of Rebellion™ minisite for more details.
Prepare to join the Rebellion. Pre-order Stay on Target from your local retailer today! ... Source: Best of the Best (http://www.fantasyflightgames.com/edge_news.asp?eidn=5231)
Title: FFG:Enemies Within
Post by: RSSFeeder on 15 December 2014, 17:30:03
Enemies WithinAnnouncing a New Sourcebook for Dark Heresy Second Edition
“Our enemies prowl in the shadows of shining cathedrals. They scuttle in the darkness of dank underhives. They lurk in the corners of gilded palaces. They even dare to stand openly, hiding behind false faces and honeyed words. They are everywhere that man live and breathe – and so we must always be ready to face them with fire and the Emperor’s wrath!”
–from the Epistles of Inquisitor Kharkov Fantasy Flight Games is proud to announce Enemies Within, a new supplement for Dark Heresy Second Edition! Across the Imperium, countless threats assail the Emperor’s dominion. Xenos from outside the Imperium’s borders launch daily incursions, intent on the destruction of our species. From the ever-changing realm of the Immaterium, daemons and other creations of the Ruinous Powers threaten to burst into Mankind’s plane of reality, eager to devour every human in existence. But perhaps the most deadly threat to the safety of the Imperium comes not from without, but within. 
The worlds of the Askellon sector fester with undiscovered heresies and cults. Heretics, mutants, and witches exist on every planet, offering dark worship to the powers of Chaos. If left unchecked, their ghastly beliefs and practices will explode across the sector, dragging humanity screaming into the darkness. For such unbridled corruption, there can be only one cure: the pure and cleansing fire of the Ordo Hereticus. Enemies Within is the first supplement for Dark Heresy Second Edition, and it offers new opportunities for your Acolytes in the Ordo Hereticus alongside a host of new heresies and cults for you to exterminate. Beware the Enemy Within  The supplement opens with a history of the Ordo Hereticus’s activity within the Askellon sector. This sector of the Imperium has long been plagued with heresies of all kinds, and even in times of relative peace, heresy spreads to three new souls for every one an Acolyte sanctifies with fire. In this chapter of Enemies Within, you’ll learn the truth behind some of the greatest tragedies in the history of the sector, including deadly psyker eruptions, ferocious mutant uprisings, and other atrocities perpetrated against the glory of the Emperor’s rule. The supplement opens with a history of the Ordo Hereticus’s activity within the Askellon sector. This sector of the Imperium has long been plagued with heresies of all kinds, and even in times of relative peace, heresy spreads to three new souls for every one an Acolyte sanctifies with fire. In this chapter of Enemies Within, you’ll learn the truth behind some of the greatest tragedies in the history of the sector, including deadly psyker eruptions, ferocious mutant uprisings, and other atrocities perpetrated against the glory of the Emperor’s rule.
You’ll also find a wealth of information about various Askellian planets and the heretical cults that you may discover fermenting on each planet. A planet’s culture may lend itself naturally to the emergence of certain cults, and your inquests will face different opponents on different planets. You may travel to the desert world of Hrax, a planet recently grown dissatisfied with the rule of the Imperium and filled with the darksome Warp power of furimancers. Or, your investigations may bring you inexorably to Pellenne, a radioactive world with a terrifyingly high level of mutation. Every planet in the Askellon sector offers new dangers and new heresies to root out. What’s more, this chapter offers the Game Master tools for generating brand new cults and devious plots, giving you new ways to spread the infection of the Warp to any part of the Askellon sector. Plenty of new options for creating an Acolyte and equipping him for his duties exist in Enemies Within. Completely new home worlds offer plenty of variety, allowing you to play an Acolyte hailing from a productive agri-world, a remote frontier world, or a feudal world without advanced technology. New backgrounds and roles allow you to battle heresy as a member of the Adepta Sororitas or as a penitent mutant. You can even take on a new elite advance, becoming a Sister of Battle and bringing down the divine wrath of the Emperor upon all enemies of humanity. Finally, you can expand your armory with new weapons, talents, and psychic powers specially suited to the Ordo Hereticus. With these new tools and skills, you can personalize your Acolyte to a greater degree than ever before. You may take up the meticulously crafted and blessed Godwyn-De’az bolt weapons, burn witches with a Brazier of Holy Fire, or ride aboard an Adepta Sororitas Immolator. You may even seek out items forbidden by the more puritan members of the Ordo, using the darksome powers of heresy to eradicate any corruption you can find. In the fight against the enemy within, you’ll need all the help you can get. 
Do Not Fail the Emperor To you, the Emperor has entrusted a most sacred duty: the protection of the Imperium and every man, woman, and child within. Your duty must remain inviolate, no matter what the cost in lives. Should you or another Acolyte shirk your noble calling, the entire sector could fall to the Warp. Sometimes, millions must burn to save the lives of billions. Join the ranks of the Ordo Hereticus with Enemies Within! Look for this Dark Heresy Second Edition supplement in the first quarter of 2015. ... Source: Enemies Within (http://www.fantasyflightgames.com/edge_news.asp?eidn=5232)
Title: FFG:Empire of Crime
Post by: RSSFeeder on 16 December 2014, 02:00:03
Empire of CrimePreview Hutt Culture and Character Creation in Lords of Nal Hutta
"Soon you will learn to appreciate me."
–Jabba the Hutt Recently we announced Lords of Nal Hutta, a sourcebook for the Star Wars®: Edge of the Empire™ roleplaying game. Lords of Nal Hutta provides players and GMs with a wealth of information to help them to incorporate the slimy characters, black markets, and lawless planets of Hutt Space into their games. You can travel into the most decadent and corrupt stretch of the galaxy, work for a criminal syndicate, or create your own ambitious and conniving Hutt character. In this decadent and corrupt region of the galaxy, you’ll find plenty of opportunities for profitable crimes, illegal luxuries, or unexpected good deeds. Today’s preview looks at Hutt character creation and the fundamentals of Hutt culture. Contributing writer Sterling Hershey also introduces you to the four kajidics featured in Lords of Nal Hutta, each one specialized in a different style of crime. 
Power and Greed Thousands of years ago, the Hutts used to be a warrior culture, settling disputes on the battlefield rather than in the political arena. When a civil war devastated the entire species, the Hutts created a ruling council and a clan system, so their battles for power and control could take place peacefully. Now, Hutt clans aggressively compete for political and economic power. The Hutt Ruling Council governs their society with a legal framework that is built to be manipulated, and their justice is based on politics and revenge instead of balance or fairness. Since they transitioned from military to economic competition, the Hutts have come to dominate criminal activity in the galaxy, using legitimate activities to conceal their illegal dealings. Their knowledge of trade routes, open and secret, is unsurpassed. The spice trade, slave trade, and weapons black market all depend on the galaxy-wide networks of the Hutts.
The Means to Prosper The most important unit of Hutt society is the kajidic – essentially a clan-based crime syndicate. Kajidic translates to “the means by which we prosper,” revealing that a kajidic’s purpose is to make its members as wealthy and powerful as possible. Each kajidic specializes in a unique set of legal and illegal economic activities, possesses a certain amount of political power, and is usually governed by a single, preeminent Hutt. Here, contributing writer Sterling Hershey introduces the four kajidics featured in Lords of Nal Hutta, including two that he designed: 
“Kajidics are criminal syndicates intertwined with the Hutt clans through all of Hutt space and beyond. The book features four of the kajidics in detail, and I named and created two of them. Each kajidic description covers its general history, recent events, legitimate and criminal activities, areas of operation, and a few significant members. There is a mixture of recognizable and new characters. “The featured kajidics include two of the best known – Desilijic and Besadii. Desilijic is Jabba the Hutt’s operation, an ancient and poweful kajidic that currently holds the upper hand in Hutt politics. The rival Besadii kajidic includes Durga the Hutt and Gardulla the Hutt, who are both heavily tied into previous Hutt storylines. Besadii lost its seat on the ruling council during the Clone Wars, but has prospered through striking secret deals with the Empire. “Qunaalac is a heavily armed kajidic. It is a major defender of Hutt space, especially around the secretive Hutt throneworlds in the Bootana Hutta. It retains more of the Hutts’ ancient militaristic past traditions compared to other kajidics. Hutt military fleets are usually ad-hoc affairs reliant on current alliances and multiple agendas, like any other Hutt operation. So the Qunaalac Hutts aren’t entirely military,
but it is their strength. “While Qunaalac operates mostly within Hutt Space, Gorensla Hutts are galactic black marketeers. They operate in the shadows, secretly owning and controlling ports, hyperspace smuggling routes, and more. Their front organizations influence entire economies. They rig laws to legalize their activities. They play and profit from all sides in wartime. Gorensla even sells to the Rebels, but are careful to conceal that fact from both sides of the Galactic Civil War.” Thank you, Sterling! You can integrate your knowledge of kajidics and Hutt culture into your campaign, whether it takes you deep into Hutt Space or entangles you in Jabba’s smuggling ring on Tatooine. If you’re building an NPC or PC Hutt character, you’ll want to consider what kajidic the Hutt belongs to and how they fit into the competitive and ruthless society of the Hutts. Be Your Own Crime Boss In Lords of Nal Hutta you’ll find the outline for creating a Hutt character, namely a young adult Hutt only one or two centuries old. Your Hutt might be a self-interested smuggler eager to rise up in the ranks of his kajidic, or an outcast and a member of the Rebel Alliance. You might be running a successful weapons smuggling ring, or making a name for yourself as a warrior in order to better launch your political career. Or, you may choose to subvert Hutt tradition, and use your wealth to aid other, more impoverished species. Hutts are physically tough, with a Brawn of three and a fairly high wound threshold. Their immense size does, however, cause a low Agility score and make them Ponderous, meaning that they can only spend one maneuver moving each turn. Hutts are also mentally tough. They have a high Willpower and are not only difficult to deceive, charm, or coerce, but resistant to the Force. Having taken advantage of their clientele for centuries, the Hutts are not about to let anyone take advantage of them. 
The Only Limit Is Ambition At the edge of the Empire, where Imperial laws fail to check violence and greed, you’re sure to encounter the Hutts. You may perform in a decadent Hutt palace, make a deal with Gardulla in order to get supplies for the Rebellion, or become indebted to Jabba because of a bad smuggling run. With Lords of Nal Hutta, you can integrate the Hutts’ aggressive politics and black market economy into your campaigns, and even participate in their devious schemes as an aspiring Hutt yourself. In Hutt space, the only law is avarice, and the only limit is ambition. Preorder Lords of Nal Hutta from your local retailer today! ... Source: Empire of Crime (http://www.fantasyflightgames.com/edge_news.asp?eidn=5234)
Title: FFG:STAR WARS (R): Force and Destiny (TM) Beta Update 11
Post by: RSSFeeder on 16 December 2014, 10:30:04
STAR WARS (R): Force and Destiny (TM) Beta Update 11News From the Developers of the Force and Destiny Beta
Hello Force and Destiny™ beta testers, This week’s update (pdf, 344 KB) contains the final errata for the Force and Destiny beta. In the past several months, we’ve seen this game undergo some important changes, and that’s thanks to you and the effort you’ve put into testing it. Now, it’s time for us to focus on polishing up the final version of the game, implementing your valuable feedback, and get the Core Rulebook finished and out to fans. Will This Final Update Match the Core Rulebook? When we first started this beta, we talked a bit about what feedback made it into the weekly errata, and what feedback did not. It’s important to reiterate that these updates are not the sum total of the changes we have made and will make to the final game;  simply the ones we felt it most important that you have available so that we could get your feedback and see the rules tested. simply the ones we felt it most important that you have available so that we could get your feedback and see the rules tested. That being said, not every potential change that you have brought to our attention will be made in the final book. There are a plethora of reasons for this, many of which go beyond whether your suggestions were good ones or not. As we’ve run this beta, we’ve had to consider whether proposed changes would break rules mechanics in unexpected ways, unbalance careers or specializations, or simply make the game less accessible to players new to Star Wars Roleplaying. We’ve also had some good suggestions that would fit better within a future supplemental product, and other good ideas that would clash with our future plans. In the end, not every change you suggested could be implemented, but we considered your feedback very carefully before making that decision. What’s New in This Update? For this final update, we have some slight changes to melee weapons and gear. However, we have more robust changes to the mechanics governing triggering Morality. Thanks to your feedback, we’ve learned that Morality is an engaging enough mechanic during gameplay that “triggering” it is less important than it is for Duty or Obligation, so we’ve transitioned the rule to an optional mechanic. Because of this, we’ve changed how the GM triggers Morality. This also gives us some interesting space to play with when it comes to integrating the three Star Wars Roleplaying lines.
The final part of this update is our proposed guidance for integrating Edge of the Empire™, Age of Rebellion™, and Force and Destiny. We’d love to hear what you think of it. Over the next few weeks, we will not be releasing any more beta updates, but we will continue to monitor the forums and accept feedback. Pressing issues and concerns will still be considered and addressed if need be. We simply need to shift our focus from updating the beta to completing the final book. Thanks again for all your hard work and enthusiasm, and may the Force be with you! ... Source: STAR WARS (R): Force and Destiny (TM) Beta Update 11 (http://www.fantasyflightgames.com/edge_news.asp?eidn=5235)
Title: FFG:Prep for Battle
Post by: RSSFeeder on 16 December 2014, 19:00:03
Prep for BattleA Designer Diary on Building Armies in an Imperial Assault Skirmish
“We have stolen a small Imperial shuttle. Disguised as a cargo ship, and using a secret Imperial code, a strike team will land on the moon and deactivate the shield generator.”
–General Crix Madine, Star Wars: Return of the Jedi Command iconic characters and soldiers from the Star Wars™ universe in Imperial Assault, a miniatures game of thrilling adventure and tactical conflict for two to five players. In previous previews, we focused on the narrative that emerges as you play through a campaign that pits the heroes of the Rebellion against a single Imperial player. More recently, though, we turned to the heated competition and battles of the skirmish game. Our last preview explored how gameplay changes during a skirmish mission. Today, Paul Winchester, one of the Imperial Assault developers, shares his thoughts on different possibilities for building a finely honed fighting force from any faction included in Imperial Assault. 
Paul Winchester on Building Your Skirmish Mission Army Have you ever wondered what would happen if Han and Chewbacca ran into IG-88 and a slew of other bounty hunters in a Mos Eisley back alley? What if a squad of Stormtroopers found themselves surrounded by vicious creatures like the Nexu? These are the exciting Star Wars battles that can come to life in the Imperial Assault skirmish game! Before a skirmish game begins, you must craft a deadly fighting force by spending up to forty points on units and powerful upgrades, as we explored in our last preview. After mustering an army, you assemble a deck of fifteen Command cards that can enhance your army and give your units an array of special abilities. Once both players have constructed armies and Command decks, the mission begins and players compete to gain forty victory points first by defeating enemy units and completing the mission’s objectives. Each faction offers dozens of powerful combinations of cards and abilities with many different strategies that may lead you to victory. Here, I’ll explore just a few of the opportunities that these three factions bring to the Star Wars battlefield. 
Soldiers of the Empire Each faction in the Imperial Assault skirmish game offers the dilemma of whether your army should include many low-cost units or a few high-powered, high-cost units. This choice has perhaps the most important ramifications in the Imperial faction, which includes the most feared villains and the largest army in the galaxy. For example, with your forty points, you can secure Darth Vader and the Royal Guard Champion for your squad. Both feature large amounts of health, two defense dice, and some of the most powerful attacks available in a skirmish. These terrifying villains can wreak havoc on your opponent’s squad, especially when combined with Command cards like Pummel and good support characters like the Imperial Officer, whose Order ability gives these powerhouses more mobility. Of course, your opponent earns victory points equal to the deployment cost of any units he defeats, so if he manages to defeat Darth Vader, he will receive a substantial reward. 
Your Imperial army could consist of Darth Vader, the Royal Guard Champion, an elite Imperial Officer, and an Imperial Officer.
On the other hand, you could enter the battlefield with squads of Stormtroopers, Imperial Officers, Probe Droids, and E-Web Engineers. While these units are easier to defeat and have weaker attacks than more expensive units, outnumbering your opponent provides two distinct advantages. First, most skirmish missions have objectives that provide victory points as well as terminals that provide you with extra Command cards while you control them. With plenty of Stormtroopers and Imperial Officers on the map, you have more units that you can commit to fulfilling these objectives and claiming terminals. The other main advantage of a large army is that, since activations alternate between you and your opponent, you may have more activations that your opponent. This means that even after your opponent has made all of his activations, you still have half of your army available. Posting a Bounty One of your most valuable resources in a skirmish mission is your Command cards, which offer unique special abilities. In response to the power of these cards, several units from the Mercenary faction help you destroy your opponent’s Command deck by using strain. Whenever a unit would suffer a strain during a skirmish, it suffers a damage unless the unit’s controller discards the top card of his Command deck. Inflicting strain is the calling card of Mercenary units like the merciless bounty hunter IG-88 and the Trandoshan Hunters. Each of these units features the Relentless ability, which forces the target of an attack to suffer a strain in addition to any damage. IG-88 even has the Assault ability, meaning he can attack (and inflict strain with Relentless) twice in one turn. 
A deadly Mercenary strike force may field IG-88, two units of elite Trandoshan Hunters, and two Nexu.
The Mercenary faction also features the ferocious Nexu, whose attack automatically inflicts the Bleeding condition on its target. A Bleeding unit suffers strain for every action it takes other than removing the Bleeding condition, forcing your opponent to delay and heal the condition or push forward and watch his Command deck melt away. As a combined force, the Mercenary faction can bring a massive amount of strain to bear. If this cumulative strain completely depletes your opponent’s Command cards, all strain is automatically counted as damage, massively increasing your damage output and quickly overwhelming your foes. The Rebellion’s Finest When you fight for the Rebel Alliance in Imperial Assault, you may choose to play as the named heroes of the Rebellion, including Luke Skywalker, Han Solo, Chewbacca, and the heroes introduced in the Imperial Assault campaign. But you also have the chance to command the unsung warriors of the Rebellion: Rebel Troopers. These infantry units can be extremely powerful, but they require a great deal of finesse and tactics to be used properly. If you can maneuver your Rebel Troopers into position, they can bring down any target with their Aim ability, which grants extra damage and accuracy if they have not yet moved on their activation. 
The soldiers of the Rebellion may compose an army with Luke Skywalker and Fenn Signis leading three units of Rebel Troopers, and supported by two upgrade cards.
You can enhance your Troopers more with Fenn Signis, one of the new heroes introduced in Imperial Assault. His status as an exceptional Rebel foot soldier is reflected in his powerful attack, his Assault ability, and his ability to give fellow Troopers multiple attacks per round, creating a powerhouse firing squad. Still not enough firepower? Enter Luke Skywalker. In addition to being a powerful combatant in his own right, he can inspire his fellow soldiers to greatness by allowing nearby friendly units to reroll an attack die, giving Rebel troopers extra chances to deal even higher damage. Alternatively, you could craft a strike team of Han Solo, Chewbacca, and Rebel Saboteurs, enabling you to quickly sabotage any enemy plans. Whether you command squads of Rebel Troopers, or lead a team of saboteurs into combat, even the most powerful Imperial villains should fear the Rebellion. Unlimited Options In addition to the strategies inherent to each faction, worlds of possible combinations await when you begin delving deeper into Skirmish Upgrade cards and Command cards. Do you wish your Nexu could attack multiple times per activation? Use the Temporary Alliance card to bring Mercenary units into your Imperial army and enhance them with an elite Imperial Officer. Is your Rebel army having trouble dealing with high-defense units, but you’ve already reached the fifteen-point limit for your Command deck? Make room in your army for Balance of the Force and you can use Maximum Firepower, which lets your Rebel Saboteurs unload their ordnance on a single powerful target. 
The combination of strategy, squad style, Skirmish Upgrades, and Command cards allows for so many different armies that no two skirmishes will ever be the same. The synergies between cards, units, and missions open worlds of tactical options for surging forward to victory. Good luck in your battles and may the Force be with you! Ready Your Troops No matter which factions you play in your Imperial Assault skirmishes, you’ll find a nearly limitless number of possible armies and tactics for you to employ. In our next preview, we’ll turn our attention to two of the central characters of the classic Star Wars trilogy – Luke Skywalker and Darth Vader. We’ll explore the extra missions and cards included in the Luke Skywalker Ally Pack and the Darth Vader Villain Pack that expand both your campaigns and your skirmishes!
Look for Imperial Assault at your local retailer soon. ... Source: Prep for Battle (http://www.fantasyflightgames.com/edge_news.asp?eidn=5236)
Title: FFG:Breaker Bay
Post by: RSSFeeder on 17 December 2014, 03:30:05
Breaker BayAnnouncing the Second Data Pack in the SanSan Cycle
“University of the Californias at Breaker Bay has something for everyone. Upload the attached datafile to your simsensie-capable PAD and take the virtual tour now!” Fantasy Flight Games is proud to announce the upcoming release of Breaker Bay, the second Data Pack in the SanSan Cycle for Android: Netrunner! As the SanSan Cycle provides fans of Android: Netrunner a guided tour of the Californias from San Francisco to San Diego, Breaker Bay focuses on the University of the Californias at Breaker Bay. UCBB has a profound impact upon the region as it educates tens of thousands of students every year in over one-thousand majors, minors, and programs from over a dozen dedicated colleges. Here, the faculty can count themselves among the most distinguished in the solar system, and the university regularly competes with Levy University and NeoTokyo Daigaku for the top spot in the NBN Best College and University Rankings. 
Accordingly, the sixty new cards from Breaker Bay (three copies each of twenty different cards) focus on the university’s graduate and undergraduate students, who number among the brightest in the world. We find resources that reflect everything from their living conditions to their parties, and we see some of the actions that the world’s largest megacorps take as they attempt to recruit the best and brightest of them. Of course, there’s a lot to learn, and you’ll find several inspired new pieces of ice, as well as a new Shaper who proves that knowledge is power. A Fast Learner While other students at UCBB may be distracted by beach parties, Corporate recruiters, or tailgating before the big games, Hayley Kaplan (Breaker Bay, 25) is quietly consumed by her passions for learning, technology, and astronomy, all of which she neatly combines in her burgeoning enterprise as a Runner.  Like most Shapers, Hayley Kaplan’s motives are not entirely clear to others, but her methods suggest that she’s interested in using her runs as a means to test the most efficient ways of distilling meaningful and actionable data from the network’s nearly infinite strings of code. Along the way, she uses her knowledge of astronomy and constellations to identify and map particularly intriguing data clusters. Like most Shapers, Hayley Kaplan’s motives are not entirely clear to others, but her methods suggest that she’s interested in using her runs as a means to test the most efficient ways of distilling meaningful and actionable data from the network’s nearly infinite strings of code. Along the way, she uses her knowledge of astronomy and constellations to identify and map particularly intriguing data clusters.
In the game, Hayley Kaplan focuses on these clusters of information by gaining actions that are effectively free. Her ability reads, “The first time you install a card each turn, you may install another card of the same type from your grip (paying its install cost).” And her favorite console, Comet (Breaker Bay, 27), introduces a similar ability, “The first time you play an event each turn, you may play another event (without spending a click) after the first one resolves.” By playing her events in quick succession, and by installing her programs or other cards in little clusters, Haley buys herself valuable clicks with which she can run or procure credits. Of course, the fact is that Haley’s and Comet’s abilities require that you draw into small combinations, and if you hold onto your programs, events, resources, or hardware in a grip of just five cards, you may choke your progress rather than accelerate it. Accordingly, you might consider using Beach Party (Breaker Bay, 31) to increase your hand size and, then, use Game Day (Breaker Bay, 26) to draw into all the events you’ll want to play and all the parts of your rig that you hope to install.  
Prepare Yourself for Future Success No matter your interests, you’ll find that your education at Breaker Bay will help you to become a more well-rounded and successful individual. The computational neuroscience and cybernetics research in Breaker Bay’s NeurotechniCollege is leading to new bioroid neural channeling techniques and applications of brain-machine interface technology. UCBB’s LibArts School fosters learning in such traditional subjects as American, Spanish, social sciences, history, and philosophy, and the Gore School of Network Architecture educates the sysops and cybersec administrators of tomorrow. In Breaker Bay, the students and buildings of UCBB are given form, as are the corporate sponsorships that provide graduate and undergraduate students with hands-on fellowship and internship experiences. Will you intern with Jinteki Biotech? Will you apply for research grant from Haas-Bioroid? Will you take out a student loan from one of the banks in the Weyland Consortium? At UCBB, your future awaits you. Look for Breaker Bay to arrive at retailers late in the first quarter of 2015! ... Source: Breaker Bay (http://www.fantasyflightgames.com/edge_news.asp?eidn=5237)
Title: FFG:Assassins and Wendigos
Post by: RSSFeeder on 17 December 2014, 12:00:03
Assassins and WendigosPreview a Hero and a Monster Group from Guardians of Deephall
The city of Deephall hangs in the balance. Four valiant heroes stand ready to defend it, but the forces of the overlord – dark priests, wendigos, and crypt dragons – are fearsome and battle-ready. If you wish to save Deephall from destruction, you must defend its walls and delve into the icy caverns above the city! Guardians of Deephall is the fourth Hero and Monster Collection for Descent: Journeys in the Dark Second Edition. Within, you’ll find thirteen detailed plastic figures: four heroes, four dark priests, three wendigos, and two crypt dragons. Each hero and monster group was originally created for the first edition of Descent, but has now been matched to second edition aesthetics, featuring entirely new artwork and figure sculpts. In addition, two brand-new quests challenge you to fight for the fate of the city of Deephall. In today’s preview, we’ll take a closer look at a hero and monster group from Guardians of Deephall: the deadly assassin Silhouette and the freezing wendigos!
An Unstoppable Force Heroes from all backgrounds join together to defend Deephall. One of these heroes is the woman named Silhouette. In her work as an assassin, she only killed at dawn. The sunset before the assassination, her victims received a scrap of paper bearing the image of her iconic blade. Many mistook this sigil as a last warning, a final opportunity to flee or make amends. But after a long night of futile flight or pleading, Silhouette materialized at daybreak, a dark figure shrouded in the brilliance of the rising sun. Though she sports a checkered past, she now turns her skills against the minions of the overlord, eager to defend the innocent people of Deephall. In battle, Silhouette can use her assassin’s skills to incapacitate the overlord’s monsters, and she can maximize her damage with her hero ability by using two single-hand weapons. Each time you perform an attack with Silhouette and roll the “X” result, you may choose a monster adjacent to you. Then, that monster must suffer damage equal to one plus the number of weapons Silhouette has currently equipped. With this ability, Silhouette never truly misses, instead taking the opportunity to deal three damage to an adjacent monster! To make matters worse for the overlord, he has no chance to roll defense dice against this damage, ensuring that it goes through unreduced. 
Silhouette’s heroic feat gives her a chance to exercise her superior mobility and recover some spoils as she races across the battlefield. As an action, she can use her heroic feat to move double her speed. Not only does this allow her to traverse the battlefield quickly, but whenever Silhouette enters a space with a search token during this movement, she may suffer a fatigue to search the token. Whether you use this feat to dash between objectives or to collect any fallen treasure, Silhouette’s speed can prove the difference between victory and defeat. The Killing Cold Silhouette and the other heroes will face countless monsters in the defense of Deephall, including the terrifying beasts known as wendigos. A deep, unnatural cold emanates from the body of a wendigo. The chill from some of these monsters’ bodies is so powerful that they have been known to freeze a man to death rather than ripping him apart with their razor-edged teeth. This frosty aura, combined with unnatural stealth and unmatchable ferocity, makes them the fiercest of mountain predators. Wendigos are deadly in combat, and possess a variety of abilities to serve you when you play as the overlord. Any wendigo can spend a surge to deal additional damage, and what’s more, wendigos also bear the Ravage ability, allowing them to take two attack actions in a single turn. The heroes may attempt to defeat the wendigos before they get close enough to attack, but the Stealthy ability makes successful attacks difficult. A hero attacking a wendigo must roll three additional range or the attack misses, giving your wendigos the opportunity to evade damage even in melee combat. 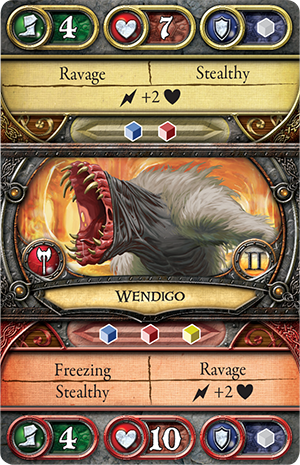 
To negate the wendigo’s natural stealth, the heroes must find ways to gain additional range. They can move closer to engage the wendigos, but they may quickly find this an undesirable situation. In addition to the Ravage and Stealthy abilities, master wendigos harness their deathly cold aura as a weapon with the Freezing ability, which forces any hero who enters a space adjacent to the master wendigo to suffer a fatigue, inhibiting the hero’s ability to gain extra movement or trigger Class cards. A City Hangs in the Balance The city of Deephall needs the protection of heroes if it will survive the implacable attacks of the overlord. You decide the fate of the city in Guardians of Deephall, the newest Hero and Monster Collection for Descent: Journeys in the Dark Second Edition. Pre-order Guardians of Deephall at your local retailer today! ... Source: Assassins and Wendigos (http://www.fantasyflightgames.com/edge_news.asp?eidn=5238)
Title: FFG:Jump to Lightspeed
Post by: RSSFeeder on 17 December 2014, 20:30:03
Jump to LightspeedAnnouncing the Sixth Force Pack in the Rogue Squadron Cycle
“Fast ship? You’ve never heard of the Millennium Falcon?”
–Han Solo, Star Wars: A New Hope Fantasy Flight Games is proud to announce Jump to Lightspeed, the sixth Force Pack in the Rogue Squadron cycle for Star Wars™: The Card Game! Once, the countless species of the galaxy were bound to their homeworlds. The gaps between planets and star systems were unimaginably vast, and even if a ship could fly at the speed of light, a journey might take hundreds of years. The galaxy shrunk forever with the discovery of hyperspace travel. Now, a journey of centuries could be accomplished in weeks… or for some ships, even less time. Use hyperspace travel to your advantage with a Jump to Lightspeed! This Force Pack brings the major themes of the Rogue Squadron cycle to a triumphant conclusion. Throughout the cycle, you’ve been invited to pair your ace Pilots with the best Vehicles. In this Force Pack, you’ll find ten new objective sets (two copies each of five distinct sets), offering some of the best pilots and starships the galaxy has seen. You may fly alongside Rogue Squadron pilots like Wes Janson and Tycho Celchu. Or, you may serve the interests of Black Sun on the ground with Guri, a deadly human replica droid. Every faction gains new ways to bridge the spaces between the stars, and with the cards in Jump to Lightspeed, you can emerge on top of the galactic struggle. 
Punch It Across the galaxy, few ships are as legendary as the Millennium Falcon. Renowned for its speed, this ship can outrace almost anything your opponent might throw at it, and in Jump to Lightspeed, you can use the Falcon’s speed and maneuverability to stay ahead of your opponent.  The objective set begins with That Bucket o’ Bolts (Jump to Lightspeed, 625). This objective bears the “Smugglers and Spies affiliation only” restriction, but it also bears a powerful Action. By focusing That Bucket o’ Bolts, you can attach a Pilot unit you control to a friendly Vehicle unit as a Pilot enhancement. In almost every circumstance, your Pilots are more powerful from the cockpit of their Vehicle, but sometimes, you can’t wait for a Vehicle to appear – you just need to play a unit. With That Bucket o’ Bolts, you can play a Pilot as a unit, then attach it to a Vehicle when the time is right. The objective set begins with That Bucket o’ Bolts (Jump to Lightspeed, 625). This objective bears the “Smugglers and Spies affiliation only” restriction, but it also bears a powerful Action. By focusing That Bucket o’ Bolts, you can attach a Pilot unit you control to a friendly Vehicle unit as a Pilot enhancement. In almost every circumstance, your Pilots are more powerful from the cockpit of their Vehicle, but sometimes, you can’t wait for a Vehicle to appear – you just need to play a unit. With That Bucket o’ Bolts, you can play a Pilot as a unit, then attach it to a Vehicle when the time is right.
One Vehicle you may attach your Pilots to is the new version of the Millennium Falcon (Jump to Lightspeed, 627). Like the past version of the Millennium Falcon (Edge of Darkness, 332), this version bears the edge (1) keyword, but it has gained the elite keyword as well. In addition, the Millennium Falcon features a new Action ability that allows you to remove this unit from an engagement once per phase. With this powerful ability, the Falcon can run rings around your opponent’s defenders. If your opponent attempts to defend with any unit without a tactics icon, he runs the risk of you simply leaving the engagement, forcing his units to focus for nothing. What’s more, with the edge (1) keyword, your opponent must play an edge card to even have a chance of winning the edge, giving you a potential means of whittling away at his hand.  Of course, the power and speed of the Millennium Falcon shine even brighter when Han Solo (Jump to Lightspeed, 626) is in command. This new Pilot version of Han Solo can be played as a normal unit, but he can also be played as an enhancement on a Vehicle for two resources. When played as an enhancement, he gains, “Reaction: After enhanced unit is declared as an attacker, target an enemy unit. That unit cannot be declared as a defender during this engagement.” With Han Solo at the controls of the Millennium Falcon, his ability will keep the Falcon out of reach of your opponent’s defenders, even highly effective defenders such as Emperor Palpatine (Core Set, 51). By denying your opponent the chance to use his best defenders, you force him to choose between an unchecked Millennium Falcon and a sub-optimal defense, which can be worse than no defense at all. The objective set also includes a copy of Heat of Battle (Jump to Lightspeed, 65), allowing you to punish your opponent if he does choose to defend. Of course, the power and speed of the Millennium Falcon shine even brighter when Han Solo (Jump to Lightspeed, 626) is in command. This new Pilot version of Han Solo can be played as a normal unit, but he can also be played as an enhancement on a Vehicle for two resources. When played as an enhancement, he gains, “Reaction: After enhanced unit is declared as an attacker, target an enemy unit. That unit cannot be declared as a defender during this engagement.” With Han Solo at the controls of the Millennium Falcon, his ability will keep the Falcon out of reach of your opponent’s defenders, even highly effective defenders such as Emperor Palpatine (Core Set, 51). By denying your opponent the chance to use his best defenders, you force him to choose between an unchecked Millennium Falcon and a sub-optimal defense, which can be worse than no defense at all. The objective set also includes a copy of Heat of Battle (Jump to Lightspeed, 65), allowing you to punish your opponent if he does choose to defend.
This objective set doesn’t just help you accelerate past potential blockers. It also helps accelerate the rate at which you bring new Pilots and Vehicles into play. The objective set comes with two copies of Well Paid (Jump to Lightspeed, 628). This free event is limited, and it allows you to reduce by one the cost and pilot cost of each Pilot and each Vehicle card you play this phase. With that amount of resource advantage, you can easily create a swarm of starfighters and ace pilots ready to bring down the Galactic Empire! Make the Jump Hyperspace has brought the stars closer together, and taking advantage of this technology with new Pilots and Vehicles can easily make the difference between victory and defeat in Star Wars: The Card Game. Climb aboard the Millennium Falcon and prepare for battle! Look for Jump to Lightspeed at your local retailer in the second quarter of 2015! ... Source: Jump to Lightspeed (http://www.fantasyflightgames.com/edge_news.asp?eidn=5239)
Title: FFG:Fighters Coming In
Post by: RSSFeeder on 18 December 2014, 05:00:03
Fighters Coming InA Preview of STAR WARS (TM): Armada
“The Empire doesn’t consider a small one-man fighter to be any threat, or they’d have a tighter defense. An analysis of the plans provided by Princess Leia has demonstrated a weakness in the battle station.”
–General Jan Dodonna There’s no denying the raw power of the Star Wars galaxy’s capital ships. Many of them are massive war machines that can exceed a kilometer in length, their crews can number in the thousands, and the largest of them boast enough firepower to cower entire star systems. Still, the Star Wars movies remind us that there’s always room – even a need – for personal heroics. There’s always the chance that a single starfighter pilot can turn the tide of battle. Accordingly, even though they’re dwarfed by the capital ships they accompany, starfighters and their pilots play a critical part in the tactical fleet battles of Star Wars™: Armada. In our earlier previews, we focused primarily on the game’s capital ships. We looked at how their command values and command stacks force you to plan ahead, we looked at how capital ships battle, and we looked at how they fly along the table. Today, though, we turn our attention to the game’s starfighters, looking at the how they function within the game and looking, also, at how even a single starfighter squadron can turn the tide of battle. 
The Squadron Phase Squadrons move according to a set of rules that is entirely different than that utilized by the game’s capital ships, and though their attacks work similarly, they use the distance side of the game’s range ruler, rather than the range side. The differences between squadrons and ships are further reinforced by the fact that squadrons also have their own phase within the game. After you and your opponent have activated all of your capital ships in the Ship Phase, you proceed to the Squadron Phase. In the Squadron Phase, you and your opponent take turns activating any squadrons that were not already activated by a Squadron command during the Ship Phase. Each squadron that activates during this phase may either move or attack, but cannot do both. The player who has initiative goes first. He chooses one of his unactivated squadrons and activates it:
- If he chooses to move his squadron, he utilizes the range ruler, placing it on the table so that its distance side is faceup, with the distance “1” end of the ruler touching any part of the base of his squadron. Then, he picks up the squadron and places it at any point along the ruler, so long as its base does not extend beyond the maximum speed indicated on its squadron card.
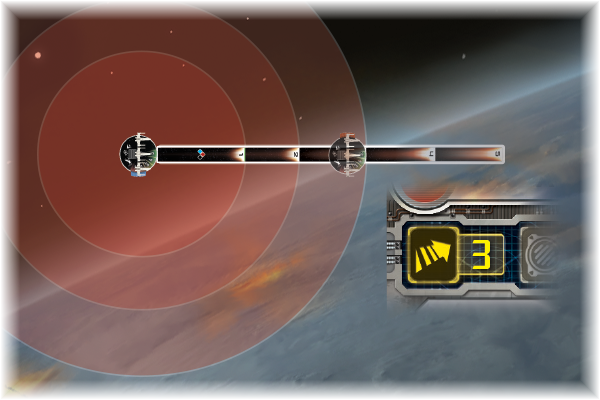
An X-wing squadron has a speed of three, meaning it can move up to distance “3” in any direction from its original starting point.
- If he chooses to attack with his squadron, he can target any enemy ship at distance “1.” Any squadron that attacks can use all the dice indicated on its squadron card, but they ignore all results.

The X-wing squadron begins its activation within distance “1” of a Victory-class Star Destroyer, meaning the Rebel player can activate it to attack.
After the active player finishes activating his squadron, he must activate a second unactivated squadron, if able. Then his opponent activates two of his own squadrons in the same way. This process continues until all squadrons are activated. 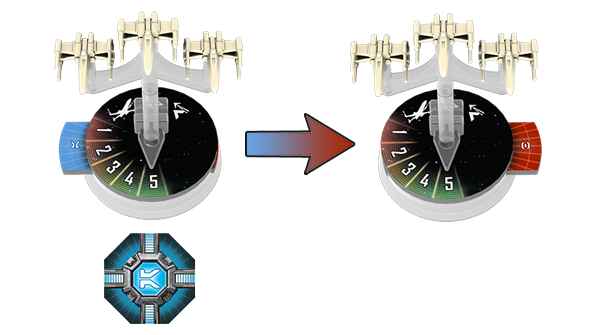
Each squadron’s base features an activation slider that you can use to track whether or not it has been activated. The activation slider displays one of two colors, orange or blue. If the color on the activation slider matches that on the initiative token, the squadron has not yet been activated.
Deploying Your Fighter Wings While you are not required to field any squadrons in your fleet, the squadrons that you bring to battle can easily prove the difference between victory and defeat. It’s hard for capital ships to hit them because most capital ships’ anti-squadron armaments number only one or two dice. Meanwhile, your squadrons each get their own attacks, and your opponent’s ships only get a limited number of defense tokens each round; swarms of starfighters can quickly wear down even the largest of ships. Accordingly, most admirals acknowledge the threat that squadrons pose by ensuring that each of their ships has its own escorting fighter wing. They may use screens of squadrons to protect their ships, or they may deploy their squadrons more aggressively to pin down enemy squadron groups. In Armada, whenever two squadrons are at distance “1” of each other, those squadrons are engaged and must abide by the rules for engagement:
- Engaged squadrons cannot move.
- Whenever an engaged squadron attacks, it must attack a squadron instead of attacking a ship.
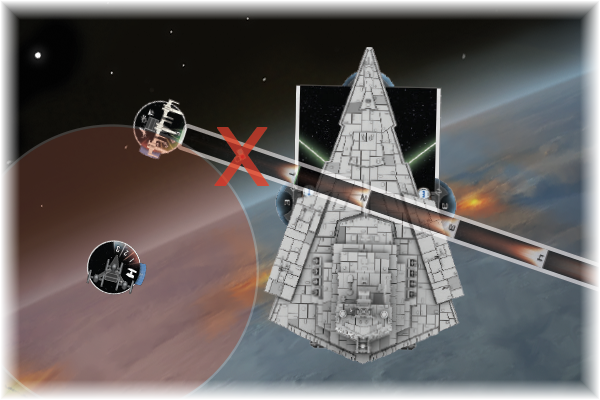
While it is engaged by the TIE squadron, the X-wing squadron cannot fire on the Victory-class Star Destroyer, leaving its captain free to ignore the pesky X-wings in favor of larger and more important targets.
Whether you’re hoping to negate your opponent’s superior numbers or you’re looking for ways to swarm your opponent’s ships with as many squadrons as possible, you want to consider how engagement can play into strategy. Ace Pilots and Their Wingmates As you think about the best ways to use your squadrons, it’s important to remember that not all fighter squadrons are the same, and you’ll want to select the right squadrons for your strategy. X-wing squadrons, for example, feature the Bomber keyword, which means that while they’re attacking a ship, they do not ignore all their results. Instead, their results are added to the damage total and allow you to resolve a critical effect as though you had scored a result with a capital ship’s attack. On the other hand, TIE fighter squadrons feature the Swarm keyword. While a TIE squadron is attacking an enemy squadron engaged with another one of your squadrons, it can reroll one die. 
In addition to the differences between the different types of starfighters (which we’ll explore more when we take a closer look at the Rebel and Imperial Fighter Squadrons Expansion Packs), there are differences between your standard squadrons and those led by your aces. An ace X-wing pilot like Luke Skywalker doesn’t necessarily gain any extra speed, hull points, or anti-squadron armament. However, he gains a number of defense tokens, which may, in the long run, prove far more valuable than a couple of hull points. Luke Skywalker, specifically, gains two brace tokens, which each allow him to halve the damage of an attack directed at his squadron. Additionally, ace pilots each have unique abilities, and in Luke’s case, his ability allows him to treat any ship he attacks as though it has no shields, meaning his damage goes straight to its hull. This is even more important when you consider that Luke attacks your opponent’s ships with a black die, which represents a meaningful step up in damage potential from the standard X-wing’s red die.  
While your squadrons’ defense tokens work the same as they do for capital ships, they may also permit additional effects. Some ace pilots, like “Howlrunner,” can use the powerful scatter defense token to negate all damage that they would otherwise take from a single attack.

The scatter defense token.
|
|
With such tremendous defensive abilities, ace pilots and their squadrons are far more resilient than their base hull points may indicate, and that means that pilots like “Howlrunner” are likely to make a significant impact round after round after round… Every Starship Matters “Admiral, we’re in position. All fighters accounted for.”
–Lando Calrissian The fighter squadrons of Star Wars: Armada may not be as large or hard-hitting as the game’s massive capital ships, but when they’re employed effectively, they offer your fleet tremendous tactical flexibility.
Adding a number of starfighter squadrons to your fleet greatly increases its tactical flexibility!
Every ship matters, no matter how small, large, or heavily outfitted, and in our next preview we’ll look at how you can bring them all together, arm them, command them, equip them with upgrades, and deploy them to engage your enemy! ... Source: Fighters Coming In (http://www.fantasyflightgames.com/edge_news.asp?eidn=5240)
Title: FFG:Descendants of Isha
Post by: RSSFeeder on 18 December 2014, 13:30:03
Descendants of IshaAnnouncing the Sixth War Pack in the Warlord Cycle
“Fetch me another plaything. This one seems to have broken.”
–Urien Rakarth Fantasy Flight Games is proud to announce Descendants of Isha, the sixth War Pack in the Warlord cycle for Warhammer 40,000: Conquest! Draw upon the power of the galaxy’s ancient races in the Descendants of Isha War Pack! Long ago, there was only one race of the Eldar people, but their depravity quickly led to Chaos. Now, you may walk the path of asceticism and self-denial with the Eldar or revel in unlimited excess and devour souls with the Dark Eldar. Whichever faction you embrace, however, you’ll find new options in this War Pack! Descendants of Isha contains two new warlords, one Eldar and one Dark Eldar, each with an eight-card signature squad, alongside forty-two other cards (three copies each of fourteen distinct cards). Each of the other factions in Warhammer 40,000: Conquest finds useful tricks and tactics in this expansion. You may clear entire planets of enemies with a deadly Space Wolves tank, fire the devastating Artillery of the Astra Militarum, or transform your opponents into Squigs with the uncontrollable psychic power of the Orks. In Descendants of Isha, the Warlord cycle comes to a triumphant conclusion, challenging you to find victory as the battle for the Traxis sector reaches new heights! 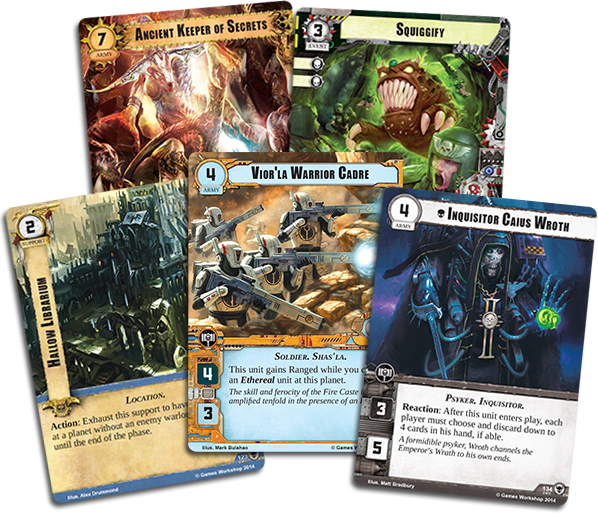
Master of Torture In Descendants of Isha, the Dark Eldar gain a new warlord and a new style of play in Urien Rakarth (Descendants of Isha, 116). This warlord is a Haemonculus, completely dedicated to the study and perfection of torture, which is reflected by Urien Rakarth’s ability. While he is hale, the cost for you to play any Torture event is reduced by one, while the cost for you to play each non-Torture event is increased by one! By building a deck filled with Torture events, you can take advantage of Urien Rakarth’s cost reduction to subject your opponent to unending torture. What’s more, Urien begins the game with eight cards in hand, one more than most warlords, enabling him to compile punishing amounts of Torture events in his hand before the game even begins.  Urien Rakarth also breaks away from the established structure of a signature squad. Most warlords up to this point have possessed a signature squad consisting of four units, two events, one support, and one attachment. Urien shows where his true power lies by including four copies of his event, Rakarth’s Experimentations (Descendants of Isha, 118). This event bears the Torture trait, and can be played at any point as an Action, allowing you to name a card type: unit, support, attachment, or event. Then, your opponent must either discard one card of that type from his hand or deal one damage to his warlord. By strategically torturing your opponent, you can either strip him of his most useful cards, or quickly rack up the damage on your opponent’s warlord, making him susceptible to hard-hitting Dark Eldar units. Urien Rakarth also breaks away from the established structure of a signature squad. Most warlords up to this point have possessed a signature squad consisting of four units, two events, one support, and one attachment. Urien shows where his true power lies by including four copies of his event, Rakarth’s Experimentations (Descendants of Isha, 118). This event bears the Torture trait, and can be played at any point as an Action, allowing you to name a card type: unit, support, attachment, or event. Then, your opponent must either discard one card of that type from his hand or deal one damage to his warlord. By strategically torturing your opponent, you can either strip him of his most useful cards, or quickly rack up the damage on your opponent’s warlord, making him susceptible to hard-hitting Dark Eldar units.
Urien Rakarth draws more power from his assistants: Twisted Wracks (Descendants of Isha, 117). There are two copies of this army unit in the signature squad, and with a strong attack and health, they’re a great deal for only two resources. What’s more, they give you a secondary option for using your Torture cards. As an Action, you may discard a Torture card from your hand to ready the Twisted Wracks, enabling the unit to potentially strike twice (or even more) in a single combat round. Whether you play Torture events against your opponent or use them to fuel your Twisted Wracks, their power cannot be underestimated. 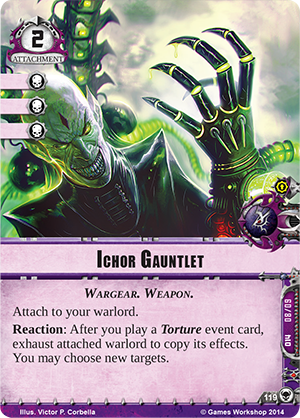 You’ll double the effectiveness of your Torture events with the inclusion of the Ichor Gauntlet (Descendants of Isha, 119). This attachment is attached directly to Urien Rakarth, and it bears a potent Reaction that reads, “After you play a Torture event card, exhaust attached warlord to copy its effects. You may choose new targets.” With this attachment, Rakarth’s Experimentations and any other Torture events in your deck are twice as effective, inviting you to torture your opponent into submission as quickly as possible. You’ll double the effectiveness of your Torture events with the inclusion of the Ichor Gauntlet (Descendants of Isha, 119). This attachment is attached directly to Urien Rakarth, and it bears a potent Reaction that reads, “After you play a Torture event card, exhaust attached warlord to copy its effects. You may choose new targets.” With this attachment, Rakarth’s Experimentations and any other Torture events in your deck are twice as effective, inviting you to torture your opponent into submission as quickly as possible.
Torture can quickly crush your opponent’s options, reducing his hand of cards to nothingness. Urien’s Oubliette (Descendants of Isha, 120) gives you the opportunity to manipulate your opponent’s deck as well as his hand. While Urien’s Oubliette is in play, your opponent must play with the top card of his deck revealed. Not only does this give you an intimate knowledge of every card in your opponent’s hand, you can also exhaust Urien’s Oubliette to discard the top card of each player’s deck or have each player draw a card. Moderating exactly which cards go to your opponent’s hand and which go to his discard pile gives you a crucial advantage in the battle for the Traxis sector. Choose Your Path The Eldar race has split in two. The Dark Eldar revel in excess, devouring souls to escape the clutches of She Who Thirsts, while the Eldar choose to deny their impulses and follow a different path. Both factions receive a powerful new warlord in Descendants of Isha, the final War Pack in the Warlord cycle for Warhammer 40,000: Conquest! Stay tuned for a preview of the Descendants of Isha War Pack in which we’ll preview the Eldar warlord and his unique signature squad. Choose which side you will fight for, and look for Descendants of Isha at your local retailer in the first quarter of 2014! ... Source: Descendants of Isha (http://www.fantasyflightgames.com/edge_news.asp?eidn=5241)
Title: FFG:Something Has to Give
Post by: RSSFeeder on 18 December 2014, 22:00:02
Something Has to GiveBalancing Your War Effort and Budget in XCOM: The Board Game
Hello, Commander. In response to the alien threat, this council of nations has chosen to activate the XCOM project. You have full command of XCOM headquarters. You must learn more about the enemy to expand our capabilities as well as the abilities of our operatives…  Being the Commander of XCOM is a high-stakes, high-pressure job. It’s not one for the weak-willed or the faint of heart. As alien invaders assail the world’s nations, laying waste to its great cities and sowing panic among the masses, you must be willing to make hard decisions that will affect the lives of hundreds of millions – maybe even billions – of people. Being the Commander of XCOM is a high-stakes, high-pressure job. It’s not one for the weak-willed or the faint of heart. As alien invaders assail the world’s nations, laying waste to its great cities and sowing panic among the masses, you must be willing to make hard decisions that will affect the lives of hundreds of millions – maybe even billions – of people.
In XCOM: The Board Game, there are four distinct roles the players must assume. Each of these roles has its own unique set of responsibilities, and the Commander is responsible for, among other things, managing the team’s budget. This isn’t a matter of simple mathematics, however; everything your team needs to do will cost you, and the money never seems to meet your needs. Ultimately, balancing your budget means choosing which technologies you can afford to research, where you’ll deploy your Interceptors or soldiers, and which nations must fend for themselves as alien invaders continue their massacre. Build Toward Victory When you play as the Commander, it is your job to track the budget and manage the emergency funds. However, there’s a catch: You don’t actually have the authority to shut down your teammates’ expenditures. Throughout the game, your teammates will assign units to various tasks based on what they think is the best way to respond to the alien threat, and based on what they believe they can contribute. Each of those units counts against your budget, but your teammates are the ones making the decisions about how many units they assign, and where they assign them – not you. 
After the team’s budget is set at thirteen credits, the Chief Scientist decides to assign eight scientists to research tasks: three to UFO Tracking, three to Plasma Cannon, and two to Interceptor Repair. While you hope the science division can make some meanginful progress, the rest of the team now has only five credits to spend!
This is one of the unique challenges of the Commander’s position within the fully co-operative structure of XCOM: The Board Game. You’re responsible for tracking the budget, but in order to make your efforts meaningful, you need to encourage the cooperation of your teammates. You know that if your team overspends, you’ll have to advance the continent with the highest panic level by one space for each credit that you’ve gone over budget. That means that you’ll be watching the different units your teammates assign to research tasks, orbital defense, and missions, and you’ll have to weigh their number against the number of credits you have available. 
The Squad Leader assigns two soldiers to the current mission and two more to base defense, committing four of your five remaining credits.
In your Emergency Funding, you have some leeway to accommodate your teammates’ enthusiasm. They’re the savings you can dip into once or twice if your team can’t get its monthly budget in order, but these funds aren’t refreshed. Once they’re spent, they’re gone. Accordingly, it’s in your best interest – and that of the whole XCOM team – if you can get your teammates to work with you to develop a more strategic and foresightful use of XCOM’s resources. One way you might be able to get your teammates to budget more effectively is to help them identify key expenditures as early as possible. If you can help your team quickly identify the most threatening aspects of the alien invasion plan, your organization can take actions that do more than respond to the various alerts flashing across the screen; you can direct all your efforts so that they build toward the completion of your final mission. 
After your team has assigned units elsewhere, the aliens spawn UFOs over several different continents. As the Commander, you know your team only has one credit remaining in the budget. Do you assign a single Interceptor, hoping to mitigate the damage in one of the continents? Do you ignore the UFOs, allow the continents to move up the panic track, and invest your last credit to recruit a soldier or build an Interceptor that you can deploy next round? Or do you go over budget, deploy your interceptors to reduce the panic in multiple continents, even as you push the most frightened continent closer to the brink of chaos?
A More Judicious Use of Limited Resources Each time you or your teammates assign a unit to a task, it counts against your budget. Each Interceptor assigned to global defense costs one credit. Each satellite assigned to orbital defense costs one credit. Each soldier assigned to a mission or base defense costs one credit. Each scientist assigned to research – one credit. You need to complete these tasks in order to hold back the alien invaders long enough to formulate a meaningful response. However, there are ways to counter the aliens’ various attacks and the crises they create that don’t cost you credits. Each player starts with one or more asset cards. Like Satellite Uplink and Research Center, these cards introduce valuable tactical abilities that can help you maintain or reshape your response to the alien menace. And some of these asset cards introduce powerful abilities that you can trigger by placing units on them:
 |
The Central Officer can place a satellite on Mission Control to move one unit from its reserve to the board or from the board to its reserve. In this way, you can add an extra soldier to base defense if the enemy invaders launch a surprisingly deadly assault, or you can pull back one of your Interceptors from global defense in order to ease the burden on your budget. |
 |
As the Commander, you can train one of the Squad Leader’s reserve soldiers by assigning it to Officer Training. That soldier becomes elite, meaning it will be able to roll an additional XCOM die in future rounds. |
 |
The Squad Leader, meanwhile, can place two soldiers on Skyranger to discard a crisis card from the crisis pool. |
These are powerful abilities, and any units assigned to asset cards don’t cost against your budget. Likewise, the science division’s research efforts are likely to unlock even more cards, introducing other abilities that you can trigger by assigning your units to them. For example, your efforts are bound to benefit if you can unlock the secrets of UFO Power, and it’s much more effective to develop techniques for Interceptor Repair than to buy new Interceptors each time they’re damaged in combat. Identifying the Invasion Plan In order to make the best possible uses of the resources available to you, you’ll want to identify the exact threat you face as early as possible. While UFOs pour into orbit and fly over the world’s great cities, while crises erupt across the globe, and while enemies assail your headquarters, it can be difficult to take your eyes off the immediate threats. But if you want to win, you need to focus on larger patterns. There are five different invasion plans in XCOM: The Board Game. As noted earlier, each invasion plan features a different ratio of UFOs, enemies, and crises. Accordingly, each drives the game’s action in a different direction, and though you’ll never know exactly what to expect, you’ll begin to recognize the larger patterns:
- The alien invaders focus on creating crises to sow chaos and panic throughout the nations when they follow their plans for Infiltration.

- When the invasion plan is Domination, you’ll have to quickly identify the greatest threat you face each round, as the aliens swarm a single, targeted continent.

- You’ll face fewer enemies and more UFOs in orbit as the aliens aim to scramble your transmissions and throw your defenses into disarray with the Misdirection invasion plan.

- The invaders focus on dominating the ground in the Onslaught invasion plan. You’ll find more enemies, and they’ll be more difficult than is typical for your difficulty level.

- If you have to fight back from a state of global Occupation, you’ll need to do so with extremely limited funding, even though the pressure never relents.

As the Commander, your recognition of these patterns can help you counsel your teammates to budget more effectively. For example, while the aliens are working at Misdirection, you may face a brutal early assault against your base that renders it uncomfortably vulnerable, but you could choose to play your odds, knowing that the massing UFOs pose the greater threat. In such a situation, you might ask the Squad Leader to assign minimal troops to your base defense, despite the risk. Then, your team can allocate those funds toward fighting UFOs and mitigating panic elsewhere… as well as racing through missions in order to locate your enemies’ key weaknesses and get an earlier start on your final mission. To that end, each invasion plan introduces a different final mission. This means that each invasion plan demands that you succeed at a different set of tasks before you can win. It also means that each invasion plan inflicts a different sort of punishment upon you whenever the damage to your base hits a red space. 
For example, the invasion plan Domination, which focuses upon pushing the aliens’ existing advantages, spawns two UFOs in each continent in the red whenever your base damage marker hits a red space.

On the other hand, the invasion plan Misdirection seizes upon the opportunity to further build a fleet of UFOs to menace the earth and scramble your transmissions. When your base damage marker hits a red space, Misdrection spawns two UFOs in orbit.
The Bottom Line Alien invaders have arrived, the world is under siege, and traditional military units have all proven ineffectual. As the poorest and richest nations alike tilt perilously close to panic, a secret coalition has activated the XCOM project. Now, as XCOM’s Commander, it falls to you to ensure that your resources are used as effectively as possible. It’s a tough job, and even as you assign your Interceptors where you feel they’re needed most and choose the crises you’ll resolve, you’ll need to identify situations that you can potentially use to your advantage. You’ll also need to recognize when it’s time to cut your losses. More than that, though, you’ll need to encourage your teammates to work with you, as any chance you have of successfully repelling the invaders hinges upon your ability to work together, united, sharing an understanding of your larger strategic concerns. In XCOM: The Board Game, when you’re Commander, you’re not some authoritarian presence with the final word on every matter. You must be a leader, and you must lead by example. If humanity is to survive, you must think quickly and clearly, putting others’ needs ahead of your own interests. You are humanity’s last hope!
Next preview: We’ll take a look at the Chief Scientist and the different tech your XCOM team can research in order to turn the tide of battle! ... Source: Something Has to Give (http://www.fantasyflightgames.com/edge_news.asp?eidn=5242)
Title: FFG:Stay on Message
Post by: RSSFeeder on 19 December 2014, 06:30:03
Stay on MessageAn Overview of the NBN Faction by 2012 World Champion Jeremy Zwirn
“We don’t actually want to discourage runners from running. We just need to ensure that we’re deflecting a majority of their hostilities toward our competitors and other corporations. The truth is that runners use an awful lot of bandwidth, and most of that usage translates to credits in our accounts.”
–Bernice Mai In the third of our faction overview articles for Android: Netrunner, guest writer and 2012 World Champion Jeremy Zwirn takes the megacorp and media giant NBN and boils it down to its essence. As Jeremy argues, NBN is, at its heart, all about the three things it does better than any other Corp faction: fast advancement, tagging the Runner, and card draw. 
Fast Advancement
One of the most powerful Corp strategies in Android: Netrunner is to fast advance your agendas, installing and scoring them in a single turn. By fast advancing your agendas, you reduce the risks and vulnerabilities associated with them because you'll never give the Runner a chance to steal them from a remote server. Oftentimes, you can play an entire game without ever installing ice in a remote server, and that saves you numerous actions and credits that allow you to focus even more on defending your central servers.
NBN is well-suited for a fast advance archetype largely because it owns what is arguably the most powerful Corp card in the game. AstroScript Pilot Program (Core Set, 81) is the poster child for fast advance. With an AstroScript scored, you can install an agenda that requires three advancement, advance it twice, and use the hosted agenda counter to immediately score the newly installed agenda before the Runner has a chance to steal it from your remote server. Chaining AstroScripts into each other is so strong and prevalent that it's sometimes referred to as “riding the train.” Whenever a Corp starts to ride the train, it threatens to win very quickly, and it places a lot of pressure on the Runner to dig for agendas in the central servers – from HQ, in particular – before it's too late.  
Another powerful component of many fast advance decks is SanSan City Grid (Core Set, 92), which lowers the advancement requirement of agendas installed in its server by one. A rezzed SanSan is similar to having a scored Astrocript; they both allow you to install and score three-advancement agendas within a single turn, although the Runner can counter a SanSan simply by trashing it.  NBN players can further improve their fast advance decks by splashing some of their influence on other helpful cards. Biotic Labor (Core Set, 59) gives the deck a trifecta of ways to score agendas “straight from HQ.” Fast Track (Honor and Profit, 27) has quickly become an integral card for the archetype because it acts like a proxy agenda without the added vulnerability of being stolen by the Runner. Sometimes all the Corp needs to win is to find an agenda to score, and Fast Track increases the odds of drawing one. When you have any combination of scored Astrocripts, a rezzed SanSan, or a Biotic Labor, you can use Fast Track to score an agenda “straight from R&D.” For example, with a scored Astroscript, you can play Biotic Labor so that you have four available actions for the turn. Then, you can play Fast Track to find another Astrocript, install and advance it twice with your remaining actions, and then use the hosted agenda counter on the already scored Astrocript to immediately score another Astrocript. Scoring agendas has never been so easy and risk free! NBN players can further improve their fast advance decks by splashing some of their influence on other helpful cards. Biotic Labor (Core Set, 59) gives the deck a trifecta of ways to score agendas “straight from HQ.” Fast Track (Honor and Profit, 27) has quickly become an integral card for the archetype because it acts like a proxy agenda without the added vulnerability of being stolen by the Runner. Sometimes all the Corp needs to win is to find an agenda to score, and Fast Track increases the odds of drawing one. When you have any combination of scored Astrocripts, a rezzed SanSan, or a Biotic Labor, you can use Fast Track to score an agenda “straight from R&D.” For example, with a scored Astroscript, you can play Biotic Labor so that you have four available actions for the turn. Then, you can play Fast Track to find another Astrocript, install and advance it twice with your remaining actions, and then use the hosted agenda counter on the already scored Astrocript to immediately score another Astrocript. Scoring agendas has never been so easy and risk free!
Once you've played with or against a fast advance deck, you'll know why it's one of the strongest archetypes in the game.
Tagging the Runner
One of NBN's biggest strengths is tagging the Runner, in particular, during the Corp's turn. If you have enough of a credit advantage over the Runner, SEA Source (Core Set, 86) or Midseason Replacements (Future Proof, 116) can tag the Runner during your turn when their conditions are met. Breaking News (Core Set, 82) gives them two temporary tags when you score it. Additionally, many NBN decks also use a number of other cards to tag reckless Runners, such as Data Raven (Core Set, 88), TGTBT (True Colors, 75), and, if you use some influence, Snare! (Core Set, 70). 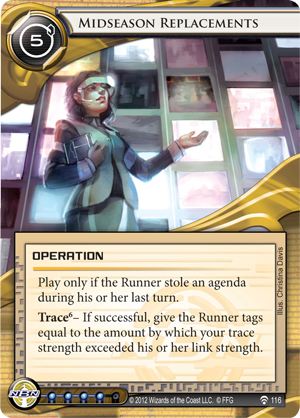 
Why is tagging the Runner useful? Well, as a basic action, the Corp can spend one click and two credits to trash any resource of a tagged Runner. Having the ability to snuff out powerful resources like Kati Jones (Humanity's Shadow, 91) and Professional Contacts (Creation and Control, 49) denies the Runner crucial resources.
Entire archetypes are built around punishing a tagged Runner, and one of the best ways to punish a tagged Runner is to burn them! Scorched Earth (Core Set, 99) can flatline the Runner from out of nowhere. Who needs to win the game by scoring agendas when scorching Runners is so much fun? This “tag and bag” archetype usually relies on spending twelve influence on three copies of Weyland's faction-defining card, Scorched Earth. You'll have little influence left, but it's well worth it.
 If using twelve influence for a few Scorched Earths is too much, you can spend it elsewhere and focus on winning without flatlining the Runner. If using twelve influence for a few Scorched Earths is too much, you can spend it elsewhere and focus on winning without flatlining the Runner.
- A well-timed Midseason Replacements will overload the Runner with tags and create opportunities for you. One of the coolest (albeit difficult) ways to win the game is to use Midseason Replacements to give the Runner at least thirteen tags, install a Project Beale (Future Proof, 115), and then use Psychographics (Core Set, 85) to put thirteen advancement tokens on it and immediately win the game with seven agenda points!
- Even if you don't live that dream, Psychographics can help you fast advance agendas out of HQ.
- Closed Accounts (Core Set, 84) is another excellent way to punish a tagged Runner. For a single credit, you can bankrupt a tagged Runner, no matter how many credits they may have. There's nothing more exhilarating than watching the Runner lose twenty or more credits!
Card Draw
Drawing cards is one of the surest ways to improve your odds of winning in card games. The more cards you draw, the more options you have, and having more options gives you a definite advantage. Drawing cards as the Corp, however, can be a double-edged sword. For the Runner to win, he generally needs to find the agendas hidden within the Corp's deck. Agendas are generally safe when buried deep within R&D, but the more the Corp draws, the more likely they'll uncover those agendas. If the Corp draws too many agendas and has no way to deal with them, the Runner can pluck them out of HQ and the game can end in a heartbeat. Getting caught with too many agendas in HQ, often referred to as being “agenda flooded,” is one of the most disheartening way to lose a game.
Thankfully, NBN has the perfect answer in the form of Jackson Howard (Opening Moves, 15). In addition to doubling the efficiency of your card draw – as he offers two cards for one action – Jackson Howard can bail you out of sticky situations when you get agenda flooded. Simply draw enough cards until you're over your maximum hand size, discard any agendas you don't want, and then use his second ability to shuffle the discarded agendas back into R&D before the Runner can steal them. This ability is so useful that nearly all competitive Corp decks will include two or three copies of Jackson Howard to help prevent agenda flooding. 
Near-Earth Hub (Upstalk, 5) is another NBN card that can generate card advantage. The first time you create a server each turn, you draw a card. If you build a deck with many assets and upgrades, Near-Earth Hub will keep you flush with cards, often drawing you an additional eight or more cards over the course of a typical game. Moreover, its generous seventeen influence makes it a good choice for many decks since you can include three copies of Biotic Labor or Scorched Earth with influence to spare. Even in the Core Set, NBN offers the Corp its best card draw. The operation Anonymous Tip (Core Set, 83) is simple yet effective; for one click, you draw three cards. If you like drawing cards, NBN is the faction for you. 
Thanks, Jeremy! As the world’s leading multi-media conglomerate, NBN knows a thing or two about staying on message. It knows its strengths and how to play to them. Don’t mistake the fact that a veteran player can reduce the faction down to its three core strengths; all the colors in the world are made from just three primary colors, and NBN’s three core strengths lend themselves to an astonishing array of deck types. ... Source: Stay on Message (http://www.fantasyflightgames.com/edge_news.asp?eidn=5243)
Title: FFG:The Force Is Strong with Him
Post by: RSSFeeder on 19 December 2014, 15:00:03
The Force Is Strong with HimPreview the Luke Skywalker Ally Pack and the Darth Vader Villain Pack
“I am your father.”
–Darth Vader, Star Wars: The Empire Strikes Back Take your place in the Star Wars universe with Imperial Assault, a new miniatures game of tactical combat and thrilling adventure for two to five players! You’ll find two complete games within Imperial Assault: a campaign game, which invites you to join a story that changes based on the outcomes of your missions, and a skirmish game, which allows you to battle head-to-head against a single opponent. In addition to the massive amount of missions and figures included in the Imperial Assault Core Set, the Luke Skywalker Ally Pack and the Darth Vader Villain Pack are included in the Core Set as an added bonus. Like other Ally Packs and Villain Packs, each of these expansions includes not only a sculpted plastic figure but also new missions and cards for the campaign and skirmish games. In today’s Imperial Assault preview, we’ll turn to these two figure packs and explore the new missions and powerful abilities they offer to you in both every game. 
Lord of the Sith There are countless characters that fill the Star Wars galaxy, and many of them are highly dangerous. But perhaps no other being inspires the same fear as Darth Vader, lord of the Sith. His skill with a Lightsaber is exceptional, his fame as a pilot is legendary, and his mastery of the dark side of the Force is nearly unmatched. In the Darth Vader Villain Pack, you gain the cards to call upon Darth Vader to eliminate any threat to the Empire’s power.  
For the campaign game, this Villain Pack introduces a new three-card Agenda set that the Imperial player may include in the Agenda deck at the start of a campaign. With this Agenda set, you can introduce a new side mission: Dark Obsession. If the heroes undertake this mission, they must engage in a desperate mission to help Luke escape before Darth Vader captures him forever. But if the hero players do not take on this side mission, you can deploy Darth Vader in any of your future missions! The two other cards in this Agenda set offer more tools for an Imperial player eager to bring Darth Vader into a mission. As You Wish can be played at the start of a mission to add the Darth Vader Deployment card to your hand of potential reinforcements, while A Dark Power reduces the deployment cost of any group by five, helping you bring your most expensive units into play much quicker. The Darth Vader Villain Pack also offers new missions and cards for the skirmish game. Two new skirmish missions use the new Massassi Ruins map, challenging your team to recover important holocrons or save important excavation sites from orbital bombardment among the verdant jungles of Yavin 4. In both skirmish missions, you can use the new Command cards introduced in this expansion. By playing Close the Gap, you can bring your Brawlers closer to your opponent, whereas Force Lightning allows you to quickly incapacitate a hostile figure. Lure of the Dark Side gives you the chance to briefly control and perform an attack with any small figure and Lord of the Sith lets Darth Vader take an additional action for each hostile figure defeated, potentially sending him on a path of destruction through your enemy’s figures. 
Hero of the Rebellion Luke Skywalker’s life changed forever from the day his aunt and uncle were slain by Imperial Stormtroopers, leading him away from rural life on Tatooine to the heroic destruction of the first Death Star. Now, he fights for galactic freedom as a hero of the Rebellion, inspiring the troops around him to greater deeds and battling with blaster and Lightsaber to vanquish the tyrannic Empire. Like other Ally Packs, the Luke Skywalker Ally Pack offers a sculpted plastic figure with new tools for both your campaigns and skirmishes. With the addition of the Luke Skywalker Ally Pack, you can include a new side mission in your campaigns. In the Sympathy for the Rebellion mission, you join Luke Skywalker in an attempt to gather new recruits for the Rebel Alliance. Of course, Imperial troopers are already in the area, and any attempt to stir the flame of rebellion quickly leads to a firefight. If you can successfully complete this mission, you gain The Ways of the Force Reward card. When a hero has this Reward card equipped, he may suffer a strain before taking an attribute test to become Focused, dramatically increasing his chances of succeeding at an attribute test and giving you a better chance of quickly completing your mission objectives. 
Your skirmish games can also benefit from the inclusion of the Luke Skywalker Ally Pack. Two new missions take advantage of the new Moisture Farm map among the deserts of Tatooine. You may battle to tag crates of precious water, or use the distraction and chaos of a Tusken Raider attack to vanquish your opponent’s army. You can also use the new Command cards included in this expansion for any skirmish mission. Deflection reduces another figure’s accuracy and gives you the chance to inflict damage against your attacker, while Meditation gives you another action for your next activation. Knowledge and Defense improves your defense with an extra white die, and Son of Skywalker gives Luke the chance to activate twice in one round, doubling his chances to deal a decisive blow to the Galactic Empire. Hero or Villain? Whether you cast your lot with the Rebellion and Luke Skywalker, or pursue the Empire’s agendas with Darth Vader, the Darth Vader Villain Pack and Luke Skywalker Ally Pack included in the Imperial Assault Core Set give you the chance to adventure and battle in the Star Wars universe. With these expansions, your campaign and skirmish games change forever. Imperial Assault will soon be available at your local retailer! Pre-order your copy today. ... Source: The Force Is Strong with Him (http://www.fantasyflightgames.com/edge_news.asp?eidn=5244)
Title: FFG:Retailers: Pre-order Your Spring 2015 Tournament Kits
Post by: RSSFeeder on 19 December 2014, 23:30:02
Retailers: Pre-order Your Spring 2015 Tournament KitsAnnouncing New Tournament Kits for Warhammer 40,000: Conquest
Take command of the Warhammer 40,000: Conquest Spring 2015 Season with new Tournament Kits! These exciting kits are now available for pre-order through our B2B store or your distributor. A game of control, annihilation, and planetary domination, Warhammer 40,000: Conquest is the hottest card game on the market and is building numerous communities around the world. The Spring 2015 Warhammer 40,000: Conquest Tournament Kit comes with an event guide and promotional materials to help support tournaments, league play, or any other event you wish to run. The order deadline for these kits is December 29th, and the Spring season begins in March. How Do I Use a Tournament Kit? Tournament Kits are designed for use with our competitive games, such as Warhammer 40,000: Conquest, and they can be used in several ways. These kits include prize support and promotional material designed to support competitive or casual tournament play at local retailers. Run an eight-week tournament series or league, use the prizes to support a single, large tournament, or host a weekly casual game night. Tournament Kits also come with a guide that provides tips and ideas on how to run a great event. What’s in the Spring 2015 Warhammer 40,000: Conquest Tournament Kit? Each Spring 2015 Warhammer 40,000: Conquest Tournament Kit comes with exciting prizes and materials to help tournament organizers: - One playmat depicting Elorath Starbane leading an army
- Two copies of an alternate art Elorath Starbane card
- Seventeen copies of an alternate art Coliseum Fighters card
- Four Orks deck boxes featuring Goffs with Cybork Bodies
- A promotional poster depicting Elorath Starbane leading an army
- One informational pamphlet on running a tournament or league

Please note: The alternate art cards in this kit are produced through FFG's In-House Manufacturing, and as such, they may appear slightly different in color and texture from the game's other cards. To be tournament legal, these cards must be sleeved with opaque or art sleeves. Are You a Retailer? If you’re interested in ordering a Spring 2015 Warhammer 40,000: Conquest Tournament Kit, you can do so through your distributor or through our B2B store. The deadline to order is December 29th, with the season starting in March. ... Source: Retailers: Pre-order Your Spring 2015 Tournament Kits (http://www.fantasyflightgames.com/edge_news.asp?eidn=5245)
Title: FFG:Retailers: Pre-order Your Spring 2015 Tournament Kits
Post by: RSSFeeder on 20 December 2014, 08:00:03
Retailers: Pre-order Your Spring 2015 Tournament KitsAnnouncing New Tournament Kits for Warhammer: Diskwars
Charge into the Warhammer: Diskwars Spring 2015 Season with new Tournament Kits! These exciting kits are now available for pre-order through our B2B store or your distributor.  With a movement system unique to the game, Warhammer: Diskwars continues to expand and build new game communities around the world. The Spring 2015 Warhammer: Diskwars Tournament Kit comes with an event guide and new promotional materials to help support tournaments, league play, or any other event you wish to run. The order deadline for these kits is December 29th, and the Spring season begins in March. With a movement system unique to the game, Warhammer: Diskwars continues to expand and build new game communities around the world. The Spring 2015 Warhammer: Diskwars Tournament Kit comes with an event guide and new promotional materials to help support tournaments, league play, or any other event you wish to run. The order deadline for these kits is December 29th, and the Spring season begins in March.
How Do I Use a Tournament Kit? Tournament Kits are designed for use with our competitive games, such as Warhammer: Diskwars, and they can be used in several ways. These kits include prize support and promotional material designed to support competitive or casual tournament play at local retailers. Run an eight-week tournament series or league, use the prizes to support a single, large tournament, or host a weekly casual game night. Tournament Kits also come with a guide that provides tips and ideas on how to run a great event. Exclusive Scenarios! Each Spring 2015 Warhammer: Diskwars Tournament Kit comes with eight copies of the exclusive Bloodgreed scenario. Scenarios are a great way to shake up your local players’ habits or introduce a new experience to your community. Use the scenarios during your event, making players use them for one round or the entire tournament, or introduce them in your own creative way. No matter how you use the scenarios, make sure to give them away as prizes before the end of the season! What’s in the Spring 2015 Warhammer: Diskwars Tournament Kit? Each Spring 2015 Warhammer: Diskwars Tournament Kit comes with exciting prizes and materials to help tournament organizers: - Eight copies of the Bloodgreed scenario
- Two copies of an alternate art Karl Franz disc
- Seventeen copies of an alternate art Skeleton Warriors disc
- Four Empire card boxes depicting Karl Franz
- A promotional poster featuring Karl Franz
- One informational pamphlet on running a tournament or league

Please note: The scenario cards in this kit are produced through FFG's In-House Manufacturing, and as such, they may appear slightly different in color and texture from the game's other cards. Order Your Kits Today Don’t miss out on Spring 2015 Warhammer: Diskwars Tournament Kits! Order your kits now through your distributor or our B2B store. The deadline to order is December 29th, with the season starting in March. ... Source: Retailers: Pre-order Your Spring 2015 Tournament Kits (http://www.fantasyflightgames.com/edge_news.asp?eidn=5246)
Title: FFG:Retailers: Pre-order Your Spring 2015 Tournament Kits
Post by: RSSFeeder on 20 December 2014, 16:30:04
Retailers: Pre-order Your Spring 2015 Tournament KitsAnnouncing New Tournament Kits for X-Wing(TM)
Launch into the X-Wing™ Spring 2015 Season with new Tournament Kits! These exciting kits are now available for pre-order through our B2B store or your distributor. Featuring cinematic dogfights and a unique movement system, X-Wing continues to expand and build new game communities around the world. The Spring 2015 X-Wing Tournament Kit comes with an event guide and new promotional materials to help support tournaments, league play, or any other event you wish to run. The order deadline for these kits is December 29th, and the Spring season begins in March. How Do I Use a Tournament Kit? Tournament Kits are designed for use with our competitive games, such as X-Wing, and they can be used in several ways. These kits include prize support and promotional material designed to support competitive or casual tournament play at local retailers. Run an eight-week tournament series or league, use the prizes to support a single, large tournament, or host a weekly casual game night. Tournament Kits also come with a guide that provides tips and ideas on how to run a great event. What’s in the Spring 2015 X-Wing Tournament Kit? Each Spring 2015 X-Wing Tournament Kit comes with exciting prizes and materials to help tournament organizers: - One exclusive Darth Vader medal (not pictured)
- Two acrylic range rulers
- Four TIE Fighter dice bags
- Two copies of an alternate art Tycho Celchu card
- Seventeen copies of an alternate art Push the Limit card
- A promotional poster featuring a YT-2400 Freighter scavenging among wreckage
- One informational pamphlet on running a tournament or league

Please note: The alternate art cards in this kit are produced through FFG's In-House Manufacturing, and as such, they may appear slightly different in color and texture from the game's other cards. Are You a Retailer? If you’re interested in ordering a Spring 2015 X-Wing Tournament Kit, you can do so through your distributor or through our B2B store. The deadline to order is December 29th, with the season starting in March ... Source: Retailers: Pre-order Your Spring 2015 Tournament Kits (http://www.fantasyflightgames.com/edge_news.asp?eidn=5247)
Title: FFG:Retailers: Pre-order Your Spring 2015 Tournament Kits
Post by: RSSFeeder on 21 December 2014, 01:00:04
Retailers: Pre-order Your Spring 2015 Tournament KitsAnnouncing Tournament Kits for Star Wars(TM): Armada
Take command of the Spring 2015 season with Star Wars™: Armada Tournament Kits! These exciting kits are now available for pre-order through our B2B store or your distributor.  In Star Wars: Armada, players take on the role of fleet admiral, commanding squadrons of support fighters, sending engineers scurrying to repair shields, and unleashing torrents of laser fire through a flurry of tactical commands. The Spring 2015 Star Wars: Armada Tournament Kit comes with an event guide and new promotional materials to help support tournaments, league play, or any other event you wish to run. The order deadline for these kits is December 29th, and the Spring season begins in March. In Star Wars: Armada, players take on the role of fleet admiral, commanding squadrons of support fighters, sending engineers scurrying to repair shields, and unleashing torrents of laser fire through a flurry of tactical commands. The Spring 2015 Star Wars: Armada Tournament Kit comes with an event guide and new promotional materials to help support tournaments, league play, or any other event you wish to run. The order deadline for these kits is December 29th, and the Spring season begins in March.
How Do I Use a Tournament Kit? Tournament Kits are designed for use with our competitive games, such as Star Wars: Armada, and they can be used in several ways. These kits include prize support and promotional material designed to support competitive or casual tournament play at local retailers. Run an eight-week tournament series or league, use the prizes to support a single, large tournament, or host a weekly casual game night. Tournament Kits also come with a guide that provides tips and ideas on how to run a great event. What’s in the Spring 2015 Star Wars: Armada Tournament Kit? Each Spring 2015 Star Wars: Armada Tournament Kit comes with exciting prizes and materials to help tournament organizers: - One exclusive Imperial Gunner medal (not pictured)
- Four sets of acrylic concentrate fire tokens (not pictured)
- Four dice bags
- Two copies of an alternate art Victory II-class Star Destroyer
- Seventeen copies of an alternate art Nebulon-B Escort Frigate
- A promotional poster featuring a Star Destroyer taking on a fleet of Rebellion ships
- One informational pamphlet on running a tournament or league

Please note: The alternate art cards in this kit are produced through FFG's In-House Manufacturing, and as such, they may appear slightly different in color and texture from the game's other cards. Order Your Kits Today Don’t miss out on Spring 2015 Star Wars: Armada Tournament Kits! Order your kits now through your distributor or our B2B store. The deadline to order is December 29th, with the season starting in March. ... Source: Retailers: Pre-order Your Spring 2015 Tournament Kits (http://www.fantasyflightgames.com/edge_news.asp?eidn=5248)
Title: FFG:Retailers: Pre-order Your Spring 2015 Tournament Expansion Kits
Post by: RSSFeeder on 21 December 2014, 09:30:03
Retailers: Pre-order Your Spring 2015 Tournament Expansion KitsAnnouncing Tournament Expansion Kits for Imperial Assault
Charge into the Spring 2015 season with Imperial Assault Tournament Expansion Kits! These exciting kits are now available for pre-order through our B2B store or your distributor. The Spring 2015 Imperial Assault Tournament Expansion Kit comes with an event guide and promotional materials to help support tournaments, league play, or any other event you wish to run. The order deadline for these kits is December 29th, and the Spring season begins in March. Note: Imperial Assault Tournament Expansion Kits support events using only the game’s skirmish mode. How Do I Use a Tournament Expansion Kit? Tournament Expansion Kits are designed for use with our competitive games, such as the skirmish mode in Imperial Assault. These kits include prize support and promotional material designed to support competitive or casual tournament play at local retailers. Run an eight-week tournament series or league, use the prizes to support a single, large tournament, or host a weekly casual game night. Tournament Expansion Kits also come with a guide that provides tips and ideas on how to run a great event. Skirmish Mode in Imperial Assault Imperial Assault’s skirmish mode features head-to-head action and is a fantastic way to run Imperial Assault events because of its short round times, fiery battles, and multitude of scenarios that will test each player’s skill over the course of a tournament. The basic rules for skirmish mode are included in the base game, and tournament rules will be released before the Spring 2015 season begins. What’s in the Spring 2015 Imperial Assault Tournament Expansion Kit? Each Spring 2015 Imperial Assault Tournament Expansion Kit comes with exciting prizes and materials to help tournament organizers: - One exclusive Stormtrooper medal (not pictured)
- Two sets of acrylic damage tokens
- Four dice bags
- Two copies of an alternate art Luke Skywalker card
- Seventeen copies of an alternate art elite Stormtrooper card
- A promotional poster
- One informational pamphlet on running a tournament or league

Please note: The alternate art cards in this kit are produced through FFG's In-House Manufacturing, and as such, they may appear slightly different in color and texture from the game's other cards. Order Your Kits Today Don’t miss out on Spring 2015 Imperial Assault Tournament Expansion Kits! Order your kits now through your distributor or our B2B store. The deadline to order is December 29th, with the season starting in March. ... Source: Retailers: Pre-order Your Spring 2015 Tournament Expansion Kits (http://www.fantasyflightgames.com/edge_news.asp?eidn=5249)
Title: FFG:Retailers: Pre-order Your Spring 2015 Tournament Kits
Post by: RSSFeeder on 21 December 2014, 18:00:03
Retailers: Pre-order Your Spring 2015 Tournament KitsAnnouncing New Tournament Kits for Star Wars: The Card Game
Help your local Star Wars™: The Card Game community learn the ways of the Force with our new Spring 2015 Star Wars: The Card Game Tournament Kits! These exciting kits are now available for pre-order through our B2B store or
your distributor. Featuring galactic struggles between the Empire and Rebellion and fast-paced action, Star Wars: The Card Game continues to expand and build new game communities around the world. The Spring 2015 Star Wars: The Card Game Tournament Kit comes with an event guide and new promotional materials to help support tournaments, league play, or any other event you wish to run. The order deadline for these kits is December 29th, and the Spring season begins in March. How Do I Use a Tournament Kit? Tournament Kits are designed for use with our competitive games, such as Star Wars: The Card Game, and they can be used in several ways. These kits include prize support and promotional material designed to support competitive or casual tournament play at local retailers. Run an eight-week tournament series or league, use the prizes to support a single, large tournament, or host a weekly casual game night. Tournament Kits also come with a guide that provides tips and ideas on how to run a great event. What’s in the Spring 2015 Star Wars: The Card Game Tournament Kit? Each Spring 2015 Star Wars: The Card Game Tournament Kit comes with exciting prizes and materials to help tournament organizers: - One playmat depicting Boushh
- Two copies of an alternate art The Defense of Yavin 4 card
- Seventeen copies of an alternate art Admiral Motti card
- Four Smuggler and Spies deck boxes featuring Boushh
- A promotional poster depicting Boushh
- One informational pamphlet on running a tournament or league

Please note: The alternate art cards in this kit are produced through FFG's In-House Manufacturing, and as such, they may appear slightly different in color and texture from the game's other cards. To be tournament legal, these cards must be sleeved with opaque or art sleeves. Are You a Retailer? If you’re interested in ordering a Spring 2015 Star Wars: The Card Game Tournament Kit, you can do so through your distributor or through our B2B store. The deadline to order is December 29th, with the season starting in March. ... Source: Retailers: Pre-order Your Spring 2015 Tournament Kits (http://www.fantasyflightgames.com/edge_news.asp?eidn=5250)
Title: FFG:Retailers: Pre-order Your Spring 2015 Tournament Kits
Post by: RSSFeeder on 22 December 2014, 02:30:03
Retailers: Pre-order Your Spring 2015 Tournament KitsAnnouncing New Tournament Kits for Call of Cthulhu
Add new terrors to your local Call of Cthulhu: The Card Game community with our new Spring 2015 Call of Cthulhu: The Card Game Tournament Kits! These exciting kits are now available for pre-order through our B2B store or your distributor. A game of nightmares, horror, and brave investigators fighting for the fate of the world, Call of Cthulhu: The Card Game continues to expand and build new game communities around the world. The Spring 2015 Call of Cthulhu: The Card Game Tournament Kit comes with an event guide and new promotional materials to help support tournaments, league play, or any other event you wish to run. The order deadline for these kits is December 29th, and the Spring season begins in March. How Do I Use a Tournament Kit? Tournament Kits are designed for use with our competitive games, such as Call of Cthulhu: The Card Game, and they can be used in several ways. These kits include prize support and promotional material designed to support competitive or casual tournament play at local retailers. Run an eight-week tournament series or league, use the prizes to support a single, large tournament, or host a weekly casual game night. Tournament Kits also come with a guide that provides tips and ideas on how to run a great event. What’s in the Spring 2015 Call of Cthulhu: The Card Game Tournament Kit? Each Spring 2015 Call of Cthulhu: The Card Game Tournament Kit comes with exciting prizes and materials to help tournament organizers: - One playmat depicting Ruinous Star Spawn
- Two copies of an alternate art Twilight Gate
- Seventeen copies of an alternate art Dreamlands Fanatic
- Four deck boxes featuring Ruinous Star Spawn
- A promotional poster depicting Ruinous Star Spawn
- One informational pamphlet on running a tournament or league

Please note: The alternate art cards in this kit are produced through FFG's In-House Manufacturing, and as such, they may appear slightly different in color and texture from the game's other cards. To be tournament legal, these cards must be sleeved with opaque or art sleeves. Are You a Retailer? If you’re interested in ordering a Spring 2015 Call of Cthulhu: The Card Game Tournament Kit, you can do so through your distributor or through our B2B store. The deadline to order is December 29th, with the season starting in March. ... Source: Retailers: Pre-order Your Spring 2015 Tournament Kits (http://www.fantasyflightgames.com/edge_news.asp?eidn=5251)
Title: FFG:Retailers: Pre-order Your Spring 2015 Tournament Kits
Post by: RSSFeeder on 22 December 2014, 11:00:04
Retailers: Pre-order Your Spring 2015 Tournament KitsAnnouncing New Tournament Kits for Android: Netrunner
Plug into your local Android: Netrunner community with our new Spring 2015 Android: Netrunner Tournament Kits! These exciting kits are now available for pre-order through our B2B store or your distributor. Pitting two players against each other in a high-stakes, futuristic cyberstruggle, Android: Netrunner continues to expand and build new game communities around the world. The Spring 2015 Android: Netrunner Tournament Kit comes with an event guide and new promotional materials to help support tournaments, league play, or any other event you wish to run. The order deadline for these kits is December 29th, and the Spring season begins in March. How Do I Use a Tournament Kit? Tournament Kits are designed for use with our competitive games, such as Android: Netrunner, and they can be used in several ways. These kits include prize support and promotional material designed to support competitive or casual tournament play at local retailers. Run an eight-week tournament series or league, use the prizes to support a single, large tournament, or host a weekly casual game night. Tournament Kits also come with a guide that provides tips and ideas on how to run a great event. What’s in the Spring 2015 Android: Netrunner Tournament Kit? Each Spring 2015 Android: Netrunner Tournament Kit comes with exciting prizes and materials to help tournament organizers: - One playmat depicting the Criminal runner Silhouette
- Two copies of an alternate art Gordian Blade
- Seventeen copies of an alternate art Pop-up Window
- Four Criminal deck boxes featuring Silhouette
- A promotional poster depicting the Criminal runner Silhouette
- One informational pamphlet on running a tournament or league

Please note: The alternate art cards in this kit are produced through FFG's In-House Manufacturing, and as such, they may appear slightly different in color and texture from the game's other cards. To be tournament legal, these cards must be sleeved with opaque or art sleeves. Order Your Kits Today Don’t miss out on Spring 2015 Android: Netrunner Tournament Kits! Order your kits now through your distributor or our B2B store. The deadline to order is December 29th, with the season starting in March. ... Source: Retailers: Pre-order Your Spring 2015 Tournament Kits (http://www.fantasyflightgames.com/edge_news.asp?eidn=5252)
Title: FFG:Retailers: Pre-order Your Spring 2015 Tournament Kits
Post by: RSSFeeder on 22 December 2014, 19:30:03
Retailers: Pre-order Your Spring 2015 Tournament KitsAnnouncing New Tournament Kits for A Game of Thrones
Venture beyond the Wall and into the A Game of Thrones: The Card Game Spring 2015 Season with new Tournament Kits! These exciting kits are now available for pre-order through our B2B store or your distributor. Featuring epic battles and countless plots of intrigue, cunning, and deceit,
A Game of Thrones: The Card Game continues to expand and build new game communities around the world. The Spring 2015 A Game of Thrones: The Card Game Tournament Kit comes with an event guide and new promotional materials to help support tournaments, league play, or any other event you wish to run. The order deadline for these kits is December 29th, and the Spring season begins in March. How Do I Use a Tournament Kit? Tournament Kits are designed for use with our competitive games, such as
A Game of Thrones: The Card Game, and they can be used in several ways. These kits include prize support and promotional material designed to support competitive or casual tournament play at local retailers. Run an eight-week tournament series or league, use the prizes to support a single, large tournament, or host a weekly casual game night. Tournament Kits also come with a guide that provides tips and ideas on how to run a great event. What’s in the Spring 2015 A Game of Thrones: The Card Game Tournament Kit? Each Spring 2015 A Game of Thrones: The Card Game Tournament Kit comes with exciting prizes and materials to help tournament organizers: - One playmat featuring the Iron Throne
- Two copies of an alternate art An Empty Throne card
- Seventeen copies of an alternate art Robert Baratheon card
- Four Baratheon deck boxes depicting Renly Baratheon
- A promotional poster featuring the Iron Throne
- One informational pamphlet on running a tournament or league

Please note: The alternate art cards in this kit are produced through FFG's In-House Manufacturing, and as such, they may appear slightly different in color and texture from the game's other cards. To be tournament legal, these cards must be sleeved with opaque or art sleeves. Are You a Retailer? Winter is here, but it won’t last forever! Prepare for warmer months and order a Spring 2015 A Game of Thrones: The Card Game Tournament Kit through your distributor or through our B2B store. The deadline to order is December 29th, with the season starting in March. ... Source: Retailers: Pre-order Your Spring 2015 Tournament Kits (http://www.fantasyflightgames.com/edge_news.asp?eidn=5253)
Title: FFG:Fantasy Flight Games Is Now Hiring
Post by: RSSFeeder on 23 December 2014, 04:00:03
Fantasy Flight Games Is Now HiringWe Are Currently Accepting Applications for Two PositionsFantasy Flight Games, leading hobby-market publisher of board games, card games, roleplaying games, and other tabletop games, is now hiring for the following positions: Details can be found in the pdf documents linked above. To apply for either of these positions, submit a cover letter with salary requirements and resume to HumanResources@fantasyflightgames.com. Your subject line should read “Application Developer” or "Graphic Designer" as appropriate. Applications must be received no later than end of business day Tuesday, December 23, 2014. Please do not call or visit. Our offices are located in Roseville, Minnesota, a suburb of the Twin Cities of Minneapolis and St. Paul. Candidates not already living within commuting distance must be willing to relocate. Fantasy Flight Publishing, Inc. is an equal opportunity employer committed to a diverse work force and a work environment free from discrimination. ... Source: Fantasy Flight Games Is Now Hiring (http://www.fantasyflightgames.com/edge_news.asp?eidn=5255)
Title: FFG:Retailers: Pre-order Your Spring 2015 Tournament Kits
Post by: RSSFeeder on 23 December 2014, 12:30:03
Retailers: Pre-order Your Spring 2015 Tournament KitsBuild and Support Your Local Player Community with Nine New Tournament Kits
Nine Spring 2015 Tournament Kits are now available for pre-order through our B2B store or your distributor! Fantasy Flight Games is proud to add two more games that will be supported by Organized Play starting in 2015: Star Wars™: Armada and Imperial Assault! Get in on the ground floor and be the first store in your area to support the players of these two spectacular games. Tournament Kits serve as the entry way to FFG’s Organized Play programs. Each kit contains prize support and helpful suggestions on how to best support your local community. With these tools, stores can host leagues, weekly game nights, or even a large-scale tournament to draw in players and build a thriving group of regular patrons. 
What Games are Supported? Whether you’re destroying your enemies in the Traxis Sector, writing vicious programs to punish pesky Runners infiltrating your servers, or leading a team of Rebel saboteurs into an Imperial TIE production facility—Tournament Kits can make your store the local hub of a thriving, global community connected by Fantasy Flight Organized Play. Visit the links below to learn more about each of the games supported by Organized Play; then pre-order your Tournament Kits today! Are You a Player? If you’re a player, you can do your part to grow Organized Play by telling your favorite local game store about our Tournament Kits. If you’re interested in taking a more active role in bringing events to your community, here are some ways you can help promote Fantasy Flight Organized Play: - Encourage your friends to join you and play at your favorite local game store
- Ask your favorite local game store if you can post a sign-up sheet for upcoming events
- Offer to run demos
- Volunteer your services as tournament organizer
The exclusive items and alternate art cards from these Spring 2015 Tournament Kits will be available for a limited period of time only, so be sure to talk with your local retailer about hosting tournaments for our Organized Play games. 
Order Now With the introduction of Star Wars™: Armada and Imperial Assault, as well as last year’s debut of Warhammer 40,000: Conquest, Organized Play support continues to expand. Don’t miss out on your chance to build a strong and healthy community in your store for the games your players enjoy, order before December 29th to receive your Tournament Kits! ... Source: Retailers: Pre-order Your Spring 2015 Tournament Kits (http://www.fantasyflightgames.com/edge_news.asp?eidn=5254)
Title: FFG:Gearing Up for a Fight
Post by: RSSFeeder on 24 December 2014, 05:30:03
Gearing Up for a FightPreview the Vehicles and Beasts of Stay on Target Man your ships! And may the Force be with you!
–General Dodonna Rebel Aces live for the excitement of battle. The thrill of successfully steering through an asteroid field while fleeing a squadron of TIE fighters. The rush of speeding into the fray as you shoot at every enemy within sight. The suspense of not knowing whether that last-minute weapons adjustment will save your life or get you killed. At these moments, your vehicle or beast is not just your transportation, but your chosen weapon, your shield, and maybe even your best friend. Stay on Target, an Ace career supplement for Star Wars®: Age of Rebellion™, features over twenty new vehicles and starships that Ace characters might take into battle – or find themselves fighting against. Stay on Target gives those interested in the Beast Rider specialization a range of species to ride into battle. Today’s preview looks at a few of these vehicles: a top-of-the-line landspeeder, a heavily-armed long-range starfighter, and a droid-equipped starcraft from the Clone Wars. We’ll also look at two beast mounts: the noble, flying Ruping and the ferocious, catlike Narglatch, and take a peek at the rules that allow any character to use an animal, tamed or not, as their mount. 
Top Gear A Rebel strike force is often in need of a good getaway vehicle, something capable of outrunning any Imperial pursuit. The sleek, precision-built AV21 landspeeder can carry two Rebels away from the scene of the crime faster than almost anything else on land. A favorite of racing aficionados and the wealthy elite, an AV21 would delight any speed-addicted Driver or Hotshot who could get his hands on one of these rare, expensive hot rods. The BTS-A2 H-wing starship will interest any Gunners on your team. Perfect for long-range patrols, freighter escorts, piracy jobs, or safely transporting diplomats, the heavily armored and heavily armed H-wing punches well above its weight. It has two cockpits: one for the pilot, and another where a pair of weapons system operators control the turret-mounted laser cannon, forward-mounted light ion cannons, and forward-mounted torpedo launchers. Not many Rebel installations field the H-wings but your team might find it the perfect interstellar vehicle. 
For Mechanics and Riggers wanting to customize a starship, the A3-Nimbus “V-wing” interceptor is ideal: durable, well-designed, and inexpensive. V-wings entered service with the Republic Navy late in the Clone Wars, selected for their speed and agility. They lack hyperdrive, but each one was originally outfitted with a Q7 astromech droid to monitor systems and perform light maintenance. With a little tinkering, your V-wing could have an X-wing’s speed and firepower. War Beasts 
Almost every culture in the Star Wars universe uses beasts of burden in agriculture, labor, and warfare. Stay on Target allows players and GMs to transform almost any animal that is large enough into a mount by giving the animal the traits of a vehicle: silhouette, speed (based on Agility), and handling (based on Agility, silhouette, and Willpower). Animals can be trained as mounts or mounted untrained at the rider’s own peril – a Survival check determines whether character can successfully ride a beast. Beast mounts can perform many of the same combat maneuvers that other vehicles can, but they can also climb, jump, and even push objects with their bodies. They may also be able to sense imminent danger, defend themselves in battle, or even save the life of a beloved rider. No one knows where the narglatch evolved. Because of their immunity to cold, they are used as mounts on the freezing world of Orto Plutonia, yet they have also been found in the swamps of Naboo. These feline beasts have never truly been domesticated, but remain instinctive predators who quietly stalk their prey before closing in on the kill. However, once trained a narglatch will become loyal to its master and fearsome in battle with claws deadlier than many melee weapons. If you want to sneak up on an Imperial installation and attack before your presence is noticed, a narglatch may be the perfect mount for you. Rupings have been used as mounts on the temperate world of Onderon for generations. These graceful, soaring reptiles possess two sets of eyes facing opposite directions, allowing them a huge field of vision and making them difficult to catch off guard. Rupings also are armed with giant claws that can deliver mortal wounds in an instant or snatch up prey and carry it aloft. They make ideal mounts for Rebel scouts gathering intelligence about an Imperial installation, and while a ruping may not fly faster than an airspeeder, it can keep you out of danger and touch down in tight spots where no airspeeder could possibly land. 
The Ride of Your Life If a ruping or narglatch doesn’t appeal to your Beast Rider character, Stay on Target describes fifteen other beasts, including tauntauns, banthas, and the immense reptilian fambaa that have been part of the Gungan army for decades. As a GM, you might deploy Imperial soldiers mounted on narglatch against your team of Rebels, or send your rebels on a mission in the Tatooine desert, with no transporation other than banthas. Beyond rebel starfighters, Stay on Target also introduces three different starfighter carriers and a quartet of TIE fighters, including the fearsome TIE Phantom, equipped with a cloaking device that makes it invisible both to radar and to the naked eye. Whether you’re an Ace looking for the perfect ride or a GM seeking new obstacles for a team of Rebellion operatives, the vehicles and beasts of Stay on Target will enrich your Age of Rebellion campaign. Pre-order Stay on Target today! ... Source: Gearing Up for a Fight (http://www.fantasyflightgames.com/edge_news.asp?eidn=5256)
Title: FFG:The Cursed City
Post by: RSSFeeder on 24 December 2014, 14:00:04
The Cursed CityPreview the Adventures of Gates of Arkham
The place is not good for the imagination, and does not bring restful dreams at night.
–H.P. Lovecraft, The Color Out of Space In a typical game of Elder Sign, you confront the many cursed artifacts, vicious monsters, and other horrors lurking in the Arkham museum. The Gates of Arkham expansion takes you outside of the museum’s warm confines and into the city of Arkham itself. Gangs fight territorial battles in Arkham’s back alleys, not caring if a stray bullet hits an innocent bystander. Strange crates of foul-smelling, slimy, writhing creatures line the shelves of the General Store. Cultists perform dark sacrificial rites on the Unvisited Isle and ravenous gugs prowl through the University Administration building, hunting for victims. Gates of Arkham features a complete deck of Arkham Adventures that allows players to visit twenty-six locations throughout this legendarily cursed city. Today’s preview will show you adventures from three locations: the Unnamable, the River Docks, and the Arkham Asylum. No matter where you go in Arkham, you are certain to encounter indescribable horrors.
A Haunted House Inside the museum, you knew what horrors awaited you in a given room before entering it. But when playing the Streets of Arkham game mode, it is impossible to tell what lies you behind a building’s closed doors. Arkham Adventure cards are laid out on the table facedown, with the adventure itself hidden until an investigator dares to visit that location. The back of a card reveals only the location, difficulty of the adventure, marked in green, gold, or red, and an effect, which may be harmful or beneficial.   The decaying, empty house may not seem too foreboding, but the red symbol above it warns you that formidable terrors are within. However, if investigators refuse to enter, then at midnight the entire team will lose sanity, no matter where they are in Arkham. The Unnameable demands to be confronted, so you take a deep breath and cross the threshold, only to perceive a trail of blood leading down into the basement and hear muffled yet familiar screams. If you fail to rescue your friend from this incomprehensible threat, you lose five stamina and risk becoming devoured. If you succeed, you earn two Elder Signs and a unique item.  On the Shore of the Miskatonic Having escaped the Unnamable, you may venture to the dark, foggy River Docks, where you could hand the unique item you earned over to another investigator who may be in dire need of it. However, upon your arrival you’ll discover that the grotesque, once-human Deep Ones are emerging from their underwater lairs and coming ashore. Upon your entry, a monster appears at this adventure, perhaps a giant, eel-like Dhole rearing out of the water. Many Arkham Adventure Cards have entry effects such as this, and they occur any time an investigator arrives at that location. For repelling the Deep Ones back into the river depths you’ll receive a choice of rewards: two common items or the defeat of two more monsters. A split reward such as this enables you to receive whichever will be most useful for your team. There are also split penalties which compel you to choose between two evils – for example, losing a few points of sanity or advancing the doom track. When the choice is between two penalties, however, you cannot choose a penalty that wouldn't affect you, say, losing an item when you have none. The consequences of your misadventures cannot be avoided. 
Among the Mad In your citywide search for elder signs you will inevitably find your sanity slipping away. Visiting the Arkham Asylum allows you to exchange two trophies in order to fully recover your sanity. During your time there you may receive some Psychiatric Assistance, although recovery itself may prove traumatic. If you roll a terror result in a failed attempt at this adventure, you’ll lose your sanity rather than regain it. Regaining your sanity also takes time: a clock icon on the card indicates that successfully completing this adventure moves the clock one step closer to midnight. Entering the Asylum might simply make matters worse. If you encounter the Ramblings of the Mad, you could push your entire team of investigators a little closer to insanity. Even success at this adventure results in losing your mind, with your reward being only a clue or a spell, neither of which will repair your psychological wounds. 
No Place Is Safe The Thing in the Basement, the Deep Ones, and the disturbed inhabitants of the Arkham Asylum pale in comparison to the powerful creatures that have waited for eons to regain control of the earth: Azathoth, Yig, Nyarlathotep, Cthulhu. It is up to you and your team of investigators to take on the horrors that haunt old, uncanny Arkham, so that you can save not only yourselves, or Arkham, but the entire world. Upcoming previews will look at the unpredictable Events that occur throughout Arkham, the new Investigators that could join your team, and the powerful Ancient Ones who threaten Arkham and the entire human race. Meanwhile, you can find more details on the Gates of Arkham and Elder Sign minisites. Prepare to brave the cursed city. Pre-order Gates of Arkham from your local retailer today. ... Source: The Cursed City (http://www.fantasyflightgames.com/edge_news.asp?eidn=5258)
Title: FFG:The Woodland Realms Unite, Part One
Post by: RSSFeeder on 24 December 2014, 22:30:03
The Woodland Realms Unite, Part OneA Second Breakfast Article by Developer Matthew Newman
“Yes, they are Elves,” said Legolas; “and they say that you breathe so loud that they could shoot you in the dark.” Sam hastily put his hand over his mouth. “But they also say that you need have no fear. They have been aware of us for a long while. They heard my voice across the Nimrodel, and knew I was one of their Northern kindred.”
–J.R.R. Tolkien, The Fellowship of the Ring At its heart, The Lord of the Rings: The Card Game is a game of exploration and adventure. Each new scenario introduces new quests for you to undertake, along with a new set of locations to explore and the enemies that haunt them. Meanwhile, even as they introduce new scenarios, the game’s Adventure Packs and deluxe expansions allow you and your friends to explore new regions of Middle-earth, from the Shadows of Mirkwood to the mines of Khazad-dûm and the tumultuous lands surrounding Isengard. Additionally, as the game’s expansions allow you to adventure through an ever-expanding selection of difficult terrain and iconic locations, they offer new heroes and player cards for you to include in your decks. Of course, since The Lord of the Rings: The Card Game isn’t competitive, but is instead a cooperative Living Card Game®, there’s no metagame compelling you to improve upon your existing decks or crushed by your rivals. Still, fans do change their decks, but they do so more out of a spirit of exploration and adventure, to try new things… Today, in the first of two Second Breakfast articles dedicated to an exploration of The Ring-maker cycle of Adventure Packs, developer Matthew Newman looks at the cycle’s Silvan Elves and the many options they now present. 
Yes, They Are Elves Greetings! With the release of The Antlered Crown just around the corner and The Ring-maker cycle coming to a close, I wanted to look at how the Elves of Middle-earth have grown in The Lord of the Rings: The Card Game. In particular, the Silvan trait has seen a lot of love in this past cycle, and we’re very excited to see the kinds of decks players form with these new Silvan cards. The Silvan Elves of The Lord of the Rings: The Card Game are unlike any other trait-based collection of characters in the game. Subtle and tricky, they prefer to use hit-and-run tactics and tend to work from behind the scenes, much unlike companies of Men or Dwarves. To represent this, all of the new Silvan allies from this cycle have Response effects that trigger when they enter play, and each sphere has an event card that allows you to return a Silvan ally to your hand to trigger a powerful effect. Since these Silvan decks rely upon their subtlety and tricks, it’s important to learn when best to take advantage of your allies and events. To help illustrate how these allies and events can work together, I’d like to share two Elf-themed decks that exhibit the strengths of the Elves of Lothlórien and Mirkwood. These decks are built with a very heavy emphasis on theme, and both of them can be built simultaneously from a single card pool, consisting of only one copy of the Core Set and one copy each of several Adventure Packs. While strong in their own right, these decks are designed to work together. When played by two players with a mind for cooperation, they become a powerful company that can tackle many quests! Today we’ll look at the first of these two decks, which I call The Elven Highborn. The Elven HighbornHeroes: Celeborn (The Dunland Trap, 1) Celeborn (The Dunland Trap, 1)
Galadriel (Celebrimbor’s Secret, 112)
Elrond (Shadow and Flame, 128)
Allies2x Arwen Undómiel
3x Defender of the Naith (Trouble in Tharbad, 65)
1x Galadhrim Minstrel
3x Galadriel’s Handmaiden (Celebrimbor’s Secret, 117)
3x Gandalf (Core Set, 73)
2x Lórien Guide (Core Set, 44)
3x Naith Guide (The Dunland Trap, 2)
1x Orophin (Celebrimbor’s Secret, 114)
2x Silvan Refugee
2x Silverlode Archer (Core Set, 17) Attachments 2x Light of Valinor (Foundations of Stone, 107) 2x Light of Valinor (Foundations of Stone, 107)
1x Mirror of Galadriel (Celebrimbor’s Secret, 118)
2x Nenya (Celebrimbor’s Secret, 121)
3x O Lórien! (Trouble in Tharbad, 58)
1x Unexpected Courage
Events2x A Test of Will
2x Children of the Sea (The Blood of Gondor, 113)
3x Elrond’s Counsel (The Watcher in the Water, 59)
3x Feigned Voices (The Three Trials, 27)
2x Hasty Stroke
2x Island Amid Perils (The Nin-in-Eilph, 90)
2x Sneak Attack (Core Set, 23)
2x Stand and Fight (Core Set, 51)
1x The Tree People (The Dunland Trap, 9) Playing The Elven Highborn The Elven Highborn takes heavy advantage of the strengths of the Silvan trait, and features both the Lady and Lord of Lórien, Galadriel and Celeborn. These two heroes enhance every ally you play and increase the value of bringing a Silvan ally back into your hand to play again later. For example, if you play a Naith Guide, she can use her Response, quest with two Willpower, and attack with two Attack Strength, all in the same turn. Then, using Feigned Voices, Island Amid Perils, or The Tree People, you can bring her back into your hand, and she can do it all over again the next turn.  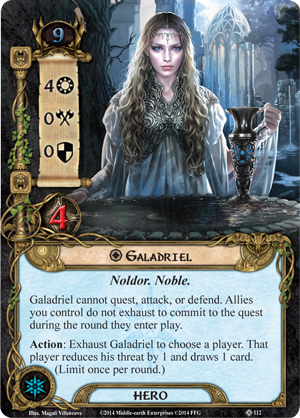
With O Lórien! and the fact that Elrond can pay for allies of any sphere, you can reliably play one to two allies every turn, so long as you have them in your hand. If any of these allies are destroyed, both Stand and Fight and Orophin can bring them back from your discard pile, triggering their Response abilities and benefiting from Celeborn and Galadriel all over again. Sneak Attack is also a great card to play with this deck, even if you don’t draw a powerful ally like Gandalf, because it allows you to take full advantage of the above synergies. With Light of Valinor, Naith Guide, Nenya, and many high Willpower allies, this deck has little trouble questing. In fact, Celeborn and Galadriel are so effective that even more combat-focused allies like the Silverlode Archer and Defender of the Naith can contribute to the quest on the turn they enter play. Lórien Guide is a bit expensive and has no Response when she enters play, but if you can save some resources by cheating her into play with The Tree People,  she can help prevent you from becoming stuck at an active location with a high quest point value. Finally, if you’re having trouble finding the many pieces of this deck that combo together, the Mirror of Galadriel is a great way to dig through your deck for a clutch event like Feigned Voices or Sneak Attack, or one of the deck’s other attachments, which are important to put into play as early as possible. she can help prevent you from becoming stuck at an active location with a high quest point value. Finally, if you’re having trouble finding the many pieces of this deck that combo together, the Mirror of Galadriel is a great way to dig through your deck for a clutch event like Feigned Voices or Sneak Attack, or one of the deck’s other attachments, which are important to put into play as early as possible. Unfortunately, this deck does have some weaknesses. While it can defend fairly well with some healthy heroes and Defender of the Naith, its only particularly strong attacker is the Silverlode Archer. Typically, taking care of a powerful enemy requires the combined strength of several Silvan allies, preferably all played on the same turn to take full advantage of Celeborn’s ability. The deck’s rather high starting threat can also be an issue, although Elrond’s Counsel, Galadriel’s Handmaiden, and Galadriel herself can all help to lower your threat to a safer level. Finally, while O Lórien! can help pay for allies and many of the deck’s events and allies function as a form of pseudo card draw, there aren’t a lot of ways for you to quickly gain lots of resources or cards, which means your first few turns will be a slow boil until you reach Elven Critical Mass. Customizing The Elven Highborn As always, there are many ways in which a good deck can be customized to suit your own needs or express your own creativity. For example, you may wish to take out several “bounce” events such as Children of the Sea, replacing them with more allies from the Leadership, Spirit, or Lore spheres. You may also wish to include more threat control, or more attachments to build up the deck’s already formidable heroes. The Elven Highborn is built with the theme of the Silvans and Lothlórien in mind, so there are many cards that have been left out in order to complement this theme, such as Steward of Gondor (Core Set, 26). If you find the deck lacking without these cards, you can easily add them in. You may also wish to include Elrond’s ring, Vilya (Shadow and Flame, 137), as well as a few Imladris Stargazers (Foundations of Stone, 106), in order to take advantage of the ring’s ability. Finally, the addition of a second Core Set would allow you to include more copies of A Test of Will and Unexpected Courage, if you desire more of them.  
The Woodland Realms Unite! While it’s decent on its own, The Elven Highborn is designed to pair with another deck, The Spear of Mirkwood, which I will cover in another Second Breakfast article next week. Be sure to drop by for a description of that deck, as well as some interesting strategies to keep in mind when playing these two decks together! ... Source: The Woodland Realms Unite, Part One (http://www.fantasyflightgames.com/edge_news.asp?eidn=5259)
Title: FFG:The Great White Silence
Post by: RSSFeeder on 25 December 2014, 06:30:05
The Great White SilencePreview Preludes and an Ancient One in Mountains of Madness
The wind, however, had not decreased in intensity one iota; indeed, if it were possible, it grew momentarily wilder and more violent; the entire house shuddered and quaked while those thunderous footsteps echoed and reechoed in the valley before the house. And the cold grew worse, so that breath hung a white vapor in the air – a cold as of outer space.
–August Derleth, Beyond the Threshold The Mountains of Madness expansion for Eldritch Horror allows players to enter the mysterious, frozen world depicted in H.P. Lovecraft’s novella, At the Mountains of Madness. You can trace the path of the doomed Miskatonic University expedition across the bleak Antarctic wasteland, explore the ruins of a prehistoric, inhuman civilization, and fight the cruel Elder Things that are now awakening. 
In today’s preview you’ll discover how Mountains of Madness brings a horrible chill to every region of the globe. We’ll look at Prelude Cards, which specify unique starting conditions for each game, and you’ll learn about Ithaqua: a terrifying, immense Ancient One from the frozen north – the opposite side of the globe from Antarctica. His aim is to spread a permanent winter over the entire world, creating the legendary, lethal Great White Silence. To defeat him, you might travel into a mythical, otherworldly kingdom, or face people driven to cannibalism by an unnatural hunger. Your team of investigators will be pushed to their limits in the quest to save humanity from frozen death. For a fuller picture of Mountains of Madness, from its Antarctic Adventures and Outpost Encounters to the new Focus action, download the rulebook (pdf, 6.9 MB) for this expansion from the Eldritch Horror support page, or by clicking the thumbnail on the right. Unpredictable Conditions When playing with this expansion, you draw a random Prelude card before setup begins. Prelude cards adjust setup in specific ways, giving investigators helpful tools or challenging tasks from the very start of the game. One prelude card, The Doomsayer from Antarctica, requires you to set up the Antarctica side board, luring your team towards Antarctica no matter which Ancient One you are fighting. The Ultimate Sacrifice changes the landscape of Eldritch Horror in a different way – by placing two defeated investigators on the board – one crippled, one driven insane – in their starting locations. The doom track is advanced by two, as if your game begins in medias res, at the moment when these investigators succumbed to the darkness and horror. By encountering them, you may be able to gain their possessions and retreat Doom, profiting from those who went before you. 
Hypothermia and Hunger No one yet has gazed upon Ithaqua and lived. The only clues to his presence are terrible snowstorms, an uncanny, shrieking wind, and the terrible, earthshaking thud of his giant feet. His human victims are found thousands of miles away from where they were last seen, their limbs shattered as if dropped from a great height, and their bodies so cold that they freeze anything or anyone that touches them.  Ithaqua can move as fast as the wind of a blizzard. He starts the Doom track at 13, giving you limited time to solve the three mysteries necessary to defeat him. As you search for answers, you will likely struggle to combat not only monsters, but also hypothermia: at every Reckoning, Ithaqua causes each investigator to gain a Hypothermia condition unless that investigator can spend a Focus to avoid it. You can also get hypothermia from losing a fight against one of Ithaqua's Cultists. His worshippers may not threaten your sanity, but they can freeze you to your core. Ithaqua can move as fast as the wind of a blizzard. He starts the Doom track at 13, giving you limited time to solve the three mysteries necessary to defeat him. As you search for answers, you will likely struggle to combat not only monsters, but also hypothermia: at every Reckoning, Ithaqua causes each investigator to gain a Hypothermia condition unless that investigator can spend a Focus to avoid it. You can also get hypothermia from losing a fight against one of Ithaqua's Cultists. His worshippers may not threaten your sanity, but they can freeze you to your core.
Along with cold often comes hunger, another of Ithaqua’s powerful weapons against the human race. In the mystery Growing Hunger, investigators must travel to the northernmost cities of Europe and America. The citizens of these otherwise calm cities have been driven so mad by an insatiable appetite that they have begun to eat other humans, both dead and living. To end the cannibalism, you must defeat the Wendigo spirits haunting these cities. Not only are Wendigos ferocious and strong, but they can instill in anyone who encounters them a terrible, all-consuming hunger. The Fabled Kingdom in the North Defeating Ithaqua may take you beyond the ends of the earth, as in the Exploring Hyperborea mystery. During the long winter nights, people in the northern hemisphere have seen glimpses of an ancient civilization in the aurora borealis. You may have heard stories about Hyperborea or read about this hidden land in the ancient Greek histories. Now, for the first time in centuries, the veil between worlds is so thin that you can walk from Greenland into Hyperborea’s thick jungles and towards its magnificent, shimmering city. In Hyperborea dwells the legendary sorcerer Eibon, who has travelled through numerous Other Worlds and knows more about the Ithaqua than any living being. Your task is to find this difficult, unpredictable man, or at least his library, and acquire his knowledge. The search will particularly test your observation and your understanding of arcane lore, but you’ll also need to keep your strength up in case a snow monster attacks you, or the Hyperborean citizens prove hostile to foreigners from Earth. 
Winter Is Coming The days are growing longer and the air is growing colder, so cold that your breath freezes instantly and you fear to go outside. Soon the frosted ground will be completely covered by snow, the rivers transformed into thick ice, and all life hidden away. If Ithaqua, his Cultists, and his minions have their way, this great white silence of winter will be all that humanity knows for the rest of existence. The world is relying on you and your team of investigators to defeat the wind-walking Ancient One and ensure that spring returns. Can you stave off hypothermia and hunger long enough to win? Eldritch Horror: Mountains of Madness will be available at your local retailer soon. ... Source: The Great White Silence (http://www.fantasyflightgames.com/edge_news.asp?eidn=5260)
Title: FFG:Find a Store Championship Near You!
Post by: RSSFeeder on 25 December 2014, 15:00:03
Find a Store Championship Near You!FFG's 2015 Tournament Season Begins with Store Championships
Players, 2015 Store Championships will begin in just under one month! Running from January through March, these events are a great way to whet your competitive appetite in the new year, meet other passionate local players, vie for year-long bragging rights at your store, and battle for your chance at cool, exclusive prizes. 
Find an Event Near You Store Championships kick off the tournament season each year, serving as the first major tournament series in FFG’s Organized Play program. For anyone looking to attend World Championship Weekend, Store Championships are the first step toward that goal and provide the winner with a bye at a Regional Championship. This year, Store Championships are expanding to seven games. Find the Store Championship closest to you by following the links below: Note: Our tournaments are listed alphabetically by nation and then by city. Please contact the event venue for more information about the tournament date, time, and other details. 
Join the Action Whether you’re training at the Jedi Academy, attempting to seal away ancient horrors, conquering planets in the name of the Emperor of Mankind, constructing a particular nasty piece of ICE, or eyeing the Iron Throne of the Seven Kingdoms, Organized Play’s goal is to help you find other players with whom you can share your favorite games. Store Championships are the first step for anyone planning on attending World Championship Weekend and a great way to find other enthusiastic players. Find an event near you and join the action! ... Source: Find a Store Championship Near You! (http://www.fantasyflightgames.com/edge_news.asp?eidn=5261)
Title: FFG:Wanton Destruction
Post by: RSSFeeder on 25 December 2014, 23:30:03
Wanton DestructionA Look at the Rampant Anarchy of Order and Chaos
Should log in to class. Should attend virtual lecture. Should submit code project. Instead, music at MAXIMUM VOLUME. It is time to shred some poor bastard’s server. Whose? Doesn’t matter.  Part of the beauty of Android: Netrunner is that each faction has its own distinct identity. All of the game’s Runners are lower-case “c” criminals, violating all manner of laws as they hack into Corporate servers, but a capital “C” Criminal does not play like a Shaper. A Shaper does not play like an Anarch. And Anarchs don’t play like anyone else. Part of the beauty of Android: Netrunner is that each faction has its own distinct identity. All of the game’s Runners are lower-case “c” criminals, violating all manner of laws as they hack into Corporate servers, but a capital “C” Criminal does not play like a Shaper. A Shaper does not play like an Anarch. And Anarchs don’t play like anyone else.
As guest writer El-ad David Amir noted in “The Anarch Way,” the Runners who associate themselves with the Anarch faction don’t like to follow the rules that others set forth. Such rules make them chafe. Accordingly, the Anarchs work against the rules. Ironically, this becomes a common, defining trait across the faction: Anarchs are defined by their opposition to the established order. What others build up, Anarchs tear down. Now, as Order and Chaos draws near, we look forward to its new cards and focus on the Anarch faction. What will these malcontents gain from the expansion? The Punk, the Saint, and the Wounded Man For starters, Order and Chaos gives us three more of these angry, dissatisfied Runners around which we can build our Anarch decks: MaxX (Order and Chaos, 29), Valencia Estevez (Order and Chaos, 30), and Edward Kim (Order and Chaos, 28). 
They’re all angry. They’re all talented. They’re all very, very good at tearing things apart. And apart from those shared qualities, they’re almost nothing alike. MaxX An angry, young g-mod streetbanger who has never appeared to live up to expectations, MaxX works a long, gray, tightly structured day job in MegaBuy customer service that fuels her appetite for nihilistic after-hours release. For MaxX, the act of shredding corporate servers is a cathartic release akin to the scratchy blare of a power chord pushed through layers of feedback.  Punks ripped apart the overly elaborate guitar solos that preceded their reductive songs. They thrashed and drummed and howled. Like them, MaxX expresses her rebuke of societal norms by processing codes that reduce servers to nothingness. Hers are acts of pure, Wanton Destruction (Order and Chaos, 35). Punks ripped apart the overly elaborate guitar solos that preceded their reductive songs. They thrashed and drummed and howled. Like them, MaxX expresses her rebuke of societal norms by processing codes that reduce servers to nothingness. Hers are acts of pure, Wanton Destruction (Order and Chaos, 35). Moreover, MaxX thinks faster than nearly everyone, though she’s forced to idle in slow-mo with normals at the office all day long. Her ability reflects this, reading, “When your turn begins, trash the top 2 cards of your stack. Draw 1 card.” It’s unclear, however, if her self-destructive tendencies will outpace her impact on the net. She’s a genetically modified dynamo who can process information at a blistering pace, but her rebellious ways constantly leave her at risk of suffering permanent brain damage – not that she cares. For MaxX, it’s all about loud, immediate thrills, and when she’s Amped Up (Order and Chaos, 31), she can do just about anything to which she sets her mind; the only question is if she’ll get it into her head to accomplish anything meaningful before she burns out. Valencia Estevez The Angel of Cayambe, Valencia Estevez uses her talents to assist some of the most desperately impoverished residents of New Angeles, while the shadow of the Beanstalk, in which she lives, casts a pall over everything she does. The Beanstalk’s constant presence and the desperation in the eyes of those people with whom she works ensure that Valencia will never forget the injustices of the system that keeps those at the top of the Beanstalk removed from those at the bottom. Accordingly, Valencia’s runs are acts of mercy. They’re not initiated to punish the megacorps she invades, nor to elicit chuckles from her friends. She takes her runs to buy second chances for people who never had a first chance. Hers is a sympathetic story, and it’s hard for any Corp to deny her intentions. Valencia Estevez ensures that the Corp always starts with one bad publicity, and several other cards in Order and Chaos further play off of her ability. The current Itinerant Protesters (Order and Chaos, 33) shrinks the Corp’s maximum hand size by one for each bad publicity it has, and Valencia can give the Corp even more bad publicity with Investigative Journalism (Order and Chaos, 49). Of course, when you look outside of Order and Chaos, the neutral event Blackmail (Fear and Loathing, 89) is a natural inclusion, and it suggests that Valencia might not be as saintly as she first appears. In fact, a Valencia Estevez deck might play downright dirty, leveraging the Corp’s dirty secrets against it until its maximum hand size is squeezed down to just one or two cards. Then, even if she uses shady methods to get there, Valencia’s almost guaranteed to be able to use the situation to her advantage, drawing free cards each turn from her signature console, Vigil (Order and Chaos, 47), and reversing the fortunes of some of New Angeles’ most desperate individuals. Edward Kim When we look at the angry man that is Edward Kim, we understand that he’s haunted by some past misfortune. For one, he’s missing a hand. We can see this, just as we can see that he hasn’t had it replaced with a cybernetic. Second, we know he lost someone – a woman or a girl – and, more than the loss of his hand, it seems that this is the loss that has truly forged him into a seething, muscular force for vengeance. Kim’s runs aren’t for play, and they aren’t about giving people second chances. So far as he’s concerned, he’s already lost. What was taken from him can never be replaced. Kim’s fury drives him toward retaliation. At the far end of every server he crashes, he sees the faceless masks of those bioroids who cost him the life and love he once held. Now, he strides powerfully through the streets, a snarl on his face, and on the net, he bares his fangs. With his built-in ability to trash the first operation he accesses at no cost, Edward Kim excels at ripping apart the Corp’s HQ. He can trash operations, he can pay to trash assets or upgrades, and if he finds agendas, he can score them. Naturally, Kim partners well with Imp (What Lies Ahead, 3), Scrubber (A Study in Static, 63), and Paricia (Creation and Control, 45), as all these cards provide him with even more means to trash the cards he accesses. However, Order and Chaos pushes Kim and his destructive efforts even further, providing him with a trio of events and an AI icebreaker that allow him to rip through ice in the same way that he rips through operations, assets, upgrades, and agendas.  
The run events Forked (Order and Chaos, 37), Knifed (Order and Chaos, 38), and Spooned (Order and Chaos, 39) all allow you to make a run and trash a specific type of ice if you can break all its subroutines. Boosting their efficiencies, meanwhile, is the AI icebreaker, Eater (Order and Chaos, 40), one of the most efficient of all icebreakers yet introduced to the game. In fact, Eater would be an overpowering addition to the game were it not for its single drawback: When you use Eater to break an ice subroutine, you cannot access cards for the remainder of your run. Of course, if you can trash all the ice that stand between you and a server’s data, you can launch subsequent runs with impunity. And then you and Edward Kim can smash the Corp in the face, hurting it just as you have been injured. Burn It All Down If you ask any of the Anarchs from Order and Chaos, the world is broken. It’s unfair. It’s lopsided. It’s built on the backs of the downtrodden and modeled so that the rich just keep getting richer. Also, it’s stupid. It makes people stupid. The execs think of them as cattle with bank accounts that they need to find better ways to herd. What, then, does Order and Chaos give to these runners as they look for ways to burn down the existing order? They ask for a match, and they get a blowtorch. The world will burn. ... Source: Wanton Destruction (http://www.fantasyflightgames.com/edge_news.asp?eidn=5262)
Title: FFG:Begin Your Assault
Post by: RSSFeeder on 26 December 2014, 08:00:04
Begin Your AssaultImperial Assault Is Now Available at Your Local Retailer
“General, prepare your troops for a surface attack.”
–Darth Vader, Star Wars: The Empire Strikes Back Imperial commanders and Rebel strike team leaders, gather your soldiers and prepare for tactical Star Wars™ combat. Imperial Assault is now available at your local retailer! You’ll have twice the opportunities to immerse yourself in the Star Wars universe with the two complete games included in Imperial Assault. In the campaign game, up to four players command heroes of the Rebellion, battling against a single Imperial player in a narrative campaign that changes every time you play through it. The skirmish game, on the other hand, gives you the chance to go head-to-head with a single opponent – mustering your own armies and fighting to complete conflicting objectives. Whichever game you play, your tactical decisions decide the fate of the galaxy!
A Narrative Campaign Our series of in-depth previews examined each aspect of the Imperial Assault experience. We began with a discussion of the basis of every mission: moving and attacking. In Imperial Assault, every figure has two actions to move, fire a blaster, engage in melee combat, search crates, open doors, or complete other tasks. Deciding which actions your figures will take each turn is the heart of gameplay. Next, we turned our attention to the Rebel heroes in the campaign game. When you play a hero in the Imperial Assault campaign game, you play as the same hero in every mission. Over the course of the campaign, you gain experience and credits, which you can use to purchase new skills and items. Whether you play as canny squad leader Gideon Argus or hardened veteran Fenn Signis, every hero offers a unique play experience and a new style of play.
We also examined the massive power wielded by the Imperial player during a campaign. One preview discussed the might of the Galactic Empire, made visible by countless stormtroopers, massive AT-ST walkers, and villains like Darth Vader. We also saw the tactics that the Imperial player can harness by calling upon reinforcements and pursuing nefarious agendas. Finally, we looked at the options made available to the Empire by taking advantage of Mercenary units, including Trandoshan hunters and the Assassin Droid, IG-88. Deadly Skirmishes Other previews focused on the second game within Imperial Assault: the skirmish game. In a skirmish mission, both players attempt to gain victory points by eliminating an opponent’s figures and completing the mission’s objectives. We presented a detailed overview of the skirmish game, highlighting the differences between campaign and skirmish missions and revealing some of the Deployment cards and Command cards you use to achieve victory. Before any skirmish game, you and your opponent construct separate armies and Command decks. Once you’ve finished creating your squad, you and your opponent test your forces against each other on the field of battle. We featured a diary by Imperial Assault developer Paul Winchester that focused on the massive amount of armies available for each of the three factions in the Core Set. 
The First Ally and Villain Packs Ally Packs and Villain Packs are the first expansions to be released for Imperial Assault! We announced seven upcoming Ally Packs and Villain Packs, but the first two figure packs are included as a bonus in the Imperial Assault Core Set: the Luke Skywalker Ally Pack and the Darth Vader Villain Pack. These figure packs each offer a detailed plastic figure, as well as new missions and powerful new cards for both the campaign game and the skirmish game. You may help Luke escape from the clutches of Darth Vader, or control the Sith Lord himself as he destroys a Rebel strike team. Whether you fight for the Rebellion or uphold the claim of the Empire, every figure pack offers new adventures for every game of Imperial Assault. To Battle Stations! The Galactic Civil War rages across the galaxy, consuming entire star systems in the turmoil of war. In Imperial Assault, you can influence this galactic struggle in the favor of the Galactic Empire or the Rebel Alliance as you battle on countless planets. Grab your blasters and prepare to begin your first mission. Visit your local retailer and pick up your copy of Imperial Assault! ... Source: Begin Your Assault (http://www.fantasyflightgames.com/edge_news.asp?eidn=5263)
Title: FFG:Under the Skin
Post by: RSSFeeder on 26 December 2014, 16:30:03
Under the SkinTim Cox Previews a Scenario for Zombie Apocalypse
What if, all of a sudden, your friends and family weren’t themselves? And not just them, but your neighbors, coworkers – everyone. Even your pets. They still look like themselves, and even talk like themselves (except your pets, obviously)… mostly. But something’s off. That’s bad enough, but it gets so much worse. There’s something under their skin.
–Under the Skin, Zombie Apocalypse You’ll face countless zombies and unimaginable dangers in Zombie Apocalypse, the first book of The End of the World line. Five distinct scenarios each offer a different take on the rise of the living dead, and you’ll need all your wits and skills if you want to survive. Some threats you may recognize from classic zombie movies or literature, but others are a little bit stranger. Today, Tim Cox, the writer who adapted Zombie Apocalypse from El Fin del Mundo, shares his thoughts on the game’s scenarios and goes in depth with his particular favorite: a scenario called Under the Skin… 
Writer Tim Cox on Reinventing the Apocalypse Zombie Apocalypse includes five distinct scenarios, each covering a different way that the world might end – specifically, with a different kind of zombie invasion. There are fast-moving infected zombies, corpses animated by a mysterious, radioactive meteor, the traditional living dead, and more. It was an exciting challenge for me to work on essentially five games at once, exploring the various dangers that players (and the rest of humanity!) might face under various circumstances. All of the scenarios were a blast to write, and it gave me a great reason to go back and binge-watch some classic (and not-so-classic) zombie movies – as if I really needed an excuse! Writing for Zombie Apocalypse was a very different experience than working on previous Fantasy Flight Games RPG products that I’ve contributed to. FFG’s The End of the World game line is based on Edge Entertainment’s El Fin del Mundo series. Each scenario in Zombie Apocalypse takes its core concept from El Fin del Mundo, but as I wrote the scenarios, I had a lot of room to work with developing the scenarios and putting my own twist on them. _Plate.jpg) All in all, developing each scenario and working to make each one unique was a great experience. In addition to providing background information and general guidance for GMs, all scenarios include sample locations with encounter seeds and a timeline of events. The timeline helps GMs gauge the spread of the outbreak on a global scale, measuring how the world around the PCs changes regardless of their actions. Of course, PCs might be able to affect events to some extent, but The End of the World is not about preventing the apocalypse – you’re just trying to survive! All in all, developing each scenario and working to make each one unique was a great experience. In addition to providing background information and general guidance for GMs, all scenarios include sample locations with encounter seeds and a timeline of events. The timeline helps GMs gauge the spread of the outbreak on a global scale, measuring how the world around the PCs changes regardless of their actions. Of course, PCs might be able to affect events to some extent, but The End of the World is not about preventing the apocalypse – you’re just trying to survive!
The Monster Within Each scenario has its own unique elements that I really enjoy, but the scenario called Under the Skin stands out as a particular favorite. As much as I love “classic” zombies (which receive plenty of attention in Zombie Apocalypse, don’t worry), I was hoping to do something a little different that would hopefully surprise and maybe even frighten the players. The concept for this scenario – zombies that continue to “live” even when cut apart – and some very interesting artwork gave me a lot to ideas for developing a distinct zombie apocalypse. The key to figuring out how these zombies would work and what set them apart was deciding the cause. I’ll give a spoiler alert now: if you don’t want the details about the cause of these zombies, you might want to skip to the end. In a nutshell, the “zombies” in this scenario aren’t animated corpses, but humans and animals infected by a parasitic organism. These parasites initially affect the behavior of the hosts, causing an uncontrollable hunger for fresh, living brains! As the infection continues, the ravenous parasites begin to break down the host’s body and consume it from within. So, in effect, we get two kinds of zombies in one. Zombies in the first stages of infection are intelligent, living hosts that use clever tricks and even weapons to eat their neighbors. In the later stages, the zombies are brain-dead corpses animated by the parasite within and almost impossible to destroy. Even when limbs get chopped off, the parasite continues to animate them! Because these parasite hosts are so unlike more familiar undead or rage zombies, it meant giving a lot of thought to different factors and how they might affect a game. This included how the parasite spread, how quickly it affected a host, and – most importantly – how the parasite and infected hosts could be killed. The parasite hosts offer varied challenges and encounters for players at each stage of infection. Those in the early phases are difficult to distinguish from ordinary people, and smart enough to conceal their nature until it’s too late. This required a different kind of approach from other zombies, which are generally obviously undead and not too bright. It was a lot of fun coming up with examples of strange behavior or methods of attack for these hosts, and I think GMs will also enjoy it! 
After the End Each scenario also includes a Post-Apocalypse section, giving players “lucky” enough to live through the apocalypse the chance to try their hand at surviving after the collapse of civilization. Each Post-Apocalypse presents its own situations and environments for the players to contend with and navigate, from blasted ruins ruled by vicious gangs to dystopian corporate-controlled cityscapes. Under the Skin has perhaps the most extreme Post-Apocalypse section. To put it briefly, a practically indestructible parasite spreading throughout the environment and infecting most of the population calls for drastic measures. If the players survive long enough, they might be among the fortunate few relocated to secure, quarantined underground facilities while the surface is subjected to a thermo-nuclear scorched-earth campaign. I wouldn’t advise going up top without some serious protective gear. But at least there are no more parasites… Thanks, Tim! In Zombie Apocalypse, you’ll have to test yourself against parasite-infected zombies and other deadly denizens of the end times. Even if your fight for survival takes you to the Post-Apocalypse, there are endless trials and horrors in store for you at the end of the world. Pre-order Zombie Apocalypse at your local retailer today! ... Source: Under the Skin (http://www.fantasyflightgames.com/edge_news.asp?eidn=5264)
Title: FFG:Tame the Wildest Reaches of the Galaxy
Post by: RSSFeeder on 27 December 2014, 01:00:03
Tame the Wildest Reaches of the GalaxyFour New Edge of the Empire (TM) Specialization Decks Are Now Available
“The Jundland Wastes are not to be traveled lightly.”
–Obi-Wan Kenobi In the Star Wars®: Edge of the Empire™ Roleplaying Game, a Colonist’s life is full of danger. You have your outstanding Obligations and your own reasons for avoiding the Empire, but you’re never really free from your debtors, bounty hunters, and Imperial agents. Moreover, the distant planets you seek to settle may have atmospheres and terrain as hostile as any pack of Stormtroopers. Fortunately, four new Specialization Decks introduce plenty of tools for overcoming all the obstacles that life sets before you. Drawn from the pages of the Far Horizons sourcebook for Colonists, these Specialization Decks each offer quick and easy access to the rules for the talents and abilities from the Entrepreneur, Marshal, and Performer specializations, as well as the Colonist Signature Abilities. Building Better Lives  For reasons as diverse as the Outer Rim planets they settle, Colonists abandon their Core World homes to explore and tame the wilderness. They may not always appear as rough and ragged as many of the other individuals you’ll find undertaking adventures at the Edge of the Empire, but Colonists are far more capable than they seem. For reasons as diverse as the Outer Rim planets they settle, Colonists abandon their Core World homes to explore and tame the wilderness. They may not always appear as rough and ragged as many of the other individuals you’ll find undertaking adventures at the Edge of the Empire, but Colonists are far more capable than they seem.
Most of them are well-educated, and many of them formerly lived among the professional and cultural elite. Their combination of education and hard-earned life experiences give them the courage and resilience to overcome any challenges put before them. They also tend to have a good perspective on the bigger picture. When the time is right, they can grab their tools, draw upon their extensive knowledge, and put their experience to good use. Likewise, Specialization Decks are an excellent tool for players and GMs looking to manage Colonists and their many skills. Each comes with twenty talent cards, one for each of the talents in the targeted specialization’s talent tree. These cards ensure that you’ll have the rules for your talents close at hand, along with art designed to help immerse you more deeply into the Star Wars galaxy.
- Entrepreneurs know the power of wealth, and handle any situation with a sharp mind and a fist full of credits. For Entrepreneurs, wealth is never a problem, just a solution.
- Marshals keep the peace in Outer Rim towns. Often the only thing standing between law and chaos, a Marshal must dispense justice with a steady hand and steely demeanor.
- Whether a musician, actor, comedian, or other entertainer, the Performer is always the center of attention. Using this to his advantage is the Performer’s greatest act.

Meanwhile, the Colonist Signature Abilities deck comes with eighteen cards that neatly summarize all the rules for the different talents from the two Colonist signature abilities found in the Far Horizons sourcebook, Insightful Revelation and Unmatched Expertise. These signature abilities allow your Colonist to make a lasting impact as a paragon of his or her trade, and the cards from Colonist Signature Abilities serve as a tangible reminder of your character’s unparalleled skill and experience. The Tools of the Trade Outfit your Colonist for life on the galaxy’s wildest, deadliest, and most exciting planets. Whether you’re looking to ply your skills in the service of a wealthy gangster or you’re looking to tame a planet full of untapped natural resources, these Specialization Decks provide you with the tools you’ll need to build and play your Colonist the way you want. Pick up your copy today! ... Source: Tame the Wildest Reaches of the Galaxy (http://www.fantasyflightgames.com/edge_news.asp?eidn=5265)
Title: FFG:Tame the Wildest Reaches of the Galaxy
Post by: RSSFeeder on 27 December 2014, 09:30:04
Tame the Wildest Reaches of the GalaxyFour New Edge of the Empire (TM) Specialization Decks Are Now Available
“The Jundland Wastes are not to be traveled lightly.”
–Obi-Wan Kenobi In the Star Wars®: Edge of the Empire™ Roleplaying Game, a Colonist’s life is full of danger. You have your outstanding Obligations and your own reasons for avoiding the Empire, but you’re never really free from your debtors, bounty hunters, and Imperial agents. Moreover, the distant planets you seek to settle may have atmospheres and terrain as hostile as any pack of Stormtroopers. Fortunately, four new Specialization Decks introduce plenty of tools for overcoming all the obstacles that life sets before you. Drawn from the pages of the Far Horizons sourcebook for Colonists, these Specialization Decks each offer quick and easy access to the rules for the talents and abilities from the Entrepreneur, Marshal, and Performer specializations, as well as the Colonist Signature Abilities. Building Better Lives For reasons as diverse as the Outer Rim planets they settle, Colonists abandon their Core World homes to explore and tame the wilderness. They may not always appear as rough and ragged as many of the other individuals you’ll find undertaking adventures at the Edge of the Empire, but Colonists are far more capable than they seem. Most of them are well-educated, and many of them formerly lived among the professional and cultural elite. Their combination of education and hard-earned life experiences give them the courage and resilience to overcome any challenges put before them. They also tend to have a good perspective on the bigger picture. When the time is right, they can grab their tools, draw upon their extensive knowledge, and put their experience to good use. Likewise, Specialization Decks are an excellent tool for players and GMs looking to manage Colonists and their many skills. Each comes with twenty talent cards, one for each of the talents in the targeted specialization’s talent tree. These cards ensure that you’ll have the rules for your talents close at hand, along with art designed to help immerse you more deeply into the Star Wars galaxy. - Entrepreneurs know the power of wealth, and handle any situation with a sharp mind and a fist full of credits. For Entrepreneurs, wealth is never a problem, just a solution.
- Marshals keep the peace in Outer Rim towns. Often the only thing standing between law and chaos, a Marshal must dispense justice with a steady hand and steely demeanor.
- Whether a musician, actor, comedian, or other entertainer, the Performer is always the center of attention. Using this to his advantage is the Performer’s greatest act.
Meanwhile, the Colonist Signature Abilities deck comes with eighteen cards that neatly summarize all the rules for the different talents from the two Colonist signature abilities found in the Far Horizons sourcebook, Insightful Revelation and Unmatched Expertise. These signature abilities allow your Colonist to make a lasting impact as a paragon of his or her trade, and the cards from Colonist Signature Abilities serve as a tangible reminder of your character’s unparalleled skill and experience. The Tools of the Trade Outfit your Colonist for life on the galaxy’s wildest, deadliest, and most exciting planets. Whether you’re looking to ply your skills in the service of a wealthy gangster or you’re looking to tame a planet full of untapped natural resources, these Specialization Decks provide you with the tools you’ll need to build and play your Colonist the way you want. Pick up your copy today! ... Source: Tame the Wildest Reaches of the Galaxy (http://www.fantasyflightgames.com/edge_news.asp?eidn=5266)
Title: FFG:The Woodland Realms Unite, Part Two
Post by: RSSFeeder on 27 December 2014, 18:00:04
The Woodland Realms Unite, Part TwoA Second Breakfast Article by Developer Matthew Newman
The final chapter of The Ring-maker cycle for The Lord of the Rings: The Card Game is coming. The Antlered Crown is scheduled to arrive at retailers next week, and after Middle-earth’s heroes have had their chance to help Saruman and the White Council throughout the scenarios from The Voice of Isengard and the first five Adventure Packs from The Ring-maker cycle, they must now enter a region at war and fighter their way through to the cycle’s climactic conclusion! As the heroes are going to need all the help they can get, developer Matthew Newman has decided to share a strategic pairing of decks that features the newly revamped Silvan trait. Featuring a slew of cards from The Ring-maker cycle and playable with just one copy of the Core Set and one copy each of several Adventure Packs, these decks provide a nice balance of willpower and muscle, along with a thematic exploration of what it means to be a Silvan Elf in The Lord of the Rings: The Card Game. 
The Elves of Northern Rhovanion In last week’s Second Breakfast article, I shared with you some thoughts on the Silvan Elves from The Ring-maker cycle and offered a sample deck, The Elven Highborn, which was designed to take advantage of the strengths of the Elves of Lórien and their leaders, Galadriel and Celeborn. Still, there is another kingdom of Elves in Rhovanion. Thranduil, father to Legolas, rules the Elven kingdom of northern Mirkwood. As Legolas meets with the Elves of Lothlórien, I’d like to share with you a second deck, meant to pair together with The Elven Highborn. I’ll also share some thoughts on how these two decks might play together. This week’s deck, The Spear of Mirkwood, focuses on combat and healing, using direct damage and swiftness to take care of enemies before they ever become a threat. The Spear of Mirkwood Heroes Haldir of Lórien (Trouble in Tharbad, 56)
Legolas (Core Set, 5)
Mirlonde (The Drúadan Forest, 32) Allies 3x Daughter of the Nimrodel (Core Set, 56)
3x Galadhon Archer (The Nin-in-Eilph, 87)
2x Galadhrim Minstrel (Trouble in Tharbad, 63)
2x Henamarth Riversong (Core Set, 60)
3x Mirkwood Runner (Return to Mirkwood, 123)
2x Rúmil (The Three Trials, 28)
3x Silvan Tracker (The Dead Marshes, 102) Attachments 2x Bow of the Galadhrim (The Nin-in-Eilph, 88)
 2x Cloak of Lórien (Celebrimbor's Secret, 120) 2x Cloak of Lórien (Celebrimbor's Secret, 120)
2x Elven Mail (The Three Trials, 29)
2x Lembas (Trouble in Tharbad, 64)
3x Ranger Spikes (Heirs of Númenor, 17)
2x Rivendell Blade (Road to Rivendell, 31)
2x Rivendell Bow (The Watcher in the Water, 57) Events 2x Feint (Core Set, 34)
3x Foe-hammer (The Hobbit: Over Hill and Under Hill, 15)
3x Hands Upon the Bow (Shadow and Flame, 131)
3x Pursuing the Enemy (Trouble in Tharbad, 60)
2x Rain of Arrows (Core Set, 33)
2x The Tree People (The Dunland Trap, 9)
2x Unseen Strike (The Redhorn Gate, 4) Playing The Spear of Mirkwood The Spear of Mirkwood is all about managing enemies in the staging area and preventing them from ever becoming a threat. This is accomplished in a number of different ways, and becomes easier the more players are added to the game. Because Mirlonde ensures the deck features a low starting threat of just twenty-three, it can slip past many enemies unnoticed. Those that would engage you may still be trapped with Ranger Spikes or taken out swiftly using Hands Upon the Bow, Galadhon Archers, and Rúmil. The trick is to prevent enemies from engaging you so that you can take advantage of Haldir’s ability, using him to strike enemies in the staging area or enemies engaged with other players, before they get the chance to attack. If you find yourself engaged with several enemies, a well-timed combo of Rain of Arrows and Pursuing the Enemy can defeat more than one enemy at the same time!  
In order to make this strategy easier, The Spear of Mirkwood contains an assortment of weapons which can be placed on Haldir or Legolas. The goal is to allow them to take enemies out in one shot, using Bow of the Galadhrim and Rivendell Blade. If these weapons are not enough to take out stronger enemies, Unseen Strike and some direct damage can surely do the trick. You can even place a Rivendell Bow on Mirlonde so she doesn’t feel left out. Better yet, give your Rivendell Bows to the Mirkwood Runners and they can take advantage of their abilities to penetrate an enemy’s defenses from afar. Because most of the deck’s allies are a bit expensive, you have two Lore heroes and two copies of The Tree People. Your best bet is to use The Tree People on Galadhon Archers or Galadhrim Minstrels, so that you can play them again and trigger their Response abilities. If you’re lucky, you’ll be able to get a three-cost Silvan Tracker, Mirkwood Runner, or Daughter of the Nimrodel for free. Since The Tree People doesn’t require exhausting the target character, you can also play it on Henamarth Riversong after looking at the top card of the encounter deck, then play him again for one resource and commit him to the quest. Customizing The Spear of Mirkwood As with The Elven Highborn, The Spear of Mirkwood can be customized or altered in many ways to suit your own needs or wants. Since this deck is very attachment and event-heavy, you might wish to add some other non-Silvan Tactics or Lore allies to help round it out. Also, The Spear of Mirkwood is built with the themes of the Silvans and the woodland realms in mind, so there are many cards that have been left out in order to complement this theme. In particular, the Horn of Gondor (Core Set, 42) makes for a wonderful addition to this deck, giving you resources every time you bounce a Silvan to your hand. Finally, if you have enough copies of The Tree People and Galadhrim Minstrel, these cards are useful enough to increase to three copies in both The Spear of Mirkwood and The Elven Highborn. The Woodland Realms Unite! While both The Elven Highborn and The Spear of Mirkwood are solid decks when played by themselves, they really shine when paired with one another. Playing The Spear of Mirkwood: Due to the high gap in starting threat between the two decks, most enemies will engage your partner. Your role is to focus on ranged combat and defeat the enemies revealed each turn, using Haldir’s ability as often as possible. If your partner is besieged by too many enemies to pick off with Haldir, you can use Rain of Arrows and Pursuing the Enemy to let fly a volley of arrows, and then you can pick off any stragglers with your ranged heroes. While your Willpower isn’t as high as your partner’s, you can still contribute to the quest. Ranger Spikes reduces an enemy’s threat, and Hands Upon the Bow allows you to pick off enemies in the staging area before resolving the quest. Your deck features two defensive attachments, Cloak of Lórien and Elven Mail, which are intended for your partner; they can turn Celeborn, Elrond, or a Defender of the Naith into a defensive powerhouse who can grapple with the toughest of enemies, keeping them occupied while you pelt them with arrows from afar.  
Playing The Elven Highborn: Your most important boon to offer your partner is Celeborn’s ability, which is global and affects all Silvan allies that enter play, even the Lore and Tactics allies your partner plays. You can also use O Lórien! to discount your partner’s allies, making it easier to play clutch allies like Silvan Tracker or Galadhon Archer. Used tactically, O Lórien allows you and your partner to take the best advantage of the allies in your hands at any given moment. Additionally, the healing generated by your partner’s allies are amplified by Elrond’s ability, which makes even a single Silvan Tracker a huge benefit to both players. If your partner’s threat is starting to get high enough to attract the attention of enemies, thus reducing the benefit of Haldir’s ability, you can use Galadriel to lower the threat and provide some helpful card draw. Finally, in a pinch, you can use Stand and Fight to retrieve a defeated Silvan Tracker or Galadhon Archer from your partner’s discard pile. The Woodlands Await You I hope you’ve enjoyed reading about these two decks and the strengths of the Silvan Elves of Mirkwood and Lothlórien. Feel free to assemble them and give them a shot through The Ring-maker cycle, or if you feel you have an even better Silvan deck to share, post it on our forums and discuss it with the rest of the community! As smoke rises over the ragged hills of Dunland, we’ll need all the help we can get… ... Source: The Woodland Realms Unite, Part Two (http://www.fantasyflightgames.com/edge_news.asp?eidn=5267)
Title: FFG:Guarding the Land of Steel
Post by: RSSFeeder on 28 December 2014, 02:00:33
Guarding the Land of SteelPreview the Daqan Units of the Hernfar Guardians Army Pack
Countless Blood Harvesters filled the water, their scythes shining in the darkness. Torches and fires were being lit throughout Hernfar Isle, signaling that Citadel Guards and Knights were on the way, but for now a few Greyhaven Battlemages would have to hold off the invasion alone. As the hulking forms of the Uthuk Y’llan forces began to come ashore, one mage held aloft a rune and shouted an attack spell at the top of her lungs… Take up arms against the ravenous hordes of the Uthuk Y’llan with Hernfar Guardians, an Army Pack expansion for BattleLore Second Edition. Hernfar Guardians features four new Daqan units, from mages skilled in combat magic to thundering metal automatons. With the included army cards, these units and the included Citadel Guard units can be instantly delployed in two different, complete, formidable armies, each able to stand firm against any onslaught. Or, you can combine units from Hernfar Guardians with those from the core set for a custom army suited to the battle at hand. In today’s preview you’ll learn about these new Daqan units, their unique abilities, and the strategic strength of both the Hernfar Guardians and Tranlon’s Raiders armies. 
Shield Your Forces and Trample Your Enemy The powerful Greyhaven Battlemages are experts in battlefield spells trained in Terrinoth's center of magical knowledge. With the same movement, combat value, and health as Citadel Guards, they can be used in many of the same ways. Unlike the Citadel Guards, however, the Greyhaven Battlemages are not limited to melee fighting. Their combat magic can attack an enemy as far as three hexes away. Two unit abilities allow these fearless wizards to benefit the entire army with their spells. Catalyst lets you draw a lore card and gain a lore point for every  result a unit of Battlemages rolls during combat, so that you can cycle through the lore deck quickly and keep the most tactically beneficial lore cards in hand. Rune Shield, activated with a result a unit of Battlemages rolls during combat, so that you can cycle through the lore deck quickly and keep the most tactically beneficial lore cards in hand. Rune Shield, activated with a  result, protects a friendly unit within one hex of the Caster unit that rolled it, allowing the protected unit to ignore one damage the next time it is attacked. Deploy a unit of Greyhaven Battlemages in the front lines, or pair them with another unit advancing into enemy territory to shield and support the entire advance. result, protects a friendly unit within one hex of the Caster unit that rolled it, allowing the protected unit to ignore one damage the next time it is attacked. Deploy a unit of Greyhaven Battlemages in the front lines, or pair them with another unit advancing into enemy territory to shield and support the entire advance. A heavily armored cavalry unit is also joining the Daqan army: the Citadel Lancers. They are not as fast as the Riverwatch Riders, but the do have a higher combat value and two deadly unit abilities. Charge, activated with a result, does damage to target units that your unit of Citadel Lancers moved towards during the Move Step, as if these horsemen’s momentum literally carries them into the enemy. Their strong horses can also Trample, doing damage for every retreat that a supported enemy unit ignores. The Riverwatch Riders excel in supporting friendly units and speeding behind enemy lines, but when you want to forcefully break an enemy line, deploy Citadel Lancers. 
Stand Firm with Iron and Stone The Greyhaven Battlemages and Citadel Lancers make a fast and fierce offensive team, but a balanced army is strong both offensively and defensively. Behind your infantry and cavalry, therefore, the armored Ironbound and a huge Siege Golem form a solid defensive wall of iron and stone. Both of these units are designed to stand firm and wipe out attacking enemies while taking minimal damage. The magically controlled Ironbound automatons can easily wipe out an enemy unit with a single attack. With a combat value of four, they can do as much damage as a Roc Warrior and, thanks to their Armor ability, they ignore the first  result produced each combat. Their only limitation is in mobility: during the move step an Ironbound unit can only move one hex. If you spend a lore at the moment you order it, however, the unit can move one hex further, so as long as you have Greyhaven Battlemages fighting and maintaining your pool of lore, your Ironbound will remain as mobile as your Citadel Guards. result produced each combat. Their only limitation is in mobility: during the move step an Ironbound unit can only move one hex. If you spend a lore at the moment you order it, however, the unit can move one hex further, so as long as you have Greyhaven Battlemages fighting and maintaining your pool of lore, your Ironbound will remain as mobile as your Citadel Guards. The Siege Golem, an immense, four-legged, artillery-carrying Rune Golem, is the most massive Daqan unit yet to take the field. Their sheer size gives these ranged units a health of six, and makes them Immovable so they can ignore a retreat, but it also prevents them from moving and attacking in the same turn. Yet, a Siege Golem can shoot as far as up to six hexes away, and ignores other units when determining line of sight, so you will not have to move it very often. The Barrage ability enables a Siege Golem to score a hit even when missing its main target: a result causes damage to an enemy unit adjacent to the target unit. Positioning a Siege Golem close behind your front lines gives you the chance to eradicate approaching enemies long before those front units engage in melee combat.
Defend and Destroy The army cards featured in Hernfar Guardians suggest two thoroughly different armies, each with its own strategic purpose. The Hernfar Guardians army is a defensive force, designed to protect the small, settled island that sits at the border between Terrinoth and the territory of the Uthuk Y’llan– the first place to be attacked in an invasion. The infantry component – two units of Greyhaven Battlemages – is smaller than the defensive line consisting of two Ironbound units and one Siege Golem. Citadel Lancers are included to herd the enemy units into perilous positions and trample them across the field, while a Crystal Spire hex is included to give any unit stationed on it an extra die during combat – perhaps your Siege Golem will linger there to make its artillery even more deadly. Tranlon’s Raiders, on the other hand, with a five-unit infantry made of Citadel Guards and Greyhaven Battlemages, is made for making inroads into enemy territory and slaying as many of the enemy as possible while moving forward. This huge infantry force is supported by two units of Citadel Lancers and two units of Ironbound. You could send the Citadel Lancers ahead to ease the way for your swarm of guards and mages, keeping the Ironbound on the sides to prevent your forced from being flanked. Another option is to divide and conquer your opponent, attacking them with a cluster of mages, cavalry, and Ironbound on each side. Once more, a Crystal Spire allows you to make one hex a particularly strong location for any Daqan unit positioned there. 
Take Command Use the army cards to instantly put strong Daqan deployments on the battlefield, or combine the units introduced in Hernfar Guardians with those from the core set of BattleLore Second Edition. For an impenetrable defensive force, you might combine Siege Golems and Ironbound with Rune Golems and a few Citadel Guards. If speed is what you’re looking for, pair the Greyhaven Battlemages and Citadel Lancers with Riverwatch Riders and a Roc Warrior, who can distract the enemy troops as the cavalry outflanks their defenses. Whether you use the included army cards or deploy armies specifically suited to your strengths as a commander, the new units of Hernfar Guardians promise to transform your battles. In our next preview, you’ll discover the Uthuk Y’llan units and armies of the Warband of Scorn Army Pack expansion. Future previews will explore the new lore cards and scenarios introduced in each Army Pack. You can also visit the BattleLore Second Edition minisite for more details. Pre-order Hernfar Guardians from your local retailer today! ... Source: Guarding the Land of Steel (http://www.fantasyflightgames.com/edge_news.asp?eidn=5268)
Title: FFG:The Darkness On the Doorstep
Post by: RSSFeeder on 28 December 2014, 10:30:03
The Darkness On the DoorstepNightmare Decks Are Now Available for the Second Half of The Hobbit Saga
“A door five feet high and three broad was outlined, and slowly without a sound swung inwards. It seemed as if darkness flowed out like a vapour from the hole in the mountain-side.”
–J.R.R. Tolkien, The Hobbit The time has come to summon up your courage once more and rejoin the illustrious burglar, Bilbo Baggins, along his adventures through the second half of The Hobbit. However, this time, the woods are darker, the enemies are stronger, and the threat of death by dragon flame is greater than ever… The Hobbit: On the Doorstep Nightmare Decks are now available for The Lord of the Rings: The Card Game. With new encounter and setup cards for you to add to the classic scenarios from The Hobbit: On the Doorstep, these Nightmare Decks add new challenges, twists, and replay value to some of the game’s best loved adventures. Think you have what it takes to confront Smaug in Nightmare Mode? Developer Caleb Grace shares more about the new challenges these Nightmare Decks offer the veteran players daring enough to confront them. 
Flies and Spiders I remember that the most daunting part of designing On the Doorstep was coming up with a fresh way to represent the Spiders of Mirkwood in The Lord of the Rings: The Card Game. Several of the scenarios from the Core Set and the Shadows of Mirkwood cycle did a fantastic job of bringing them to life, and I wanted to introduce something equally compelling but mechanically unique. The scenario’s poison mechanic ended up doing that for me, and the Nightmare Mode version pushes this mechanic to the extreme. Poison created a sort of countdown timer for characters, but in Standard Mode characters that are poisoned don’t appear to be adversely affected right up until they are made unconscious. In Nightmare Mode, this changes. In Nightmare Mode, the whole Flies and Spiders scenario is loaded with effects that represent the harmful qualities of the spiders’ poison. Even as the poison surges through your characters’ bodies and pushes them toward unconsciousness, it makes them susceptible to other threats, as well. Two of my favorite are Attercop (Flies and Spiders Nightmare Deck, 2) and Dark Colony (Flies and Spiders Nightmare Deck, 4).  
The six-Attack Strength enemy, Attercop, cannot be defended by poisoned characters, and it gets a one-point reduction in engagement cost for each poison card in play. Meanwhile, the four-Threat Strength location, Dark Colony, prevents poisoned characters from readying while it is the active location. Effects like these really bring the threat of spider poison to the forefront of this scenario, and to drive it home, the Flies and Spiders setup card (Flies and Spiders Nightmare Deck, 1) forces each player to give one poison to a hero he controls during at the start of the game! The Lonely Mountain The Lonely Mountain was originally designed before Easy Mode and Nightmare Mode existed, but our team was already discussing ways to introduce multiple levels of difficulty. I saw an opportunity to merge a scaling difficulty with the scenario’s theme by giving players the option of deciding how much treasure they wanted to steal from Smaug’s hoard. It seemed fitting that the greedier players who sought to burgle all Smaug’s treasures would also face a greater degree of difficulty.  As a result, the easiest way to defeat the scenario was to steal just a single treasure from under The Lonely Mountain (The Hobbit: On the Doorstep, 43) and move on. In Nightmare Mode, we’ve taken away that option. The setup card for The Lonely Mountain (The Lonely Mountain Nightmare Deck, 1) decrees that the players cannot advance to stage three while there is at least one card stacked under the titular location. That means the players have to successfully burgle all five treasure cards from under The Lonely Mountain before they can advance to the final stage. As a result, the easiest way to defeat the scenario was to steal just a single treasure from under The Lonely Mountain (The Hobbit: On the Doorstep, 43) and move on. In Nightmare Mode, we’ve taken away that option. The setup card for The Lonely Mountain (The Lonely Mountain Nightmare Deck, 1) decrees that the players cannot advance to stage three while there is at least one card stacked under the titular location. That means the players have to successfully burgle all five treasure cards from under The Lonely Mountain before they can advance to the final stage.
The scenario’s setup card also makes it harder to defeat Smaug. Now, it is impossible to damage him without first attaching A Bare Patch (The Hobbit: On the Doorstep, 39). Smaug was already a formidable enemy, so it wasn’t really necessary to make him any more aggressive. Instead, we wanted to prevent players from being able to destroy the dragon immediately after reaching stage three. This decision to make the players discover Smaug’s weak spot before being able to damage him seemed both thematically appropriate and mechanically wise since it reinforced the theme of burgling at stage three. The rest of the cards in the encounter set focus on increasing each player’s threat to represent the heroes raising Smaug’s suspicions and arousing his ire. Speaking of which, Belching Fire (The Hobbit: On the Doorstep, 50) is replaced by four copies of the treachery card, The Dragon’s Ire (The Lonely Mountain Nightmare Deck, 6). Where previously Smaug could attack one player unexpectedly during the quest phase, now the dragon can attack each player! The Battle of Five Armies Many of the players who have played through The Hobbit: On the Doorstep have named The Battle of Five Armies as their favorite scenario. The decisions they make each round about which quest stage to tackle, and the repercussions of those decisions, give players the feeling they are caught up in a conflict bigger than their heroes, and they just can’t be everywhere at once. In Nightmare Mode, these decisions are given even greater weight and importance with the introduction of more aggressive enemies and locations. Instead of a Gundabad Wolf Rider (The Hobbit: On the Doorstep, 55), who removes one progress from the current quest when it attacks, players will have to face the Frenzied Warg-Rider (The Battle of Five Armies Nightmare Deck, 3), who removes one progress from each quest stage when it attacks. Then there’s the Embattled Valley (The Hobbit: On the Doorstep, 5), which forces each player to assign X damage among heroes he controls at the end of each round, where X is the number of quest stages with no progress on them. The result is that you have more reason than ever to place progress upon each quest stage, but you have to work harder to do so.  
Of course, if you were playing The Battle of Five Armies in Standard Mode, you’d gain a reprieve from all the effects that remove progress from the quest as soon as you reached stage five, since progress cannot be placed on that stage. However, there’s no escape from these effects in Nightmare Mode. Instead, we used these effects to further enhance the feeling of battle at stage five by adding an exciting effect to the scenario’s setup card (The Battle of Five Armies Nightmare Deck, 1): “While the players are at stage 5b, this card gains: ‘Forced: When the players are instructed to remove any amount of progress from a quest stage, place 1 progress here instead.’” Now, if Bolg’s armies succeed in placing a certain number of progress on the setup card, they win the battle, and the players lose the game! In Nightmare Mode, this mechanic makes the encounter deck even more dangerous at stage five and creates a lot of tension as the players must defeat the goblins before they themselves are defeated. Thanks, Caleb! Bilbo Baggins and his companions stand once more at the threshold of Mirkwood. Can you help them survive the forest and the dangers that follow? Will Bilbo survive to play his part in the greater fate of Middle-earth, or will he fall before the onslaught of dragon fire and goblin armies? Steel your nerves for the darkest and deadliest perils you’ve yet faced in The Hobbit Saga Expansions for The Lord of the Rings: The Card Game. The Hobbit: On the Doorstep Decks are now available! ... Source: The Darkness On the Doorstep (http://www.fantasyflightgames.com/edge_news.asp?eidn=5270)
Title: FFG:The Darkness On the Doorstep
Post by: RSSFeeder on 28 December 2014, 19:00:03
The Darkness On the DoorstepNightmare Decks Are Now Available for the Second Half of The Hobbit Saga “A door five feet high and three broad was outlined, and slowly without a sound swung inwards. It seemed as if darkness flowed out like a vapour from the hole in the mountain-side.”
–J.R.R. Tolkien, The Hobbit The time has come to summon up your courage once more and rejoin the illustrious burglar, Bilbo Baggins, along his adventures through the second half of The Hobbit. However, this time, the woods are darker, the enemies are stronger, and the threat of death by dragon flame is greater than ever… The Hobbit: On the Doorstep Nightmare Decks are now available for The Lord of the Rings: The Card Game. With new encounter and setup cards for you to add to the classic scenarios from The Hobbit: On the Doorstep, these Nightmare Decks add new challenges, twists, and replay value to some of the game’s best loved adventures. Think you have what it takes to confront Smaug in Nightmare Mode? Developer Caleb Grace shares more about the new challenges these Nightmare Decks offer the veteran players daring enough to confront them.
Flies and Spiders I remember that the most daunting part of designing On the Doorstep was coming up with a fresh way to represent the Spiders of Mirkwood in The Lord of the Rings: The Card Game. Several of the scenarios from the Core Set and the Shadows of Mirkwood cycle did a fantastic job of bringing them to life, and I wanted to introduce something equally compelling but mechanically unique. The scenario’s poison mechanic ended up doing that for me, and the Nightmare Mode version pushes this mechanic to the extreme. Poison created a sort of countdown timer for characters, but in Standard Mode characters that are poisoned don’t appear to be adversely affected right up until they are made unconscious. In Nightmare Mode, this changes. In Nightmare Mode, the whole Flies and Spiders scenario is loaded with effects that represent the harmful qualities of the spiders’ poison. Even as the poison surges through your characters’ bodies and pushes them toward unconsciousness, it makes them susceptible to other threats, as well. Two of my favorite are Attercop (Flies and Spiders Nightmare Deck, 2) and Dark Colony (Flies and Spiders Nightmare Deck, 4).
The six-Attack Strength enemy, Attercop, cannot be defended by poisoned characters, and it gets a one-point reduction in engagement cost for each poison card in play. Meanwhile, the four-Threat Strength location, Dark Colony, prevents poisoned characters from readying while it is the active location. Effects like these really bring the threat of spider poison to the forefront of this scenario, and to drive it home, the Flies and Spiders setup card (Flies and Spiders Nightmare Deck, 1) forces each player to give one poison to a hero he controls during at the start of the game! The Lonely Mountain The Lonely Mountain was originally designed before Easy Mode and Nightmare Mode existed, but our team was already discussing ways to introduce multiple levels of difficulty. I saw an opportunity to merge a scaling difficulty with the scenario’s theme by giving players the option of deciding how much treasure they wanted to steal from Smaug’s hoard. It seemed fitting that the greedier players who sought to burgle all Smaug’s treasures would also face a greater degree of difficulty. As a result, the easiest way to defeat the scenario was to steal just a single treasure from under The Lonely Mountain (The Hobbit: On the Doorstep, 43) and move on. In Nightmare Mode, we’ve taken away that option. The setup card for The Lonely Mountain (The Lonely Mountain Nightmare Deck, 1) decrees that the players cannot advance to stage three while there is at least one card stacked under the titular location. That means the players have to successfully burgle all five treasure cards from under The Lonely Mountain before they can advance to the final stage. The scenario’s setup card also makes it harder to defeat Smaug. Now, it is impossible to damage him without first attaching A Bare Patch (The Hobbit: On the Doorstep, 39). Smaug was already a formidable enemy, so it wasn’t really necessary to make him any more aggressive. Instead, we wanted to prevent players from being able to destroy the dragon immediately after reaching stage three. This decision to make the players discover Smaug’s weak spot before being able to damage him seemed both thematically appropriate and mechanically wise since it reinforced the theme of burgling at stage three. The rest of the cards in the encounter set focus on increasing each player’s threat to represent the heroes raising Smaug’s suspicions and arousing his ire. Speaking of which, Belching Fire (The Hobbit: On the Doorstep, 50) is replaced by four copies of the treachery card, The Dragon’s Ire (The Lonely Mountain Nightmare Deck, 6). Where previously Smaug could attack one player unexpectedly during the quest phase, now the dragon can attack each player! The Battle of Five Armies Many of the players who have played through The Hobbit: On the Doorstep have named The Battle of Five Armies as their favorite scenario. The decisions they make each round about which quest stage to tackle, and the repercussions of those decisions, give players the feeling they are caught up in a conflict bigger than their heroes, and they just can’t be everywhere at once. In Nightmare Mode, these decisions are given even greater weight and importance with the introduction of more aggressive enemies and locations. Instead of a Gundabad Wolf Rider (The Hobbit: On the Doorstep, 55), who removes one progress from the current quest when it attacks, players will have to face the Frenzied Warg-Rider (The Battle of Five Armies Nightmare Deck, 3), who removes one progress from each quest stage when it attacks. Then there’s the Embattled Valley (The Hobbit: On the Doorstep, 5), which forces each player to assign X damage among heroes he controls at the end of each round, where X is the number of quest stages with no progress on them. The result is that you have more reason than ever to place progress upon each quest stage, but you have to work harder to do so.
Of course, if you were playing The Battle of Five Armies in Standard Mode, you’d gain a reprieve from all the effects that remove progress from the quest as soon as you reached stage five, since progress cannot be placed on that stage. However, there’s no escape from these effects in Nightmare Mode. Instead, we used these effects to further enhance the feeling of battle at stage five by adding an exciting effect to the scenario’s setup card (The Battle of Five Armies Nightmare Deck, 1): “While the players are at stage 5b, this card gains: ‘Forced: When the players are instructed to remove any amount of progress from a quest stage, place 1 progress here instead.’” Now, if Bolg’s armies succeed in placing a certain number of progress on the setup card, they win the battle, and the players lose the game! In Nightmare Mode, this mechanic makes the encounter deck even more dangerous at stage five and creates a lot of tension as the players must defeat the goblins before they themselves are defeated. Thanks, Caleb! Bilbo Baggins and his companions stand once more at the threshold of Mirkwood. Can you help them survive the forest and the dangers that follow? Will Bilbo survive to play his part in the greater fate of Middle-earth, or will he fall before the onslaught of dragon fire and goblin armies? Steel your nerves for the darkest and deadliest perils you’ve yet faced in The Hobbit Saga Expansions for The Lord of the Rings: The Card Game. The Hobbit: On the Doorstep Decks are now available! ... Source: The Darkness On the Doorstep (http://www.fantasyflightgames.com/edge_news.asp?eidn=5271)
Title: FFG:Nature's Ire
Post by: RSSFeeder on 29 December 2014, 03:30:03
Nature's IreThe Second Descent Cooperative Adventure Is Now Available
Nature’s Ire, the second cooperative adventure for Descent: Journeys in the Dark Second Edition, is now available via Fantasy Flight Games in-house manufacturing! Previously available only through a Descent Game Night Kit, you can now pick up your own copy of the Nature’s Ire adventure. This expansion marks the second fully cooperative adventure for Descent Second Edition. In traditional games of Descent, one player is the overlord, controlling deadly monsters and springing traps, while up to four players battle these monsters, gathering items and experience as they move through the campaign. Cooperative adventures like Nature’s Ire change this gameplay entirely by allowing up to four players to work together to defeat monsters and traps controlled by the game. Each cooperative adventure simulates a mini campaign in one  session, inviting you to explore an expanding area, testing your wits, battling monsters, and grabbing loot and experience along the way! session, inviting you to explore an expanding area, testing your wits, battling monsters, and grabbing loot and experience along the way! Important: The rules for the Nature’s Ire expansion are not included in the box. The rules (pdf, 27.8MB) are available for free download by clicking the thumbnail to the right or from the Descent: Journeys in the Dark Second Edition support page. Enter the Forest In the Nature’s Ire cooperative adventure, you and your friends investigate the disappearance of the population of Blue Rock village. Accompanied by a single survivor, you must venture beneath the boughs of a foreboding forest, battling deadly foes and the forces of nature to save the missing villagers from a most gruesome fate. As you move through the adventure, new encounters and areas are revealed from a randomized Exploration deck, meaning you’ll never face the same adventure twice!  Each area that you encounter features its own objective that you must complete before you move on. You may clash with fearsome merriods on the shores of a river, or rescue hapless civilians from the clutches of goblin archers. Time is not on your side, however. If you delay too long, any number of unpleasant effects may occur. Only after an encounter has resolved, for good or for ill, can you open the next door and proceed forward in the adventure. Each area that you encounter features its own objective that you must complete before you move on. You may clash with fearsome merriods on the shores of a river, or rescue hapless civilians from the clutches of goblin archers. Time is not on your side, however. If you delay too long, any number of unpleasant effects may occur. Only after an encounter has resolved, for good or for ill, can you open the next door and proceed forward in the adventure.
In Nature’s Ire, like all Descent cooperative adventures, there is no overlord player to command his monsters against you. Because of this, your objective also changes. In the cooperative variant of Descent, you and the other heroes win the game if you can make your way through the various encounters in the Exploration deck pushing forward to reach the heart of the forest and a showdown for the fate of Blue Rock’s villagers. If you rescue the civilians and defeat the forces arrayed against you, you win the game, but the threats you face along the way are legion. Evil in the Woods Because there’s no overlord in the cooperative variant of Descent, the overlord track replaces the overlord’s objective. A fate token and a doom token are placed at opposite ends of the overlord track, and if these tokens ever meet, the heroes lose the game. The doom token advances slowly, but once it moves forward, it never retreats. The fate token, however, fluctuates based on the outcomes of your encounters. For example, if a hero is knocked out, fate advances by one, but successfully completing a main encounter may allow you to reset the fate token to the beginning of its track. Bloodthirsty monsters lurk in the shadow of the forest in Nature’s Ire, and you’ll enter combat with ettins, goblin archers, merriods, and cave spiders. Monsters in cooperative Descent adventures are controlled by a unique deck of monster activation cards that gives monsters a list of actions. Each turn, after the heroes have moved and activated, one monster activation card is revealed, and every monster on the map resolves actions based on the card. Because each monster activation card contains different actions, you’ll never know exactly how the monsters will react to your intrusion into their forest realm. 
Because cooperative Descent adventures simulate a mini campaign, you’ll have the chance to gain Class cards and collect loot for your heroes. Experience is gained after main encounters, allowing you to immediately improve your hero’s skills by purchasing new Class cards. You’ll also be able to grab new items by filling the loot track. The loot track grows with each monster you kill, and killing larger monsters gives you access to more loot. By slaying the monsters that stands in your way, you gain better weapons and armor throughout the Nature’s Ire adventure. Save the Villagers The village of Blue Rock lies in peril. Only you and your fellow heroes can save its people. Venture into the forest when you order your copy of Nature’s Ire, now available through our webstore! ... Source: Nature's Ire (http://www.fantasyflightgames.com/edge_news.asp?eidn=5272)
Title: FFG:Life and Death in the Virtual World
Post by: RSSFeeder on 29 December 2014, 12:00:03
Life and Death in the Virtual WorldThe Source Is Now Available for Android: Netrunner
The drive was just a small block of metal. His hands were shaking. Back on Earth, in the relative safety of his apartment, cyber-explorer Nasir Meidan stares at the quantum drive in his hand. He boots up his console. He wonders, was he able to complete his download? Does this drive truly contain the net’s legendary source protocols? What will he find? After five Data Packs of thrilling lunar encounters, Corporate security measures, and armed mercenaries, all Nasir has left to do is pull up the files… The Source, the sixth and final Data Pack in the Lunar Cycle for Android: Netrunner, is now available at retailers and online through our webstore! The Source brings the cat-and-mouse cyberstruggles of Android: Netrunner back to Earth, but its sixty new cards (three copies each of twenty different cards) ensure that game will be forever changed by your journeys. At the end of your lunar expedition, you’ll find a final look at the moon’s locations, grail ice, and Corporate divisions. 
You’ll also find surprising new takes on life, evolution, and death in the virtual world. Corps gain new cards that power up their servers and others that can self-destruct. Meanwhile, self-propagating viruses explode into the network, even as talented Runners find new ways to summon programs out of the aether. With The Source, it’s not a question of whether or not you’ll find the seeds of a new power; it’s a question of whether you’ll use that power to create or to destroy. The Power to Create… In Android: Netrunner, you build by developing your economy and board state, and you destroy by attacking your opponent’s economy and board state. The Source gives both Corp and Runner plenty of new tools to do both. Corp players can quickly build up their servers and economies with ice like Errand Boy (The Source, 102) and Excalibur (The Source, 111), as well as operations like Shoot the Moon (The Source, 107).  
- Errand Boy is a piece of ice so apparently harmless that the Runner may simply never break any of its subroutines. However, the strength of Errand Boy isn’t in what it does to the Runner but what it does for the Corp. Weyland may use it to dig for copies of Scorched Earth (Core Set, 99) or Punitive Counterstrike (True Colors, 79), or it may simply collect the credits it will eventually need to pay for those cards. On the other hand, the ice’s low influence cost means that it is equally effective in a deck built around Jinteki: Replicating Perfection (Trace Amount, 31).
- The last of the grail ice, Excalibur can only be broken by AI icebreakers, and this makes it a fantastic building block for a solid Corporate defense. You can pair it with Swordsman (Second Thoughts, 33) to slow down any Runner who wants to probe the server your Excalibur protects, or you could play it in a deck with Mother Goddess (Upstalk, 10) and Chimera (Cyber Exodus, 60), adding new measures of defense to a deck that forces the Runner to find unusual means of breaking or bypassing your ice. Of course, you can always hold one or two copies of Excalibur in your hand to add its subroutine to another piece of grail ice.
- Shoot the Moon is just the latest in a long list of reasons that Runners simply do not want NBN to tag them. If the Runner’s foolish enough to end his turn with even a single tag, the Corp can then quickly convert it into three with Big Brother (Trace Amount, 35) before playing Shoot the Moon to rez any three pieces of its ice for free. Alternately, Shoot the Moon can played after Midseason Replacements (Future Proof, 116) to quickly slam shut the early game and open a scoring window by rezzing such intimidating ice as Tollbooth (Core Set, 90) and Flare (Future Proof, 117), or even out-of-faction ice like Janus 1.0 (What Lies Ahead, 12) and Wotan (Second Thoughts, 30).
Still, the game’s Runners aren’t about to concede any ground. Instead, they’re taking advantage of their new lunar resources, and taking advantage of events like Code Siphon (The Source, 115), to build rigs full of cards like Sage (The Source, 117) and Au Revoir (The Source, 119).  
- The game’s Shapers gain another powerful search effect in Code Siphon. After you run successfully against the Corp’s R&D, you can elect to search your stack for a program and install it, instead of accessing cards. It costs you a tag to siphon the data away from the Corp, but you can lower the cost of the program you install by three for each piece of ice protecting R&D. Notably, this works even if those ice aren’t rezzed.
- Sage is effectively a two-for-one program and arguably one of the game’s most efficient icebreakers. For one card and two MU, Sage grants you the ability to break both code gate and barrier subroutines, and it gains strength as you gain memory. Though it doesn’t have the full versatility of the game’s AI icebreakers, it doesn’t suffer from their weaknesses. Moreover, as both a decoder and fracter, it offers efficient interactions with cards like Wraparound (Fear and Loathing, 96) and Lockpick (Opening Moves, 6).
- Assembling a rig full of the best and most efficient programs and pieces of hardware is one way to gain an economic advantage over your rival, but you can gain advantages in other ways, as well. You might force the Corp into overspending by assembling a cost-effective early rig of Snitch (Cyber Exodus, 45) and multiple copies of Au Revoir. Will the Corp allow you to run straight through its ice? Or will it pay the cost to rez it, knowing that you’ll simply jack out and collect your credits anytime the ice might damage you? Either way, you win.
…Or to Destroy The same tools that can be used to create can be used to destroy. For example, you can use the credits that your Errand Boy grants you to pay for Markus 1.0 (The Source, 104) and trash the Runner’s cards, or you could use them to boost the trace you initiate with Troll (The Source, 108). Likewise, a Criminal Runner gaining credits with Au Revoir might choose to spend them on Bribery (The Source, 118), making it prohibitively expensive for the Corp to rez its ice.  
Still, there are destructive measures rooted in The Source that are even more drastic. Runners can accelerate the potency of their virus programs with Incubator (The Source, 113), reducing the amount of time it takes a Parasite (Core Set, 12) to eat through a piece of ice or for a Medium (Core Set, 10) to power up a Demolition Run (Core Set, 3) that can immediately force the Corp into a desperate end game.  However, there’s no card from The Source that’s more flagrantly destructive than the Corp upgrade Self-destruct (The Source, 112). Not only does it trash all cards in or protecting the server it enhances, Self-destruct also stands a good chance of dealing three net damage to any Runner who stumbles into it. Even better, because it can be used at any point during a run on its server, Self-destruct ensures your agendas won’t fall into Runner hands, even if they’re protected only by a piece of ice as thin as a Paper Wall (Mala Tempora, 59) or Pop-up Window (Cyber Exodus, 56). Instead, you can blow up your Self-destruct as a properly equipped Runner approaches, blow up your ice, and blow up your agenda, leaving the Runner with nothing to find except a trace attempt with a base strength of three. However, there’s no card from The Source that’s more flagrantly destructive than the Corp upgrade Self-destruct (The Source, 112). Not only does it trash all cards in or protecting the server it enhances, Self-destruct also stands a good chance of dealing three net damage to any Runner who stumbles into it. Even better, because it can be used at any point during a run on its server, Self-destruct ensures your agendas won’t fall into Runner hands, even if they’re protected only by a piece of ice as thin as a Paper Wall (Mala Tempora, 59) or Pop-up Window (Cyber Exodus, 56). Instead, you can blow up your Self-destruct as a properly equipped Runner approaches, blow up your ice, and blow up your agenda, leaving the Runner with nothing to find except a trace attempt with a base strength of three.
Unlock Your True Potential Will you use The Source to create new virtual worlds or reduce them to ash? The choice is yours. The Source is now available at your local retailer and online through our webstore. ... Source: Life and Death in the Virtual World (http://www.fantasyflightgames.com/edge_news.asp?eidn=5273)
Title: FFG:Retailers: Pre-order Your Spring 2015 Tournament Kits
Post by: RSSFeeder on 29 December 2014, 20:30:03
Retailers: Pre-order Your Spring 2015 Tournament KitsAnnouncing New Tournament Kits for Call of Cthulhu
The application window for our Spring 2015 Tournament Kits is now closed. In the coming weeks, we will have more information about other upcoming opportunities for you to get involved with FFG Organized Play. Be sure to check our website for updates.
A game of nightmares, horror, and brave investigators fighting for the fate of the world, Call of Cthulhu: The Card Game continues to expand and build new game communities around the world. The Spring 2015 Call of Cthulhu: The Card Game Tournament Kit comes with an event guide and new promotional materials to help support tournaments, league play, or any other event you wish to run. The order deadline for these kits is December 29th, and the Spring season begins in March. How Do I Use a Tournament Kit? Tournament Kits are designed for use with our competitive games, such as Call of Cthulhu: The Card Game, and they can be used in several ways. These kits include prize support and promotional material designed to support competitive or casual tournament play at local retailers. Run an eight-week tournament series or league, use the prizes to support a single, large tournament, or host a weekly casual game night. Tournament Kits also come with a guide that provides tips and ideas on how to run a great event. What’s in the Spring 2015 Call of Cthulhu: The Card Game Tournament Kit? Each Spring 2015 Call of Cthulhu: The Card Game Tournament Kit comes with exciting prizes and materials to help tournament organizers: - One playmat depicting Ruinous Star Spawn
- Two copies of an alternate art Twilight Gate
- Seventeen copies of an alternate art Dreamlands Fanatic
- Four deck boxes featuring Ruinous Star Spawn
- A promotional poster depicting Ruinous Star Spawn
- One informational pamphlet on running a tournament or league
Please note: The alternate art cards in this kit are produced through FFG's In-House Manufacturing, and as such, they may appear slightly different in color and texture from the game's other cards. To be tournament legal, these cards must be sleeved with opaque or art sleeves. Are You a Retailer? If you’re interested in ordering a Spring 2015 Call of Cthulhu: The Card Game Tournament Kit, you can do so through your distributor or through our B2B store. The deadline to order is December 29th, with the season starting in March. ... Source: Retailers: Pre-order Your Spring 2015 Tournament Kits (http://www.fantasyflightgames.com/edge_news.asp?eidn=5251)
Title: FFG:Retailers: Pre-order Your Spring 2015 Tournament Kits
Post by: RSSFeeder on 30 December 2014, 05:00:04
Retailers: Pre-order Your Spring 2015 Tournament KitsAnnouncing New Tournament Kits for Android: Netrunner
The application window for our Spring 2015 Tournament Kits is now closed. In the coming weeks, we will have more information about other upcoming opportunities for you to get involved with FFG Organized Play. Be sure to check our website for updates.
Pitting two players against each other in a high-stakes, futuristic cyberstruggle, Android: Netrunner continues to expand and build new game communities around the world. The Spring 2015 Android: Netrunner Tournament Kit comes with an event guide and new promotional materials to help support tournaments, league play, or any other event you wish to run. The order deadline for these kits is December 29th, and the Spring season begins in March. How Do I Use a Tournament Kit? Tournament Kits are designed for use with our competitive games, such as Android: Netrunner, and they can be used in several ways. These kits include prize support and promotional material designed to support competitive or casual tournament play at local retailers. Run an eight-week tournament series or league, use the prizes to support a single, large tournament, or host a weekly casual game night. Tournament Kits also come with a guide that provides tips and ideas on how to run a great event. What’s in the Spring 2015 Android: Netrunner Tournament Kit? Each Spring 2015 Android: Netrunner Tournament Kit comes with exciting prizes and materials to help tournament organizers: - One playmat depicting the Criminal runner Silhouette
- Two copies of an alternate art Gordian Blade
- Seventeen copies of an alternate art Pop-up Window
- Four Criminal deck boxes featuring Silhouette
- A promotional poster depicting the Criminal runner Silhouette
- One informational pamphlet on running a tournament or league
Please note: The alternate art cards in this kit are produced through FFG's In-House Manufacturing, and as such, they may appear slightly different in color and texture from the game's other cards. To be tournament legal, these cards must be sleeved with opaque or art sleeves. Order Your Kits Today Don’t miss out on Spring 2015 Android: Netrunner Tournament Kits! Order your kits now through your distributor or our B2B store. The deadline to order is December 29th, with the season starting in March. ... Source: Retailers: Pre-order Your Spring 2015 Tournament Kits (http://www.fantasyflightgames.com/edge_news.asp?eidn=5252)
Title: FFG:Retailers: Pre-order Your Spring 2015 Tournament Kits
Post by: RSSFeeder on 30 December 2014, 13:30:03
Retailers: Pre-order Your Spring 2015 Tournament KitsAnnouncing New Tournament Kits for A Game of Thrones
The application window for our Spring 2015 Tournament Kits is now closed. In the coming weeks, we will have more information about other upcoming opportunities for you to get involved with FFG Organized Play. Be sure to check our website for updates.
Featuring epic battles and countless plots of intrigue, cunning, and deceit,
A Game of Thrones: The Card Game continues to expand and build new game communities around the world. The Spring 2015 A Game of Thrones: The Card Game Tournament Kit comes with an event guide and new promotional materials to help support tournaments, league play, or any other event you wish to run. The order deadline for these kits is December 29th, and the Spring season begins in March. How Do I Use a Tournament Kit? Tournament Kits are designed for use with our competitive games, such as
A Game of Thrones: The Card Game, and they can be used in several ways. These kits include prize support and promotional material designed to support competitive or casual tournament play at local retailers. Run an eight-week tournament series or league, use the prizes to support a single, large tournament, or host a weekly casual game night. Tournament Kits also come with a guide that provides tips and ideas on how to run a great event. What’s in the Spring 2015 A Game of Thrones: The Card Game Tournament Kit? Each Spring 2015 A Game of Thrones: The Card Game Tournament Kit comes with exciting prizes and materials to help tournament organizers: - One playmat featuring the Iron Throne
- Two copies of an alternate art An Empty Throne card
- Seventeen copies of an alternate art Robert Baratheon card
- Four Baratheon deck boxes depicting Renly Baratheon
- A promotional poster featuring the Iron Throne
- One informational pamphlet on running a tournament or league
Please note: The alternate art cards in this kit are produced through FFG's In-House Manufacturing, and as such, they may appear slightly different in color and texture from the game's other cards. To be tournament legal, these cards must be sleeved with opaque or art sleeves. Are You a Retailer? Winter is here, but it won’t last forever! Prepare for warmer months and order a Spring 2015 A Game of Thrones: The Card Game Tournament Kit through your distributor or through our B2B store. The deadline to order is December 29th, with the season starting in March. ... Source: Retailers: Pre-order Your Spring 2015 Tournament Kits (http://www.fantasyflightgames.com/edge_news.asp?eidn=5253)
Title: FFG:Retailers: Pre-order Your Spring 2015 Tournament Kits
Post by: RSSFeeder on 30 December 2014, 22:00:03
Retailers: Pre-order Your Spring 2015 Tournament KitsBuild and Support Your Local Player Community with Nine New Tournament Kits
The application window for our Spring 2015 Tournament Kits is now closed. In the coming weeks, we will have more information about other upcoming opportunities for you to get involved with FFG Organized Play. Be sure to check our website for updates. Fantasy Flight Games is proud to add two more games that will be supported by Organized Play starting in 2015: Star Wars™: Armada and Imperial Assault! Get in on the ground floor and be the first store in your area to support the players of these two spectacular games. Tournament Kits serve as the entry way to FFG’s Organized Play programs. Each kit contains prize support and helpful suggestions on how to best support your local community. With these tools, stores can host leagues, weekly game nights, or even a large-scale tournament to draw in players and build a thriving group of regular patrons.
What Games are Supported? Whether you’re destroying your enemies in the Traxis Sector, writing vicious programs to punish pesky Runners infiltrating your servers, or leading a team of Rebel saboteurs into an Imperial TIE production facility—Tournament Kits can make your store the local hub of a thriving, global community connected by Fantasy Flight Organized Play. Visit the links below to learn more about each of the games supported by Organized Play; then pre-order your Tournament Kits today! Are You a Player? If you’re a player, you can do your part to grow Organized Play by telling your favorite local game store about our Tournament Kits. If you’re interested in taking a more active role in bringing events to your community, here are some ways you can help promote Fantasy Flight Organized Play: - Encourage your friends to join you and play at your favorite local game store
- Ask your favorite local game store if you can post a sign-up sheet for upcoming events
- Offer to run demos
- Volunteer your services as tournament organizer
The exclusive items and alternate art cards from these Spring 2015 Tournament Kits will be available for a limited period of time only, so be sure to talk with your local retailer about hosting tournaments for our Organized Play games.
Order Now With the introduction of Star Wars™: Armada and Imperial Assault, as well as last year’s debut of Warhammer 40,000: Conquest, Organized Play support continues to expand. Don’t miss out on your chance to build a strong and healthy community in your store for the games your players enjoy, order before December 29th to receive your Tournament Kits! ... Source: Retailers: Pre-order Your Spring 2015 Tournament Kits (http://www.fantasyflightgames.com/edge_news.asp?eidn=5254)
Title: FFG:Breaking the Ice
Post by: RSSFeeder on 31 December 2014, 06:30:03
Breaking the IceMountains of Madness Is Now Available
For a second we gasped in vague admiration of the scene’s unearthly cosmic beauty, and then vague horror began to creep into our souls.
–H.P. Lovecraft, At the Mountains of Madness Mountains of Madness, the new side board expansion for Eldritch Horror, is now available at your local retailer! A Misktaonic University expedition to Antarctica has discovered prehistoric ruins and encountered inhuman, bloodthirsty creatures. In Mountains of Madness, investigators follow that expedition's trail and search Antarctica’s icy expanses for the clues needed to save humanity from the awakening Ancient Ones. In addition to the side board depicting locations throughout Antarctica, this expansion features two Ancient Ones and eight investigators who are willing to sacrifice their lives and their sanity to save the human race. These brave souls are aided by plenty of new Assets, Spells, and Artifacts as they search for clues and battle not only monsters, but harsh and deadly conditions across the globe.
The Secrets of Antarctica If you choose to brave Antarctica’s below-zero temperatures and isolated expanses, you’ll trace the path of a doomed Miskatonic University expedition, from the bustling Miskatonic Outpost over the snowy, uncanny Mountains of Madness to the magnificent, haunted City of the Elder Things. Our first preview provides a detailed look at the locations on the Antarctica side board, the encounters that you may have there, and the assets that could help you survive that frozen realm. In Antarctica, investigators will likely encounter the star-shaped, winged, and vicious Elder Things that have inhabited that continent for eons. These sapient beings once ruthlessly ruled all life on Earth and yearn to retake dominion over the planet. The Rise of the Elder Things, discussed in our third preview, is one of the two Ancient Ones featured in this expansion. To defeat them you’ll have to solve four mysteries, more than for other Ancient Ones, and many of the answers can only be found in the ice surrounding the South Pole.
There are rewards for embarking on an Antarctic expedition no matter which Ancient One you're fighting. The Adventure cards (also discussed in the third preview) that guide your journey within Antarctica help you to complete mysteries more quickly if you successfully complete certain Antarctic encounters. Learning the history of the Elder Things and exploring the remnants of their civilization may make the difference between saving humanity or letting the Ancient Ones wreak havoc worldwide. A Deadly Global Chill As the Elder Things begin to stir in Antarctica, another horror is awakening in the northern hemisphere. Known as the Wind-Walker because he seems to travel on shrieking winds, the giant Ithaqua seeks to plunge the entire world into eternal winter. Our fourth preview introduced you to the quests you might undertake to stop Ithaqua and his minions, including a journey from Greenland deep into the mythical Other World of Hyperborea. As your team of investigators strives to prevent the Earth from freezing over, they’ll also have to fight off Ithaqua’s closest allies, hypothermia and insatiable hunger. These Conditions could not only diminish an investigator’s stamina and sanity, but might render an investigator dangerous for himself and for others. 
Chosen Warriors The investigators of Mountains of Madness are united in their determination to defeat the Ancient Ones, but each has been touched by the horror in a unique way. Four of these men and women were featured in our second preview: the waitress Agnes Baker who is haunted by memories of a past life, the bootlegger Finn Edwards who has unwittingly become involved in a supernatural conspiracy, the violinist Patrice Hathaway whose music forms a bridge between worlds, and the lawyer George Barnaby who seeks revenge for his wife’s murder. Joining this motley crew are the explorer Ursula Downs, the pragmatic handyman Wilson Richards, the rookie cop Tommy Muldoon, and the librarian Daisy Walker. Their skills are as diverse as their backgrounds. Daisy and Agnes are specialists in arcane lore, but Agnes is more suited to an Antarctic expedition, while Daisy might travel Europe and North America collecting Artifacts and Spells. Patrice excels in gathering clues and possess a strong will that helps her withstand Other World encounters, while Wilson’s physical strength and stamina enable him to survive the most brutal attacks and harshest conditions. George’s legal career has endowed him with profound international influence and his years of life experience allow him to remain sane in the most bizarre circumstances. Tommy, Ursula, and Finn are jacks-of-all-trades, ready to fight monsters in the streets of Arkham, close gates in the Amazon, or sled across the Frozen Wastes of Antarctica in search of clues. With their abilities combined, these investigators can take on any Ancient One and rescue humanity from the most awful horrors. 
Confront the Cold A chill wind is blowing. There are rumors of cannibalism in the world’s northernmost countries and news about scientists cruelly mutilated in Antarctica fills the airwaves. Monsters are running rampant in city streets and Gates to Other Worlds are opening in the wilderness. Temperatures are plummeting across the globe, and things will only become worse unless you and your team of investigators can solve the mysteries necessary to vanquish these dire threats. Whether you explore the vastness of Antarctica, traverse the frozen northern regions of the world, or fight your battles in Arkham’s back alleys, it will take all your sanity and stamina to survive the ice and save humanity. The question is, are you prepared to confront the cold? Experience the chills and horrors of Mountains of Madness today! ... Source: Breaking the Ice (http://www.fantasyflightgames.com/edge_news.asp?eidn=5269)
Title: FFG:Here Comes the Imperial Raider
Post by: RSSFeeder on 31 December 2014, 15:00:03
Here Comes the Imperial RaiderIntroducing a New Huge Ship to X-Wing (TM) and the STAR WARS (TM) Galaxy!
Epic Play for the X-Wing™ miniatures game is about to get more epic… Fantasy Flight Games is thrilled to bring you the all-new Raider-class corvette, a new Imperial ship for X-Wing Epic Play and a new addition to the Star Wars galaxy! Designed in partnership with Lucasfilm Ltd. for use within the game’s Cinematic Play and Epic Play formats, the Raider-class corvette is the highlight of the upcoming Imperial Raider Expansion Pack. 
The Raider-class corvette.
Kuat Drive Yards began manufacturing the Raider-class corvette in 6BBY as a dedicated anti-fighter vessel after it was successfully pitched by Lira Wessex, the designer of the Imperial-class Star Destroyer. She recognized that the Imperial Navy lacked a small, modern craft to reinforce the TIE fighter squadrons deployed by Star Destroyers, and she designed the Raider-class corvette as a durable, 150m vessel that featured multiple hardpoints and would excel at suppressing Rebel fighter attacks. Like the Rebellion’s huge ships, the GR-75 medium transport and CR90 Corellian corvette, the Raider is too big for Standard Play and the game’s standard 1/270 scale. Accordingly, the expansion’s Raider miniature is presented at a relative scale that makes it playable, even as it dwarfs the game’s small- and large-base ships. In addition to the Raider-class corvette, the Imperial Raider Expansion pack also contains one TIE Advanced miniature with a variant paint scheme, eight ship cards, thirty-four upgrade cards, and all the maneuver dials, damage decks, tokens, and game pieces that you need to fly your Raider and its TIE Advanced escort. Finally, the expansion introduces a new campaign, The Will of the Empire, in which you’ll command a Raider-class corvette and run a prototype TIE Advanced through its test flights in the wild, lawless sectors of the Outer Rim. 
The Imperial Raider Expansion Pack comes with one Raider miniature, one TIE Advanced miniature, eight ship cards, thirty-four upgrades, a huge range ruler, and all the maneuver dials, damage decks, and tokens you need to launch your Imperial ships into Epic Play battles!
The Origins of the Raider-class Corvette With its powerful primary weapon, Single Turbolasers, Ion Cannon Batteries, and multiple crew options, the Raider-class corvette is destined to make a massive impact in X-Wing Cinematic Play and Epic Play. As a dedicated anti-fighter ship, the Raider offers a powerful counter to many of the Rebellion’s favored strategies. It also represents an exciting new addition to the Star Wars universe, and the development team offers insight into the ship’s origin: “The impetus behind the Raider-class corvette came from a desire to produce an Imperial ship for X-Wing that was comparable in size and role to the Rebel corvette. “Before we even announced the Tantive IV™ Expansion Pack, we knew Imperial players would need a comparable ship to lead their fleets in the game’s Epic Play battles. But none of the ships within the established IP and extended universe quite fit the bill. As we looked at ships that were larger than the VT-49 Decimator, the next possibility was the Lancer-class frigate at 250m; however, that was larger than we wanted for the scope of the game. Moreover, it didn’t quite fit the desired role, so we worked with Lucasfilm Ltd. and drew upon existing materials to create a new starship that fit seamlessly into the aesthetics and background of the Star Wars universe. “The result was a cross between a Star Destroyer and a single-pilot fighter, something fast and aggressive. 
“The Raider is a starship made specifically for anti-fighter warfare. Its six dual heavy laser cannons proved more accurate against snubfighters than the turbolaser batteries of its Star Destroyer cousins, and the disruptive effects of its ion cannon emplacements, along with the efficiency of its localized command, make it a powerful addition to small strike forces. “It’s also a ship that’s particularly well-suited to fighting alongside a number of TIE Advanced. Both the Raider-class corvette and TIE Advanced are well-suited to quick assault missions. They are both equipped with hyperdrives and enough defenses to stand up to a wide range of threats. They can jump into a sector, launch a quick assault, and then jump away. Then, they can leave after the mission is complete. This makes them ideal vessels for use in the Outer Rim, and this is an idea that you’ll be able to explore even further within the context of the expansion’s campaign.” –Andrew Navaro, Frank Brooks, and Steve Kimball Pushing the Limits of the TIE Advanced

The Imperial Raider Expansion Pack contains one TIE Advanced with an alternate paint scheme.
|
|
While the Raider, itself, is restricted to use in Cinematic Play and Epic Play, the Imperial Raider Expansion Pack also contains a new TIE Advanced miniature with an alternate paint scheme. Originally touted as a replacement for the standard TIE fighter, the TIE Advanced offered a significant number of improvements over the TIE/ln, but it ultimately proved too expensive for mass production. Similarly, in X-Wing, the TIE Advanced is a more powerful and durable starfighter than the TIE fighter, but it comes with a higher squad point cost. For the extra squad points, though, the TIE Advanced offers shielding, the target lock action, and the ability to wield missiles, making it a more versatile and resilient fighter for those talented pilots who can truly take advantage of all that it has to offer. Thus, just as the expansion’s new TIE Advanced is legal for use within the game’s Standard Play, its new pilots and upgrades promote the fighter’s strengths, allowing you to take better advantage of all that its technological enhancements can offer. The Imperial Raider Expansion Pack comes with six ship cards for the TIE Advanced, including four new, unique pilots, and it also introduces two potent, TIE Advanced only upgrades – the TIE/x1 Title and the Advanced Targeting Computer system upgrade. 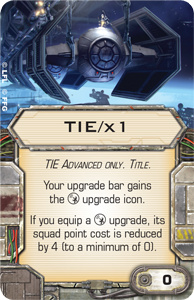 
Together, these upgrades greatly enhance the TIE Advanced’s existing strengths and give the Rebellion far more reason to fear such renowned Imperial pilots as Darth Vader and Maarek Stele. They also give you plenty of reasons to call upon the services of Commander Alozen and the other new ace pilots from the Imperial Raider Expansion Pack. Crush the Rebellion With its Raider-class corvette and TIE Advanced, as well as their many upgrades, the Imperial Raider Expansion Pack is a truly epic addition to any Imperial fleet! You can expect to power up your Raider in the first quarter of 2015. Until then, keep your eyes open for more information about this huge new Imperial ship and its accompanying TIE Advanced. Those Rebel scum won’t stand a chance! ... Source: Here Comes the Imperial Raider (http://www.fantasyflightgames.com/edge_news.asp?eidn=5274)
Title: FFG:New Horizons
Post by: RSSFeeder on 31 December 2014, 23:30:03
New HorizonsHow Order and Chaos Is Helping the Weyland Consortium Save Humanity
“Progress demands sacrifice. Where would humanity be now if we’d refused to pay for all our advances in science and technology? If we refuse to pay more, how will we continue to move forward?”
–Jack Weyland How many barrels of fossil fuel still lie untapped beneath the ground and the oceans? How long have the world’s industries spewed their toxic exhaust into the atmosphere? How many humans can populate the earth before we exhaust the resources we need in order to survive? As we draw closer to the release of Order and Chaos, the third deluxe expansion for Android: Netrunner, there are many Runners and rival corporate execs who still waste their time blaming the Weyland Consortium for all manner of Earth’s many woes.
- They like to cite Weyland’s continued support of its GRNDL division (Fear and Loathing, 97) and its use of Geothermal Fracking (Opening Moves, 17).
- They note that the Weyland Consortium has skewed the corporate landscape by playing hardball time and again, frequently gobbling up its competition in Hostile Takeovers (Core Set, 94) and then using its ties with various government officials to relax any inconvenient antitrust laws.
- Finally, they claim that the Weyland Consortium’s vast fortunes are tainted by the blood of those the megacorp has trampled under foot and buried under the foundations of its buildings. Some make these claims literally; some merely point at the economic disparity between those who live upon the Beanstalk’s royalties and those who live within its shadow.
However, the truth is that the world was broken long before Jack Weyland was born into it. Many generations of scientists and environmentalists had expressed their concerns about dwindling fuel reserves and overpopulation long before Weyland first broke ground for the New Angeles Space Elevator. And while others were looking at the countless families who had their homes obliterated to make room for the Beanstalk’s foundation – or the foundation of some other Weyland Consortium development – Jack Weyland was looking up, past the top of the Beanstalk, out to the stars, and toward the future of humanity. 
Funding the Dream In many ways, the Weyland half of Order and Chaos is about daring to dream. People like to think of Jinteki as the “mysterious” corporation with myriad inscrutable designs, and while Jinteki’s reputation is well-deserved, it’s not the only corporation with designs that aren’t immediately evident. After seeing various aspects of its multiple divisions, people often assume they understand the Weyland Consortium as a whole, but that’s the same as imagining that you know how a thousand-piece puzzle fits together after having seen only a handful of pieces. One of the things we get out of Order and Chaos is a better understanding of what the Weyland Consortium is all about. And our glimpse of the larger puzzle begins with one of the key pieces, the new identity, Titan Transnational (Order and Chaos, 3).  As their motto boasts, the good people at Titan Transnational excel at “Investing in Your Future.” Of course, they’re also investing in their futures and that of the Weyland Consortium as a whole. The returns? You gain two influence and the ability to place an agenda counter upon any agenda you score. As their motto boasts, the good people at Titan Transnational excel at “Investing in Your Future.” Of course, they’re also investing in their futures and that of the Weyland Consortium as a whole. The returns? You gain two influence and the ability to place an agenda counter upon any agenda you score.
Naturally, this means that Titan Transnational decks are likely to feature agendas that allow you to spend agenda counters for various rewards. Thus, your deck is likely to feature some combination of the three existing options – Geothermal Fracking, Project Atlas (What Lies Ahead, 18), and Executive Retreat (Trace Amount, 39) – and the two agendas from Order and Chaos that feature agenda counters, Firmware Updates (Order and Chaos, 4) and High-Risk Investment (Order and Chaos, 7). As we look at what these agendas hold in common, we see that most of them give us money and access to our deck’s key cards. Then we see the ominous exception, Firmware Updates. While the other agendas give us things, this one enhances our ability to keep others from taking our things. In the midst of Weyland’s commercialism, we find a need for greater security. Could it be that there’s more to the Weyland Consortium than the accumulation of wealth? Securing the Dream Of the twenty-four different Weyland cards (by title) in Order and Chaos, eight of them are ice. By far the largest percentage of the faction’s new cards by card type, nearly all of these ice can be advanced – or present the ability to advance other ice. And their prevalence in Order and Chaos points to the fact that Weyland is up to something truly massive and secret. Weyland’s advanceable ice are one of the faction’s signature investments. Ideally, their advancement ensures they provide effective security from turn one through the late game. Some gain strength from being advanced; others gain subroutines. And, now, with Order and Chaos, some have their cost reduced for each advancement counter on them. This new mechanic features prominently upon the expansion’s quartet of space-themed ice, Asteroid Belt (Order and Chaos, 12), Wormhole (Order and Chaos, 13), Nebula (Order and Chaos, 14), and Orion (Order and Chaos, 15).  
Not only is it more efficient, per your standard click to credit ratio, to advance these ice than pay full cost for them, the mechanic plays into a number of other Weyland themes.
- For starters, these ice are strong; the lowest strength among them is the “5” of Nebula, which is still far above average for a sentry.
- You can further increase the efficiency of these ice by running Because We Built It (A Study in Static, 76) as your identity, using renewable credits to pay down on them early. Then, once they’re rezzed, you can use Constellation Protocol (Order and Chaos, 8) to move their advancement tokens to your other ice.
- Finally, Commercialization (Cyber Exodus, 58) ensures that the advancement tokens on your ice are never wasted.
With advanceable ice, you’re always able to build upon your existing defenses, so your security is limited only by your desire to invest. And it’s clear that with six new types of advanceable ice and a Builder (Order and Chaos, 16) to accelerate their advancement, Weyland is investing heavily in security. The inclusion of the new identity, Argus Security (Order and Chaos, 1), is only further proof that the megacorp has something it wants safely hidden from the public. So it’s almost certain that the many people who think they know the Weyland Consortium will soon be surprised. Dreams of the Infinite Where is Jack Weyland leading the Weyland Consortium, and where is the Weyland Consortium taking humanity? The answer: deep space. No longer a member of Weyland’s board of directors, Jack Weyland has nonetheless been given the freedom and resources to pursue his personal ambitions. These ambitions are illustrated by the third of the expansion’s identities, Gagarin Deep Space (Order and Chaos, 2). They’re given further shape by the agendas, Glenn Station (Order and Chaos, 5) and the asset Space Camp (Order and Chaos, 10).  
No one is entirely certain why Weyland has turned his attention so fully toward space, but a handful of the financial analysts following Weyland’s recent deals and interviews suggest that he has come to realize that all the world’s liberal bluster is immaterial. They say he believes it’s not a matter of whether or not the Earth will fail to support humanity; it’s a matter of when. No matter how many steps the world’s nations and leading megacorps may take to slow the pace of environmental degradation and overpopulation, they argue, the world is already a lost cause. So they say that Jack Weyland and the Weyland Consortium are willing to break a few eggs to advance the cause of viable deep space exploration. If humanity is to survive, it needs to find a new home, maybe more than one. It won’t be enough, either, to settle the moon or Mars. No, humanity’s new home will need to be free of its tethers to Earth, as well as its political baggage. It won’t be able to rely upon the resources of a planet whose environment is increasingly unstable, nor one in which an entrenched culture of clan-based hostilities. Humanity needs to find and terraform a virgin planet that can fully support its inhabitants.  Others speculate that, based upon the technologies his division is developing, Weyland’s true goal is to transform the human race into a spacefaring species tied to no planet at all, but free to roam the stars, marvel at their wonders, and search for sentient alien life. One can only imagine how humanity might potentially benefit from the discovery of alien technology, and those who support this interpretation of Weyland’s activities claim that he’s one of the few individuals alive who would dare to dream such a dream. Others speculate that, based upon the technologies his division is developing, Weyland’s true goal is to transform the human race into a spacefaring species tied to no planet at all, but free to roam the stars, marvel at their wonders, and search for sentient alien life. One can only imagine how humanity might potentially benefit from the discovery of alien technology, and those who support this interpretation of Weyland’s activities claim that he’s one of the few individuals alive who would dare to dream such a dream.
Both camps claim that Jack Weyland’s dreams of deep space exploration border on madness, but as they note, that’s a quality shared by the dreams that have inspired all of humanity’s greatest achievements. And they point out that it doesn’t matter if others don’t recognize Weyland’s true ambitions. Weyland left The Board (Order and Chaos, 11) for his dream; not even the company that he founded understands where he’s headed. What matters to Weyland is that his dream survives the world’s petty political and economic turbulence. It needs to survive narrow-minded hackers and their violations of Weyland Consortium servers. And if it does, it can mean that the human race continues to have a future, even after the Earth no longer does. How Will You Defend the Dream? One of the most world’s most divisive figures, Jack Weyland has demonstrated over and over again that he’s willing to do whatever it takes to realize deep space exploration within his lifetime. How will you defend the dream? With bluffs? With powerful ice? Or with retaliatory strikes against those who seek to steal your intellectual property? In Order and Chaos, Weyland execs gain a fantastic array of tools to win the cyberstruggles of Android: Netrunner, and it’s up to you to employ them effectively. Will you help humanity explore new horizons, or will your efforts topple under the weight and scrutiny of a public that’s convinced you belong to a cold-hearted company with absolutely no regard for anything but its own bottom line? ... Source: New Horizons (http://www.fantasyflightgames.com/edge_news.asp?eidn=5275)
Title: FFG:Smoke and Blood and Fire
Post by: RSSFeeder on 01 January 2015, 08:00:08
Smoke and Blood and FireThe Antlered Crown Is Now Available for The Lord of the Rings: The Card Game
“Death to the Forgoil! Death to the Strawheads! Death to the robbers of the North!”
–J.R.R. Tolkien, The Two Towers War has come to the hills of Dunland. The Antlered Crown, the final Adventure Pack in The Ring-maker cycle for The Lord of the Rings: The Card Game, is now available at your local retailer and online through our webstore! As a handful of Middle-earth’s greatest heroes return to Dunland from the ruins of Hollin, they find the region scarred by the battles raging between the different Dunlending clans. The Raven has risen against the Boar, the Wolf waits to choose its side, and their warriors fight and die all across the embattled lands. In The Antlered Crown, as the heroes seek to complete their journey to Isengard, they must ally with the Boar Clan and help defeat the Raven Chief. In The Antlered Crown, these events are given shape by a challenging new scenario that depicts the brutal war that has erupted throughout the hills of Dunland. Amid fields littered with the bodies of the fallen, you must press a new assault deep into the territories held by the Raven Clan and its ferocious warriors. 
At War with the Raven Clan Throughout the scenario in The Antlered Crown, you find yourself racing into pitched battles with the Raven Clan. The scenario features unique rules for the creation of a “Raven deck,” and as you pursue the Raven Chief through the clan’s villages and war-camps, different encounter card effects will allow the enemies from this Raven deck to leap into the staging area and defend their leader. Thus, you not only have to concern yourself with the Time X effects on each of the quest stages, you find yourself strongly encouraged to travel quickly from location to location. Each of the scenario’s locations also features the Time X keyword, and like the Raven War-camp (The Antlered Crown, 155) and Dunland Battlefield (The Antlered Crown, 157) they all introduce threats that weigh far more heavily than their Threat Strengths alone.  
Of course, once you corner the Raven Chief (The Antlered Crown, 151), you then have to defeat him in order to end the war, and that’s no simple task. For starters, the Raven Chief cannot be damaged so long as the Raven Chief’s Camp (The Antlered Crown, 152) is in play, and even after it leaves play, he remains a fearsome warrior with an Attack Strength of five, a Defense Strength of five, and nine Hit Points. Plus, every time he attacks, he removes one time counter from the active location, meaning that he may continue to summon an unrelenting horde of Wild Men to his side. Meanwhile, you gain the aid of the Boar Clan’s Chief Turch (The Antlered Crown, 150), but his aid is almost as much a burden as it is a blessing. Chief Turch is a great warrior in his own right, able to defend without exhausting, and able to attack with an Attack Strength of three. However, should Chief Turch be defeated, you lose the game. Thus, you have to weigh your options carefully any time you might want to use Chief Turch to defend an attack for you; he is “immune to player card effects” and cannot be healed by your cards. Ride to War “Erkenbrand!” the Riders shouted. “Erkenbrand!”
–J.R.R. Tolkien, The Two Towers Beyond its new scenario, the sixty new cards in The Antlered Crown also include the new hero, Erkenbrand (The Antlered Crown, 137), and three copies each of nine new player cards that further develop the Rohan and Ent traits, as well as The Ring-maker cycle’s focus on the Doomed keyword. With additional support from two unique, new Titles, Captain of Gondor (The Antlered Crown, 140) and The Day’s Rising (The Antlered Crown, 139), you’ll find both the Rohirrim and Ents ready to go to war, and they come not a moment too soon. The hills of Dunland are struck by smoke and blood and fire. Your heroes must play their part, and they’ll want all the help they can get. March to war today! The Antlered Crown is now available at your local retailer and online through our webstore! ... Source: Smoke and Blood and Fire (http://www.fantasyflightgames.com/edge_news.asp?eidn=5276)
Title: FFG:Cleared for Launch
Post by: RSSFeeder on 01 January 2015, 16:30:04
Cleared for LaunchThe Stay on Target Ace Sourcebook Is Now Available
Take part in daring raids, thrilling dogfights, and incredible escapes. Stay on Target, an Ace career supplement for Star Wars®: Age of Rebellion™ is now available at your local retailer and in our online store. Stay on Target provides fresh options for Ace characters, along with new vehicles, gear, and ships for your Age of Rebellion campaign. For GMs and non-Ace characters, it contains the material you need to stage a thrilling dogfight in an asteroid belt, send guerrilla troops riding Banthas across the desert, create the bravest Xexto pilot in the Rebel Alliance, or work with an astromech droid to survive an interplanetary battle. 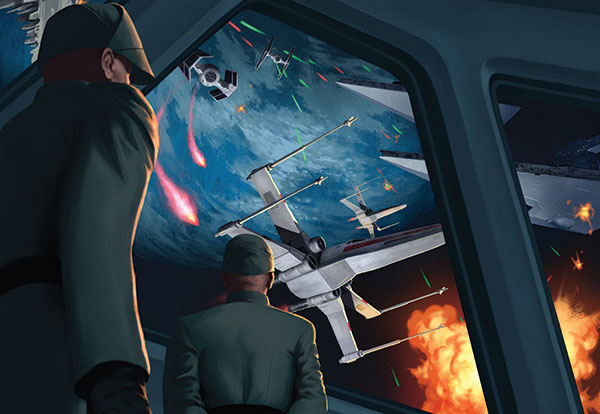
Aces of the Rebellion In our first preview, we looked at the three new species and Ace specializations featured in Stay on Target. You might join the Rebellion as a talkative, meddling Chadra-fan, a six-limbed, speed-addicted Xexto, or a stoic, brave, and soulful Dressellian. Aces with the Rigger specialization are talented engineers capable of modifying their vehicle even in the midst of battle. Hotshots, at home in the pilot’s seat, rely on quick thinking, fast reflexes, and luck to get them out of the tricky situations thay they fearlessly plunge into. Beast Riders are unique among Aces for preferring the wilderness to the inside of a cockpit.  Non-Ace characters can pick up Rigger, Beast Rider, and Hotshot as non-career specializations and create, for instance, a Diplomat with a Riggger’s intuitive mechanical know-how, or a Spy with the piloting skills and recklessness of a Hotshot. Non-Ace characters can pick up Rigger, Beast Rider, and Hotshot as non-career specializations and create, for instance, a Diplomat with a Riggger’s intuitive mechanical know-how, or a Spy with the piloting skills and recklessness of a Hotshot. Aces also get more options for backgrounds and duties. Your Beast Rider may be a former jockey who won fame and money in the Chandrila Equinoid Derby, or perhaps your Rigger worked for a starship manufacturer as a prototype tester and now strives to give the Rebellion technological superiority over the Empire. You might even play a veteran Pilot who flew during the Clone Wars and now travels the galaxy recruiting younger talent. Whatever your background, species, and mix of talents, there’s a role for you within the Rebel Alliance. Starfighters and Fighting Beasts Plenty of new gear, vehicles, starships, and animals are included in Stay on Target. Our second preview looked at a custom-built landspeeder, a heavily armed H-wing, and the durable V-wing. It also looked at two beast mounts: the vicious, feline narglatch and the graceful, avian ruping. A Beast Rider Ace might also choose a Cracian Thumper as a mount. These mammals are easily trained, inexpensive to acquire, and can endure a range of climates. Despite their name, Cracian Thumpers possess a natural stealth, allowing their rider to sneak up on the enemy unnoticed. Any Hotshots, Pilots, or Riggers in your group may be interested in the speedy T-wing or the Heavy-95 multi-role starfighter. The R-60 “T-wing” interceptor is one of the fastest, lightest starfighters available, perfect for dodging asteroids or laser fire from enemy ships. The Heavy-95 is a revised version of the Z-95 Headhunter, rebuilt with faster engines, more firepower, and an astromech droid socket. Both the T-wing and the Heavy-95 have hyperdrive, allowing you to pursue an enemy across the galaxy if you need to. 
Dogfighting in Difficult Terrain Dogfights are where Ace characters truly shine, and an Age of Rebellion campaign is rarely without intense starship combat. Stay on Target expands the guidelines for dogfighting, introducing rules and combat result options for navigating asteroid fields and passing through nebulae of brightly colored, vision-obstructing dust. For example, nebulae have the special feature Where Are We?, which adds extra Setback dice to all Astrogation checks. Guidelines are also provided for staging large space battles in which squadrons of smaller starfighters dart like insects among destroyers, carriers, and other capital ships. Any ship with a silhouette above four is treated as complicated, obstacle-filled terrain. With these guidelines, a full-scale battle involving dozens of ships becomes simple to stage, as long as you focus on the actions of your team of rebels within that battle. 
Take the Controls Stay on Target enables you to play a Hotshot eager to fly into your next dogfight or a Dressellian Soldier galloping across Hoth on the back of a Tauntaun. It provides GMs resources for integrating Ace characters into campaigns, managing astromech droid NPCs, and for staging the most impressive space battles that Age of Rebellion has known yet. Become one of the Rebellion’s risings stars. Get your copy of Stay on Target today! ... Source: Cleared for Launch (http://www.fantasyflightgames.com/edge_news.asp?eidn=5277)
Title: FFG:The End Is Nigh
Post by: RSSFeeder on 02 January 2015, 01:00:03
The End Is NighZombie Apocalypse Is Now Available
“I’ll never forget the first ghoul I saw. I was out driving at night and a deer stepped right in front of the car. I stopped to check the damage and I saw it lit up in the headlights. It was a deer alright, but it was rotten, putrid. It looked like it had been decaying for days. And then it got to its feet – and started coming right at me!”
–Night of the Meteor, Zombie Apocalypse The dead rise from mouldering graves, pushing aside soft earth and shambling out of morgue coolers and ancient mausoleums. The world as you know it is about to end. What lies before you will test you to the utmost… and it’s sure to be fun! Zombie Apocalypse is now available at your local retailer and online through our webstore. Zombie Apocalypse is the first book in The End of the World roleplaying game line. Each book in the line challenges you to survive as the world ends in truly dramatic fashion. Ancient gods may exact their wrath on Earth, aliens from beyond our solar system may invade our atmosphere, or our own technology may develop sentience and turn on us. Naturally, Zombie Apocalypse focuses on the rise of the living dead, and even within that titular theme, there’s plenty of room for different scenarios and adventures. -Plate.jpg)
Can You Survive? Most roleplaying games begin when you and your fellow players create characters to play as in the game. In Zombie Apocalypse and the other books of The End of the World line, you receive the unique invitation to play as yourself in the  midst of the world’s apocalypse! Rather than playing an invented character, you play an abstracted version of yourself, using your own skills and talents as you attempt to survive the end of the world. We gave an example of what this kind of character creation looks like in our first preview of Zombie Apocalypse. midst of the world’s apocalypse! Rather than playing an invented character, you play an abstracted version of yourself, using your own skills and talents as you attempt to survive the end of the world. We gave an example of what this kind of character creation looks like in our first preview of Zombie Apocalypse. Your skills and talents aren’t the only things drawn from your own life and experience. Your gear and weapons are limited to whatever you may have near you when you begin the roleplaying session. Venturing out of your home to find additional weapons or supplies may be one of the first expeditions you must make – and it may also be one of the most dangerous. The daily struggle for survival offers dozens of possibilities for adventure and conflict at the end of the world. Grocery stores or restaurants may be an adequate food source at first, but looters and other survivors will quickly deplete their stockpiles. Even finding clean water can be a struggle as the structures of society shut down one by one. Succeeding at these tasks would test anyone’s skills, and as we explored in our second preview, these tasks are handled with an elegant, narrative system that keeps the focus on the story. Experience the Apocalypse Five different scenarios are featured in Zombie Apocalypse, each presenting a unique take on the zombies that end the world. You may battle infected rage zombies or parasite-ridden humans that hunt with all the cunning of uncontaminated humans. Dark voodoo rituals may provide the impetus for the zombies’ attacks or radiation from a meteor may cause dead humans and animals alike to rise. Of course, the apocalypse doesn’t have to be the end. If you’re careful, you may survive long past the initial outbreak of the zombie apocalypse. Each scenario in the book is split into two parts: Apocalypse and Post-Apocalypse. In the Apocalypse section, Game Masters find information on what the players see and experience in the first hours and days of the zombie outbreak. The truth behind the origin of the apocalypse and details about the zombies are also included in this section, though the players may have to work very hard to discover this information. _Infested-Cow.png)
The Post-Apocalypse section, on the other hand, deals with life after the initial panic and turmoil of the apocalypse have faded. In the Post-Apocalypse, a new “norm” emerges, where humans struggle to adapt to new dangers and eke out a living. In some cases, the Post-Apocalypse may be more dire than the circumstances of the Apocalypse. The land may burn with radiation after nuclear bombs eradicate the zombie plague. A new world order may arise, transforming the world into a dystopia ruled by one man. No matter what happens, both Apocalypse and Post-Apocalypse offer hundreds of possible adventures for you and other survivors! For more information on the scenarios in Zombie Apocalypse, read our third and fourth previews. Shoot for the Head! The end of the world has arrived. Zombies are everywhere, and they’re hungry for your brains. If you want to keep your gray matter intact, you’ll need every skill and talent, and you’ll also need the help of your fellow survivors. Can you survive the end of life as we know it? Gather your friends and enter the apocalypse! Zombie Apocalypse is now available at your local retailer and through our webstore. ... Source: The End Is Nigh (http://www.fantasyflightgames.com/edge_news.asp?eidn=5278)
Title: FFG:Prince of the Underworld
Post by: RSSFeeder on 02 January 2015, 09:30:03
Prince of the UnderworldPreview a Scum and Villainy Objective Set from the Between the Shadows Expansion
“If you cannot afford to lose, you should not play the game.”
–Prince Xizor The shadows offer a perfect place to hide from Imperial attention, and those who dwell there might have the means to obtain illicit technology or favors. Between the Shadows brings new power to the Scum and Villainy and Jedi affiliations for Star Wars™: The Card Game. The Jedi work secretly for the galaxy’s good, while the Scum and Villainy work for the highest bidder. By their very nature, the Scum and Villainy are often found working alone, with loyalties shifting at a moment’s notice. The exception is the massive Black Sun crime syndicate. Uniting pirates, spice runners, information brokers, bounty hunters, and mercenaries, Black Sun rose to unmatched prestige during the events of the Galactic Civil War, largely due to the actions of its leader: Prince Xizor. In our last preview, we explored the power of a fully-trained Jedi with a new version of Luke Skywalker. Today, however, we visit the other side of the shadows to plunge into the darkness of Black Sun and Prince Xizor’s objective set! 
A Black Sun Rises Prince Xizor is a master of schemes and treachery, and his possible plots take life with the Masterful Manipulation (Between the Shadows, 670) objective. This objective has two resources and a Reaction that allows you to use both resources without qualms. Masterful Manipulation bears the text, “Reaction: After your opponent’s turn ends, shuffle this objective back into your objective deck to draw 1 card.” Under normal circumstances, focusing an objective for two resources means it won’t provide any resources on your next turn, but Masterful Manipulation offers you an easy way out. You can use both of this objective’s resources and replace it in your objective deck at the end of your opponent’s turn, granting you new, unfocused resources for your next deployment phase. In addition, if your opponent ever wants to destroy Masterful Manipulation, he’ll have to do it in one turn, before any sign of Xizor’s schemes vanishes into the shadows.  As the ruler of a criminal empire, Prince Xizor (Between the Shadows, 671) is a force to be reckoned with in the galaxy. Your opponent will surely learn to fear Prince Xizor and his massive spread of combat icons. Whether you need to eliminate enemy units, damage an objective, or befuddle your opponent with cunning tactics, Prince Xizor has a way to accomplish all his goals. Not only does he have the elite keyword, his Reaction allows him to capture a card from each opponent’s hand whenever an objective leaves play. Prince Xizor’s ability not only triggers when an objective is destroyed, but also when Masterful Manipulation is reshuffled into your deck, giving you even more access to capturing your opponent’s cards and fueling objectives such as The Findsman’s Intuition (Lure of the Dark Side, 537) or Jabba’s Reach (Edge of Darkness, 374). As the ruler of a criminal empire, Prince Xizor (Between the Shadows, 671) is a force to be reckoned with in the galaxy. Your opponent will surely learn to fear Prince Xizor and his massive spread of combat icons. Whether you need to eliminate enemy units, damage an objective, or befuddle your opponent with cunning tactics, Prince Xizor has a way to accomplish all his goals. Not only does he have the elite keyword, his Reaction allows him to capture a card from each opponent’s hand whenever an objective leaves play. Prince Xizor’s ability not only triggers when an objective is destroyed, but also when Masterful Manipulation is reshuffled into your deck, giving you even more access to capturing your opponent’s cards and fueling objectives such as The Findsman’s Intuition (Lure of the Dark Side, 537) or Jabba’s Reach (Edge of Darkness, 374).
You gain another method to trigger Xizor’s Reaction in Shadows of the Empire (Between the Shadows, 674). By playing this event during your turn, you may place a target enemy objective at the bottom of its owner’s objective deck. For just one resource, you can eliminate threatening objectives ranging from Against All Odds (Lure of the Dark Side, 524), to May the Force Be With You (Join Us or Die, 567), to The Defense of Yavin 4 (Core Set, 138), and trigger Xizor’s ability to boot.  A criminal organization like Black Sun has plenty of ways to get the resources you need, such as by hiring a Debt Collector (Between the Shadows, 673). A Debt Collector can prove useful for defending your objectives and provide the resources you need to pay for the best starfighters. Black Sun also gains a powerful attacker in the Black Sun Headhunter (Between the Shadows, 672). This Fighter is an amazing bargain for two resources, offering four damage capacity, shielding, and high potential blast damage. The best starfighters never come free, though, and you must spend a Scum resource after each deployment phase to maintain the services of the Black Sun Headhunter. With the help of your Debt Collector though, you’ll have the funds to retain the Black Sun Headhunter long-term. A criminal organization like Black Sun has plenty of ways to get the resources you need, such as by hiring a Debt Collector (Between the Shadows, 673). A Debt Collector can prove useful for defending your objectives and provide the resources you need to pay for the best starfighters. Black Sun also gains a powerful attacker in the Black Sun Headhunter (Between the Shadows, 672). This Fighter is an amazing bargain for two resources, offering four damage capacity, shielding, and high potential blast damage. The best starfighters never come free, though, and you must spend a Scum resource after each deployment phase to maintain the services of the Black Sun Headhunter. With the help of your Debt Collector though, you’ll have the funds to retain the Black Sun Headhunter long-term.
This objective set concludes with a new fate card introduced in Between the Shadows: The Prince’s Scheme (Between the Shadows, 675). This fate card contributes only one Force icon to your side, but if you control a participating unique Scum and Villainy unit, you may take a non-fate card from your opponent’s edge stack and place it in your edge stack! Increasing your Force icon total while decreasing your opponent’s means certain victory in many edge battles. Out of Darkness The Between the Shadows deluxe expansion leads you into the shadows of the Star Wars universe to engage in hidden conferences and illicit dealing. Whether you pledge yourself to the Jedi, the Scum and Villainy, or to another affiliation with shadowy interests, you’ll find the cards you need in Between the Shadows. Preorder this deluxe expansion at your local retailer, and check back for more previews! ... Source: Prince of the Underworld (http://www.fantasyflightgames.com/edge_news.asp?eidn=5280)
Title: FFG:Assemble the Fleet
Post by: RSSFeeder on 02 January 2015, 18:00:03
Assemble the FleetA Look at Fleet-building in STAR WARS (TM): Armada
“Hurry. The Alliance should be assembled by now.”
–Leia Organa The Star Wars galaxy is vast. Thousands of space-faring species inhabit millions of worlds. Their diversity is expressed in their technologies, philosophies, and attitudes, and in Star Wars™: Armada, rules for fleet-building allow you to bring a degree of this diversity to your strategies. For starters, in Armada, a starship isn’t just a starship. It’s also a weapon that’s wielded by the pilot who flies it or the crew that operate it. It can be enhanced with weapon upgrades, reinforced hull plating, and better comm systems. You might improve your command ship by outfitting it with an expanded hangar bay, or you might simply improve its performance by hand-picking all your crew members from the most elite talent available.
The Armada Core Set contains ten squadrons, three capital ships, nearly one hundred cards, plus a maneuver tool, range ruler, and all the dice, tokens, and command dials that you need to start battling for the fate of the galaxy!
Ships, Crews, Commanders, and Weapons In Armada, your fleet isn’t just the collection of miniature starships and fighter squadrons that you bring to the table; you also bring a collection of cards that define how your starships will function. These include ship, squadron, upgrade, and commander cards.  Each card has a fleet point cost, indicated by a number in its lower right corner, and in a standard game, you and your opponent can each spend up to a total of 300 fleet points. If you spend fewer fleet points than your opponent, however, you can determine who will have initiative as the first player. Each card has a fleet point cost, indicated by a number in its lower right corner, and in a standard game, you and your opponent can each spend up to a total of 300 fleet points. If you spend fewer fleet points than your opponent, however, you can determine who will have initiative as the first player.
Ship Cards You need a ship card for each ship you bring to battle. Your choice of ship card for a given miniature will impact both its abilities and its weight in your fleet.  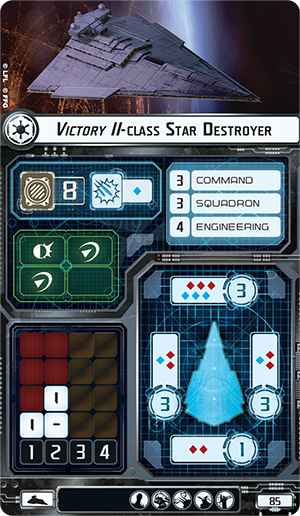
As an example, here we see the ship card for the Victory I-class Star Destroyer (left) presented alongside the ship card for the Victory II-class Star Destroyer (right). The Victory II costs eighty-five fleet points, as opposed to the seventy-five fleet points that you need to spend to add the Victory I to your fleet, and for the extra ten fleet points, you have five of your short-range black dice upgraded to medium-range blue dice, and your upgrade bar changes, losing the missile upgrade option in favor of an ion cannon upgrade slot.
Squadron Cards As noted in our preview of the game’s fighter squadrons, each squadron can be fielded as a non-unique collection of starfighters, or as one led by an ace pilot. Your decision impacts the abilities, defense tokens (if any), and fleet cost of your squadron.  
An X-wing squadron led by Luke Skywalker (left) is far more likely to make a major impact than your standard X-wing Squadron (right), but bringing Luke’s talents to your table will cost you an extra seven fleet points.
Upgrade Cards Upgrade cards come in all forms. You have weapons upgrades, comms upgrades, and crew upgrades, and each ship in your fleet comes with an upgrade bar that indicates what sort of upgrades you can attach to it. For a modest investment of fleet points, each upgrade card introduces a new ability that allows you to customize a ship to better fit into your overall strategy.   
Examples of upgrade cards include the crew member Leia Organa, Enhanced Armament, and the CR90 corvette title, Dodonna’s Pride.
Commander Cards Each fleet needs a commander. Your commander is a special type of upgrade card, and you must assign one commander to one of your capital ships. This ship then becomes your flagship. You can only have one flagship in your fleet, but it can be any of your ships, regardless of the upgrade icons on its upgrade bar. Then, so long as your flagship remains intact, your commander bolsters your fleet with a powerful and unique ability that you’ll do well to incorporate into your strategy. 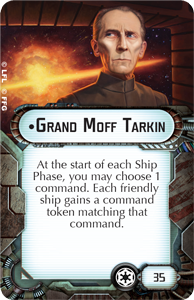 
The Core Set comes with two commander cards. Grand Moff Tarkin bolsters an Imperial fleet by assigning an extra command token to each of its ships at the start of each Ship Phase. Rebel commander General Dodonna, on the other hand, ensures that the faceup damage you deal your enemies will be as impactful as possible.
As you select the specific ship and squadrons that you’ll add to your fleet, along with any upgrades that you intend to use, you begin to form the outline of a larger strategy. As you change your selections, this outline changes. Accordingly, even with a limited number of ship miniatures, you can field an impressively diverse assortment of fleets, each of which may pursue its own strategy in battle. 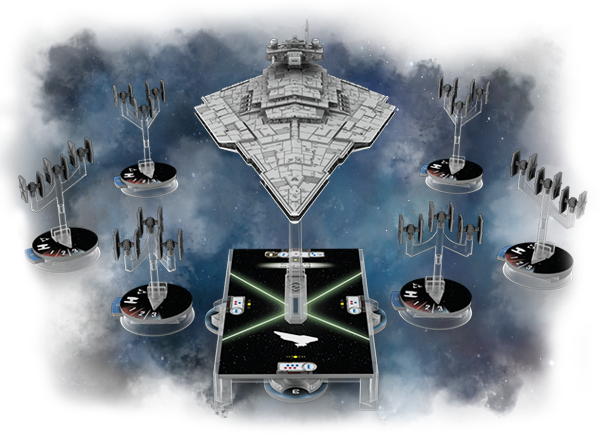
A Victory-class Star Destroyer heads to battle, flanked by six TIE fighter squadrons.
Define Your Objectives Your selection of ships and fighters to fly into battle isn’t accompanied only by your decisions of how to upgrade them and who to assign as commander. There’s another, critical step to fleet-building in Armada. Along with its ships, fighters, and upgrades, your fleet must include three objectives. These add variety to each battle by providing a narrative for why your fleets are fighting each other. Importantly, they also change how you score points, so you want to make sure that your choice of objectives fits into your overall strategy. There are three categories of objectives:
 |
Assault: Assault objectives typically identify one or more ships that are worth extra fleet points when destroyed. |
 |
Defense: Defense objectives encourage you to position your ships so that they control specific sections of the battlefield. |
 |
Navigation: Navigation objectives reward you for maneuvering aggressively and with precision. |
You have to bring one objective from each category. Then, at the beginning of the game, the first player chooses one of the second player’s three objectives to use throughout the game. All other objectives are set aside. Like Most Wanted, each objective introduces additional rules to impact your setup, as well as a number of unique game effects that can shape the course of a game. Additionally, most objectives introduce ways for you to score points that aren’t based solely upon the costs of the ships and squadrons you destroy. Expanded Fleet, Expanded Options For those players who want to explore Armada and its battles beyond the Core Set, the game’s expansion packs increase your options considerably. As you grow your collection with new expansions, their ships, upgrades, and commanders all offer you new options for fleet-building. Already, in our announcement of the first wave of Armada expansions, we’ve had an early look at the Gladiator-class Star Destroyer, the Assault Frigate Mark II, and the other starships that will arrive to retailers at the same time as the Core Set. Each comes with its own strengths, so that you can build the fleet that best suits your tactics. 
Expansions for Armada allow you to incorporate new ships, squadrons, and upgrades into your fleet!
In our next couple previews, we’ll explore the different Wave I ships, as well as their new crews, commanders, and weapons, and we’ll look at how these ships offer different strategic options for your Rebel and Imperial fleets. ... Source: Assemble the Fleet (http://www.fantasyflightgames.com/edge_news.asp?eidn=5281)
Title: FFG:Intercept and Destroy
Post by: RSSFeeder on 03 January 2015, 02:30:03
Intercept and DestroyA Preview of the M3-A Interceptor Expansion Pack for X-Wing (TM)
Our last preview of the sixth wave of X-Wing™ expansions focused on the Virago, a StarViper-class attack platform and one of the rarest and most technologically advanced of all fighters in the Star Wars galaxy. While the Virago is a truly lethal vessel, it is also unique. Only one Virago exists, and even the base StarViper-class attack platform is too expensive for most organizations to field very many of them in their fleets. Thus, as we continue to explore what the Scum and Villainy faction will soon bring to X-Wing and its explosive space battles, we turn our attention toward another starfighter with much lower production costs, the M3-A “Scyk” interceptor. Like the StarViper-class attack platform, the Scyk was produced by MandalMotors, but it was the product of a very different design philosophy. 
A 360-degree view of the M3-A “Scyk” interceptor.
The Scyk is a lightly armored and lightly shielded interceptor that features tremendous customizability, and its low cost made it a favorite of the Hutt Cartel and Car’das smugglers, who purchased it in large quantities. Accordingly, the ship enters X-Wing as an agile, but lightly armored, starship with two attack, three agility, two hull, and one shield. Piloted by a Cartel Spacer, the cheapest of these Scyk interceptors costs you only fourteen squad points. This is the sort of efficiency that makes the Scyk a good fighter to form the backbone of your Scum fleet, but the other reason so many of the galaxy’s Scum found the ship so attractive is that it can easily be upgraded to a “Heavy Scyk” Interceptor, meaning the ship can easily be outfitted to perform an astonishingly wide variety of roles. The “Heavy Scyk” Interceptor  For two squad points, the “Heavy Scyk” Interceptor Title allows you to add one of three possible upgrade icons to your upgrade bar: missile, torpedo, or cannon. For two squad points, the “Heavy Scyk” Interceptor Title allows you to add one of three possible upgrade icons to your upgrade bar: missile, torpedo, or cannon.
While the Scyk’s speed and agility give it a good chance of getting in close to its target to deliver a payload of Cluster Missiles or fire an Advanced Proton Torpedo, it’s the heavy Scyk’s ability to wield a cannon that really maximizes its versatility and buys it a unique place in your Scum squadrons. Imagine, for just twenty-three squad points, your heavy Scyk could wield the Heavy Laser Cannon from the Slave I™ Expansion Pack and serve as a menacing flanker, capable of battering foes with attacks of four dice from Range 2–3. However, that’s just the beginning, especially since the M3-A Interceptor Expansion Pack comes with three different cannons, two of which are new to the game.
 |
A heavy Scyk could equip an Ion Cannon for as few as nineteen squad points. This option increases the number of attack dice the ship rolls, from two to three. While the Ion Cannon can’t deal more than a single damage in one shot, it negates the defender’s bonus defense die at Range 3, and it adds an element of control to your ship and squad that very likely enhances the effectiveness of your remaining eighty-one squad points… especially if the rest of your squad includes ace HWK-290 pilot Dace Bonearm. |
 |
Alternatively, the “Mangler” Cannon is an excellent option for any squad built to concentrate its fire on a single target, blast through its shields, and remove it from the battle. While the “Mangler” Cannon doesn’t increase your odds of scoring damage, directly, it does significantly increase your odds of ensuring that the damage you deal goes further toward crippling your foe, either with a Direct Hit or another devastating effect like Weapon Malfunction. |
 |
Meanwhile, the Flechette Cannon offers an attack and effect comparable to that of the Ion Cannon, but it costs just two squad points and doesn’t deal an ion token to its target. Instead, any unstressed ship hit by a Flechette Cannon receives one stress token. |
While the unmodified Scyk is a quick and efficient fighter capable of avoiding enemy fire long enough to make an impact in battle, the heavy Scyk’s ability to equip any of these cannons – or missiles, or a torpedo – ensures that you’ll be able to field your Scyk in whatever way best suits your squadron and strategy. Better to Be Slippery Than Dead While the heavy Scyk’s cannons, torpedoes, and missiles can greatly increase your Scum squadron’s firepower, the M3-A interceptor’s ace pilots can significantly bolster its defenses. In our earlier previews, we’ve stressed how aggressive and selfish the Scum faction’s pilots are. We’ve looked at how some of them steal tokens from their rivals or deflect damage to their wingmates, and we’ve explored how many of their abilities work best when they fly out of formation.  However, as much as we’ve stressed how selfish these pilots are, we’ve also stressed how much they’re focused on self-preservation, and the M3-A interceptor’s aces stress this latter theme more than the others, as their unique pilot abilities do less to further boost the firepower their ship can gain through its upgrades and do more to ensure they can survive multiple rounds of combat in a fighter with no more combined hull and shielding than a TIE/ln. However, as much as we’ve stressed how selfish these pilots are, we’ve also stressed how much they’re focused on self-preservation, and the M3-A interceptor’s aces stress this latter theme more than the others, as their unique pilot abilities do less to further boost the firepower their ship can gain through its upgrades and do more to ensure they can survive multiple rounds of combat in a fighter with no more combined hull and shielding than a TIE/ln.
For instance, elusive pilot Laetin A’shera gains one evade token each time he successfully evades an incoming attack. Accordingly, he excels in situations where your Scyks may be called upon to race toward a number of opposing ships flying in formation or in which he may have to whittle down the defenses of a ship like the Firespray-31 or YT-1300 that can call upon a Gunner to launch a secondary attack whenever its first attack fails to connect. Typically, these Gunner-enabled attacks catch ships after their defensive tokens have been stripped away, but that will never be the case for Laetin A’shera. If you give him a Stealth Device, he may even prove so slippery that your opponent will simply focus his attacks elsewhere… even if Laetin A’shera is launching attacks of four dice each with his Heavy Laser Cannon. Meanwhile, despite the fact that most Scum pilots look upon formation tactics with an attitude approaching disdain, Serissu encourages them. The most skilled of the Scyk pilots, Serissu spends most of her time training other pilots, so it’s only natural that she wants to help them survive, especially if it that increases her chances of survival, as well. Since Serissu’s ability works for her allies, but not for herself, she benefits from making herself as small and slippery a target as possible. Give her a Stealth Device and flank her with wingmates that each present far more enticing targets; when you present your opponent with the choice of firing at a three-agility ship that can fire at you from Range 3 for four dice or a four-agility ship that only attacks for two dice, you ensure that there’s no satisfying outcome for your opponent’s attacks. In X-Wing, you never want to overlook any means of forcing or luring your opponent into making suboptimal decisions in the heat of battle. Whatever You Want It to Be With its speed, agility, and heavily customizable firepower, the M3-A “Scyk” interceptor more than compensates for its minimal hull and shields. Moreover, there’s the fact that you can configure it to play very nearly any role within your squadron that you desire. Remember, the Hutts were feared throughout the galaxy for a reason, and the starfighter that formed the spine of their fleet was a good part of that reason. The time is fast approaching when you’ll be able to field your own Scum fleet, and you’ll do well to follow the Hutts’ example and consider how the Scyk can play its part.
In the meantime, as you wait for the release of the M3-A Interceptor Expansion pack and the other X-Wing Wave VI expansions, join the other fans on our community forums and discuss how you plan to incorporate your Scyk into your Scum squadrons! ... Source: Intercept and Destroy (http://www.fantasyflightgames.com/edge_news.asp?eidn=5282)
Title: FFG:What Little Is Known for Certain
Post by: RSSFeeder on 03 January 2015, 11:00:04
What Little Is Known for CertainAn Overview of the Jinteki Corporation by Guest Writer El-ad David Amir
At the core of Android: Netrunner are its asymmetrical cyberstruggles, waged between Corp and Runner as they race to score agenda points. However, even though these battles play out primarily over the solar system’s omnipresent network, they aren’t without character. Both Corp and Runner must identify with one of the game’s seven factions, and by coming to understand what you can expect from these factions, and by learning to identify their strengths and weaknesses, you can improve your deck-building and play. You can play to your faction’s strengths, and you can watch for your opponent’s likely next move. In previous articles, we’ve presented overviews of the Anarchs, Shapers, and NBN. Today, guest writer El-ad David Amir explores the mysteries of Jinteki, the undisputed Corporate masters of the shell game. 
Guest Writer El-ad David Amir on the Mysteries of Jinteki Suspicions abound regarding Jinteki’s true corporate vision. Even on the inside, few individuals enjoy a full picture of the company’s larger ambitions. Yet, occasionally, a Runner may successfully escape Jinteki’s servers with a fragmented piece of the larger puzzle. So far as anyone can tell from putting these pieces together, the reality of Jinteki is both fascinating and mortifying: human cloning and the bioengineering of psychics stands alongside the development of groundbreaking drugs and medical techniques. A leader in nearly every form of bioscience, Jinteki routinely brings the most esoteric realms of fantasy within the realm of science, and while the corp claims it’s working to lead humanity into a brighter future, critics worry that Jinteki’s goals are much more perverse. They fear that the corp may actually be working to completely obsolete the human race. Meanwhile, public opinion shifts daily, as the newscasts condemn Jinteki’s unethical treatment of clones on one day only to praise its advancements in medicine on the next. 
In Android: Netrunner, a Jinteki player’s strategy mirrors the Corp’s duality. Jinteki’s cards support two complementary strategies and allow the Corp to shift between them effortlessly. Played properly, Jinteki can confuse even the most skilled runners… or leave them conveniently hospitalized in a Jinteki mental health clinic, their brains turned into mush. Death by a Thousand Cuts The first approach to Jinteki, symbolized by the black tree of Personal Evolution (Core Set, 67), is the death by a thousand cuts. As Runners explore your various servers, their hands are slowly eroded. Neural Katana (Core Set, 77), Data Mine (Core Set, 76), and House of Knives (Honor and Profit, 4) are just a few of the tools that the black tree uses.  
If a Runner makes even a tiny misstep or a slight miscalculation, a chain of Neural EMPs (Core Set, 72) can easily end the game. If the Runner waits too long, Chairman Hiro (Honor and Profit, 8) and a Ronin (Future Proof, 112) can drop him into the negative. Even when Runners take care to refill their hands, the ceaseless net damage may hit key components of their rigs, slowing them down and allowing you to win via the more traditional agenda victory. The Mask of Benevolence  Through the looking-glass we find the white tree of Replicating Perfection (Trace Amount, 31), which offers another take on Jinteki based around the concept of work compression. To quote George Hollis, who first shared the idea with the Android: Netrunner community, work compression is “the ability to use clicks for actions across multiple turns, and then to force the runner to match you click-for-click within the space of a runner’s single turn.” Through the looking-glass we find the white tree of Replicating Perfection (Trace Amount, 31), which offers another take on Jinteki based around the concept of work compression. To quote George Hollis, who first shared the idea with the Android: Netrunner community, work compression is “the ability to use clicks for actions across multiple turns, and then to force the runner to match you click-for-click within the space of a runner’s single turn.”
Instead of playing as efficiently as possible, you play to capitalize upon the crucial moment in which you can overflow the Runner. Nisei Mk II (Core Set, 68) and Caprice Nisei (Double Time, 114) are two keys to this approach as they force repeated runs on your remote in an attempt to steal the agenda. Net damage remains an important weapon. Even if you’re not trying to flatline the Runner with the work compression deck type, a well-timed Snare! (Core Set, 70) will force the Runner to waste time on drawing up and removing the tag. This is wasted time that you can take advantage of by installing and advancing an agenda like NAPD Contract (Double Time, 119). Place it behind Chum (Core Set, 75), Komainu (Honor and Profit, 17), and a layer of mystery ice, and it should be quite safe. The white tree’s chief deception is its apparent benevolence, but make no mistakes: It’s just as ruthless as its black twin. Running the Shell Game An important common thread through Jinteki’s various decks is the diversity of their agendas and their highly varied abilities. The Future Perfect (Honor and Profit, 7) is nigh untouchable. If you can chain the effects of Nisei Mk II and Unorthodox Predictions (Mala Tempora, 53), you can force the Runner into a perpetual time-out. Finally, Braintrust (What Lies Ahead, 14), Medical Breakthrough (Honor and Profit, 5), and Clone Retirement (Second Thoughts, 32) open a fast-advance option for the Corp, taking you from zero to seven in a flurry of turns.  
Along with your array of potent ambushes and highly virulent agendas, these agendas and their abilities force Runners into all sorts of bad places. Runners can never ignore Jinteki’s install-advance-advance. Let’s examine typical builds for each of Jinteki’s play styles. As its name implies, the “Cambridge Jin” is the deck played to victory at the 2014 Cambridge Regional Championship. It uses Mushin No Shin (Honor and Profit, 15) to set up either a Ronin or a Cerebral Overwriter (Creation and Control, 9). As its remotes fill up with more and more assets, the “Cambridge Jin” forces the Runner into an unenviable dilemma: Run and risk massive brain damage, or stick to the relatively safe remotes and race the inevitable double-Ronin. This deck is a painful clock of tiny, never-ending cuts, with a core of several notable cards: 
- 3x Ronin
- 3x Cerebral Overwriter
- 3x Mushin Nu Shin
- 3x Psychic Field (Honor and Profit, 10)
- 3x House of Knives
Next is the Replicating Perfection “Glacier” deck, a powerhouse that might just be the strongest Corp deck from the 2014 tournament season. “Glacier” takes its time to defend its central servers, relying on massive economy and self-defending agendas to block the runner at every turn. Eventually it sets up a nigh-impregnable remote, featuring Caprice Nisei, Ash 2X3ZB9CY (What Lies Ahead, 13), or both, and wins by advancing agendas in the span of the following three to four turns. 
Of course, as Jinteki excels at switching seamlessly from one approach to another, it is possible to create powerful decks that combine the two strategies. Using the slim, tight clock forced on the Runner by Harmony Medtech (Honor and Profit, 1), the following build utilizes cheap agendas, fast ice, a combination of ambushes, and Trick of Light (Trace Amount, 33). Combining these results in a lightning-fast deck that can steal the victory from under the most confident of Runners. 
- 3x Braintrust
- 3x Trick of Light
- 3x Paper Wall (Mala Tempora, 59)
- 2x Plan B (Honor and Profit, 23)
- 2x Shi.Kyu (Honor and Profit, 11)
One Point of Clarity in a Fog of Uncertainty Jinteki is one of the world’s most commonplace names. The megacorp’s stupefying array of technological advances touches on nearly every aspect of daily life, yet very little is known about the work it performs behind closed doors. Chairman Hiro has shared very little information about the company’s vision, and the jury is still out on the ethical implications of its practices. The situation in Android: Netrunner, however, is much clearer. Jinteki is a powerful force with which to be reckoned. ... Source: What Little Is Known for Certain (http://www.fantasyflightgames.com/edge_news.asp?eidn=5283)
Title: FFG:Facing the Dragon
Post by: RSSFeeder on 03 January 2015, 19:30:03
Facing the DragonPreview Lord Hawthorne and the Crypt Dragons from Guardians of Deephall
The village of Deephall stands in dire need. Its dead rise as mindless zombies, animated by the magic of dark priests. Four heroes defend the city’s walls, but strength alone will not be enough to save Deephall. To put an end to this evil, the heroes must venture into the icy caverns high above the city and find a mysterious pendant that may hold the key to Deephall’s woes. Like other Hero and Monster Collections for Descent: Journeys in the Dark Second Edition, Guardians of Deephall offers thirteen sculpted plastic figures previously available only through the first edition of Descent. Now, these figures have been brought in line with the aesthetics of the second edition with new sculpts and artwork. Within this expansion, you’ll find four heroes, two crypt dragons, three wendigos, and four dark priests, as well as two brand-new quests: Guardians of Deephall and The Curse of Iona.
In our last preview, we took a closer look at Silhouette and the wendigo monster group. Today, we turn to the martial prowess of Lord Hawthorne and the terrifying presence of the crypt dragons! Sworn to Defend Years ago, Lord Hawthorne and his men lay under siege in Seragart. When they poured from the city gates in a final sortie, few expected victory. But the throng of barbarians fell beneath Lord Hawthorne’s blade, leaving their sorcerous warlord scrambling to retreat. Lord Hawthorne pursued the rout and closed in on the dark mage, but only severed a corner of his cloak. Lord Hawthorne swore then that his opponents would never again escape his blade. He has never broken his oath, and now he has sworn to protect the city of Deephall or die in the attempt! As a Warrior, Lord Hawthorne brings overwhelming strength to your quests, cutting down the deadly monsters of the overlord wherever they may stand. In combat, Lord Hawthorne is renowned for his mastery of greatswords and other enormous weapons. His hero ability grants Reach to all of his Melee weapon attacks, enabling you to attack foes up to two spaces away. This added range for Melee weapons makes Lord Hawthorne a powerful force, especially in the tight corridors and cramped confines of a dungeon. 
Lord Hawthorne deals even more damage to monsters by using his heroic feat at the opportune moment. As an action, he may use his heroic feat to attack, move up to two spaces, and perform another attack against a different target! With two attacks and added mobility, Lord Hawthorne can cut through a variety of monsters. What’s more, Lord Hawthorne’s hero ability applies to these attacks, increasing the range of this heroic feat even more. As a cunning warrior and a deadly combatant, Lord Hawthorne’s blade could make the difference between victory and defeat in Deephall. Hoarded in Darkness Many of the overlord’s monsters join the assault on Deephall directly, but some lurk in the shadows instead, such as the fearsome crypt dragons. While other dragons hoard items for their great value or shining brilliance, crypt dragons are far more interested in items of great magic or fate. These powerful artifacts have been known to carry dreadful curses and terrorize settlements near the tombs and graveyards where these beasts build their hoards. The presence of crypt dragons in the caverns above the city may hold a clue to the source of Deephall’s woes. Crypt dragons are formidable in battle, and when you play as the overlord, you can call upon their dread power to send the heroes fleeing in terror. All crypt dragons can attack at range, spending surges to deal extra damage. They can also spend a surge to grant Blast to their attacks, allowing every blast of black fire to affect large groups of figures. Crypt dragons also share a Horrifying visage. Every hero adjacent to a Horrifying monster suffers from reduced willpower, making him more susceptible to the overlord’s tricks and deception.  
Master crypt dragons offer another option for taking advantage of the heroes’ compromised willpower. As an action, a master crypt dragon can Cause Fear, forcing an adjacent hero to test his willpower. If the hero fails, he must flee two spaces away from the monster and become immobilized. By keeping the heroes from moving closer to the quest’s objectives, your crypt dragons may become a crucial part of the overlord’s monstrous army. Salvation or Ruin The city of Deephall lies in your hands. Will you defend its walls as a hero, slaying foul monsters at every turn? Or will you command dark priests, wendigos, and crypt dragons in unceasing assault until Deephall is brought to ruin? The choice is yours in Guardians of Deephall, a new Hero and Monster Collection for Descent: Journeys in the Dark Second Edition! Look for Guardians of Deephall at your local retailer soon! ... Source: Facing the Dragon (http://www.fantasyflightgames.com/edge_news.asp?eidn=5284)
Title: FFG:Domain of the Master
Post by: RSSFeeder on 04 January 2015, 04:00:08
Domain of the MasterPreview a Jedi Objective Set from the Between the Shadows Expansion
“Mudhole? Slimy? My home this is!”
–Yoda, Star Wars: The Empire Strikes Back
Journey into the most secret parts of the Galactic Empire in the Between the Shadows deluxe expansion for Star Wars™: The Card Game. Among the cards of this expansion, you’ll find plenty of new cards for the Jedi and Scum and Villainy affiliations, as well as others who engage in shadowy operations. The Scum and Villainy of the galaxy thrive on their back-alley deals and secretive crimes, while the Jedi seek to keep their flame alive and undermine the servants of the dark side. When we announced Between the Shadows, we previewed the most feared bounty hunter in the galaxy: Boba Fett. Then, in our first preview, we looked at a new version of Luke Skywalker – much more experienced in the ways of the Force. We delved into the Black Sun criminal empire and its leader, Prince Xizor, in our second preview. Today, however, we journey deep into the swamps of Dagobah to see the united power held by a group of Jedi in Yoda’s objective set. 
Into the Swamp Mixing two affiliations in one deck in Star Wars: The Card Game has a number of benefits, but under certain circumstances, an undiluted affiliation can prove the most powerful. In Between the Shadows, the Jedi can be strongest when facing the dark side as a single united force. Together, the Jedi seek victory by relying on their steadfast commitment to and their intimate knowledge of the Force.  Your path to gaining the benefits of a unified group of Jedi begins with the objective of this set, The Master’s Domain (Between the Shadows, 638). This objective produces resources equal to the number of Jedi objectives that you control. Because of this ability, if you have only Jedi objectives in play, you could potentially generate three resources from this one objective, greatly increasing your ability to pay for units and powerful events. Your path to gaining the benefits of a unified group of Jedi begins with the objective of this set, The Master’s Domain (Between the Shadows, 638). This objective produces resources equal to the number of Jedi objectives that you control. Because of this ability, if you have only Jedi objectives in play, you could potentially generate three resources from this one objective, greatly increasing your ability to pay for units and powerful events.
You’ll find more rewards for creating a deck using only Jedi objective sets with a new version of Yoda (Between the Shadows, 639). This Yoda possesses the elite keyword and a massive amount of Force icons, similar to his past incarnations. The true power of this unit, however, is that he gains an edge-enabled tactics icon for each Jedi objective you control. With that many tactics icons, Yoda rivals the power of Emperor Palpatine (Core Set, 51). The amount of Force icons within a pure Jedi deck makes winning the edge much easier, and cards like The Flight of the Crow (Knowledge and Defense, 543) help you further develop the edge prowess of your unique Jedi units. The Bogwing (Between the Shadows, 640) is another card that only grows stronger with more Jedi objectives in play. This free Creature has a damage capacity of X, which is equal to the number of Jedi objectives in play. As an added bonus, a Bogwing gains a unit damage if you have three or more Jedi objectives, making it an inexpensive and efficient defender. To help you keep your units safe when defending or attacking, this objective set also includes a copy of Lightsaber Deflection (Between the Shadows, 89), a free event that deflects one point of damage onto another unit.  A group of Jedi sharing a united purpose are always a power to be reckoned with, and their commitment to the Force cannot be underestimated. You gain another tool to keep control of the Force struggle in Yoda’s Hut (Between the Shadows, 641). This enhancement provides a resource, but if you control at least three Jedi objectives, Yoda’s Hut also contributes two Force icons to your side during the Force struggle. This enhancement offers you an easy and inexpensive way to keep control of the Force, giving you time to control the game and deal extra damage from holding the Force. A group of Jedi sharing a united purpose are always a power to be reckoned with, and their commitment to the Force cannot be underestimated. You gain another tool to keep control of the Force struggle in Yoda’s Hut (Between the Shadows, 641). This enhancement provides a resource, but if you control at least three Jedi objectives, Yoda’s Hut also contributes two Force icons to your side during the Force struggle. This enhancement offers you an easy and inexpensive way to keep control of the Force, giving you time to control the game and deal extra damage from holding the Force.
The final card in this objective set is a brand-new fate card, The Jedi’s Resolve (Between the Shadows, 642). When played in an edge battle, this fate card contributes two Force icons, but its ability is even more potent. If you control a participating unique Jedi unit in the engagement, this card lets you set the Balance of the Force to the light side and skip the Force phase this turn. For the maximum effect, you should play this fate card while defending one of your opponent’s attacks. By skipping the Force phase on your opponent’s turn and depriving him of the chance to commit any of his units, you ensure that the Balance of the Force rests with you at the beginning of your next turn. The Deepest Commitment Whether you follow the way of the Jedi and defend the galaxy, or use your bounties and illicit practices to turn a profit, you’ll find plenty of new cards in Between the Shadows. Enter the shadows of the Star Wars universe when Between the Shadows releases at retailers everywhere next week! ... Source: Domain of the Master (http://www.fantasyflightgames.com/edge_news.asp?eidn=5285)
Title: FFG:A New Year of Gaming
Post by: RSSFeeder on 04 January 2015, 12:30:04
A New Year of GamingHappy New Year from Fantasy Flight Games.png) Today marks the close of 2014, and Fantasy Flight Games is thrilled to see the end of another great year of games. We’re incredibly thankful to all of you for your support! Today marks the close of 2014, and Fantasy Flight Games is thrilled to see the end of another great year of games. We’re incredibly thankful to all of you for your support!
A new year is just around the corner, and as you play your old favorites, you can be sure there’s plenty of new games to be revealed in the coming year. The Fantasy Flight offices will be closed on New Year’s Day as our employees ring in the new year, but we’ll be back on January 2nd to enter a brand new year of gaming alongside you. Thank you for an amazing 2014, and we're wishing all of you an even better 2015! ... Source: A New Year of Gaming (http://www.fantasyflightgames.com/edge_news.asp?eidn=5286)
Title: FFG:Let Mac and PC Enter the Fray
Post by: RSSFeeder on 04 January 2015, 21:00:03
Let Mac and PC Enter the FrayVote for BattleLore: Command on Steam GreenlightBattleLore: Command is now up for voting in Steam Greenlight. Go to the game’s Greenlight page and vote now to make this tactical combat game available for PC and Mac OSX! Currently available for iOS and Android, BattleLore: Command puts you in charge of a formidable, fantastical army fighting epic fantasy battles. The game’s single-player mode places you in command of the brave Daqan forces as they wage war against the bloodthirsty invading Uthuk Y’llan. In the skirmish mode, you can lead either the Daqan or the Uthuk Y’llan army into battle against either the computer or against a friend. Each skirmish mission tests your strategic skills with a unique objective and allows you to muster a specific set of units suited to the battle at hand. Using the 3D view with a zoom lens, you can see the action from anywhere on the field, taking in the entire battle at once or experiencing a single fight up close.
The PC and Mac versions will feature online multiplayer capability for the skirmish mode. An update will also soon bring online multiplayer to iOS and Android, so that you can go head-to-head against another commander based anywhere in the world. Praise for BattleLore: Command The iOS and Android versions of BattleLore: Command are already earning acclaim for intense strategic gameplay and stunning graphics. Dave Neumann of Pocket Tactics praises the “wonderfully deep strategic experience” of playing BattleLore: Command. He writes that it “can take its place in the pantheon of must-have games for iOS or Android. It has the feel of a wargame or miniatures game, but is far more accessible and easy to learn.” Matt Thrower of Pocket Gamer calls it “a sharp, effective strategy game… wrapped up in an attractive envelope of graphics and sound” with a “peerless single player mode.” Finally, in his review for Board Game Geek, Bradley Cummings says the game is “downright gorgeous” and “cannot be missed,” naming it “one of the best of the year.” 
Take Command You can already download BattleLore: Command from Google Play and the iTunes App Store. With your support on Steam Greenlight, it will soon become available for Mac OSX and PC. Visit the BattleLore: Command Greenlight page and vote today! ... Source: Let Mac and PC Enter the Fray (http://www.fantasyflightgames.com/edge_news.asp?eidn=5287)
Title: FFG:Visions of Dawn
Post by: RSSFeeder on 05 January 2015, 05:30:08
Visions of DawnAnnouncing a New Hero and Monster Collection for Descent Second Edition
The ogres and trolls of Terrinoth have long warred between themselves, keeping them from presenting any threat to organized armies. But now, a truce has been forged, sworn on the skull of Ig’thalea, the warrior-priestess who shattered the last alliance between ogres and trolls. A foul army of ogres and trolls will sweep across Terrinoth unless a small band of heroes ends this alliance before it truly begins. Fantasy Flight Games is proud to announce Visions of Dawn, a new Hero and Monster Collection for Descent: Journeys in the Dark Second Edition! Trolls and ogres are two of the largest and most belligerent monsters in Terrinoth. Only their age-old hatred for each other has safeguarded the innocent from their depredations. Now, this ancient war has been supplanted by a budding alliance. In Visions of Dawn, you can lead an army of ogres and trolls to rampage across the land, or you can be one of the noble few to stand in their way. 
Contains two ogres, two trolls, two manticores, and four heroes.
Visions of Dawn offers ten plastic figures previously only available through the first edition of Descent. You may take up arms with four heroes of the realm: Master Thorn, Nara the Fang, Ispher, and Sir Valadir. You may play as the overlord, commanding a monstrous legion composed of ogres, trolls, and manticores. To expand your experience as hero or overlord, this Hero and Monster Collection offers two brand new quests, Trucebreaker and Visions of Dawn, each challenging you to quest and battle for the future of the realm. Reptilian Endurance One hero to join your battle in this expansion is Ispher. Screams of terror are nothing unique for him: they follow him to each new town and village. He has been mistaken for a bandit, a monster, and most memorably, the incarnation of a spirit that ate disobedient children. Often attacked or turned away, only the wise find a brilliant healer with a caustic sense of humor. No stranger to irony, Ispher has commonly saved those who mocked him just an hour earlier. Now, Ispher has but one goal: to use his arts to destroy the true, unbridled cruelty of the overlord. Ispher’s healing arts are unparalleled, even among other Healers. Many Healers are forced to take time away from healing the party to tend their own wounds, but Ispher avoids this delay with his natural regenerative properties. Ispher’s hero ability keeps him from ever becoming poisoned, and it also allows him to recover two damage at the start of his turn. With this constant healing to rely on, Ispher has plenty of time to keep the rest of the party hale. 
Ispher also features a powerful heroic feat that can turn the tide of battle in an instant. Once per encounter, Ispher may use an action to choose himself or an adjacent hero. The chosen hero immediately recovers eight damage and removes all conditions! This sudden surge of health allows any hero to work towards his objectives, instead of wasting crucial actions healing. Combined with his hero ability, Ispher’s heroic feat invites you to recover an unprecedented amount of damage every turn, keeping every hero ready for action. Hungry for Flesh The heroes will need every bit of healing they can muster when facing monsters as terrifying as the ogres. Always eager for their next crime, ogres tend to carve out territory near small villages or deserted roads, where they can isolate potential prey. Once an ogre has cornered its victim, only a mighty warrior can hold out long against the ogre’s staggering blows. Even those who survive rarely do so in one piece. In battle, an ogre is a fearsome opponent, easily rending a hero limb from limb. Ogres can spend a surge to deal additional damage, and they can also use surges to trigger the Knockback ability. Knockback allows an ogre to cast a hero up to three spaces, potentially throwing him into hazardous terrain or separating him from his comrades. When ogres prowl the darkness, a hero alone is often as good as dead.  
Heroes like Ispher are not the only creatures that can practice healing in Visions of Dawn. Master ogres take vitality from the blood of heroes, as evidenced by the Fleshmonger ability. The first time an ogre deals damage to a hero, you may take one of his hero tokens and place it on the ogre’s Monster card. For each hero token on its card, the master ogre gains two additional health, allowing it to swell its already formidable health by attacking numerous heroes. These abilities make ogres dangerous on their own, but when they fight side-by-side with trolls, all of Terrinoth may tremble. A Dark Alliance For the first time in living memory, trolls and ogres have joined forces. Should they solidify their peace treaty, darkness will roll across the land. Take up your swords and fight for the dawn in this new Hero and Monster Collection! Visions of Dawn will be available in the second quarter of 2015. ... Source: Visions of Dawn (http://www.fantasyflightgames.com/edge_news.asp?eidn=5288)
Title: FFG:Secrets Bought with Blood
Post by: RSSFeeder on 05 January 2015, 22:30:03
Secrets Bought with BloodSecrets and Schemes Is Now Available for A Game of Thrones: The Card Game
“Any friend of Varys the Spider is someone I will trust just as far as I can throw him.”
–George R.R. Martin, A Dance with Dragons The Seven Kingdoms are rife with turmoil and intrigue. The Great Houses of Westeros plot and scheme, playing their game of thrones. In this world, secrets are weapons just as dangerous as swords or bows. Join the battles and intrigues with Secrets and Schemes, the first Chapter Pack of the Wardens cycle for A Game of Thrones: The Card Game, now available at your local retailer! In this Chapter Pack, you get your first taste of the upcoming Wardens cycle. This cycle brings plenty of House Arryn cards down from the Eyrie to join the fight for the Iron Throne, while offering new support for your trait-based decks. At the same time, every House gains new Limited Responses, powerful abilities that can only be triggered once per round. Each House has new secrets and tactics prepared, and this expansion gives you the chance to use them all. 
Deadly Weapons  Two of the Limited Responses found in Secrets and Schemes come in the form of deadly Weapons, wielded by renowned warriors. The first of these weapons is Red Rain (Secrets and Schemes, 6), the Valyrian steel sword of House Drumm. In A Game of Thrones: The Card Game, this deadly sword can only be wielded by a unique Greyjoy character, but its Limited Response dramatically increases the havoc the attached character wreaks in challenges. After the character wielding Red Rain is declared as an attacker, you may choose a character controlled by the defending player. If you then win the challenge by four or more Strength, the chosen character is discarded from play! Two of the Limited Responses found in Secrets and Schemes come in the form of deadly Weapons, wielded by renowned warriors. The first of these weapons is Red Rain (Secrets and Schemes, 6), the Valyrian steel sword of House Drumm. In A Game of Thrones: The Card Game, this deadly sword can only be wielded by a unique Greyjoy character, but its Limited Response dramatically increases the havoc the attached character wreaks in challenges. After the character wielding Red Rain is declared as an attacker, you may choose a character controlled by the defending player. If you then win the challenge by four or more Strength, the chosen character is discarded from play!
The other Limited Response Weapon included in this Chapter Pack is Hotah’s Axe (Secrets and Schemes, 12). This attachment bears the setup keyword, and it also reads, “Limited Response: After you win a challenge in which attached character participated, choose a character. That character loses a challenge icon of your choice until the end of the phase. Then, if that character has no challenge icons, kill it.” Removing challenge icons has long been the specialty of House Martell, and with Hotah's Axe, you can easily kill troublesome single-icon characters, like the Horselord (Ancestral Home, 75), that oppose your quest for the Iron Throne. Building the Realm  Of course, not every card with a Limited Response ability is an attachment. You’ll find a similarly powerful ability on Ser Kevan Lannister (Secrets and Schemes, 8), a champion card designed by the 2012 A Game of Thrones: The Card Game Chinese Champion, Bing Ouyang. This version of Ser Kevan Lannister boasts two beneficial traits: Lord and Knight, alongside a Noble crest, which enables you to protect him with The Power of Blood (Core Set, 194). But many times, you won’t even want to keep Ser Kevan Lannister from dying. As a Limited Response, whenever Ser Kevan Lannister enters play or leaves play, you may choose a Lannister or neutral location in your discard pile and put it into play. Of course, not every card with a Limited Response ability is an attachment. You’ll find a similarly powerful ability on Ser Kevan Lannister (Secrets and Schemes, 8), a champion card designed by the 2012 A Game of Thrones: The Card Game Chinese Champion, Bing Ouyang. This version of Ser Kevan Lannister boasts two beneficial traits: Lord and Knight, alongside a Noble crest, which enables you to protect him with The Power of Blood (Core Set, 194). But many times, you won’t even want to keep Ser Kevan Lannister from dying. As a Limited Response, whenever Ser Kevan Lannister enters play or leaves play, you may choose a Lannister or neutral location in your discard pile and put it into play.
This ability has dozens of possible applications, but one of these potential uses is to add new resilience to Lannister decks using the House of Dreams (A Roll of the Dice, 119) agenda. Many players use City plots to counter this agenda, counting on A City Besieged (Chasing Dragons, 59) to discard their opponent’s House of Dreams location. Ser Kevan Lannister allows you to return that location to play, giving you the chance to reestablish your deck’s central strategy and forcing your opponent to find another answer to your location. Scheme in the Shadows Whether you take up fabled weapons or join Ser Kevan Lannister in building the fortune of House Lannister, you can join the fight for the Iron Throne in this Chapter Pack. Forge secrets into weapons and lay your schemes well: only one can win the game of thrones! Secrets and Schemes is now available at your local retailer! ... Source: Secrets Bought with Blood (http://www.fantasyflightgames.com/edge_news.asp?eidn=5289)
Title: FFG:Unleash the Scourge
Post by: RSSFeeder on 06 January 2015, 07:00:03
Unleash the ScourgeThe Scourge War Pack Is Now Available for Warhammer 40,000: Conquest
“Needz Mor Dakka!!!”
–Gubgutz, Ork Strategist A new plague of death sweeps across the Traxis sector. Those who stand against it sicken and die, rotting before they hit the ground and leaving none alive but the servants of Chaos! Now, you can infect your opponents with new and terrible diseases from The Scourge War Pack for Warhammer 40,000: Conquest, now available at your local retailer. In this expansion, you gain a new warlord for the Chaos faction: Ku’gath Plaguefather who wields the corrosive power of Nurgle. Beyond this new warlord and his signature squad, you’ll find plenty of cards for other factions, continuing the major themes of the Warlord cycle by introducing new uses for your warlords. You may fortify yourself in an Inquisitorial Fortress, hunt through the stars with more Space Wolves, or embrace Kauyon battle tactics with the Tau. You can even unleash a horde of frenzied Orks to ravage the sector! 
Take a Hit Currently, the Orks in the Traxis sector are led exclusively by Nazdreg (Core Set, 3), the warlord of the Bad Moons. Under Nazdreg’s leadership, the Orks are always ready to take a hit – as long as they can hit back even harder. Nazdreg grants the Brutal keyword to all of your units at his planet, allowing them to deal more damage as they take damage themselves.  This strategy has some inherent weaknesses, however. If your units have no damage, they gain no benefit from Brutal. But as your units take damage, they become increasingly more fragile. Now, in The Scourge, Nazdreg and the Orks find new ways to make their brutal threats more deadly and reliable than ever. This strategy has some inherent weaknesses, however. If your units have no damage, they gain no benefit from Brutal. But as your units take damage, they become increasingly more fragile. Now, in The Scourge, Nazdreg and the Orks find new ways to make their brutal threats more deadly and reliable than ever.
One crucial addition is Dakka Dakka Dakka! (The Scourge, 34). By playing this event during the deployment phase and exhausting your warlord, you deal one damage to every unit in play! Obviously, this offers an easy way to deal with weakened enemy units. More importantly, it boosts the potential attack power of every army you control at the same planet as Nazdreg, besides activating units like the Bad Dok (Core Set, 65) that must be damaged to unlock their abilities. Dakka Dakka Dakka! can also protect your units from taking too much damage. By using it as a shield card at the opportune moment, you can shield enough damage to keep your army from annihilation, allowing it to strike for the maximum possible amount of damage. Of course, an Ork warband needs plenty of units with high damage capacity to make the most of Brutal. To that end, you may choose to take advantage of an Attack Squig Herd (The Scourge, 33). This unit features an already respectable four ATK, but its damage capacity of six is even higher. When combined with Nazdreg, an Attack Squig Herd with five damage could strike for nine damage, enough to bloody nearly any warlord in the game, even when its controller attempts to protect it with a shield card. As your units take damage, they become more powerful, but they also come closer to destruction. In this War Pack, you gain another way to forestall the demise of your heavily damaged Orks: a Kustom Field Generator (The Scourge, 35). The Kustom Field Generator offers you an exceptional effect that can be triggered when one of your Ork units is assigned damage. You can exhaust the Kustom Field Generator to prevent all damage, then reassign it as indirect damage among your Ork units at the same planet. In other words, you can split the damage from an incoming attack among your Ork units. Not only does this allow you to keep a unit from being destroyed, it allows you to deal more damage to your other units and increase their attack power for your future attacks! Forward unto Glory War rages throughout the Traxis sector, even as the legions of Chaos sweeps forwards, laden thick with plague and pestilence and death. But the foul daemons and corruption vomited forth from the Warp are not the sector’s only claimants. The Emperor’s finest Space Marines, ancient Eldar warriors, and crazed Ork warbands also contest these planets. Will you rampage with the diseased legions of Chaos, or will you lead another army to glory? Pick up your copy of The Scourge War Pack at your local retailer today! ... Source: Unleash the Scourge (http://www.fantasyflightgames.com/edge_news.asp?eidn=5290)
Title: FFG:Equipped for War
Post by: RSSFeeder on 06 January 2015, 15:30:03
Equipped for WarFour Dice Bags for Our Warhammer: 40,000 Themed Products Are Now Available
Four different Warhammer: 40,000 themed Dice Bags are now available at your local retailer! These stylish and thematic Dice Bags are designed specifically to help keep track of all of your Fantasy Flight Games Warhammer: 40,000 product accessories, including dice, tokens, and cards for: Enter the Grim Darkness of the 41st Millennium Fantasy Flight Supply is committed to providing you the best materials to protect, customize, and enhance your games and gameplay experience. Each Dice Bag provides players with convenient and durable means to transport all the components necessary for your battles in the grim darkness of the 41st Millennium. Of course, you must pick sides. With these Dice Bags you can choose from an Ork, an Inquisitor, the Imperial Aquila, or the Chaos Star. Crafted with a blend of polyester and nylon, each bag features a polypropylene draw string, and measures 6.25” by 9” (15.9 cm by 22.9 cm). Safeguard Your Resources Warhammer: 40,000 Dice Bags offer you the tools you need to protect your game components and keep your attention on the roleplaying, board game, or card game at hand. Look for these Warhammer 40,000 themed Dice Bags at your local retailer today! ... Source: Equipped for War (http://www.fantasyflightgames.com/edge_news.asp?eidn=5291)
Title: FFG:Hit the Net in Style
Post by: RSSFeeder on 07 January 2015, 00:00:04
Hit the Net in StyleAndroid: Netrunner Art Sleeves Are Now Available
|
“Always keep your gear in top shape. You never want your console to glitch when it's your brain on the line.”
–Kate "Mac" McCaffrey
Six limited edition Android: Netrunner Art Sleeves are now available at your local retailer and online through our webstore!
Offering a high-tech combination of functionality and style, Fantasy Flight Supply Android: Netrunner Art Sleeves combine beautiful game-related art with top-quality card protection. Take your pick of designs in the meat world or the virtual world; our six new sleeve designs immerse you more fully than ever in the high-stakes cyberstruggles of Android: Netrunner, even as their clear, 100 micron-thick, non-PVC, acid-free polypropylene plastic offers your cards durable protection that comes free of any damaging chemicals that could corrode your cards.
|
All Android: Netrunner Art Sleeves fit snugly around your LCG, CCG, or other standard-sized cards (card size: 2 1/2” x 3 1/2”), and they facilitate easy shuffling and handling. Each pack contains 50 sleeves to protect the cards from your favorite Corp deck, your favorite Runner deck, or your favorite deck for any of our other LCGs®! The Best of Two Worlds
“The greatest runs are orchestrated almost entirely in meat space. It keeps the corps off-balance."
–Silhouette The setting of Android: Netrunner is a gritty, futuristic world filled with artificial intelligence, gestural interfaces, and virt displays. The rich benefit from custom genetics and cyberimplants while the poor toil alongside bioroids and clones in the shadows of monolithic towers controlled by a handful of megarich corporations. They host their secrets on the omnipresent network and guard their most valuable data with a dizzying of array of barriers, code gates, sentries, and traps that define the landscape of the game’s virtual world. Both the virtual and meat worlds of Android: Netrunner come to life with the six designs for our limited Android: Netrunner Art Sleeves. Click any of the above images to enlarge “Goodnight, New Angeles. From all of us at NBN Nightly to all of you at home, sleep well. We’re watching over you.”
–NBN Nightly Whether you plan to use Android: Netrunner Art Sleeves to protect your Corp and Runner decks for Android: Netrunner, run deep against the servers of another LCG, or safeguard an entirely different collection of cards, these stunning, top-quality sleeves allow you to do so in style, all while immersing you in the cyberpunk future of New Angeles, NeoTokyo, and the all-reaching network. Get your Android: Netrunner Art Sleeves today! ... Source: Hit the Net in Style (http://www.fantasyflightgames.com/edge_news.asp?eidn=5293)
Title: FFG:Enter the Shadows
Post by: RSSFeeder on 07 January 2015, 08:30:03
Enter the ShadowsBetween the Shadows Is Now Available for STAR WARS (TM): The Card Game
“Bounty hunters. We don’t need that scum.”
–Admiral Piett, Star Wars: The Empire Strikes Back The shadows of the galaxy are home to thousands of sentients – those who prefer to avoid close scrutiny. Bounty hunters, assassins, slavers, and thieves seek the anonymity of darkness to perpetrate their crimes with impunity. In those same shadows, the last of the Jedi hide, keeping the fire of their belief alive and working in secret for the return of justice to the galaxy. Now, you can call upon both the Jedi and the Scum of the galaxy to aid you in your battle to determine the galaxy’s fate. Between the Shadows is now available for Star Wars™: The Card Game, both at your local retailer and online through our webstore! 
In this deluxe expansion, you’ll find twenty-six brand-new objective sets (two copies each of twelve distinct objective sets and one copy each of two “limit one” objective sets). These objective sets are focused on the Jedi and the Scum and Villainy, including iconic characters from both affiliations, such as Boba Fett, Luke Skywalker, Prince Xizor, and Yoda. Of course, the Jedi and the Scum and Villainy are not the only parties to benefit from this expansion. You’ll find new cards for every affiliation in this expansion, as we’ll explore below. 
A Profitable Alliance Admiral Piett claimed that the Empire had no need of bounty hunters, but you may decide differently with the new Sith objective set included in Between the Shadows. This objective set’s most potent application may be in conjunction with Scum and Villainy sets. The Scum and Villainy of the galaxy are always looking for reliable ways to capture their opponents, and in this Sith objective set, they gain some help from Imperial Intelligence.  This objective set gives you some excellent tools for capturing your opponent’s cards with minimal complications. Confiscation (Between the Shadows, 691) is an enhancement that you attach to an enemy Character unit, allowing you to capture any light side card attached to the enhanced unit as an Action. As long as Confiscation remains on the unit, you can ensure that unit will never have beneficial enhancements. Official Inquiry (Between the Shadows, 692) gives you another opportunity to capture cards, allowing you to look at the top three cards of an opponent’s deck and capture one of those cards. With two reliable ways to capture cards, you’ll be able to fuel objectives like Jabba’s Reach (Edge of Darkness, 374) and The Findsman’s Intuition (Lure of the Dark Side, 537) much more easily. This objective set gives you some excellent tools for capturing your opponent’s cards with minimal complications. Confiscation (Between the Shadows, 691) is an enhancement that you attach to an enemy Character unit, allowing you to capture any light side card attached to the enhanced unit as an Action. As long as Confiscation remains on the unit, you can ensure that unit will never have beneficial enhancements. Official Inquiry (Between the Shadows, 692) gives you another opportunity to capture cards, allowing you to look at the top three cards of an opponent’s deck and capture one of those cards. With two reliable ways to capture cards, you’ll be able to fuel objectives like Jabba’s Reach (Edge of Darkness, 374) and The Findsman’s Intuition (Lure of the Dark Side, 537) much more easily.
This set also contains two copies of the Imperial Intelligence Officer (Between the Shadows, 690), a unit with a Reaction that allows you to look at your opponent’s hand when it enters play. Gaining knowledge of your opponent’s cards is always useful, and the Imperial Intelligence Officer’s ability dramatically increases the effectiveness of other cards, such as Get Me Solo! (The Search for Skywalker, 227).  The remaining cards in the objective set allow you to deny your opponent’s plans more effectively than ever before. The Investigation (Between the Shadows, 688) is an objective that, when revealed, allows you to name any card. As long as The Investigation is undamaged, your opponent cannot play a card with the title that you named. By keeping your opponent from playing the card most damaging to your deck, whether Luke Skywalker (Core Set, 92) or the Sleuth Scouts (Edge of Darkness, 340), you can minimize the risk of encountering that card with the help of The Investigation. The remaining cards in the objective set allow you to deny your opponent’s plans more effectively than ever before. The Investigation (Between the Shadows, 688) is an objective that, when revealed, allows you to name any card. As long as The Investigation is undamaged, your opponent cannot play a card with the title that you named. By keeping your opponent from playing the card most damaging to your deck, whether Luke Skywalker (Core Set, 92) or the Sleuth Scouts (Edge of Darkness, 340), you can minimize the risk of encountering that card with the help of The Investigation.
The set concludes with Ysanne Isard (Between the Shadows, 689), the feared Director of Imperial Intelligence. As a unit, Ysanne Isard offers a variety of benefits. She can provide a resource when needed, her combat icons make her effective on attack or defense, and with three Force icons, she can even take the Force at need. What’s more, her Reaction can allow you to drastically hinder your opponent’s attempts to build his board. After an opponent plays a copy of a captured card or enhancement, you can reveal the captured card to return the just played card to its owner’s hand, depriving him of the resources he paid and keeping him from ever playing that card as long as you have a captured copy! A Daring Raid The Rebel Alliance also gains more shadowy operatives in Between the Shadows. Alliance Special Forces doesn’t have the numbers to face the Empire in pitched battle, so instead, they work behind the scenes, carrying out strategic raids and targeted sabotage. In Star Wars: The Card Game, this is portrayed through the edge battle, and this mechanic is the specialty of Alliance Special Forces!  Fight for Alliance Special Forces with the Commando Raid (Between the Shadows, 657) objective set. This set is limited to one per deck, and the objective bears a potent Action ability: once per turn, you may discard a fate card from your hand to resolve its ability. Playing a fate card from your hand with Commando Raid sacrifices the opportunity to count the fate card’s Force icons for the edge battle, but this allows you to trigger the card’s ability without the danger of being discarded by a well-timed Twist of Fate (Core Set, 171). Fight for Alliance Special Forces with the Commando Raid (Between the Shadows, 657) objective set. This set is limited to one per deck, and the objective bears a potent Action ability: once per turn, you may discard a fate card from your hand to resolve its ability. Playing a fate card from your hand with Commando Raid sacrifices the opportunity to count the fate card’s Force icons for the edge battle, but this allows you to trigger the card’s ability without the danger of being discarded by a well-timed Twist of Fate (Core Set, 171).
Your strike team is most successful while led by Lieutenant Judder Page (Between the Shadows, 658). Lieutenant Judder Page once fought for the Imperial Army, but now he is the leader of the Rebel Alliance’s most successful commando team. While Lieutenant Judder Page is participating in an engagement, he gains “Interrupt: When you discard your edge stack, return 1 fate card not named Twist of Fate from that edge stack to its owner’s hand.” By recycling your fate cards for later use, you maximize their power, as well as enhancing the power of other members of Alliance Special Forces, such as General Crix Madine (Lure of the Dark Side, 520). The set also includes two copies of Page’s Commandos (Between the Shadows, 659), giving you more power to manipulate your edge battles. After this unit enters play, you may return the topmost fate card from your discard pile to your hand, giving you yet another way to recur your fate cards and ensure that you are always a force to be reckoned with in edge battles. Of course, the set would be incomplete without some fate cards, so this set concludes with a copy of Heat of Battle (Between the Shadows, 65) and Target of Opportunity (Between the Shadows, 133)! Light or Dark? Dozens of new options open for every deck as you enter the underworld in Between the Shadows. You can fight alongside the secretive Jedi to restore peace and order to the galaxy, or you can take up arms with the Scum and Villainy in a gamble to snatch more credits. Whichever affiliation you support, you’ll find shadowy units and objective sets in this deluxe expansion. Pick up Between the Shadows at your local retailer today! ... Source: Enter the Shadows (http://www.fantasyflightgames.com/edge_news.asp?eidn=5292)
Title: FFG:Worlds of Iniquity
Post by: RSSFeeder on 07 January 2015, 17:00:04
Worlds of IniquityPreview the Locations and Modular Events of Lords of Nal Hutta
“Let the Empire think they control the galaxy – we know where the true power lies.”
–Jabba Desilijic Tiure, Lords of Nal Hutta Home to lethal political posturing, high-stakes smuggling, and decadent luxuries, Hutt Space is one of the most dangerous and profitable regions in the galaxy. In Lords of Nal Hutta, a supplement for Star Wars®: Edge of the Empire™, players venture into this lawless sector where the Empire has little power, immense wealth lives side by side with terrible poverty, and any deal might result in terrible pain or tremendous profit. You’ll find ample descriptions of several Hutt planets and countless details about Hutt culture in Lords of Nal Hutta, enabling you not only to create complex Hutt PCs and NPCs, but stage an entire campaign in Hutt Space. Today’s preview surveys three of the many locations featured in Lords of Nal Hutta: Toydaria, Nar Shaddaa, and the Hutt homeworld, Nal Hutta. It also looks at the modular encounter that takes place on each planet. Modular encounters are flavorful set pieces that provide a sample of the experiences your group might have in Hutt space. GMs can easily incorporate a modular encounter into an existing campaign, use one as the launching point for a campaign of their own creation, or make one the focus of a single-session adventure. 
Markets, Mushrooms, and Swamps Although a few cities dot its landscape, most of Toydaria is covered with putrid swamps and pastoral villages that remain untouched by technology. The shrewd, avian Toydarians have resisted being enslaved by the Hutts, but they have allowed the Empire to station a garrison deep within the swampland. You might venture to Toydaria hoping to pick up exotic food items to sell abroad, open up a trading contract with King Maalva, or relax in the luxurious gardens of the royal palace, but you’ll have to be careful to avoid any Imperial entanglements. In “Toydarian Grocery Shopping,” one of the five modular encounters in Lords of Nal Hutta, players are tasked to find rare Black Gabaki mushrooms to be served at the king’s banquet. Black Gabaki mushrooms only grow inside dank swamp caves, where voracious grabworms and other deadly predators dwell, and their high value on the black market is partially owed to the peril involved in obtaining them. Characters might take on this task in order to work their way into court, or as their first job within a Hutt kajidic – either way, it could prove as lucrative as it dangerous. The Smuggler’s Moon Nar Shaddaa is a massive, smog-filled city, filled with ports, cantinas, markets, slums, smuggled weapons, and slaves. It is a haven for the lost, downtrodden, and hunted, where an operative of the Black Sun smuggling ring might buy you a drink, or you might discover a former Jedi knight living on the streets. You might go to Nar Shaddaa in order to quickly make some credits, or just to see for yourself the magnificent mixture of luxury and depravity. 
Each sector of the city has a uniquely sordid character. In the Corellian sector, you’ll find posh restaurants and trendy nightclubs alongside fighting pits and public housing. The Red Light Sector is notorious throughout the galaxy, and on its streets you can find any temptation imaginable among the slave dealers and bio-enhancement shops. The Undercity is an expansive and polluted processing district inhabited by murderers and mutants, so vile and dangerous that even the hardiest bounty hunters avoid it. The modular encounter “A Deal Gone Wrong” takes you to the streets of a busy Nar Shaddaa market district, where players will encounter a down-on-her-luck Twi’lek smuggler fighting with a a Trandoshan weapons dealer over some merchandise that she failed to procure. The situation is so explosive that players have no choice but to become involved. Taking either side will likely earn them some credits… and get them into some serious trouble. 
An Invitation You Can’t Refuse Like Toydaria, Nal Hutta is a humid and swampy planet. Unlike Toydaria, Nal Hutta has synonymous with heinous villainy and ruthless subjugation ever since the Hutts invaded it and almost eradicated the native Evocii. The capital, Bilbousa, is home to both the Hutt Ruling Council and the most profitable weapons smugglers in the galaxy. Nearby are the Guarja shipyards, where starfighters are manufactured and secretly sold to the Rebel Alliance, not because the Hutts want to overthrow the Empire, but purely for the sake of profit. The modular encounter “Rubbing Slimy Elbows” takes place on Nal Hutta. Players are invited by a mysterious Hutt patron to attend a lavish traditional dinner called a Granee Noopa. Refusing the invitation is impossible without causing serious offense, and attending means a chance to earn fame, fortune, and opportunities for further advancement among the Hutts. However, clear information about Granee Noopas is difficult to find. Some say that no one who has ever attended one has lived to talk about it. However, that doesn’t mean you can’t be the first to survive and spill all the details. 
Peril and Profit You may enter Hutt Space looking to make a profit or resolve a debt, to acquire some illegal weapons or rise in your clan’s crime syndicate. Whatever your reason for venturing into this lawless territory may be, you’re certain to encounter supreme luxury, dangerous intrigues, and all sorts of illicit activities. Pre-order Lords of Nal Hutta from your local retailer today! ... Source: Worlds of Iniquity (http://www.fantasyflightgames.com/edge_news.asp?eidn=5294)
Title: FFG:Tigris & Euphrates
Post by: RSSFeeder on 08 January 2015, 01:30:04
Tigris & EuphratesAnnouncing the Return of a Classic Game
The king surveyed his territory, wondering where to build a temple to the goddess Inanna, a promised reward for her help in ending a rebellion. The city was crowded thick with houses and markets, bounded by the Tigris River and ringed by the bright colors of cultivated land. His eyes finally came to rest on a flat-topped hill looming over the city’s northern edge, long held by another king. There had been decades of peace between the two kings, but the temple must be built or else the goddess would exact terrible vengeance for the broken promise. The king had no choice. It was time for that peace to end. Fantasy Flight Games is proud to be publishing Tigris & Euphrates, Reiner Knizia’s award-winning tile placement game, in which two to four players take on the roles of rulers building civilizations in ancient Mesopotamia. This edition of Tigris & Euphrates maintains the game’s original mechanics while giving it an updated look based on the art of ancient Sumer and Babylon. It also features all the components necessary to play advanced variations, from a double-sided game board and civilization buildings to a wonder tile and accompanying idol. 
Nascent Civilizations Tigris & Euphrates takes you back in time thousands of years to the moment that humans began building permanent settlements. As a ruler amid the chaos of this rapid urban growth, you have the chance to establish a civilization that will endure for centuries. But Mesopotamia is a narrow region, an island of priceless arable land surrounded by vast deserts with only enough space for one dynasty to flourish. If you want to make a mark on history, you must subjugate your opponents and develop the region’s strongest, most magnificent civilization. Only one ruler can dominate the fertile crescent! 
You begin your civilization by placing a leader and a tile – either a blue farm, red temple, green market, or black settlement on the board to form a kingdom. Each type of tile has a leader token of the same color, and when you place a tile in the same kingdom as its corresponding leader, you earn a victory point. The Euro Classics Line Our new Euro Classics line is dedicated to making select Euro-style games widely available and introducing new audiences to them. Its immense popularity and elegant marriage of mechanics to theme make Tigris & Euphrates an excellent game to launch this line. Stay tuned for news about the games that will follow it.  | | Your goal is not only to build the largest civilization, but also the healthiest one, balanced between commerce, agriculture, housing, and religion. All four spheres of civilization are entwined and necessary. Markets without nearby settlements will be empty. Without farms, a city will starve. Without temples, the people cannot appease the gods. The strength of a player’s civilization is measured in victory points, and whoever has the most points in their weakest sphere wins. Competing Dynasties and Lasting Monuments Growth breeds conflict. Dynasties may coexist peacefully for a little while, but soon the region’s limited resources will set even vowed allies at odds. Another dynasty’s leader may try to weaken you by inciting rebellion among your people and forcing you to fight for your own territory. Whichever leader has the most divine support – the most temples – controls the rebelling area. Wars occur when two kingdoms are united under leaders of the same color, and wars are fought using tiles of that color. If by placing a tile you unite two kingdoms with blue leaders, for example, you must muster more farm tiles than your opponent in order to win. As your civilization develops and your dynasty persists, you may want to erect a monument to its greatness, a four-tile brick and stone edifice that your people can take pride in. You may construct a civilization building for your people, such as a library, granary, or palace, or even build a massive five-tile wonder crowned with an idol and visible for miles around. Wars and rebellions may ruin farms, destroy settlements, and close markets, but monuments cannot destroyed. They can, however, be taken over by another ruler, and building a monument may make you the target of an envious neighbor seeking to enhance his own power. 
Civilization Begins Mesopotamia was once an unsettled wilderness, its soil unbroken by plow, its landscape free of homes and ziggurats. Once its wealth was discovered, not just farms and homes, but entire cities appeared and quickly expanded. As the population grew, the region became densely crowded with competing monarchs, each trying to rule over as much territory as possible. Generations of warfare ensued, until one dynasty emerged victorious and ruled the region for centuries. Do you have the leadership and strategic skill it takes to create a balanced civilization, defeat your opponents, and found a dynasty to last the ages? The struggle to dominate the fertile crescent begins in second quarter of 2015. Until then, you can find more information on the Tigris & Euphrates description page. ... Source: Tigris & Euphrates (http://www.fantasyflightgames.com/edge_news.asp?eidn=5295)
Title: FFG:Drakon
Post by: RSSFeeder on 09 January 2015, 03:00:03
DrakonAnnouncing a New Edition of a Classic Board Game
The knight stepped quickly down the spiral staircase, his chainmail clinking as he moved. His sword was drawn and clean, and it shone in the torchlight. The knight had already overcome trials in this unnatural labyrinth. He had escaped the allure of the magical harp. He had survived the dragon’s cruel games. He had collected nearly all the gold he needed to escape. Around the corner ahead, he saw it – an unmistakable gleam. Torchlight on golden coins. Only a few more feet and he would have his salvation. But as he stepped forward a windstorm rose around him, and the golden gleam vanished… Fantasy Flight Games is proud to announce the new edition of Drakon, a classic board game of treasure and dragonfire for two to six players! You have been caught looting the hoard of the dreaded Drakon. For such transgression, a fiery death should be the only appropriate response. But Drakon has decided to toy with you before she devours you. You and your rival heroes will each be released into the labyrinth, and the first hero to discover ten gold pieces will go free with his treasure. The rest of you will satisfy the dragon’s hunger. In every game of Drakon, you and your opponents must fight to stay alive in the midst of the labyrinth. On your turn, you can either move your hero to another room, or add another piece to the labyrinth, placing beneficial chambers in your own path and throwing your opponents into harm’s way. But you must be cautious. The chambers of Drakon’s labyrinth are filled with danger and ancient magics, not to mention the dragon herself. To navigate these deadly corridors and survive, you’ll need to be quick and careful. 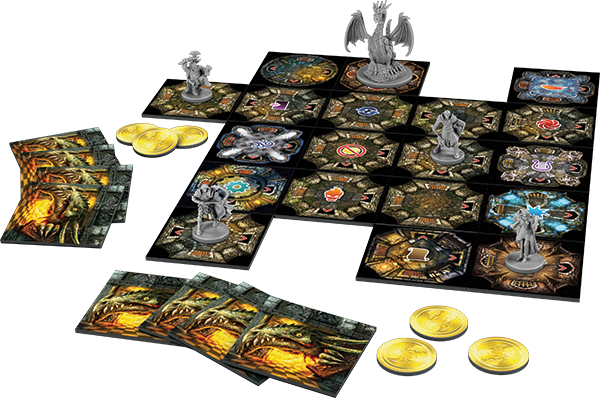
Shape the Labyrinth On every turn, you have a crucial choice to make. You can either move forward into a new chamber, or you can expand the labyrinth by playing a new chamber tile from your hand. The new chambers that you play feature unique circumstances and magical objects that you may encounter on your adventures through Drakon’s lair. 
The majority of these chambers offer powerful effects to any hero that enters the chamber. You may gain the power to destroy any chamber in the labyrinth, or call a windstorm to carry you along, increasing your movement. You may even take command of a floating chamber and fly it to the other side of the labyrinth. Other chambers force more harmful effects on those heroes unlucky enough to enter. A room may cause you to lose a coin as you avoid the dangers within, and any hero who hears the siren song of the magical harp is forced to move into its chamber. As you and your fellow heroes play these chambers from your hand, they form a cunning maze, and only the wise can find their way out. Despite the power of these chambers, the central goal of your quest is to find gold: only by being the first player to claim ten gold can you escape the dungeon. Plenty of chambers allow you to find a coin or steal a coin from an opponent, but the gold value of coins can vary dramatically. Your most recently stolen coin may have a value of three gold or just one. Because coins are kept face-down, hiding their value, you’ll never know exactly how close your opponents are to victory. The Heroes and the Dragon Six heroes are trapped within Drakon’s sadistic labyrinth, and each hero has his own unique abilities to help him survive. Each ability can only be used once per game though, making the timing of the ability incredibly important. You may play as the sorceress and escape from a most dire situation by passing through a wall. You may play as the thief and collect the gold you need at the most opportune moment by preying on another hero. You may even play as the ranger and use a burst of speed to race across the maze when necessary. No matter which hero you play in a game of Drakon, you’ll need to take full advantage of your unique ability at the opportune moment if you want to grab the gold and escape from Drakon’s clutches. 
Of course, the heroes are not alone in the labyrinth. The legendary dragon also stalks the halls and chambers of the maze, taunting any hero unlucky enough to encounter her. Certain chambers throughout the labyrinth allow you to move Drakon through the dungeon. If you can move Drakon into the same chamber as a hapless hero, that hero is immediately sent back to the entrance chamber and loses three coins, as Drakon toys with him before releasing him once more into the maze. Escape the Labyrinth You and your rival heroes are trapped. Your greatest threat may be Drakon or the other heroes. In this dark labyrinth, only one thing can save you: your own greed. Will you ruthlessly grab gold and undermine your opponent’s schemes before escaping to victory? Or will you fail and become just another meal for the dragon? You decide your fate, but only one hero can escape from Drakon! Check out the Drakon description page for more details, and look for Drakon in the second quarter of 2015. ... Source: Drakon (http://www.fantasyflightgames.com/edge_news.asp?eidn=5297)
Title: FFG:It Is Your Destiny
Post by: RSSFeeder on 09 January 2015, 20:00:03
It Is Your DestinyAnnouncing the STAR WARS (R): Force and Destiny (TM) Beginner Game
“I am a Jedi, like my father before me.”
–Luke Skywalker Follow your destiny with the Star Wars®: Force and Destiny™ Beginner Game, the perfect entry into the Star Wars: Force and Destiny roleplaying experience for players of all skill levels! With its complete, learn-as-you-go adventure, players can open the box, ignite their lightsabers, and explore their destinies as Force users in the Star Wars galaxy. Pre-generated character folios keep the rules right at your fingertips, while custom dice and an exciting narrative gameplay system advance your story with every roll. Learn as You Play The abridged ruleset, which is incorporated into the included adventure, allows you to learn as you play throughout your adventure. With plenty of opportunities for combat, social encounters, clever thinking, moral conflict, and more, Mountaintop Rescue, the included adventure leads you through the fundamentals of Force and Destiny even as you participate in its action-packed narrative. High up the snow-clad slopes of Mount Tellec on the Outer Rim planet Spintir, you and your allies must travel to an ancient temple and rescue the humble scholar Hethan Romund, one of the few individuals still willing to share any knowledge of the fallen Jedi Order. All the while, the game’s mechanics are introduced incrementally as part of the exciting narrative. Character Folios Get You Into the Game In the Star Wars: Force and Destiny Beginner Game, you’ll choose one of four pre-generated characters and jump right into the game. Will you play as a human trained in the arts of defense, a mysterious Zabrak mystic, an agile Togruta seeker, or a lightsaber-wielding Kel Dor able to move objects with the power of the Force? The included character folios keep all the information you need to assume the role of your character at your fingertips. 
Each eight-page folio includes a background explaining that character’s connection with Hethan Romund, the Force, and the other heroes. Additionally, quick reference guides cover the basics of the game’s core mechanics, as well as plenty of options for advancing your character during Mountaintop Rescue and into adventures beyond. Build the Story with Unique Custom Dice The Force and Destiny Beginner Game features a unique custom dice mechanic that provides a wealth of narrative options. Symbols for success, failure, and complications are all printed directly on the dice.  Even a successful roll can place you under threat, and even a failure can create some advantage. Even a successful roll can place you under threat, and even a failure can create some advantage. In this system, which takes all narrative conditions into account, players and Game Masters quickly build a dice pool for each task. Then they roll and let the dice help guide the growth of the story. The Star Wars: Force and Destiny Beginner Game is scheduled to arrive at retailers in the second quarter of 2015. Visit our Star Wars: Force and Destiny Beginner Game description page to learn more. Then, gather your friends, clear your mind, and head into the mountains of Spintir. May the Force be with you! ... Source: It Is Your Destiny (http://www.fantasyflightgames.com/edge_news.asp?eidn=5298)
Title: FFG:Fantasy Flight Games Is Now Hiring
Post by: RSSFeeder on 13 January 2015, 00:00:03
Fantasy Flight Games Is Now HiringWe Are Currently Accepting Applications for Two PositionsFantasy Flight Games, leading hobby-market publisher of board games, card games, roleplaying games, and other tabletop games, is now hiring for the following positions: Details can be found in the pdf documents linked above.
- To apply for the position of Application Developer, please submit a cover letter with salary requirements and resume to HumanResources@fantasyflightgames.com; under the subject line “Application Developer” no later than end of business day Tuesday, January 30, 2015.
- To apply for the position of Temporary Associate, please submit your application (pdf, 106 KB) to HumanResources@fantasyflightgames.com; under the subject line “Temporary Associate” no later than end of business day Friday, January 16, 2015.
Please do not call or visit. Our offices are located in Roseville, Minnesota, a suburb of the Twin Cities of Minneapolis and St. Paul. Candidates not already living within commuting distance must be willing to relocate. Fantasy Flight Publishing, Inc. is an equal opportunity employer committed to a diverse work force and a work environment free from discrimination. ... Source: Fantasy Flight Games Is Now Hiring (http://www.fantasyflightgames.com/edge_news.asp?eidn=5300)
Title: FFG:Cold, Metal, and Evil
Post by: RSSFeeder on 13 January 2015, 08:30:04
Cold, Metal, and EvilA Preview of the IG-2000 Expansion Pack for X-Wing (TM)
“You want me to describe the inside of IG-2000? It’s cold and metal and a little bit of evil. Just like its pilot.”
–Dash Rendar What makes X-Wing™ such a compelling game? There are any number of different factors that you could cite. There are the game’s meticulously detailed and pre-painted miniatures. You have the inherent drama of dice rolls and the strategy involved in maximizing your odds. You can field squadrons from some of the galaxy’s most iconic starships. Then, you can pilot them with such heroes as Luke Skywalker and Han Solo, or with such notorious villains as Darth Vader and Boba Fett. However, once you really fall in love with the game, few thrills top that of executing the perfect maneuver. If you get it all right, you might fly past the enemy ships, slam through a hard Koiogran-turn, and catch your target right in your sights. Or you might fly in from the side and catch your target dead-to-rights, even as you’re completely outside his firing arc. Getting it right, though, is a matter of both skill and knowledge. When you lock your ship’s maneuver into its maneuver dial, you need to both correctly anticipate your opponent’s maneuvers and judge the distance that your ship will travel. This means that you want, at least, a practical understanding of your ship’s maneuvers and an awareness of the maneuvers your opponent’s ships can execute. Of course, some ships have more potential maneuvers than others, making them more exciting to fly and harder to anticipate. One of these ships is the Aggressor, the starship included in the IG-2000 Expansion Pack. 
A 360-degree view of the Aggressor.
The Aggressor and Its Maneuver Dial The Aggressor is no freighter, shuttle, or support ship. It’s a powerful assault fighter designed expressly for space combat and loaded with potent power cores and weapons systems. In X-Wing, the Aggressor is an agile, tough, and hard-hitting fighter with a balanced stat array of three Attack, three Agility, four Hull, and four Shields. Additionally, the Aggressor’s action bar features the focus, target lock, and evade actions, as well as the boost action, making it the first large-base ship in X-Wing to feature the boost action natively. 
All these stats and actions make the Aggressor an intimidating fighter to have bearing down upon you, but the real key to the ship is its loaded maneuver dial. The Aggressor is able to perform every single straight maneuver, bank, or turn at speeds “1” and “2,” and most of them are green. Then, at speed “3,” the Aggressor features three green maneuvers, one straight and two banks, as well as two Segnor’s Loop maneuvers. Finally, the Aggressor also features a speed “4” Koiogran-turn. 
The Aggressor's maneuver dial. | | Altogether, the Aggressor’s fully loaded maneuver dial ensures that you’ll always have one or two good maneuver options. Your opponent will never know exactly what to expect. On the other hand, you’re going to need all the maneuverability and element of surprise that the Aggressor offers because it only features a forward firing arc. You don’t have a turret weapon or rear firing arc to help you compensate for botched maneuvers. Certainly, you can use your illicit upgrade slot to equip a “Hot Shot” Blaster or Feedback Array. However, you’ll still want to focus on your flying, as these upgrades are for limited use only. In many ways, then, the Aggressor is the first large-base ship that’s all about its maneuvers, and that might just make it the most “natural” of the large-base ships yet to arrive to a miniatures game that is – at its heart – all about outmaneuvering your opponent in order to get the ideal shot. Of course, its pilots are anything but natural… IG-88 and the IG-2000 The IG-2000 Expansion Pack comes with four ship cards, all of which present different, unique models of the deadly assassin droid IG-88. Each comes with a pilot skill value of “6” and costs thirty-six squad points, but the four models are clearly differentiated by their unique pilot abilities.  | As assassin droids, all the different IG-88 models are excellent killers. However, IG-88A also boasts a unique pilot ability that allows him to excel not only at killing, but also at surviving. Each time he destroys an enemy, IG-88A recovers one shield. |  | IG-88 earned a reputation as a bounty hunter who always delivered, and this consistency is reflected in IG-88B’s unique pilot ability, which functions almost like a built-in Gunner. Once per round, if he performs an attack that does not hit, IG-88B can perform an attack with an equipped cannon upgrade. Notably, you can use the same cannon twice, so if you miss, for example, with an Ion Cannon, you can fire that Ion Cannon again, aiming for a better result. |  | IG-88C is the slipperiest of the four models, gaining a free evade action each time he performs a boost action. After all, despite all of his strength and armor plating, it was the speed and scope of IG-88’s superior intelligence that truly made him such a lethal threat, and if he’s equipped with Push the Limit or Experimental Interface, IG-88C can perform as many as three actions, easily clearing his stress token each round by performing one of his many green maneuvers. | 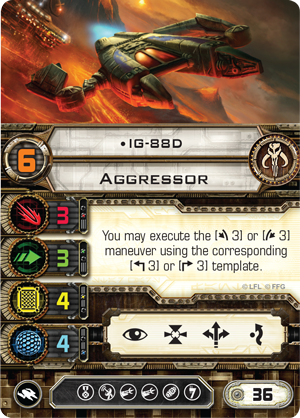 | The fourth and final of the IG-88 models, IG-88D adds two more maneuvers to the Aggressor’s already astonishing dial. However, IG-88D’s ability goes beyond the mere addition of two three-speed Sengor’s Loop maneuvers; it allows him a choice at the moment he executes his maneuver. Accordingly, if he has a higher pilot skill value than his target, IG-88D can subtly adjust his maneuver from a three-bank Sengor’s Loop to a three-turn Segnor’s Loop. In turn, this may give him the edge he needs to catch a rival within a firing arc that otherwise may have just missed. | Finally, as deadly and talented as each of these IG-88 models are on their own, the IG-2000 Title upgrade allows them to link their abilities. Accordingly, we’re likely to see a number of solid squad builds that feature two copies of the IG-2000. Imagine, for example, the staying power that you’d gain by linking IG-88A’s ability with that of IG-88C. Equip both with Push the Limit, and you’ll have two high-powered ships that can potentially boost, evade, focus, and recover shields round after round. 
Alternately, you could link IG-88C with IG-88D and equip both with Advanced Sensors to field a starfighter duo whose maneuvers will be nigh impossible to predict. 
In this example, IG-88C uses his Advanced Sensors to perform a boost action before revealing a three-speed Segnor’s Loop. Realizing his maneuver (shown in red) would fail to catch the X-wing within his firing arc, IG-88C uses IG-88D’s ability to perform a three-turn Sengor’s Loop (shown in green), which catches the X-wing in arc, allowing him to shoot for the kill.
No matter which combination you choose, or even if you run just a single model of IG-88, you’re certain to find plenty of tricks among the potential combinations of pilot abilities and upgrades. Then, it’s up to you to use these tricks to outmaneuver your opponent and line up the perfect shot. An Elite Killing Machine Every bit as deadly as its pilot, the IG-2000 is a perfect blend of attacking power, agility, and resilience. With its myriad maneuver options, it’s also the perfect large-base ship to fly about the battlefield in an unpredictable fashion. Keep your opponent guessing. In the coming weeks, keep your eyes open for more previews of the IG-2000 Expansion Pack and the other Wave VI expansions ships, including a faction overview by developers Alex Davy and Frank Brooks! ... Source: Cold, Metal, and Evil (http://www.fantasyflightgames.com/edge_news.asp?eidn=5299)
Title: FFG:Make Your Money Work for You
Post by: RSSFeeder on 14 January 2015, 01:30:03
Make Your Money Work for YouAn Overview of the Weyland Consortium by Guest Writer Andrew Grace
Few characters in fiction or cinema are quite so compelling as a truly dangerous villain, and the Weyland Consortium may just be the best villain in the world of Android: Netrunner. This isn’t to say that the Corp will admit anything other than the fact that it has continued to improve the world by leading the development of new construction and tapping into new energy resources. However, the people who play Android: Netrunner know that there’s plenty more to the Weyland Consortium than you’ll ever find in the newsies. There’s a dark side. A considerable dark side. And whether or not this darkness is necessary to preserve all the good that Weyland brings to the world, the moon, and the exploration of space is a matter of dispute. In the game, it’s enough for Runners to know that the Corp has very likely initiated massive neighborhood renovation projects just to create the rubble under which it can bury the bodies of those who crossed it. Today, in the fifth of our faction overview articles, guest writer Andrew Grace dares to offer us a quick peek at the different things the execs may discuss behind the closed doors of the Weyland Consortium. 
No Advertisement Necessary Like most Android: Netrunner players, I like to imagine what the advertisements for the various corporations would actually sound like. NBN’s ads would be hyperbolic and trendy. Jinteki’s must feature tranquil music over a backdrop of streams and trees and perfectly bio-engineered babies. Haas-Bioroid’s might resemble something you would see in a German car commercial; only instead of a finely tuned sedan cruising along the Autobahn, you would have finely tuned biotic laborers constructing high-rises in a single day. Still, the reassuring baritone narration would be the same. The Weyland Consortium, however, doesn’t need that kind of smooth salesmanship. Their ads? I imagine that they just put the WC logo on the screen and say, “The Weyland Consortium. You can trust us because we already control you, and you’re probably still alive.” 
And that’s why Weyland is the best Corp in Android: Netrunner. They’ve already won, and they can afford to wait until you realize it. Money: It’s Still Good for You The Weyland Consortium is the old money of the Android: Netrunner world, its Tom and Daisy Buchanans, if you will. They don’t need to evolve or refine themselves in pursuit of perfection like Jinteki. They don’t need to stay up-to-date like NBN or engineer the future like Haas-Bioroid. They don’t need to steer the world in their favor because it’s already working in their favor. Weyland’s tactics are tried-and-true, and I imagine the drink of choice at their corporate retreats is the Old Fashioned. They would rather advance the ice they trust than develop some new sentry or code gate with a list of subroutines so long and so complicated that you have to read it three times. They’re also the only Corp with cards that feature firearms, and while firearms may seem archaic compared to cerebral mapping or genetically-engineered psychics, they offer the same definitive conclusion to some future concerns as they do now. In fact, the next time I play a Punitive Counterstrike (True Colors, 79), I intend to tell the Runner his mistake was “bringing a cyberdeck to a gun fight.” 
Weyland isn’t in a rush to change its ways because it knows that the best way to keep making money is to have the most money available to invest in the first place. To the uninitiated, Weyland’s Core Set identity card, Building a Better World (Core Set, 93), may not look like much. Each time you play a transaction operation, gain a credit. It seems straightforward enough, but it’s missing a phrase commonly found on identity cards, “Once per turn.” If you play three transaction cards in a turn, you gain three extra credits. For those of you doing the math at home, that’s a whole turn’s worth of credits for the average Jinteki player, and it’s just a turn-end bonus for the average Weyland player.  Consider the net returns. As far as I can tell, Hedge Fund (Core Set, 110) may be the single most commonly played card in Android: Netrunner, and it offers twenty-five percent better returns when you’re playing Building a Better World versus any other identity. Beanstalk Royalties (Core Set, 98) is thirty-three percent more profitable, and the low-influence Green Level Clearance (A Study in Static, 70) offers fifty percent more credits to a Weyland player than an in-faction Haas-Bioroid player. Consider the net returns. As far as I can tell, Hedge Fund (Core Set, 110) may be the single most commonly played card in Android: Netrunner, and it offers twenty-five percent better returns when you’re playing Building a Better World versus any other identity. Beanstalk Royalties (Core Set, 98) is thirty-three percent more profitable, and the low-influence Green Level Clearance (A Study in Static, 70) offers fifty percent more credits to a Weyland player than an in-faction Haas-Bioroid player.
If you start your turn with a mere two credits – which seems unlikely, because you’re playing Weyland – you can play the Green Level Clearance that draws into the Hedge Fund you need to afford to Restructure (Second Thoughts, 40) and end your turn with sixteen credits. Furthermore, if you’ve spent a few turns advancing your Ice Walls (Core Set, 103) or Swarms (Opening Moves, 18), you can recoup your expenses – and make a tidy one-credit profit, of course – with Commercialization (Cyber Exodus, 58). With Paywall Implementation (The Spaces Between, 28), you can even ensure that any time a Runner actually dares hack his way through your ice, you still make a profit. And with Sealed Vault (The Spaces Between, 29), you can keep your precious credits safe from any crafty, would-be Criminals hoping to bleed you with an Account Siphon (Core Set, 18). Even your agendas give you credits. Government Contracts (A Study in Static, 77), Geothermal Fracking (Opening Moves, 17), and Hostile Takeover (Core Set, 94) all reward you with enormous profits, as if to apologize for forcing you to spend the clicks necessary to advance them. When you play as the Weyland Consortium, the question isn’t whether or not you’ll have credits; the question is what you’ll do with them. No One Is Safe So what does the Weyland Consortium do with all its money? It buys power. I like to think that Weyland execs plan a wide variety of different ways to use their nearly inexhaustible supply of credits to buy all the power and influence they need to look into their enemies’ doomed and terrified faces and state, cooly, “I’m going to destroy you. And possibly everything you love if it suits my interests. But definitely you. Whenever and however I feel like it.” 
Then they go back to the office and spend some spare change on the PR (or extortion) necessary to assure the rest of the population that any rumors they may have heard are completely unfounded and not worth their time. This means that the Weyland faction satisfies a uniquely aggressive, authoritarian impulse that the other Corp factions just don’t. Most Corps rely on a certain level of subterfuge to score their agendas: Is that card with two advancement tokens an agenda or an ambush? Is that unrezzed ice a harmless barrier or a program-trashing sentry? They can’t always protect their agendas, but they must always do their best to convince the Runner that the cards in their servers are, in fact, well-protected… or that they’re not agendas. On the other hand, Weyland could play with their agendas face-up and it would make very little difference. Weyland could throw six points worth of agendas in its archives, and it would only serve to convince a Runner to leave the archives alone. Why? Because all of that cool Criminal confidence, all of that carefree Anarch boasting, and all of that studious Shaper preparation mean nothing to Weyland’s ruthless arsenal of meat-damage inflicting cards. Jinteki may tax your grip with relentless net damage and Haas-Bioroid’s bioroids may gradually fry your brain, but Weyland will straight-up murder you. And they will spare no expense to do so, because “expense” is only a meaningful concept if your funds are finite. Weyland will murder you, and then they will deploy their legion of black ops cleaners and PR geniuses to make sure no one remembers you ever existed. There are just two cards at the crux of Weyland’s murder brigade: Scorched Earth (Core Set, 99) and Punitive Counterstrike. 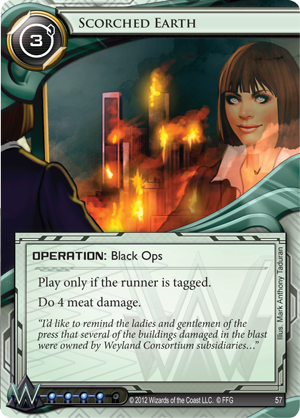 
Cards like Dedicated Response Team (Future Proof, 118) and The Cleaners (Second Thoughts, 36) may also contribute to the general aura of terror surrounding a good Weyland deck. They can soften the Runner up or put the nail in his coffin, but Scorched Earth and Punitive Counterstrike are so potent as the faction’s core retaliatory threat that you don’t even have to put them in your deck. There’s a good chance that as soon as you reveal your identity to a Runner, that Runner’s going to start drawing cards until he finds a Plascrete Carapace (What Lies Ahead, 9), and that sort of fear can give you all the time you need to install a solid wall of ice in front of your central servers or start looking for your hardware-destruction cards. Yes, in addition to owning all the best means of doling out lethal quantities of meat damage, Weyland also boasts the necessary tools to make sure that Runners can’t do anything to protect themselves. Not only will Power Grid Overload (Trace Amount, 37) and Taurus (Upstalk, 9) destroy their body armor and leave them praying for a quick end beneath a falling asteroid, but Swarm, Archer (Core Set, 101), and even a well-timed Burke Bugs (Future Proof, 119) will trash their programs. As the Weyland Consortium, it’s your job to remind those impudent thieves that those funds are yours because you earned them, and you intend to protect what’s yours. It always seems to happen that, in the final moments, every single thing that those Runners see around them belongs to the Weyland Consortium. Then… The End. ... Source: Make Your Money Work for You (http://www.fantasyflightgames.com/edge_news.asp?eidn=5301)
Title: FFG:Make Them Bleed
Post by: RSSFeeder on 14 January 2015, 10:00:04
Make Them BleedPreview the New Uthuk Y'llan Units of Warband of Scorn
With adrenaline coursing through her veins and the taste of Daqan blood on her tongue, the Blood Sister leaned back on the barricade and began chanting the summons. It wasn’t long before the earth began to quake with a low rumbling, and then it broke open as a giant, spined, insect-like demon crawled out of the ground. The Blood Sister laughed with glee and ran her fingers along its curved back. “Are you hungry, Doombringer? There are delicious humans just beyond this barricade. Go. Devour them. It is time for our people to rise.” Lacerate your enemies with Warband of Scorn! In this Army Pack expansion for BattleLore Second Edition, you’ll find four fiendish new Uthuk Y’llan units and additional Blood Harvesters to support them. Build your own diabolical custom armies by combining these new units with ones from the core set, or use the two Army cards included in the expansion to instantly deploy balanced and ferocious armies composed entirely of units from Warband of Scorn, ready to devastate your opponent and feast on their blood. Today’s preview introduces the four new units of Warband of Scorn: burrowing demons, Blood Sisters wielding dark magic, creatures whose very bones can deal damage, and deranged infantry troops. You’ll learn each unit’s capabilities and discover the strategic advantages of the Warband of Scorn and Bleeding Coven armies. 
Blood and Bone Centuries ago, the Uthuk Y’llan were first transformed from mere desert hunter-gatherers into vicious and relentless, warriors by drinking demon blood. To this day they continue to drink demon blood and use it in their dark rituals, but above all they crave the blood of their enemies. feeding upon it and draw strength from spilling it. Two units featured in Warband of Scorn, the Blood Sisters and the Grotesque, specialize in drawing blood. They can Bleed other units, slicing their veins and weakening them so that the Bleeding unit rolls one fewer die in combat. The Blood Sisters are the powerful and cruel priestesses of the Uthuk Y’llan: practitioners of blood magic, demon tamers, and ritual murderers. On the battlefield they, like the Greyhaven Battlemages of Hernfar Guardians, constitute Caster units: ranged infantry fighting with magic. They have a movement value of two, a combat value and health of three, and their dark magic can harm enemy units up to three hexes away. With a lore result, they can Bleed nearby friendly units, sacrificing the strength of their own forces, in order to deal damage to the target. Yet the Blood Sisters’ magic can heal as well as harm: with a heroic result, they recover a point of health if the target unit has suffered any damage. 
So much demon blood flows through the veins of the Grotesque that little humanity is left in them. Their limbs are transmogrified and their very bones have become weapons. They have the same movement, combat value, and health as the Blood Sisters, and with a heroic result, they can Bleed the target unit and feast upon that blood. Instead of advancing, they can shoot forth sharp bone spurs from their body, attacking a target within two hexes and rolling three dice. Thanks to this Bone Blast ability, the Grotesque can lay waste to enemy units without taking a dangerous position. To come within range of a Grotesque unit is to beckon bloodshed and death. Deranged and Devouring 
Joining the Blood Sisters in the front lines are wild Beserkers driven insane by their thirst for blood. Insanity makes them unpredictable: their Deranged ability allows you to reroll a die in every combat roll a unit of Beserkers makes. The opportunity to reroll increases your chances of dealing damage or unleashing their Thousand Cuts heroic ability, which deals a point of damage to an adjacent enemy unit whether or not that unit was the original target of an attack. Such unpredictability makes the Beserkers a terrifying threat. The fact that there are four Beserkers in each unit makes them even more pernicious. The fourth new unit is the Doombringer: a ravenous, creeping, six-legged demon drawn into war by its insatiable hunger. Its movement value of three is enhanced by its burrowing ability, which allows the Doombringer to ignore movement restrictions of hexes it moves through and sneak under the enemy without their knowledge. Wherever the Doombringer goes, its presence stops the enemy in their tracks: Elite and Infantry enemy units adjacent to a Doombringer cannot be commanded to move. In addition, with a heroic result, Doombringers devour infantry and cavalry, gnawing away at anyone or anything within reach of their massive jaws. Warband and Coven The Army cards in Warband of Scorn offer two armies: a destructive invading force determined to lay waste to everything in its path, and a ritual encampment ready to lash out at any attackers. Warband of Scorn is a decentered, offensive army capable of attacks on multiple fronts and litter the battlefield with the bleeding dead. It’s infantry-heavy, with three units of Beserkers and two units of Blood Sisters, joined by two of the three Blood Harvester units included in this expansion. Two Grotesque units and a Doombringer complete the army, the latter allowing you to slip beneath enemy lines and attack from the rear, the former allowing you to occupy a strategic position and prevent anyone from advancing past it. The Bleeding Coven is an incredibly flexible defensive force that draws strength directly from the blood it has recently spilled. Again, infantry dominate: three units each of Blood Harvesters and Beserkers are supported by two units each of Blood Sisters and Grotesque. The remaining muster points are spent on two Blood Fields: magical pools of blood that nourish the Uthuk Y’llan, giving health to an Uthuk unit occupying one at the start of its turn. Well placed, the Blood Field hexes have the potential to make some of your units invincible. At the very least, they grant you extra time for killing and harvesting Daqan blood. 
A Taste for War For the Uthuk Y’llan, war is exhilarating, a chance not only to take revenge upon an enemy, but to delight in their gruesome deaths and, above all, savor the taste of their blood. The units of Warband of Scorn excel in spilling blood, in performing magic with it, and using it to enhance their own strength. Whether you integrate these units with other Uthuk Y’llan forces, or let the Warband of Scorn itself take the field, they promise to put fear in the hearts of the Daqan Lords and transform your games of BattleLore. Pre-order Warband of Scorn from your local retailer today! ... Source: Make Them Bleed (http://www.fantasyflightgames.com/edge_news.asp?eidn=5302)
Title: FFG:The 2015 Store Championship Season Has Begun!
Post by: RSSFeeder on 14 January 2015, 18:30:03
The 2015 Store Championship Season Has Begun!Find an Event Near You
With the new year comes a new season, and Store Championships are off to a strong start. Stores around the world have begun hosting Championships, and first-round byes for Regional Championships have already begun finding their way into the hands of players. Find a Store Championship Near You Store Championships kick off the tournament season each year, serving as the first major tournament series in FFG’s Organized Play program. Whether you’re looking for a leg up on your way to World Championship Weekend in November or searching for a local event larger than your usual game night, Store Championships are your chance to meet others, play your favorite game, and spend a day having fun. Find the Store Championship closest to you by following the links below: Note: Our tournaments are listed alphabetically by nation and then by city. Please contact the event venue for more information about the tournament date, time, and other details. 
Join FFG at the Games Center Fantasy Flight Games is joining the action and hosting Store Championships at our Games Center in Roseville, MN! This past weekend saw Star Wars™: The Card Game and Warhammer: Diskwars Store Championships, but we still have five more exciting Store Championships to host. Join in the event, play against FFG staff, or just stop by and say hi on the following dates: Share Your Store Championship Experience FFG Organized Play is now on Twitter and Facebook. Follow us and tell us what deck or squad you’re bringing to Store Championships. If you’ve already played in a Store Championship, tell us how you did! ... Source: The 2015 Store Championship Season Has Begun! (http://www.fantasyflightgames.com/edge_news.asp?eidn=5303)
Title: FFG:The 2015 Store Championship Season Has Begun!
Post by: RSSFeeder on 15 January 2015, 03:00:03
The 2015 Store Championship Season Has Begun!Find an Event Near You
With the new year comes a new season, and Store Championships are off to a strong start. Stores around the world have begun hosting Championships, and first-round byes for Regional Championships have already begun finding their way into the hands of players. Find a Store Championship Near You Store Championships kick off the tournament season each year, serving as the first major tournament series in FFG’s Organized Play program. Whether you’re looking for a leg up on your way to World Championship Weekend in November or searching for a local event larger than your usual game night, Store Championships are your chance to meet others, play your favorite game, and spend a day having fun. Find the Store Championship closest to you by following the links below: Note: Our tournaments are listed alphabetically by nation and then by city. Please contact the event venue for more information about the tournament date, time, and other details.
Join FFG at the Games Center Fantasy Flight Games is joining the action and hosting Store Championships at our Games Center in Roseville, MN! This past weekend saw Star Wars™: The Card Game and Warhammer: Diskwars Store Championships, but we still have five more exciting Store Championships to host. Join in the event, play against FFG staff, or just stop by and say hi on the following dates: Share Your Store Championship Experience FFG Organized Play is now on Twitter and Facebook. Follow us and tell us what deck or squad you’re bringing to Store Championships. If you’ve already played in a Store Championship, tell us how you did! ... Source: The 2015 Store Championship Season Has Begun! (http://www.fantasyflightgames.com/edge_news.asp?eidn=5304)
Title: FFG:Tears in the Fabric of the World
Post by: RSSFeeder on 15 January 2015, 11:30:04
Tears in the Fabric of the WorldPreview the Gates and Ancient Ones of Gates of Arkham
As a foulness shall ye know Them. Their hand is at your throats, yet ye see Them not; and Their habitation is even one with your guarded threshold. Yog-Sothoth is the key to the gate, whereby the spheres meet. Man rules now where They ruled once; They shall soon rule where man rules now. After summer is winter, and after winter summer. They wait patient and potent, for here shall They reign again.
–H.P. Lovecraft, The Dunwich Horror Travel from harsh city streets into mysterious Other Worlds in Gates of Arkham, a new expansion for Elder Sign. With the Ancient Ones growing ever stronger, the horrors have broken out of the museum’s confines and now run rampant throughout Arkham. Even worse, gates to Other Worlds are opening at locations across the city, in the Woods and the Black Cave, in the center of town at Independence Square, even within the Bank of Arkham and the South Church. Only by traveling through these gates and encountering the Other Worlds can you make Arkham safe once more. Only by defeating the horrors occupying Arkham can you prevent the terrible, doombringing Ancient Ones from awakening. In today’s preview you will learn how gates connect Arkham to Other Worlds and what terrible dangers these gates pose for human civilization. You’ll also learn about two of the new Ancient Ones featured in Gates of Arkham, whose mere tentative stirrings open these gates that not only destabilize time and space but also let loose terrible monsters into the city. 
Passages Between Worlds The gates opening throughout Arkham have released not only Vampires or Cultists, but inhuman and vicious creatures such as Night Gaunts, Gugs, and Dholes into the streets. These monsters haunt the Miskatonic shores and lurk in dark hallways, stalking their next victims. Worse than the monsters, the gates themselves make locations that might seem safe – the Police Station, the Arkham Asylum, St. Mary’s Hospital – dangerous, unstable passages into Other Worlds where the bravest investigators might fear to venture. You have always been able to visit Other Words in Elder Sign. In Gates of Arkham, however, visits to Other Worlds take on a renewed importance. Now a multitude of effects, from Mythos cards to the advancement of the doom track can cause gates to Other Worlds to open. When a gate opens and an Other World is revealed, a gate marker is placed on both that facedown Other World and an Arkham Adventure card, showing the link between them. Until the Other World adventure is resolved and the gate is sealed, no investigator can move to or attempt that Arkham Adventure. A gate may open, for instance, in the back booth at Velma’s Diner – but only by passing through that gate will the investigators learn what Other World it connects to. It may lead to the City of Gugs, a mausoleum-like realm that offers an Elder Sign, a Unique Item, and the chance to retreat doom to the investigator who completes an adventure there. However, be careful that you do not fall victim to vicious gugs, ghasts, or ghosts inhabiting this Other World. Or, from Velma’s diner you may walk into submerged, sanity-draining Ancient Sarnath, where even the hardiest investigators are reluctant to go. Three sets of gate markers, along with several markers for sealed gates, are included in Gates of Arkham. If you are asked to open a fourth gate, you must spawn a monster instead. If all Arkham Adventures have either an open gate or a sealed gate marker on them and another gate opens, a gate burst occurs. You must then advance doom and remove all sealed gate markers before adding another gate and venturing into the Other World where it leads. 
The Lurker at the Threshold All four of the Ancient Ones introduced in Gates of Arkham cause gates to open as they awaken. As the guardian of the gates, Yog-Sothoth is feared even by other Ancient Ones. He is the eldest of them all, the omniscient lurker at the threshold, eager to consume all life forms that come within his reach, and his reach only increases as the boundaries between worlds become blurred. His awakening is the catalyst for the terrible End Times, and you will need fifteen Elder Signs to ensure that he remains asleep. While still asleep he is quite capable of shredding the dimensional fabric and unleashing plentiful horrors. If Yog-Sothoth is the Ancient One, a gate opens every midnight. Four more gates will open over the course of his awakening. He causes more gates to open than any other Ancient One does, destabilizing locations throughout Arkham, pulling monsters into the world, and hastening the advance of doom. Yog-Sothoth also prevents investigators from using spells, focusing dice, and receiving assistance when they are in Other Worlds. So, even as a multitude of gates are opening, Yog-Sothoth makes it more difficult for investigators to seal those gates – or even survive. 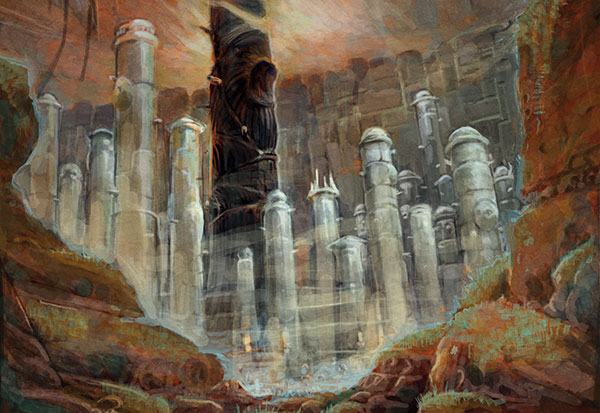
A Sight Worse than Death Itself The Ancient Ones are hideous to look upon, and the sight of one has been known to drive even the most fearless men insane. Yet only the dark god Ghatanothoa eternally paralyzes those who look upon him, transforming their bodies to stone and leather while their brains remain living and functional within, all too aware of their helpless imprisonment. Long ago, this hellish demon held sway over the ancient land of K’naa; now he waits just outside of Arkham, eager to rule again. It takes only ten Elder Signs to defeat Ghatanothoa, but there are only nine spots on his doom track, so you do not have much time to gather those priceless tokens. Your search for them will likely take you into Other Worlds, especially with gates opening throughout Arkham, but Ghatanothoa’s presence makes traveling to Other Worlds quite deadly. When an investigator completes an Other World adventure, he rolls a green die. On a terror result, the investigator is devoured, having met Ghatanothoa’s annihilating gaze. 
Through the Gates The gates tearing at Arkham’s dimensional fabric are as big a threat as the Gugs lurking in back alleys, the Cultists performing black magic in the forest, or the bootlegging gang wars that have claimed countless innocent victims. Only by venturing through the gates into the unknown can you make time and space cohere again and prevent the terrible Ancient Ones from taking over the world. Pre-order Elder Sign: Gates of Arkham from your local retailer today! ... Source: Tears in the Fabric of the World (http://www.fantasyflightgames.com/edge_news.asp?eidn=5312)
Title: FFG:Government Conspiracies
Post by: RSSFeeder on 15 January 2015, 20:00:02
Government ConspiraciesA Preview of For the Greater Good for Call of Cthulhu: The Card Game
“During the winter of 1927-28 officials of the Federal government made a strange and secret investigation of certain conditions in the ancient Massachusetts seaport of Innsmouth. The public first learned of it in February, when a vast series of raids and arrests occurred, followed by the deliberate burning and dynamiting – under suitable precautions – of an enormous number of crumbling, worm-eaten, and supposedly empty houses along the abandoned waterfront.”
–H.P. Lovecraft, The Shadow Over Innsmouth Furtive cultists and alien monsters prowl the alleys and hillsides of Call of Cthulhu: The Card Game. They crave blood and power, they offer sacrifices to dark gods, and they bide their time until the stars are once again properly aligned and their evil machinations bring the world to ruin. All the while, they carefully conceal the terrifying secrets of their very existence from the unsuspecting masses. How, then, can humanity fight back against a foe it scarcely knows exists? The answer is that we rely upon the efforts of a few individuals who have uncovered fragments of the truth. These individuals may each see only a small fraction of the terrors that threaten our existence, but in the For the Greater Good deluxe expansion, many of them band together as members of the Agency faction. United, they wage a secret war against the hordes of vile cultists, monsters, and servitors. In today’s preview, we take a look at these defenders of humanity and their reasons for keeping their efforts secret. Humanity’s Secret Defenders With its focus on the Agency faction, For the Greater Good lends a massive measure of new strength to one of the game’s largest subtypes, government. Still, even though the government subtype is one of the game’s largest and has its origins all the way back in the Core Set, it has hitherto offered remarkably little in the way of synergy. Only two existing cards provide the game’s forty different government characters with any advantageous tricks or bonuses: Special Agent Clarkston (Aspirations of Ascension, 61) lowers their cost, and The Company (Seekers of Knowledge, 43) gives them Toughness. Now, however, For the Greater Good gives the government subtype a much greater reach. For starters, Lt. Wilson Stewart (For the Greater Good, 16) can work with your government characters to reduce the costs of your Agency characters; he can exhaust to reduce the cost of an Agency character by an amount equal to the number of government characters you control. Meanwhile, the Military Attaché (For the Greater Good, 15) adds valuable Arcane icons to your government characters, shoring up one of the faction’s greatest weaknesses. Altogether, the introduction of these two characters from For the Greater Good, combined with the efforts of Special Agent Clarkston and The Company, means that your government characters are going to be more cost-effective and tougher than ever. They’ll also be more capable of rushing toward early leads, investigating stories, and readying during the Arcane struggle in order to defend on your opponent’s turn. And that means that the expansion’s other government characters arrive in a new context, one wherein the government subtype is more meaningful and more potent than ever.
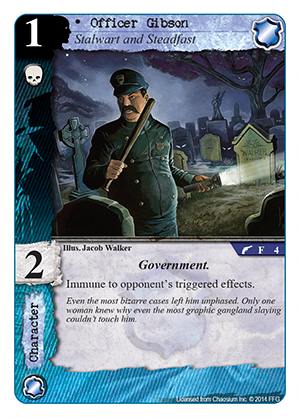 |
Officer Gibson (For the Greater Good, 4) becomes a great early-game defender who only becomes more powerful as he gains Toughness and Arcane icons, even while helping Lt. Wilson Stewart lower the cost of other government characters. All the while, his immunity to your opponent’s triggered effects makes him a great target for attachments like Shotgun (Core Set, 14) and Snowmobile (For the Greater Good, 21). |
 |
Even if you can’t draw an early Military Attaché, you can still gain Arcane icons at a story by sending the new government character, Warrant Officer (For the Greater Good, 10). Armed with a wrench and a flashlight, this Warrant Officer grants both an Arcane icon and a Combat icon to each of your Agency characters at the same story. Because his response triggers when he’s committed, these icons last until the end of the phase, even if your Warrant Officer flees the story in terror. |
 |
The Terror struggle is much less of a concern for one of the expansion’s other government officials. The Heroic General Edward Irving (For the Greater Good, 18) not only boasts Willpower and Toughness, but he can ready himself any time he loses a Terror struggle. Here, in a nutshell, we see the embodiment of the Agency’s most heroic tendencies: as its members confront unfathomable threats that might drive lesser individuals insane, they don’t use their time to seek accolades, but just to battle through the first waves in order to find some means to drive back and defeat any subsequent waves. |
The Untold Story Why don’t we know more about the Agency’s efforts to confront the Ancient Ones and their minions? There are two possible explanations, neither of which precludes the other. One possibility is that the government characters from For the Greater Good follow the examples set by General Edward Irving and Lt. Wilson Stewart. They keep their work secret because they understand how maddening it could be if the world at large were ever to learn that its very existence was constantly threatened by forces it couldn’t possibly understand. But there is another possible theory for the Agency’s secrecy. Some speculate that the individuals responsible for extending the Agency’s global networks may, in fact, operate with far less noble intentions. After all, in a faction that has mastered the art of bureaucracy, it’s all too easy for some individuals to hold secrets that lie within larger secrets that are themselves nested within the layers of other secrets. Alongside its brazen proficiency in the Combat struggle, the Agency has a long history of conspiracies, cover ups, and bureaucratic Red Tape (For the Greater Good, 27). Its members have specialized in eliminating incriminating evidence since the Core Set and Torch the Joint! (Core Set, 18), but a few careless slip-ups have tipped others to their involvement in deeper events. We’ve seen evidence of a greater Cover Up (Perilous Trials, 22), which leads directly toward speculation about the nature of the Agency’s conspiracies and those members involved. The increase in the number and efficiency of government characters seems, also, to correlate with the introduction of four new conspiracies, all of which offer Agency players new and powerful means of conducting their business away from prying eyes. 
Players with Agency decks that feature a lot of low-cost characters or make use of ample cost reduction may wish to explore the faction’s involvement in The Blackwood Initiative (For the Greater Good, 35). While it’s in play, The Blackwood Conspiracy plays resourcing and card advantage against each other, forcing unprepared players into truly difficult decisions as they grapple with how they wish to balance two of the game’s essential elements. Meanwhile, even though this potent conspiracy is Loyal and costs two resources, you can get it into play for just one resource via Cover Up, even before your opponent manages to resource his first card. 
If you’d prefer to resource normally but want to control how your opponent commits to stories, you could instead play a copy of The Usual Suspects (For the Greater Good, 32). Playing to the Agency’s strengths, this conspiracy replaces the Terror struggle with a second Combat struggle, but you might not really want to win this conspiracy. First of all, it’s not necessarily the best target for your investigations. Instead of requiring five success tokens, The Usual Suspects requires eight, meaning it takes at least one additional turn to score. Second, its game text protects the characters you commit elsewhere from the disruptive and harmful effects of non-unique characters like Wheelman (Denizens of the Underworld, 19), Ya-te-veo (The Unspeakable Pages, 91), and even the terrifying Ravager from the Deep (Core Set, 46). Additionally, its presence on the table may prevent your opponent from aggressively pursuing success tokens with characters like the Alternative Historian (Seekers of Knowledge, 15) and Faceless Abductor (The Order of the Silver Twilight, 7). 
The Anderson Building (For the Greater Good, 34) presents an alternate means of controlling how your opponent commits to stories. So long as The Anderson Building is in play, any time a player succeeds at a story, he must trigger its effect as though he had won it. While this is a great way to draw a lot of cards through Chaos Unleashed (The Shifting Sands, 8), it’s also a powerful disincentive to the commitment of too many characters to The Ninth Plague (The Shifting Sands, 2) or Within the Ice (The Shifting Sands, 4). 
Finally, there’s an elite sect of Agency operatives toiling behind the scenes to conduct The Great Work (For the Greater Good, 33). As long as this conspiracy remains in play, players cannot trigger effects from out of play, unless they have a character commit to it. This means your opponent can’t play events, sneak up on you with Black Dogs (Words of Power, 29), or confound you with the sudden appearance of his diabolical Dreamlands Fanatics (In the Dread of Night, 47). Even the mighty Descendant of Eibon (The Terror of the Tides, 75) is thwarted by this conspiracy, as are all effects your opponent might hope to trigger from the discard pile. Now that they have put such powerful, far-reaching conspiracies into motion, the Agency’s government officials are certain to vie for the title of the most secretive faction within Call of Cthulhu: The Card Game, especially when you consider the synergies its conspiracies have with such conspirators as Abbess Allegria Di Biase (Terror in Venice, 1) and Intelligence Agent (For the Greater Good, 7). To What End? The only question that remains is whether these conspirators are working in the shadows on behalf of humanity, or if they’re merely pawns for other, more sinister players. Could it be that all their efforts to defend human civilization are being secretly corrupted and perverted? In our next preview of For the Greater Good, we’ll take a look at two Agency deck lists that may look outwardly similar, but ultimately reveal some profoundly ominous differences. Until then, head to your local retailer, and pre-order your copy of For the Greater Good! ... Source: Government Conspiracies (http://www.fantasyflightgames.com/edge_news.asp?eidn=5313)
Title: FFG:What Lies Beneath
Post by: RSSFeeder on 16 January 2015, 04:30:03
What Lies BeneathThe Deep Realms Expansion for Talisman Is Now Available
The tavern maid rushed out of the dungeon with enough gold tucked in her skirts to make sure she’d never have to work another day in her life. No, bigger and better things awaited her just on the other side of that rickety wood and rope bridge. She paused and looked back into the darkness for a second, but when she turned around again a towering knight in full armor stood before her. As the knight raised his sword, she looked up at its face, thinking to beg for mercy. Inside the helmet was a skinless, grinning skull. The Deep Realms, an expansion for Talisman 4th Edition, is now available at your local retailer and in our online store. Designed by Jon New, the designer of Talisman: The Nether Realms, in collaboration with our own Samuel Bailey, The Deep Realms opens up the dark, haunted, and rat-infested passages between the Dungeon and the City regions. A perilous bridge allows you to travel across the Deep Realms, or you can venture deeper, into the Old Sewers and the Catacombs. These tunnels are filled with tantalizing wealth – and terrifying, life-threatening dangers. Important: Both The Dungeon and The City expansions for Talisman Revised 4th Edition are required to play with The Deep Realms. 
Crossing the Bridge Perhaps you’ve met trouble in the City and are hoping that the treasures concealed in the Dungeon will solve your problems. Perhaps you have barely survived the Dungeon’s perils and are rushing towards the City for healing, a hot meal, and some rest. The bridge between the Skull Passage and the Rat Run provides a shortcut – but not without its own dangers. Some unsavory people like to lurk at this gloomy crossroads. As you cross the bridge you might gain a Follower that you never wanted, such as the Jinx. If you’re fortunate, you may stumble upon something valuable left behind by another traveler, such as a Broken Sword that can be reforged, or the Tome of Ages, which lets you to spend fate in order to avoid missing a turn. However, on the bridge you also may encounter rats that have wandered out of the sewers in search of food, or a wraith hunting fresh souls. If the bridge proves too treacherous, you can always turn back and retrace your steps through the Dungeon or the City – or try to find a way out through the dark tunnels below. 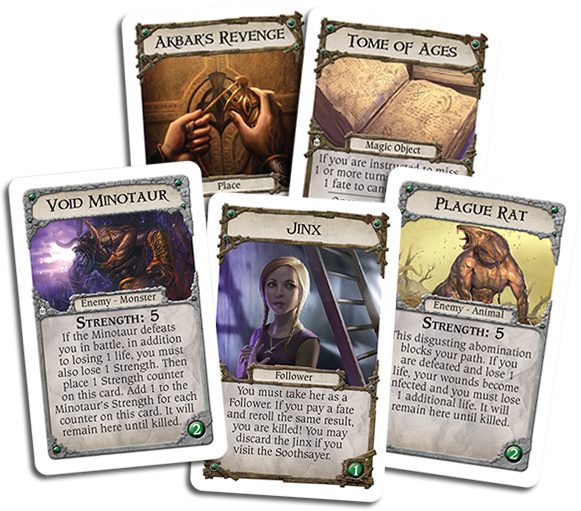
The Lairs of Wraiths and Rats From the Cavern space in the Dungeon you can venture into the Catacombs, a labyrinth of tunnels where evil Spirits are more powerful than normal. If you escape the numerous traps and withstand the horrors, you can progress to the Throne Room and try to wrest some treasure from the monstrous Wraith Lord. If you defeat him, you’ll emerge with your booty wherever you like in the Outer Region. If you fail, you’ll be magically transported back to the Hall of Darkness in the heart of the Dungeon. If you’re in the City, you may walk from the Thieves’ Alley into the infested Old Sewers, where rats of all varieties gain extra Strength in the dank darkness. Deep within the sewers you’ll find the Rats’ Nest, where their giant, vicious queen sits atop a horde of valuable Objects. If you win a fight against her, you can take an Object from that horde. If she wins, her vermin minions will carry you to the Rats’ Road in the City and leave you there empty-handed. 
Delve into the Darkness The Deep Realms are filled with rodents, wraiths, zombies, harmful Followers, and challenging Traps. Yet those willing to brave the perils of these unlit and inhospitable regions may be rewarded with not only desirable Objects and valuable Treasures, but perhaps even a Talisman to ease their journey towards the Crown of Command. Find out what lies beneath the Dungeon and the City. Pick up your copy of The Deep Realms today! ... Source: What Lies Beneath (http://www.fantasyflightgames.com/edge_news.asp?eidn=5314)
Title: FFG:Fog on the Barrow-downs
Post by: RSSFeeder on 16 January 2015, 13:00:05
Fog on the Barrow-downsA New Standalone Scenario Is Now Available for The Lord of the Rings
“He was suddenly aware that it was getting very cold, and that up here a wind was beginning to blow, an icy wind. A change was coming in the weather.”
–J.R.R. Tolkien, The Fellowship of the Ring Fantasy Flight Games is proud to announce that Fog on the Barrow-downs is now available for The Lord of the Rings: The Card Game! Brave a perilous journey across the barrow-downs, and come face to face with the barrows’ terrible wights. First released in 2014 as part of a special Fellowship Event, Fog on the Barrow-downs is a fifty-four card scenario for The Lord of the Rings: The Card Game directly inspired by one of the early chapters in The Fellowship of the Ring. You’ll need all your courage to survive. You’ll also need to be careful you don’t end up trapped in one of the barrow-wights’ tombs, for the danger of winding up inside a barrow, separated from your friends, is a very real threat. Moreover, just as with the The Old Forest scenario that came before it, Fog on the Barrow-downs can also be played in campaign mode as part of your The Lord of the Rings campaign. In addition to its quest and encounter decks, Fog on the Barrow-downs comes with a new campaign card and a powerful boon. From the house of Tom Bombadil, the scenario’s four quest stages and forty-one encounter cards lead you into the thick of the barrow-downs… It’s up to you to find a way out. 
Trapped Inside a Barrow “Then suddenly he knew that he was imprisoned, caught hopelessly; he was in a barrow.”
–J.R.R. Tolkien, The Fellowship of the Ring In The Fellowship of the Ring, the journey that Frodo and his companions take across the barrow-downs nearly ends in disaster. Frodo is ensorcelled, captured, and dragged into a tomb, along with Sam, Merry, and Pippin. As dread washes over him, Frodo scarcely manages to summon forth his courage. He resists the wight and calls for Tom Bombadil, who eventually saves the Hobbits. When you play through Fog on the Barrow-downs, you’ll be able to share some of the panic that Frodo felt when he found himself imprisoned. In order to defeat the scenario, you need to pass through the Standing Stones (Fog on the Barrow-downs, 6), which means that at least one player must leave the fellowship, only to be trapped inside a Great Barrow (Fog on the Barrow-downs, 7), isolated at his own staging area.  
There, inside the Great Barrow, you’re separated from your friends, unable to aid them or receive their aid, and although previous scenarios for The Lord of the Rings: The Card Game have also split the fellowship, none have done so in quite the same way, leaving your friends to face the wights among the barrow-downs, even while you must survive the other wights residing within their tomb. It’s possible, too, that your friends may also be caught by the wights and buried. There are five copies of Great Barrow, so the longer you spend trapped at your own stage four, the greater the odds are that your allies will get caught, themselves. And then the pressure really starts to mount, both because you need everyone to reconvene at stage three in order to win and because the wights that you’ll face inside the barrows can prevent you from drawing extra cards, gaining extra resources, and lowering your threat.  Fortunately, the trials you’ll face in the barrow-downs don’t take you too far from Tom Bombadil’s home, and there’s a good chance that Tom Bombadil (Fog on the Barrow-downs, 19) may appear just as you fear you’ll be overwhelmed, sing one of his cheery songs, and help you on your way. Fortunately, the trials you’ll face in the barrow-downs don’t take you too far from Tom Bombadil’s home, and there’s a good chance that Tom Bombadil (Fog on the Barrow-downs, 19) may appear just as you fear you’ll be overwhelmed, sing one of his cheery songs, and help you on your way.
In campaign mode, you may even be able to take one of Tom’s songs with you. If you complete your passage through Fog on the Barrow-downs, you earn the boon, Ho! Tom Bombadil! (Fog on the Barrow-downs, 21), which allows you to cancel the “when revealed” effects of any one encounter card you face later in the campaign. However, you’ll want to use this boon wisely; once you use it, it’s removed from the campaign pool, and Tom’s cheery voice will be nothing more than a memory. Enter the Barrow-downs Today! “Don’t you go a-meddling with old stone or cold Wights or prying in their houses, unless you be strong folk with hearts that never falter!”
–Tom Bombadil, The Fellowship of the Ring How strong is your heart? Will your courage hold up to the trials of Fog on the Barrow-downs? Now is the time to find out. Pick up your copy today! ... Source: Fog on the Barrow-downs (http://www.fantasyflightgames.com/edge_news.asp?eidn=5315)
Title: FFG:Fog on the Barrow-downs
Post by: RSSFeeder on 16 January 2015, 21:30:03
Fog on the Barrow-downsA New Stand-alone Scenario Is Now Available for The Lord of the Rings
“He was suddenly aware that it was getting very cold, and that up here a wind was beginning to blow, an icy wind. A change was coming in the weather.”
–J.R.R. Tolkien, The Fellowship of the Ring Fantasy Flight Games is proud to announce that Fog on the Barrow-downs is now available for The Lord of the Rings: The Card Game! Brave a perilous journey across the barrow-downs, and come face to face with the barrows’ terrible wights. First released in 2014 as part of a special Fellowship Event, Fog on the Barrow-downs is a fifty-four card scenario for The Lord of the Rings: The Card Game directly inspired by one of the early chapters in The Fellowship of the Ring. You’ll need all your courage to survive. You’ll also need to be careful you don’t end up trapped in one of the barrow-wights’ tombs, for the danger of winding up inside a barrow, separated from your friends, is a very real threat. Moreover, just as with the The Old Forest scenario that came before it, Fog on the Barrow-downs can also be played in campaign mode as part of your The Lord of the Rings campaign. In addition to its quest and encounter decks, Fog on the Barrow-downs comes with a new campaign card and a powerful boon. From the house of Tom Bombadil, the scenario’s four quest stages and forty-one encounter cards lead you into the thick of the barrow-downs… It’s up to you to find a way out.
Trapped Inside a Barrow “Then suddenly he knew that he was imprisoned, caught hopelessly; he was in a barrow.”
–J.R.R. Tolkien, The Fellowship of the Ring In The Fellowship of the Ring, the journey that Frodo and his companions take across the barrow-downs nearly ends in disaster. Frodo is ensorcelled, captured, and dragged into a tomb, along with Sam, Merry, and Pippin. As dread washes over him, Frodo scarcely manages to summon forth his courage. He resists the wight and calls for Tom Bombadil, who eventually saves the Hobbits. When you play through Fog on the Barrow-downs, you’ll be able to share some of the panic that Frodo felt when he found himself imprisoned. In order to defeat the scenario, you need to pass through the Standing Stones (Fog on the Barrow-downs, 6), which means that at least one player must leave the fellowship, only to be trapped inside a Great Barrow (Fog on the Barrow-downs, 7), isolated at his own staging area.
There, inside the Great Barrow, you’re separated from your friends, unable to aid them or receive their aid, and although previous scenarios for The Lord of the Rings: The Card Game have also split the fellowship, none have done so in quite the same way, leaving your friends to face the wights among the barrow-downs, even while you must survive the other wights residing within their tomb. It’s possible, too, that your friends may also be caught by the wights and buried. There are five copies of Great Barrow, so the longer you spend trapped at your own stage four, the greater the odds are that your allies will get caught, themselves. And then the pressure really starts to mount, both because you need everyone to reconvene at stage three in order to win and because the wights that you’ll face inside the barrows can prevent you from drawing extra cards, gaining extra resources, and lowering your threat. Fortunately, the trials you’ll face in the barrow-downs don’t take you too far from Tom Bombadil’s home, and there’s a good chance that Tom Bombadil (Fog on the Barrow-downs, 19) may appear just as you fear you’ll be overwhelmed, sing one of his cheery songs, and help you on your way. In campaign mode, you may even be able to take one of Tom’s songs with you. If you complete your passage through Fog on the Barrow-downs, you earn the boon, Ho! Tom Bombadil! (Fog on the Barrow-downs, 21), which allows you to cancel the “when revealed” effects of any one encounter card you face later in the campaign. However, you’ll want to use this boon wisely; once you use it, it’s removed from the campaign pool, and Tom’s cheery voice will be nothing more than a memory. Enter the Barrow-downs Today! “Don’t you go a-meddling with old stone or cold Wights or prying in their houses, unless you be strong folk with hearts that never falter!”
–Tom Bombadil, The Fellowship of the Ring How strong is your heart? Will your courage hold up to the trials of Fog on the Barrow-downs? Now is the time to find out. Pick up your copy today! ... Source: Fog on the Barrow-downs (http://www.fantasyflightgames.com/edge_news.asp?eidn=5316)
Title: FFG:2015 Warhammer 40,000: Conquest Regional Championships
Post by: RSSFeeder on 17 January 2015, 06:00:04
2015 Warhammer 40,000: Conquest Regional ChampionshipsApply by February 6th to Host a Tournament
Are You a Retailer?
Apply today to host a Regional Championship!
|
|
Fantasy Flight Games is excited to announce Warhammer 40,000: Conquest Regional Championship applications are now armed and ready for battle! Retailers are invited to apply now for this year’s Regional season, running from May 1st through July 31st. If you are a United States retailer or tournament organizer interested in hosting a 2015 Regional Championship event, fill out our online application form before February 6th 23:59 CST (Central Standard Time) to be considered. If you are a retailer outside of the United States, please contact your distributor to apply to host a Regional Championship or ask questions. International applications must be submitted before February 6th 23:59 CST (Central Standard Time) to be considered. How Do Regional Championships Fit into Organized Play? Regional Championships are your chance to create a community that spans beyond your town or city and the first big test for competitive players on their road to World Championship Weekend in November. A premier event, Regional Championships attract players hoping to earn the precious first-round bye at their National Championship and gain a leg up on their opponents. Regional Championships are exclusive events and there are a limited number of them run around the world each year. We are excited to announce that this year we are increasing the number of events to better serve the needs of players. In the United States, each region can host up to three Regional Championships (see the map below). If you are outside of the United States, contact your distributor for more information on Regional Championships in your country.  What Does Premier Level Mean? Premier-level events are the most prestigious tournaments FFG supports. Players can come to these events expecting the highest level of competition, as well as the strictest enforcement of rules. From the Warhammer 40,000: Conquest tournament rules: Premier events are the highest level of competition for Fantasy Flight Games tournaments, and all players, judges, and tournament organizers involved are held to the highest levels of conduct. Players are assumed to be familiar with the game’s rules, as well as the latest FAQ and tournament rules, and should expect all rules to be strictly enforced. Regional Championships, National Championships, and World Championships are premier events. Regional Championship Prizes A bye is not the only prize on the line at Warhammer 40,000: Conquest Regional Championships. In addition to a poster and info sheet, each Regional Championship kit comes with exclusive prizes for up to 64 players.
- 1 Regional 2015 trophy
- 1 card granting the winner a first-round bye at the country’s National Championship
- 4 double-sided, spot-glossed Nazdreg warlord cards
- 8 Regional playmats
- 16 packs of acrylic damage tokens
- 64 Flash Gitz alternate art cards
 Please note: The alternate art cards in this kit are produced through FFG's In-House Manufacturing, and as such, they may appear slightly different in color and texture from the game's other cards. To be tournament legal, these cards must be sleeved with opaque or art sleeves. Apply Now Apply today by completing the United States online application form for the chance to host some of the most lethal and devoted Warlords in your region. International retailers should contact their distributor to apply. Don’t wait! Apply before February 6th 23:59 CST (Central Standard Time), or Regional Championship applications will close and your chance at dominating the Traxis Sector will end! ... Source: 2015 Warhammer 40,000: Conquest Regional Championships (http://www.fantasyflightgames.com/edge_news.asp?eidn=5317)
Title: FFG:2015 X-Wing(TM) Regional Championships
Post by: RSSFeeder on 17 January 2015, 14:30:03
2015 X-Wing(TM) Regional ChampionshipsApply by February 6th to Host a Tournament
Are You a Retailer?
Apply today to host a Regional Championship!
|
|
Fantasy Flight Games is excited to announce X-Wing™ Regional Championship applications are now prepped and ready to go to lightspeed! Retailers are invited to apply now for this year’s Regional season, running from May 1st through July 31st. If you are a United States retailer or tournament organizer interested in hosting a 2015 Regional Championship event, fill out our online application form before February 6th 23:59 CST (Central Standard Time) to be considered. If you are a retailer outside of the United States, please contact your distributor to apply to host a Regional Championship or ask questions. International applications must be submitted before February 6th 23:59 CST (Central Standard Time) to be considered. How Do Regional Championships Fit into Organized Play? Regional Championships are your chance to create a community that spans beyond your town or city and the first big test for competitive players on their road to World Championship Weekend in November. A premier event, Regional Championships attract players hoping to earn the precious first-round bye at their National Championship and gain a leg up on their opponents. Regional Championships are exclusive events and there are a limited number of them run around the world each year. We are excited to announce that this year we are increasing the number of events to better serve the needs of players. In the United States, each region can host up to three Regional Championships (see the map below). If you are outside of the United States, contact your distributor for more information on Regional Championships in your country.
What Does Premier Level Mean? Premier-level events are the most prestigious tournaments FFG supports. Players can come to these events expecting the highest level of competition, as well as the strictest enforcement of rules. From the X-Wing tournament rules: Premier events are the highest level of competition for Fantasy Flight Games tournaments, and all players, judges, and tournament organizers involved are held to the highest levels of conduct. Players are assumed to be familiar with the game’s rules, as well as the latest FAQ and tournament rules, and should expect all rules to be strictly enforced. Regional Championships, National Championships, and World Championships are premier events. Regional Championship Prizes A bye is not the only prize on the line at X-Wing Regional Championships. In addition to a poster and info sheet, each Regional Championship kit comes with exclusive prizes for up to 64 players.
- 1 Regional 2015 trophy
- 1 card granting the winner a first-round bye at the country’s National Championship
- 4 sets of acrylic maneuver templates
- 8 sets of translucent dice (not pictured)
- 16 packs of acrylic shield tokens (not pictured)
- 64 Boba Fett alternate art cards
 Please note: The alternate art cards in this kit are produced through FFG's In-House Manufacturing, and as such, they may appear slightly different in color and texture from the game's other cards. Apply Now Apply today by completing the United States online application form for the chance to host some of the most resilient and inventive pilots in your region. International retailers should contact their distributor to apply. Don’t wait! Apply before February 6th 23:59 CST (Central Standard Time), or Regional Championship applications will close and you will be left drifting in vacuum! ... Source: 2015 X-Wing(TM) Regional Championships (http://www.fantasyflightgames.com/edge_news.asp?eidn=5318)
Title: FFG:2015 Imperial Assault Regional Championships
Post by: RSSFeeder on 17 January 2015, 23:00:03
2015 Imperial Assault Regional ChampionshipsApply by February 6th to Host a Tournament
Are You a Retailer? Apply today to host a Regional Championship!
| | Fantasy Flight Games is excited to announce Imperial Assault Skirmish Regional Championship applications are now geared up and ready for action! Retailers are invited to apply now for this inaugural Regional season, running from May 1st through July 31st. If you are a United States retailer or tournament organizer interested in hosting a 2015 Regional Championship event, fill out our online application form before February 6th 23:59 CST (Central Standard Time) to be considered. If you are a retailer outside of the United States, please contact your distributor to apply to host a Regional Championship or ask questions. International applications must be submitted before February 6th 23:59 CST (Central Standard Time) to be considered. How Do Regional Championships Fit into Organized Play? Regional Championships are your chance to create a community that spans beyond your town or city and the first big test for competitive players on their road to World Championship Weekend in November. A premier event, Regional Championships attract players hoping to earn the precious first-round bye at their National Championship and gain a leg up on their opponents. Regional Championships are exclusive events and there are a limited number of them run around the world each year. We are excited to announce that this year we are increasing the number of events to better serve the needs of players. In the United States, each region can host up to three Regional Championships (see the map below). If you are outside of the United States, contact your distributor for more information on Regional Championships in your country.
What Does Premier Level Mean? Premier-level events are the most prestigious tournaments FFG supports. Players can come to these events expecting the highest level of competition, as well as the strictest enforcement of rules. From FFG’s official tournament rules: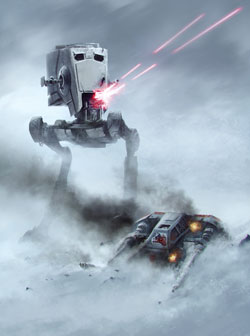 Premier events are the highest level of competition for Fantasy Flight Games tournaments, and all players, judges, and tournament organizers involved are held to the highest levels of conduct. Players are assumed to be familiar with the game’s rules, as well as the latest FAQ and tournament rules, and should expect all rules to be strictly enforced. Regional Championships, National Championships, and World Championships are premier events. Regional Championship Prizes A bye is not the only prize for the taking at Imperial Assault Skirmish Regional Championships. In addition to a poster and info sheet, each Regional Championship kit comes with exclusive prizes for up to 64 players. - 1 Regional 2015 trophy
- 1 card granting the winner a first-round bye at the country’s National Championship
- 4 dice bags
- 8 sets of translucent dice (not pictured)
- 16 packs of acrylic terminal tokens
- 64 AT-ST alternate art cards

Please note: The alternate art cards in this kit are produced through FFG's In-House Manufacturing, and as such, they may appear slightly different in color and texture from the game's other cards. Apply Now Apply today by completing the United States online application form for the chance to host some of the craftiest and strongest soldiers in your region of the galaxy. International retailers should contact their distributor to apply. Don’t hesitate to join the action! Apply before February 6th 23:59 CST (Central Standard Time), or Regional Championship applications will close and your mission will expire! ... Source: 2015 Imperial Assault Regional Championships (http://www.fantasyflightgames.com/edge_news.asp?eidn=5319)
Title: FFG:2015 Star Wars(TM): The Card Game Regional Championships
Post by: RSSFeeder on 18 January 2015, 07:30:04
2015 Star Wars(TM): The Card Game Regional ChampionshipsApply by February 6th to Host a Tournament
Are You a Retailer? Apply today to host a Regional Championship!
| | Fantasy Flight Games is excited to announce Star Wars™: The Card Game Regional Championship applications are now fully loaded and operational! Retailers are invited to apply now for this year’s Regional season, running from May 1st through July 31st. If you are a United States retailer or tournament organizer interested in hosting a 2015 Regional Championship event, fill out our online application form before February 6th 23:59 CST (Central Standard Time) to be considered. If you are a retailer outside of the United States, please contact your distributor to apply to host a Regional Championship or ask questions. International applications must be submitted before February 6th 23:59 CST (Central Standard Time) to be considered. How Do Regional Championships Fit into Organized Play? Regional Championships are your chance to create a community that spans beyond your town or city and the first big test for competitive players on their road to World Championship Weekend in November. A premier event, Regional Championships attract players hoping to earn the precious first-round bye at their National Championship and gain a leg up on their opponents. Regional Championships are exclusive events and there are a limited number of them run around the world each year. We are excited to announce that this year we are increasing the number of events to better serve the needs of players. In the United States, each region can host up to three Regional Championships (see the map below). If you are outside of the United States, contact your distributor for more information on Regional Championships in your country. What Does Premier Level Mean? Premier-level events are the most prestigious tournaments FFG supports. Players can come to these events expecting the highest level of competition, as well as the strictest enforcement of rules. From the Star Wars: The Card Game tournament rules: Premier events are the highest level of competition for Fantasy Flight Games tournaments, and all players, judges, and tournament organizers involved are held to the highest levels of conduct. Players are assumed to be familiar with the game’s rules, as well as the latest FAQ and tournament rules, and should expect all rules to be strictly enforced. Regional Championships, National Championships, and World Championships are premier events. Regional Championship Prizes A bye is not the only bounty that can be found at Star Wars: The Card Game Regional Championships. In addition to a poster and info sheet, each Regional Championship kit comes with exclusive prizes for up to 64 players. - 1 Regional Champion trophy
- 1 card granting the winner a first-round bye at the country’s National Championship
- 4 double-sided, spot-glossed identity cards featuring the Revel and Imperial factions
- 8 Regional playmats
- 16 packs of acrylic focus tokens
- 64 Admiral Ackbar alternate art cards
 Please note: The alternate art cards in this kit are produced through FFG's In-House Manufacturing, and as such, they may appear slightly different in color and texture from the game's other cards. To be tournament legal, these cards must be sleeved with opaque or art sleeves. Apply Now Apply today by completing the United States online application form for the chance to host some of the best and brightest from both sides of the Force. International retailers should contact their distributor to apply. Be careful not to wait too long! After February 6th 23:59 CST (Central Standard Time), applications will close and the fate of the galaxy will be out of your hands. ... Source: 2015 Star Wars(TM): The Card Game Regional Championships (http://www.fantasyflightgames.com/edge_news.asp?eidn=5320)
Title: FFG:2015 A Game of Thrones: The Card Game Regional Championships
Post by: RSSFeeder on 18 January 2015, 16:00:03
2015 A Game of Thrones: The Card Game Regional ChampionshipsApply by February 6th to Host a Tournament
Are You a Retailer?
Apply today to host a Regional Championship!
|
|
Fantasy Flight Games is excited to announce A Game of Thrones: The Card Game Regional Championship applications are open and the time to call your banners is now! Retailers are invited to apply now for this year’s Regional season, running from May 1st through July 31st. If you are a United States retailer or tournament organizer interested in hosting a 2015 Regional Championship event, fill out our online application form before February 6th 23:59 CST (Central Standard Time) to be considered. If you are a retailer outside of the United States, please contact your distributor to apply to host a Regional Championship or ask questions. International applications must be submitted before February 6th 23:59 CST (Central Standard Time) to be considered. How Do Regional Championships Fit into Organized Play? Regional Championships are your chance to create a community that spans beyond your town or city and the first big test for competitive players on their road to World Championship Weekend in November. A premier event, Regional Championships attract players hoping to earn the precious first-round bye at their National Championship and gain a leg up on their opponents. Regional Championships are exclusive events and there are a limited number of them run around the world each year. We are excited to announce that this year we are increasing the number of events to better serve the needs of players. In the United States, each region can host up to three Regional Championships (see the map below). If you are outside of the United States, contact your distributor for more information on Regional Championships in your country.
What Does Premier Level Mean? Premier-level events are the most prestigious tournaments FFG supports. Players can come to these events expecting the highest level of competition, as well as the strictest enforcement of rules. From the A Game of Thrones: The Card Game tournament rules: Premier events are the highest level of competition for Fantasy Flight Games tournaments, and all players, judges, and tournament organizers involved are held to the highest levels of conduct. Players are assumed to be familiar with the game’s rules, as well as the latest FAQ and tournament rules, and should expect all rules to be strictly enforced. Regional Championships, National Championships, and World Championships are premier events. Regional Championship Prizes A bye is not the only reward in the prize purse at A Game of Thrones: The Card Game Regional Championships. In addition to a poster and info sheet, each Regional Championship kit comes with exclusive prizes for up to 64 players.
- 1 Regional Champion trophy
- 1 card granting the winner a first-round bye at the country’s National Championship
- 4 stone Stark House cards
- 8 Regional playmats
- 16 packs of acrylic Stark power tokens
- 64 Shadowblack Lane alternate art cards

Please note: The alternate art cards in this kit are produced through FFG's In-House Manufacturing, and as such, they may appear slightly different in color and texture from the game's other cards. To be tournament legal, these cards must be sleeved with opaque or art sleeves. Apply Now Apply today by completing the United States online application form for the chance to host some of the toughest and most courageous knights in your region. International retailers should contact their distributor to apply. Don’t hesitate! Apply before February 6th 23:59 CST (Central Standard Time) or miss the chance to host one of the most renowned and colorful tourneys of the year! ... Source: 2015 A Game of Thrones: The Card Game Regional Championships (http://www.fantasyflightgames.com/edge_news.asp?eidn=5321)
Title: FFG:2015 Call of Cthulhu: The Card Game Regional Championships
Post by: RSSFeeder on 19 January 2015, 00:30:03
2015 Call of Cthulhu: The Card Game Regional ChampionshipsApply by February 6th to Host a Tournament
Are You a Retailer?
Apply today to host a Regional Championship!
|
|
Fantasy Flight Games is excited to announce the 2015 Regional Championship Season for Call of Cthulhu: The Card Game. Regional Championship applications have been unearthed and now await bold investigators! Retailers are invited to apply now for this year’s Regional season, running from May 1st through July 31st. If you are a United States retailer or tournament organizer interested in hosting a 2015 Regional Championship event, fill out our online application form before February 6th 23:59 CST (Central Standard Time) to be considered. If you are a retailer outside of the United States, please contact your distributor to apply to host a Regional Championship or ask questions. International applications must be submitted before February 6th 23:59 CST (Central Standard Time) to be considered. How Do Regional Championships Fit into Organized Play? Regional Championships are your chance to create a community that spans beyond your town or city and the first big test for competitive players on their road to World Championship Weekend in November. A premier event, Regional Championships attract players hoping to earn the precious first-round bye at their National Championship and gain a leg up on their opponents. Regional Championships are exclusive events and there are a limited number of them run around the world each year. We are excited to announce that this year we are increasing the number of events to better serve the needs of players. In the United States, each region can host up to three Regional Championships (see the map below). If you are outside of the United States, contact your distributor for more information on Regional Championships in your country.
What Does Premier Level Mean? Premier-level events are the most prestigious tournaments FFG supports. Players can come to these events expecting the highest level of competition, as well as the strictest enforcement of rules. From the Call of Cthulhu: The Card Game tournament rules: Premier events are the highest level of competition for Fantasy Flight Games tournaments, and all players, judges, and tournament organizers involved are held to the highest levels of conduct. Players are assumed to be familiar with the game’s rules, as well as the latest FAQ and tournament rules, and should expect all rules to be strictly enforced. Regional Championships, National Championships, and World Championships are premier events. Regional Championship Prizes A bye is not the only reward for those who survive Call of Cthulhu: The Card Game Regional Championships. In addition to a poster and info sheet, each Regional Championship kit comes with exclusive prizes for up to 64 players.
- 1 Regional Champion trophy
- 1 card granting the winner a first-round bye at the country’s National Championship
- 4 sets of Wood domain cards
- 8 Regional playmats
- 16 packs of acrylic damage tokens
- 64 Uruborus alternate art cards

Please note: The alternate art cards in this kit are produced through FFG's In-House Manufacturing, and as such, they may appear slightly different in color and texture from the game's other cards. To be tournament legal, these cards must be sleeved with opaque or art sleeves. Apply Now Apply today by completing the United States online application form for the chance to host some of the most influential investigators and cultists in your region. International retailers should contact their distributor to apply. Time is short! Apply before February 6th 23:59 CST (Central Standard Time) while the stars are aligned! ... Source: 2015 Call of Cthulhu: The Card Game Regional Championships (http://www.fantasyflightgames.com/edge_news.asp?eidn=5322)
Title: FFG:2015 Android: Netrunner Regional Championships
Post by: RSSFeeder on 19 January 2015, 09:00:03
2015 Android: Netrunner Regional ChampionshipsApply by February 6th to Host a Tournament
Are You a Retailer?
Apply today to host a Regional Championship!
|
|
Fantasy Flight Games is excited to announce Android: Netrunner Regional Championship applications have been rezzed and are now online! Retailers are invited to apply now for this year’s Regional season, running from May 1st through July 31st. If you are a United States retailer or tournament organizer interested in hosting a 2015 Regional Championship event, fill out our online application form before February 6th 23:59 CST (Central Standard Time) to be considered. If you are a retailer outside of the United States, please contact your distributor to apply to host a Regional Championship or ask questions. International applications must be submitted before February 6th 23:59 CST (Central Standard Time) to be considered. How Do Regional Championships Fit into Organized Play? Regional Championships are your chance to create a community that spans beyond your town or city and the first big test for competitive players on their road to World Championship Weekend in November. A premier event, Regional Championships attract players hoping to earn the precious first-round bye at their National Championship and gain a leg up on their opponents. Regional Championships are exclusive events and there are a limited number of them run around the world each year. We are excited to announce that this year we are increasing the number of events to better serve the needs of players. In the United States, each region can host up to three Regional Championships (see the map below). If you are outside of the United States, contact your distributor for more information on Regional Championships in your country.
What Does Premier Level Mean? Premier-level events are the most prestigious tournaments FFG supports. Players can come to these events expecting the highest level of competition, as well as the strictest enforcement of rules. From the Android: Netrunner
tournament rules: Premier events are the highest level of competition for Fantasy Flight Games tournaments, and all players, judges, and tournament organizers involved are held to the highest levels of conduct. Players are assumed to be familiar with the game’s rules, as well as the latest FAQ and tournament rules, and should expect all rules to be strictly enforced. Regional Championships, National Championships, and World Championships are premier events. Regional Championship Prizes A National Championship bye is not the only prize up for grabs at Android: Netrunner Regional Championships. In addition to a poster and info sheet, each Regional Championship kit comes with exclusive prizes for up to 64 players.
- 1 Regional Champion trophy
- 1 card granting the winner a first-round bye at the country’s National Championship
- 4 double-sided, spot-glossed identity cards featuring Edward Kim and Gagarin Deep Space
- 8 Regional playmats
- 16 packs of acrylic credit tokens
- 64 Reina Roja alternate art cards

Please note: The alternate art cards in this kit are produced through FFG's In-House Manufacturing, and as such, they may appear slightly different in color and texture from the game's other cards. To be tournament legal, these cards must be sleeved with opaque or art sleeves. Apply Now Apply today by completing the United States online application form for the chance to host some of the most enthusiastic and daring runners in your region. International retailers should contact their distributor to apply. Don’t wait! The application server will be unplugged on February 6th 23:59 CST (Central Standard Time), closing applications for the 2015 Regional Championships. ... Source: 2015 Android: Netrunner Regional Championships (http://www.fantasyflightgames.com/edge_news.asp?eidn=5323)
Title: FFG:2015 Imperial Assault Regional Championships
Post by: RSSFeeder on 19 January 2015, 17:30:03
2015 Imperial Assault Regional ChampionshipsApply by February 6th to Host a Tournament
Are You a Retailer? Apply today to host a Regional Championship!
| | Fantasy Flight Games is excited to announce Imperial Assault Skirmish Regional Championship applications are now geared up and ready for action! Retailers are invited to apply now for this inaugural Regional season, running from May 1st through July 31st. If you are a United States retailer or tournament organizer interested in hosting a 2015 Regional Championship event, fill out our online application form before February 6th 23:59 CST (Central Standard Time) to be considered. If you are a retailer outside of the United States, please contact your distributor to apply to host a Regional Championship or ask questions. International applications must be submitted before February 6th 23:59 CST (Central Standard Time) to be considered. How Do Regional Championships Fit into Organized Play? Regional Championships are your chance to create a community that spans beyond your town or city and the first big test for competitive players on their road to World Championship Weekend in November. A premier event, Regional Championships attract players hoping to earn the precious first-round bye at their National Championship and gain a leg up on their opponents. Regional Championships are exclusive events and there are a limited number of them run around the world each year. We are excited to announce that this year we are increasing the number of events to better serve the needs of players. In the United States, each region can host up to three Regional Championships (see the map below). If you are outside of the United States, contact your distributor for more information on Regional Championships in your country.
What Does Premier Level Mean? Premier-level events are the most prestigious tournaments FFG supports. Players can come to these events expecting the highest level of competition, as well as the strictest enforcement of rules. From FFG’s official tournament rules: Premier events are the highest level of competition for Fantasy Flight Games tournaments, and all players, judges, and tournament organizers involved are held to the highest levels of conduct. Players are assumed to be familiar with the game’s rules, as well as the latest FAQ and tournament rules, and should expect all rules to be strictly enforced. Regional Championships, National Championships, and World Championships are premier events. Regional Championship Prizes A bye is not the only prize for the taking at Imperial Assault Skirmish Regional Championships. In addition to a poster and info sheet, each Regional Championship Expansion Kit comes with exclusive prizes for up to 64 players. - 1 Regional 2015 trophy
- 1 card granting the winner a first-round bye at the country’s National Championship
- 4 dice bags
- 8 sets of translucent dice (not pictured)
- 16 packs of acrylic terminal tokens
- 64 AT-ST alternate art cards
Please note: The alternate art cards in this kit are produced through FFG's In-House Manufacturing, and as such, they may appear slightly different in color and texture from the game's other cards. Apply Now Apply today by completing the United States online application form for the chance to host some of the craftiest and strongest soldiers in your region of the galaxy. International retailers should contact their distributor to apply. Don’t hesitate to join the action! Apply before February 6th 23:59 CST (Central Standard Time), or Regional Championship applications will close and your mission will expire! ... Source: 2015 Imperial Assault Regional Championships (http://www.fantasyflightgames.com/edge_news.asp?eidn=5319)
Title: FFG:Announcing 2015 Regional Championships
Post by: RSSFeeder on 20 January 2015, 02:00:05
Announcing 2015 Regional ChampionshipsRetailers: Apply by February 6th to Host a Regional Championship
Are You a Retailer?
Apply today to host a Regional Championship!
|
|
Fantasy Flight Games is excited to announce applications for the 2015 Regional Championship season are now open! Apply by February 6th 23:59 CST (Central Standard Time) to host one of these premier events at your store. If you are a retailer outside of the United States, please contact your distributor for more information and to apply to host a Regional Championship. International applications must be submitted before February 6th 23:59 CST (Central Standard Time) to be considered. Regional Championships are your chance to create a community that spans beyond your town or city and the first big test for competitive players on their road to World Championship Weekend in November. 
What Are Regional Championships? Regional Championships are your chance to host a diverse array of passionate players and create a community that spans beyond your town or city. Players sometimes travel many hours to attend these premier events and compete for exclusive prizes, as well as a bye at the country's National Championship. We encourage stores to add side events, additional prizes, or other creative ideas to make a player’s Regional Championships experience something to remember. Regional Championships sit between Store Championships and National Championships in the OP calendar, providing a competitive atmosphere for those looking toward being crowned a National Champion while allowing local players a chance to compete for something more than title of Store Champion. In 2015, Regional Championships run from May 1st through July 31st. After reviewing the 2014 Regional season, we have decided to expand the number of Regional Championships in 2015. Each region in the United States will now have up to three Regional Championships for each game. If you are outside of the United States, contact your distributor for more information on Regional Championships in your country.
What Games Are Supported? Regional Championships are a major part of the Organized Play calendar each year. This year, we are excited to announce the addition of Warhammer 40,000: Conquest and Imperial Assault Skirmish to the list of Regional Championships around the world. Follow the links below to see what’s included in each kit and apply to host a Regional Championship for each game. Are You a Player? If you’re a player, you can do your part by telling your favorite game store about Regional Championships. If you’re interested in taking a more active role in bringing Organized Play events to your store, here are some other ways you can promote Fantasy Flight OP:
- Encourage your friends to join you and play at your favorite local game store
- Ask your favorite local game store if you can post a sign-up sheet for upcoming events
- Offer to run demos
- Check with your store to see if they are in need of a tournament organizer or judge
The exclusive items and alternate art cards included in these kits are only available at 2015 Regional Championships, so be sure to talk with your local retailer about applying to host a Regional Championship. 
Apply Today Retailers, apply today by completing the United States online application form for the chance to host enthusiastic players in your area. International retailers should contact their local distributor to apply. Don’t miss out! Regional Championship applications close February 6th at 23:59 CST (Central Standard Time). ... Source: Announcing 2015 Regional Championships (http://www.fantasyflightgames.com/edge_news.asp?eidn=5324)
Title: FFG:Star Destroyers!
Post by: RSSFeeder on 20 January 2015, 10:30:03
Star Destroyers!Preview Two Imperial Starship Expansion Packs for STAR WARS (TM): Armada
“Star Destroyers, two of them, coming right at us.”
–Han Solo Recently, we announced the upcoming release of the first wave of expansion packs for Star Wars™: Armada, and in our last preview, we looked at how the game allows you to incorporate these ships, fighter squadrons, and upgrades into your own, custom fleet. Now that you know how you can use your three-hundred fleet points to buy capital ships, starfighters, upgrades, and your commander, we turn to the first two Imperial expansion packs to explore what they offer. Of course, both of them feature powerful Star Destroyers, but you’ll also find a great deal more, including a host of unique upgrades, including two commanders that can serve as alternates for the Core Set’s Grand Moff Tarkin. Victory-class Star Destroyer Expansion Pack
The largest and most powerful of all the ships from the Core Set and first wave, the Victory-class Star Destroyer formed the core of the Imperial Navy at the outset of the Galactic Civil War, and it’s likely, soon, to form the core of many an Imperial fleet in Armada. Available in both the Core Set and the Victory-class Star Destroyer Expansion Pack, the Victory-class Star Destroyer can be fielded as either of two subclasses. The more powerful Victory II costs eighty-five fleet points, and the Victory I, which is very nearly as imposing, costs seventy-three.
The ship cards for the Victory I (left) and Victory II (right).
These ships are the same in the expansion pack as they are in the Core Set, but the upgrades differ. And, as you can begin to guess from a look at their action bars, the different Victory-class Star Destroyers can each field an astonishing array of upgrades. 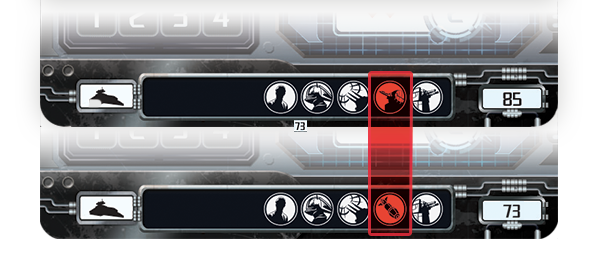
Both the Victory I (bottom) and Victory II (top) can host as many as five standard upgrades, plus a title. Additionally, the Victory-class Star Destroyer can serve as an excellent flagship for your commander, so you can theoretically associate as many as seven upgrade cards with a single Victory-class Star Destroyer.
Notably, though, the Victory II features the ion cannon upgrade type while the Victory I features the missile upgrade type. A small differences in icons that might slip your notice at first, this is the sort of distinction to which shrewd commanders will pay close attention as they assemble their fleets.  For example, the Victory I can equip the Assault Concussion Missiles upgrade. Then, whenever your attack includes a result on a black attack die, you can deal one point of damage to each hull zone adjacent to the defending hull zone. You can only trigger one critical effect per attack, so if you trigger the effect from your Assault Concussion Missiles, you won’t deal a faceup damage card to the enemy ship; of course, the exchange is that you will deal an extra two points of damage. For example, the Victory I can equip the Assault Concussion Missiles upgrade. Then, whenever your attack includes a result on a black attack die, you can deal one point of damage to each hull zone adjacent to the defending hull zone. You can only trigger one critical effect per attack, so if you trigger the effect from your Assault Concussion Missiles, you won’t deal a faceup damage card to the enemy ship; of course, the exchange is that you will deal an extra two points of damage.
On the other hand, the Victory II can equip either the Overload Pulse or the Ion Cannon Batteries found in the Victory-class Star Destroyer Expansion Pack. You can trigger the critical effect of either of these upgrades whenever you roll a result on a blue attack die. If you’ve equipped an Overload Pulse, you can exhaust all of the defending ship’s defense tokens, leaving it, effectively, a sitting duck for the remainder of the round. Or if you’ve equipped the Ion Cannon Batteries, you can strip away a ship’s command tokens, leaving it with fewer and weaker command options. As you can see, the upgrades that you select for your ships will drastically impact your strategy, and that means that each of the fourteen upgrades from the Victory-class Star Destroyer Expansion Pack offers its own range of strategic concerns. However, no upgrade cards offer more far-reaching strategic concerns than new commanders and title cards. Even though the Core Set offers a wide enough range of ship cards, squadrons, and upgrades to permit a great deal of fleet-building flexibility, it includes only one commander card for each faction and just one title for each type of ship. The Imperials gain Grand Moff Tarkin as their sole commander, and any Imperial looking to field a unique Victory-class Star Destroyer must choose to field the Dominator. These are both solid options, but the Imperial Navy gains greater flexibility with the Victory-class Star Destroyer Expansion Pack. Admiral Motti offers his services as commander, and you can field the Corrupter or Warlord instead of the Dominator (or alongside it). 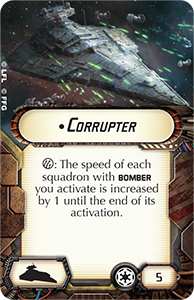 
These cards greatly expand the range of possible synergies you’ll be able to develop within your fleet, as do the expansion’s eleven other crew members, teams, hangar bays, and armaments. Accordingly, the Victory-class Star Destroyer Expansion Pack, like each Armada expansion, isn’t just all about its pre-painted miniature Star Destroyer; it’s about harnessing enough firepower to put the fear of the Empire into your opponents. Gladiator-class Star Destroyer Expansion Pack
The Gladiator-class Star Destroyer Expansion Pack also expands your fleet-building options with its miniature Star Destroyer, two ship cards, and ten upgrades. Less powerful and less resilient than the Victory-class, the Gladiator-class Star Destroyer is also less expensive, costing either fifty-six fleet points for the Gladiator I or sixty-two fleet points for the Gladiator II.  
The ship cards for the Gladiator I (left) and Gladiator II (right).
And while it’s not as powerful as the Victory-class, the Gladiator-class – in many ways – features a better balance of strengths. Instead of the Victory’s six forward-facing attack dice, the Gladiator features four, but it can also fire four dice from both its left and right hull zones, as opposed to the three dice that the Victory fires from its sides. Simultaneously, the Gladiator trades away one of the Victory’s redirect tokens for an evade token, reducing its ability to rely upon its shields for protection, but increasing its ability to evade attacks at long range. Perhaps more importantly, the Gladiator is a faster and nimbler ship, with a maximum speed of “3” – as opposed to the Victory’s maximum speed of “2” – and a command rating of “2.” The reduced command, of course, limits the number of tokens your Gladiator-class Star Destroyer can store, but it also means that you’ll be able to react more swiftly to your opponent’s tactics.  Its increased maximum speed is also important because the Gladiator features no medium-range blue attack dice. Instead, it features a hefty dose of potent, close-range black dice, so any admiral fielding a Gladiator-class Star Destroyer will want to find a way to race it into position to fire as quickly as possible. Its increased maximum speed is also important because the Gladiator features no medium-range blue attack dice. Instead, it features a hefty dose of potent, close-range black dice, so any admiral fielding a Gladiator-class Star Destroyer will want to find a way to race it into position to fire as quickly as possible.
One of those ways may be to take advantage of the upgrades and titles that appear in the expansion. Engine Techs nearly double the efficiency of your navigation commands, and though the Demolisher title doesn’t directly add to your ship’s speed, by allowing your Gladiator-class to fire after moving, it greatly increases your ability to get into position to fire at the target of your choice as early as possible. Likewise, by increasing the range of your black attack dice from close to medium whenever you attack the rear hull zone of an enemy ship, the Insidious title also adds to your range and maneuverability. Moreover, if you happen to equip your Gladiator-class with Expanded Launchers, you could fire as many as four of those black dice at medium-range.  Finally, the Gladiator-class Star Destroyer Expansion Pack comes with a commander upgrade of its own, Admiral Screed, who presents an interesting alternative for Grand Moff Tarkin or Admiral Motti. Finally, the Gladiator-class Star Destroyer Expansion Pack comes with a commander upgrade of its own, Admiral Screed, who presents an interesting alternative for Grand Moff Tarkin or Admiral Motti.
“Once per activation, when a friendly ship is attacking, it may spend 1 die to change a die to a face with a icon.” The fact that you can use Admiral Screed’s ability once per activation means that you can apply it to each capital ship in your fleet. However, activating it requires the sacrifice of one of your attack dice. In the case where you roll two blanks, the decision to sacrifice one of them to turn the other into a critical result is a relative no-brainer, but those situations should be relatively rare. The blue attack die has no blank faces, and the red and black attack dice have only two blank faces each. Still, Admiral Screed’s ability can come in handy even if you don’t roll blanks. For example, the face of the black attack die that shows a result also shows a result. If you sacrifice one result to convert another result to a result of plus , you lose no damage but gain the opportunity to trigger a critical effect. Moreover, guaranteed results can greatly increase the potency of your upgrades can potentially offset the cost of losing other dice results, even standard hits. With Admiral Screed aboard your flagship, you can guarantee a black result for your Assault Concussion Missiles or a blue result for your Victory-class Star Destroyer’s Ion Cannon Batteries. 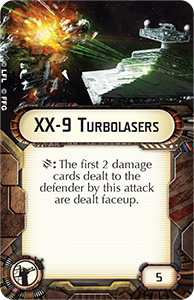 In certain situations, you might even elect to give up the raw number of damage cards that you force onto your opponent’s hull in order to turn the first two of them faceup with the XX-9 Turbolasers found in the Victory-class Star Destroyer Expansion Pack. In certain situations, you might even elect to give up the raw number of damage cards that you force onto your opponent’s hull in order to turn the first two of them faceup with the XX-9 Turbolasers found in the Victory-class Star Destroyer Expansion Pack.
The Imperial Fleet Is Yours to Command The rules for fleet-building, along with the Star Destroyers and upgrades from the first wave of Armada expansions, ensure that you will be able to enjoy a range of Imperial fleets as diverse as the citizens of the galaxy they will help you conquer. In our next preview, we’ll take a look at the Rebellion’s capital ships. Until then, it’s time to think about all the different Imperial fleets you can create. Once you’ve decided on your favorite builds, head to our forums to share them with the other members of the Armada community! ... Source: Star Destroyers! (http://www.fantasyflightgames.com/edge_news.asp?eidn=5325)
Title: FFG:Warhammer: Diskwars Organized Play to End
Post by: RSSFeeder on 20 January 2015, 19:00:03
Warhammer: Diskwars Organized Play to EndOrganized Play to Close After Season One 2015
Organized Play for Warhammer: Diskwars will come to a close after the Spring 2015 tournament season. While Warhammer: Diskwars continues to show healthy sales, we have come to realize that the game’s audience is more casual than competitive in nature, preferring to play casual, pick-up games with their friends rather than compete in structured tournaments. As a result, we have decided to end Organized Play for Warhammer: Diskwars after Season One 2015. The War Is Yet to Be Decided However, there is still time for those of you who continue to lust for battle to litter the Old World’s battlefields with the bodies of your rivals. We are currently in the middle of the 2015 Store Championship season, and you can check our list of participating retailers to see if there’s a Store Championship tournament scheduled near you. Then, from March through June, our Spring 2015 tournament season is your chance to march boldly forward toward the realm of Chaos and vie for ultimate glory. Participating retailers have already placed their orders for their Spring 2015 Tournament Kits, and you can check with the staff of your favorite local game store to see if they’re running any Warhammer: Diskwars tournaments.
The contents of the Warhammer: Diskwars Spring 2015 Tournament Kit.
Meet Your Foes on New Battlegrounds Even after the end Warhammer: Diskwars Organized Play, you can continue to enjoy your battles in the Old World. If you don’t already have an active play group, you can head to our community forums to look for nearby players who may be interested in meeting for games. We know that the battles of Warhammer: Diskwars will continue to rage across the Old World. Heroes will continue to muster their troops and head to war. Although the game’s Organized Play will soon come to a close, we know the forces of Order and Destruction will continue to draw their blades and shed their blood in pursuit of power, glory, and victory. ... Source: Warhammer: Diskwars Organized Play to End (http://www.fantasyflightgames.com/edge_news.asp?eidn=5326)
Title: FFG:Brutality and Brains
Post by: RSSFeeder on 21 January 2015, 03:30:03
Brutality and BrainsPreview the New Species of Lords of Nal Hutta
“This bounty hunter is my kind of scum. Fearless and inventive.”
–Jabba the Hutt, Return of the Jedi The upcoming Lords of Nal Hutta sourcebook for Star Wars®: Edge of the Empire™ takes players into the lawless, ruthless depths of Hutt Space. In this region of the galaxy you’ll find exiles, smugglers, and all sorts of scum, including countless bounty hunters and enslaved bodyguards. You may find yourself hunting others for profit, or being relentlessly hunted for an Obligation to the Hutts that you could not fulfill. The four playable species featured in Lords of Nal Hutta are all native to this violence and chaos. A playable Hutt was discussed in our first preview. In today’s preview, contributing writer Gregory Koteles introduces the other three: the stoic Niktos, bloodthirsty Ganks, and cunning Sakiyans. You’ll also get to peek at some of the cybernetic implants that may enable your character to not just survive, but even thrive in Hutt Space. 
Gregory Koteles on the New Species of Lords of Nal Hutta Alongside the Gamorreans and Weequay, the Niktos are probably one of the most recognizable races working for the Hutts. Due to rapid mutation caused by radiation on their homeworld, there are five distinct Nikto subspecies. From a design perspective, this gave us a lot to play with. While the Niktos all share a basic physiology and certain characteristics, the subspecies have unique traits that can give them a real edge in certain situations and environments, such as the Red Niktos’ capacity to weather the hottest desert environment, the Green Niktos’ natural coordination and deadly claws, or the Pale Niktos’ ability to move through water as easily as on land. Niktos are excellent survivors and likely to appeal to players who prefer more straightforward and brutal methods of conflict resolution. Though the Niktos are familiar to most Star Wars fans, the Ganks have made far fewer appearances in the Star Wars universe and remain much more mysterious – even their homeworld is unknown. These notoriously secretive, consummate mercenaries have a penchant for augmenting their bodies with cybernetics – a lot of them. Ganks start their careers in Edge of the Empire with multiple cybernetic implants and can augment their natural abilities with even more technological enhancements as they progress, making them extremely efficient killers – though they might want to avoid the company of Jawa scavengers, lest they find themselves used for spare parts. The Sakiyans are known for stealth and cunning. We chose to concentrate on their impressive hunting and tracking abilities, making them excellent Bounty Hunters and Explorers. Their slighter frames make them likely to absorb raw damage, but this is more than made up for by their intelligence and perspicacity. As one of the few species native to Hutt Space not completely under Hutt domination, the Sakiyans are less likely than others to owe a starting Obligation to the masters of Nal Hutta. Yet, coming from a culture that puts great emphasis on honor, they’re likely to owe some Obligation to their family and their pride, or clan. 
Along with their Hutt overlords, these three new playable races give players the opportunity to explore the darker margins of life on the fringe of the galaxy, and they give GMs a few new resources to complicate things for players who cross paths with the Hutts. Thanks, Gregory!  Becoming More Machine Becoming More Machine
Whether you play a Gank assassin who needs to kill on sight, or a human wanting to replace a lost limb, cybernetics allow you to transcend your body’s limits. As long as you have the credits to pay for it, there’s a doctor on Nar Shaddaa willing to implant any artificial device you can imagine. For an edge in the struggle for survival, you may want to purchase some adrenal implants. These small devices attached to your subadrenal gland stimulate the production of epinephrine, which speeds recovery from fatigue. Any character who possesses adrenal implants therefore gains a rank in the Rapid Recovery talent. Similarly, cybernetic reflexes stimulate and regulate the nervous system, granting one rank of the Rapid Reaction talent. Either implant could make a significant difference in the middle of a fight – or even a high-stakes late-night negotiation. Gank comm implants allow characters to communicate silently across several kilometers, essentially as if sharing thoughts. A team of characters with Gank comm implants could not only coordinate actions at a distance, but plan an attack or escape while standing in the presence of an enemy threat. These implants have proven to be so useful that almost all adult Ganks possess them and while they’re relatively rare, they only cost a couple of hundred credits. The repulsor fist is a more drastic cybernetic improvement: a violent melee weapon that replaces your hand and upper arm. Lacking synthskin, repulsor fists aren’t designed to appear natural. Instead, you can rely on the mere sight of one to instill fear and caution in a potential attacker. For Bounty Hunters, Hired Guns, and anyone else who intends on doing a lot of melee fighting, a repulsor fist is a solid, permanent, investment. 
Hunters and Hunted You might make a living in Hutt Space as a Gank mercenary, using your cybernetic implants and brute strength to survive in war, or as a Sakiyan assassin, relying on your wits and natural stealth to hunt down your target. You might take on the sympathetic role of an escaped Nikto, hunted by the cruel Hutt that you once served, or play a conniving young Hutt, willing to do anything to rise in your kajidic. No matter what, you’ll soon find that almost everyone in Hutt space is either a hunter or hunted, and that it’s far better to be the predator than the prey. Do you have what it takes to survive in this realm of iniquity, or will you fall victim to others’ cunning snares and cold-blooded cruelty? Pre-order Lords of Nal Hutta today! ... Source: Brutality and Brains (http://www.fantasyflightgames.com/edge_news.asp?eidn=5327)
Title: FFG:Chrome City
Post by: RSSFeeder on 21 January 2015, 11:50:03
Chrome CityAnnouncing the Third Data Pack in the SanSan Cycle
Lopez is part of a fast-growing community in Chrome City and across the West Coast. They call themselves chromeheads, and they wear their implants as fashion accessories. Fantasy Flight Games is proud to announce the upcoming release of Chrome City, the third Data Pack in the SanSan Cycle for Android: Netrunner! Function breeds fashion in Chrome City. The Data Pack’s sixty new cards (three copies each of twenty individual cards) introduce players to the northern SanSan borough of Chrome City. Here, among the sketchy chop shops planted in the shadow of Haas-Bioroid’s genetics division, a growing community of chromeheads have begun to transform cybernetics into fashion statements. If the surgery’s good, the latest cybernetics don’t just make you trendy; they also make you smarter, stronger, and more resilient. But a bad chopper’s just as likely to cause you irreparable brain damage as outfit you for the runways. Accordingly, Chrome City and its cybernetic hardware introduce a volatile mixture of risks and rewards, many of which are centered around protecting or damaging the Runner’s brain. 
Brain Cage As an example of the benefits a Runner’s cybernetics might provide, we can look at the neutral card, Brain Cage (Chrome City, 49). For just one resource, this unique piece of hardware increases your maximum hand size by three. In that respect, it compares quite favorably with the two-cost resource Public Sympathy (Cyber Exodus, 50), which increases your hand size by two.  It also compares favorably in the sense that it’s a piece of hardware rather than a resource. Resources are generally easier to trash, as if it tags you, the Corp can hit any of them for a click and two credits just by making use of the game’s standard actions. Hardware, on the other hand, can’t be targeted by the Corp’s framework actions and are targeted by only an extremely limited number of Corp cards. It also compares favorably in the sense that it’s a piece of hardware rather than a resource. Resources are generally easier to trash, as if it tags you, the Corp can hit any of them for a click and two credits just by making use of the game’s standard actions. Hardware, on the other hand, can’t be targeted by the Corp’s framework actions and are targeted by only an extremely limited number of Corp cards.
On the other hand, Brain Cage also comes with a nasty install cost: when you install it, you suffer one brain damage. Since this brain damage is both random and permanent, you risk losing any one of the key cards you may be holding when you install your Brain Cage, and your newly increased maximum hand size is effectively increased by two, rather than three. You can, however, prevent this brain damage if you find a good Chrome Parlor (Chrome City, 44) and a truly skilled chopper. They say that if you find a good chopper, you should stick with her for life. While you may be able to debate the merits of that advice, there’s no doubt that a good Chrome Parlor can greatly increase the efficiency of any deck that makes use of cybernetics. Each of the game’s Runner factions gains a piece of two-influence cybernetic hardware in Chrome City, and each forces you to suffer brain or meat damage when it’s installed. Thus, if you want to take advantage of Brain Cage, Net-Ready Eyes (Chrome City, 47), and the other trendy cybernetic upgrades included within the Data Pack, it’s certainly worth your time to find a reliable Chrome Parlor. Cybernetics Division Even as it offers Runners the chance to expand their abilities as they sample the latest trends in cybernetic technology, Chrome City introduces a new identity for the leading name in cybernetics, Haas-Bioroid.  With its Cybernetics Division (Chrome City, 50) identity, Haas-Bioroid gains a new way to apply fast, constant pressure upon the Runner. In effect, it forces the Runner to suffer one point of brain damage right out of the portal, and this early reduction in hand size can change the whole shape of a game. With its Cybernetics Division (Chrome City, 50) identity, Haas-Bioroid gains a new way to apply fast, constant pressure upon the Runner. In effect, it forces the Runner to suffer one point of brain damage right out of the portal, and this early reduction in hand size can change the whole shape of a game.
For starters, it makes every other point of damage all the more menacing.
- It quickly adds up with any brain damage caused by bioroid ice such as Heimdall 1.0 (Core Set, 61), Viktor 1.0 (Core Set, 63), and Janus 1.0 (What Lies Ahead, 12).
- It almost forces the Runner to draw up to his maximum hand size every turn lest he find himself flatlined by a single Scorched Earth (Core Set, 99).
Then, the fact that Cybernetics Division features a smaller minimum deck size means that it should be easier to draw into an early copy of Self-Destruct Chips (Chrome City, 51), along with the ice you need to protect it as you advance it. And if an unwary Runner runs out of clicks as he barges through your server, you can deal yet another point of brain damage by rezzing and trashing the sysop Ryon Knight (Chrome City, 54). Altogether, then, Haas-Bioroid’s Cybernetics Division doesn’t just shrink the Runner’s hand size; it reduces his options. It impacts the order in which he uses his clicks. It puts him on a timer, potentially prompting him to run earlier than he’d like. And it may even force him to reevaluate the metagame as a whole; can he still afford to run without adding Brain Cage or Public Sympathy to his deck? Upgrade Yourself. Upgrade Your Deck. Join the chrome revolution. Chrome City is scheduled to arrive at retailers early in the second quarter of 2015! ... Source: Chrome City (http://www.fantasyflightgames.com/edge_news.asp?eidn=5328)
Title: FFG:Shall We Turn East or West?
Post by: RSSFeeder on 21 January 2015, 20:00:05
Shall We Turn East or West?Preview the Side Quests of The Lost Realm Expansion for The Lord of the Rings
“The day has come at last,” he said: “the day of choice which we have long delayed. What shall now become of our Company that has travelled so far in fellowship? Shall we turn west with Boromir and go to the wars of Gondor; or turn east to the Fear and Shadow; or shall we break our fellowship and go this way and that as each may choose? Whatever we do must be done soon.”
–Aragorn, The Fellowship of the Ring After a long journey north and west from the realm of Isengard, several of Middle-earth’s heroes draw near the realm of Arnor. Here, a number of Dúnedain rangers have long safeguarded the region’s simpler folk from the Orcs and other dangers of Angmar and the wilds further north. The Lost Realm deluxe expansion for The Lord of the Rings: The Card Game is now just several weeks away, and it will soon transport us to the northern wilds of Eriador. When we first announced the expansion, we took a look at its Dúnedain Rangers and how they excel as hunters, offering players a number of advantages for engaging enemies. However, as the expansion introduces players to this new region of Middle-earth and explores its themes and conflicts, the Dúnedain and their trials are given shape in more than one way. Today, developer Caleb Grace takes a look at how the expansion offers a dramatic new type of decision for players to make. Like the Rangers of the North, when you follow tracks that split and lead in two different directions, you must make your own decisions as to which you will follow. You are the secret protectors of the land; there is no one else to guide you. You can only hope that you make the right decisions. 
Developer Caleb Grace on the Side Quests of The Lost Realm The key to making a fun game is ensuring that players will have to make plenty of meaningful decisions. Many of these are already built into The Lord of the Rings: The Card Game by the demands the encounter deck puts upon your heroes: What ally do I play this turn? To which location do I travel? Should I optionally engage an enemy this round? Still, as we started looking at The Lost Realm, the design team felt that we could add another choice that would give the game more of a “choose your own adventure” feel and strengthen the overall storytelling experience — the choice of where to quest. To address that issue, The Lost Realm deluxe expansion introduces side quests to the game. In many video games and roleplaying games, side quests are optional adventures that you can choose to undertake while working toward larger goal. Often, they present you with a reward when you complete them. Side quests in The Lord of the Rings: The Card Game work in a similar fashion, presenting you with new and exciting choices to make, as well meaningful consequences that can be either good or bad. How Do Side Quests Work? A side quest is a quest card with either an encounter card back, or a player card back.
- Encounter side quests are part of an encounter set and are shuffled into the encounter deck.
- Player side quests are included in a player’s deck and are played from a player’s hand.
Regardless of where it comes from, when a side quest enters play, it is placed in the staging area. If there is a side quest in the staging area at the beginning of the quest phase, the first player has to make a decision: Which quest will they attempt to complete in the quest phase? The staging area doesn’t change, but the players can decide where they’ll want to place their progress. Do they continue trying to make progress on the main quest, or do they turn aside from their original goal in order to complete the side quest? In order to make that decision truly meaningful, each side quest has a powerful effect that the players will have to examine carefully as they make their choice. An encounter side quest may have an incredibly detrimental effect on the overall game state if left uncompleted, but players may still choose to ignore them in favor of placing progress on the main quest. It is up to the players to determine what they feel is the right choice based on their own unique situation. In this way, one of the most exciting things about side quests is that they add a great deal of replayability to each scenario. 
A great example of this concept is the encounter side quest, Make Camp (The Lost Realm, 55), which reads: “Characters cannot be healed.
“Response: After Make Camp is defeated, each player heals up to 3 damage from a hero he controls.” The negative impact of this side quest can be very situational. If the players do not have many damaged characters, they will likely ignore this side quest in favor of placing progress on the main quest. On the other hand, if there are a lot of damaged characters in play, the players may feel a more desperate need to heal them and dedicate at least one round to defeating this side quest. When they do complete Make Camp, they will also trigger its Response effect, allowing each player to heal one hero. Many of the side quests included in The Lost Realm have this type of reward effect for completing them because the design team saw it as a way to push the storytelling element of the game. Make Camp is the story of heroes who are exhausted from continuous exertion and need a safe place to rest. Until they find it, they must push themselves past their limits (as represented by not being able to heal), but when they do get a chance to sleep, they wake up feeling refreshed (as represented by healing damage). Side Quests and Encounter Sets Working to bring storytelling and gameplay together with side quests made designing the individual encounter sets more exciting than ever. Typically, while all of a scenario’s encounter sets add to the scenario’s challenges and feel, only the cards from the encounter set directly to the scenario are used to drive its story. By including a side quest in each of the six encounter sets that are used in The Lost Realm and the Angmar Awakened cycle, we were able to add new story elements with these encounter sets, too, making them stronger thematically as well as mechanically. For example, take the Foul Weather encounter set, which is built around Make Camp. While the passive effect on Make Camp may be situational, it comes in an encounter set with eight total treachery cards, six of which deal damage to characters. In that light, Make Camp becomes the capstone for that set’s design, and the other side quests are similarly the capstones of the five other encounter sets in The Lost Realm. 
Seal the Tomb (The Lost Realm, 63) is another great example: “Forced: At the end of the refresh phase, discard the top 3 cards of the encounter deck. Return the topmost Undead enemy in the encounter discard pile to the staging area.” This side quest introduces a plot twist as the heroes learn of countless undead rising from the grave. If left unchecked, Seal the Tomb can potentially add an additional enemy to the staging area every single round. That’s easily enough to overwhelm a greater number of parties, but if that isn’t bad enough, Seal the Tomb also gains strength from the other nine cards in the Cursed Dead encounter set. Naturally, it’s packed with Undead enemies, increasing the odds that there will be Undead enemies in the encounter discard pile. Also, it contains both the Dead Lord (The Lost Realm, 60) and Cursed Dead (The Lost Realm, 61), which become more aggressive if there are Undead enemies in the discard pile. That means that even though Seal the Tomb doesn’t offer them a beneficial Response effect, the players might still decide that it’s in their best interests to defeat it.  
Player Side Quests On the other hand, player side quests always offer you a reward when completed. That’s because in order to complete a side quest, you must first draw it into their hand and put it into play. Only then can you even attempt to complete it, and for every round you spend completing a side quest, you come no closer to defeating the scenario, even though your threat continues to climb. However, the benefit from completing a player side quest may prove to be worth the effort. The Lost Realm includes one such player side quest, Gather Information (The Lost Realm, 14): “Response: After this stage is defeated, each player may search his deck for 1 card and add it to his hand. Each player shuffles his deck.” 
Prior to The Lost Realm, there was only one card in The Lord of the Rings: The Card Game that allowed you to search your entire deck for a card of your choice and add it to your hand. That card is Word of Command (The Long Dark, 84), it requires you to exhaust an Istari character, and it only allows you to search your deck for a card, not your teammates. When you defeat Gather Information, you and your friends all get to search your decks for any one card each and add those cards to your hands. That’s a very powerful effect. The question is whether or not you’ll be able to take an entire round away from the main quest in order to trigger it. Choices are key to great games, and you’ll find that choice and many others awaiting you in The Lost Realm deluxe expansion! Pre-order Your Copy Today In a number of weeks, The Lost Realm deluxe expansion for The Lord of the Rings: The Card Game will lead players deep into the intrigues of a dark and deadly adventure. From what terrifying evils have the Rangers of the North long guarded the simple folk of Bree and the Shire? You’ll soon have your chance to find out. In the meantime, head to your local retailer today to pre-order your copy of The Lost Realm! ... Source: Shall We Turn East or West? (http://www.fantasyflightgames.com/edge_news.asp?eidn=5329)
Title: FFG:Reading the Riddles
Post by: RSSFeeder on 22 January 2015, 04:50:05
Reading the RiddlesAn Updated The Lord of the Rings: The Card Game FAQ Is Now Available
“None can foretell what will come to pass, if we take this road or that. But it seems to me now clear which is the road we must take.”
–Elrond, The Fellowship of the Ring 
Click on the above thumbnail to download the FAQ (pdf, 13.7 MB).
| | As a cooperative Living Card Game®, The Lord of the Rings: The Card Game functions differently than competitive LCGs. You work with your friends against an encounter deck, or you play by yourself. This means that, as a The Lord of the Rings player, you interact with a different sort of metagame than you would while playing a competitive card game. This cooperative metagame isn’t driven by players’ relentless and creative efforts to gain advantages in a tournament environment, but by your desires to enjoy clarity and a sense of adventure as you endeavor to overcome the challenges of new scenarios. For the most part, then, the metagame for The Lord of the Rings: The Card Game is self-policing; if you don’t like how a card works or interacts with the scenarios that you’re attempting to beat, you can simply choose not to play it. However, as the game grows, issues sometimes arise that merit further clarification or balance. It is to address these situations that the developers have updated the game’s FAQ (pdf, 13.7 MB). The Developers on What’s New in the FAQ? The design team for The Lord of the Rings: The Card Game is deeply grateful to all of you who play our game, and it is our goal to provide you with many rewarding gaming experiences for years to come. To that end, we have updated our FAQ to answer some common questions, clarify a few rules, and issue some necessary errata to a small handful of cards. It has been nearly one year since our last FAQ update. In that time, the game has grown significantly, and a number of rules issues have arisen that deserve closer attention. In order to address some of those rules issues, we have issued errata to nine cards. While this may seem like a lot, the vast majority of these changes were made only to clarify how the card is intended to function. For example, the treachery cards Counter-attack (Assault on Osgiliath, 106) and Impenetrable Fog (The Morgul Vale, 157) both received errata to add the word “either” to their effects. This was only to make it more clear their effects give players a choice. Likewise, the word “then” was edited out of the second line of The Power of Mordor (Heirs of Númenor, 61) so that players would still be required to reveal encounter cards for the second part of the card’s effect even if the first part was not fully resolved.  
Sometimes, though, in order to preserve the long term health of The Lord of the Rings: The Card Game, it is necessary to restrict a card’s effect, and this FAQ issues errata to a few cards in order to balance them within the context of a growing card pool.  Will of the West (Core Set, 49) is the backbone of every endless loop in the game, and while the design team acknowledges how much fun it can be to discover endless loops when deck-building, we also recognize that they can cheapen the game by taking away meaningful decisions. In order to balance Will of the West and keep as much of its original effect as intact as possible, it is now removed from the game after it resolves. This way, players can still use its effect to recycle their decks, but only once per copy of Will of the West. Will of the West (Core Set, 49) is the backbone of every endless loop in the game, and while the design team acknowledges how much fun it can be to discover endless loops when deck-building, we also recognize that they can cheapen the game by taking away meaningful decisions. In order to balance Will of the West and keep as much of its original effect as intact as possible, it is now removed from the game after it resolves. This way, players can still use its effect to recycle their decks, but only once per copy of Will of the West.
A Elbereth! Gilthoniel! (Shadow and Flame, 132) is another card whose potential uses exceed its intended effect. Formerly titled O Elbereth! Gilthonial!, A Elbereth! Gilthoniel! has received errata to its title as well as its game effect. Its ability to place an enemy that just attacked you on the bottom of the encounter deck is an exciting way to deal with a Black Rider (The Black Riders, 39) or a Mumak (Heirs of Númenor, 54), but it was never intended to allow players to get rid of “boss” enemies like the Witch-king or the Balrog. As a result, the design team has edited A Elbereth! Gilthoniel! to work only against non-unique enemies. This simple edit allows the card to continue to function the way it was intended, and without warping the game.  The ability provided by A Watchful Peace (Heirs of Númenor, 12) to recur locations that should go to the victory display upsets the balance of various scenario designs. Therefore, A Watchful Peace now reads: “Response: After a location worth no victory points leaves play as an explored location...” This change ensures that when a location with victory points is explored, it will be added to the victory display. The ability provided by A Watchful Peace (Heirs of Númenor, 12) to recur locations that should go to the victory display upsets the balance of various scenario designs. Therefore, A Watchful Peace now reads: “Response: After a location worth no victory points leaves play as an explored location...” This change ensures that when a location with victory points is explored, it will be added to the victory display.
Finally, Blue Mountain Trader (The Dunland Trap, 6) was designed to be an interesting card in multiplayer because of its ability to change control from one player to another. However, as written, its action allows players to move resources from hero to hero in an unlimited fashion that makes managing your heroes’ resources almost inconsequential. As a result, the design team has added the limit of “Once per round” to the Blue Mountain Trader in order to prevent its abuse while still allowing players the ability to trade control. In addition to these errata, the FAQ tackles a number of other rules issues in the Rules Clarifications and Q&A segments. The design team is confident that these updates will improve each player’s understanding and enjoyment of The Lord of the Rings: The Card Game. Thank you for playing! –Caleb Grace and Matthew Newman Thanks, guys! The new FAQ for The Lord of the Rings: The Card Game is now available on the game’s support page, as is a low-res printer-friendly version. Download your copy today. ... Source: Reading the Riddles (http://www.fantasyflightgames.com/edge_news.asp?eidn=5330)
Title: FFG:Dark Dealings
Post by: RSSFeeder on 22 January 2015, 21:45:04
Dark DealingsPreview the Investigators and Memberships of Gates of Arkham
He found himself swaying to infandous rhythms said to pertain to the blackest ceremonies of the Sabbat and to have an origin outside the time and space we comprehend. Presently he realized what he was listening for – the hellish chant of the celebrants in the distant black valley… He was not his own master. He had signed the black book after all.
–H. P. Lovecraft, The Dreams in the Witch House In the Gates of Arkham expansion for Elder Sign, investigators fight against unfathomable horrors on battle fronts throughout this legendary New England city. Those hardy souls who defeated the threats inside the Arkham museum are now faced with new challenges – gates that rupture space and time, omniscient Ancient Ones, uncompromising gang wars, devout and ruthless Cultists. Fortunately, other investigators are coming to their aid, equipped with arcane talents surpassing ordinary human capabilities. In today’s preview you will meet four of the eight investigators included in Gates of Arkham. You will also learn about the two underground organizations that control the city: the bootlegging Sheldon Gang and the clandestine Order of the Silver Twilight. Since survival in Arkham is as much about your associations as it is about your strengths, joining one of these organizations may not only grant you privileged access to closed headquarters and valuable secrets, but ultimately save your life. 
Local Legends and Mysterious Foreigners Gravedigger William Yorick and Professor Norman Withers are both Arkham natives accustomed to life in the haunted city. A hard worker (and aspiring Shakespearean actor), Yorick knows more about the dead than most people would ever care to. Being brutally pragmatic, Yorick is willing to give away the mysterious corpses he handles for his own benefit: by discarding a monster trophy, he can add the red and yellow dice to his pool. Professor Withers’ chosen field is Astronomy, which he tirelessly lectures on at Miskatonic University. Yet his erudition goes beyond the scientific and into the arcane: when an Other World adventure is resolved, he may draw a spell to aid the investigation. Some of the new investigators are drawn to Arkham by rumors of the city’s occult secrets, haunted spaces, and the recent uncanny events. The young shaman Akachi Onyele has traveled there from Africa, told by her mentor that it is her destiny to seal the gates that are tearing Arkham apart. Her magical connection with the Earth allows her to help others: when an Other World card is drawn, she can return stamina and sanity to an investigator of her choice. The concert violinist Patrice Hathaway came to Arkham neither to save the city nor to perform for its wealthier inhabitants, but to cure her own psychological troubles and purge from her mind the horrors she has sensed and seen. Her transcendent violin music has opened up to her an awareness of Other Worlds– and the terrible creatures in those Other Worlds are now very aware of her. Her connection to other dimensions allows Patrice to gain extra clues, and through her music she can easily convey them to other investigators. 
Bootlegging and Black Magic Anyone who has spent time in Arkham knows that it is not the local government, the police, or even the Miskatonic University bureaucracy that controls the city, but rather two underground organizations: the Sheldon Gang and the Silver Twilight Lodge. The members of these organizations possess enormous amounts of political power, live outside of the law, and are privy to dark, often deadly, secrets.  
With connections throughout the United States and deep into Canada, the Sheldon Gang is Arkham’s largest supplier of illegal liquor– and will do anything to maintain that status. The gang’s members include not only bootleggers, distributors, and their armed protectors, but city council members, prominent businessmen, and senior police officers who keep their involvement secret not only from the public, but even from their own families. You can obtain a membership in the Sheldon Gang by spending trophies at Hibb’s Roadhouse, their reputed headquarters. It may give you access to helpful Allies, or Common Items like cash, cars, and guns, but it can also help keep you out of trouble. If the police raid Hibb's, you're better off being part of the Sheldon Gang than an innocent bystander or even a loyal member of the police: part of the adventure is marked as a membership task, which you can bypass as long as you’re a card-carrying Sheldon Gang member. The Order of the Silver Twilight is even more secretive, with a presence in Arkham dating back far beyond living memory. Most Arkham citizens can only guess what goes on behind the closed doors of the gabled, Victorian, Silver Twilight Lodge, but the ubiquitous rumors tell of black magic and bloody occult rites. As with the Sheldon Gang, its members include many of Arkham’s elite, bound by strict vows not to speak of their dark dealings or reveal the order’s ancient mysteries. Once you become initiated by spending trophies at the Silver Twilight Lodge, you’ll be invited to attend their clandestine rituals in hidden locations throughout the city and bypass Silver Twilight membership tasks. You will also be granted Membership rewards, such as access to the Lodge’s immense library of arcane knowledge – or even priceless Elder Signs. 
Illicit Ties that Bind You never know who may be involved with the Arkham underground. Patrice Hathaway’s captivating music may attract the attention of a member of the Order of the Silver Twilight, who draws her in with the promise of soothing her psyche only to take advantage of her connection with Other Worlds. Norman Withers may have been working for the Sheldon Gang since the beginning of prohibition, subtly selling whiskey to other Miskatonic University professors and their beleaguered graduate students. In a city where gangsters hold as much power as the police, vicious monsters are roaming the streets, and a gate to an Other World may open in the lobby of the bank, cultivating illicit and occult connections will give you additional Allies, Spells, and Elder Signs, and may even help you survive. Pre-order Gates of Arkham from your local retailer today! ... Source: Dark Dealings (http://www.fantasyflightgames.com/edge_news.asp?eidn=5331)
Title: FFG:Fantasy Flight Games Is Now Hiring
Post by: RSSFeeder on 23 January 2015, 06:45:05
Fantasy Flight Games Is Now HiringWe Are Currently Accepting Applications for Two PositionsFantasy Flight Games, leading hobby-market publisher of board games, card games, roleplaying games, and other tabletop games, is now hiring for the following positions: Details can be found in the pdf documents linked above.
- To apply for the position of Application Developer, please submit a cover letter with salary requirements and resume to HumanResources@fantasyflightgames.com; under the subject line “Application Developer” no later than end of business day Friday, January 30, 2015.
- To apply for the position of Game Center Line Cook, please submit your application (pdf, 106 KB) to the Game Center Staff member or HumanResources@fantasyflightgames.com; under the subject line “Game Center Line Cook” no later than end of business day Friday, January 30, 2015.
Please do not call or visit. Our offices are located in Roseville, Minnesota, a suburb of the Twin Cities of Minneapolis and St. Paul. Candidates not already living within commuting distance must be willing to relocate. Fantasy Flight Publishing, Inc. is an equal opportunity employer committed to a diverse work force and a work environment free from discrimination. ... Source: Fantasy Flight Games Is Now Hiring (http://www.fantasyflightgames.com/edge_news.asp?eidn=5333)
Title: FFG:Building for the End Game
Post by: RSSFeeder on 23 January 2015, 15:45:03
Building for the End GameA Preview of the Order and Chaos Expansion for Android: Netrunner
While the Anarchs and Weyland Consortium are the stars of Order and Chaos, the expansion has plenty to offer each of the other factions of Android: Netrunner. Six different neutral cards and an array of versatile, low-influence Anarch and Weyland cards introduce new efficiencies, tricks, and tactics for all manner of Corps and Runners. Today, we look at some of these cards and how they may help you safeguard your servers, avoid tags, and advance your economies. 
Safeguard Your Servers Have you ever kept a Runner out of your R&D by rezzing a copy of Enigma (Core Set, 111) only for the Runner to then install Yog.0 (Core Set, 14) on his next turn? This is a common problem and one experienced by Corps everywhere as players move from a game’s middle stages to its final throes. In his introduction to the Lunar Cycle, developer Lukas Litzsinger explained how the Corp wants to extend its mid-game as long as possible. In the mid-game, he writes, the Corp has bought itself time to score agendas by barricading its servers with ice the Runner cannot yet break: “Generally, most games of Android: Netrunner can be broken down into three stages: the early game, the mid-game, and the late game. Historically, the early game belongs to the Runner, who looks to score as many agenda points as possible before the Corp can rez its defenses. In the mid-game, the Corp has established enough defenses to start scoring some points. Then, in the late game, the Runner’s rig is fully assembled, the Corporation’s defenses become vulnerable, and no agenda is safe. The most powerful Runner decks try to extend the early portion of the game as long as possible, and may even prevent the mid-game stage from ever occurring. And many of the best Corp decks are able to win the game in any stage, often by flatlining a careless Runner.” While Lukas went on to explain how the Lunar Cycle and its cards offered both Corps and Runners novel means to delay, interrupt, and even reverse the standard movements from early game to mid-game and late game, the fact remains that most Corps want to live in the mid-game as long or as much as possible, and that means they need meaningful defenses. Here, Order and Chaos introduces several new cards that any Corp can use to extend its mid-game.
 First of all, Patch (Order and Chaos, 21) can transform such binary ice as Enigma, which are only “on” until such a time as the Runner has installed a program like Yog.0 that shuts them “off,” into ice that can continue to impede or, at least, tax the Runner. Not only can it boost a good number of code gates past the point that Yog.0 makes light of them, Patch can work wonders on sentries, since most killers are expensive to boost. First of all, Patch (Order and Chaos, 21) can transform such binary ice as Enigma, which are only “on” until such a time as the Runner has installed a program like Yog.0 that shuts them “off,” into ice that can continue to impede or, at least, tax the Runner. Not only can it boost a good number of code gates past the point that Yog.0 makes light of them, Patch can work wonders on sentries, since most killers are expensive to boost.
- Alternatively, you could get more value out of your ice by using The Twins (Order and Chaos, 24) to discard your extra copies and make the Runner smash back into the ice he just passed, but this time, you might catch him slamming into it face first. Against a piece of ice like Janus 1.0 (What Lies Ahead, 12), this might even be a lethal, game-winning play, and one that’s certainly much cheaper than rezzing a second copy of the ice.
- Finally, though you may intentionally build your deck with ice like Janus 1.0 to tax the Runner, bleeding him of clicks and credits turn-by-turn, there may come a time when you need your ice to provide hard stops. Enter Sub Boost (Order and Chaos, 25), an operation that adds an “End the run” subroutine after all of its other subroutines. Not only might this operation force the Runner to suffer extra brain damage against Janus 1.0 or end his run, it can also work wonders when hosted on ice like Universal Connectivity Fee (Up and Over, 67) that are immune to most icebreakers.
As a whole, these cards tend to reflect the Weyland Consortium’s focus on strong, defensive barriers. After all, this is the faction that gave us advanceable ice, and for those Corps willing to pay the influence, Order and Chaos gives us even more of these advanceable ice, as well as the code gate Builder (Order and Chaos, 16) to continue ramping them up, run after run after run. Avoid Tags Even as the Corp is using these new cards to build up its defenses, Order and Chaos provides Runners with new ways to avoid tags, shake the ones they take, and focus more on running against Corporate servers and less on finding ways to get out of Corporate crosshairs.  If you’re looking to stay off-grid, a Qianju PT (Order and Chaos, 54) allows you to forfeit a click at the beginning of your turn in order to avoid the first tag you would take until the beginning of your next turn. If you’re looking to stay off-grid, a Qianju PT (Order and Chaos, 54) allows you to forfeit a click at the beginning of your turn in order to avoid the first tag you would take until the beginning of your next turn.
This can be handy if you suspect you might run into a Snare! (Core Set, 70) or think you might take a tag from ice like Shadow (Core Set, 104) or Data Raven (Core Set, 88). It’s also a great piece of equipment for Runners looking to play multiple copies of Account Siphon (Core Set, 18). If you keep the tags from your Account Siphon, you can quickly find yourself bankrupt or dead, so it’s generally advisable to shake the tags after you get them. If you avoid the first of them with your Qianju PT, you find yourself another two credits ahead with each Account Siphon. Nonetheless, the best use for a Qianju PT may be to stave off the tags the Corp might try to lay upon you during its turn. More than one Runner has been flatlined by an SEA Source (Core Set, 86) tag that led into one or more copies of Scorched Earth (Core Set, 99). Sometimes, however, you can’t avoid a tag… or you might intentionally tag yourself to mill the Corp with a Data Leak Reversal (Future Proof, 103). In these situations, you might wish to supplement your deck with the Chop Bot 3000 (Order and Chaos, 45). Much like Aesop’s Pawnshop (Core Set, 47), the Chop Bot 3000 adds new value to otherwise dead (or even detrimental) cards that you have installed. Those cards can be discarded to fuel either a single card draw or to allow you to remove one tag. Advance Your Economy As much as Android: Netrunner is largely about finding innovative ways to maneuver toward economic superiority, Order and Chaos maintains some of these fundamentals with cards for both Corp and Runner.
- A Dedicated Technician Team (Order and Chaos, 26) can perform wonders for a Corporation like Haas-Bioroid that might try to bunker up within its central servers, tucked away behind layers upon layers of ice, until it can score its agendas from hand with the assistance of Biotic Labor (Core Set, 59).
- Meanwhile, the Cyberdex Virus Suite (Order and Chaos, 27) offers an efficient response to the recent onslaught of the many new virus programs that Runners have been throwing against Corp servers.
 Once a Runner start building up a huge stack of virus counters, the Corp takes tremendous risks if it simply continues to ignore them, but spending three clicks to wipe virus counters can prove a horrific tempo hit. Cyberdex Virus Suite offers an alternate response, allowing you to purge virus counters and take other actions on your turn. Once a Runner start building up a huge stack of virus counters, the Corp takes tremendous risks if it simply continues to ignore them, but spending three clicks to wipe virus counters can prove a horrific tempo hit. Cyberdex Virus Suite offers an alternate response, allowing you to purge virus counters and take other actions on your turn.
- The Runners gain their own efficiencies, too, but whereas cards like Cyberdex Virus Suite offer Corps new efficiencies built around greater versatility, the event Day Job (Order and Chaos, 36) rewards Runners who are willing to go all-in on their turns. While your Day Job demands that you sacrifice your entire turn (or, at least, four clicks of it), it can also take you from the brink of poverty to a point where you can easily pay for quick economic boosts like Sure Gamble (Core Set, 50) or install such expensive icebreakers as Femme Fatale (Core Set, 26). Moreover, it’s a single card worth a boost of eight credits, and in a slim deck, such as you might have with Chaos Theory (Cyber Exodus, 46), the card efficiency it provides might be as important as the credits it can grant you until such a time as you get your Magnum Opus (Core Set, 44) installed.
A New World Order While Weyland is attempting to develop a new world order, and while the Anarchs are attempting to tear down the existing order, the neutral and low-influence cards from Order and Chaos ensure that every faction can find plenty of ways to get into the action. When Order and Chaos arrives, how will you use its cards to shape the future? Will you take humanity to the stars? Will you plunge New Angeles into chaos? Or will you quietly secure data toward some other end goal that’s all your own? Your chance to make an impact is nearly here; Order and Chaos is due to arrive at retailers late next week! ... Source: Building for the End Game (http://www.fantasyflightgames.com/edge_news.asp?eidn=5332)
Title: FFG:Salvaging Hope from the Wreckage
Post by: RSSFeeder on 24 January 2015, 00:45:03
Salvaging Hope from the WreckageXCOM's Chief Scientist Gives Humanity a Fighting Chance at Survival
Standard military responses have proven ineffectual. Human civilization stands on the brink of collapse. In the face of an extraordinary threat, the time has come for extraordinary solutions… The digital companion app for XCOM: The Board Game is now available for download, and the game is scheduled to arrive at retailers late next week! In XCOM: The Board Game, you are part of an extraordinary team of individuals. You and up to three friends assume the roles of XCOM’s department heads, and it’s up to you to find some way to use your soldiers, scientists, satellites, Interceptors, weapons, and other resources to establish an effective response to the alien invaders that brushed aside the world’s militaries. Throughout our series of previews, as we’ve explored the different challenges that XCOM offers players, we’ve looked at how the different roles allow you to respond to those challenges.
- We’ve seen how the Central Officer is responsible for maintaining XCOM’s satellite network and obtaining accurate information from the game’s digital companion app.
- We’ve seen how the Squad Leader forms teams of soldiers to simultaneously defend the base and undertake dangerous missions.
- And we’ve seen how a good Commander will help the team manage its efforts to stay within budget, strategically directing its expenditures toward launching and completing the game’s final mission to achieve victory.
Today, we explore the responsibilities of the Chief Scientist, the fourth of XCOM’s department heads, and we look at how XCOM’s science division can provide the technological advances that just might help you win your war against the alien hordes.
Chief Scientist In XCOM: The Board Game, your team starts out horribly outmatched and outgunned, thrust into a world that is falling swiftly into panic, and if you are to have any chance of winning your war, you’re going to need new technology. Fortunately, as the Chief Scientist, you command a science division comprised of some of the world’s most brilliant individuals. 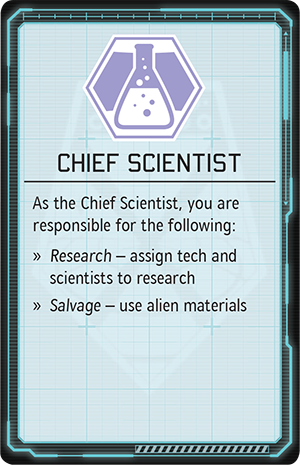 Per the Chief Scientist’s reference card, your role is defined by two key responsibilities: Per the Chief Scientist’s reference card, your role is defined by two key responsibilities:
- Research – assign tech and scientists to research
- Salvage – use alien materials
However, that’s an intentionally minimalist expression of the role and its responsibilities. It doesn’t explore the role’s impact in the game or stress the importance of the decisions that you’ll make:
- As the Chief Scientist, you are responsible for supplying your teammates with the technological advances they need to repel the alien invasion.
- As the Chief Scientist, you are responsible for developing a far-sighted approach to the war that overlooks early losses to aim for ultimate victory.
Of course, no matter how you look at the role, it is defined first and foremost by the deck of twenty-eight tech cards from which you draw and select new technologies to research. From Holo-Targeting to Firestorm and from UFO Navigation to Alloy Cannon, these technologies provide your team with different benefits, but before you can use any of these technologies, you need to research them. To research a tech card, you must first assign it as a task to one of the three stations in your laboratory. Then, you must assign a number of scientists to the task. You can assign up to three scientists to any task, and you should typically assign a number of scientists that weighs the benefits of the technology against the budget and the number of successes you need. 
Each tech card indicates a number of successes that you need to complete your research. In this example, Elerium requires two successes. Understanding the tremendous potential financial benefits of researching this technology on the first attempt, the Chief Scientist has assigned three scientists, meaning that he will roll three dice when he attempts his research.
However, while some may look at your job in such simplistic terms as “assigning scientists to research tasks,” you recognize that you’re not just forging a random collection of new technologies. No, in order to win the war, XCOM relies upon you to make key strategic decisions about the technologies you research.
 |
For example, a Plasma Cannon demands a heavy research investment, and though it can make it much easier for you to defeat the enemies you face, the energy you spend researching it won’t pay off if your Commander can’t keep Interceptors on hand to place upon it in the resolution phase. |
 |
Likewise, Revive is more useful in some circumstances than in others. If your Squad Leader can’t keep support soldiers on hand, it’s not useful at all, but if your enemies aren’t focusing their attacks on your base, it may help you mount a successful and efficient defense that relies on only one soldier. |
 |
Finally, technologies like Weapon Fragments that provide you economic benefits are more effective the earlier you research them. The closer you get to your final mission, the less effective they become, and the more you need technologies like Battle Scanners that can help you succeed at your tasks. |
Like the Commander, then, the Chief Scientist benefits tremendously from understanding the alien invasion plan and the enemies your soldiers will face. The more you understand the nature of the challenges that lie before you, the more you can strategically direct your research to respond to them. The two scientists you assign to a task may require the same two credits as the two soldiers you’d assign to a mission or the two Interceptors you’d assign to global defense, but if you assign your scientists wisely, they may make a far greater impact over the course of the game. Assigned poorly, however, they may make no positive impact at all. Accordingly, as the Chief Scientist, you will want to make good use of your Research Center and Workshop.  
- If you identify which technologies are most likely to help you, you can dig through your tech deck by exhausting your Research Center and discarding tech cards that would be less helpful.
- On the other hand, if your team is strapped for funding and asks you to refrain from late-game research as much as possible, you can still assign crack teams of scientists to your Workshop to derive temporary benefits from tech cards in your hand before discarding them.
Together, these two assets provide your role with enough flexibility that you can shape your research for maximum impact from turn one through the end of the game. Salvage  Another key part of your role as Chief Scientist is the management of salvage. Each time an enemy is defeated, it’s claimed as salvage, and the Chief Scientist can make use of these fallen enemies in a number of different ways. Another key part of your role as Chief Scientist is the management of salvage. Each time an enemy is defeated, it’s claimed as salvage, and the Chief Scientist can make use of these fallen enemies in a number of different ways.
The first use of salvage is provided by your asset card, Laboratory. During the resolution phase, as you’re resolving your research tasks, you can discard one salvage to your Laboratory to add one XCOM die to each of your rolls on one task. Effectively, by discarding a salvage, you gain the benefits of assigning another scientist. This can be an effective way to research new technologies even while your teammates are asking you to hold back on expenditures, and it can also give you a bonus die when you decide you really, really need some new technology now. While you’re limited to three scientists per task, discarding salvage to the Laboratory allows you to roll as many as four XCOM dice for critical tasks. Meanwhile, there are two tech cards that open new uses for your salvage.
- Weapon Fragments allows you to sell off surplus alien tech, transforming any number of salvage into an equal number of credits on Emergency Funding.
- Xenobiology, on the other hand, takes the ability of your Laboratory and pushes it to an extreme, allowing you to discard salvage during the timed phase to immediately research any one tech card from your hand, provided you discard salvage equal to the number of successes you would need to research the tech.
 
Paired with Archangel Armor and a focus hauling enemies back to XCOM headquarters as salvage, an early Xenobiology can greatly accelerate your research and mastery of alien technologies, allowing you to weaponize them and bring them to the battlefield.
These cards and their effects illustrate how much can be gained from the dissection and examination of your fallen enemies. Of course, to get those bodies, you need the full cooperation of the Squad Leader and his soldiers. Accordingly, it pays to research some tech for the Squad Leader to keep him happy, and to keep XCOM’s soldiers safe in the field.
- By reducing the threat by one during a mission or enemy task, Holo-Targeting decreases the risk that your team will lose soldiers on a mission or during base defense.
- Some tech you may give to the Squad Leader, like Run & Gun and Battle Scanners, add dice that greatly increase the chances that your team’s soldiers will succeed at their tasks.
 
If you can keep the Squad Leader happy, then, you might convince him to make use of Archangel Armor. This tech can feed you as many as two salvage per round, though you’ll need the Squad Leader to hold two soldiers back from missions to do so. Crafting Your Comeback Reports are coming from around the world of alien ships being blown out of the sky, military aircraft bearing the markings of no country, and special forces soldiers with weapons and body armor unlike anything we’ve ever seen… Where the world’s militaries have failed, XCOM must succeed. To do so, you’ll need as much cutting edge tech you can possibly wield. You’ll want Alien Alloys, Battle Scanners, a better Defense Matrix, Plasma Cannons, UFO Power, and Blaster Launchers.  
As the Chief Scientist, you’ll keep your teammates fully supplied with the tools they need to survive their encounters with the alien invaders. Accordingly, you want to come to the mission with a plan. You start on your heels, and time is against you. Still, if you perform your duties well, you just might help your teammates strike harder and faster, and you might help them survive shots from weapons that would have killed them otherwise. Next week, you just might help win the war. ... Source: Salvaging Hope from the Wreckage (http://www.fantasyflightgames.com/edge_news.asp?eidn=5334)
Title: FFG:Behind the Scenes with the Galaxy's Scum and Villainy
Post by: RSSFeeder on 24 January 2015, 09:45:04
Behind the Scenes with the Galaxy's Scum and VillainyX-Wing's Developers Take a Look at the Game's Third Faction
As Civil War rages throughout the galaxy and the battles of X-Wing™ continue to pit daring Rebels against disciplined Imperial pilots, a third faction waits for its time to strike. Led by such notorious figures as Boba Fett and Prince Xizor, the galaxy’s Scum and Villainy will soon bring new ships, new abilities, and new excitement to X-Wing players everywhere. As we continue to look forward to the release of the first four Scum expansions, the game’s developers, Alex Davy and Frank Brooks, offer their take on the faction’s introduction, including why it’s a natural fit for X-Wing and what the faction offers the game. They conclude by offering a couple of sample lists that illustrate how differently the faction’s squadrons may look, even as they share a focus on the faction’s penchant for dirty tricks and illegal technology.
Developers Alex Davy and Frank Brooks on the Scum and Villainy Faction Why create a third faction for the X-Wing miniatures game? Since the announcement of the Scum and Villainy faction at Gen Con Indy 2014, we’ve been asked that question numerous times by fans who are excited, trepidatious, or just plain curious. One of the most compelling reasons is thematic. The faction offers a fitting home to the Star Wars galaxy’s most notorious bounty hunters, pirates, and Black Sun agents. When we watched the movies as kids, the galaxy’s scum etched themselves into our imaginations through a handful of memorable scenes: amid the filthy opulence of Jabba’s palace, in a dark Mos Eisley cantina full of weird and nefarious aliens, and on the deck of an Imperial-class Star Destroyer, where six sinister bounty hunters met with the Dark Lord of the Sith, their rag-tag equipment and disdain for discipline contrasting sharply with the surrounding signs of the Empire’s military precision. These Scum generally do their best to remain outside the conflicts of the Galactic Civil War, except for when it’s profitable to become involved. Still, they form an integral part of the Star Wars universe, exerting profound influence over the lives of millions, including many of the Rebel Alliance’s greatest heroes. In X-Wing, the Scum & Villainy faction gives players the opportunity to interact with these characters and the seedy fringes of a galaxy at war. The criminal underground even intersects directly with the protagonists of the Star Wars galaxy: Han was hunted throughout the original trilogy by a score of ruthless bounty hunters throughout, while in Shadows of the Empire, Luke, Leia, Lando, and Dash Rendar had to contend with machinations of the cruel and calculating Prince Xizor. As we see them, the Scum faction’s rogues, villains, bounty hunters, and criminals are a quintessential part of the Star Wars universe, and it’s thrilling to bring them into the game. What does this mean for the X-Wing? New stuff! New ships, new characters, new scenarios, and new ways to play. With such a rich thematic vein to mine, inspiration came easily, and the result is a third faction with an entirely different feel. Dirty Tricks and Illegal Technology In X-Wing, the Rebel Alliance focuses on teamwork and defense, and it features a high ratio of shielded ships and synergistic pilot abilities. The Galactic Empire has no such concern for its pilots, which means its dogfighters run the gamut from cheap cannon fodder to elite, fragile offensive powerhouses whose pilots rely purely on their own abilities for survival. Meanwhile, the hotshot pilots of the Scum and Villainy faction represent a loose coalition of ruthless individuals whose motivations happen to temporarily align. Formation flying is rare, self-sacrifice unheard of, and pilots must pay nearly as much attention to their supposed allies as to their foes. Among the Scum, you can never be certain that some unstable mercenary won’t have packed his ship full of thermal detonators. Still, what they lack in military discipline and raw pilot skill they make up for with dirty tricks, highly illegal technology, unpredictable maneuvers, and some of the finest and wildest starships that money can buy. 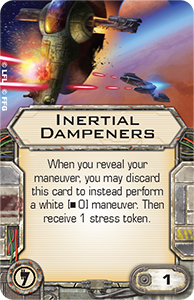
These tricks, technological advances, and maneuvers lead directly to an increased diversity among the squads available to X-Wing players. This is important because asymmetrical competitive thrive on diversity. The more viable lists and strategies that exist, the more varied and exciting the gameplay. Variety is something at which the Scum’s loose cannons are going to excel, and we have put together a couple of sample lists to illustrate the point. Dual Aggressors Alex’s list features one of his favorite Star Wars characters, the cold and merciless assassin droid, IG-88. 
IG-88A (36)
Predator (3)
Advanced Sensors (3)
Proximity Mines (3)
Shield Upgrade (4)
Inertial Dampeners (1)
IG-2000 (0) IG-88C (36)
Predator (3)
Advanced Sensors (3)
Proximity Mines (3)
Shield Upgrade (4)
Inertial Dampeners (1)
IG-2000 (0) Total Squad Points: 100 A two-ship list is a huge gamble, especially when you’re relying exclusively on a forward firing arc, but IG-88 can do things that other pilots can only dream about. With their native boost actions, Advanced Sensors, and access to both a K-turn and the Segnor’s Loop maneuver, these Aggressors are masters of repositioning. Advanced Sensors allows them to perform a boost action before executing a maneuver, which means you can angle your K-turn or Segnor’s loop in jaw-dropping ways.
A 360-degree view of the agile Aggressor.
Thanks to IG-88C and the IG-2000 Title, both ships in the list get an evade token each time they boost, and Predator helps ensure the ship’s shot doesn’t go to waste. Proximity Mines are also made more flexible by Advanced Sensors, allowing them to be dropped either before or after the Aggressor performs a maneuver, making them an ideal tool for dealing with fragile, high pilot skill enemies like TIE phantoms and TIE interceptors. Against a swarm of enemy ships, which is easily this list’s toughest matchup, IG-88A’s ability to provide shield regeneration can help the droids weather the storm. Then, Inertial Dampeners add an extra dash of unpredictability to an already versatile list. This is one of my favorite ways to fly dual IG-88s, but the fantastic thing about this ship is how many different options it provides. With a dial chock full of green maneuvers, Push the Limit is an excellent choice, and Advanced Sensors can be swapped out for Accuracy Corrector, allowing IG-88 to focus and evade for defense, secure in the knowledge that he will roll at least two hits with his attack. Adrenaline Rush, Advanced Sensors, and IG-88D make for even crazier K-turn possibilities, and Expert Handling gives you access to a large ship with both boost an barrel roll! Thugs and Pirates Frank’s list features one HWK-290, two Z-95 Headhunters, and two Y-wings. Though all of these ships can also be flown by the Rebel Alliance, the list has a distinctive feel when flown in the Scum faction. 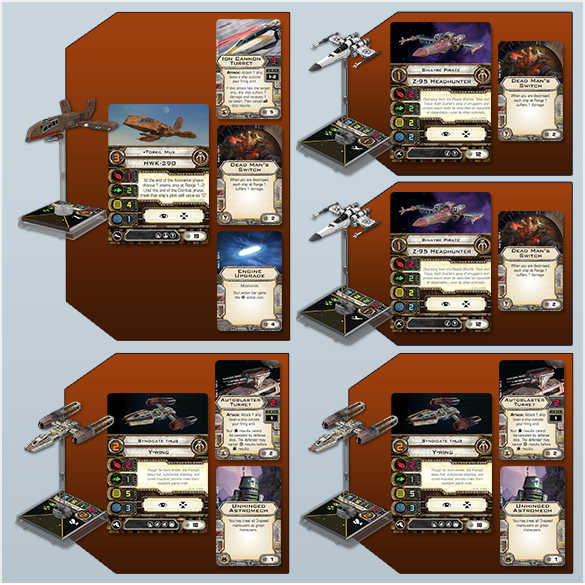
Torkil Mux (19)
Ion Cannon Turret (5)
Dead Man’s Switch (2)
Engine Upgrade (4) Binayre Pirate (12)
Dead Man’s Switch (2) Binayre Pirate (12)
Dead Man’s Switch (2) Syndicate Thug (18)
Autoblaster Turret (2)
Unhinged Astromech (1) Syndicate Thug (18)
Autoblaster Turret (2)
Unhinged Astromech (1) Total Squad Points: 100 This list attempts to leverage as much as it can off of Torkil Mux’s ability. By reducing an enemy’s pilot skill to “0,” Torkil Mux allows for his entire squadron to attack the targeted ship before it can attack back. To that effect, this list gets away with paying the minimum price for pilot skill, thereby leaving room for several utility upgrades. Bidding low on pilot skill leads to some other benefits, too. The Binayre Pirates, with their pilot skill values of “1,” can maneuver early and block enemy flight paths, pinning down ships for the Syndicate Thugs to target with their Autoblaster Turrets. Additionally, as the battlefield becomes more crowded and chaotic, the list’s liberal use of Dead Man’s Switches may force your opponent into some truly difficult play decisions.
A 360-degree view of the Scum-themed Z-95 Headhunter from the Most Wanted Expansion Pack.
Whereas a Rebel squad that features the same ships would most likely fly in formation, those tactics are unwise in this list as taking down one of the Z-95 Headhunters with Dead Man’s Switch could very easily injure the other. Accordingly, this list requires a bit of finesse to fly, especially since the Y-wings have to get very close in order to be their most effective. That’s why the Unhinged Astromechs allow for the Y-wings to move more unpredictably. Additionally, the list’s emphasis on Torkil Mux means that he has a rather large target on his head, so you need to be very careful with him. Try to fly erratically and use his boost from the Engine Upgrade to get out of arcs and at Range 1–2 of his prey. Of course, these lists demonstrate just a couple of the many new squadrons the faction provides, and we hope you will enjoy experimenting with the galaxy’s Scum and Villainy as much as we have! ... Source: Behind the Scenes with the Galaxy's Scum and Villainy (http://www.fantasyflightgames.com/edge_news.asp?eidn=5335)
Title: FFG:Enter the Dreamlands
Post by: RSSFeeder on 24 January 2015, 18:45:06
Enter the DreamlandsSix Classic Call of Cthulhu Asylum Packs Are Now Updated and Available
“Only three fully human souls since time began had ever crossed and recrossed the black impious gulfs to other dreamlands, and of that three two had come back quite mad. There were, in such voyages, incalculable local dangers; as well as that shocking final peril which gibbers unmentionably outside the ordered universe, where no dreams reach.”
–H.P. Lovecraft, The Dream-Quest of Unknown Kadath Fantasy Flight Games is proud to announce that the six classic Asylum Packs of the Dreamlands cycle for Call of Cthulhu: The Card Game have been reprinted and are now available! Long out of print and in demand, these six Dreamlands Asylum Packs are now available via Fantasy Flight Games’ in-house manufacturing. Each has been updated to the sixty-card format which features three copies each of twenty individual cards, and this printing incorporates all errata from the game’s latest FAQ (pdf, 1.0 MB). 
What Lies Within the Dreamlands? It was the Dreamlands cycle that first introduced the game’s popular Day and Night mechanics, which add a sense of time and a heightened tension to its struggles. Meanwhile, the cycle also introduced a number of fantastic Dreamlands locations and Dreamer characters, those daring souls who have learned how to explore the strange and mysterious realms beyond our mortal world. Here, in a realm where your imagination makes you strong, you’ll be able to climb The Seventy Steps (In Memory of Day, 30) and converse with the intrepid Randolph Carter (Search for the Silver Key, 63). However, the Dreamlands can also be treacherous, and you must remain wary, lest you be ambushed by the fearsome Dreamlands Fanatic (In the Dread of Night, 47) or stumble into The Cavern of Flame (In the Dread of Night, 49).  
Should you dare to enter the Dreamlands, you may also come across some of its stranger residents. Ghouls, Gugs, and Zoogs all appear in these Asylum Packs, as do a handful of eldritch Tomes that may shed light upon these realms of dreams, such as a Dream Diary (Twilight Horror, 4) or The Book of Black Stones (Search for the Silver Key, 79).  
Altogether, the Dreamlands cycle is filled with cards that echo and evoke H.P. Lovecraft’s visions of a realm in which the dreamer can experience unparalleled freedoms, witness unimaginable beauty, and find himself subjected to unfathomable horrors. Dare to Dream “Carter resolved to go with bold entreaty whither no man had gone before, and dare the icy deserts through the dark to where unknown Kadath, veiled in cloud and crowned with unimagined stars, holds secret and nocturnal the onyx castle of the Great Ones.”
–H.P. Lovecraft, The Dream-Quest of Unknown Kadath Travel with Dreamers, visit the Dreamlands, and take your games of Call of Cthulhu into strange, new realms. The six classic Asylum Packs from the Dreamlands cycle are now updated and available. Pick up your copies today! Note: Due to subtle variations in print quality that arise with in-house manufacturing, players must sleeve these cards in opaque or art sleeves to use them in tournament play. ... Source: Enter the Dreamlands (http://www.fantasyflightgames.com/edge_news.asp?eidn=5336)
Title: FFG:Answers to Help You Solve the Mysteries
Post by: RSSFeeder on 25 January 2015, 03:45:06
Answers to Help You Solve the MysteriesAn Updated Eldritch Horror FAQ Is Now OnlineSo I must break through all reticences at last – even about that ultimate nameless thing beyond the mountains of madness.
–H.P. Lovecraft, At the Mountains of Madness  There is now an updated FAQ and errata for Eldritch Horror available on the game’s support page. You can download it there, or by clicking the thumbnail on the right. It answers rules questions about the core game, the Forsaken Lore expansion, and the game’s newest expansion, Mountains of Madness. Armed with this fresh information, you and your fellow investigators can better focus on solving the dark mysteries of the Ancient Ones before they awaken and unleash incomprehensible horrors. There is now an updated FAQ and errata for Eldritch Horror available on the game’s support page. You can download it there, or by clicking the thumbnail on the right. It answers rules questions about the core game, the Forsaken Lore expansion, and the game’s newest expansion, Mountains of Madness. Armed with this fresh information, you and your fellow investigators can better focus on solving the dark mysteries of the Ancient Ones before they awaken and unleash incomprehensible horrors.
This update features a few new errata for the core game and both expansions, and provides details about the new Assets, Conditions, and Spells introduced in Mountains of Madness. There are also clarifications regarding movement, the Acquiring Assets action, and the special abilities of the new investigators Finn Edwards, Ursula Downs, and Wilson Richards. Download the updated FAQ (pdf, 478 KB) today! ... Source: Answers to Help You Solve the Mysteries (http://www.fantasyflightgames.com/edge_news.asp?eidn=5337)
Title: FFG:Fantasy Flight Games Is Now Hiring
Post by: RSSFeeder on 25 January 2015, 12:45:05
Fantasy Flight Games Is Now HiringWe Are Currently Accepting Applications for Four PositionsFantasy Flight Games, leading hobby-market publisher of board games, card games, roleplaying games, and other tabletop games, is now hiring for the following positions: Application Developer (pdf, 82.5 KB) - Details can be found in the pdf document. To apply for the position of Application Developer, please submit a cover letter with salary requirements and resume to HumanResources@fantasyflightgames.com; under the subject line “Application Developer” no later than end of business day Friday, January 30, 2015.
Game Center Line Cook (pdf, 79 KB) - Details can be found in the pdf document. To apply for the position of Game Center Line Cook, please submit your application (pdf, 106 KB) to the Game Center Staff member or HumanResources@fantasyflightgames.com; under the subject line “Game Center Line Cook” no later than end of business day Friday, January 30, 2015.
Hobby Market Sales Associate (pdf, 67 KB) - Details can be found in the pdf document. To apply for the position of Hobby Market Sales Associate, please submit a cover letter with salary requirements and resume to HumanResources@fantasyflightgames.com; under the subject line “Hobby Market Sales Associate” no later than end of business day Monday, February 9, 2015.
Organized Play Associate (pdf, 69 KB) - Details can be found in the pdf document. To apply for the position of Organized Play Associate, please submit a cover letter with salary requirements and resume to HumanResources@fantasyflightgames.com; under the subject line “Organized Play Associate” no later than end of business day Friday, February 6, 2015.
Please do not call or visit. Our offices are located in Roseville, Minnesota, a suburb of the Twin Cities of Minneapolis and St. Paul. Candidates not already living within commuting distance must be willing to relocate. Fantasy Flight Publishing, Inc. is an equal opportunity employer committed to a diverse work force and a work environment free from discrimination. ... Source: Fantasy Flight Games Is Now Hiring (http://www.fantasyflightgames.com/edge_news.asp?eidn=5333)
Title: FFG:2015 X-Wing(TM) Regional Championships
Post by: RSSFeeder on 27 January 2015, 00:45:02
2015 X-Wing(TM) Regional ChampionshipsApply by February 6th to Host a Tournament
Are You a Retailer? Apply today to host a Regional Championship!
| | Fantasy Flight Games is excited to announce X-Wing™ Regional Championship applications are now prepped and ready to go to lightspeed! Retailers are invited to apply now for this year’s Regional season, running from May 1st through July 31st. If you are a United States retailer or tournament organizer interested in hosting a 2015 Regional Championship event, fill out our online application form before February 6th 23:59 CST (Central Standard Time) to be considered. If you are a retailer outside of the United States, please contact your distributor to apply to host a Regional Championship or ask questions. International applications must be submitted before February 6th 23:59 CST (Central Standard Time) to be considered. How Do Regional Championships Fit into Organized Play? Regional Championships are your chance to create a community that spans beyond your town or city and the first big test for competitive players on their road to World Championship Weekend in November. A premier event, Regional Championships attract players hoping to earn the precious first-round bye at their National Championship and gain a leg up on their opponents. Regional Championships are exclusive events and there are a limited number of them run around the world each year. We are excited to announce that this year we are increasing the number of events to better serve the needs of players. In the United States, each region can host up to three Regional Championships (see the map below). If you are outside of the United States, contact your distributor for more information on Regional Championships in your country.
What Does Premier Level Mean? Premier-level events are the most prestigious tournaments FFG supports. Players can come to these events expecting the highest level of competition, as well as the strictest enforcement of rules. From the X-Wing tournament rules: Premier events are the highest level of competition for Fantasy Flight Games tournaments, and all players, judges, and tournament organizers involved are held to the highest levels of conduct. Players are assumed to be familiar with the game’s rules, as well as the latest FAQ and tournament rules, and should expect all rules to be strictly enforced. Regional Championships, National Championships, and World Championships are premier events. Regional Championship Prizes A bye is not the only prize on the line at X-Wing Regional Championships. In addition to a poster and info sheet, each Regional Championship kit comes with exclusive prizes for up to 64 players. - 1 Regional 2015 trophy
- 1 card granting the winner a first-round bye at the country’s National Championship
- 4 sets of acrylic maneuver templates
- 8 sets of alternate style dice (not pictured)
- 16 packs of acrylic shield tokens (not pictured)
- 64 Boba Fett alternate art cards
Please note: The alternate art cards in this kit are produced through FFG's In-House Manufacturing, and as such, they may appear slightly different in color and texture from the game's other cards. Apply Now Apply today by completing the United States online application form for the chance to host some of the most resilient and inventive pilots in your region. International retailers should contact their distributor to apply. Don’t wait! Apply before February 6th 23:59 CST (Central Standard Time), or Regional Championship applications will close and you will be left drifting in vacuum! ... Source: 2015 X-Wing(TM) Regional Championships (http://www.fantasyflightgames.com/edge_news.asp?eidn=5318)
Title: FFG:The Dark Tide Approaches
Post by: RSSFeeder on 27 January 2015, 09:45:08
The Dark Tide ApproachesA Preview of the Helm's Deep Scenario from The Treason of Saruman
“Branched lightning smote down upon the eastward hills. For a staring moment the watchers on the wall saw all the space between them and the Dike lit with white light: it was boiling and crawling with black shapes, some squat and broad, some tall and grim, with high helms and sable shields. Hundreds and hundreds more were pouring over the Dike and through the breach. The dark tide flowed up to the walls from cliff to cliff.”
–J.R.R. Tolkien, The Two Towers After The Black Riders and The Road Darkens allowed players to accompany Frodo Baggins along the first stages of his epic journey to Mount Doom, the Fellowship has broken. Now, Frodo must find his way toward the dark mountains of Mordor without the help of his former companions. Those companions, meanwhile, must swiftly recover from all the early losses that fate has dealt them, for one wizard’s betrayal threatens to cripple their efforts, as well as those of all the forces who would stand against the Dark Lord. The Treason of Saruman is coming soon for The Lord of the Rings: The Card Game, and as its three scenarios carry players through select events drawn directly from the first half of The Two Towers, the expansion gives us a new villain, whose White Hand baters against our heroes at every turn. While Saruman’s Uruks, his magic, and his evil are at the heart of all three of the expansion’s scenarios, there’s perhaps no greater illustration of the scope of his power than in the scenario that allows us to accompany Aragorn and the Riders of Rohan for the Battle of Helm’s Deep. In a period of several weeks, we’ll be able to stand atop the walls of Helm’s Deep, alongside Aragorn, Legolas, Gimli, and Théoden. Until then, however, developer Caleb Grace offers a look at the all-new fashion in which The Treason of Saruman brings this momentous battle to your tabletop. Developer Caleb Grace on the Battle of Helm’s Deep  The Treason of Saruman is coming in a number of weeks, so let’s talk about the scenario that everyone is dying to play: Helm’s Deep! It’s arguably the most exciting chapter in The Two Towers and one of the most memorable battles in fiction. And the design team is proud to have come up with a way to stage this battle in The Lord of the Rings: The Card Game that we believe lives up to the legend! The Treason of Saruman is coming in a number of weeks, so let’s talk about the scenario that everyone is dying to play: Helm’s Deep! It’s arguably the most exciting chapter in The Two Towers and one of the most memorable battles in fiction. And the design team is proud to have come up with a way to stage this battle in The Lord of the Rings: The Card Game that we believe lives up to the legend!
In order to give life to your defense of Helm’s Deep, the scenario has you switch places with the encounter deck by making it the players’ job to prevent the encounter deck from placing progress on the current quest. Each stage that the encounter deck advances brings the army of Isengard one step closer to capturing the fortress. If stage 4B is defeated, then Helm’s Deep falls and the players lose the game. In order for the players to defeat the scenario, they must defend Helm’s Deep through a long night of constant battle. To do this, the objective card, The Defense of Helm’s Deep (The Treason of Saruman, 33), tracks the passage of time by collecting one resource token each round, and the players advance to stage 5A when the last resource token is placed on it. At stage 5, the players join the Riders of Rohan as they charge out of the fortress at dawn and ride over their enemies. When they defeat the last enemy in play, they win the battle!  Making it to stage 5 will not be easy though. The defensive nature of the scenario turns some elements of the game upside down and creates challenging decisions. For example, you don’t necessarily want to explore locations. The locations in this scenario represent the different parts of the fortress, meaning it’s your job to defend them and keep them in play. When a section of Helm’s Deep leaves play, that means it has fallen to the enemy, and that can have dire consequences. Consider Deeping Wall (The Treason of Saruman, 38): Making it to stage 5 will not be easy though. The defensive nature of the scenario turns some elements of the game upside down and creates challenging decisions. For example, you don’t necessarily want to explore locations. The locations in this scenario represent the different parts of the fortress, meaning it’s your job to defend them and keep them in play. When a section of Helm’s Deep leaves play, that means it has fallen to the enemy, and that can have dire consequences. Consider Deeping Wall (The Treason of Saruman, 38):
“While Deeping Wall is the active location, each hero gets +1 defense strength.
"Forced: When Deeping Wall is explored, raise each player’s threat by 4.” By traveling to Deeping Wall, you can increase your heroes’ defense strength and slow the encounter deck’s progress on the quest by using the active location as a buffer. However, if Deeping Wall is explored, you and your friends must each raise your threat by four as part of the fortress is overrun. Of course, if you don’t explore any locations, they’ll continue to add their threat strength to the total threat strength of the staging area as it rises, and it will become increasingly difficult to keep the encounter deck from placing progress on the quest. Accordingly, you will probably have to make some choices where neither option feels good, and you might face some moments of real desperation, too. That’s an appropriate feeling when you consider how close Saruman’s army came to capturing Helm’s Deep. In fact, if it were not for the valor of a few outstanding allies, the men of Rohan would have been overmatched by their enemies, so the design team is pleased to announce the arrival of two of those esteemed allies: Legolas and Gimli! Keeping Count One of the biggest challenges with the Saga Expansions has been finding space for all the cards we want to include. Tolkien created such a rich world, full of amazing characters, that there just isn’t enough room in each Saga Expansion to include all the characters that we’d like. That’s why the design team made the difficult, early decision not to release two members of the Fellowship in either of the first two The Lord of the Rings Saga Expansions, but to save them for The Treason of Saruman. That decision was made, in part, because both Legolas and Gimli are already available as heroes in the Core Set, but also because so much of the battle of Helm’s Deep revolves around these two unlikely friends. To any fan of the book, the game that Gimli (The Treason of Saruman, 4) and Legolas (The Treason of Saruman, 5) play at Helm’s Deep is as unforgettable as the outcome. Eighty-three fewer Orcs survived the battle as a direct result of their competition!  
Hopefully, players will find their ally versions just as unforgettable as their participation in the battle of Helm’s Deep. Tactics players will be glad for a new way to draw cards by combining Legolas and his Response effect with his Ranged keyword. That seemed like a fun way to merge his Silvan far-sightedness with his skill with a bow. Gimli’s effect was inspired by his flavor text: “Give me a row of orc-necks and room to swing and all weariness will fall from me!” Accordingly, when an enemy is revealed from the encounter deck, Gimli throws off his weariness and readies. That means you can use Gimli’s two Willpower to quest and still take advantage of his two Defense Strength and Sentinel keyword if an enemy is revealed. Each ally is strong in his own right, but they also work together very well, as they should, allowing you to defend and attack any enemy in play, even one engaged with your friend. That’s important because you, your friends, and your characters, will have to work well together if you hope to emerge victorious from the battle of Helm’s Deep! ... Source: The Dark Tide Approaches (http://www.fantasyflightgames.com/edge_news.asp?eidn=5338)
Title: FFG:What Secrets Reside Beneath the Cover Up?
Post by: RSSFeeder on 27 January 2015, 18:45:05
What Secrets Reside Beneath the Cover Up?A Preview of For the Greater Good for Call of Cthulhu: The Card Game
“The stir of the Suydam investigation made it certain that these unauthorised newcomers were flooding Red Hook in increasing numbers; entering through some marine conspiracy unreached by revenue officers and harbour police.”
–H.P. Lovecraft, The Horror at Red Hook  The Agency-focused deluxe expansion, For the Greater Good, is nearly here. In our last preview, we explored some of what its new government characters and conspiracies may soon add to the faction and to Call of Cthulhu: The Card Game as a whole. Their new synergies and abilities look to significantly strengthen humanity’s ability to fight against the dark and evil cults that seek to plunge the world into chaos. The Agency-focused deluxe expansion, For the Greater Good, is nearly here. In our last preview, we explored some of what its new government characters and conspiracies may soon add to the faction and to Call of Cthulhu: The Card Game as a whole. Their new synergies and abilities look to significantly strengthen humanity’s ability to fight against the dark and evil cults that seek to plunge the world into chaos.
However, Call of Cthulhu and its eerie fictional setting are full of dark secrets and terrifying twists, and many of the valiant men and women who serve the government, believing they’re working for the greater good, may in fact be advancing the far-sighted designs of some nefarious cabal. In Call of Cthulhu: The Card Game, it’s just as easy to mix two factions together as it is to make a deck that uses only a single faction, and you can readily build a deck that features some unholy alliance between factions that no one may have ever suspected of working together. These alliances, in turn, lead to countless deck types, inhabiting alternate worlds, and they may include two factions, or three, or even more. There’s no limit to the decks that players can create, but each new deck reveals its own secrets. Accordingly, as we continue exploring For the Greater Good and the conspiracies it introduces to Call of Cthulhu: The Card Game, we turn our attention to two outwardly similar Agency decks:
- One is pure Agency, relying upon the efforts of its operatives to explore the eerie circumstances surrounding three copies of Eldritch Nexus (Core Set, 154), shielding humanity from the horrors by wrapping them up within an elaborate conspiracy, The Blackwood Initiative (For the Greater Good, 35).
- The other deck is also an Agency deck and shares twenty-three of the same core cards, but as it hides the truth within the layers of its conspiracy, we begin to recognize a darker influence. In this second deck, the Agency’s operatives are being subtly manipulated by a cabal of powerful conspirators and the cult of Shub-Niggurath.
Heroes of the Agency
The Eerie Circumstances:
Eldritch Nexus x3
The Conspiracy:
The Blackwood Initiative x2
The Cover Up:
Cover Up x3
Dr. Christine Maire x1
Local Sheriff x3
Officer Gibson x3
Paul Lemond x3
Shotgun Blast x3
The Foundation x2
Humanity’s Secret Defenders:
Abbess Allegria Di Biase x2
Beneath the Burning Sun x3
Church Operative x3
General Edward Irving x1
Lt. Wilson Stewart x3
Marshall Greene x1
Military Attaché x2
Red Tape x2
San Marco Basilica x3
Shotgun x3
Special Agent Clarkston x2
Trial Judge x2
|
Plunged into Darkness
The Eerie Circumstances:
Eldritch Nexus x3
The Conspiracy:
The Blackwood Initiative x2
The Cover Up:
Cover Up x3
Dr. Christine Maire x1
Local Sheriff x3
Officer Gibson x3
Paul Lemond x3
Shotgun Blast x3
The Foundation x2
The Government Conspirators:
Karl Heinrich x2
Terrible Old Man x3
The Nefarious Cabal:
Descendant of Eibon x1
The Claret Knight x1
The Mage Known as Magnus x1
The Red-Gloved Man x1
The Cult of Shub-Niggurath:
Black Dog x3
Book of Iod x3
Grasping Chthonian x3
Hungry Dark Young x3
Savio Corvi x3
Shocking Transformation x3
|
Strategy:
The key card in this deck is The Blackwood Initiative, which forces players to discard a card in order to resource a card. Given that players only draw two cards in the draw phase each turn, The Blackwood Initiative forces your opponent into some painful decisions early in the game as he decides whether he’ll forfeit an entire turn’s worth of card draw in order to resource a domain, or if he’ll forfeit the opportunity to resource a domain in order to hold onto the cards he’s just drawn.
In the meantime, you have to make the same decisions, but you have a strong early game built around your one-cost characters, Officer Gibson (For the Greater Good, 4) and Paul LeMond (Core Set, 4). Equipped with a Shotgun (Core Set, 14), Officer Gibson is capable of taking on nearly any foe, and Paul LeMond can copy any icons in play, provided you have the domains open to pay for them.
As the game goes on, you should be able to reduce the pain that resourcing would cause you by reducing the cost of your characters with Special Agent Clarkston (Aspirations of Ascension, 61) and Lt. Wilson Stewart (For the Greater Good, 16).
The two can help you build into late-game characters like General Edward Irving (For the Greater Good, 18) and The Foundation (For the Greater Good, 20).
Finally, the deck features a number of synergies built around its government traits, day mechanics, and the presence of its conspiracy:
Military Attaché (For the Greater Good, 15) provides nearly universal Arcane icons.
After The Blackwood Initiative forces your opponent to discard cards in order to resource, your Church Operatives (Terror in Venice, 3) compound your opponent’s suffering, forcing him to discard cards in order to target your Agency characters with any detrimental effects.
While secretly performing her sworn duties, Conspirator Abbess Allegria Di Biase (Terror in Venice, 1) will not be cowered by any terror nor slowed by anyone seeking to wound her. Not even the dread Khopesh of the Abyss (The Shifting Sands, 16) can harm her.
|
Strategy:
In this deck, the many layers of the conspiracy, The Blackwood Initiative, carefully conceal the fact that a nefarious cabal of conspirators and the cult of Shub-Niggurath have infilitrated the Agency’s highest ranks and have been manipulating government officials in order to advance their diabolical plot.
Duplicity is critical to their success, so they rely upon the powers of Shocking Transformation (Core Set, 140) in order to ensure the pieces fall into play without anyone the wiser.
The deck’s restricted card, Shocking Transformation allows you to quickly bring into play such powerful characters as The Claret Knight (Seekers of Knowledge, 38), The Foundation (For the Greater Good, 20), and Karl Heinrich (For the Greater Good, 17).
In fact, Karl Heinrich doesn’t just appear as some naive dupe in this deck. Quite the opposite, he comes across as a twisted and cruel sadist who is all too eager to discard the resources for which your opponent has had to sacrifice so much.
So long as you can destroy your opponents characters in Combat struggles – any Combat struggles, not just the ones in which Karl Heinrich participates – the haunted commander roots characters out from your opponent’s domain.
Accordingly, even after The Blackwood Initiative forces your opponent to discard to resource, Karl Heinrich demands that your opponent resource non-character cards, or risk seeing his resourced characters bleed out from under his domains. This means you’re less likely to face any nasty surprises, even if you don’t play Dr. Christine Maire (For the Greater Good, 6), who simply eliminates all speculation about what your opponent might have in his hand.
|
Layers Within Layers of Dark and Deadly Secrets  The sample decks above illustrate but two of the nearly infinite ways the new Agency cards from For the Greater Good can be put to use for good… or for evil. The sample decks above illustrate but two of the nearly infinite ways the new Agency cards from For the Greater Good can be put to use for good… or for evil.
Will you grab your shotguns and fight back against the forces threatening to unmake all of human civilization? Or will you manipulate endless troops of unwitting government officials, using them all to advance some dark ritual or open portals to other worlds? Among all the ways that Call of Cthulhu: The Card Game evokes the eerie fiction of H.P. Lovecraft, perhaps the most terrifying is that the characters in your deck never truly know if they’re the heroes, or if they’re merely being played to some nefarious end. Dozens of the Agency’s most noble men and women will soon put their lives on the line, not just the overburdened detectives like the King John (For the Greater Good, 8), but also the Overworked Bureaucrats (For the Greater Good, 3) and forensic psychologists like Dr. Christine Maire. How will you use them all? If you haven’t already pre-ordered your copy of For the Greater Good, go pre-order it at your local retailer today! ... Source: What Secrets Reside Beneath the Cover Up? (http://www.fantasyflightgames.com/edge_news.asp?eidn=5339)
Title: FFG:Beasts of Legend
Post by: RSSFeeder on 28 January 2015, 03:45:07
Beasts of LegendAnnouncing Two New Reinforcement Packs for BattleLore Second Edition
The dragon stirred restlessly on its hoard, sending gold and jewels cascading down the sides. It could sense a thief approaching, already close. When the thief arrived, he would be greeted with snapping teeth, rending claws, and a blazing stream of fire, but for now, the dragon could only impatiently wait. Then the ground began to rumble beneath the steps of the approaching thief, and the dragon realized its foe may be a worthy challenger. Fantasy Flight Games is proud to announce the first Reinforcement Packs for BattleLore Second Edition: the Mountain Giant Reinforcement Pack and the Great Dragon Reinforcement Pack! Legendary creatures have strode across the battlefields of BattleLore Second Edition since the days of the Core Set. Roc Warriors and Chaos Lords currently serve the Daqan Lords and the Uthuk Y’llan, while Siege Golems and Doombringers will soon arrive with the upcoming release of Hernfar Guardians and Warband of Scorn. You can easily build an army around these legend units, and each one can deal unprecedented destruction to your opponent’s forces. But some creatures are wild by nature; they cannot be controlled by one army. They may be temporarily harnessed for battle, but in the end, they can never be tamed. Mountain Giants and Great Dragons are two such creatures, and you can bring their might to your battles with these Reinforcement Packs. Both the Mountain Giant Reinforcement Pack and the Great Dragon Reinforcement Pack contain a detailed plastic figure, the cards you need to muster this unit in your army, three new lore cards to customize your lore deck, and a new terrain tile. In addition, each Reinforcement Pack offers a pre-constructed scenario that highlights the new unit and challenges you to fight for victory in entirely new ways. 
From the Mountains  The mountains of Terrinoth are home to terrifying beasts of all kinds, including the Mountain Giants. These enormous humanoids are usually content to stay close to their lairs, but when one is enticed to venture out, the very ground shakes beneath his massive feet. A Mountain Giant is undeniably a fearsome combatant on the field of battle. He can cast boulders with stunning accuracy at your foes or cut a swath around himself with his club. The mountains of Terrinoth are home to terrifying beasts of all kinds, including the Mountain Giants. These enormous humanoids are usually content to stay close to their lairs, but when one is enticed to venture out, the very ground shakes beneath his massive feet. A Mountain Giant is undeniably a fearsome combatant on the field of battle. He can cast boulders with stunning accuracy at your foes or cut a swath around himself with his club.
A Mountain Giant’s strength can also reduce the buildings of the realm to nothing more than rubble. By playing the Crushing Force lore card, you can replace a building hex near the Mountain Giant with a rubble hex – terrain which provides no benefits and damages any unit that enters! Two other lore cards are also included in this Reinforcement Pack, and if you field the Mountain Giant in your army, you can include these cards in your lore deck. You’ll aid the Uthuk Y’llan with the Mountain Giant’s power in the included pre-built scenario, The Sound of Thunder. In this scenario, the Daqan Lords have taken a handful of Blood Harvesters captive, but an Uthuk Y’llan raiding party has assembled to free the prisoners – and they’ve enlisted a Mountain Giant to help. The Daqan Lords must protect the prisoners while the Uthuk Y’llan use the Mountain Giant to destroy buildings and liberate the captives. Although this scenario puts the Mountain Giant under the command of the Uthuk Y’llan, you can bring the Mountain Giant’s strength to any army in your other games of BattleLore. 
Nowhere to Run  In all Terrinoth, few creatures can match the might and ferocity of a Great Dragon. These beasts commonly collect treasure of all kinds into a massive hoard, and they would face any odds rather than see a single piece stolen from its glittering mass. Unfortunately for would-be thieves, a Great Dragon is well equipped to defend its loot. A Great Dragon in the service of an army is a terrifying thing – it flies across the battlefield, breathing plumes of flame on any who cross its path. In all Terrinoth, few creatures can match the might and ferocity of a Great Dragon. These beasts commonly collect treasure of all kinds into a massive hoard, and they would face any odds rather than see a single piece stolen from its glittering mass. Unfortunately for would-be thieves, a Great Dragon is well equipped to defend its loot. A Great Dragon in the service of an army is a terrifying thing – it flies across the battlefield, breathing plumes of flame on any who cross its path.
When you muster a Great Dragon in your army, you must place the hoard terrain hex underneath it. The hoard is full of all kinds of treasure, and if the enemy occupies it at the start of his turn, he claims the treasure as victory points. Thankfully, the Great Dragon watches over its loot vigilantly. Whenever ordered, a Great Dragon may return to the hoard hex instead of moving and attacking. You may even use the Great Dragon’s Firestorm lore card to dissuade enemy units from approaching the hoard. Firestorm places inferno markers next to an enemy unit, and whenever a unit enters an inferno marker, it takes a damage. Even without a supporting army, a Great Dragon is a dangerous foe. In the Into the Fire pre-built scenario, the Daqan Lords and the Uthuk Y’llan compete to claim the dragon’s hoard. Both armies start on the same edge of the battlefield, and they must compete to overpower the Great Dragon and be the first to claim its hoard. The task may sound simple, but the Great Dragon is a mighty combatant, and your opponent’s army is just as desperate for treasure as your own. You can introduce fiery danger to every game of BattleLore Second Edition with the Great Dragon Reinforcement Pack. Reinforcements on the Way New reinforcements for your armies arrive as legendary creatures walk and fly onto the battlefields of Terrinoth. Will you call upon the might of a Mountain Giant, or unleash an inferno with the Great Dragon? The choice is yours. Look for the Mountain Giant Reinforcement Pack and the Great Dragon Reinforcement Pack at your local retailer in the second quarter of 2015! ... Source: Beasts of Legend (http://www.fantasyflightgames.com/edge_news.asp?eidn=5340)
Title: FFG:The Ethereals Arrive
Post by: RSSFeeder on 28 January 2015, 21:45:04
The Ethereals ArriveGift of the Ethereals Is Now Available for Warhammer 40,00: Conquest
“I shall reap a terrible bounty from the death that I sow in your name, Father Nurgle…”
–Typhus the Traveller, Herald of Nurgle The Tau Ethereals guide their entire race, shepherding them towards their rightful place as rulers of the galaxy. Now, the Ethereals have led the Tau to the Traxis sector! Swell the ranks of the Tau and every other faction with the Gift of the Ethereals War Pack for Warhammer 40,000: Conquest, now available at your local retailer and online through our webstore. A new Tau warlord strides onto the battlefields of the Traxis sector in this expansion, but the Tau are not alone in receiving reinforcements. Dark Eldar mercenaries fight for whoever can pay, the Astra Militarum call countless legions to arms, and White Scars Space Marines ride to battle on their bikes. You may repair your supports with an Ork Repair Krew, or foretell the future with the power of the Eldar. 
Of course, the minions of Chaos are not idle as the Tau arm themselves under a new warlord. With new Chaos cards from Gift of the Etherals, you can devote yourself wholeheartedly to Father Nurgle and follow Ku’gath Plaguefather! The Fetid Stench of Nurgle  The forces of Nurgle receive a new army unit in this expansion: the Rotten Plaguebearers (Gift of the Etherals, 59). This unit has the Daemon trait, allowing you to reduce its cost with your Cultists, but it also bears a powerful Action. When you use the Rotten Plaguebearers’ Action, you exhaust the unit to deal one damage to any other unit at the same planet. This ability has dozens of possible uses. You could use it to deal a damage to an enemy unit before any other attacks can be made, or to damage one of your units, such as Ku’gath Plaguefather (The Scourge, 23) himself. Many Nurgle abilities, including Ku’gath Plaguefather and Fetid Haze (The Scourge, 27) require a unit that has been damaged. The Rotten Plaguebearers give you another way to activate these abilities. The forces of Nurgle receive a new army unit in this expansion: the Rotten Plaguebearers (Gift of the Etherals, 59). This unit has the Daemon trait, allowing you to reduce its cost with your Cultists, but it also bears a powerful Action. When you use the Rotten Plaguebearers’ Action, you exhaust the unit to deal one damage to any other unit at the same planet. This ability has dozens of possible uses. You could use it to deal a damage to an enemy unit before any other attacks can be made, or to damage one of your units, such as Ku’gath Plaguefather (The Scourge, 23) himself. Many Nurgle abilities, including Ku’gath Plaguefather and Fetid Haze (The Scourge, 27) require a unit that has been damaged. The Rotten Plaguebearers give you another way to activate these abilities.
You’ll find another way to quickly deal damage to your enemies with the Nurgling Bomb (Gift of the Ethereals, 60). When you play this event, you may choose any planet. Every non-Nurgle unit at the planet either takes one damage or is routed back to its controller’s headquarters. By playing the Nurgling Bomb on a crucial planet, you force your opponent to choose between two unappealing options. Either he sees widespread damage dealt to his units, or his entire force is routed to his HQ, leaving your forces in possession of the planet. Either way, your Nurgle units escape the damage unscathed. The third Chaos card included in Gift of the Ethereals gives you another way to take advantage of the typically high-cost cards in Chaos decks. This card is the Throne of Vainglory (Gift of the Ethereals, 61). As an Action, you can exhaust this support to discard the top card of your deck. If the discarded card costs three or more resources to play, you may put two Cultist token units into play at your HQ! Cultist token units can be sacrificed to reduce the cost of your Daemon units, which are among the most expensive and powerful units in the game. Whether you’re trying to summon a Soul Grinder (Core Set, 91) or a Black Legion Heldrake (Core Set, 87), a reliable source of additional Cultists can easily keep pressure off of your resources. Choose Your Tactics Whether you’re spreading disease with the servants of Nurgle or following the inspirational leadership of the Tau Ethereals, your armies can benefit from the additional troops, steadfast supports, and powerful events contained in the Gift of the Ethereals War Pack. Muster your forces and prepare to take the Traxis sector by storm! Pick up your copy of Gift of the Ethereals at your local retailer today. ... Source: The Ethereals Arrive (http://www.fantasyflightgames.com/edge_news.asp?eidn=5342)
Title: FFG:The Game Begins
Post by: RSSFeeder on 29 January 2015, 06:45:07
The Game BeginsA Deadly Game Is Now Available for A Game of Thrones: The Card Game
“You shall ride with me, and Shagga and Conn for the Stone Crows, Ulf for the Moon Brothers, and Timett son of Timett for the Burned Men.”
–George R.R. Martin, A Game of Thrones The game of thrones is played in shadowy alleys and on bloody battlefields. It stretches from the deserts of Dorne to the court at King’s Landing and the icy wastes beyond the Wall. No one escapes its reach, from the poorest peasants to the greatest lords and ladies in the Red Keep. Whoever plays the game must quickly realize one thing – the game of thrones is deadly, and only ruthlessness can keep you alive. Now, you have new cards to harness as you plunge headfirst into the struggle for power that is the game of thrones. A Deadly Game is now available for A Game of Thrones: The Card Game at your local retailer! 
A Deadly Game continues to explore the major themes of the Wardens cycle. You’ll find powerful and iconic unique characters to lead and inspire your forces. You can also draw upon new “limited responses” and trait-based decks, even as more Castle plots offer increased rewards for players who choose to fortify their position before making a decisive attack. No matter which path you pursue to victory, the cards in this Chapter Pack offer new options for your path to the Iron Throne. Call the Clans  Some of the most unlikely players in the game of thrones are the clansmen of the Vale. For years, they were content to raid travelers and passerby without involving themselves in larger affairs. But the arrival of Tyrion Lannister changed that forever, and Clansman characters can form a crucial part of the Lannister forces in A Game of Thrones: The Card Game. With the arrival of A Deadly Game, you’ll find more Clansman to lead across Westeros. Some of the most unlikely players in the game of thrones are the clansmen of the Vale. For years, they were content to raid travelers and passerby without involving themselves in larger affairs. But the arrival of Tyrion Lannister changed that forever, and Clansman characters can form a crucial part of the Lannister forces in A Game of Thrones: The Card Game. With the arrival of A Deadly Game, you’ll find more Clansman to lead across Westeros.
A new unique Clansman character arrives in this Chapter Pack: Ulf Son of Umar (A Deadly Game, 26). Ulf Son of Umar bears an ability that can prove crucial in many Clansman-focused decks. His ability reads, “Any Phase: Discard a card from your hand to give Ulf Son of Umar any keyword or crest printed on another character in play until the end of the phase.” Obviously, gaining keywords and crests can quickly make Ulf Son of Umar a force to be reckoned with – especially since you can copy keywords and crests from your own characters or your opponent’s characters. But the cost of this ability can also prove beneficial. Many Clansman cards offer additional benefits when you have less cards in hand than your opponent, and Ulf Son of Umar offers a reliable, unlimited way to ensure that these abilities are always active.  Your Clansman characters gain another boon in the Moon Brother Harriers (A Deadly Game, 27), warriors belonging to Ulf’s clan. This character bears a War crest, making it a useful for using cards like Die by the Sword (Lords of Winter, 47), and what’s more, the Moon Brother Harriers have the opportunity to enhance your other Clansman characters. By paying one gold during a challenge, you can give your participating Clansman characters one additional STR until the end of the challenge. What’s more, you can activate this ability once per challenge, and the Moon Brother Harriers don’t even need to participate in the challenge to trigger their ability. When enough of the Valemen unite, the Moon Brother Harriers and the Lannisters’ coin can sway any challenge in your favor. Your Clansman characters gain another boon in the Moon Brother Harriers (A Deadly Game, 27), warriors belonging to Ulf’s clan. This character bears a War crest, making it a useful for using cards like Die by the Sword (Lords of Winter, 47), and what’s more, the Moon Brother Harriers have the opportunity to enhance your other Clansman characters. By paying one gold during a challenge, you can give your participating Clansman characters one additional STR until the end of the challenge. What’s more, you can activate this ability once per challenge, and the Moon Brother Harriers don’t even need to participate in the challenge to trigger their ability. When enough of the Valemen unite, the Moon Brother Harriers and the Lannisters’ coin can sway any challenge in your favor.
The final House Lannister card in A Deadly Game – the Vale Encampment (A Deadly Game, 28) – helps you bring your Clansman characters into play even quicker. You can discard the Vale Encampment in the marshaling phase to reduce the cost of the next Clansman card you play, and when you do play that card, you draw an additional card, giving you more options for coming challenges. With these cards, A Deadly Game provides you with the tools you need to lead the clansmen out of the Mountains of the Moon and sweep across Westeros. Player or Pawn? From the clansmen of the Vale to the Dothraki across the Narrow Sea, no one is exempt from the game of thrones. You must only choose whether you will decide your own fate as a player or be swept along as a pawn. Join iconic characters like Brienne of Tarth and Khal Drogo in A Deadly Game for the future of the Seven Kingdoms. Pick up your copy of A Deadly Game at your local retailer today! ... Source: The Game Begins (http://www.fantasyflightgames.com/edge_news.asp?eidn=5343)
Title: FFG:Defending Deephall
Post by: RSSFeeder on 12 February 2015, 10:45:03
Defending DeephallGuardians of Deephall Is Now Available for Descent Second Edition
“None fall faster than they that flee.”
–Lord Hawthorne The city of Deephall lies defenseless before the dark forces of the overlord. Only you and your fellow heroes stand between the city and the oncoming tide of evil, but can you truly hope to defeat the forces arrayed against you? Find out with the Guardians of Deephall Hero and Monster Collection for Descent: Journeys in the Dark Second Edition, now available at your local retailer and online through our webstore! Like other Hero and Monster Collections, Guardians of Deephall includes thirteen detailed plastic figures previously only available through the first edition of Descent. Now you can fight to hold the walls of Deephall with Sahla, Silhouette, Lord Hawthorne, and Mordrog, or command hordes of dark priests, wendigos, and crypt dragons as the overlord. In addition, Guardians of Deephall offers two brand-new quests, challenging you to defend Deephall and uncover the artifact that is the source of its troubles. Whether you fight for Deephall’s salvation or its destruction, you’ll find the heroes, monsters, and quests you need in this Hero and Monster Collection!
A Savage Fighter One of the most unlikely heroes to come to the defense of Deephall is Mordrog, the orc. Mordrog has long fought to defend Terrinoth, but no matter how many monsters he slays, he remains unable to teach humans the true superiority of orcish nature. From his hunts in the Mountains of Despair to battles before Nerekhall’s gates, his accomplishments are ignored in favor of inferior human heroes. Such prejudice does not trouble Mordrog, however. He simply pities the humans for their weakness and lack of warrior spirit. Now he sees the defense of Deephall as one more opportunity to prove the prowess of an orc. During your quests, the overlord may do well to avoid enraging Mordrog. Mordrog’s hero ability allows him to recover one fatigue every time he suffers one or more damage. With no limit on the amount of times this ability can be triggered, Mordrog can easily recover enough fatigue to trigger his Class cards on multiple consecutive turns. Of course, Mordrog has to take damage to trigger his hero ability, but with fourteen health, he can absorb even the most punishing attacks and respond with lethal force. 
When Mordrog picks his target, he pursues it with dogged tenacity and unrelenting force. After he performs an attack that does not defeat its target, he may trigger his heroic feat to perform an additional attack against the same target. What’s more, the second attack receives a bonus surge, enhancing the power of Mordrog’s chosen weapon. With this heroic feat, you can quickly finish off any monster that survives your initial onslaught. Protect the City The fate of the city of Deephall lies in your hands. Can you defend the city and recover the pendant that causes its woes, or will the overlord triumph and bring darkness sweeping over the realm? The choice is yours in the Guardians of Deephall Hero and Monster Collection. Pick up your copy of Guardians of Deephall at your local retailer today! ... Source: Defending Deephall (http://www.fantasyflightgames.com/edge_news.asp?eidn=5344)
Title: FFG:Where Is Humanity Headed?
Post by: RSSFeeder on 12 February 2015, 19:45:03
Where Is Humanity Headed?Order and Chaos Is Now Available for Android: Netrunner
“And in other news, we’ve learned that yesterday’s traffic accident in the SanSan High Lane has claimed the lives of three individuals, including twenty-nine year-old Leon Hargrove. An alleged hacker and self-avowed human rights activist, Mr. Hargrove was scheduled to go to trial for the recent data breach in J2 Construction, a Weyland Consortium subsidiary…”
–NBN Live at 5 Where is humanity headed? Order and Chaos, the third deluxe expansion for Android: Netrunner, is now available at your local retailer and online through our webstore! The world of Android is constantly changing. Megacorporations such as Haas-Bioroid and Jinteki continually introduce new work efficiencies with their bioroids and clones. Other corporations, like the Weyland Consortium, remake the world itself, changing its face with the destruction of old buildings and the construction of new ones. Even invisibly, the world changes, as the network that binds its people together extends further outward into the solar system, to the colonies on the Moon and Mars, and channels ever more data. Amid all these changes, humanity, too, must change, but how will it change? Where does its future lie? With 165 new cards (three copies each of fifty-five different cards), Order and Chaos pours new fuel upon the heated struggles between two wildly different visions for the future of humanity. 
Bigger and Broader Horizons First, you have the Weyland Consortium, which is constantly looking for new ways to expand humanity’s horizons and, accordingly, the company’s business opportunities. Even though the company’s founder, Jack Weyland, has stepped down from the board of directors to pursue his own endeavors, the Weyland Consortium continues to test new possibilities in energy sources, lunar colonization, and other development. Its successes could change the very course of human history, so it always safeguards its most far-sighted and futuristic ambitions with bleeding-edge ice and operations.  Meanwhile, the Weyland Consortium has always been willing to play hardball to get what it wants, and Order and Chaos adds to the Corp’s history of Aggressive Negotiations (Core Set, 97) and Hostile Takeovers (Core Set, 94) by adding such hardline new cards as Argus Security (Order and Chaos, 1) and Government Takeover (Order and Chaos, 6). Meanwhile, the Weyland Consortium has always been willing to play hardball to get what it wants, and Order and Chaos adds to the Corp’s history of Aggressive Negotiations (Core Set, 97) and Hostile Takeovers (Core Set, 94) by adding such hardline new cards as Argus Security (Order and Chaos, 1) and Government Takeover (Order and Chaos, 6).
Though there’s never been any evidence to substantiate the rumors that the Weyland Consortium has used Punitive Counterstrikes (True Colors, 79) and Scorched Earth (Core Set, 99) policies to defend its propriety data from would-be Runners, rumors of such activities continue unabated. In fact, Order and Chaos offers even more grist to the rumor mill in the form of such operations as Housekeeping (Order and Chaos, 20) and Traffic Accident (Order and Chaos, 22). Altogether, these new cards, along with the expansion’s advanceable ice, suggest that even as the Weyland Consortium is pursuing new business opportunities, it is sticking to its core strengths, and that may be cause for concern among those who don’t appreciate the Corp’s mercenary use of the planet’s resources or share its particular vision for humanity. Exploding Society’s Hierarchical Structures This brings us to the expansion’s three outraged new Anarchs, who seek to undermine everything that the Weyland Consortium and other corporations have built upon the backs of humanity’s downtrodden. While just a handful of megacorps control nearly all the world’s wealth, these angry Runners work against the injustices they perceive by lashing out against the Corps, flooding their servers with viruses, rooting through their headquarters for secrets to expose to the media, and using hammers to smash in the metallic skulls of their biotic workforces. However, while much has been made of these Anarchs, their brazen personalities, and their strongly individualistic tendencies, comparatively little attention has been given to their digital fingerprints on the net. Still, it’s here, on the net, that we may truly find the Anarchs’ greatest legacy. Though Anarchs are known far more for burning down servers than for any constructive activities, their widespread use of virus programs has littered the back alleys, corner rooms, and other niche spaces of the network. And in those spaces, it appears, all these various virus programs and AI programs have been breeding.  In Order and Chaos, the Anarchs get their first five-influence card, and it’s a powerful virus that’s likely to define the faction for a long time to come. Hivemind (Order and Chaos, 42) represents a possible evolution of the network, liberating it from such hierarchical structures as those imposed on Corporate servers, and transforming it into a fully level playing field in which all data communicates with all other data. Each virus counter on Hivemind is considered to be on each other virus program in play; that means this one card can fuel your Parasites (Core Set, 12), Datasuckers (Core Set, 8), Mediums (Core Set, 10), and other viruses. In Order and Chaos, the Anarchs get their first five-influence card, and it’s a powerful virus that’s likely to define the faction for a long time to come. Hivemind (Order and Chaos, 42) represents a possible evolution of the network, liberating it from such hierarchical structures as those imposed on Corporate servers, and transforming it into a fully level playing field in which all data communicates with all other data. Each virus counter on Hivemind is considered to be on each other virus program in play; that means this one card can fuel your Parasites (Core Set, 12), Datasuckers (Core Set, 8), Mediums (Core Set, 10), and other viruses.
Though Hivemind can’t gain virus counters on its own, clever Anarchs will find plenty of ways to boost this universal link, including the new Virus Breeding Ground (Order and Chaos, 52). And once you get virus counters on your Hivemind, you won’t want to see them eliminated by a Corp player who chooses to use three clicks to wipe virus counters. Accordingly, you’ll want to consider hosting your Hivemind on the daemon, Progenitor (Order and Chaos, 43). What’s Your Vision of Humanity? In the Order and Chaos deluxe expansion for Android: Netrunner, you’ll find two wildly different visions of humanity pitted against each other in a struggle for survival. Which vision will you support? Where will you lead humanity? Head to your local retailer today to pick up your copy of Order and Chaos, or order it online from our webstore! ... Source: Where Is Humanity Headed? (http://www.fantasyflightgames.com/edge_news.asp?eidn=5345)
Title: FFG:UFOs Sighted!
Post by: RSSFeeder on 13 February 2015, 04:45:04
UFOs Sighted!XCOM: The Board Game Is Now Available
All attempts to contact the invaders thus far have failed. Their only purpose seems to be destruction and chaos. One fact is quite clear: the militaries of the world are severely outgunned. In the absence of a miracle, this could very well be the end of civilization as we know it… Calibrate your laboratory instruments, prep your Interceptors, and get your soldiers into battle armor. Reports of UFO sightings have now been confirmed. XCOM: The Board Game is now available!
You Are Humanity’s Last Hope In XCOM: The Board Game, you and up to three friends assume the roles of the leaders of the elite, international organization known as XCOM. It is your job to defend humanity, quell the rising panic, and turn back the alien invasion. Where the world’s militaries have failed to stand against the alien invaders, you must succeed. To do so, you must make strategic use of the resources available to you. You must launch Interceptors to shoot down alien UFOs, assign soldiers to key missions, research alien technology, and use that technology to defend your base, all while you try to keep the world from collapsing just long enough that you can coordinate one final mission to repel the invaders for good.
All the while, the game’s innovative and free digital companion app coordinates the alien invaders, randomly selecting from one of five different invasion plans. Each invasion plan represents a general outline that the alien commanders will use to coordinate the arrival of new UFOs, plan strikes against your base, and respond to your successes or failures as it seeks to conquer Earth. Moreover, the app manages all of these tasks and heighten’s the game’s tension as it forces you to respond in real-time. Read the Early Reviews Based on the critically acclaimed and much-beloved XCOM computer game series, XCOM: The Board Game has exploded into the media since we first announced the game ahead of Gen Con Indy 2014. Coverage has run across sites dedicated to board games, as well as those that traditionally focus more on computer games, and even such traditional news media outlets as The Guardian have remarked upon the game’s use of a digital companion app. In fact, the game’s app and its integration into gameplay have been the most commonly discussed topics. However, many reviewers have also remarked upon the game’s novel and compelling interpretation of the XCOM experience. What’s common to nearly all reviews, though, are the claims that XCOM: The Board Game offers a unique take on XCOM, cooperative board gaming, and the hybridization of board and digital gaming. It is that hybridization that interests The Guardian: “The forthcoming XCOM board game gets the balance right, letting four players co-operate in saving the world from an alien invasion while a companion app tosses an element of randomisation into the mix – and lets one player pretend they’re hooked into the global defence network for real.” The review from Polygon carries this idea even further and states it a bit more strongly: “It's not a regular board game. It's a board game with a companion app, one that can be run inside a web browser or on a tablet. And the app isn't a gimmick. It's an integral part of how the board game works. It creates a tension that is wholly unique, bringing it closer to something like the Artemis Bridge Simulator or the indie iOS hit Spaceteam.” Of course, it’s not just the use of the app that matters, but the end result, and the early review from PC Gamer offers an excellent summary of what XCOM: The Board Game brings to the XCOM experience: “Most of the time, the theme of the videogame seems like a weird bolt-on to the cardboard version, both watering down what might be good gameplay mechanics and failing to create a meaningful connection to original game. XCOM: The Board Game avoids both of these traps, both delivering a new, fun coop experience and conjuring up the XCOM world in interesting ways.” Can You Find a Way to Defeat the Unknown Foe? Hello, Commander. In response to the alien threat, this council of nations has chosen to activate the XCOM project. You are humanity’s last hope. Against an overwhelming alien invasion force, you and your friends must find a way to destroy UFOs, research alien technology, defend your base, and uncover the alien invasion plan. To do so, you’ll need better knowledge of the enemy, much of which you gain from our series of previews.
- In “Alien Intelligence,” we take a closer look at the game’s companion app and the role of Central Officer.
- In “The Desperate Defense,” we look at the alien invasion’s key threats: UFOs, enemies, and global crises.
- The push-your-luck dice rolling mechanics of the game’s resolution phase and the role of Squad Leader are the two focal elements in “Pushing Deeper into Danger.”
- How is XCOM: The Board Game different from other cooperative board games? We explore this question, as well as the role of Commander, in “Something Has to Give.”
- Finally, in “Salvaging Hope from the Wreckage,” we review the critical importance of XCOM’s ongoing research and high-tech weapons, as well as the role of Chief Scientist.
It’s time to save the world. XCOM: The Board Game is now available at your local retailer and online through our webstore! ... Source: UFOs Sighted! (http://www.fantasyflightgames.com/edge_news.asp?eidn=5341)
Title: FFG:The Wastes of Eriador
Post by: RSSFeeder on 13 February 2015, 13:45:03
The Wastes of EriadorAnnouncing the First Adventure Pack in the Angmar Awakened Cycle
“What roads would any dare to tread, what safety would there be in quiet lands, or in the homes of simple men at night, if the Dúnedain were asleep, or were all gone into the grave?”
–Aragorn, The Fellowship of the Ring Fantasy Flight Games is proud to announce the upcoming release of The Wastes of Eriador, the first Adventure Pack in the Angmar Awakened cycle for The Lord of the Rings: The Card Game! For nearly seven-hundred years, the Witch-king of Angmar terrorized the North from his home in Carn Dûm. Though his forces were eventually defeated, the shadows of the Witch-king’s evil have lain across the lands through all the centuries that followed his departure from the region. Now, in The Wastes of Eriador, several of Middle-earth’s heroes must join forces with the noble Dúnedain who have long guarded the region’s simpler folk from the untold evils that still reside within Carn Dûm and its environs. Following immediately upon the heels of the epic events that unfold in The Lost Realm deluxe expansion, the scenario from The Wastes of Eriador tasks you to rescue a captive Ranger. However, as you pursue the enemies who have captured him, your trail leads you ever northward, ever deeper into the hills of Angmar. There, as day fades into night, the howling of wolves suggest that your party of hunters may soon become the hunted… In addition to its new scenario, The Wastes of Eriador also contains a new hero and three copies each of nine different player cards. In the lands traveled so often by the Rangers of the North, you’ll find new Dúnedain, Hobbits, Scouts, and side quests. You’ll also find new ways to protect your heroes from damage, as well as the new Valour trigger, which continues to gain strength throughout the Angmar Awakened cycle. 
For more about The Wastes of Eriador, the Valour trigger, and the Angmar Awakened cycle, we turn to lead developer Matthew Newman. Lead Developer Matthew Newman on Angmar Awakened Greetings, I am very excited for the Angmar Awakened cycle! Like The Ring-maker and Against the Shadow cycles before it, Angmar Awakened continues a tale that begins with the events of the deluxe expansion that precedes it – The Lost Realm. Altogether, this epic, nine-scenario adventure takes place within a new region, with new challenges. Throughout their journeys, your heroes will have to trek across snowy wastes, escape from the clutches of wicked goblins, investigate the ruins of an ancient kingdom, and uncover a terrible secret that threatens all of the North!  Meanwhile, the cycle’s new player cards take The Lord of the Rings: The Card Game in several different, all-new directions. For example, in previous cycles we’ve seen various Secrecy cards that reward players for keeping their threat low, hiding from enemies, and sneaking their way through locations and around obstacles. But what about those heroes of Middle-earth who choose to face Sauron’s forces head on, confronting them face-to-face upon the field of battle? For those who do not shy away from risk and danger, we introduce a new ability trigger – Valour. Meanwhile, the cycle’s new player cards take The Lord of the Rings: The Card Game in several different, all-new directions. For example, in previous cycles we’ve seen various Secrecy cards that reward players for keeping their threat low, hiding from enemies, and sneaking their way through locations and around obstacles. But what about those heroes of Middle-earth who choose to face Sauron’s forces head on, confronting them face-to-face upon the field of battle? For those who do not shy away from risk and danger, we introduce a new ability trigger – Valour.
Valour cards are inspired by a quote from Boromir that I think highlights the difference between his philosophy and perhaps the rest of the Company of the Ring: “But always I have let my horn cry at setting forth, and though thereafter we may walk in the shadows, I will not go forth as a thief in the night.” If you like to take risks and tend to play aggressive decks, Valour cards are for you. Still, being brave doesn’t mean being foolish and taking unnecessary risks, and these cards can see play in any deck. They will simply be most powerful when your threat is high and your situation is dire. Unlike Secrecy cards, which benefit you when your threat is twenty or less, Valour cards benefit you when your threat is forty or higher. This is typically later in the game, when you have already built up your strength and resources aren’t quite as much of an issue. So instead of offering effects at a discounted cost, these cards offer powerful effects that can only be triggered when your threat is forty or higher. Valour cards are designed to save you when you face overwhelming odds, and they can help you secure victory when victory might otherwise be out of your grasp. However, Valour cards are only prevalent in those spheres with little to no threat reduction – Leadership and Tactics. This means that a Valour-heavy deck will often straddle the line between victory and defeat, as the encounter deck is typically most dangerous when players’ threats are at their highest. Valour cards aren’t the cycle’s only new focus, though, and all four of the game’s spheres gain cards in Angmar Awakened that strengthen existing themes and explore new ones. In addition to their new Valour cards, Leadership and Tactics players can look forward to several Gondor and Dúnedain cards. Meanwhile, Lore players can look forward to manipulating the encounter deck and victory display, as well as cards that reward them greatly for their forethought and wisdom. Finally, Spirit players will be able to explore what it really means to be a Noldor Elf, with cards that introduce a new strategy for the High Elves of Middle-earth. 
Will You Aid the Rangers of the North? The Rangers of the North have long guarded the region’s simpler folk from the dangers that roam the wilds. Now, one of their number has been captured, and his captors are dragging him deep into the hills of Angmar. Will you aid the noble Dúnedain? Will you brave the The Wastes of Eriador? Look for The Wastes of Eriador to arrive at retailers everywhere in the second quarter of 2015. Until then, keep your eye on our website for more words from the developers and other The Lord of the Rings: The Card Game news! Note: As the first Adventure Pack in the Angmar Awakened cycle, The Wastes of Eriador introduces our new LCG® packaging to The Lord of the Rings: The Card Game Adventure Packs. While the packaging is now molded plastic, every Adventure Pack still contains the full complement of sixty cards. ... Source: The Wastes of Eriador (http://www.fantasyflightgames.com/edge_news.asp?eidn=5346)
Title: FFG:Uncertainty Principles
Post by: RSSFeeder on 13 February 2015, 22:45:03
Uncertainty PrinciplesPreview Events, Skills and the Rules of Gates of Arkham
Just where the supreme horror lay, I could not for my life tell.
–H.P. Lovecraft, The Thing on the Doorstep Arkham has always been home to witches and cultists, and filled with uncanny places where most people fear to walk, let alone dwell. Yet in the Gates of Arkham expansion for Elder Sign, the city has fallen deeper into chaos. Gates are destabilizing time and space so that formerly safe locations are now the entrances to treacherous Other Worlds. Terrifying abominations such as Night Gaunts and Leng Spiders are pouring through these open gates and rampaging in the streets. Two secretive, underground organizations, the Sheldon Gang and the Order of the Silver Twilight, control the streets more than the Arkham police. 
Today we will preview Event cards, which bring to life the constant uncertainty that reigns in Arkham. Some events are welcome and help you with the adventure ahead. Others are harmful and hinder your progress, if they don't make the situation in Arkham worse. Fortunately, Gates of Arkham also introduces skills, which grant investigators enduring abilities to help them navigate the this legendarily cursed city. To guide you through the chaos and uncertainty, we have also uploaded the rules of Gates of Arkham. Download them (pdf, 7.2 MB) from the Elder Sign support page, or by clicking the thumbnail on the right. Unpredictable Events 
When you enter locations in Arkham you are often venturing into the unknown. Even when you know the adventure that lies ahead of you, however, an Event can introduce unforeseeable complications. If you’re at an adventure with an Event icon (pictured on the right), you must draw an Event card at the beginning of your resolution phase. Some Events only affect the adventure in play and the investigators engaged in it; others can affect the entire game. Perhaps you choose to attend a play at Independence Square. Even before the curtain is lifted, you must draw an event: perhaps Unexpected Difficulties occur, lock one of the green dice and making it more difficult for you to succeed in this adventure. But those difficulties only last for the present resolution phase. You might decide to remain at the performance and try again to mitigate the madness this play unleashed in the audience. So, on your next resolution phase you draw another event and now strike a Devil’s Bargain – if you successfully resolve the adventure, you must add two doom tokens to the doom track, bringing the Ancient One closer to coming awake. Not all Events are bad. If you find yourself trapped in the Forbidden Library of the Witch House, a Narrow Escape will allow you to avoid losing your sanity or advancing the doom track if you try and fail to retrieve the Elder Sign hidden among the dusty volumes. Since you cannot leave the Forbidden Library until you resolve the adventure, this Event card can also make it possible for you to survive multiple turns locked inside. 
Survival Skills If you do make it out of the Forbidden Library alive, you’ll be rewarded with a new skill. Unlike Spells and Common Items, which are usually discarded after a single use, skills can be kept. Any Medical Training gained from your research, for example, will benefit your team of investigators for the length of the game, or, in an emergency, you can exhaust it to save another investigator’s life. You may even stumble upon some good Luck that will enable you to avoid particularly bad Events. But you’ll need more than skills to survive in the Streets of Arkham game mode. Gates of Arkham also introduces new Spells, such as the powerful Reach of the Mind. You’ll also come across Items that couldn’t have been found inside the museum walls. You might find a Roadster with a full tank of gas ready to speed you across the city to another location. Or a mysterious stranger may give you a Suitcase of Cash that you can use to purchase a useful Item, some sanity, or even membership in the Sheldon Gang. 
Confront the Unknown Nothing is certain in Arkham. A respected doctor might actually be a mad scientist seeking to resurrect the dead. Where the altar once stood in the South Church, there might now be a gateway to a mysterious ancient civilization. A stop at Velma’s Diner for coffee and pie might turn into a battle for your life against a rapacious monster, or a room in Ma’s Boarding House that has been haunted for decades may suddenly seem welcoming and free from horrors. But amid the chaos and uncertainty caused by the Ancient One’s awakening, you must fight for order. You must confront the unknown in Arkham to keep its horrors from taking over the world. Gates of Arkham will be available soon. ... Source: Uncertainty Principles (http://www.fantasyflightgames.com/edge_news.asp?eidn=5347)
Title: FFG:Take Command of the Rebel Fleet
Post by: RSSFeeder on 14 February 2015, 07:45:04
Take Command of the Rebel FleetPreview Three Rebel Starship Expansion Packs for STAR WARS (TM): Armada
“I just said you were a fair pilot. I didn’t know they were lookin’ for somebody to lead this crazy attack.”
–Han Solo Our last preview of Star Wars™: Armada focused on the Victory-class Star Destroyer and the Gladiator-class Star Destroyer, the two Imperial starships coming out in the game’s first wave of expansions. Today, we continue our exploration of the game, its ships, and its expansions with a look at the three different capital ships with which the Rebellion will soon be able to confront these Star Destroyers. CR90 Corellian Corvette Expansion Pack
The miniature CR90 Corellian corvette found in the CR90 Corellian Corvette Expansion Pack is identical to that found in the game’s Core Set. Still, the expansion is well worth the consideration of anyone looking to field more than one corvette in battle. First of all, most ambitious Rebel commanders are likely to want their fleets to count a good number of corvettes. Certainly, it’s possible to bring more than one to battle. The CR90 Corvette A weighs in at just forty-four of your three-hundred fleet points, and the CR90 Corvette B costs you a mere thirty-nine fleet points. For those points, though, both ships offer you three-dice attacks from your primary, forward-facing weapons; four hull; and a total of seven shields. 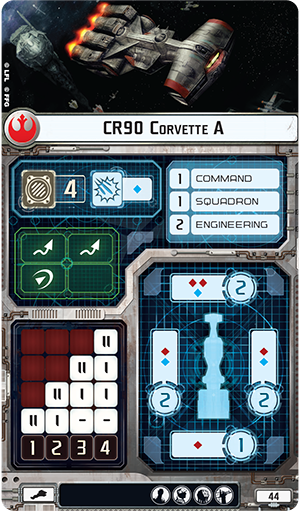 
The ship cards for the CR90 Corvette A (left) and CR90 Corvette B (right).
However, the expansion’s benefits extend far beyond the additional miniature you’ll find within it. As with the Imperial starship expansions, each Rebel starship expansion pack introduces a number of upgrade cards, several of which are unique to the expansion. For example, the CR90 Corellian Corvette Expansion Pack allows you to recruit Mon Mothma as your commander should you prefer her to the Core Set’s General Dodonna. It also comes with the valiant Raymus Antilles and two different titles, meaning that you can fly the iconic Tantive IV or daring Jaina’s Light alongside the Core Set’s Dodonna’s Pride.  As the lightest and most agile ship within the Rebel fleet, the CR90 corvette offers a great deal of tactical flexibility not available to your other ships, and the expansion capitalizes upon this flexibility. Not only does the expansion’s Raymus Antilles allow your corvette to double up on the effects of any command it chooses, gaining a token even as it executes the command from the dial, but a number of other cards allow you to exploit the different upgrades available to the CR90 Corvette A and CR90 Corvette B. As the lightest and most agile ship within the Rebel fleet, the CR90 corvette offers a great deal of tactical flexibility not available to your other ships, and the expansion capitalizes upon this flexibility. Not only does the expansion’s Raymus Antilles allow your corvette to double up on the effects of any command it chooses, gaining a token even as it executes the command from the dial, but a number of other cards allow you to exploit the different upgrades available to the CR90 Corvette A and CR90 Corvette B.
Where the CR90 Corvette B features an ion cannons upgrade, the CR90 Corvette A instead features the turbolaser upgrade. Accordingly, you might add the Leading Shots upgrade card to a CR90 Corvette B equipped with the Dodonna’s Pride in order to deal faceup damage cards directly to the hulls of enemy ships, especially in a fleet with General Dodonna as commander. Or you might equip your CR90 Corvette A with the H9 Turbolasers upgrade, and if your opponent’s Victory-class Star Destroyer has spent one of its redirect tokens, you can convert one of your damage results to an accuracy result in order to force your opponent to soak the damage you deal on the hull zone you’ve targeted. The way Armada allows you to upgrade and customize your ships ensures that you’ll have tremendous control over the way they fit into your overall strategy, and the CR90 Corellian Corvette Expansion Pack greatly increases the number of roles your corvettes can play within your Rebel fleet. Nebulon-B Frigate Expansion Pack
The second Rebel ship found in the Core Set is the Nebulon-B frigate, and the Nebulon-B Frigate Expansion Pack enhances its utility and versatility within your fleet by adding a pre-painted Nebulon-B miniature along with eight upgrade cards. The Nebulon-B is a ship that is truly designed to play one of two different roles within your fleet, and the Nebulon-B Frigate Expansion Pack further highlights the distinctions between the roles, allowing you to use it as a powerful support ship or as a potent fighter escort. Of course, once you have both the Core Set and the Nebulon-B Frigate Expansion Pack, you can field two Nebulon-B frigates in battle, potentially utilizing both the Nebulon-B Escort Frigate and the Nebulon-B Support Refit in the same fleet.  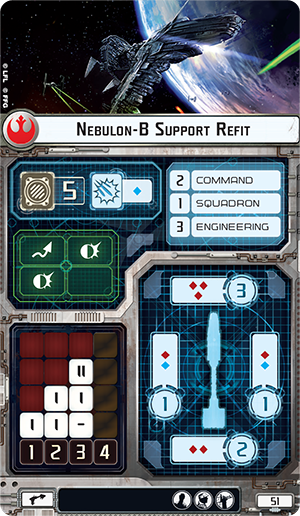
The ship cards for the Nebulon-B Escort Frigate (left) and Nebulon-B Support Refit (right).
Both these types of Nebulon-B frigate feature the same attack dice, shields, hull, and upgrade slots. There are two key differences that merit the six extra fleet points. First of all, the Nebulon-B Escort Frigate gains an extra blue die to its anti-squadron armament, making it far more effective at eliminating enemy squadrons, either to protect itself or free up your fighters to attack enemy ships. Additionally, it gains an extra squadron value, meaning it can activate an extra squadron whenever it reveals the squadron command. This is particularly meaningful if you equip your Nebulon-B frigate with the expansion’s Yavaris title, which allows your squadrons to attack twice when you activate them with the squadron command, so long as they don’t move. Add Luke Skywalker to the mix, and the differences between the two types of Nebulon-B designs becomes profoundly noticeable. Of course, there’s plenty to say in favor of the Nebulon-B Support Refit. For starters, it comes with all the same attack dice, but at a discount of six fleet points. This is a great option for fleet admirals who plan to use their Nebulon-B frigates to attack directly. For starters, the Salvation title adds extra damage with each result it scores from its front hull zone. Then, the addition of an Intel Officer or XI7 Turbolasers (or both) can minimize your opponent’s ability to defend against your attacks, ensuring that they hit for maximum, targeted impact.  
The Support Refit is also, arguably, the better ship to outfit with the Core Set’s Redemption title, which is the title you’d likely select if you wanted your Nebulon-B to play a more defensive role than offensive one. It grants an extra point of engineering to friendly ships within Range 1–5 whenever they resolve the repair command, either from the dial or from a token. Either way, that extra point may make the difference between merely moving a shield and recovering one, or between recovering a shield and discarding some harmful faceup damage card. Additionally, that extra point of engineering piles up quickly; the more you resolve the repair command, the more value you get from the Redemption. Assault Frigate Mark II Expansion Pack
The third of the Rebel starship expansion packs in the first wave of Armada releases is the Assault Frigate Mark II Expansion Pack. Featuring one pre-painted Assault Frigate Mark II miniature and fourteen upgrades, this is the big Rebel expansion for admirals who want to battle the Empire’s Star Destroyers on more even terms. While neither the CR90 corvette or Nebulon-B frigate wield firepower that measures up to a Star Destroyer’s, and both demand that you fly them carefully about the battlefield in order to limit their exposure to your opponent’s main weapons, the Assault Frigate Mark II can fire attacks of four dice from either its left or right hull zone. Those are attack values that match the Gladiator-class Star Destroyer’s best attacks for total dice, but at a greater distance, and while they don’t quite measure up to the Victory-class Star Destroyer’s forward attack, they give the advantage to any Rebel commander who can maneuver an Assault Frigate Mark II alongside a Victory-class Star Destroyer, whose left and right hull zones attack for only three dice each. As to be expected, as with each of the other ships, there are multiple ways to outfit your Assault Frigate Mark II, and you will find notable differences between the eighty-one fleet point Assault Frigate Mark II A and the seventy-two fleet point Assault Frigate Mark II B.  
The ship cards for the Assault Frigate Mark II A (left) and the Assault Frigate Mark II B (right).
For the extra fleet points it costs you, the Assault Frigate Mark II A gains an extra blue attack die from its forward and rear hull zones. It also features a more impressive anti-squadron armament of two blue dice, instead of just one. On the other hand, the Assault Frigate Mark II B features a squadron value of “3” instead of “2.” It may not be as well-equipped at dealing with enemy fighters directly, but it can better coordinate any fighter wing sent to escort it. However, both versions of the Assault Frigate Mark II feature a command value of “3,” meaning that it’s noticeably less responsive than the Rebellion’s other ships. As is true of all the starships in Armada, the more powerful ships demand that you plan further ahead. Still, the ship’s larger command value also means that it can hold more command tokens for later use, and that pairs well with the ability of the expansion’s commander, Garm Bel Iblis, who in both the game’s first and penultimate rounds allows you to add a number of command tokens to each of your ships equal to their command ratings.  
Garm Bel Iblis is accompanied within the expansion’s upgrades by another unique Rebel, Adar Tallon, who serves equally well aboard the Assault Frigate Mark II B and the Yavaris. For ten fleet points, Adar Tallon basically allows you to get double the value out of your best squadron pilot every round, and if you choose to go all-in on the investment in your squadrons, you may also wish to consider equipping your Assault Frigate Mark II B with the Gallant Haven title, which reduces by one the total damage dealt to any of your squadrons at distance “1.” Like the Nebulon-B frigate, the Assault Frigate Mark II also seems to be meant for one of two roles, and if you opt not to outfit it as a fighter escort, then you can add the Paragon title to add one black die to any attack your ship makes as a second attack against the same target. With the Paragon title, your Assault Frigate Mark II A can concentrate its fire upon a single foe for as many as eight attack dice, or nine if you also outfit it with the Enhanced Armament upgrade. Even Star Destroyers have a hard time concentrating nine dice at the same foe, and if you start launching those sorts of explosive attacks against your enemies, it’s worth taking a look at adding the Sensor Team upgrade to your ship. At the cost of two dice, the Sensor Team allows you to gain an accuracy result when you need it to prevent your opponent from halving the damage his ship would otherwise take. The Fleet Will Be Ready Soon The Rebel fleet is gathering outside of Sullust and will soon be ready for action. How will you meet the Imperials? Will you swarm them with your corvettes? Will you use the Yavaris, Gallant Haven, and Adar Tallon to get the most out of your ace fighter pilots? Or will you bring out the big guns of your Assault Frigate Mark II A? In our next preview, we’ll take a look at the fighters and pilots in the Rebel and Imperial Fighter Squadron Expansion Packs. Until then, head to our community forums to share your favorite Rebel fleet designs with the other members of the Armada community! ... Source: Take Command of the Rebel Fleet (http://www.fantasyflightgames.com/edge_news.asp?eidn=5348)
Title: FFG:Halls of Terra
Post by: RSSFeeder on 14 February 2015, 16:45:05
Halls of TerraAnnouncing a New Expansion for Relic
He stood in front of the massive, ancient, marble doors of the Sanctum Imperialis, feeling the pitiless gaze of the Adeptus Custodes penetrating him as he waited. He hoped that the rusted dents on his armor, the long scars across his face, and the token of the Inquisition’s support would attest to his piety and loyalty. He knew that what he was asking for – an audience with the God-Emperor – was a privilege unknown to any but the most dedicated and uncorrupted servants of the Imperium. He could only pray to be deemed worthy of it. At long last one of the guards approached and tonelessly spoke. “Your wish has been granted. You may enter the Eternity Gate and approach the Golden Throne.” Fantasy Flight Games is proud to announce the upcoming release of Halls of Terra, a side board expansion for the Warhammer 40,000 board game, Relic. The Antian Sector is on the brink of succumbing to heresy and Chaos. In Halls of Terra, your quest to save the Antian Sector takes you to mankind’s homeworld, where you must persuade the ruling powers of the Imperium to endorse you as an Imperial Champion. Not only the fate of the Antian Sector, but also your life and honor are at stake in your negotiations with the devout Adepta Sororitas, the ruthless Inquisition, the cold-blooded Adeptus Arbites, and even the God-Emperor himself. You’ll soon find that politics and diplomacy can prove as deadly as any battles inside the Warp Rift, and that corruption haunts even the Imperium’s capital. 
Relic: Halls of Terra features a side board depicting locations in Holy Terra and nearby Mars. A new orange Threat deck brings these worlds to life and challenges players as they strive to gain affiliations and prove themselves worthy to appear before the God- Emperor. Three new characters and another terrifying Nemesis enter the game, while additional scenarios reshape the struggle against the forces of Chaos. The Ancient Home of Humanity The most sacred place in the entire Imperium is Holy Terra, the teeming birthplace of humanity and home of the immortal God-Emperor. An endless stream of pilgrims travels to Terra seeking merely to touch its sanctified soil, but you have much greater ambitions: to win the support of one of the Imperium’s governing organizations and with that support, enter the Sanctum Imperialis and seek the Emperor’s endorsement. 
On your journey towards the Palace Gates, you’ll likely visit one of the satellites Titan or Luna. The former is home to the fortress-monastery of the secretive and uncorruptable Grey Knights, the latter is a Civilised World and major crossroads where you may use Cunning to win the favor of the Imperial Nobilty. You may also choose to visit the Forge World Mars, headquarters of the Adeptus Mechanicus whose arcane knowledge produces the technology that fuels the Imperium’s eternal war effort. Once on Terra you may face trial at the Halls of Judgement or discover the secrets of the Scholastia Psykana, the training center for the mysterious Adeptus Astra Telepathica. Then you may approach the fearsome Titanoliths that surround the Palace and the Adeptus Custodes who guard it. They only permit characters with the utmost Cunning, Willpower, or Strength to stand before the Senate and the God-Emperor, and therefore will challenge you in your best attribute. War by Other Means For every organization whose favor you earn in the Sol System, you’ll collect an affiliation token, but these are hard to win and easily lost. At least one affiliation is necessary merely to pass through the Palace Gates. The more affiliations you possess, the more likely you are to earn a Relic from the High Lords of Terra or the Emperor. 
You may arrive on Terra thinking that political battles cannot possibly be as lethal as the bloody fights you have endured in the Antian Sector, but some Imperial powers will take your life if you fail to conquer them in a battle of Cunning, Willpower, or sheer brute Strength. Political battles may also yield military rewards. If you manage to enter the Sanctum Imperialis and lay eyes upon the immortal God-Emperor, he will name you a Champion of one of the Imperial powers, such as the Adepta Sororitas, and grant you a lasting advantage in the ongoing war against Chaos. Corruption Is Everywhere Even in the Sol system, the holiest part of the Imperium, you can encounter corruption and heresy. A False Pilgrim may be attempting to hide among the hordes of religious devotees, or you may meet a Fugitive Witch on the crowded streets. The Inquisition itself could even question your innocence, forcing you to use Cunning to convince them of your piety. Indeed, some citizens of the Imperium thrive on corruption, manipulating it in order to achieve their own ends. The darkly pragmatic House Belisarius Navigator, a member of the Imperial Nobility, accumulates Corruption easily and even has some immunity against it. Her character abilities allow her to both exchange Corruption cards for movement points and decide when certain Corruption cards activate. So, although constantly welcoming Corruption, she nevertheless may keep her mind and body pious and pristine. 
Any taint of corruption is so unwelcome in Terra that you may be given a mission to root out corruption and combat it. The Cleanse Holy Terra mission charges its bearer to eradicate any unclean souls who have violated the sanctity of the Sol System. The rewards is not only a completed mission, but also affiliation with the Inquisition. You might even please the Emperor and gain the Adeptus Arbites affiliation by revealing another character’s apostasy or corruption. If you are already affiliated with the Adeptus Arbites, you can force the corrupt character to lose an affiliation – or two lives. A Deadly Game A visit to Terra is no secure undertaking. You may lose your life attempting to win over the Adeptus Astra Telepathica, or become a victim in the Inquisition’s merciless war on heresy. But with the support of the High Lords of Terra or the God-Emperor, you will be far better equipped to conquer the horrors of the Antian Sector and triumph in the ultimate confrontation with Chaos. The voyage to the Sol System begins in the second quarter of 2015. Stay tuned for upcoming previews of the dangers and rewards that await you on Holy Terra. ... Source: Halls of Terra (http://www.fantasyflightgames.com/edge_news.asp?eidn=5350)
Title: FFG:Upgrade Your Hyperdrive
Post by: RSSFeeder on 15 February 2015, 01:45:03
Upgrade Your HyperdriveThe STAR WARS (TM) Dice App Has Been Updated
“They’ve just made the jump into hyperspace.”
–Darth Vader, Star Wars: A New Hope Upgrade your hyperdrive and prepare for the jump to lightspeed! The Star Wars™ Dice app for Android and iOS has been updated to support both Imperial Assault and Star Wars: Armada! With this latest update, the Star Wars Dice app has been expanded to cover even more of Fantasy Flight Games’ Star Wars RPGs and miniatures games. Now, you can easily roll digital dice for Imperial Assault and Star Wars: Armada, as well as X-Wing™ and all iterations of the Star Wars Roleplaying Game: Edge of the Empire, Age of Rebellion, and Force and Destiny. 
Ready for Adventure Imperial Assault presents six unique dice types for every combat. Attack dice determine how accurate your blaster fire is, how much damage you deal, and how many surges you can use to trigger unique abilities. Defense dice, on the other hand, allow figures to block damage, evade surges, or dodge entire attacks. With newly updated Star Wars Dice app, you can even preset commonly rolled dice combinations, putting every attack or defense at your fingertips. 
You command fleets of capital ships and fighter squadrons in Star Wars: Armada, and with the Star Wars Dice app, even the largest turbolasers can be easily calibrated, aimed, and fired. Whether you’re firing at long-range or unleashing a devastating barrage at close quarters, you can quickly roll as many Armada attack dice as you need. 
In addition to dice for both Imperial Assault and Star Wars: Armada, the Star Wars Dice app supports both X-Wing™ and every iteration of the Star Wars roleplaying game. Whether you’re engaged in a breakneck dogfight or tense negotiations, the Star Wars Dice app will ensure that you can quickly and easily learn the results of your choices, keeping the action tense and the battles cinematic. With its convenient radial menu, the Star Wars Dice app allows you to roll up to twenty of these dice in any combination, and even includes standard polyhedral dice in seven types! This means that even when you’re not playing a Star Wars game, the Star Wars Dice app is the only dice roller you’ll ever need. Into Hyperspace With top-notch equipment, you can take on the whole Empire yourself. If you haven’t already, pick up your copy of the Star Wars Dice app from the App Store or the Google Play Store, and enter the Star Wars galaxy! ... Source: Upgrade Your Hyperdrive (http://www.fantasyflightgames.com/edge_news.asp?eidn=5352)
Title: FFG:Smugglers and Assassins
Post by: RSSFeeder on 15 February 2015, 09:58:02
Smugglers and AssassinsPreview Two Figure Packs for Imperial Assault
“You should have paid him when you had the chance. Jabba’s put a price on your head so large, every bounty hunter in the galaxy will be looking for you.”
–Greedo, Star Wars: A New Hope The galaxy is a dangerous place. Smugglers risk their lives moving valuable and illegal cargo past Imperial patrols, and anyone can become the target of a trained bounty hunter. These low-lifes make up the seedy underworld of Star Wars™, and you can bring that underworld to your games of Imperial Assault with the Han Solo Ally Pack and the IG-88 Villain Pack! In October, we announced seven new Ally Packs and Villain Packs for Imperial Assault, inviting you to embark on new missions and expand the campaign and skirmish games. Like the Luke Skywalker Ally Pack and the Darth Vader Villain Pack included in the Core Set, these figure packs offer detailed plastic figures to bring these iconic heroes and villains to life alongside a new side mission for any campaign and two new skirmish missions that share the same map. In addition, Ally Packs offer new Reward cards for the heroes, Villain Packs give the Imperial player new Agenda cards to draw on, and all figure packs contain new Command cards for enhancing your Command decks in skirmish missions. Today, we’ll preview two of the seven new Ally Packs and Villain Packs: the Han Solo Ally Pack and the IG-88 Villain Pack! 
Never Tell Me the Odds In your games of Imperial Assault, Han Solo’s smuggling wiles can prove extremely helpful. With his Ally Pack, you don’t just gain a sculpted plastic figure – you gain new missions to highlight Han Solo and new cards to make him even more dangerous to the servants of the Empire. The Han Solo Ally Pack introduces new content for the Imperial Assault campaign game, beginning with the Imperial Entanglements side mission, which invites you to repel Imperial boarders from the Millennium Falcon with Han Solo. Successful completion of this mission grants you a new Reward card: the Quickdraw Holster. While equipped with the Quickdraw Holster, you may suffer a strain and deplete the card when an attack is declared against you. Then, you may interrupt your opponent’s turn to attack your would-be attacker! With the Quickdraw Holster, you’ll always shoot first when it matters. You’ll also find two new missions for the skirmish game in this expansion. Local Trouble challenges you to fight for control of a cantina, but the local thugs will attack anyone who comes close. Alternatively, you can gamble for victory in Sabacc Standoff by battling to control a sabacc table and increasing the victory points at stake with the Command cards in your hand. Whether you dive into the underworld with these missions or other skirmish missions, six new Command cards give you plenty of ways to enhance your Smugglers.  
You may use Slippery Target to stay a few steps ahead of your opponent’s figures. By playing this card when a hostile figure moves adjacent to one of your figures, you can immediately move your figure away. Alternatively, you could sabotage your opponent by playing Disable to keep an adjacent figure from using surge and action abilities. You may even use I Make My Own Luck to seize initiative at the start of the round, ensuring that Han Solo makes his activation before any other figure has the chance to act. With these Command cards and the others included in this figure pack, Han Solo and your other Smugglers will leave their mark on any skirmish mission. A Mechanical Hunter Of course, for every being like Han Solo with a bounty on his head, there’s someone willing to hunt them down and collect the profit. IG-88 is one such bounty hunter, but he’s far more than just a killer. To some, IG-88 is a revolutionary, fighting to reject the inferiority imposed on Droids by the biologicals.  
In your games of Imperial Assault, the Empire can take advantage of IG-88’s revolution with the Droid Uprising agenda set. This set begins with the Binary Revolution side mission, challenging the Rebels to survive a deadly Droid revolt and rewarding the Imperial player for victory by allowing him to use IG-88 as a villain in later missions. The agenda set continues with Sabotaged Plans. By playing this card and spending an influence, you may discard one Side Mission card, allowing you to keep the Rebel heroes from even starting the most profitable missions. Finally, by purchasing Firepower Upgrade, you can spend an influence to allow your Droids to trigger surge abilities up to twice per attack, granting them unparalleled combat prowess. You’ll also find two new missions for the Imperial Assault skirmish game: Mind of its Own and Most Dangerous Game. The first of these missions challenges you to control terminals as an automated laser sweeps through the Ord Mantell junkyard. The second invites both players to hunt down their opponents’ figures with designated bounty hunters. Both missions promise new encounters and fast-paced combat in the Star Wars universe.  
Whether you play one of the included missions or another skirmish mission, the new Command cards in the IG-88 Villain Pack bring new powers to the Droids and Hunters in your strike team. Merciless allows you to place your opponent in an unenviable position: he must discard the top two cards of his Command deck or you gain three victory points. Dirty Trick can be used whenever a hostile figure enters an adjacent space, forcing the figure to suffer three strain or become Stunned. Finally, you can use Blaze of Glory on IG-88 to ready his Deployment card, granting him an additional activation in a round! IG-88 suffers three damage at the end of the round, but an extra activation can result in far more damage to your opponent. Hunter or Hunted Whether you smuggle goods and fight for the Rebel Alliance alongside Han Solo, or hunt down your prey with IG-88, you’ll find cards and missions to enhance your games of Imperial Assault in these figure packs. Join us next time for a preview of the Chewbacca Ally Pack and the General Weiss Villain Pack. Pre-order your Imperial Assault Ally Packs and Villain Packs at your local retailer today! ... Source: Smugglers and Assassins (http://www.fantasyflightgames.com/edge_news.asp?eidn=5351)
Title: FFG:The Underway
Post by: RSSFeeder on 15 February 2015, 18:45:03
The UnderwayAnnouncing the Fourth Data Pack in the SanSan Cycle
“The Underway is a funky, chaotic, and eclectic mix of architecture and ethnicities. What unifies it is a general counterculture vibe – the sense that they are pioneers and iconoclasts. But this independent spirit paved the way for the rise of Los Muertos.”
–Exposé on The Underway: Part IV – Days of the Muertos Fantasy Flight Games is proud to announce the upcoming release of The Underway, the fourth Data Pack in the SanSan Cycle for Android: Netrunner! SanSan is the cradle of high-end tech, home to beautiful beaches, and the host of the World Expo. It is also still recovering from “The Big One,” the cataclysmic earthquake that opened up the San Andreas fault and redefined America’s western coast. However, this event that was disastrous for many was an opportunity for others, some of whom quickly moved their homes and businesses into the new space that was created. Fast-forward, and this new space, now dubbed “The Underway,” is a motley assembly of many different architectural styles, ethnicities, and cultural influences. It’s a hotbed of holographic artists, indie studios, and the birthplace of Jank-Juke-Jazz. It has also become synonymous with gang activity, particularly that of Los Muertos, a street gang whose members are identified by their bioluminescent tattoos and that deals in illegal tech as much as it deals in flesh and drugs. 
Accordingly, the sixty new cards in The Underway (three copies each of twenty different cards) dabble in an eclectic mix of upgrades, assets, and resources, as well as a handful of illicit hardware and programs. Meanwhile, everything seems to run through Los Muertos, and even as the gang’s criminal influence bolsters the Criminal faction, it pervades everything in this Data Pack. It starts with a new Criminal Runner identity, it reaches outward as other Runner factions are supplied with the sort of tech you don’t normally find in America, and it ripples into every aspect of every card as Corps are forced to deal with the gang’s members in one way or another. A Dangerous Game The Corps of Android: Netrunner may more or less rule the world, but Los Muertos rules the Underway. Still, it’s difficult to know who is or isn’t part of the gang unless they activate their bioluminescent tattoos. Then, it’s easy, as their faces are marked by bright, skull-like lines and decorative swoops or swirls. Their relative anonymity makes them brazen, and it makes them difficult for Corporate problem-solvers. Any given Street Peddler (The Underway, 62) could be part of Los Muertos, ready to participate in the gang’s next Drive By (The Underway, 64).  
But Corps can’t operate blindly. Were a Corp to miss its mark with a shipment of Defective Brainchips (The Underway, 72) or the services of a Contract Killer (The Underway, 78), it could gain international notoriety and suffer irreparable damage to its reputation. Accordingly, some Corps may seek to expose the gang’s influence, slowly but surely winning the public to their side with Exposé (The Underway, 75) pieces. Others may simply accept the Underway Grid (The Underway, 80) for what it is, a region of SanSan, hidden from the light, where the rules are different, everyone’s life is riddled by secrets, and violence is expected.  
Viva Los Muertos “Is your neighbor secretly a violent criminal? The answer to this chilling question and more, right after the break.”
–Shannon Claire, SSN 5 Since The Big One, the Underway has emerged as a hive of criminal activity. Within its shadows, many Runners have learned their trade and honed their skills. The members of its largest gang, Los Muertos, rule the streets, profiting off their deals in flesh and drugs and tech. For the right price, you can find anything, but you have to be careful about how you get it. Can the Corps clean up the Underway’s streets? Can they burrow in and change its local culture? As Corps and criminals vie for control of the regional business, The Underway Data Pack is certain to lead to all-new forms of subterranean aggression. Look for The Underway to arrive at retailers everywhere in the second quarter of 2015! ... Source: The Underway (http://www.fantasyflightgames.com/edge_news.asp?eidn=5353)
Title: FFG:The Darth Dilemma
Post by: RSSFeeder on 16 February 2015, 03:45:04
The Darth DilemmaAn Imperial Assault Guest Article from Zach Bunn
“A young Jedi named Darth Vader, who was a pupil of mine until he turned to evil, helped the Empire hunt down and destroy the Jedi knights. He betrayed and murdered your father. Now the Jedi are all but extinct.”
–Obi-Wan Kenobi, Star Wars™: A New Hope Darth Vader is one of the greatest villains of all-time, and he can easily be one of the most terrifying threats in Imperial Assault. With massive striking power, a mastery of the Force, and powerful defenses, Darth Vader forces you to carefully consider any plan of attack if you wish to achieve victory. Today, Zach Bunn explores the threat of Darth Vader and methods to form an attack plan in every game of Imperial Assault. Zach Bunn on Darth Vader in Imperial Assault I was recently teaching the skirmish game of Imperial Assault to a new player when I had one of those moments that all of us experience as we progress through the learning stages of most games. The epiphany reverberated through my brain, like Obi-Wan’s voice in Star Wars: A New Hope as Luke turns off his targeting computer. It happened right as I finished explaining the win condition of skirmish missions. I said, “So, you have to get to forty points, usually through a combination of accomplishing objectives and destroying your opponent’s units.” A critical part of that victory condition is destroying your opponent’s units. As my epiphany revealed, the harder a unit is to destroy, the harder it is for you to gain points by killing it. The more points your opponent has invested in hard-to-destroy units, the harder it is for you to gain those points. I looked down at Darth Vader and all the pieces came together. It seems so obvious now, but at the time I had to pause the demo and ponder a concept that I now refer to as the “Darth Dilemma.” There are many reasons why Darth Vader is extremely powerful in Imperial Assault, but because I was too busy fielding Darth Vader, I never really looked at it from my opponent’s side. A unit like Darth Vader creates a terrifying dilemma for your opponent because he ties up nearly half of your army points in a unit that’s extremely difficult to kill. If you attempt to destroy Darth Vader and fail, you’ve wasted your actions and figures for nothing. If you attempt to avoid him, you have to make your way to victory by destroying lesser units or by scoring an absurd amount of objectives. You have to choose how you want to try to confront Vader, and neither option is very appealing. Back to the demo. We set up the “Leave No Evidence” skirmish mission, which challenges both players to recover important artifacts from the Massassi Ruins on Yavin 4. I noted the six excavation tokens on the board, each worth six points. Math says that thirty-six objective points are on the line. For my opponent to win this scenario and not have to destroy Darth Vader (who’s worth eighteen points), he must capture at least three objectives and destroy every other figure in my army. If I can score four objectives, my opponent is now forced kill Darth Vader to win. If I protect one of my lesser figures and score three objectives, my opponent is forced to kill Darth Vader. By taking advantage of this dilemma, I can create some bad exchanges for my opponent. I’ve found that to deal with Darth Vader consistently, you must immediately decide whether you’re going to confront him or avoid him. There is no middle ground. Because he rolls two black defense dice and has the option to re-roll one per attack, his average defense is around four blocks! If you just try to whittle Vader’s health down after you’ve lost a good chunk of your army, you won’t have the firepower to finish the job. If you start your assault early and back off, you’ve wasted too much time and offense on a zero-point payoff. You’ve got to commit to a plan early, and you’ve got to follow through. Though it’s Darth Vader who specifically creates this dilemma out of the Imperial Assault Core Set, there’s a fundamental lesson to be learned and applied regardless of his presence. I’ve adopted a methodology ever since that moment, and it’s helped me determine good lines of attack for any given scenario and army combination. It’s a simple and universal line of questioning that should be considered before every first turn in Imperial Assault. 
Solving the Dilemma At the start of each game, I have several important decisions to make. These decisions affect my deployment, the early movement of my figures, and where I direct my offense throughout the game. When you first start playing skirmish missions, it may seem like you can simply move toward your opponent at the beginning of the game and start shooting the closest units, but this has proven to be a losing strategy. I’ve seen too many games where, by using this kind of strategy, my opponent gets to thirty points before realizing he has no reasonable path to victory. This is a depressing realization, and I try to avoid it by asking the following questions before the game begins: 1. How many points does this scenario’s special objectives offer? 2. How many of those points can I reasonably expect to capture?  3. Given the answers to points 1 and 2, which of my opponent’s models do I need to destroy to get to forty points? 3. Given the answers to points 1 and 2, which of my opponent’s models do I need to destroy to get to forty points?
4. If my point calculation in 2 starts to look too ambitious in the middle of the game, which additional models will be easiest to destroy in order to make up the difference? 5. Go through steps 1 through 4 again as if I were my opponent. What objectives might he reasonably expect to capture? What units of mine will he be trying to destroy? The games of Imperial Assault that I’ve lost are typically the result of being too eager and not fully considering the questions above. By spending a few minutes considering your path to victory, each decision you make throughout the game is put into context. When evaluated with this context in mind, you’ll find yourself carefully considering your plan, rather than just dashing around a corner and shooting down a pesky unit with your Stormtroopers! As you embark on your first skirmish games, remember that sometimes the best decision isn’t the obvious or emotional one. You win by getting to forty points before your opponent. While considering the win condition of a game isn’t a new tactic by any stretch of the imagination, asking the important questions and constructing a plan of action is often the difference between victory and defeat. Stay focused, and make sure that every move you make contributes to an end game that gives you the best chance of winning. Until next time, may the Force be with you! Zach Ready Your Troops Thanks, Zach! Darth Vader poses a deadly threat to any strike team, and the Rebel Alliance needs a plan to deal with him. Will you dispatch Rebel Troopers and Saboteurs to complete your objectives as quickly as possible? Will Luke Skywalker, Han Solo, and Chewbacca confront Darth Vader directly? Gather your strike team and prepare for Star Wars battles in the Imperial Assault skirmish game! Zach Bunn is a Star Wars fanatic, a lead member of Team Covenant, and a fan of Imperial Assault. In coming weeks, stay tuned for more Imperial Assault guest articles from Zach and other writers! ... Source: The Darth Dilemma (http://www.fantasyflightgames.com/edge_news.asp?eidn=5354)
Title: FFG:Journey into Hutt Space
Post by: RSSFeeder on 16 February 2015, 12:45:03
Journey into Hutt SpaceLords of Nal Hutta Is Now Available
Venture into one of the most dangerous parts of the galaxy! Lords of Nal Hutta, a sourcebook for the Star Wars®: Edge of the Empire™ roleplaying game, is now available at your local retailer and in our online store. Lords of Nal Hutta contains all the information that you need to experience Hutt Space. It provides countless details about Hutt civilization, including their ruthless crime syndicates and violent history. It describes each of the major locations in Hutt Space, from the dimly lit cantinas and black markets of Nar Shaddaa to the jungles of Saki, providing GMs with numerous and detailed settings for adventures. Lords of Nal Hutta also features new playable species and a wide variety of gear to help you survive in this notoriously lawless region. 
Crime Families The heart of Hutt culture is the kajidic, a clan-based syndicate governed by a single Hutt and often specialized in illegal activities. It is within his kajidic that a Hutt is given his first job, cultivates his career, and perhaps even attains political power. In our first preview, contributing writer Sterling Hershey introduced the four most prominent kajidics, from Jabba’s own Desilijic to the militaristic Qunaalac Hutts. For Hutts, power and money are inextricably linked, and the end almost always justifies the means. Many kajidics, specialize in the lucrative spice trade – “spice” euphemistically including a wide variety of legal and illegal substances. Hutts have put thousands of slaves to work in spice production, and employed a vast number of smugglers and pilots who, like the famous Han Solo, are willing to risk their lives (and Imperial entanglements) for the sake of profit. A risky spice smuggling run, such as the infamous Kessel Run, could be the centerpiece of an Edge of the Empire campaign. A failed run might be the source of your obligation to a vindictive Hutt overlord. 
Worlds of Beauty, Cruelty, and Wealth A total of twelve planets are detailed in Lords of Nal Hutta: densely populated trade outposts where anything can be found for a price, desolate worlds with enslaved populations, vast game reserves where assassins hone their skills, radioactive wastelands. Our second preview explored three different planets within Hutt Space: the so-called Smuggler’s Moon, Nar Shaddaa, the capital and home of the Hutts, Nal Hutta, and the pastoral world of Toydaria. It also looked at three modular encounters: ready-made, detailed set pieces that GMs can use as the launching point of a campaign or a single-session adventure. One location essential for any voyage into Hutt Space is the Kwenn Space Station, the neutral gateway between the Empire-controlled Mid Rim and the lawless regions ruled by the Hutts. Over 325,000 humans, Hutts, and other species permanently reside in the space station, with at least another 20,000 passing through daily, many of them being spice smugglers, weapons dealers, and mercenaries. But Kwenn is also an elite resort catering to the galaxy’s ultra-wealthy. Its towers are filled with expensive entertainments, from casinos and cantinas to spas – and even an opera house. It’s an ideal place for a smuggler to have a business meeting with his Hutt employers, for a bounty hunter to begin the search for her quarry, or for a quiet young entertainer to become involved in a Rebel conspiracy. 
Native Species and Survival Gear Lords of Nal Hutta introduces four new playable species native to Hutt Space: Ganks, Niktos, Sakiyans, and of course, the Hutts. In our third preview, contributing writer Gregory Koteles discussed the Ganks’ predilection for cybernetics, the Sakiyans’ stealth and intelligence, and the Niktos’ diversity. We also looked at a few of the cybernetic implants that your Gank or other character might purchase in Hutt Space. Of course, survival in Hutt Space isn’t just a matter of shooting first. In this realm of deadly intrigue, you may want tools more subtle than a blaster. Poison, for example, may be a more effective weapon, and Lords of Nal Hutta introduces three kinds of it. If you intend on gambling at the Kwenn Space Station, you might want a marked sabaac deck or some loaded chance cubes to ensure to ensure that the odds are always in your favor. A portable credit cleaner can make sure that any money you earn in Hutt Space cannot be traced by even the most skilled accountant droids.
Follow Your Ambitions Hutt Space is a realm of extremes. Its inhabitants are largely free from Imperial laws, but slavery is rampant. Unfathomable wealth lives side by side with desperate poverty. There’s as many opportunities for profit and political gain in Hutt Space as there are backroom deals, and as many opportunities for doing good as there are examples of cruelty. Whatever lures your Edge of the Empire roleplaying group into Hutt Space, you’re sure to encounter there danger, intrigue, and plentiful adventures. Pick up your copy of Lords of Nal Hutta today! ... Source: Journey into Hutt Space (http://www.fantasyflightgames.com/edge_news.asp?eidn=5355)
Title: FFG:Speed Up Your Games
Post by: RSSFeeder on 16 February 2015, 21:45:03
Speed Up Your GamesAnnouncing the STAR WARS (TM): Armada Maneuver Tool Accessory Pack
“Set your course for the Hoth system.”
–Darth Vader The Star Destroyers are on their way, Star Wars™: Armada is coming, and Fantasy Flight Games is pleased to announce that the Star Wars™: Armada Maneuver Tool will be made available to players as an Armada accessory pack! The massive capital starships of Armada feature designs that balance their scale and complexity with ease of use, and the Armada maneuver tool is at the heart of this design. As these ships batter their foes ion cannons, proton torpedoes, and turbolasers, their momentum constantly carries them forward across the battlefield, and the maneuver tool allows you to adjust their courses, even as it accounts for their tremendous inertia. 
The Armada maneuver tool.
The Armada Maneuver Tool accessory pack provides you an easy way to add a second maneuver tool to your games. You can also use the Armada Maneuver Tool accessory pack to build a shorter maneuver tool to accompany your full-size maneuver tool and to use with slower fleets or in tighter spaces. With a second maneuver tool built for shorter maneuvers, you can more easily navigate tight squeezes in the heat of battle. Capital Ship Movement Made Easy The Armada maneuver tool is one of the game’s most innovative features and makes it easy for you to set a ship’s course. Capital ships can’t easily vary their speeds or execute hairpin turns like the starfighters that buzz around them. Accordingly, the maneuver tool lends an element of realism to your ships’ pitch and yaw, working in conjunction with your ships‘ available maneuvers to account for their inertia as they fly through the stars. To set a ship’s course, you begin by resetting the maneuver tool so that all of its joints are straight. Then your ship’s speed indicates how far it will travel along the maneuver tool. At each joint, you can click the tool left or right a number of times away from the center position as indicated by your ship’s speed chart.
The speed charts for the CR90 corvette (left) and the Victory II-class Star Destroyer (right).
Each column on the speed chart corresponds to the speed number at the bottom of the column and shows the number of times that each joint can be clicked while your ship travels at that speed. The rows on your ship’s speed chart correspond to the joints on the maneuver tool. The row directly above the speed number relates to the first joint, the second row relates to the second joint, and so forth. An “I” indicates that the joint can be clicked once in either direction, while an “II” means it can be clicked twice. Meanwhile, a “–” means the maneuver tool must remain straight at that joint.
Using the game’s unique maneuver tool, a Rebel player plots a “3” speed maneuver for his Nebulon-B escort frigate.
Additionally, you are allowed to use the maneuver tool to measure your ship’s possible positions before you commit to the move. An Innovative and Integral Game Component In many ways, the design of the Armada maneuver tool is responsible for enabling the game’s fluid, forward-looking approach to ship movement. It is an innovative and integral part of the game. Whether you use it to add a second, full-size maneuver tool to your games or to build a shorter maneuver tool for use in tight spaces, the Armada Maneuver Tool accessory pack ensures that you’ll be able to keep things calm in engineering as you focus all your firepower on enemy ships. Look for the Star Wars: Armada Maneuver Tool accessory pack to arrive at retailers in the second quarter of 2015. ... Source: Speed Up Your Games (http://www.fantasyflightgames.com/edge_news.asp?eidn=5357)
Title: FFG:The Galaxy at Your Fingertips
Post by: RSSFeeder on 17 February 2015, 06:45:04
The Galaxy at Your FingertipsX-Wing (TM) Playmats Are Now Available
“Any attack made by the Rebels against this station would be a useless gesture, no matter what technical data they have obtained. This station is now the ultimate power in the universe! I suggest we use it!”
–Admiral Motti, Star Wars: A New Hope The Death Star Assault Playmat and the Starfield Playmat are now available online through our webstore! With these new X-Wing Playmats, available via Fantasy Flight’s In-House Manufacturing, you can set your interstellar dogfights firmly in the Star Wars universe, bringing even more thematic gameplay to your X-Wing games. Two different playmat designs allow you to evoke the vastness of space in your X-Wing matches as fly your ships above the Death Star orbiting Yavin 4 or take your battles to an open starfield. 
| What Happened to the X-Wing Starfield Game Tile Kit? After extensive testing, we have determined that the Starfield Game Tile Kit is no longer the best option for an X-Wing play surface. The X-Wing Playmats will replace the Starfield Game Tile Kit. | | Enter the Star System Each X-Wing Playmat takes the form of an easily portable, 3’ by 3’ natural rubber playmat, complete with a slip-resistant bottom that helps to ensure your valuable miniatures stay safe during your space battles. Whether you field a squadron for the Rebel Alliance, the Imperial Navy, or the Scum and Villainy of the galaxy, you’ll find a cinematic setting for your ship-to-ship battles in the X-Wing Playmats. If you want to play with the GR-75 medium transport or the Corellian CR90 corvette, you can even combine two playmats to form the massive, six-foot-by-three-foot play surface required for Epic Play or Star Wars: Armada. 
Two separate designs await your space battles. You can take your space battles to Yavin 4 by playing on the Death Star Assault Playmat. This playmat displays the Death Star as it orbits above Yavin 4, allowing you to set your dogfights in the climactic ending of Star Wars: A New Hope. Whether you seek to break the Empire’s power, or establish dominion over the galaxy, this playmat will serve you well. As another option, the Starfield Playmat displays a dramatic view of the galaxy’s stars, placing your dogfight anywhere in the Star Wars universe. This playmat’s minimalist design makes this playmat especially suitable for tournament play, offering a stylish background for your tournament dogfights. 
What’s more, both playmats are legal in all X-Wing Organized Play events, bringing the Star Wars setting to your tournament matches. Each playmat measures three feet by three feet, marking out the dimensions of a tournament game of X-Wing. These playmats provide a professional and thematic play surface for any faction as you battle your way to victory. Bring the Universe to You With these X-Wing Playmats at your fingertips, you can play each of your X-Wing dogfights in an easily portable piece of the Star Wars universe. Prepare to upgrade your X-Wing play surfaces, and pick up your X-Wing Playmats today! ... Source: The Galaxy at Your Fingertips (http://www.fantasyflightgames.com/edge_news.asp?eidn=5356)
Title: FFG:Desperate Allies
Post by: RSSFeeder on 17 February 2015, 15:45:03
Desperate AlliesAnnouncing an Age of Rebellion Sourcebook for Diplomats
“The more you tighten your grip, Tarkin, the more star systems will slip through your fingers.”
–Princess Leia Organa Fantasy Flight Games is proud to announce Desperate Allies, a new career supplement for the Star Wars®: Age of Rebellion™ Roleplaying Game! Desperate Allies is a sourcebook for Diplomats of all kinds, inviting you to join in tense negotiations, make last-second deals, and spread hope in a galaxy consumed by fear of the Empire. Within this supplement, you’ll find plenty of new opportunities and tools for Diplomats, including three new playable species and three new specializations, along with new items and vehicles well suited for diplomatic missions. You’ll also find rules for establishing Rebel bases, allowing you to enrich your campaign with diplomatic embassies, covert intel outposts, secure safehouses, or any other bases you can imagine. 
Feeding the Fire The Alliance to Restore the Republic is committed to fighting the Empire, but not all battles are fought with blasters. Diplomats use their words to fight for a better future. They convince new systems and factions to declare their support for the Rebel Alliance. They supply troops on the front lines with much-needed weapons, tools, and provisions. They spread hope for a brighter future in a galaxy choking on fear of the Empire. Diplomats can come from all walks of life and serve many functions within the Rebel Alliance. They may have been politicians or Senators before the rise of Emperor Palpatine, or they may have come from much more lowly origins. A Diplomat might have extensive schooling, or may just have a knack for getting the right equipment to the right people. No matter what background or specialization your Diplomat may have, you’ll find plenty to learn and take advantage of in Desperate Allies. For more on the new additions included in Desperate Allies, we turn to lead developer Max Brooke. Developer Max Brooke on Desperate Allies Desperate Allies is a sourcebook for Diplomats and all other representatives of the Alliance to Restore the Republic, giving Age of Rebellion players and GMs new tools to tell stories of politics, intrigue, and dramatic twists. This book offers three new species with long histories as diplomats: the cunning Neimoidians, the wise Caamasi, and the calculating Gossams. Additionally, Desperate Allies features three new Diplomat specializations. The Advocate, Analyst, and Propagandist provide your Diplomats with unique new avenues for development, and give other characters access to potent social abilities that their careers might otherwise lack. This supplement also includes new backgrounds, motivations, and two powerful signature abilities to give Diplomats an edge. 
From left to right: Caamasi, Neimoidian, Gossam.
Tools of the trade are as important in negotiations as they are in the cockpit or on the battlefield, and Desperate Allies has numerous iconic and novel examples of weapons, armor, gear, and equipment that emissaries of the Rebel Alliance use to complete their important tasks. You may find a lightweight and elegant blaster pistol to rely on, or use your resplendent robes to command the attention of a room. Diplomats need transport as well, so this book has a selection of vessels ideal for diplomatic missions – and for evading or outflying the Empire when a job turns dangerous! The life of a Diplomat is rarely a peaceful one in the Rebel Alliance, and the tools and equipment in Desperate Allies give Diplomats the best chance of surviving their adventures. In addition to the wealth of new character options it includes, Desperate Allies provides GMs with guidance and rules to enhance their social encounters and create moments for Diplomat characters to shine. Players will be able join in the negotiation and deals required to bring new soldiers and star systems into the Rebellion. Desperate Allies also features a number of modular encounters and adventure outlines that focus on diplomacy – without depriving players of the fast-paced action and adventure they expect from Star Wars roleplaying! These resources can be used to underscore the theme of intrigue in ongoing Age of Rebellion campaigns or to create stories with a focus on politics and power. Finally, this volume contains the rules for creating Rebel bases, which GMs and players can use to construct and develop their own fortresses and hideouts. Your Diplomats can use these rules to establish embassies, but every character in Age of Rebellion can take advantage of the chance for a secure safehouse. Desperate Allies invites you to partake in the galactic politics of Age of Rebellion, assisting players and GMs alike in bringing this vibrant part of the Star Wars universe to life! 
The Stylus Is Mightier than the Sword War is a central theme of Age of Rebellion, but without the Diplomats who envision a better life, warfare is just meaningless bloodshed. Diplomats ensure that soldiers have the support they need to wage war, but more importantly, they give the troops reasons to fight – to liberate the galaxy and to see something better built on the ashes of the Galactic Empire. Look for Desperate Allies at your local retailer in the second quarter of 2015! ... Source: Desperate Allies (http://www.fantasyflightgames.com/edge_news.asp?eidn=5358)
Title: FFG:Fantasy Flight Games Is Now Hiring
Post by: RSSFeeder on 18 February 2015, 00:45:03
Fantasy Flight Games Is Now HiringWe Are Currently Accepting Applications for Two PositionsFantasy Flight Games, leading hobby-market publisher of board games, card games, roleplaying games, and other tabletop games, is now hiring for the following positions: Application Developer (pdf, 81.9 KB) - Details can be found in the pdf document. To apply for the position of Application Developer, please submit a cover letter with salary requirements and resume to HumanResources@fantasyflightgames.com; under the subject line “Application Developer.”
Game Center Line Cook - Full Time (pdf, 67.8 KB) - Details can be found in the pdf document. To apply for the position of Game Center Line Cook, please submit your application (pdf, 106 KB) to the Game Center Staff member or HumanResources@fantasyflightgames.com; under the subject line “Game Center Line Cook” no later than end of business day Friday, February 13, 2015.
Please do not call or visit. Our offices are located in Roseville, Minnesota, a suburb of the Twin Cities of Minneapolis and St. Paul. Candidates not already living within commuting distance must be willing to relocate. Fantasy Flight Publishing, Inc. is an equal opportunity employer committed to a diverse work force and a work environment free from discrimination. ... Source: Fantasy Flight Games Is Now Hiring (http://www.fantasyflightgames.com/edge_news.asp?eidn=5333)
Title: FFG:Use the Force
Post by: RSSFeeder on 18 February 2015, 09:45:03
Use the ForceAnnouncing the STAR WARS (R): Force and Destiny (TM) Core Rulebook
“My ally is the Force. And a powerful ally it is. Life creates it, makes it grow. Its energy surrounds us and binds us. Luminous beings are we, not this crude matter.”
–Master Yoda Fantasy Flight Games is proud to announce the upcoming release of the Star Wars®: Force and Destiny™ Core Rulebook and Game Master’s Kit. The power of the Force flows through you. All your life you have felt it and used it, perhaps even unconsciously. Now, at last, you have found others like you who can sense and manipulate the Force, others willing to risk their lives for the sake of justice, for the sake of bettering the galaxy. Together, you are searching for the secrets of the outlawed Jedi Order and fighting against any evil that you encounter, including the Empire. Guiding you on your journey is the Force and Destiny Core Rulebook, which contains everything necessary for you to experience the Force’s immense power and take part in action-filled, epic adventures set in the Star Wars universe. 
Outcasts in a War-Torn Galaxy “For over a thousand generations the Jedi Knights were the guardians of peace and justice in the Old Republic. Before the dark times, before the Empire.”
–Obi-Wan Kenobi With a single, brutal, masterful stroke, Chancellor Palpatine took over the galactic government and abolished the Jedi Order. The Clone Wars ended and the Empire was born. Over the following decades, resistance against the Empire slowly strengthened until at last an organized Rebellion formed and destroyed the first Death Star, beginning a great civil war. Force and Destiny takes place in this war-torn galaxy, where Force-sensitives and anyone with ties to the Jedi must keep secret their power at risk of imprisonment and death. While Force and Destiny is a complete and independent roleplaying system, it is also fully cross-compatible with our other two Star Wars roleplaying games, Age of Rebellion™ and Edge of the Empire™, set in the same time period. You could send Force-sensitives from Force and Destiny to the lawless locations featured in Edge of the Empire, or create a Rebel cell composed of outcast Force-users and idealistic Colonists who take on the Empire in an adventure from Age of the Rebellion. 
The Balance Between Light and Dark “Anger, fear, aggression. The dark side are they. Once you start down the dark path, forever will it dominate your destiny.”
– Master Yoda As Force-sensitive characters, you and the others in your group must learn to use the Force without the guidance of the Jedi Order. You also live with the constant threat of Imperial discovery, and will likely have to fight for your survival. You may choose to spend your life in the shadows, defending the downtrodden and carefully walking the line between good and evil. Or, you may join the Rebellion and battle the Empire from the pilot’s seat of a starfighter. No matter what your character’s background, career, or ultimate aims, you will no doubt take on incredible missions and perform legendary deeds. Your character will inevitably be forced to make difficult choices, and there will be countless opportunities to demonstrate your honor or surrender to violence, self-interest, and evil. Would you commit murder to free an enslaved friend? Would you use torture to elicit information that might save thousands of lives? In Force and Destiny, Morality is a defining aspect of character. Torture, failing to prevent another’s cruelty, even theft can pull you towards the dark side. Once fallen, you will have to relentlessly prove your commitment to the light side before you can leave the dark side behind. 
The Stuff of Legends “Yes, Artoo, I was just coming to that.”
–Threepio The heart of every Force and Destiny campaign is the 448-page Core Rulebook, beautifully illustrated with original art to immerse you fully in the Star Wars universe. In the Core Rulebook’s thirteen chapters you’ll find everything you need to play the game, from instructions on creating complex Force-sensitive characters to a thorough guide to the game’s narrative dice system. Entire chapters are dedicated to skills, talents, gear and weapons (including lightsabers), vehicles and starships, and of course, the Force itself. For game masters, the Core Rulebook includes a chapter with helpful suggestions about running game sessions, developing a campaign, and handling your PCs’ ever-shifting Morality. You’ll also find detailed information about galactic geography, a history of the Jedi and Sith Orders from their ancient past until the Galactic Civil War, a catalogue of NPC adversaries, and a complete, stand-alone adventure, Lessons of the Past, to begin your Force and Destiny campaign. 
Mastering the Force “You’ll find I’m full of surprises.”
–Luke Skywalker The Force and Destiny Game Master’s Kit places right before your eyes all the information that you need to lead session of Force and Destiny. A GM screen not only helps you conceal your plots and machinations from the PCs, but features convenient reference charts that cover topics from vehicle critical hits to spending advantage and triumph results in combat. The GM Kit also features detailed guidelines for knight-level play, in which PCs start an adventure with advanced capabilities, and for crafting custom lightsabers from materials that characters may encounter in their adventures. Above all, it contains a complete two-to-three session adventure, Hidden Depths, which can either stand on its own or tie in with the adventure in the Core Rulebook. 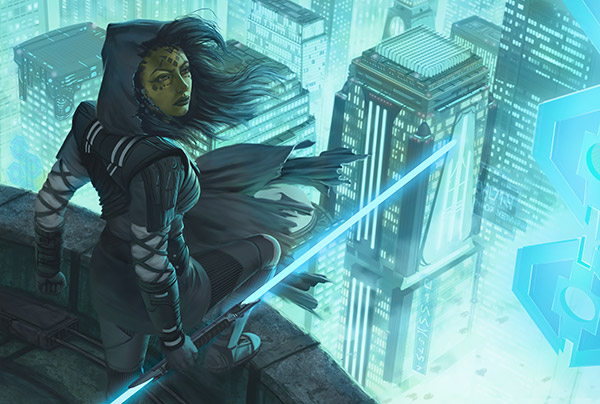
Meet Your Destiny The Force and Destiny Core Rulebook and GM kit will be available in the third quarter of 2015. In the meantime, visit the Force and Destiny minisite for additional details and, soon, in-depth previews of the game. Your destiny awaits. May the Force be with you! ... Source: Use the Force (http://www.fantasyflightgames.com/edge_news.asp?eidn=5359)
Title: FFG:Jeremiah Kirby
Post by: RSSFeeder on 18 February 2015, 18:45:08
Jeremiah KirbyA Preview of the Champion Card in For the Greater Good
For the Greater Good is coming soon to Call of Cthulhu: The Card Game! With nearly two-thirds of its 165 cards focused on the Agency and its operatives, For the Greater Good gives the faction a major boost. However, it also offers plenty to fans of the game’s other factions. Each of the game’s seven other factions gains at least one new character and at least one new support; they also gain more potential options from the expansion’s three different neutral cards, which include the new Ancient One Iod, The Hunter of Souls (For the Greater Good, 36). Thus, even as the Agency’s Government agents pursue new leads in their defense of humanity, these other new characters allow the other factions to accelerate their plans for saving, dominating, or devouring the world. Like the Bedlam Boys (For the Greater Good, 41) and Restless Mi-Go (For the Greater Good, 45), most of them are also two-cost and one skill. However, the similarities between them tend to end there. After all, the monstrous scientists of Yog-Sothoth don’t function like the Syndicate’s criminals. Nor do Cthulhu’s cultists work toward the same intents as Miskatonic University’s bravest explorers and investigators. 
Today, we turn our attention more closely toward one of these characters, as two-time World Champion Jeremy Zwirn offers a look at the character card he designed for Miskatonic University and that will soon see release with For the Greater Good. Jeremy Zwirn on Jeremiah Kirby  Today, I'm very excited to show you my World Champion card and share a few of the thoughts I had while designing it. Having the opportunity to design your own Champion card is truly amazing, and I'm extremely grateful to be forever linked in this way to Call of Cthulhu: The Card Game. Today, I'm very excited to show you my World Champion card and share a few of the thoughts I had while designing it. Having the opportunity to design your own Champion card is truly amazing, and I'm extremely grateful to be forever linked in this way to Call of Cthulhu: The Card Game.
I'm a big fan of the literature of H.P. Lovecraft and have read all of his stories. The Cthulhu Mythos is brimming with interesting characters, items, and locations. As I thought about basing a card on one of these, I was a bit overwhelmed by the possibilities; where was I to begin? I thought about designing a card around one of the notable, named characters yet to appear in the LCG®: Professor William Dyer, Captain Obed Marsh, Abdul Alhazred (author of the Necronomicon), Joseph Curwen, or Herbert West, the infamous reanimator. The idea of designing a card around a powerful artifact, like the Shining Trapozehedron, also intrigued me.
In the end, I decided to make a card that pictured what I would like to be in the Cthulhu Mythos. That decision gave me the freedom to explore my card’s design without the pressure to match its mechanics to a known character. The result is the Explorer and Investigator, Jeremiah Kirby (For the Greater Good, 43).
Exploring New Ground
I wanted my Champion Card to stand apart from those designed by my predecessors. The four previous World Champion character cards in Call of Cthulhu: The Card Game all share a cost of three, three or more icons, and three skill. Three of them are neutral. They’re all good at combat and have Willpower. Instead of following suit, I thought it would be more interesting to give my character just one point of skill, one icon, and focus more attention on the ability. I learned to play Call of Cthulhu with a Miskatonic University rush deck and am a hardcore gamer, so the faction of “nerds” felt right. The faction is known for its abundance of card draw, so I wanted to create a twist on this mechanic. For a while, I thought about designing a character that always revealed the top card of your deck and allowed you to play it as though it were in your hand. The idea was fun and interesting, but I wanted something more interactive. I'm a fan of mini-games that involve direct interaction with your opponent, and I love highly tactical cards that require you to weigh multiple factors each time you use them. Accordingly, when Jeremiah Kirby enters play, his response triggers a “card draw” ability, but your opponent influences which cards you get. Meanwhile, since Jeremiah Kirby is an Explorer, I wanted his name to sound like an arctic explorer. Many of the Explorer characters in Call of Cthulhu are named after real explorers. Roald Ellsworth (Seekers of Knowledge, 4), for example, is named after Roald Amundsen and Lincoln Ellsworth. Taking the cue, I chose to name my card after Jeremiah Reynolds and Sydney Kirkby, slightly modifying Kirkby’s last name because my Golden Retriever’s name is “Kirby.” Playing with Jeremiah Kirby  In card games, I like nothing more than finding synergy between cards and creating decks where the whole is greater than its individual parts. Jeremiah Kirby is full of potential synergies, and many of those synergies involve other Miskatonic cards. Since he has the Explorer subtype, he can take advantage of all the synergies it grants. In card games, I like nothing more than finding synergy between cards and creating decks where the whole is greater than its individual parts. Jeremiah Kirby is full of potential synergies, and many of those synergies involve other Miskatonic cards. Since he has the Explorer subtype, he can take advantage of all the synergies it grants.
- If Jeremiah Kirby leaves play, Roald Ellsworth lets you draw two cards or retrieve any one card from your discard pile.
- If you have James “Cookie” Fredericks (Seekers of Knowledge, 8) in play and fewer cards in hand than your opponent, you can order your responses to first trigger Cookie’s response, then trigger Kirby’s response to take a total of three of the top eight cards from your deck into your hand.
- Moreover, Jeremiah Kirby is a prime target to drop into play with the lynchpin of Explorer decks, Ultima Thule (Seekers of Knowledge, 26). As long as your opponent doesn't disrupt this combo, you'll net two cards each turn, and if you have Roald Ellsworth in play, that turns into four cards each turn.
Synergy is such a beautiful thing!
Explorer isn't Jeremiah Kirby's only subtype; he's also an Investigator. Thus, two Anthropology Advisors (Core Set, 25) will let you play him at no cost and give him two additional Investigation icons. Since he boasts such a powerful enters play ability, if you’re reducing his cost to nothing, you may sometimes want him to be destroyed just so that you can play a second (or third) copy of him. He’s a great target to commit to a story where you’ll need to take a wound after losing a combat struggle, or you can equip him with a Khopesh of the Abyss (Touched by the Abyss, 16) and wound away. Having Infirmary (Words of Power, 28) in play makes these viable options to keep the cards flowing.
The cards from Miskatonic University aren’t the only cards with which Jeremiah combines nicely. One of the best examples is Tom Capor’s Champion Card, Hall of Champions (Written and Bound, 20). I’ve always enjoyed the design of that card and wanted to make a card that synergized with it. Finding Jeremiah Kirby with the Hall of Champions will give you two cards and, potentially, three success tokens at a story. That’s not bad, especially since this could happen every turn, especially if you use cards like Archaeology Interns (Into Tartarus, 97) or Surprising Find (Touched by the Abyss, 109) to manipulate Jeremiah Kirby back to the top of your deck. Playing Against Jeremiah Kirby
Every player of Call of Cthulhu has cards they love to use. Who doesn’t like cards that destroy your opponent’s characters or make them go crazy? Everyone has their favorite cards to play, but who has favorites to play against? For me, Jeremiah Kirby is one of those cards; I actually enjoy playing against it more than with it! The way he creates interactions between known and hidden information can lead to intriguing scenarios. For example, imagine your opponent starts the game and plays Jeremiah Kirby on his first turn, revealing Lucas Tetlow (Seekers of Knowledge, 9), Jeremiah Kirby, Matthew Alexander (Seekers of Knowledge, 7), Dwellers Below (The Sleeper Below, 11), and Flooded Vault (Terror in Venice, 10). 
Which card do you choose first to put on the bottom of his deck? There are many factors to consider: what cards do you have in hand, and what might your opponent have in hand? If you have some non-Location support cards in hand, that Lucas Tetlow might be problematic. What cards have been resourced? If your opponent resourced a Matthew Alexander, does that mean he already has one in hand and doesn’t need another copy? What support cards is your opponent running? Flooded Vault could unearth anything from a Khopesh of the Abyss to Ultima Thule, and you have to consider all the possibilities. Does your second choice influence your first choice? If your opponent chooses to keep Flooded Vault, should you send that second copy of Jeremiah Kirby to the bottom of his deck so he can’t trigger card draw off it after a Khopesh bursts out of that Vault to attach to the first copy.
I thoroughly enjoy thought processes like these, even if the outcome isn't in my favor. I love trying to deduce what my opponent is thinking and using that to my advantage. I can't wait for a scenario like this to happen in a tournament.
Acknowledgements
I want to thank FFG for the opportunity to design this Champion Card, and I want to thank Brad Andres and Damon Stone for working with me to design a card I'm proud of. I'm really looking forward to playing with (and against) Jeremiah Kirby, and I hope you are as well! Thanks, Jeremy! For the Greater Good is now just a couple weeks away. In the meantime, keep your eyes open for our final preview, when we meet some of the Hunters who make their debut in this eighth deluxe expansion for Call of Cthulhu: The Card Game. ... Source: Jeremiah Kirby (http://www.fantasyflightgames.com/edge_news.asp?eidn=5360)
Title: FFG:Imperial Investigation
Post by: RSSFeeder on 19 February 2015, 03:45:03
Imperial InvestigationA Designer Diary on Inquests in Enemies Within
“We thought he perished during our last encounter, but the ritual markings undoubtedly show the involvement of that damnable heretic Zethor. I don’t know how he escaped the purge on Temperance, but with the Emperor’s guidance, this time we will make sure of his fate.”
–Witch-Seeker Arbella Syne The Askellon sector groans beneath the weight of a billion billion souls and their numberless sins. Everywhere, heresy sprouts and blooms, infecting the innocent and spreading madness. For such unquestionable evil, there is only one certain cure: the cleansing fire of the Inquisition and the Ordo Hereticus. Yet finding the roots of corruption is difficult. An Inquisitor’s Acolytes must develop a plan of investigation and follow the clues before they can confront the source of the heresy. In the Enemies Within sourcebook for Dark Heresy Second Edition, you’ll find new rules to give structure to your Inquests in the Imperium. Today, Tim Cox shares his perspective on the Inquest rules he developed for Enemies Within! _FightingMutants.png)
Tim Cox on Inquests in Enemies Within Mysteries and investigations lie at the heart of Dark Heresy Second Edition, as Acolytes and Inquisitors strive to uncover the threats to humanity, but mysteries also rank among the most difficult adventures for GMs to run and for players to follow. To assist players and GMs with running investigations and tracking the Acolytes’ progress, Enemies Within includes new rules for Inquests. These rules help players solve mysteries, conduct investigations, and hunt down the heretics, witches, and mutants that threaten the survival of Mankind. When developing the rules for Inquests, I wanted to provide structure and mechanics to support investigative play without constraining GMs or players. Inquests needed rules that were flexible enough to represent any sort of mystery or heresy a GM might invent, while providing a solid foundation to ensure the plot advances. I also wanted to keep the focus on targeted investigations against known heretics and cults, while maintaining the flexibility to handle other types of mysteries. Planting the Seeds At their heart, the final rules for Inquests provide an organised system for conducting investigations, presenting guidelines that GMs can use to build their own mystery adventures. Although GMs can use Inquest rules for any investigation, they are best suited to handling investigations initiated by the Acolytes (or a Player Character Inquisitor). The beginning of an Inquest invites the Acolytes to plan the focus of their investigation, selecting their target and determining the Inquest’s scope – Minoris, Majoris, or Extremis. The scope is a reflection of the mission’s difficulty and length, and it dictates the Influence rewards for success. 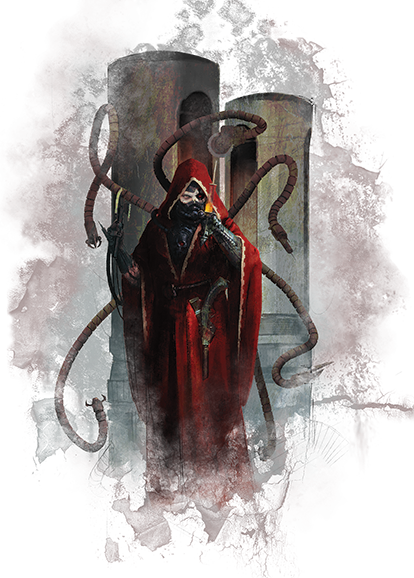 The amount of player involvement in an Inquest means that Acolytes have the discretion to choose their target, the scope of their objective, and the resources they will use to accomplish it. This ensures that players and GMs are on the same page at the outset of the adventure and it further represents the discretion that trusted Acolytes and even Inquisitors exercise in deciding which threats to pursue and how best to prosecute their duties. The amount of player involvement in an Inquest means that Acolytes have the discretion to choose their target, the scope of their objective, and the resources they will use to accomplish it. This ensures that players and GMs are on the same page at the outset of the adventure and it further represents the discretion that trusted Acolytes and even Inquisitors exercise in deciding which threats to pursue and how best to prosecute their duties.
Chasing the Heresy During an Inquest, Acolytes accrue Investigation points by finding clues and following leads, resulting in a tangible measurement for their progress. The number of Investigation points needed to complete an Inquest depends on its scope. A higher scope generally means more clues for the Acolytes to find. In an Inquest, clues have an assigned Investigation point value, which can vary greatly based on the clue’s importance. In order for the Inquest to progress, the Acolytes might need to find a single vital clue or several minor clues. Acolytes gain additional Investigation points for successfully uncovering leads from a clue, but a mistaken interpretation or a false lead can actually cost them points. Once the Acolytes have obtained a predetermined number of Investigation points, they trigger a Revelation, or an important break in the case. In order to benefit from the Revelation, they must successfully navigate a Confrontation – an important encounter with the potential to change the course of an investigation. Although Confrontations don’t always involve combat, they are often encounters with important heretics and lieutenants of the Acolytes’ target, or even with highly placed members of the organization the Acolytes seek to bring down. Confrontations may also be shocking discoveries, tense social encounters, or other important developments. When the warband achieves the necessary total Investigation points, the results of their clues lead to the final Confrontation with their target, and the opportunity to successfully complete the Inquest. If the Acolytes are successful, they and their Inquisitor receive Influence based on the scope of the Inquest. Even if the Acolytes fail to defeat their foe, obtaining enough Investigation points nets them a reduced Influence reward. In some cases, such as during an Inquest against a particularly powerful Nemesis, just undoing his horrid schemes may be all that is possible. 
Nothing According to Plan One of my favourite elements of the Inquest rules is complications. At the outset of an Inquest, a GM can choose from a selection of complications or randomly determine one. Complications range from jurisdictional disputes with local forces or a branch of the Adeptus Terra, to local customs or practices that threaten to delay the investigation, to betrayal by a trusted ally. Each complication has mechanical effects and may cost the Acolytes Investigation points or affect their Subtlety. Although players have a good deal more involvement in the selection, creation, and prosecution of an Inquest than they might in other adventures, complications provide a level of unpredictability and surprise that keeps the Acolytes on their toes. And although they may choose the target and scope of their Inquest, no Acolyte can ever tell for certain where that Inquest may lead them. Doing the Emperor’s Work I hope both GMs and players will enjoy incorporating Inquests into their games. Whether hunting down old foes or uncovering nascent threats, Inquests make up the work of the Inquisition. I look forward to hearing about the mysteries your Acolytes uncover and the threats you contend with! Thanks, Tim! Prepare to uncover the cults and heresies that fester throughout the Askellon sector with the new rules for Inquests. Check back for our next preview, in which we look at the new options available to your Acolytes as you work alongside the Ordo Hereticus. Pre-order your copy of Enemies Within today! ... Source: Imperial Investigation (http://www.fantasyflightgames.com/edge_news.asp?eidn=5361)
Title: FFG:Secret Vigil
Post by: RSSFeeder on 19 February 2015, 12:45:03
Secret VigilA Preview of The Lost Realm Deluxe Expansion for The Lord of the Rings
“In the wild lands beyond Bree there were mysterious wanderers. The Bree-folk called them Rangers, and knew nothing of their origin. They were taller and darker than the Men of Bree and were believed to have strange powers of sight and hearing.”
–J.R.R. Tolkien, The Fellowship of the Ring Soon, The Lost Realm deluxe expansion for The Lord of the Rings: The Card Game will provide you and your heroes the chance to undertake daring, new adventures in a previously unexplored region of Middle-earth. Outside the peaceful villages of Bree-land, lies a land tainted by ancient evils. In the darkest, northern reaches of Eriador, the Witch-king of Angmar once ruled. His armies terrorized the region for nearly seven centuries, and though he no longer resides within Carn Dûm, there are other evils that have found their way to Angmar. In The Lost Realm, you join forces with the Rangers of the North, the Dúnedain who have secretly warded Bree-land and its neighboring villages from the dangers of Angmar and the surrounding lands. 
The Orcs Are Massing Your adventures begin with the expansion’s first scenario, Intruders in Chetwood. When a couple Rangers of the North discover a large group of Orcs making its way toward Bree-land, they realize they need help. The Ranger Iârion (The Lost Realm, 16) asks you to help him intercept the war-party before it can assault the Men of Bree.  
Though the Orcs begin with a day’s lead, Iârion proves a skilled tracker, guiding you swiftly through forests and over hills. However, your trials won’t end once you manage to catch the Orc War-party (The Lost Realm, 17); they’ll have only just begun. At its heart, The Lord of the Rings: The Card Game is about adventures rooted in exploration and discovery. You and your friends work together against a randomized encounter deck full of enemies to fight, dangerous locations to explore, and treachery cards that can snatch victory right out of your hands. Meanwhile, each game immerses you in a story that unfolds as you press forward on your quest, moving from stage to stage. In these ways, The Lost Realm and its scenarios offer as pure an experience as The Lord of the Rings: The Card Game as you could hope to find.  From the opening moments of Intruders in Chetwood, as you hunt the Orcs, through the final quest stage of its final scenario, The Lost Realm immerses you in a narrative adventure full of challenges, choices, and intrigues. In an earlier preview, developer Caleb Grace addressed how the expansion’s side quests add narrative depth, even as they force you and your heroes to choose between pursuing the main quest and ridding the realm of other threats. From the opening moments of Intruders in Chetwood, as you hunt the Orcs, through the final quest stage of its final scenario, The Lost Realm immerses you in a narrative adventure full of challenges, choices, and intrigues. In an earlier preview, developer Caleb Grace addressed how the expansion’s side quests add narrative depth, even as they force you and your heroes to choose between pursuing the main quest and ridding the realm of other threats.
Along the way, you’ll need to travel from the relative safety of Chetwood Forest (The Lost Realm, 18) to the ruins of Fornost. You’ll learn why Aragorn told the Council of Elrond that the North would have had no peace if not for the Rangers of the North. You’ll learn about the foes he said would freeze lesser men’s hearts, and you’ll face them in battle. Moreover, you’ll have to do all this while trudging onward through foul weather and unmarked wilderness. The result is that you’ll understand what it’s like to be one of the Dúnedain Rangers. You’ll feel the weight of responsibility sitting squarely upon your back, and yet you’ll continue onward, because there is no good alternative. You will gain no fame nor fortune should you succeed, but if you fail, many innocent men and women will die. The Tireless Hunt Of course, The Lost Realm explores the Rangers of the North and their trials in more ways than one. The expansion introduces two new Dúnedain Ranger heroes, a host of new Dúnedain allies, and a handful of related events and attachments. As we’ve already seen, many of these new cards focus on scouting out enemies and engaging them, and this means that The Lost Realm adds a new dimension to the Tactics sphere of influence, even as it bolsters the Dúnedain trait. Each sphere of influence has its strengths and weaknesses, and in multi-player games, Tactics players will often protect other members of their fellowship from as many enemies as possible. For starters, then, Tactics players frequently aim to optionally engage enemies as often as possible, and they often play with threat levels that are slightly higher than the rest of the table, so that they will be the first targeted by enemies in the engagement phase. Often, though, you’ll find yourselves facing situations in which multiple enemies enter the staging area at once, and your Tactics player can’t engage them all. These situations occur frequently enough that many Tactics players feel the need to incorporate Ranged and Sentinel characters, as well as events such as Feint (Core Set, 34), in order to help their friends across the table. Soon, The Lost Realm will introduce new means of controlling the game’s enemies and engagements, and this means that Tactics players will be able to pursue a wide range of all-new, effective deck-building archetypes. The new Tactics version of Aragorn (The Lost Realm, 1) is likely to be the lynchpin in many of these builds. Not only does he subtract one from the Defense Strength of every enemy engaged with you, he comes with a Response ability that can pull enemies away from other players: “Response: After Aragorn participates in an attack that destroys an enemy, choose an enemy not engaged with you and engage that enemy.” Some of Aragorn’s benefits are obvious. By offering a consistent and immediate means of pulling enemies away from your fellow players, Aragorn’s ability grants you new freedom in the construction of your deck and the selection of your heroes. You face less need than ever to include Ranged characters or cards like The Hammer-stroke (The Blood of Gondor, 111) in order to attack those enemies that engage your fellow players. Some of Aragorn’s benefits are less obvious, but no less effective. Since Aragorn’s Response isn’t a Combat Action, it works anytime he participates in an attack that destroys an enemy. That means that he can use cards like Quick Strike (Core Set, 35) to attack and destroy enemies before other enemies attack your teammates, and in this way, you can be an effective teammate and combatant, even if you don’t include Sentinel characters in your deck. To this end, The Lost Realm also introduces Tireless Hunters (The Lost Realm, 8), which for one resource serves both as a Sentinel replacement and as shadow cancellation.  
Finally, even as it offers Tactics players a range of new freedoms, The Lost Realm provides them with some limited, thematic means to explore an entirely new role – threat reduction. For a single resource, Secret Vigil (The Lost Realm, 12) can attach to an enemy and reduce its Threat Strength by one, making it easier to quest successfully so long as that enemy remains in the staging area. Then, once that enemy is destroyed, Secret Vigil reduces each player’s threat by an amount equal to the target enemy’s printed Threat Strength. When you consider that The Galadhrim’s Greeting (Core Set, 46) costs three resources for a table-wide threat reduction of two, you’ll be especially thankful for the Dúnedain and their Secret Vigil, especially when they eliminate an enemy as threatening as an Angmar Marauder (The Lost Realm, 44). Explore the North Will you experiment with a Dúnedain deck, or will you rely upon other heroes as you face the perils of the North? Either way, The Lost Realm offers an immersive and perilous exploration of one of Middle-earth’s most intriguing realms, the dark and shadowy lands just outside of Bree-land and the Shire. The Lost Realm is now just a few weeks away. In the meantime, stay tuned for more news, including a look at the expansion’s second hero and a pair of sample Dúnedain decks designed to work together! ... Source: Secret Vigil (http://www.fantasyflightgames.com/edge_news.asp?eidn=5362)
Title: FFG:Avoid a Backstabbing
Post by: RSSFeeder on 19 February 2015, 21:45:03
Avoid a BackstabbingNew FAQ and Tournament Rules are Available for A Game of Thrones
The 2015 A Game of Thrones: The Card Game Organized Play season has gotten off to a roaring start with Store Championships. Battles rage across the Seven Kingdoms each week, and those with the most knowledge give themselves the best opportunity to be named Champion. Will you use your knowledge to gain an advantage over your foe? Or will you fall by the wayside, just another pretender to the throne? What knowledge will you acquire, and how will you use it? Be sure to read the new FAQ (pdf, 2.3 MB) and tournament rules (pdf, 1.5 MB) before heading out to your next tournament.  
These changes will go into effect on February 16th, 2015.
A Word from the Developers Hello A Game of Thrones players, As we move deeper into the Store Championship season, a couple of metagame trends that began to creep into the game at last year’s Tourney of Stahleck and World Championships have strengthened their grasp upon the environment. Instead of waiting until our regularly scheduled pre-Regional Championships FAQ document, we have decided to release a small mid-season FAQ to address these concerns. The top item being addressed is the River plot deck which, in spite of a restriction to Crossing the Mummer’s Ford (Spoils of War, 20), is still dominating the game. To lower the ceiling on how much card advantage Crossing the Mummer’s Ford card can provide, we are adding an errata to its effect that prevents it from being triggered by other card effects. This will limit the card’s effectiveness to one use each time a player cycles through his or her plot deck. To anticipate the most likely rules question relating to this errata, if another River plot attempts to trigger it as the top River card in your used pile, the “cannot” is absolute, and nothing will happen. In addition to the River plot deck, we are taking this opportunity to address a few other strategies that have been warping the recent environment. Daenerys Targaryen (Ancestral Home, 76) and Melisandre’s Favor (The Horn that Wakes, 63) have both been added to the restricted list. We are adding an errata to Harrenhal (Ancestral Home, 78) that requires the character killed to pay its cost be both owned and controlled by the player who is using Harrenhal, to break up the card’s combo potential with the aforementioned Melisandre’s Favor. Finally, the combo of Unburnt (Queen of Dragons, 1) and Aloof and Apart (Secrets and Schemes, 18) is being checked, so that the free save the combo enables is no longer repeatable. In the Q&A section, we field questions on two topics. The first explains the timing of the new Castle plots. The second covers the physical placement (dead pile, discard pile, or deck) of multiple cards that leave play simultaneously when there are no specific instructions regarding the order in which those cards arrive in their new location. We hope that this FAQ release serves to rejuvenate the environment, and helps to maximize your enjoyment of the game over the remainder of the Store Championship season. Nate French
Fantasy Flight Games 
Thanks Nate! Don’t let yourself be caught unaware at your next Store Championship. Download the new FAQ and tournament rules today so you’ll be ready as you ride into battle. ... Source: Avoid a Backstabbing (http://www.fantasyflightgames.com/edge_news.asp?eidn=5363)
Title: FFG:Fantasy Flight Games Is Now Hiring
Post by: RSSFeeder on 04 March 2015, 14:45:09
Fantasy Flight Games Is Now HiringFantasy Flight Games, leading hobby-market publisher of board games, card games, roleplaying games, and other tabletop games, is now accepting applications for the position of
Application Developer (pdf, 81.9 KB)
. Details can be found in the linked pdf document. To apply for this position, please submit a cover letter with salary requirements and resume to HumanResources@fantasyflightgames.com; under the subject line âApplication Developer.â Please do not call or visit. Our offices are located in Roseville, Minnesota, a suburb of the Twin Cities of Minneapolis and St. Paul. Candidates not already living within commuting distance must be willing to relocate. Fantasy Flight Publishing, Inc. is an equal opportunity employer committed to a diverse work force and a work environment free from discrimination. Â
Discuss this article
in our forums!
Source: Fantasy Flight Games Is Now Hiring (https://www.fantasyflightgames.com/en/news/2015/2/9/fantasy-flight-games-is-now-hiring-2/)
Title: FFG:Use the Force
Post by: RSSFeeder on 04 March 2015, 23:45:11
Use the ForceâMy ally is the Force. And a powerful ally it is. Life creates it, makes it grow. Its energy surrounds us and binds us. Luminous beings are we, not this crude matter.â
  âMaster Yoda Fantasy Flight Games is proud to announce the upcoming release of the Star Wars®: Force and Destiny⢠Core Rulebook and Game Masterâs Kit. The power of the Force flows through you. All your life you have felt it and used it, perhaps even unconsciously. Now, at last, you have found others like you who can sense and manipulate the Force, others willing to risk their lives for the sake of justice, for the sake of bettering the galaxy. Together, you are searching for the secrets of the outlawed Jedi Order and fighting against any evil that you encounter, including the Empire. Guiding you on your journey is the Force and Destiny Core Rulebook, which contains everything necessary for you to experience the Forceâs immense power and take part in action-filled, epic adventures set in the Star Wars universe. 
Outcasts in a War-Torn GalaxyâFor over a thousand generations the Jedi Knights were the guardians of peace and justice in the Old Republic. Before the dark times, before the Empire.â
  âObi-Wan Kenobi With a single, brutal, masterful stroke, Chancellor Palpatine took over the galactic government and abolished the Jedi Order. The Clone Wars ended and the Empire was born. Over the following decades, resistance against the Empire slowly strengthened until at last an organized Rebellion formed and destroyed the first Death Star, beginning a great civil war. Force and Destiny takes place in this war-torn galaxy, where Force-sensitives and anyone with ties to the Jedi must keep secret their power at risk of imprisonment and death. While Force and Destiny is a complete and independent roleplaying system, it is also fully cross-compatible with our other two Star Wars roleplaying games, Age of Rebellion⢠and Edge of the Empireâ¢, set in the same time period. You could send Force-sensitives from Force and Destiny to the lawless locations featured in Edge of the Empire, or create a Rebel cell composed of outcast Force-users and idealistic Colonists who take on the Empire in an adventure from Age of the Rebellion. 
The Balance Between Light and DarkâAnger, fear, aggression. The dark side are they. Once you start down the dark path, forever will it dominate your destiny.â
  â Master Yoda As Force-sensitive characters, you and the others in your group must learn to use the Force without the guidance of the Jedi Order. You also live with the constant threat of Imperial discovery, and will likely have to fight for your survival. You may choose to spend your life in the shadows, defending the downtrodden and carefully walking the line between good and evil. Or, you may join the Rebellion and battle the Empire from the pilotâs seat of a straighter. No matter what your characterâs background, career, or ultimate aims, you will no doubt take on incredible missions and perform legendary deeds. Your character will inevitably be forced to make difficult choices, and there will be countless opportunities to demonstrate your honor or surrender to violence, self-interest, and evil. Would you commit murder to free an enslaved friend? Would you use torture to elicit information that might save thousands of lives? In Force and Destiny, Morality is a defining aspect of character. Torture, failing to prevent anotherâs cruelty, even theft can pull you towards the dark side. Once fallen, you will have to relentlessly prove your commitment to the light side before you can leave the dark side behind. 
The Stuff of LegendsâYes, Artoo, I was just coming to that.â
  âThreepio The heart of every Force and Destiny campaign is the 448-page Core Rulebook, beautifully illustrated with original art to immerse you fully in the Star Wars universe. In the Core Rulebookâs thirteen chapters youâll find everything you need to play the game, from instructions on creating complex Force-sensitive characters to a thorough guide to the gameâs narrative dice system. Entire chapters are dedicated to skills, talents, gear and weapons (including lightsabers), vehicles and starships, and of course, the Force itself. For game masters, the Core Rulebook includes a chapter with helpful suggestions about running game sessions, developing a campaign, and handling your PCsâ ever-shifting Morality. Youâll also find detailed information about galactic geography, a history of the Jedi and Sith Orders from their ancient past until the Galactic Civil War, a catalogue of NPC adversaries, and a complete, stand-alone adventure, Lessons of the Past, to begin your Force and Destiny campaign. 
Mastering the ForceâYouâll find Iâm full of surprises.â
  âLuke Skywalker The Force and Destiny Game Masterâs Kit places right before your eyes all the information that you need to lead session of Force and Destiny. A GM screen not only helps you conceal your plots and machinations from the PCs, but features convenient reference charts that cover topics from vehicle critical hits to spending advantage and triumph results in combat. The GM Kit also features detailed guidelines for knight-level play, in which PCs start an adventure with advanced capabilities, and for crafting custom lightsabers from materials that characters may encounter in their adventures. Above all, it contains a complete two-to-three session adventure, Hidden Depths, which can either stand on its own or tie in with the adventure in the Core Rulebook. 
Meet Your DestinyThe Force and Destiny Core Rulebook and GM kit will be available in the third quarter of 2015. In the meantime, visit the Force and Destiny minisite for additional details and, soon, in-depth previews of the game. Your destiny awaits. May the Force be with you!
Discuss this article
in our forums!
Source: Use the Force (https://www.fantasyflightgames.com/en/news/2015/2/9/use-the-force-rpg/)
Title: FFG:Jeremiah Kirby
Post by: RSSFeeder on 05 March 2015, 16:45:11
Jeremiah KirbyFor the Greater Good is coming soon to Call of Cthulhu: The Card Game! With nearly two-thirds of its 165 cards focused on the Agency and its operatives, For the Greater Good gives the faction a major boost. However, it also offers plenty to fans of the gameâs other factions. Each of the gameâs seven other factions gains at least one new character and at least one new support; they also gain more potential options from the expansionâs three different neutral cards, which include the new Ancient One Iod, The Hunter of Souls (For the Greater Good, 36). Thus, even as the Agencyâs Government agents pursue new leads in their defense of humanity, these other new characters allow the other factions to accelerate their plans for saving, dominating, or devouring the world. Like the Bedlam Boys (For the Greater Good, 41) and Restless Mi-Go (For the Greater Good, 45), most of them are also two-cost and one skill. However, the similarities between them tend to end there. After all, the monstrous scientists of Yog-Sothoth donât function like the Syndicateâs criminals. Nor do Cthulhuâs cultists work toward the same intents as Miskatonic Universityâs bravest explorers and investigators. 
Today, we turn our attention more closely toward one of these characters, as two-time World Champion Jeremy Zwirn offers a look at the character card he designed for Miskatonic University and that will soon see release with For the Greater Good. Jeremy Zwirn on Jeremiah Kirby Today, I'm very excited to show you my World Champion card and share a few of the thoughts I had while designing it. Having the opportunity to design your own Champion card is truly amazing, and I'm extremely grateful to be forever linked in this way to Call of Cthulhu: The Card Game. Today, I'm very excited to show you my World Champion card and share a few of the thoughts I had while designing it. Having the opportunity to design your own Champion card is truly amazing, and I'm extremely grateful to be forever linked in this way to Call of Cthulhu: The Card Game.
I'm a big fan of the literature of H.P. Lovecraft and have read all of his stories. The Cthulhu Mythos is brimming with interesting characters, items, and locations. As I thought about basing a card on one of these, I was a bit overwhelmed by the possibilities; where was I to begin? I thought about designing a card around one of the notable, named characters yet to appear in the LCG®: Professor William Dyer, Captain Obed Marsh, Abdul Alhazred (author of the Necronomicon), Joseph Curwen, or Herbert West, the infamous reanimator. The idea of designing a card around a powerful artifact, like the Shining Trapozehedron, also intrigued me. In the end, I decided to make a card that pictured what I would like to be in the Cthulhu Mythos. That decision gave me the freedom to explore my cardâs design without the pressure to match its mechanics to a known character. The result is the Explorer and Investigator, Jeremiah Kirby (For the Greater Good, 43). Exploring New GroundI wanted my Champion Card to stand apart from those designed by my predecessors. The four previous World Champion character cards in Call of Cthulhu: The Card Game all share a cost of three, three or more icons, and three skill. Three of them are neutral. Theyâre all good at combat and have Willpower. Instead of following suit, I thought it would be more interesting to give my character just one point of skill, one icon, and focus more attention on the ability. I learned to play Call of Cthulhu with a Miskatonic University rush deck and am a hardcore gamer, so the faction of ânerdsâ felt right. The faction is known for its abundance of card draw, so I wanted to create a twist on this mechanic. For a while, I thought about designing a character that always revealed the top card of your deck and allowed you to play it as though it were in your hand. The idea was fun and interesting, but I wanted something more interactive. I'm a fan of mini-games that involve direct interaction with your opponent, and I love highly tactical cards that require you to weigh multiple factors each time you use them. Accordingly, when Jeremiah Kirby enters play, his response triggers a âcard drawâ ability, but your opponent influences which cards you get. Meanwhile, since Jeremiah Kirby is an Explorer, I wanted his name to sound like an arctic explorer. Many of the Explorer characters in Call of Cthulhu are named after real explorers. Roald Ellsworth (Seekers of Knowledge, 4), for example, is named after Roald Amundsen and Lincoln Ellsworth. Taking the cue, I chose to name my card after Jeremiah Reynolds and Sydney Kirkby, slightly modifying Kirkbyâs last name because my Golden Retrieverâs name is âKirby.â Playing with Jeremiah Kirby In card games, I like nothing more than finding synergy between cards and creating decks where the whole is greater than its individual parts. Jeremiah Kirby is full of potential synergies, and many of those synergies involve other Miskatonic cards. Since he has the Explorer subtype, he can take advantage of all the synergies it grants. In card games, I like nothing more than finding synergy between cards and creating decks where the whole is greater than its individual parts. Jeremiah Kirby is full of potential synergies, and many of those synergies involve other Miskatonic cards. Since he has the Explorer subtype, he can take advantage of all the synergies it grants.
- If Jeremiah Kirby leaves play, Roald Ellsworth lets you draw two cards or retrieve any one card from your discard pile.
- If you have James âCookieâ Fredericks (Seekers of Knowledge, 8) in play and fewer cards in hand than your opponent, you can order your responses to first trigger Cookieâs response, then trigger Kirbyâs response to take a total of three of the top eight cards from your deck into your hand.
- Moreover, Jeremiah Kirby is a prime target to drop into play with the lynchpin of Explorer decks, Ultima Thule (Seekers of Knowledge, 26). As long as your opponent doesn't disrupt this combo, you'll net two cards each turn, and if you have Roald Ellsworth in play, that turns into four cards each turn.
Synergy is such a beautiful thing! Explorer isn't Jeremiah Kirby's only subtype; he's also an Investigator. Thus, two Anthropology Advisors (Core Set, 25) will let you play him at no cost and give him two additional Investigation icons. Since he boasts such a powerful enters play ability, if youâre reducing his cost to nothing, you may sometimes want him to be destroyed just so that you can play a second (or third) copy of him. Heâs a great target to commit to a story where youâll need to take a wound after losing a combat struggle, or you can equip him with a Khopesh of the Abyss (Touched by the Abyss, 16) and wound away. Having Infirmary (Words of Power, 28) in play makes these viable options to keep the cards flowing. The cards from Miskatonic University arenât the only cards with which Jeremiah combines nicely. One of the best examples is Tom Caporâs Champion Card, Hall of Champions (Written and Bound, 20). Iâve always enjoyed the design of that card and wanted to make a card that synergized with it. Finding Jeremiah Kirby with the Hall of Champions will give you two cards and, potentially, three success tokens at a story. Thatâs not bad, especially since this could happen every turn, especially if you use cards like Archaeology Interns (Into Tartarus, 97) or Surprising Find (Touched by the Abyss, 109) to manipulate Jeremiah Kirby back to the top of your deck. Playing Against Jeremiah KirbyEvery player of Call of Cthulhu has cards they love to use. Who doesnât like cards that destroy your opponentâs characters or make them go crazy? Everyone has their favorite cards to play, but who has favorites to play against? For me, Jeremiah Kirby is one of those cards; I actually enjoy playing against it more than with it! The way he creates interactions between known and hidden information can lead to intriguing scenarios. For example, imagine your opponent starts the game and plays Jeremiah Kirby on his first turn, revealing Lucas Tetlow (Seekers of Knowledge, 9), Jeremiah Kirby, Matthew Alexander (Seekers of Knowledge, 7), Dwellers Below (The Sleeper Below, 11), and Flooded Vault (Terror in Venice, 10). 
Which card do you choose first to put on the bottom of his deck? There are many factors to consider: what cards do you have in hand, and what might your opponent have in hand? If you have some non-Location support cards in hand, that Lucas Tetlow might be problematic. What cards have been resourced? If your opponent resourced a Matthew Alexander, does that mean he already has one in hand and doesnât need another copy? What support cards is your opponent running? Flooded Vault could unearth anything from a Khopesh of the Abyss to Ultima Thule, and you have to consider all the possibilities. Does your second choice influence your first choice? If your opponent chooses to keep Flooded Vault, should you send that second copy of Jeremiah Kirby to the bottom of his deck so he canât trigger card draw off it after a Khopesh bursts out of that Vault to attach to the first copy. I thoroughly enjoy thought processes like these, even if the outcome isn't in my favor. I love trying to deduce what my opponent is thinking and using that to my advantage. I can't wait for a scenario like this to happen in a tournament.  Acknowledgements  I want to thank FFG for the opportunity to design this Champion Card, and I want to thank Brad Andres and Damon Stone for working with me to design a card I'm proud of. I'm really looking forward to playing with (and against) Jeremiah Kirby, and I hope you are as well! Thanks, Jeremy! For the Greater Good is now just a couple weeks away. In the meantime, keep your eyes open for our final preview, when we meet some of the Hunters who make their debut in this eighth deluxe expansion for Call of Cthulhu: The Card Game. Â
Discuss this article
in our forums!
The copyrightable portions of Call of Cthulhu: The Card Game are © 2008 - 2013 Fantasy Flight Publishing, Inc. Call of Cthulhu is a registered trademark of Chaosium, Inc. Living Card Game, LCG, LCG logo and Fantasy Flight Supply are trademarks and/or registered trademarks of Fantasy Flight Publishing, Inc. All rights reserved to their respective owners.  Source: Jeremiah Kirby (https://www.fantasyflightgames.com/en/news/2015/2/10/jeremiah-kirby/)
Title: FFG:Imperial Investigation
Post by: RSSFeeder on 06 March 2015, 01:45:15
Imperial InvestigationâWe thought he perished during our last encounter, but the ritual markings undoubtedly show the involvement of that damnable heretic Zethor. I donât know how he escaped the purge on Temperance, but with the Emperorâs guidance, this time we will make sure of his fate.â
   âWitch-Seeker Arbella Syne The Askellon sector groans beneath the weight of a billion billion souls and their numberless sins. Everywhere, heresy sprouts and blooms, infecting the innocent and spreading madness. For such unquestionable evil, there is only one certain cure: the cleansing fire of the Inquisition and the Ordo Hereticus. Yet finding the roots of corruption is difficult. An Inquisitorâs Acolytes must develop a plan of investigation and follow the clues before they can confront the source of the heresy. In the Enemies Within sourcebook for Dark Heresy Second Edition, youâll find new rules to give structure to your Inquests in the Imperium. Today, Tim Cox shares his perspective on the Inquest rules he developed for Enemies Within! _FightingMutants.png)
Tim Cox on Inquests in Enemies WithinMysteries and investigations lie at the heart of Dark Heresy Second Edition, as Acolytes and Inquisitors strive to uncover the threats to humanity, but mysteries also rank among the most difficult adventures for GMs to run and for players to follow. To assist players and GMs with running investigations and tracking the Acolytesâ progress, Enemies Within includes new rules for Inquests. These rules help players solve mysteries, conduct investigations, and hunt down the heretics, witches, and mutants that threaten the survival of Mankind. When developing the rules for Inquests, I wanted to provide structure and mechanics to support investigative play without constraining GMs or players. Inquests needed rules that were flexible enough to represent any sort of mystery or heresy a GM might invent, while providing a solid foundation to ensure the plot advances. I also wanted to keep the focus on targeted investigations against known heretics and cults, while maintaining the flexibility to handle other types of mysteries. Planting the SeedsAt their heart, the final rules for Inquests provide an organised system for conducting investigations, presenting guidelines that GMs can use to build their own mystery adventures. Although GMs can use Inquest rules for any investigation, they are best suited to handling investigations initiated by the Acolytes (or a Player Character Inquisitor). The beginning of an Inquest invites the Acolytes to plan the focus of their investigation, selecting their target and determining the Inquestâs scope â Minoris, Majoris, or Extremis. The scope is a reflection of the missionâs difficulty and length, and it dictates the Influence rewards for success.  The amount of player involvement in an Inquest means that Acolytes have the discretion to choose their target, the scope of their objective, and the resources they will use to accomplish it. This ensures that players and GMs are on the same page at the outset of the adventure and it further represents the discretion that trusted Acolytes and even Inquisitors exercise in deciding which threats to pursue and how best to prosecute their duties. The amount of player involvement in an Inquest means that Acolytes have the discretion to choose their target, the scope of their objective, and the resources they will use to accomplish it. This ensures that players and GMs are on the same page at the outset of the adventure and it further represents the discretion that trusted Acolytes and even Inquisitors exercise in deciding which threats to pursue and how best to prosecute their duties.
Chasing the HeresyDuring an Inquest, Acolytes accrue Investigation points by finding clues and following leads, resulting in a tangible measurement for their progress. The number of Investigation points needed to complete an Inquest depends on its scope. A higher scope generally means more clues for the Acolytes to find. In an Inquest, clues have an assigned Investigation point value, which can vary greatly based on the clueâs importance. In order for the Inquest to progress, the Acolytes might need to find a single vital clue or several minor clues. Acolytes gain additional Investigation points for successfully uncovering leads from a clue, but a mistaken interpretation or a false lead can actually cost them points. Once the Acolytes have obtained a predetermined number of Investigation points, they trigger a Revelation, or an important break in the case. In order to benefit from the Revelation, they must successfully navigate a Confrontation â an important encounter with the potential to change the course of an investigation. Although Confrontations donât always involve combat, they are often encounters with important heretics and lieutenants of the Acolytesâ target, or even with highly placed members of the organization the Acolytes seek to bring down. Confrontations may also be shocking discoveries, tense social encounters, or other important developments. When the warband achieves the necessary total Investigation points, the results of their clues lead to the final Confrontation with their target, and the opportunity to successfully complete the Inquest. If the Acolytes are successful, they and their Inquisitor receive Influence based on the scope of the Inquest. Even if the Acolytes fail to defeat their foe, obtaining enough Investigation points nets them a reduced Influence reward. In some cases, such as during an Inquest against a particularly powerful Nemesis, just undoing his horrid schemes may be all that is possible. 
Nothing According to PlanOne of my favourite elements of the Inquest rules is complications. At the outset of an Inquest, a GM can choose from a selection of complications or randomly determine one. Complications range from jurisdictional disputes with local forces or a branch of the Adeptus Terra, to local customs or practices that threaten to delay the investigation, to betrayal by a trusted ally. Each complication has mechanical effects and may cost the Acolytes Investigation points or affect their Subtlety. Although players have a good deal more involvement in the selection, creation, and prosecution of an Inquest than they might in other adventures, complications provide a level of unpredictability and surprise that keeps the Acolytes on their toes. And although they may choose the target and scope of their Inquest, no Acolyte can ever tell for certain where that Inquest may lead them. Doing the Emperorâs WorkI hope both GMs and players will enjoy incorporating Inquests into their games. Whether hunting down old foes or uncovering nascent threats, Inquests make up the work of the Inquisition. I look forward to hearing about the mysteries your Acolytes uncover and the threats you contend with! Thanks, Tim! Prepare to uncover the cults and heresies that fester throughout the Askellon sector with the new rules for Inquests. Check back for our next preview, in which we look at the new options available to your Acolytes as you work alongside the Ordo Hereticus. Pre-order your copy of Enemies Within today!
Discuss this article
in our forums!
Dark Heresy Second Edition is a roleplaying game of danger, mystery, and brutal violence set in the decaying far future of Warhammer 40,000. Players take on the role of defenders of humanity and embark on hazardous adventures into the dark heart of the 41st Millennium. As an Acolyte of an Inquisitor, youâll serve at the front line of a great and secret war to root out dangers that imperil all of humanity. Source: Imperial Investigation (https://www.fantasyflightgames.com/en/news/2015/2/11/imperial-investigation/)
Title: FFG:Secret Vigil
Post by: RSSFeeder on 06 March 2015, 10:45:17
Secret VigilâIn the wild lands beyond Bree there were mysterious wanderers. The Bree-folk called them Rangers, and knew nothing of their origin. They were taller and darker than the Men of Bree and were believed to have strange powers of sight and hearing.â
   âJ.R.R. Tolkien, The Fellowship of the Ring Soon, The Lost Realm deluxe expansion for The Lord of the Rings: The Card Game will provide you and your heroes the chance to undertake daring, new adventures in a previously unexplored region of Middle-earth. Outside the peaceful villages of Bree-land, lies a land tainted by ancient evils. In the darkest, northern reaches of Eriador, the Witch-king of Angmar once ruled. His armies terrorized the region for nearly seven centuries, and though he no longer resides within Carn Dûm, there are other evils that have found their way to Angmar. In The Lost Realm, you join forces with the Rangers of the North, the Dúnedain who have secretly warded Bree-land and its neighboring villages from the dangers of Angmar and the surrounding lands. 
The Orcs Are MassingYour adventures begin with the expansionâs first scenario, Intruders in Chetwood. When a couple Rangers of the North discover a large group of Orcs making its way toward Bree-land, they realize they need help. The Ranger Iârion (The Lost Realm, 16) asks you to help him intercept the war-party before it can assault the Men of Bree. Though the Orcs begin with a dayâs lead, Iârion proves a skilled tracker, guiding you swiftly through forests and over hills. However, your trials wonât end once you manage to catch the Orc War-party (The Lost Realm, 17); theyâll have only just begun. At its heart, The Lord of the Rings: The Card Game is about adventures rooted in exploration and discovery. You and your friends work together against a randomized encounter deck full of enemies to fight, dangerous locations to explore, and treachery cards that can snatch victory right out of your hands. Meanwhile, each game immerses you in a story that unfolds as you press forward on your quest, moving from stage to stage. In these ways, The Lost Realm and its scenarios offer as pure an experience as The Lord of the Rings: The Card Game as you could hope to find.  From the opening moments of Intruders in Chetwood, as you hunt the Orcs, through the final quest stage of its final scenario, The Lost Realm immerses you in a narrative adventure full of challenges, choices, and intrigues. In an earlier preview, developer Caleb Grace addressed how the expansionâs side quests add narrative depth, even as they force you and your heroes to choose between pursuing the main quest and ridding the realm of other threats. From the opening moments of Intruders in Chetwood, as you hunt the Orcs, through the final quest stage of its final scenario, The Lost Realm immerses you in a narrative adventure full of challenges, choices, and intrigues. In an earlier preview, developer Caleb Grace addressed how the expansionâs side quests add narrative depth, even as they force you and your heroes to choose between pursuing the main quest and ridding the realm of other threats.
Along the way, youâll need to travel from the relative safety of Chetwood Forest (The Lost Realm, 18) to the ruins of Fornost. Youâll learn why Aragorn told the Council of Elrond that the North would have had no peace if not for the Rangers of the North. Youâll learn about the foes he said would freeze lesser menâs hearts, and youâll face them in battle. Moreover, youâll have to do all this while trudging onward through foul weather and unmarked wilderness. The result is that youâll understand what itâs like to be one of the Dúnedain Rangers. Youâll feel the weight of responsibility sitting squarely upon your back, and yet youâll continue onward, because there is no good alternative. You will gain no fame nor fortune should you succeed, but if you fail, many innocent men and women will die. The Tireless HuntOf course, The Lost Realm explores the Rangers of the North and their trials in more ways than one. The expansion introduces two new Dúnedain Ranger heroes, a host of new Dúnedain allies, and a handful of related events and attachments. As weâve already seen, many of these new cards focus on scouting out enemies and engaging them, and this means that The Lost Realm adds a new dimension to the Tactics sphere of influence, even as it bolsters the Dúnedain trait.  Each sphere of influence has its strengths and weaknesses, and in multi-player games, Tactics players will often protect other members of their fellowship from as many enemies as possible. For starters, then, Tactics players frequently aim to optionally engage enemies as often as possible, and they often play with threat levels that are slightly higher than the rest of the table, so that they will be the first targeted by enemies in the engagement phase. Each sphere of influence has its strengths and weaknesses, and in multi-player games, Tactics players will often protect other members of their fellowship from as many enemies as possible. For starters, then, Tactics players frequently aim to optionally engage enemies as often as possible, and they often play with threat levels that are slightly higher than the rest of the table, so that they will be the first targeted by enemies in the engagement phase.
Often, though, youâll find yourselves facing situations in which multiple enemies enter the staging area at once, and your Tactics player canât engage them all. These situations occur frequently enough that many Tactics players feel the need to incorporate Ranged and Sentinel characters, as well as events such as Feint (Core Set, 34), in order to help their friends across the table. Soon, The Lost Realm will introduce new means of controlling the gameâs enemies and engagements, and this means that Tactics players will be able to pursue a wide range of all-new, effective deck-building archetypes. The new Tactics version of Aragorn (The Lost Realm, 1) is likely to be the lynchpin in many of these builds. Not only does he subtract one from the Defense Strength of every enemy engaged with you, he comes with a Response ability that can pull enemies away from other players: âResponse: After Aragorn participates in an attack that destroys an enemy, choose an enemy not engaged with you and engage that enemy.â Some of Aragornâs benefits are obvious. By offering a consistent and immediate means of pulling enemies away from your fellow players, Aragornâs ability grants you new freedom in the construction of your deck and the selection of your heroes. You face less need than ever to include Ranged characters or cards like The Hammer-stroke (The Blood of Gondor, 111) in order to attack those enemies that engage your fellow players. Some of Aragornâs benefits are less obvious, but no less effective. Since Aragornâs Response isnât a Combat Action, it works anytime he participates in an attack that destroys an enemy. That means that he can use cards like Quick Strike (Core Set, 35) to attack and destroy enemies before other enemies attack your teammates, and in this way, you can be an effective teammate and combatant, even if you donât include Sentinel characters in your deck. To this end, The Lost Realm also introduces Tireless Hunters (The Lost Realm, 8), which for one resource serves both as a Sentinel replacement and as shadow cancellation.   Finally, even as it offers Tactics players a range of new freedoms, The Lost Realm provides them with some limited, thematic means to explore an entirely new role â threat reduction. For a single resource, Secret Vigil (The Lost Realm, 12) can attach to an enemy and reduce its Threat Strength by one, making it easier to quest successfully so long as that enemy remains in the staging area. Then, once that enemy is destroyed, Secret Vigil reduces each playerâs threat by an amount equal to the target enemyâs printed Threat Strength. When you consider that The Galadhrimâs Greeting (Core Set, 46) costs three resources for a table-wide threat reduction of two, youâll be especially thankful for the Dúnedain and their Secret Vigil, especially when they eliminate an enemy as threatening as an Angmar Marauder (The Lost Realm, 44). Explore the NorthWill you experiment with a Dúnedain deck, or will you rely upon other heroes as you face the perils of the North? Either way, The Lost Realm offers an immersive and perilous exploration of one of Middle-earthâs most intriguing realms, the dark and shadowy lands just outside of Bree-land and the Shire. The Lost Realm is now just a few weeks away. In the meantime, stay tuned for more news, including a look at the expansionâs second hero and a pair of sample Dúnedain decks designed to work together!
Discuss this article
in our forums!
The copyrightable portions of The Lord of the Rings: The Card Game and its expansions are © 2011 - 2013 Fantasy Flight Publishing, Inc. The Lord of the Rings, and the characters, items, events and places therein are trademarks or registered trademarks of The Saul Zaentz Company d/b/a Middle-earth Enterprises and are used, under license, by Fantasy Flight Games. Living Card Game, LCG, LCG logo and Fantasy Flight Supply are trademarks and/or registered trademarks of Fantasy Flight Publishing, Inc. All Rights Reserved to their respective owners. Source: Secret Vigil (https://www.fantasyflightgames.com/en/news/2015/2/11/secret-vigil/)
Title: FFG:Avoid a Backstabbing
Post by: RSSFeeder on 06 March 2015, 19:45:10
Avoid a Backstabbing
The 2015 A Game of Thrones: The Card Game Organized Play season has gotten off to a roaring start with Store Championships. Battles rage across the Seven Kingdoms each week, and those with the most knowledge give themselves the best opportunity to be named Champion. Will you use your knowledge to gain an advantage over your foe? Or will you fall by the wayside, just another pretender to the throne? What knowledge will you acquire, and how will you use it? Be sure to read the new FAQ (pdf, 2.3 MB) and tournament rules (pdf, 1.5 MB) before heading out to your next tournament. These changes will go into effect on February 16th, 2015. A Word from the DevelopersHello A Game of Thrones players, As we move deeper into the Store Championship season, a couple of metagame trends that began to creep into the game at last yearâs Tourney of Stahleck and World Championships have strengthened their grasp upon the environment. Instead of waiting until our regularly scheduled pre-Regional Championships FAQ document, we have decided to release a small mid-season FAQ to address these concerns. The top item being addressed is the River plot deck which, in spite of a restriction to Crossing the Mummerâs Ford (Spoils of War, 20), is still dominating the game. To lower the ceiling on how much card advantage Crossing the Mummerâs Ford card can provide, we are adding an errata to its effect that prevents it from being triggered by other card effects. This will limit the cardâs effectiveness to one use each time a player cycles through his or her plot deck. To anticipate the most likely rules question relating to this errata, if another River plot attempts to trigger it as the top River card in your used pile, the âcannotâ is absolute, and nothing will happen. In addition to the River plot deck, we are taking this opportunity to address a few other strategies that have been warping the recent environment. Daenerys Targaryen (Ancestral Home, 76) and Melisandreâs Favor (The Horn that Wakes, 63) have both been added to the restricted list. We are adding an errata to Harrenhal (Ancestral Home, 78) that requires the character killed to pay its cost be both owned and controlled by the player who is using Harrenhal, to break up the cardâs combo potential with the aforementioned Melisandreâs Favor. Finally, the combo of Unburnt (Queen of Dragons, 1) and Aloof and Apart (Secrets and Schemes, 18) is being checked, so that the free save the combo enables is no longer repeatable. In the Q&A section, we field questions on two topics. The first explains the timing of the new Castle plots. The second covers the physical placement (dead pile, discard pile, or deck) of multiple cards that leave play simultaneously when there are no specific instructions regarding the order in which those cards arrive in their new location. We hope that this FAQ release serves to rejuvenate the environment, and helps to maximize your enjoyment of the game over the remainder of the Store Championship season. Nate French
Fantasy Flight Games 
Thanks Nate! Donât let yourself be caught unaware at your next Store Championship. Download the new FAQ and tournament rules today so youâll be ready as you ride into battle.
Discuss this article
in our forums!
The copyrightable portions of A Game of Thrones: The Card Game and its expansions are © 2008 - 2013 Fantasy Flight Publishing, Inc. Licensed by George R.R. Martin. The names, descriptions, and depictions applied to this game are derived from works copyrighted by George R.R. Martin, and may not be used or reused without his permission. A Game of Thrones: The Card Game, its expansion titles, Living Card Game, LCG, the LCG logo and Fantasy Flight Supply are trademarks and/or registered trademarks of Fantasy Flight Publishing, Inc. All rights reserved to their respective owners.  Source: Avoid a Backstabbing (https://www.fantasyflightgames.com/en/news/2015/2/12/avoid-a-backstabbing/)
Title: FFG:Take to the Streets
Post by: RSSFeeder on 07 March 2015, 13:45:15
Take to the StreetsBehind everything crouched the brooding, festering horror of the ancient townâ¦
   âH.P. Lovecraft, The Dreams in the Witch House A city full of horrors awaits you. The Gates of Arkham expansion for Elder Sign is now available at your local retailer and in our online store. Gates of Arkham features the new Streets of Arkham game mode, which takes the action of Elder Sign out of the museum and into the legendary, haunted, New England city of Arkham. As four new Ancient Ones threaten to awake, their stirrings are ripping at the fabric of space and time, causing gates to Other Worlds to open, and releasing horrors throughout the city. Fortunately, eight investigators are adding their strengths to the vital struggle to save Arkham from unspeakable, irrevocable doom. 
The Streets of ArkhamThe Streets of Arkham game mode leaves the museum and takes the action to twenty-five locations throughout Arkham, such as Independence Square, the River Docks, and Maâs Boarding House. In this mode, detailed in our first preview, a complete deck of Arkham Adventure cards replaces the core set Adventure deck. Arkham Adventures are played facedown, so you enter a location without knowing what lies ahead. You may, for example, choose to visit the Curiositie Shoppe in order to gain a unique item. But when you reach it, you find that the door has been smashed open and a thin trail of blood leads across the threshold, as if the victim of some violent event inside the Shoppe has recently fled. Merely entering the Shoppe mysteriously drains your stamina. And before you can begin to piece together what has happened, an unexpected Event occurs.  Â  Some Arkham Adventures are marked with a red moon icon that signals you to draw an Event card at the start of your Resolution phase. Events, featured in our fourth preview, may be good or bad. For example, at the beginning of your adventure in the Curiositie Shoppe, the Hungry Creatures Event may cause a ravenous monster to appear. Or you may have a sudden epiphany and gain some Rare Knowledge, which gives you a clue or a spell to help you complete the tasks ahead. With random Events able to put victory within your reach, or bring the Ancient One closer to awakening, every moment, every move you make in Arkham is critical, unpredictable, and potentially game-changing. Gates to Other WorldsNot even physical space is stable in Arkham. As described in our second preview, a gate can open at any location, say, the Police Station, transforming it into the portal to an uncanny and fearsome Other World â perhaps the monster-infested City of Gugs. In order to seal the gate and return the Police Station to some semblance of normality, youâll have to undertake an Adventure in that Other World. Until you succeed at the appointed tasks in the City of Gugs, the Police Station is wholly unvisitable, no longer a place of order and justice, but the home of a disastrous rip in the material of the cosmos. 
Some Events and midnight effects create gates, but it is the stirring of the Ancient Ones that truly lies behind these universal disturbances, since it is outside of the gates that they patiently wait and through the gates that they will come. All four Ancient Ones of Gates of Arkham have spaces on their doom tracks that cause gates to open. All four are pulled closer to awakening as gates tear Arkham apart. Unlikely Heroes with Underground TiesIn your fight against these Ancient Ones youâll need investigators capable of surviving in the Other Worlds and on Arkhamâs streets, tough and shrewd people who may come from nefarious backgrounds or from the heights of society. One such individual is Finn Edwards, a successful bootlegger on the East Coast. His illegal trade grants him a few privileges, including the ability to easily acquire common items for anyone he chooses, such as one of the four investigators featured in our third preview. 
Surviving in Arkham can be as much a matter of who you know as what you know, so Gates of Arkham offers investigators the chance to gain a membership in one of the cityâs most powerful organizations. Memberships allow investigators to skip certain tasks and offer additional rewards for success, enabling you to navigate Arkham more easily and have more tools in your battle against the Ancient One. Finn Edwards is a natural fit for the Sheldon Gangâ an infamous and well-armed nationwide bootlegging network. In Arkham, they have as much power as the police, if not more, since several police officers are on the Sheldon Gang payroll. If you prefer dark rituals and arcane tomes to gunfights and smuggling, you might seek membership in the Order of the Silver Twilight, an ancient and secretive organization of unknown origin that somehow possesses a wealth of knowledge about the Ancient Ones. The Order of the Silver Twilight may not control the streets, but it can include you in its powerful occult rites and perhaps even lead you to a priceless Elder Sign. 
Horrors Around Every CornerNo place in Arkham is completely safe, not St. Maryâs Hospital or the South Church, not Velmaâs Diner or Hibbâs Roadhouse. Thankfully, Gates of Arkham also lets investigators acquire Skills that can help you conquer the cityâs terrors and chaos. Some Wanderlust, for example, enables you to open up the locked doors of Arkhamâs locations and peer inside before entering. Many components of the expansion, such as the new investigators, Ancient Ones, spells, and items can be used outside of the Streets of Arkham game mode to bring fresh terrors to your experience inside the Arkham museum. Nevertheless, the heart of Gates of Arkham lies in the cityâs streets and tangled woods, in its thick fogs and dark old secrets. And unless you and your fellow investigators can seal the gates ripping the city apart, kill the monsters threatening its inhabitants, and prevent the Ancient Ones from awakening, Arkham will be lost. If youâre brave enough to fight the horrors of this haunted New England town, pick up your copy of Gates of Arkham today!
Discuss this article
in our forums!
The copyrightable portions of Elder Sign are © 2011-2013 Fantasy Flight Publishing, Inc. Elder Sign, Arkham Horror and Fantasy Flight Supply are trademarks and/or registered trademarks of Fantasy Flight Publishing, Inc. Source: Take to the Streets (https://www.fantasyflightgames.com/en/news/2015/2/12/take-to-the-streets/)
Title: FFG:Back into the Shadows
Post by: RSSFeeder on 07 March 2015, 22:45:18
Back into the Shadows âAgainst the Power that now arises there is no victory. To this City only the first finger of its hand has yet been stretched. All the East is moving.â
   âJ.R.R. Tolkien, The Return of the King Fantasy Flight Games is proud to announce that three new Nightmare Decks are now available for The Lord of the Rings: The Card Game! When Middle-earthâs heroes returned to Minas Tirith, triumphant after the battles they faced through the scenarios from Heirs of Númenor, they found the Cityâs Steward wracked with worry. Traitors and treachery had infiltrated the City and spread throughout its underbelly like a disease. After the Heirs of Númenor deluxe expansion, the Against the Shadow cycle followed the heroes and their efforts to purge the Dark Lordâs servants from the heart of Gondor. From the gutters and darkened alleys of Minas Tirith, their investigations led them into the neighboring Drúadan Forest and then to Amon Dîn. At each turn, the plot thickened, and players were immersed in an epic adventure, full of innovative mechanics, iconic locations, vibrant characters, plot twists, and treachery. Now, three new Nightmare Decks allow you to experience the thrill of discovery all over again with new Plots and mechanics, as well as deadlier challenges. When you return to the first three scenarios from the Against the Shadow cycle with these Nightmare Decks, youâll find that the conspiracies run deeper, your foes are more ferocious, and the Dark Lordâs servants have come closer than ever to plunging Gondor into chaos! 
Lead Developer Matthew Newman on the Against the Shadow Nightmare DecksWhen you play through the Against the Shadow cycle in Nightmare Mode, youâll find that its scenarios have changed and evolved, and the shadow of Mordor has grown. Good luck! The Stewardâs FearThis beloved scenario kicks off the Against the Shadow cycle with an investigation into an evil cabal secretly plotting the downfall of Minas Tirith. One of the most entertaining aspects of this quest is its replayability. In the original scenario, players randomly select from three Plot objectives and three Villain enemies, then confront the cabal of traitors that has banded together in one of nine possible combinations. In Nightmare Mode, we added more depth to this theme by adding new Plot objectives and creating an unpredictable environment wherein your Plot and Villain are always moving forward and gaining strength.  For example, if you donât quickly explore the location Traitorsâ Den (The Stewardâs Fear Nightmare Deck, 6), the cabal may hatch an additional Plot that youâll need to confront in addition to the one set aside during setup. For example, if you donât quickly explore the location Traitorsâ Den (The Stewardâs Fear Nightmare Deck, 6), the cabal may hatch an additional Plot that youâll need to confront in addition to the one set aside during setup. The Stewardâs Fear also introduced locations with the Underworld X keyword, which allowed the enemies hiding within them to attack once they were revealed. This Nightmare Deck adds strength to this theme and the Underworld deck with new Underworld locations, a treachery card that you shuffle into the Underworld deck, and a slippery enemy who attacks you when he first emerges from the Underworld deck, only to vanish right out of your sight if you canât destroy him immediately. Finally, The Cabalâs Champion (The Stewardâs Fear Nightmare Deck, 10) is an objective that increases the strength of the Villain you will eventually face at stage three. The longer you take to root out this Villain, the more powerful he or she becomes. This emphasizes your need to move swiftly through each quest stage and ensures a tense and climactic endgame for the adventure as you confront the leader of the cult. The Drúadan ForestWhen players first pursued those cabalists who fled from Minas Tirith into The Drúadan Forest, they likely found it much deadlier than they had imagined. The enemies the players had been hunting were dead, but the forest was full of deadly and cunning Wose enemies that provided a unique challenge, discarding the heroesâ resources with their Prowl X keyword and then punishing them with effects that grew more powerful as the playersâ resources dwindled. For this Nightmare Deck, we decided to change the dynamic of this quest in a way that complements the encounter deck as a natural fit, even while it dramatically alters the way players need to approach The Drúadan Forest. These changes all start with the setup card (The Drúadan Forest Nightmare Deck, 1): âHeroes do not collect resources during the resource phase. âSetup: Add resources to each heroâs resource pool until each hero has 5 resources. Search the encounter deck for 1 copy of Garden of Poisons and add it to the staging area. Shuffle the encounter deck.â At first, as your heroes enter the Drúadan Forest, you may feel that you have everything you need at your disposal. Fifteen resources is a lot, after all! But since your heroes do not collect resources during the resource phase each round, you find yourself second-guessing every card you play. Meanwhile, the scenarioâs Wose enemies and treachery cards continue to swipe at your remaining resources until you run out, at which point cards such as Drúadan Warrior (The Drúadan Forest Nightmare Deck, 3) and Eilenach (The Drúadan Forest Nightmare Deck, 6) become truly nightmarish. The Drúadan Forest Nightmare Deck doesnât just introduce new enemies and treacheries; it introduces an entirely new paradigm, one that challenges players to think outside the box and creates a truly tense and exciting experience! Encounter at Amon DînEncounter at Amon Dîn is a scenario that in many ways captures what The Lord of the Rings: The Card Game is all about â noble heroes putting themselves in great danger in order to protect the lives of others. The Nightmare Mode version of this scenario is designed to truly emphasize the idea and feeling of this self-sacrifice. Nearly every card presents you with a difficult decision: you can confront some fierce obstacle in order to protect one or more villagers, or you can play it safe at the cost of innocent lives. This idea first finds shape in the scenarioâs setup card (Encounter at Amon Dîn Nightmare Deck, 1): âForced: At the beginning of the quest phase, either discard 1 villager token from Rescued Villagers, or reveal an encounter card.â As you need to make this difficult choice each and every turn, you really begin to feel like you are throwing yourself into a series of dangerous situations in order to save lives. Other cards like Orc Raiders (Encounter at Amon Dîn Nightmare Deck, 2) and Save Us! (Encounter at Amon Dîn Nightmare Deck, 8) help to compliment this theme, as well. These decisions almost guarantee youâll suffer many more casualties, and that means you will find yourself bound for an epic confrontation with the deadly Ghulat (Encounter at Amon Dîn, 71). Simultaneously, though, you will need to make sure more villagers were rescued than slain, and this is a task that becomes much more difficult objective with this Nightmare Deckâs deadlier enemies and ravaged locations. I hope you enjoy confronting the new challenges from these Nightmare Decks as much as we enjoyed crafting them. Be brave and confront the shadow head on. Alámenë! Will You Stand Against the Growing Shadow?In the dark land of Mordor, the Enemy has grown stronger, and his agents have stolen secretly into the very heart of Gondor. Though many may think the streets of Minas Tirith are free from evil, the war against the Enemy is not won, nor are any of its battles truly ended. Traitors once again skulk about the darkest alleys of Minas Tirith and steal through the forests of Gondor. Your work is not ended until the Enemy himself is defeated. Take up your arms once more, and stand fast against the growing Shadow. Pick up your copies of the Against the Shadow Nightmare Decks today!
Discuss this article
in our forums!
The copyrightable portions of The Lord of the Rings: The Card Game and its expansions are © 2011 - 2013 Fantasy Flight Publishing, Inc. The Lord of the Rings, and the characters, items, events and places therein are trademarks or registered trademarks of The Saul Zaentz Company d/b/a Middle-earth Enterprises and are used, under license, by Fantasy Flight Games. Living Card Game, LCG, LCG logo and Fantasy Flight Supply are trademarks and/or registered trademarks of Fantasy Flight Publishing, Inc. All Rights Reserved to their respective owners. Source: Back into the Shadows (https://www.fantasyflightgames.com/en/news/2015/2/12/back-into-the-shadows/)
Title: FFG:Free Traders
Post by: RSSFeeder on 08 March 2015, 16:45:16
Free TradersâLook, I ainât in this for your revolution, and Iâm not in it for you, Princess. I expect to be well paid. Iâm in it for the money.â
   âHan Solo A smugglerâs life is one of bending the rules or creating your own, of fighting for survival and making narrow escapes. Smugglers may be thought of as greedy and self-interested, but thatâs the price they pay for freedom â and under Imperial rule, freedom is a precious commodity. Theyâll take on any job that pays well, not just for the money, but because money is what gives them independence. In Fly Casual, a sourcebook for the Star Wars®: Edge of the Empire⢠roleplaying game, youâll find everything you need to experience a Smugglerâs life, from talents that let you talk your way out of trouble to gear that conceals contraband. For Game Masters thereâs plentiful information about smuggling within the Star Wars galaxy, a guide to designing a smuggling ring for your group, and ideas for staging con jobs, scams, break-ins, and all sorts of illegal activities. Todayâs preview focuses on the Smugglers themselves. Weâll look at the three new Smuggler specializations introduced in Fly Casual, three new species apt to practice these specializations, and some of the gear that can help you succeed in this underhanded, risky, and lucrative career. 
Talk the TalkIn the Edge of the Empire Core Rulebook, youâll find three Smuggler specializations. You can choose to be a focused, hardworking Pilot, a quick-witted, cavalier Scoundrel, or a stealthy, cunning Thief. But if your charisma is your favorite weapon, and you prefer to negotiate rather than intimidate or fight, you might want to become a Charmer, the first of the new specializations introduced in Fly Casual. Armed with the skills Charm, Cool, Leadership, and Negotiation, Charmers can befriend the people theyâre about to steal from and talk their way out of a bad situation. They can easily navigate both the underworld and the upper echelons of society, and they always know exactly the right thing to say. Sometimes a Charmerâs persuasive words and disarming smile are enough to gain entry to a private cantina, or to pass through an Imperial checkpoint. At those times, False Credentials may prove useful. For 800 credits your character can buy a fake identity that will fool even the most sophisticated scanners and most perceptive adversaries. You may want to keep some on hand just in case someone links your characterâs real name to the ignoble deceptions and illegal deeds youâve perpetrated. 
Beat the OddsCharmers are easy to recognize: their natural magnetism and compelling words always make them the center of attention. Gamblers, however, must avoid receiving too much attention and keep their tricks hidden in order to survive. Rather than attract attention, they may prefer to keep a low profile and secretly strategize for the moment when they reveal their hand. Specializing as a Gambler involves more than always winning at the sabacc table. Gambling is a mentality, a way of life, a willingness to risk it all and a knowledge of how to triumph against the odds. A Gambler's bonus skills include Computers, Cool, Deception, and Skulduggery, allowing you to double up on the latter two since they are part of the Smuggler base skill set. With these skills, you are as well suited to playing casual games of cards with the Imperial aristocracy as you are hacking into the computers of a Hutt crime boss. You might be the brains behind an independent smuggling ring, or a card shark out in one of the colonies. You might even play a Trader and use the Gambler specialization to enhance your negotiating skills. 
Shoot First Sometimes deals go wrong. Sometimes your client refuses to pay for the merchandise youâve smuggled across the galaxy. Sometimes you get caught in the act of stealing, or a rival Smuggler turns to violence to cut down his competition. In these cases, having a Gunslinger on board your ship can prove very useful. Gunslingers start with the bonus career skills Coercion, Cool, Knowledge (Outer Rim), and Ranged (Light). But the true strength of a Gunslinger lies in their ability to shoot faster than their opponent. The Gunslingerâs talents allow him to draw fast, aim well, and deliver a lethal blow before anyone else has got a weapon in hand.  All Smugglers need a way to prevent their valuables â and stolen goods â from being taken in a search. But Gunslingers who want to keep their hands free for drawing and shooting may be particularly interested in a Smugglerâs Trenchcoat. It has more pockets (and pockets within pockets) than Imperial stormtroopers are willing to search, and, since it adds a point to your soak value, it protects both you and your contraband in a fight. All Smugglers need a way to prevent their valuables â and stolen goods â from being taken in a search. But Gunslingers who want to keep their hands free for drawing and shooting may be particularly interested in a Smugglerâs Trenchcoat. It has more pockets (and pockets within pockets) than Imperial stormtroopers are willing to search, and, since it adds a point to your soak value, it protects both you and your contraband in a fight.
Native to the Outer RimThe three playable species introduced in Fly Casual each hail from a different world in the Outer Rim. Each offers its own challenges and advantages for the Smuggler career. The Quarren once led a peaceful underwater existence on their homeworld of Dac, and these tentacled, amphibious humanoids still feel more comfortable swimming than walking or flying. Conflicts with the Mon Calamari and the Empire have now compelled some Quarren to leave Dac and earn a living on the fringes of the galaxy. Because they can be aggressive and strong-willed, Quarren take easily to the Gunslinger specialization or the Hired Gun career, but some also possess a natural meticulousness that suits them to the work of a Mechanic or Outlaw Tech. The shrewd, elegant, reptilian Falleen make excellent Charmers, Politicos, and even Performers, possessing a disarming presence that can make anyone put down their guard. After all, the Falleen control the Black Sun, one of the most powerful crime syndicates ever known in the galaxy. In addition to their natural intelligence and cunning, the Falleen also have the ability to modulate their skin color and pheromones to affect the emotional states of others. Anyone who lets his guard down might find himself agreeing to whatever a Falleeen wants without exactly knowing whyâ and later regretting his decisions. The tall, burly Gotals possess great Cunning, lack much Presence, and, because they can be so inconspicuous, are well suited for the Gambler specialization. They also possess energy-sensitive horns that, through fluctuations in the electro-magnetic field, can sense the emotional states of others. The same adaptations that enable Gotals to tell whether or not someone is bluffing also make them sympathetic Doctors or perceptive Marshals. Yet some Gotals use their empathy as a weapon: a Gotal Bounty Hunter, for example, could use it to more easily hunt down his prey. 
The new species of Fly Casual from left to right: a Gotal, Quarren, and Falleen Fortune Favors the BoldA Charmer, a Gambler, a Gunslinger, and a Pilot could make an excellent smuggling team: let the Charmer and Gambler run con jobs and do the dirty work while the Gunslinger eliminates any armed opponents and the Pilot takes care of the quick getaway.You might also pick up Charmer, Gambler, or Gunslinger as an additional specialization so that your Colonist, Bounty Hunter, or Explorer has a few underhanded tricks up her sleeve. Whether smuggling is your livelihood or you play high-stakes games of sabacc and hintaro as a pastime, Fly Casual open up dangerous, profitable, and thrilling new adventures for you to experience in the Star Wars universe. Fly Casual is coming soon. Pre-order it from your local retailer today!
Discuss this article
in our forums!
Participate in grim and gritty adventures on the fringes of the Star Wars universe with Star Wars®: Edge of the Empireâ¢. Edge of the Empire is a complete standalone roleplay system that transports players to some of the shadiest locations in the Outer Rim, the underbelly of the Core Worlds, and everywhere else in-between! © and ⢠Lucasfilm Ltd.  Source: Free Traders (https://www.fantasyflightgames.com/en/news/2015/2/13/free-traders/)
Title: FFG:The Lay of the Battlefield
Post by: RSSFeeder on 09 March 2015, 01:45:14
The Lay of the BattlefieldPoisoned arrows darkened the skies but the horses were galloping too fast to be hit. They charged straight into the midst of the half-demon archers: some fell beneath the horsesâ trampling hooves, others simply fled. Then the horses stopped cold. Standing between the Citadel Lancers and their goal was a tall, bloodied barricade of spears, sharpened wood staves, and bones. The men exchanged determined glances, and prepared their horses for the perilous jump⦠Charge forward with Hernfar Guardians and Warband of Scorn, the new Army Pack expansions for BattleLore Second Edition. In Hernfar Guardians youâll find thirty-four sculpted plastic figures: four new Daqan units adept at breaking enemy lines and defending prized positions, along with the Citadel Guards to support them. Warband of Scorn contains thirty-seven Uthuk Y'llan figures: three units of Blood Harvesters and four new units certain to make your opponentâs army bleed in every fight. Earlier previews have provided in-depth introductions to the units of Hernfar Guardians and those of Warband of Scorn. We also previewed the Army cards of each expansion, which suggest battle-ready offensive and defensive armies made from only the units included in the Army Pack. Todayâs preview will look at some of the new scenario cards, which not only transform your battlefield into a fresh and treacherous landscape, but also offer new strategic challenges to overcome. 
Spires and LoreIn Hernfar Guardians, the Daqan army must not only protect the homes and fields of the people of Terrinoth, but also prevent the realmâs powerful magic runes and crystals from falling into the wrong hands. One new scenario card, The Ruins of Lore, charges you specifically with keeping the attacking Uthuk Yâllan army away from two powerful crystal spires embedded in the landscape. For every turn you can keep the spires safe, you gain a victory point. 
Crystal spire hexes are introduced to BattleLore for the first time in Hernfar Guardians. When one of your units occupies a crystal spire at the beginning of their Move Step, you can roll an additional die for that unit during combat that turn. In The Ruins of Lore, Crystal Spires also provide you with one lore if you occupy them at the end of your turn. That lore may then be spent to move a unit at the end of the round, allowing you to pursue the Uthuk Yâllan during combat and then pull back, or move a friendly unit that was forced to retreat back into position. You may want to occupy one crystal spire with a Siege Golem, whose artillery can eradicate enemy forces long before they enter your territory. In the Behind the Lines scenario, however, your goal is to penetrate deep into territory occupied by the enemy. In setup, youâll place a Daqan faction banner marker behind enemy lines, which grants your Daqan units an additional victory point for occupying that spot. Regardless of your opponentsâ goals, you must focus on attaining that position and holding it at all costs. To do so, youâll need strong, swift units like the Citadel Lancers, who can either rupture or skirt the enemy lines. Citadel Guards or Greyhaven Battlemages can then follow the cavalry, claim the faction banner marker, and defend it until your victory is complete. 
A Bloodied BattlefieldWhat the Daqan seek to defend, the vicious and fearless Uthuk Yâllan seek to raid, ravage, and destroy â and the more Daqan soldiers they slaughter in the process, the better. Two of the five scenarios in Warband of Scorn give you victory points for the enemy units you slay. In The Blood-Stained Forest, you earn a victory point whenever a friendly unit in a forest hex eliminates an enemy unit. Since your Caster units ignore the combat restrictions of forests in this scenario, you might send your Blood Sisters into the trees to unleash their dark magic against the enemy. 
As The Blood-Stained Forest focuses on Caster units, Bleeding Skies rewards your Ranged units for every enemy unit they destroy. You might, therefore, muster your Blood Sisters together with Viper Legion units from the core set, so they can fill the skies with demonic magic and poisoned arrows. Bleeding Skies also encourages you to turn the terrain itself into a weapon, giving you extra incentive to use the new barricade hexes featured in both Warband of Scorn and Hernfar Guardians. These hexes impede movement, block retreats, and deal a point of damage to any unit that moves through them. When an enemy unit stops on a barricade hex in Bleeding Skies, moreover, you may roll one die to see if the barricade deals any additional damage. Barricade hexes make your territory difficult and dangerous for enemy units to enter, but they may also hinder the movement of your own forces. Fortunately, the ravenous Doombringer can burrow beneath barricades, hills, buildings, forests, and even other units, only to surface in the middle of the enemyâs troops and greedily devour them, freeing the rest of the Uthuk Y'llan army to lacerate any attackers. 
Defend or Destroy?Will you protect the rich fields and noble people of Terrinoth, or delight in ravaging their land and drawing Daqan blood? Will you fortify your position with barricades and rain destruction from the skies, or charge foward in the hope of breaking through enemy lines? Whichever you prefer, these Army Pack expansions offer new ways to achieve victory and fresh battlefield challenges for you to overcome. Pre-order Warband of Scorn and Hernfar Guardians from your local retailer today!
Discuss this article
in our forums!
The copyrightable portions of BattleLore Second Edition are © 2013 Fantasy Flight Publishing, Inc. BattleLore is a registered trademark of Fantasy Flight Publishing, Inc. Source: The Lay of the Battlefield (https://www.fantasyflightgames.com/en/news/2015/2/13/the-lay-of-the-battlefield/)
Title: FFG:Master of Hawks
Post by: RSSFeeder on 13 March 2015, 11:45:14
Master of Hawks
May the winds of fate guide my sword.
Baharroth
Long ago, only one race of Eldar dwelt among the stars. But their depravity awakened a new Ruinous Power: She Who Thirsts. Now the race has split into the Dark Eldar and the Eldar. One of these factions embraces every form of torture, while the other walks a path of asceticism. Youll find new warlords for both in the Descendants of Isha War Pack for Warhammer 40,000: Conquest!
In December, we announced Descendants of Isha, and in our announcement article, we revealed Urien Rakarth, a Haemonculus devoted to the study and perfection of torture. Today, we turn our attention to the Eldar warlord included in this War Pack: Baharroth, Phoenix Lord of the Swooping Hawks!

Lord of the Winds
Baharroth
(Descendants of Isha, 111) is known as The Cry of the Wind in the Eldar Lexicon. He is renowned for his speed in battle, and he has led his Swooping Hawks to countless victories. In Warhammer 40,000: Conquest, Baharroths ability text consists of just one word, but that word conveys everything you need to know about the Swooping Hawks fighting style. Baharroth bears the Mobile keyword, allowing him to move to an adjacent planet at the beginning of any combat phase.
While plenty of other units in Warhammer 40,000: Conquest have possessed the Mobile keyword, a Mobile warlord opens new strategies for Eldar forces in the Traxis sector. Because hes Mobile, Baharroth may win the command struggle on one planet, then move to an adjacent planet for battle. Baharroths mobility also allows him to threaten an attack on multiple planets, forcing your opponent to spread his defenses thin. In addition, no other warlord can so easily avoid the hunt of
Ragnar Blackmane
(The Howl of Blackmane, 1) as the Phoenix Lord of the Swooping Hawks.
Of course, Baharroth is not the only Mobile unit the Eldar command. Four copies of
Baharroth's Hawks
(Descendants of Isha, 112) join him in battle, and each of these units bears the Mobile keyword. In addition, these units gain three additional ATK when theyre at the same planet as Baharroth. With two command icons each, these units can easily win command struggles at planets across the sector, then flock to Baharroths side for battle, becoming dangerous attackers.
Legend tells that Baharroths sword was forged in the dying fires of a supernova, and now you can wield
The Shining Blade
(Descendants of Isha, 114) against your enemies. The Shining Blade can only be attached to a Mobile unit, but between Baharroth and Baharroths Hawks, you have plenty of Mobile units at your disposal. This attachment grants a crucial Interrupt to the attached unit. Whenever the attached unit declares an attack, you may declare that attack against an enemy unit at an adjacent planet instead. By stretching your attacks to adjacent planets, you can easily clear your opponents units with minimal danger to your own units, preparing the way for your eventual conquest.
You can boost your attacks to even greater potency with
Banner of the Ashen Sky
(Descendants of Isha, 113). After a unit moves from one planet to another, such as through the use of the Mobile keyword, you may exhaust this support to give that unit a heightened ATK for its next attack. With a Mobile warlord, you can be sure that youll trigger this Reaction almost every turn, increasing the power of your attacks and destroying the enemies of the Eldar craftworlds.
Finally, in some cases, even a Mobile unit cant move fast enough between the planets to reach your objective. In those cases, you can play one of the two copies of
Cry of the Wind
(Descendants of Isha, 115) included in this signature squad. By playing this free event after a unit moves from one planet to another, you can move that unit to an adjacent planet. This naturally increases the mobility of your Mobile units, but it also gives you a response to your opponents Mobile units, allowing you to force them back to the planet they originally came from or draw them further on into a deadly trap. However you use Cry of the Wind, its certain to secure air superiority for your warlord and his armies.
Elegant and Deadly
When you field Baharroth as your warlord, the Swooping Hawks are yours to command, but this War Pack also offers you the torture and dread experimentations of Urien Rakarth. Who will you lead to command the Traxis sector the Eldar or the Dark Eldar?
Make your choice, and pre-order the Descendants of Isha War Pack at your local retailer!
Discuss this article
in our forums!
© Games Workshop Limited 2014. Games Workshop, the Games Workshop logo, Warhammer, the Warhammer logo, the foregoing marks respective logos and all associated marks, logos, places, names, creatures, races and race insignia/devices/logos/symbols, vehicles, locations, weapons, units and unit insignia, characters, products and illustrations from the Warhammer World are either ® or TM, and/or © Games Workshop Ltd 2000 - 2014, variably registered in the UK and other countries around the world. This edition published under license to Fantasy Flight Publishing Inc. Fantasy Flight Supply is a trademark of Fantasy Flight Publishing, Inc. Living Card Game, LCG, the LCG logo, Fantasy Flight Games, and the FFG logo are registered trademarks of Fantasy Flight Publishing, Inc. All rights reserved to their respective owners.
Source: Master of Hawks (https://www.fantasyflightgames.com/en/news/2015/2/18/master-of-hawks/)
Title: FFG:It Is the Future You See
Post by: RSSFeeder on 13 March 2015, 11:45:14
It Is the Future You See
Always in motion is the future.
Yoda
X-Wing fans, take heed! The galaxys Scum and Villainy are headed to your tabletops and X-Wing games late next week!
Given a jump start by the sixth wave of X-Wing starship expansions, the Scum and Villainy faction will soon contest the Imperial Navy and Rebel Alliance for control of some of the galaxys most lucrative sectors. For the past few months, weve taken a look at what this factions ships and upgrades have to offer the game. Today, two-time World Champion Paul Heaver takes a look at the impact that all these ships and upgrades, taken together, may have upon the ever-evolving metagame.

World Champion Paul Heaver on the Post-Scum Metagame
As we look forward to the introduction of the new Scum and Villainy faction, we X-Wing players face an unusual situation. The sheer number of pilots and upgrades presents a dizzying array of options, and its hard to know where to start building squads for the new metagame. This article will explain some of what I expect well see as popular archetypes as the new ships are released.
As each new wave is released, I try to figure out how the new cards will fit into the current metagame. I currently classify most ships into three pillars, as I call them:
- Turrets: Turret ships tend to be durable and can always keep fire on a target. They also tend to be expensive compared to other ships that have the same number of attack dice. They prey on arc-dodgers.
Han Solo
,
Dash Rendar
, and the VT-49 Decimator pilots are popular.
- Jousters: Joust ships all sport the best durability-to-cost or attack-to-cost ratios in the game. Almost always, they are flown by non-unique pilots that you point at the opposing side and fire. They dont have many tricks, but its hard to beat them point-for-point for health, agility, or red dice. They tend to beat turrets. This pillar is dominated by TIE fighters, Z-95 Headhunters, and B-wings.
- Arc-dodgers: Arc-dodgers cost more than the jousters, and will crumble under focused fire. However, they excel at avoid jousting ships firing arcs and can chew up most jousters over a number of turns. They almost always have some sort of nonstandard movement available to them, such as decloak, boost, or barrel rolls. The TIE phantom is this pillars current ruler.

A 360-degree view of the TIE phantom, arc-dodger extraordinaire.
Few lists are composed solely of ships belonging all to the same pillar. Usually, the best lists balance synergies between mixed ship types. My World Championship list had a turret backed up by a few jousters, for example. The list I beat in the finals was an arc-dodger with a strong jousting component. Most lists that you see in high-end tournament play feature only the best ships from these three categories, with other ships that dont fit in falling behind.
Wave V increased the power of turret ships, as the YT-2400 and VT-49 Decimator arrived on the scene. In the current metagame, arc-dodging has gotten more difficult. You can also find more two-ship builds than ever before, as the new ships have a hefty point cost associated with them. We can begin our exploration of how the X-Wing metagame might change by asking the question: how will the new upgrades from Wave VI fit into the current metagame?
For the most part, they wont fit into the current power builds. Few of the upgrades are playable outside of the Scum faction, but these few will still make a splash. Rather than further elevating the current power builds, these upgrades will lend greater strength to squads that have recently taken a hit.
 The first of these upgrades is
Autothrusters
. I imagine that every TIE interceptor and A-wing will be equipped with these, and I expect these ships to see more play. These arc-dodging ships will survive longer against, and inflict more damage upon, the turrets that prey on them. The next is the
Mangler Cannon
, which will be used by the
Outrider
to remove the donut hole that their
Heavy Laser Cannons
gave them. At thirty-nine points, a
Wild Space Fringer
with Outrider and a Mangler Cannon is the cheapest three-attack, Range 13 turret you can find. For the jousting ships, the Y-wing might make a comeback. It was seen in Rebel swarms as a durable cheap ship, but it has fallen out of favor. With the new
BTL-A4
Title, you can add an ion shot to the standard attack at a reasonable price.
The first of these upgrades is
Autothrusters
. I imagine that every TIE interceptor and A-wing will be equipped with these, and I expect these ships to see more play. These arc-dodging ships will survive longer against, and inflict more damage upon, the turrets that prey on them. The next is the
Mangler Cannon
, which will be used by the
Outrider
to remove the donut hole that their
Heavy Laser Cannons
gave them. At thirty-nine points, a
Wild Space Fringer
with Outrider and a Mangler Cannon is the cheapest three-attack, Range 13 turret you can find. For the jousting ships, the Y-wing might make a comeback. It was seen in Rebel swarms as a durable cheap ship, but it has fallen out of favor. With the new
BTL-A4
Title, you can add an ion shot to the standard attack at a reasonable price.
So each pillar gets at least one new card to add to their ships, but none of them add to the most popular ship in the category. This is great because it adds more options to your Rebel and Imperial lists, and more variety in each round of an event.
And thats before even considering the Scum cards!
Competitive Scum and Villainy Squadrons
The Scum faction is great at tailoring a ship for the role you want it to play. They have more upgrade slots, and their illicit and Salvaged Astromech slots are unique to their ships. As such, its very hard to place them into neat categories, which fits the factions style. For example, look at a
Binayre Pirate
with a
"Hot Shot" Blaster
; its a jouster that can double as a turret for a round.
Serissu
with
Elusiveness
and a
Stealth Device
combines well with five Binayre Pirates with Hot Shot Blasters. This squad has less aggression than a typical swarm, but it forces your opponents into hard choices. Will they fire at the four-agility Elusive M3-A interceptor at long range, or will they slowly fight through your defensive rerolls to take down the more threatening ships?
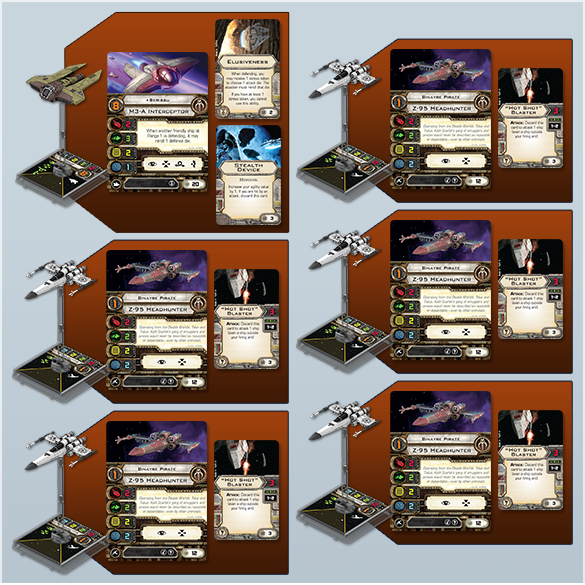
Likewise, I think a lot of the first Scum lists are going to be one or two named ships, with a contingent of smaller ships such as Z-95 Headhunters or M3-A interceptors to back them up. Its a solid start to try out the faction, as you can see what your anchor ships can do, while using the accompanying rabble to add more health and damage. Still, the faction cant really support the brute force squads like the TIE swarm or the Rebel swarm of four B-wings and one Z-95 Headhunter. The Scum need to use their unique tricks.
The anchor ship can vary based on what you want to do with it. The StarViper, preferably with
Virago
and
Advanced Sensors
, can end up just about anywhere.
Guri
, loaded down with
Push the Limit
, Virago, Autothrusters, Advanced Sensors, and
Inertial Dampeners
, is extremely hard to pin down. You can then support this arc-dodger with such allies as three
Cartel Spacers
with
"Heavy Scyk" Interceptor
Titles and Mangler Cannons.

The Firespray-31 also works great as an anchor ship. All of the new pilots are good at what they do, and one loaded Firespray-31 plus a few Headhunters is a solid build. With an Illicit slot added to its already impressive array of upgrades, this ship can easily fulfill many different roles.
Kath Scarlet
loaded with an
Engine Upgrade
, Push the Limit, and
K4 Security Droid
flies a lot differently than
Emon Azzameen
with
Experimental Interface
, the
Andrasta
Title and three
Proximity Mines
!

The Aggressor is almost never going to be seen as a lone anchor ship. This ship works best in pairs, each with the
IG-2000
Title. Or, in epic games, use all four! With the large number of green moves and actions on its action bar, I suspect Push the Limit will be a popular upgrade, as well as Advanced Sensors, which will let you boost before performing a
Segnor's Loop
. Your style of play varies wildly depending which two Aggressors you bring:
IG-88A
and
IG-88B
are more offensively oriented, while
IG-88C
and
IG-88D
are more defensive. However, with all the points youll be spending on these ships, you cant fit much else.
I suspect that the factions Y-wings and HWK-290s will be used as support, when you dont feel like filling your anchor list with more Z-95 Headhunters or cannon-toting M3-A interceptors. Both offer excellent options, but arent quite powerful enough to star as the sole anchor of a list. Both ships perform excellently with Engine Upgrades and a turret, to dodge arcs and fire unanswered with the shorter range turrets that they carry.
Take
Kavil
with an
Autoblaster Turret
, Engine Upgrade, Push the Limit, and
Unhinged Astromech
as an example. He flies like a TIE interceptor, and can generally roll three attack dice whose hits cant be cancelled. He doesnt cost much either; you can still pair him with a
Mandalorian Mercenary
with
Gunner
and two
Black Sun Soldiers
.
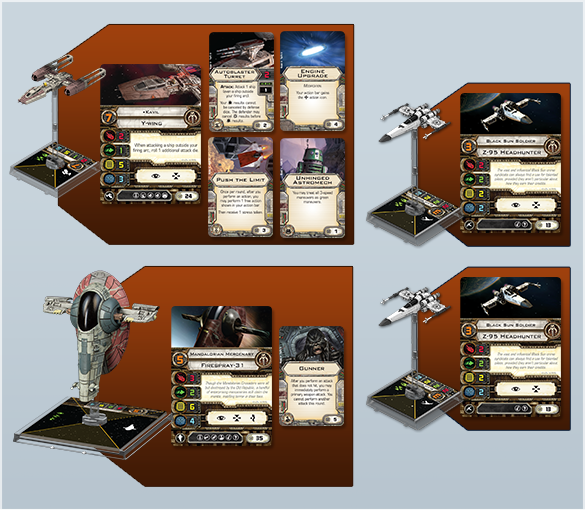
If you want to shoot elite targets down more easily,
Torkhil Mux
is worth consideration. With an
Ion Cannon Turret
,
Intelligence Agent
, and an Engine Upgrade, he can get into range and weaken his target enough for a
Predator
-equipped Firespray-31 to finish it off.
So thats what I suspect well see in the Wave VI metagame: the few changes to the pillars of Rebel and Imperial play will spur some of the less popular ships to new life, and the Scum faction will favor the use of one or two anchors, plus a handful of small ships. However, this still leaves a lot of room for variety, and I suspect the games you play against Scum players will be vastly different, based on the pilots and upgrades they choose!
Thanks, Paul!
X-Wing Wave VI arrives at retailers late next week. What will your Scum squadrons look like? Will you run a single anchor ship? Will you run dual Aggressors? Do you have a completely different list in mind? As you wait for Wave VI to hit your favorite local retailer, head over to our community forums, and share your builds with the rest of our X-Wing community!
Discuss this article
in our forums!
Source: It Is the Future You See (https://www.fantasyflightgames.com/en/news/2015/2/19/it-is-the-future-you-see-wave-6/)
Title: FFG:The Thousand Young
Post by: RSSFeeder on 16 March 2015, 10:45:16
The Thousand Young
Ever Their praises, and abundance to the Black Goat of the Woods. Iä! Shub-Niggurath! The Goat with a Thousand Young!
H.P. Lovecraft, The Whisperer in Darkness
Fantasy Flight Games is proud to announce the upcoming release of The Thousand Young, the ninth deluxe expansion for Call of Cthulhu: The Card Game!
Deep in the bowels of the fetid swamps and shadowed woods of Louisiana, evil lurks. Dark Priests of hidden religions make blood sacrifices in the name of the All Mother, The Black Goat of the Woods, the mighty and terrible Shub-Niggurath. Soon this darkness will cover all of the city of New Orleans, for her thousand young are spreading and ready for flesh

With its 165 cards (three copies each of 55 different cards), The Thousand Young adds new depth and resilience to the Shub-Niggurath faction. Nearly two-thirds of the expansions cards bolster the All Mothers ranks with Ghouls, Dark Young, Monsters, Mi-Go, and Cultists. Youll also find ghastly new Locations, foul Curses, and a new version of the Villainous Dark Mother, herself.
Still, the Black Goat of the Woods is not the regions only corrupting influence. In the heart of the Big Easy, Nyarlathoteps many Avatars play a deep and complicated game, manipulating human agencies and monstrous cultists, alike. These Avatars infiltrate every one of the games eight factions, even as the factions all gain mysterious new Locations that afford players new interactions with the top cards of their decks.
Spawning a Thousand Young
"Of Their semblance can no man know, saving only in the features of those They have begotten on mankind; and of those are there many sorts."
H.P. Lovecraft, The Dunwich Horror
 One of the most terrifying and mysterious of the Great Old Ones, Shub-Niggurath is known primarily as the All Mother whose worship was banned in nearly every nation and throughout all eras of human history. Still, her influence continues to shape the world, unabated. Her worshippers include the foul, towering Dark Young; the strange, fungoid, aliens known as Mi-Go; and human Cultists who give themselves to her, aspiring to be transformed by her powers or to help her populate the world with her monstrous spawn.
All of these appear in The Thousand Young, as do a plethora of Servitors, Undead, and Chthonians. In total, the ranks of Shub-Niggurath are expanded by no fewer than sixty-nine characters (three copies each of twenty-three different characters).
Chief among them, of course, is the All Mother herself,
Shub-Niggurath
(The Thousand Young, 23). In The Thousand Young, Shub-Niggurath appears as an eight-cost Ancient One, complete with her standard Villainous and Invulnerable keywords, as well as a powerful Response that allows you to spawn a whole unholy horde of minions when you play her. Finally, she also benefits from the expansion's new Resilient keyword.
Appearing on more than a dozen different cards in The Thousand Young, the Resilient keyword ensures that your cards will see play, maybe even multiple times. Whenever a card with the Resilient keyword would leave play, its controller may instead return to the top of its owner's deck. Because this is a passive effect, it cannot be cancelled, and that means that you can keep your Resilient characters, like Shub-Niggurath, from being shuffled into your deck or even from being hit by the growing number of "remove from the game" effects, to which The Thousand Young adds another handful.
Moreover, because Shub-Niggurath and Resilient cards allow you a new range of interactions with the top of your deck, they add to the power of such cards as
Frenzied Ghoul
(The Thousand Young, 7) and
Dark Sargassum
(The Thousand Young, 22), both of which you can bolster by revealing Shub-Niggurath or some other powerful Resilient character from the top of your deck.
In Call of Cthulhu: The Card Game, the Shub-Niggurath faction has long excelled at overrunning its opponents with its monstrous hordes, and The Thousand Young only serves to ensure that this strategy will remain viable for the foreseeable future, reinforcing it with the new version of Shub-Niggurath, her myriad new followers, and the Resilient keyword.
Dark God of a Thousand Forms
"It was then that Nyarlathotep came out of Egypt. Who he was, none could tell, but he was of the old native blood and looked like a Pharaoh."
H.P. Lovecraft, Nyarlathotep
The unfathomable evils of Shub-Niggurath and her followers aren't the only malign influences that The Thousand Young introduces to the sweltering nights of darkest Louisiana. Each of the game's factions also gains a new Avatar of Nyarlathotep, even as the Black Man appears himself within the expansion in the form of
The Crawling Chaos
(The Thousand Young, 36).
 Like Shub-Niggurath, this version of Nyarlathotep is both Villainous and Resilient, and his Resilient keyword allows you to create any number of combinations with his Avatars, each of which is also Resilient. First, when you play Nyarlathotep, you can return one of his Avatars to your hand to lower his cost by three. Then, whenever you succeed at a story to which Nyarlathotep is committed, you can sacrifice him to put one of his Avatars into play, already committed to an unresolved story. Played well, you may be able to use Nyarlathotep's disguises to win uncontested success tokens at a story to which no one was committed before you began resolving struggles, and if Nyarlathotep's new disguise happens to be that of
Harley Warren
(The Thousand Young, 44), you might just be able to win a story and place one success token at each of the game's other stories.
Like Shub-Niggurath, this version of Nyarlathotep is both Villainous and Resilient, and his Resilient keyword allows you to create any number of combinations with his Avatars, each of which is also Resilient. First, when you play Nyarlathotep, you can return one of his Avatars to your hand to lower his cost by three. Then, whenever you succeed at a story to which Nyarlathotep is committed, you can sacrifice him to put one of his Avatars into play, already committed to an unresolved story. Played well, you may be able to use Nyarlathotep's disguises to win uncontested success tokens at a story to which no one was committed before you began resolving struggles, and if Nyarlathotep's new disguise happens to be that of
Harley Warren
(The Thousand Young, 44), you might just be able to win a story and place one success token at each of the game's other stories.
Of course, it's not just Nyarlathotep's ability to shift from one guise to another that's remarkable. Because he bears the Resilient keyword, his sacrifice need never be truly permanent. You could, instead, merely return him to the top of the deck, in order to play him again on your next turn. And then you could swap him out for some other Avatar. After all, Nyarlathotep is the Outer God of a Thousand Faces, a figure wholly inscrutable by human logic, and he has a long history of appearing where he wants, when he wants, in a guise that is both familiar and frightening to those who behold him.
A Thousand Different Directions
"Iä! Shub-Niggurath! As a foulness shall ye know Them. Their hand is at your throats, yet ye see Them not; and Their habitation is even one with your guarded threshold."
H.P. Lovecraft, The Dunwich Horror
 While the All Mother's progeny ensure that The Thousand Young offers the Resilient keyword a potent introduction into Call of Cthulhu: The Card Game, the expansion doesn't focus as much on any single subtype within the faction. Where the Seekers of Knowledge deluxe expansion allowed fans of Miskatonic University to send Explorers across the globe, and where Denizens of the Underworld added a great measure of depth and focus to the Criminal subtype, The Thousand Young instead offers a wide array of subtypes and abilities, some of which allow you to bring characters into play in surprising fashion, some of which allow you to trigger effects when characters enter play, and some of which continue to support the faction's strengths in support destruction.
Instead of shedding a new light on some clear deck-building path, The Thousand Young leads you into the darkest bayous of Louisiana, where the trees and murky waters conceal all manner of evils, and the expansion offers you a tremendous measure of power to serve Shub-Niggurath in the fashion of your choice. Will you focus on devouring your opponents with Ghouls at Night? Will you muscle your way through stories with your unending hordes of Dark Young? Will you ally yourself with Nyarlathotep and use his Avatars to your benefit? Or will your Cultists usher Shub-Niggurath, herself, into the world?
The choice is yours. The Thousand Young is due to arrive at retailers everywhere late in the second quarter of 2015!
Discuss this article
in our forums!
The copyrightable portions of Call of Cthulhu: The Card Game are © 2008 - 2013 Fantasy Flight Publishing, Inc. Call of Cthulhu is a registered trademark of Chaosium, Inc. Living Card Game, LCG, LCG logo and Fantasy Flight Supply are trademarks and/or registered trademarks of Fantasy Flight Publishing, Inc. All rights reserved to their respective owners.
Source: The Thousand Young (https://www.fantasyflightgames.com/en/news/2015/2/19/the-thousand-young/)
Title: FFG:Lead the Sortie
Post by: RSSFeeder on 16 March 2015, 10:45:16
Lead the Sortie
From every rampart waved the banner of House Tully: a leaping trout, silver, against a rippling blue-and-red field. It was a stirring sight, but it did not lift her heart.
George R.R. Martin, A Game of Thrones
The clansmen of the Vale broil forth from the Mountains of the Moon, eager to avenge the wrongs perpetrated against them by House Arryn. In Essos, Dothraki khalasars ride to war across seas of grass, while in the heart of Westeros, the men of House Tully prepare to defend their home from those who would take it by force. Now, you can bring all of these characters, factions, and Houses to your games of A Game of Thrones: The Card Game. The Valemen Chapter Pack is now available online through our webstore and at your local retailer!
The Valemen continues the major themes of the Wardens cycle, bringing additional support to iconic characters, trait based decks, and Limited Responses. With sixty new cards (three copies each of twenty distinct cards), this Chapter Pack brings plenty of exciting new options for every House, including a new Castle plot and recognizable characters like Euron Crows Eye and Ser Ilyn Payne.
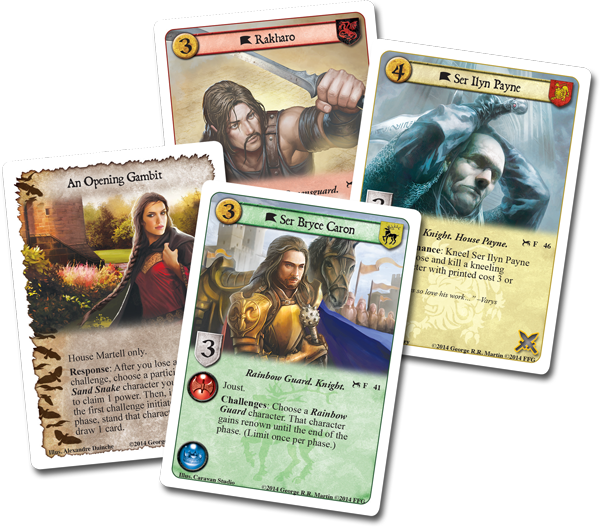
On the Attack
In The Valemen, every House receives powerful cards to support new strategies and play styles. But the warriors of one House in particular prepare to press the attack, sallying forth from their defensive position to take the fight to their opponents. Take advantage of the new offensive options available to House Stark through their allies House Tully in this Chapter Pack!

The first House Tully card in this expansion is
Blackfish's Vanguard
(The Valemen, 53). This character is an Army of House Tully, and it offers several important tactical options. Firstly, it bears the renown and deadly keywords, simultaneously rewarding you for winning challenges and dissuading your opponent from defending himself. Whats more, Blackfishs Vanguard boosts the initiative value of your revealed plot by an amount equal to the number of House Tully characters you control. In a dedicated House Tully deck, this initiative boost can quickly grow, giving you much greater control over the outcome of the challenges phase. With one or more copies of Blackfishs Vanguard, you can ensure that youll seize the initiative when you need it.
Not every House Tully warrior is as naturally deadly as Blackfishs Vanguard. Thats where the training of
Ser Desmond Grell
(The Valemen, 52) comes in handy. This characters ability reads, Challenges: Choose a House Tully character. That character gains deadly until the end of the phase. (Limit once per phase.) In most situations, the mere presence of Ser Desmond Grell is enough to deter your opponent from defending. Since he can give a character the deadly keyword after your opponent has declared defenders, your opponent faces the threat of losing a character whenever he chooses to defend. Whether your opponent lets your challenges through or sacrifices his own characters to defend them, youre sure to come out ahead.
Of course, you dont need to be content with the standard rewards for winning a challenge.
Maester Vyman
(The Valemen, 51) offers you an additional benefit when you win a challenge in which at least one House Tully character participated. After you win this challenge, you may reveal the top card of your deck and add it to your hand, bringing you new options without counting towards your draw cap. As an added bonus, Maester Vyman bears a Learned crest, offering you more potential control of your opponents actions by combining him with
Outwit
(The Isle of Ravens, 80).
Take Command of Your House
The intrigues and battles of Westeros lie before you. Call your banners and prepare to make your bid for the Iron Throne. The Valemen Chapter Pack is now available at your local retailer!
Discuss this article
in our forums!
The copyrightable portions of A Game of Thrones: The Card Game and its expansions are © 2008 - 2013 Fantasy Flight Publishing, Inc. Licensed by George R.R. Martin. The names, descriptions, and depictions applied to this game are derived from works copyrighted by George R.R. Martin, and may not be used or reused without his permission. A Game of Thrones: The Card Game, its expansion titles, Living Card Game, LCG, the LCG logo and Fantasy Flight Supply are trademarks and/or registered trademarks of Fantasy Flight Publishing, Inc. All rights reserved to their respective owners.
Source: Lead the Sortie (https://www.fantasyflightgames.com/en/news/2015/2/20/lead-the-sortie/)
Title: FFG:Lead the Fighter Attack
Post by: RSSFeeder on 16 March 2015, 10:45:16
Lead the Fighter Attack
Admiral, were in position. All fighters accounted for.
Lando Calrissian
In our last two previews of Star Wars: Armada, we looked at the games first capital ships, for both the Imperial Navy and the Rebel Alliance. We looked at how each ships different configurations offer it a range of tactical flexibility, as do the many titles and upgrades available in the Core Set and the first wave of expansions.
However, your capital ships are only part of the equation. Your starfighter squadrons can also make a major impact, but you have to use them properly. A good fleet admiral wont deploy a screen of TIE fighters to perform a job better assigned to TIE bombers, nor use TIE bombers to intercept enemy fighters when TIE interceptors would better perform that task.
In todays preview, then, well take a look at the eight different fighter squadrons available in the Core Set and first wave of expansions, and well explore some of the ways you may be able to make good use of their different abilities.
Imperial Fighter Squadrons

Imperial commanders are taught to take advantage of their superior numbers and firepower to overwhelm their foes, and this strategy relies in large measure upon the Empires seemingly limitless supply of TIE fighters.
In Armada, your standard TIE Fighter Squadron costs just eight of your 300 fleet points. For that investment, you gain a battery armament of one blue attack die and, more importantly, an anti-squadron armament of three blue attack dice. As one might expect, this makes it an extremely efficient anti-fighter unit, especially when you take into consideration its Swarm ability, which allows it to reroll one of its attack dice whenever it attacks a squadron engaged with another squadron.
Typically, that another squadron would be another TIE Fighter Squadron, but if you have a few fleet points to spare, it could just as well be
"Howlrunner"
or
"Mauler" Mithel
. These TIE fighter aces both cost roughly twice as much as a standard squadron, but in fleets that want to make short work of enemy fighters, theyre still a bargain. Both add considerable damage potential, and they also gain tremendous resilience from defense tokens that allow them to halve the damage from one attack and completely ignore the damage from another.
 You can also add resilience to your fighter squadrons by upgrading to the
TIE Advanced Squadron
. The TIE Advanced Squadron features five hull and can shield your other fighter squadrons with its Escort ability. Squadrons with Escort prevent squadrons they are engaged with from performing attacks against squadrons without Escort.
You can also add resilience to your fighter squadrons by upgrading to the
TIE Advanced Squadron
. The TIE Advanced Squadron features five hull and can shield your other fighter squadrons with its Escort ability. Squadrons with Escort prevent squadrons they are engaged with from performing attacks against squadrons without Escort.
Of course, the TIE Advanced is also the starfighter flown by the legendary Sith Lord
Darth Vader
. Drawing upon the dark side of the Force, Darth Vader adds an extra black die to all of his attacks against enemy fighter squadrons, and whenever he scores a
 result, he adds one extra damage to his damage total.
Meanwhile, if youre looking to race your fighters across the battlefield as quickly as possible, you may wish to consider investing in one or more
TIE Interceptor Squadrons
. With a speed of 5, this starfighter squadron is as fast as they come, and for just eleven fleet points, its pilots can Swarm their foes, roll four blue attack dice, and gain Counter 2.
 The Counter X keyword allows a squadron to attack any squadron that performs a non-counter attack against it, using an anti-squadron armament of X blue dice. Accordingly, your foe might wish to pick apart your other squadrons first, but
Soontir Fel
s unique ability punishes anyone who pursues this strategy. Then, because Soontir Fel and your other TIE Interceptor Squadrons all have the Swarm keyword, they can have their Counter attacks further boosted by Howlrunner.
The Counter X keyword allows a squadron to attack any squadron that performs a non-counter attack against it, using an anti-squadron armament of X blue dice. Accordingly, your foe might wish to pick apart your other squadrons first, but
Soontir Fel
s unique ability punishes anyone who pursues this strategy. Then, because Soontir Fel and your other TIE Interceptor Squadrons all have the Swarm keyword, they can have their Counter attacks further boosted by Howlrunner.
While most Imperial fighter squadrons excel at engaging other fighter squadrons,
TIE Bomber Squadrons
do not. They have the Heavy ability, which means they do not prevent engaged squadrons from attacking ships or moving. Instead, TIE Bomber Squadrons gain the Bomber ability.
Normally, when fighter squadrons attack a capital ship, they ignore all results other than
 . However, ships with the Bomber ability add their
results to the damage total and can even resolve critical effects. This means that, at just nine fleet points, the TIE Bomber Squadron can be an impactful addition to any fleet, as its battery armament consists of one black die which, with a little luck, can deal two damage in a single attack.
. However, ships with the Bomber ability add their
results to the damage total and can even resolve critical effects. This means that, at just nine fleet points, the TIE Bomber Squadron can be an impactful addition to any fleet, as its battery armament consists of one black die which, with a little luck, can deal two damage in a single attack.
Rebel Fighter Squadrons

The Rebellions fighter squadrons feature the same keywords and abilities as the Empires, but they feature them in different combinations and with different, speeds, hull values, anti-squadron armaments, and battery armaments. Altogether, they feel like drastically different starfighters.
For example, the
X-wing Squadron
features the Escort keyword and a hull value of 5, just like the TIE Advanced Squadron. However, its speed is one lower, at 3, and it gains the Bomber ability, along with a potent battery armament of one red die. Altogether, its a more rounded fighter squadron than either the anti-fighter TIE Advanced Squadron or the TIE Bomber Squadron, but at thirteen fleet points, its also a larger investment than either of those Imperial squadrons.
Of course, the X-wing is also the starfighter of choice for many of the Rebellions greatest aces, and
Luke Skywalker
and
Wedge Antilles
are about as great as they come. With his battery armament of one black die and his ability to ignore enemy shields, Luke Skywalker excels at attacking enemy ships, potentially crippling them with devastating critical effects. On the other hand, Wedge Antilles is an unparalleled dogfighter, who can fire as many as six blue dice at an enemy squadron that has already been activated.
Here, we begin to see some of the heroics that one might expect from the Rebellions veterans. While you could simply have Wedge Antilles wait to activate until after his chosen target, you could choose, instead, to have him fly his squadron in formation with
"Dutch" Vander
, who can toggle the activation slider of any squadron he damages.
Both Dutch Vander and the standard
Y-wing Squadron
feature the Bomber and Heavy keywords like the Empires TIE Bomber Squadron. However, for one extra fleet point, the Y-wing Squadron features an anti-squadron armament of two blue dice, instead of one black die. It also differentiates itself from the TIE Bomber Squadron through the addition of one hull point and the loss of one point of speed. More importantly, though, the two starfighter squadrons dont really share equivalent roles.
While the TIE Bomber Squadron is the Empires most effective and dedicated anti-ship squadron, the Rebellions most effective anti-ship squadron is the
B-wing Squadron
. Though its the slowest starfighter squadron in the games first wave, the B-wing Squadron is the one most likely to concern enemy ship captains. It features both the Bomber ability and a battery armament of two dice, one blue and one black. Once you get it into position, the B-wing Squadrons attack dice race to the top of the charts for damage potential versus fleet points.
 B-wing ace
Keyan Farlander
further enhances the B-wings lethality with his battery armament of two black dice and his unique ability, While attacking a ship, if the defending hull zone has no shields, you may reroll any number of dice in your attack pool.
B-wing ace
Keyan Farlander
further enhances the B-wings lethality with his battery armament of two black dice and his unique ability, While attacking a ship, if the defending hull zone has no shields, you may reroll any number of dice in your attack pool.
Finally, while most of the Rebellions fighter squadrons are slower than the Empires, the
A-wing Squadron
offers Rebel players a means of racing quickly into engagements. With its speed of 5, your A-wing Squadron can move swiftly into position to aid your other squadrons, or it can engage your foes early, holding them back from the other squadrons with which you intend to attack enemy ships. Either way, as soon as its locked into a high-speed dogfight, the A-wing Squadrons Counter 2 ability gives it a decided edge.
Lock S-Foils in Attack Position
In Armada, you not only command your fleet, you assemble it. Thus, your path to victory begins with the careful selection of those ships and starfighter squadrons that you intend to take to battle. Will you use squadrons with the Bomber ability to batter enemy ships? Will you utilize interceptors to engage enemy fighters before they can approach your ships? Will you rely upon the talents of a few starfighter aces? The tactical flexibility that squadrons offer is limited only by the fact that you cant spend more than one-third of your fleet points on fighter squadrons.
Theres no denying the raw power of the Star Wars galaxys capital ships, nor that theyre the heart of Armada and its battles. Still, theres always room for personal heroics, and theres always the chance that a single starfighter pilot can turn the tide of battle.
Discuss this article
in our forums!
Star Wars: Armada is an epic two-player game of tactical fleet battles in the Star Wars universe. Massive Star Destroyers fly to battle against Rebel corvettes and frigates. Banks of turbolasers unleash torrential volleys of fire against squadrons of X-wing and TIEs. As Rebel and Imperial fleets collide, it is your job to issue the commands that will decide the course of battle and, ultimately, the fate of the galaxy.
© & TM Lucasfilm Ltd.
Source: Lead the Fighter Attack (https://www.fantasyflightgames.com/en/news/2015/2/23/lead-the-fighter-attack/)
Title: FFG:Live Free
Post by: RSSFeeder on 16 March 2015, 19:45:15
Live Free
Never tell me the odds.
Han Solo
Fly Casual, a sourcebook for the Star Wars®: Edge of the Empire roleplaying game, is now available at your local retailer and in our online store.
As a Smuggler, you thrive on risk and adventure. Youre happy never knowing what your next job might be or where it might take you. You might transport spice for a Hutt kajidic on one trip and ferry stolen medical supplies to a Rebel cell on the next. You dont mind taking on illegal jobs from nefarious crime lords, as long as the pay is good. You just want to avoid Imperial attention, remain independent, and stay alive.
For players who want to experience the thrills, dangers, and freedom of a Smugglers life, Fly Casual introduces new specializations, species, and signature abilities, along with new vehicles, and gear. For Game Masters, it provides copious information about smuggling in the Star Wars galaxy, from ideas for smuggling jobs to guidelines for quick-draw showdowns.

Shady Characters
Weve already previewed the three new specializations Charmer, Gambler, and Gunslinger featured in Fly Casual, along with the three new species: the glamorous and shrewd Falleen, the empathic Gotals, and the aggressive Quarren. All are well-suited to becoming Smugglers, but theres no limit to the careers they might take on. A Falleen could use her grace and intelligence as a Politico or Trader, while a Gotal might use his sensitivity to others emotions as a Doctor in an Outer Rim colony. A Quarren, given the species meticulousness, might find employment as an Outlaw Tech.
Although Smugglers may be Scoundrels, they arent necessarily cynical criminals or Outer Rim low-lifes. Fly Casual offers numerous suggestions for Smuggler backgrounds and Obligations. A Charmer might have been born into a privileged situation in a core world, but gave it all up in order to experience the open skies. A Gunslinger might once have been part of the Imperial military, but then became disillusioned with the Empires policies and left. Your Obligation might come from the notoriety youve gained for flagrantly breaking the law, or you might have a family on your homeworld that you support through smuggling.
No matter your specialization or background, as a Smugglers you are most certainly self-reliant. The new Unmatched Fortune signature ability helps you control your fate. The basic ability allows you to spend two Destiny Points to change the face of a positive die in your pool, making success out of failure, or even a triumph out of a success. If you foresee yourself getting into a lot of tough situations with no obvious exit, you may want the Narrow Escape signature ability. It allows you to spend two Destiny Points and make a Streetwise check: if you pass, you can escape from the present problem unscathed and live to fight, and fly, another day.

The Ship of Your Dreams
Some Smugglers, particularly Gamblers, might be able to sustain their career planetside. But most need a ship to carry their contraband, or at least help them make a clean getaway. Fly Casual features a range of ships suited to smuggling and new attachments so you can customize your chosen vessel. A whisperthrust engine, for example, makes your ship hard to detect at low speeds and can help you avoid getting boarded by Imperial officials. If you do get boarded, cloaked smuggling compartments and a rapid cargo evacuation chute can ensure they wont find any evidence of your illegal merchandise.
A good smugglers ship at a low price is the Starlight-class light freighter, which costs just under 70,000 credits and is incredibly fast at unloading and loading cargo. The sail-like shape of these freighters makes them unmistakeable, but it also makes them difficult to handle and unable to carry too much weight. Nevertheless, for lighter jobs and quick exits, you cant do much better for the price.
One of the best light freighters is the YT-2000, twice as expensive as the Starlight-class freighter, with better handling, better durability, nearly twice the encumbrance capacity, and better guns. YT-2000 was intended to be the pinnacle of the YT light freighter series, but the design was leaked through espionage and production was rushed before all the kinks were worked out. For that reason, keeping a YT-2000 in shape means constant work for a Mechanic or Outlaw Tech but that job could easily become a labor of love.

Occupational Hazards
If smuggling were easy it wouldnt be nearly as much fun. Therefore, Fly Casual offers Game Masters a number of ways to complicate smuggling jobs. To assist you in creating Imperial entanglements, it provides details on the Imperial Customs Office, the Bureau of Ships and Services, and the logistics of hacking transponder codes. If youre staging a heist, you can use some of the detection devices and traps described in Fly Casual. The book even introduces rules for playing hintaro, a game played with chance cubes that is certain to drain your PCs credits unless they know how to beat the odds.
Game Masters may also appreciate the three types of nemeses described: the Patron, the Law, and the Friendly Foe. A Smugglers relationship with his Patron may begin positive, but a failed job or personal offense could turn a Patron into a deadly and powerful enemy. The Law, of course, is seldom on a Smugglers side. The Friendly Foe may have gotten you out of countless scrapes, or even taught you everything you know, but that doesnt mean you can trust him. He might buy a round of drinks only to distract you while he steals your cargo, or hook you up with a spice smuggling job a few days before turning you in to the authorities.

Take to the Skies
Whether youre an ambitious and cunning Charmer looking to pick up the perfect talents, a seasoned Pilot in search of the perfect ship, or a Game Master developing smuggling adventures for your Edge of the Empire campaign, youll find what you need in Fly Casual.
The open skies of the Outer Rim are waiting. Pick up your copy of Fly Casual today!
Discuss this article
in our forums!
Participate in grim and gritty adventures on the fringes of the Star Wars universe with Star Wars®: Edge of the Empire. Edge of the Empire is a complete standalone roleplay system that transports players to some of the shadiest locations in the Outer Rim, the underbelly of the Core Worlds, and everywhere else in-between!
© and Lucasfilm Ltd.
Source: Live Free (https://www.fantasyflightgames.com/en/news/2015/2/23/live-free/)
Title: FFG:Wrath of the Gods
Post by: RSSFeeder on 17 March 2015, 12:45:21
Wrath of the Gods
An axe age, a sword age
shields are riven
a wind age, a wolf age,
before the world goes headlong.
Völuspá stanza 45
Fantasy Flight Games is proud to announce the upcoming release of Wrath of the Gods, the second book in The End of the World roleplaying line!
Strange humanoid creatures, stinking of seaweed, shamble out of Earths oceans as a mind-breaking horror rises from Rlyeh. The massive wolf Fenrir awakens beneath the Scandes mountain range as Jörmungandr, the world-serpent, writhes out of the Pacific. Earthquakes shake the world as Earth itself attempts to eradicate mankind. The supernatural has become irrevocably intertwined with the physical, and youll need all of your skills and talents just to survive for another day. The world will shake beneath the Wrath of the Gods!
Like the other books in The End of the World roleplaying game line, Wrath of the Gods offers you a one-of-a-kind opportunity the chance to play as yourself amidst the tumult and terror of the worlds ending. Five distinct scenarios offer different ways the world might end as ancient deities return to save or destroy humanity. With a unique scenario structure, dozens of possible adversaries and encounters, and an elegant, narrative rules system, Wrath of the Gods pulls you as close as you can (safely) come to the end of life as we know it.

The Hand that Holds the Sword
Most roleplaying games invite you to step outside of yourself into a character that you imagine perhaps a reptilian shaman or a stealthy gnome assassin. The End of the World is different: it gives you the chance to play as yourself in the midst of a divine apocalypse! Before your first game of Wrath of the Gods, youll create an abstracted version of yourself, focusing on six characteristics: dexterity, vitality, logic, willpower, charisma, and empathy. These characteristics help determine exactly what you are capable of as you take up arms alongside the Norse gods or negotiate with warriors from the ancient Mayan civilization.

In addition to these characteristics, youll create positive and negative features to further define yourself within the game. Features are much more unique than characteristics these are the abilities, weaknesses, and quirks that make you unique, divided into physical, mental, and social categories. In the game, your features can affect anything you do: positive features give you an edge when you try to complete a related task, while negative features can cause you to suffer more stress from certain tasks. For example, you may have the Long-Distance Runner positive feature in the physical category, which will help you outrace an unexpected Deep One attack. However, you may also have to find a way to deal with the Gets Sick Easily negative feature a feature that Pestilence, one of the Four Horsemen, is certain to exploit. Whatever makes you different, you can use features to weave it into your character in Wrath of the Gods.
After youve created your character, youre ready to begin one of the five scenarios included in Wrath of the Gods. No matter which scenario you play, every game of Wrath of the Gods starts in your hometown. Youll hide from trolls and goblins in familiar buildings and parks, and youll have to use whatever gear and weapons you have nearby to survive when every animal on Earth suddenly turns against humanity. Will you stay put and attempt to fortify your home against Mayan warriors, or venture out in search of a more secure shelter and risk the attention of a fallen angel? A wooden baseball bat may be your best defense against a draugr or other monsters until you can find more suitable weapons. Whats more, adequate supplies of food and medicine quickly become difficult to find in humanitys last days, and any expedition bears the constant risk of being captured and tortured by Deep Ones or caught in a unexplainable volcanic explosion.
Surviving the Apocalypse and Beyond
Your starting place and hometown may remain the same between games, but each of the five scenarios in Wrath of the Gods offers a very different look at how the supernatural might end civilization. The ancient Mayan apocalypse may come to pass, along with the return of the Mayan people and the feathered serpent, Quetzalcoatl. You may find the events foretold in the Book of Revelation unfolding around you as the Four Horsemen ravage the world. Earth itself may reject humanity, causing animals to turn on their masters and plants to grow at unbelievable speeds. The Norse gods may return to the world to meet their fated opponent as Ragnarök explodes around you. Finally, Cthulhu may rise from his resting place in the heart of the Pacific ocean, heralded by cultists and Deep Ones and bringing untold terror and insanity to every inhabitant of Earth.
Each scenario offers profiles for the NPCs you may meet, as well as plenty of locations with lists of possible encounters. Whether youre fleeing the titanic battle between Thor and Jörmungandr, reasoning with a trigger-happy gang of looters, or attempting to outwit a hunting panther, these NPC profiles and possible encounters give you the tools to flesh out the end of the life as we know it.

Whichever scenario you play, Wrath of the Gods offers a unique structure that splits each scenario in two. The first half of the scenario focuses on the initial furor and panic of the apocalypses outbreak. Countless people die in the first days of the apocalypse, but for those who survive, a new normality is eventually established in the post-apocalypse. The post-apocalypse may lack the thrashing fury and danger of the apocalypses first spasms, but in many cases, the post-apocalypse world is more dangerous than ever. For example, the apocalypse may chronicle Cthulhus rise from the Pacific and his rampage across the world, while the post-apocalypse challenges you to survive as Deep Ones and Star-Spawn systematically hunt down humans for sacrifice.
The flexible scenario structure used in Wrath of the Gods enables you to run whatever campaign fits you and your players. You may plan a one-session event, inviting your players to survive as long as they can in the chaos of Armageddon, or you may run a campaign spanning years as your characters live through Earths initial assaults on human technology and civilization and learn to forge a new life in the untamed wilderness of the post-apocalypse.
How Can Man Die Better?
The gods descend to Earth, and you and your companions must find some way to survive the divine wrath. Whether you take up arms with heroes of yore, ambush a hunting Star-Spawn, or travel through the trackless forests that consume our cities, youll find new adventure and thrills at the end of the world with Wrath of the Gods!
Look for Wrath of the Gods at your local retailer in the second quarter of 2015.
Discuss this article
in our forums!
The copyrightable portions of The End of the World RPG are © 2014 Fantasy Flight Publishing, Inc. The End of the World is a trademark of Edge Entertainment and used under license.
Source: Wrath of the Gods (https://www.fantasyflightgames.com/en/news/2015/2/24/wrath-of-the-gods/)
Title: FFG:The Secret Order
Post by: RSSFeeder on 17 March 2015, 21:24:28
The Secret Order
"Blake stooped over the gleaming bones and noted their peculiar state. Some of them were badly scattered, and a few seemed oddly dissolved at the ends. Others were strangely yellowed, with vague suggestions of charring. This charring extended to some of the fragments of clothing. The skull was in a very peculiar statestained yellow, and with a charred aperture in the top as if some powerful acid had eaten through the solid bone."
H.P. Lovecraft, The Haunter of the Dark
For the Greater Good, the eighth deluxe expansion for Call of Cthulhu: The Card Game, will soon bolster the Agency's ranks with new characters, supports, events, and conspiracies. In our earlier previews, we've looked at how these cards add new strength to the Government subtype, how they bury the truth beneath layers of conspiracy, and how they add new characters and new strengths to each of the game's eight different factions. However, we have not yet seen all that this expansion has to offer; there is another order we have not yet explored.
Much as the Seekers of Knowledge expansion introduced Explorers to Miskatonic University and The Key and the Gate introduced Yithians to Yog-Sothoth, For the Greater Good introduces a new subtype to the Agency, Hunter. Even among the ranks of the Agency's covert operatives, these new Hunters are mysterious figures. Their very existence borders on mythical, and though they're bound to make a powerful impact upon the faction's play style, they don't appear in the same numbers as the Yithians first appeared, nor with the same focus on synergies as Miskatonic University's Explorers. Instead, as we shall see, the expansion's fifteen Hunters (three copies each of five different characters) are more individualistic and bring wildly different abilities to the table.
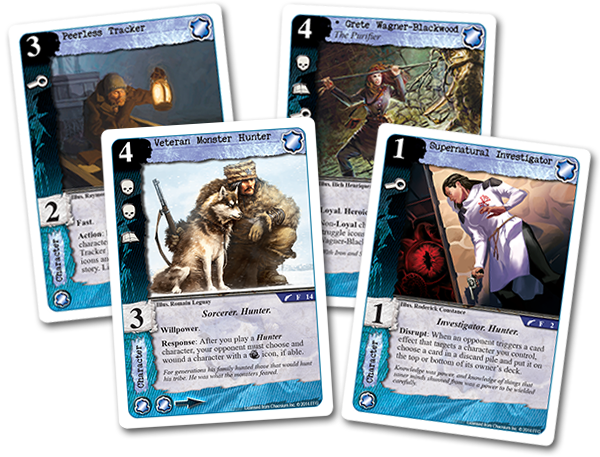
Still, there is a unifying focus that lies at the heart of this new subtype, as developer Damon Stone reveals.
Developer Damon Stone on the Hunters of For the Greater Good
One of the new features of For the Greater Good is the introduction of the Hunter subtype, which denotes the members of the secret order, Hunters of Ardenne. The Hunters tirelessly continue a great work that began within the Order of Saint Hubert, patron saint of mathematicians, hunters, and knights. After one of the Order's knights survived an encounter with some strange thing that he realized saw him as prey, he turned to his brothers and sisters in order to make sense of the entity. Those that joined him in his efforts eventually formed an order within the Order, dedicated to studying the most mysterious and terrifying creatures that encroached upon the domains of man.
It wasnt until Abbess Allegria Di Biase came to prominence that the Orders secret cabal broke away and renamed itself Hunters of Ardenne, and they took upon themselves a new purpose, not just to study the mysteries and horrors, but find a way to fight against them. And fight they did, drawing upon both modern science and absolute faith to push back against all entities that would seek dominion over humankind.
 Mechanically, the Hunters are characters whose abilities are geared toward giving you the advantage during story resolution, rather than manipulating the game state outside of the story phase. For example, the
Relentless Stalker
(For the Greater Good, 5), boasts both Willpower and Toughness, making it easier for him to survive the dangerous Terror and Combat struggles, and his two Combat icons and Combat struggle booster can even help him to hold a story against much larger numbers. Meanwhile,
Grete Wagner-Blackwood
(For the Greater Good, 12) has such a commanding presence and gains such strength from her zealotry that characters who are unable to match her in their loyalty are unable to count their icons in struggles where she is committed.
Mechanically, the Hunters are characters whose abilities are geared toward giving you the advantage during story resolution, rather than manipulating the game state outside of the story phase. For example, the
Relentless Stalker
(For the Greater Good, 5), boasts both Willpower and Toughness, making it easier for him to survive the dangerous Terror and Combat struggles, and his two Combat icons and Combat struggle booster can even help him to hold a story against much larger numbers. Meanwhile,
Grete Wagner-Blackwood
(For the Greater Good, 12) has such a commanding presence and gains such strength from her zealotry that characters who are unable to match her in their loyalty are unable to count their icons in struggles where she is committed.
Centuries have passed since the Hunters of Ardenne first began their studies. Over that time, the world has changed. The church has changed, and science has benefitted from many significant advances. Still, wherever the unfathomable terrors of other worlds seek to cheat their way into our world, the Hunters wade into the darkness, wielding faith, fire, and science to burn away the shadows and cleanse the world.
Faith, Fire, and Science
What does it mean, in Call of Cthulhu: The Card Game, to harness the combined powers of faith and science to confront and defeat the most horrifying creatures to find their way into our reality? We explore these ideas in a sample deck that pairs the Hunters from For the Greater Good with the
Abbess Allegria Di Biase
(Terror in Venice, 1), a few
Church Operatives
(Terror in Venice, 3), and a couple of the Agency's favorite weapons, the
Shotgun
(Core Set, 14) and
Prize Pistol
(In Memory of Day, 22).
"The Great Work Never Ends"
Characters (29):
Supports (12):
Events (6):
Conspiracies (3):
Strategy:
This deck is centered around The Great Work, which grant you complete protection from your opponent's events, along with any effects that can trigger from the discard pile, so long as you can keep your opponent from committing charaters to the conspiracy.

To that end, the deck focuses on supporting its cheap rush potential with a number of wounding effects, such as that of the Prize Pistol and Veteran Monster Hunter, that can repeatedly trigger from in play. In fact, since the deck features a total of seventeen different Hunters, and because all copies of the Veteran Monster Hunter can trigger their Response abilities each time you play a Hunter, you should be able to blast your way through the ranks of nearly any opponent who would hope to scare you away in the Terror struggles. Against other foes, your standard Agency Combat superiority and Weapon attachments should help limit the number of characters your opponent can keep on the table or afford to commit to The Great Work.
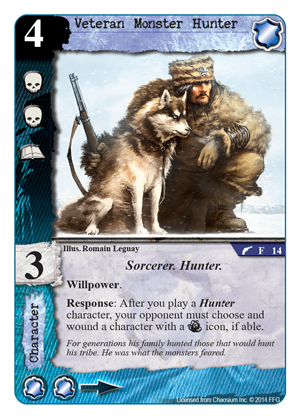 Of course, the world of Call of Cthulhu is full of horrifying surprises, and that means that, despite your best efforts, it's possible your opponent may find a way to commit one or more characters to The Great Work and trigger effects from out of play. Even then, your deck might frustrate his dark ambitions. Faith and science (or bureaucracy) combine in the forms of Red Tape, Church Operative, and Hunters of Ardenne. Together, these cards grant your Hunters complete immunity to your opponent's triggered effects while they're committed to stories, force your opponent to discard a card in order to target one of your characters, and cancel the first effect your opponent triggers each turn. It's entirely possible to find a scenario in which your opponent will have to trigger one effect just to have it cancelled in order to discard a card from hand in order to target one of your Agency characters with a second effect.
If it comes together, the deck should force your opponent to play the game "by the book." No more cheating in
Dreamlands Fanatics
(In the Dread of Night, 47) or other similar characters. No longer will you live in fear of
Naomi O'Bannion
(Denizens of the Underworld, 1) and her ability to trigger Tactics from the discard pile. If your opponent wants to play events or trigger any of these effects, he'll have to send characters to The Great Work, and that's where your Hunters can pick them apart, one by one.
Arm Yourself for the Coming Hunt
Will you stand with the Hunters of Ardenne and join their quest to purge the world of terrifying evils? The time is coming. Pick up your shotgun, load it with ammo, and ready yourself for the hunt. For the Greater Good arrives at retailers later this week!
Discuss this article
in our forums!
The copyrightable portions of Call of Cthulhu: The Card Game are © 2008 - 2013 Fantasy Flight Publishing, Inc. Call of Cthulhu is a registered trademark of Chaosium, Inc. Living Card Game, LCG, LCG logo and Fantasy Flight Supply are trademarks and/or registered trademarks of Fantasy Flight Publishing, Inc. All rights reserved to their respective owners.
Source: The Secret Order (https://www.fantasyflightgames.com/en/news/2015/2/24/the-secret-order/)
Title: FFG:Now May I Make a Right Choice
Post by: RSSFeeder on 18 March 2015, 14:45:20
Now May I Make a Right Choice
"Let me think!" said Aragorn. "And now may I make a right choice, and change the evil fate of this unhappy day!"
J.R.R. Tolkien, The Two Towers
Hard choices and hard roads lie in wait for fans of The Lord of the Rings: The Card Game. Frodo Baggins has disappeared, the Fellowship is broken, and Middle-earth's heroes must now seek a new path forward. In The Treason of Saruman, as in The Two Towers, your adventures turn away from Frodo's quest for a moment and, instead, follow the decisions made by
Aragorn
(The Treason of Saruman, 1) and the Three Hunters.
 In our last preview, developer Caleb Grace offered a glimpse of the trials that lie before you. In the expansion's second scenario, your road leads to Helm's Deep, where you face a novel situation as the encounter deck tries to make progress on the quest and you must stop it. Before then, though, you must rescue your captive companions from the clutches of Saruman's Uruk-hai, and every choice you make will resonate not only throughout your hunt, but at the walls of Helm's Deep, and forward throughout the whole of your The Lord of the Rings Saga campaign.
With their boons and burdens, The Lord of the Rings Saga Expansions ensure that your decisions carry tremendous weight. While each Saga scenario offers a rewarding play experience in its own right, they gain momentum as you play through them in sequence, and your boons and burdens ensure that your past decisions have an impact upon your present and your future.
In today's preview, developer Caleb Grace explores the ways that these decisions and their importance may change in The Treason of Saruman, even as he reveals five of the expansion's new boons and burdens.
Developer Caleb Grace on the Boons and Burdens from The Treason of Saruman
One of the most important features of our The Lord of the Rings Saga Expansions are their boons and burdens. These campaign-specific cards help tie the events of each scenario together, both rewarding and punishing players for their choices along the way. In The Road Darkens Saga Expansion, players received a wealth of powerful boons from the Council of Elrond in Rivendell and the Lady of the Wood in Lórien. Those boons were earned automatically; players didn't need to meet any conditions to win them. The Treason of Saruman marks a shift in the way the players receive boons. As the narrative grows darker and more tense, it's appropriate that this change in tone is reflected in the ways that your choices will carry with you in Campaign Mode. Therefore, you'll find fewer boon cards in The Treason of Saruman, and they are also more difficult to earn.
 For starters, when you set up the expansion's first scenario, The Uruk-hai, you must remove the boon cards
Gildor Inglorion
(The Black Riders, 77) and
Mr. Underhill
(The Black Riders, 17) from the campaign pool. There are two main reasons these boons are removed from the campaign pool: First, they were boons associated with Frodo Baggins, who is not featured in The Treason of Saruman. Second, the boons and burdens from The Lord of the Rings Saga Expansions are meant to tie you into the narrative, even as they serve a mechanical function. The design team felt that the boons would counteract their purpose were Gildor to appear at Isengard, or if Frodo were able to use his disguise as Mr. Underhill to prevent an enemy from attacking him, even as he walked along the footsteps of Mount Doom. So the decision was made to remove them from the campaign entirely. This decision also served to balance the number of boons and burdens to better reflect the dire nature of the heroes quest.
For starters, when you set up the expansion's first scenario, The Uruk-hai, you must remove the boon cards
Gildor Inglorion
(The Black Riders, 77) and
Mr. Underhill
(The Black Riders, 17) from the campaign pool. There are two main reasons these boons are removed from the campaign pool: First, they were boons associated with Frodo Baggins, who is not featured in The Treason of Saruman. Second, the boons and burdens from The Lord of the Rings Saga Expansions are meant to tie you into the narrative, even as they serve a mechanical function. The design team felt that the boons would counteract their purpose were Gildor to appear at Isengard, or if Frodo were able to use his disguise as Mr. Underhill to prevent an enemy from attacking him, even as he walked along the footsteps of Mount Doom. So the decision was made to remove them from the campaign entirely. This decision also served to balance the number of boons and burdens to better reflect the dire nature of the heroes quest.
 Even as you lose those boons, you gain an opportunity to earn some exciting new ones. There are four new Skill boons that you can earn at the end of The Uruk-hai:
Intimidation
(The Treason of Saruman, 15),
Hands of a Healer
(The Treason of Saruman, 16),
Forewarned
(The Treason of Saruman, 17), and
Leader of Men
(The Treason of Saruman, 18). Each of these boons can only be attached to a hero with the corresponding trait: Warrior, Healer, Ranger, or Noble. Notably, these are the same four traits that your heroes were able to gain via the boon attachments that you could earn at the end of A Knife in the Dark from The Black Riders Saga Expansion. Just as those boons allowed your characters to improve their talents, these new boon attachments represent another opportunity for your heroes to level up by earning powerful abilities to go along with their traits.
Even as you lose those boons, you gain an opportunity to earn some exciting new ones. There are four new Skill boons that you can earn at the end of The Uruk-hai:
Intimidation
(The Treason of Saruman, 15),
Hands of a Healer
(The Treason of Saruman, 16),
Forewarned
(The Treason of Saruman, 17), and
Leader of Men
(The Treason of Saruman, 18). Each of these boons can only be attached to a hero with the corresponding trait: Warrior, Healer, Ranger, or Noble. Notably, these are the same four traits that your heroes were able to gain via the boon attachments that you could earn at the end of A Knife in the Dark from The Black Riders Saga Expansion. Just as those boons allowed your characters to improve their talents, these new boon attachments represent another opportunity for your heroes to level up by earning powerful abilities to go along with their traits.
However, these boons wont be handed out simply for defeating the scenario, like at the end of A Knife in the Dark. If you want to earn them, you will have to fare exceptionally well against The Uruk-hai. That may prove difficult, and some groups may choose to replay the scenario multiple times in order to earn the boons.
Will You Be Hindered by Poisoned Counsels?
 On the flip side, it is easy to earn the new burden card,
Poisoned Counsels
(The Treason of Saruman, 21). This nasty little treachery has a player card back because it is shuffled into a players deck when it is earned. Then, if you draw it into your hand from the deck, Poisoned Counsels forces you to discard every other card in your hand. And all that is necessary to earn this burden is to spend a little time in Edoras, wrestling with Wormtoungues lies.
On the flip side, it is easy to earn the new burden card,
Poisoned Counsels
(The Treason of Saruman, 21). This nasty little treachery has a player card back because it is shuffled into a players deck when it is earned. Then, if you draw it into your hand from the deck, Poisoned Counsels forces you to discard every other card in your hand. And all that is necessary to earn this burden is to spend a little time in Edoras, wrestling with Wormtoungues lies.
At the beginning of the scenario, Helms Deep, the players are faced with a choice: advance immediately to Stage 2A and face Saruman's armies, or spend a turn in Edoras to prepare their forces.
You may not want to earn the burden, but that free turn is hard to pass up. In addition to allowing you to skip the quest phase, Stage 1B allows each player to put an ally into play for free! Those extra allies can mean the difference between questing successfully or unsuccessfully during the first quest phase at Stage 2B. Also, it's entirely possible that you may never draw Poisoned Counsels. You'll only have one copy in a deck of at least fifty cards. There's no guarantee that you will ever see it, but if you do, it will definitely have an impact on the game.
The design team spent a lot of time developing these boons and burdens to give you the best possible Saga experience and to deliver on our promise to make decisions matter. Along with the challenges of your quests and the encounter deck, these boons and burdens should add some dramatic ups and downs to the course of your epic The Lord of the Rings campaign!
Thanks, Caleb!
In your The Lord of the Rings campaign, as you continue along the road to Mordor and the fires of Mount Doom, you are accompanied by the consequences of the decisions you make. Will you make the right decisions? You will soon have your chance to find out. The Treason of Saruman is coming!
Discuss this article
in our forums!
The copyrightable portions of The Lord of the Rings: The Card Game and its expansions are © 2011 - 2013 Fantasy Flight Publishing, Inc. The Lord of the Rings, and the characters, items, events and places therein are trademarks or registered trademarks of The Saul Zaentz Company d/b/a Middle-earth Enterprises and are used, under license, by Fantasy Flight Games. Living Card Game, LCG, LCG logo and Fantasy Flight Supply are trademarks and/or registered trademarks of Fantasy Flight Publishing, Inc. All Rights Reserved to their respective owners.
Source: Now May I Make a Right Choice (https://www.fantasyflightgames.com/en/news/2015/2/25/now-may-i-make-a-right-choice/)
Title: FFG:Start Your Smuggling Run
Post by: RSSFeeder on 19 March 2015, 16:45:12
Start Your Smuggling Run
Chewie, this wont help me! Save your strength, therell be another time!
Han Solo, Star Wars: The Empire Strikes Back
Ally Packs and Villain Packs for Imperial Assault bring new adventure to your campaign and skirmishes! In all figure packs, youll find detailed plastic figures of iconic characters, as well as new Command cards, Agenda cards, Reward cards, and Deployment cards. In addition, each figure pack features a new campaign side mission and two new skirmish missions that use the same map.
In our last preview, we explored an infamous rogue and a deadly bounty hunter with the Han Solo Ally Pack and the IG-88 Villain Pack. Today, well take a look at the new strategies opened by two more figure packs as we preview the Chewbacca Ally Pack and the General Weiss Villain Pack!
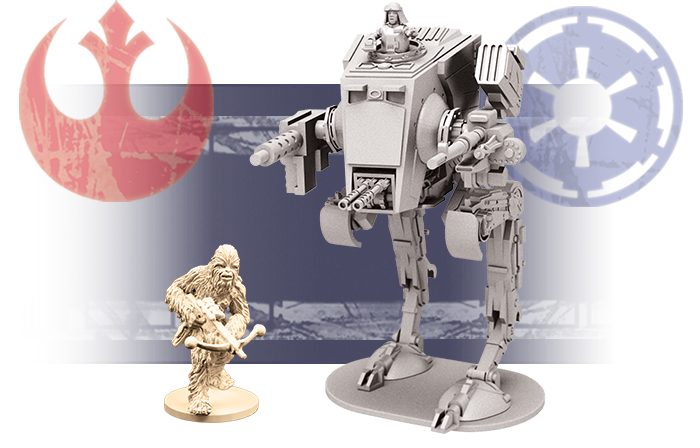
A Wookiees Loyalty
Chewbacca
is widely known as Han Solos companion and protector, and this Wookiee is fearsome combatant and a worthy ally for any team of Rebels. Whether you use him in a campaign mission or a skirmish mission, Chewbacca's two abilities highlight the two major roles he can fill.
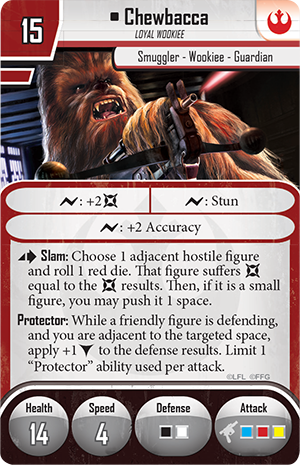
Chewbaccas first role is as a front-lines fighter, dealing damage and clearing the way for other heroes. His Slam ability is a crucial part of this ability. By using Slam as an action, Chewbacca can choose an adjacent hostile figure and roll a red die. The chosen figure suffers damage equal to the die result, and if the target is a small figure, Chewbacca can push it one space.
Dealing damage when your opponent cannot roll defense dice is a massive benefit, and with one red die, Chewbacca can deal significant damage with every Slam. If the figure survives the blow, you may also be able to push it one space. One space might not seem like much, but thats often all you need to block your opponents firing lanes, forcing him to move to a less advantageous position before opening fire.
Chewbaccas second ability reflects his identity as a guardian. With the Protector ability, Chewbacca grants all adjacent friendly figures a bonus block whenever they roll defense dice. A bonus block is useful no matter what your situation, and it can sometimes make the difference between life and death for a figure.
In your campaigns, Chewbacca is a great asset for any Rebel strike team. In many campaign missions, the Imperial player wins if he wounds all of the heroes. Chewbacca's Protector ability forces your opponent to deal much more damage if he wants to wound the heroes for victory. Chewbaccas damage dealing prowess can also clear the way for your heroes, but the Imperial player often redeploys any units that are destroyed. You can make this option less appealing with the
Intimidation
Reward card. This card can be depleted during a mission after you defeat the last figure in a group to increase the deployment cost of that group by two! You gain this card by winning the Celebration side mission, which is included in the Chewbacca Ally Pack.
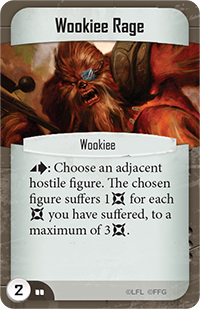

Chewbacca offers similar benefits in your skirmish missions, whether you play with the new Imperial Labor Camp map or another skirmish setting. New Command cards in this Ally Pack invite you to enhance your strategies for Chewbacca and other figures. You may use
Wookiee Rage
to damage an adjacent hostile figure without allowing him to roll defense dice. Alternatively, you may use
Hold Ground
to keep hostile figures from exiting spaces adjacent to a Guardian unit, buying your other figures time to accomplish objectives. Finally, you may take revenge for a friendly figures defeat by playing
Debts Repaid
. This card allows you to ready Chewbaccas Deployment card and Focus him, setting up a devastating reprisal on your next turn.
The Generals Command

While smugglers like Chewbacca flout Imperial law, there are those who are completely committed to upholding the Empire. One of these men is
General Weiss
, a field commander of Imperial forces. With the General Weiss Villain Pack, you can construct either a standard AT-ST or General Weisss own heavily modified assault walker.
On the battlefield, General Weisss customized walker is a formidable presence. The Epic Arsenal ability illustrates its firepower, allowing the general to form an attack pool out of any three attack dice. General Weiss may use two blue dice and a green die to attack heroes at long-range, or overwhelm nearby targets and trigger surge abilities with two red dice and a yellow die, or any other combination of dice. Whatever your situation, Epic Arsenal ensures that you always have the best possible dice.
General Weiss also possesses a keen tactical mind and an understanding that, in battle, positioning is one of your most valuable assets. The Generals Orders ability allows you to choose up to two other friendly figures on the map and perform a move with those characters. By keeping your forces mobile, you can take up position on new firing lanes or make tactical retreats to keep your troops from being surrounded by enemy forces.
In your campaign games General Weiss can put his tactical expertise to use by ordering your other troops to charge into battle or claim objectives, even while he focuses his firepower on the heroes. No hero can hold out long against concentrated fire from General Weiss, and by wounding the heroes one at a time, you can bring the Empire closer to victory every turn.
Of course, The Generals Scheme agenda set means that Weisss influence is not limited to the battlefield. You may lure the heroes into the
Forest Ambush
side mission, you may give an
Inspiring Command
to focus figures adjacent to an Imperial Leader, or you may make
Special Modifications
to a normal AT-ST to grant it increased firepower.


Your Imperial skirmish forces can also benefit from General Weiss and his unique talents as well as the new Command cards included in this Villain Pack. You can battle within a new skirmish map the Imperial Research Lab, an area filled with narrow corridors. In these confined quarters, a card like
Explosive Weaponry
could easily damage a large amount of enemy figures by giving your attack Blast 1. Alternatively, you can take advantage of General Weisss large size with
Overrun
. In his assault walker, he can fill almost any passage, and Overrun allows you to damage hostile figures when you enter their spaces. Another new Command card allows Weiss to call upon the
Endless Reserves
of the Empire. Endless Reserves brings a defeated friendly Trooper back to its group, and after use, this card is shuffled back into your Command deck.
Prepare for Battle
You may live a lawless life on the Outer Rim, free from any governments interference. You may work to uphold the galactic order of the Empire by any means necessary. No matter which side you support, its time to enter the Galactic Civil War.
Pre-order your Ally Packs and Villain Packs at your local retailer today, and check back for our preview of the Rebel Troopers and the Royal Guard Champion.
Discuss this article
in our forums!
Source: Start Your Smuggling Run (https://www.fantasyflightgames.com/en/news/2015/2/25/start-your-smuggling-run/)
Title: FFG:The Bottom Line
Post by: RSSFeeder on 19 March 2015, 16:45:12
The Bottom Line
I dont want your congratulations. I just want the credits you owe me.
Gabriel Santiago
Today, in the penultimate installment of our faction overviews for Android: Netrunner, we hack into Corp HQ and take a look at the games winningest Runners, the Criminals. Our guide? 2014 World Champion Dan DArgenio, who paired his Criminals with Jinteki for the tournament. As he suggests, the tricks and tactics employed by the games Criminals might not appeal to everyone, but if youre interested in winning at the highest levels of competition, you ought to at least understand what makes these Runners tick.

Cash Rules All
Shapers hack into the servers of multinational corporations for the challenge. Anarchs run to tear down the corporations and societal norms they despise. Criminal runners get into their line of work because if youre good at it its just so fantastically profitable. Theres a big prize in the mainframe of NBN headquarters, and Criminals are in it to win it. If youre the type of win-at-all-costs Runner who wants to use every dirty tactic available, Criminal is the faction for you.
All that matters is the bottom line, and the bottom line is that Criminals have been the most successful faction of runners in the history of Android: Netrunner.
The Criminal Syndicate
 Straight out of the Core Set,
Gabriel Santiago
(Core Set, 17) was a force to be reckoned with. Gabe thrives when he is getting right in the face of the Corp, and he is equipped with the tools to do so.
Straight out of the Core Set,
Gabriel Santiago
(Core Set, 17) was a force to be reckoned with. Gabe thrives when he is getting right in the face of the Corp, and he is equipped with the tools to do so.
-
Inside Job
(Core Set, 21) not only threatens a Corporations remote servers, but can combo with
Emergency Shutdown
(Cyber Exodus, 43) to undo all the hard work it took to rez that
Wotan
(Second Thoughts, 30).
-
Sneakdoor Beta
(Core Set, 28) allows Gabe to pressure the Corps oft-neglected Archives and get paid to do so.
- He can import Anarch cards like
Datasucker
(Core Set, 8),
Knight
(Mala Tempora, 43), and
Parasite
(Core Set, 12) to make sure he has continuous access to HQ for a reasonable price.
The two credits he earns might not seem like a lot, but if youre getting it every turn and accessing agendas from the Corps hand, it can add up quite quickly. As soon as the game starts, any plans the Corporation might have had to build up its other servers are immediately put on hold as it tries to keep Gabe from tearing apart its HQ, even if there isnt much there.
 The next Criminal runner to be released solidified the factions position as top dog for years to come. Meet
Andromeda
(Humanitys Shadow, 83), a dispossessed ristie and the first lady of Android: Netrunner.
The next Criminal runner to be released solidified the factions position as top dog for years to come. Meet
Andromeda
(Humanitys Shadow, 83), a dispossessed ristie and the first lady of Android: Netrunner.
From the Corps perspective, Gabe is a pest. A nuisance. Andromeda is downright oppressive. Born into an upper-class family, Andy begins the game with quite the head start. Nine cards might not seem that much better than the next top-tier runners effect, but her ability to start the game powerfully and consistently has propelled her to the front of the pack.
Opening turns like
Sure Gamble
(Core Set, 50),
Desperado
(Core Set, 24),
Security Testing
(Honor and Profit, 48), and
Dirty Laundry
(Creation and Control, 52) are the embodiment of the Criminal enterprise. This is a common start for Andromeda, and it means that on turn two, you have arguably the best console in the game already in play, plenty of money to install your programs, and what amounts to a three-credit-per-click
Magnum Opus
(Core Set, 44), but one that isnt taking up any memory. And thats before you install your Datasucker and hit up
John Masanori
(Opening Moves, 9).
After Andromeda, the Honor and Profit expansion introduced us to three new Criminal identities.
-
Ken "Express" Tenma
(Honor and Profit, 29) continues in the tradition of making money by staying on his feet. His ability can pay out as well as Gabes if you build your deck correctly, and an extra couple of influence points means that Ken can make use of an extra copy of
The Maker's Eye
(Core Set, 36) to add R&D pressure to the Corporation while they struggle to cover HQ.
-
Silhouette
(Honor and Profit, 30) is more of a niche runner, but a slim deck size grants her consistency, and shes always a great girl to have around if youre facing down a lot of Jinteki players using
Mushin No Shin
(Honor and Profit, 15) to deploy ambushes.
-
Iain Stirling
(Honor and Profit, 28) is the strangest of the bunch. A good strategy is to leverage a
Hostage
(Opening Moves, 4) in the early game to amass a lot of resources, and if the Corporation seizes the opportunity to score first, you then get a huge bonus payout of two credits per turn.
Tricks of the Trade
Criminals are not so much about building towards a powerful rig like their Shaper counterparts. Sure, they claim Desperado is the best console and piece of hardware in the game, and they say they own a few of the best programs as well, but being a Criminal is all about using your tactics to bring the Corporation to their knees.
Account Siphon
(Core Set, 18) has been turning the tables on the Corporations bankroll for a long time. As Corp players have gotten better at making money, it has dropped off in relative power level, but just the threat of Account Siphon still means that no matter if youre playing Gabe or Silhouette or some other less-HQ-focused Criminal, defending home base has to be first priority. Few other cards in the game can threaten a fifteen-credit swing, and a well-timed Account Siphon attempt, even if unsuccessful, could cause the Corporation to expend so many credits protecting themselves that their other servers become easy to access.


Inside Job and Emergency Shutdown go hand in hand. Is there a pesky
Tollbooth
(Core Set, 90) keeping you out of HQ? No problem. Go around, get in, and shut it down. No icebreaker necessary.
When you do need to eventually start breaking ice,
Special Order
(Core Set, 22) ensures that the Criminal never has to dig too hard to find the right tool for the job. So what if we dont have in-faction breakers like
Gordian Blade
(Core Set, 43),
Corroder
(Core Set, 7), or
Yog.0
(Core Set, 14)? We only need to spend influence on one copy of each, and theyll always be a phone call away. Just make sure you have a
Faerie
(Future Proof, 104) ready in case you run into a
Grim
(Opening Moves, 20) or
Archer
(Core Set, 101), and your singleton Corroder will stick around for the entire game.
Finally,
Legwork
(Honor and Profit, 35) is the newest addition to the high-power Criminal event suite.
R&D Interface
(Future Proof, 107) and
Medium
(Core Set, 10) are great for sustained R&D pressure, but when it comes to HQ, its usually more efficient to get in, get out, and call it a day. Most Criminals dont want to waste too much time pounding HQ and seeing the same card over and over again. With Legwork, we can wait for a few turns until the agendas pile up in the Corps hand and steal tons of points just by getting in one time. The heist to end all heists. If it doesnt end the game on the spot, we can turn our attention to R&D once were reasonably sure weve taken HQ for all its worth.

The Right Tool for the Job
A discussion of the Criminal faction wouldnt be complete without talking about what I believe is the single best Runner card in the game. I think that most competitive players would argue that Desperado holds that honor. Even at the steep cost of three influence, it is still the most splashed console in Shaper and Anarch decks, and for good reason: for the low startup cost of three credits, Desperado is an offer you cant refuse.
 One of the most common mistakes that beginners make when building Criminal decks is to include fewer than three Desperado. For the same cost,
Doppelganger
(A Study in Static, 64) looks like it might be just as good or better, and
Logos
(Honor and Profit, 37) seems like it could be a better fit in some slow decks. You can certainly choose to build a Criminal deck that functions perfectly well without Desperado, but doing so is just handicapping yourself. Three Desperados means that you get it into play as soon as possible, which means that you start getting paid as soon as possible. If youre playing Datasucker and the Corp has an undefended Archives, you suddenly have an option available thats significantly better than clicking for a credit. If youve got Security Testing in play too, youre starting to become more efficient than a Shaper with a full rig could ever hope to be. If youve got John Masanori by your side as well, you can gain three credits, a virus counter, and a card draw for just a single click, once per turn. Magnum Opus and
Professional Contacts
(Creation and Control, 49), eat your heart out.
One of the most common mistakes that beginners make when building Criminal decks is to include fewer than three Desperado. For the same cost,
Doppelganger
(A Study in Static, 64) looks like it might be just as good or better, and
Logos
(Honor and Profit, 37) seems like it could be a better fit in some slow decks. You can certainly choose to build a Criminal deck that functions perfectly well without Desperado, but doing so is just handicapping yourself. Three Desperados means that you get it into play as soon as possible, which means that you start getting paid as soon as possible. If youre playing Datasucker and the Corp has an undefended Archives, you suddenly have an option available thats significantly better than clicking for a credit. If youve got Security Testing in play too, youre starting to become more efficient than a Shaper with a full rig could ever hope to be. If youve got John Masanori by your side as well, you can gain three credits, a virus counter, and a card draw for just a single click, once per turn. Magnum Opus and
Professional Contacts
(Creation and Control, 49), eat your heart out.
Even without including all these combos in your deck, Desperado can function like a point of bad publicity and a memory chip in one package. Looking at cards like
Frame Job
(Opening Moves, 1) and
Activist Support
(True Colors, 62), its clear that the cost of an actual point of bad publicity is pretty high. Much higher than the three credits you have to invest in your Desperado. Unlike an actual bad publicity, Desperado can pay you for free runs, such as checking Archives or newly installed assets in remote servers. An early Desperado also supercharges your face-checking. If the corporation wants to keep a
Rototurret
(Core Set, 64) unrezzed until you install a program or keep its HQ ice face-down until you try to Account Siphon them, Desperado is going to make them pay for that luxury in more than just random accesses.
I Aint a Killer, But Dont Push Me
Being a good runner means getting in and out without making a big mess. The fact that Criminals often have to import their icebreakers from other factions means that they dont have a lot of spare copies left in the stack. This means that Criminals need some protection from the Corporations nasty destroyer ice. Thankfully, while Criminals are not known in hacking circles for their programming, there is one type of program that they do better than anyone else: killers.
Being able to break sentry subroutines efficiently is a huge advantage for Criminals, as sentries often have the most painful subroutines for the Runner to let go unbroken. Because Criminals can so readily protect the few programs in their deck from trashing subroutines and net damage with the killers that they have in-faction, they dont have to worry about losing their only Corroder when theyre face-checking or Security Testing the Corps ice.

Possibly the best killer, possibly even the best icebreaker in Android: Netrunner is the ephemeral Faerie. While a one-time-use breaker may initially seem innocuous, its the nature of sentries that makes Faerie such a powerhouse. Sentries tend to fall into one of two categories. On one hand, you have those sentries that can be dealt with without programs, such as
Caduceus
(What Lies Ahead, 19),
Shadow
(Core Set, 104),
Data Raven
(Core Set, 88), and
Pup
(Honor and Profit, 18). On the other hand, you have sentries that are very damaging to face-check but are often a pain to rez, such as Grim, Archer,
Komainu
(Honor and Profit, 17), and
Flare
(Future Proof, 117). A Faerie on the board not only costs zero to deploy, but it enables you to safely run into face-down ice until the Corporation rezzes something truly nasty. Because its so cheap to use, this often means that the Corp has to give up a big tempo hit to get a Criminal to use his or her Faerie, often along with an access and important information about where its most dangerous ice is located.

Femme Fatale
(Core Set, 26) is another very strong killer that Shapers have been importing for just one influence point since the beginning of the game. While Criminals arent easily able to play her with
Stimhack
(Core Set, 4) and
Self-modifying Code
(Creation and Control, 46) or by combining
Test Run
(Cyber Exodus, 47) with
Scavenge
(Creation and Control, 34), the ability to ensure passage past any piece of ice is usually worth her steep cost. Criminals frequently find themselves using Femme to target a piece of HQ ice the Corporation has refused to rez in order to guarantee a successful Account Siphon, or theyll use her in conjunction with an Inside Job to get deep into a remote server with two layers of ice. The fact that it costs two credits to pump her strength can make her somewhat expensive, but the often-imported Datasucker can help bring opposing sentries down to Femmes level. Additionally, Femme has the big benefit of being able to get around ice like powerful, taxing sentries like Komainu and Tollbooth for nothing, or next to nothing.
Theres a newer Criminal killer on the block that is also starting to make waves. Though it demands access to a lot of stealth credits,
Switchblade
(Up and Over, 77) is the most cost-efficient killer in the game. For the low start-up cost of three credits and access to enough recurring stealth credits, you can break just about any sentry for free. Grim, Archer, and Komainu all fall victim to a Switchblade and two
Silencers
(Double Time, 104), making it an awesome choice for any Criminal who is tired of breaking bank on the plethora of multi-subroutine sentries protecting the Corporations servers these days.
Whoever Said Crime Doesnt Pay
didnt play Android: Netrunner. The winningest faction in the game is a powerhouse thats here to stay, thanks to strong identities, an extremely effective console, and game-changing events. One of the biggest reasons to stay within the Criminal family is that some of their best cards, Desperado, Faerie, and Account Siphon to name a few, are irreplaceable and heavy on influence cost. If you want to play three of all of these cards in your deck, use them to tear through corporate servers with terrifying efficiency, and win World Championships, then its time for you to start exploring the advantages native to a life of crime.
Discuss this article
in our forums!
Netrunner is a TM of R. Talsorian Games, Inc. Android is TM & ©2015 Fantasy Flight Publishing, Inc. All rights reserved. Netrunner is licensed by Wizards of the Coast LLC. ©2015 Wizards.
Source: The Bottom Line (https://www.fantasyflightgames.com/en/news/2015/2/25/the-bottom-line/)
Title: FFG:Wave VI Is Now Available
Post by: RSSFeeder on 20 March 2015, 09:45:14
Wave VI Is Now Available
This bounty hunter is my kind of scum, fearless and inventive.
Jabba the Hutt
Bounty hunters, illicit technology, Salvaged Astromechs, pirates, and Black Sun operatives. The sixth wave of X-Wing starship expansions has arrived!
- Most Wanted Expansion Pack
- StarViper Expansion Pack
- M3-A Interceptor Expansion Pack
- IG-2000 Expansion Pack
Now available at retailers everywhere, X-Wing Wave VI marks the introduction of the games third faction, the galaxys Scum and Villainy, a collection of individuals loosely bound by their shady business endeavors.
Ultimately, the whole wave reflects the fact that this new factions pilots are less interested in teamwork and collective victories than personal gain. Their unique pilot abilities encourage different types of squadrons than those commonly employed by Rebel and Imperial players, as do their new starships, illicit upgrades, and Salvaged Astromechs.
New Faction. New Style.
The members of the Scum and Villainy faction may not be the most cooperative or disciplined military force in the galaxy, but their myriad tricks are certain to cause all manner of trouble for the games Rebel and Imperial pilots. Likewise, their arrival is destined to shake up the X-Wing metagame, opening the way for all sorts of new squads to make inroads in tournament and casual play.
Several pilots, specifically, are destined to make major impacts upon the game, even when they dont appear on the table:
Torkhil Mux
is likely to change the very nature of the pilot skill bidding war. As two-time World Champion Paul Heaver explains it, In most cases, the ideal pilot skill value is one higher than whatever your opponent is fielding. But spending squad points to hit that ideal pilot skill is a gambit that can fail if your opponent has pilots with higher skill than yours, or simply doesnt bother to bid on pilot skill and just sticks with the minimum skill levels. As a HWK-290 pilot with a low pilot skill and commensurate cost Torkhil Mux is a cheap bid for pilot skill; however, he also nullifies much of the benefit your opponent seeks to get by investing his points into his pilots pilot skill values. At the end of the Activation phase, he can reset one enemy pilots skill to 0 until the end of the Combat phase, meaning that even though your opponent bid higher for pilot skill values, your ships get to fire first.
Emon Azzameen
is another pilot whos likely to shake up the metagame. In his
Andrasta
, Emon Azzameen is almost without peer as a bomber. Like any pilot capable of delivering a payload of
Seismic Charges
or
Proximity Mines
, he can use the 1 straight template; however, Emon Azzameen may instead choose to use the 3 straight template or either 3 turn template. The option to use these alternate templates to drop his bombs gives Emon Azzameen much greater control over their impact on the battlefield (as shown below), and that means that X-Wing players are likely to see more bombs on the battlefield than ever before.

Emon Azzameens ability to choose from any one of four different templates as he drops his bombs makes the battlefield a more hazardous place than ever before.
Finally, the arrival of IG-88 is likely to spur a dramatic rise in the number of two-fighter squad builds. Not only do the four iterations of IG-88 all pilot the fast, durable, and hard-hitting Aggressor, but if they upgrade their Aggressors with the
IG-2000
Title, they also become the first pilots able to share pilot abilities. This means that in squads that run two Aggressors with the IG-2000 Title, you can mix-and-match the four different IG-88 pilot abilities, pairing such elements as
IG-88B
s built-in
Gunner
ability with
IG-88C
s free evade action. Or you could pair
IG-88A
s ability to regain shields after eliminating foes with
IG-88D
in order to gain extra maneuvers on your maneuver dial. However you choose to partner IG-88s unique pilot abilities, these dual-Aggressor builds add an all-new form of customization to your squads.
Of course, those are just a few examples of the many, many ways that the Scum and Villainy faction and its pilots are likely to change the game. Throughout our previews, weve explored even more of the ways that the Scum and Villainy faction will utilize their starships, illicit upgrades, and unique pilot abilities.
Read Our Previews for More Information
- In Illicit Dealings, we looked at the two new upgrade types unique to the Scum and Villainy faction, the illicit upgrade and the Salvaged Astromech. By offering a distinctive range of dirty, aggressive, and expensive tricks, these upgrades go a long way toward establishing the factions overall intent and feel.
- In The Galaxys Most Wanted, Part One and The Galaxys Most Wanted, Part Two, you can read about how the Most Wanted Expansion Pack, its ships, upgrades, and pilots give the faction and its dirty tricks a massive jump start, helping it quickly get up to speed against the established powers of the Rebel and Imperial fleets.
- In Lethal Ambitions, we looked at the StarViper-class attack platform and its renowned creator,
Prince Xizor
- In Intercept and Destroy, we explored the many ways that Scum fleets might deploy the versatile M3-A Scyk interceptor. A light, but highly customizable, starfighter, the Scyk can be flown in large groups, or it can be outfitted with the
"Heavy Scyk" Interceptor
Title and utilize a cannon like the
"Mangler" Cannon
or
Ion Cannon
to confront enemy fleets.
- In Cold, Metal, and Evil, we looked at the IG-2000 Expansion Pack, its deadly Aggressor, the ships maneuver dial, the four unique versions of IG-88, the IG-2000 Title, and the expansions other upgrades. Not only is the Aggressor the first large-base starfighter to feature an inherent boost action, its also one of only two large-base starships in the game with only a forward firing arc. Still, while the other such starship, the Lambda-class shuttle, is notorious for its sluggish maneuver dial, the Aggressor is a surprisingly fast and maneuverable vessel, and the preview looks at some of the ways its maneuverability is likely to make it both a challenge and a joy to field in battle.

IG-88s Aggressor comes loaded with all sorts of maneuvers, including the startling new
Segnor's Loop
. Still, you can load IG-88Ds unique pilot ability into your squad for even more maneuvers, gaining the option to perform a Segnors Loop at the end of either 3 turn template. All these maneuver options, along with the ships inherent boost action, make it truly difficult for your opponent to guess where your Aggressor will end its Activation phase.
Do Not Underestimate Them
You can either profit by this or be destroyed. Its your choice.
Luke Skywalker
X-Wing Wave VI is here. The Scum and Villainy faction is here. You can dive into the heart of the Galactic Civil War, or you can try to make a profit in the fringes of the galaxy. Its your choice.
Head to your local retailer to pick up your X-Wing Wave VI expansions today!
Discuss this article
in our forums!
Source: Wave VI Is Now Available (https://www.fantasyflightgames.com/en/news/2015/2/26/wave-vi-is-now-available/)
Title: FFG:Faith, Science, and Shotguns
Post by: RSSFeeder on 21 March 2015, 12:45:11
Faith, Science, and Shotguns
"The police could not but realise that they had stumbled on a dark cult totally unknown to them."
H.P. Lovecraft, The Call of Cthulhu
Confronted by horrifying, otherworldly monsters and by the evidence of foul rituals that defy all human decency and human comprehension, as your perceptions of reality suddenly shatter and as your world expands to include vast, cold darknesses full of new terrors, will you recoil from the discoveries? Will you succumb to madness? Or will you take up your torch and your shotgun and head into the darkness with a new resolve, standing alongside those few other brave men and women who have also come to a similar understanding of the nature of human existence
For the Greater Good is now available at your local retailer and online though our webstore!
The eighth deluxe expansion for Call of Cthulhu: The Card Game, For the Greater Good adds 165 new cards to the game (three copies each of fifty-five different cards), roughly two-thirds of which bolster the ranks of the Agency faction, which purportedly serves humanity's interests as its front-line defenders in the ongoing struggle for survival in the face of foul cultists, ghouls, monsters, and elder gods. Though the conspiracies run deep and it's not entirely clear whether or not everyone associated with the Agency's Government networks has humanity's best interests at heart, the faction's agents gain renewed powers to operate in all fields, as the expansion adds a host of new characters that greatly bolster the Government trait. Meanwhile, the Hunters of Ardenne battle against evil, emboldened by both faith and science.
Of course, the game's other factions don't sit idly by as the Agency extends its networks. Each of the game's seven other factions gains new characters and support cards, as well as the ability to draw upon several new neutral cards, including the Ancient One
Iod
(For the Greater Good, 36) and the Polar event
Ice Storm
(For the Greater Good, 38).

Gear Up
Whether or not it's fully justified, the Agency has long held a reputation as the "attachment faction" of Call of Cthulhu: The Card Game. This likely owes in part to such characters as
James Logan
(Whispers in the Dark, 1) and
John Henry Price
(Search for the Silver Key, 61), who make attachments better in decks with them than without them. However, the reputation also owes greatly to the tremendous utility that the faction gains from its attachments and to the fact that even though the Agency ranks fifth among the factions in terms of total support cards, it has more attachments than all but three: Miskatonic University, the Syndicate, and Yog-Sothoth.
Notably, those three factions have all benefitted greatly from their own faction-focused deluxe expansions, and once For the Greater Good arrives and helps the Agency fill its rank with new recruits, those recruits will also benefit from an influx of new supports, including several noteworthy attachments.
For the Greater Good provides every faction with at least one one-cost support card that attaches to a story and impacts the way that characters will need to approach it. The Agency gets two of these cards, including
Under Surveillance
(For the Greater Good, 23). The Agency has long excelled at Combat struggles, and Under Surveillance ensures that your Government hit squad will be able to start its investigations on the right foot, both by playing to its strength as it begins resolving the story's struggles and by providing an alternative benefit for winning Combat struggles at the story. Armed with a
Lightning Gun
(Secrets of Arkham, 3), a Hunter like the
Relentless Stalker
(For the Greater Good, 5) could potentially hold off an entire army of cultists or earn up to four success tokens against a character without Invulnerability.
As far as Invulnerability goes, Agency operatives gain some of that in the form of their new
Armored Car
(For the Greater Good, 25). The absolute best protection that money and science can offer in the face of devouring Ancient Ones and
Ravagers from the Deep
(Core Set, 46), an Armored Car grants Invulnerability to all your characters at the same story. Better yet, because you can transfer it from character to character as an action, you make sure that it ends up at the story where you need it most. Just save a resource to race it to the scene of the otherworldly invasion!
Finally, since there's no guarantee that the Ancient Ones or their cultists will reveal themselves in an urban area, the Agency's operatives need to be ready to confront their evils wherever they should arise, even if that means heading to the frozen tundra of Siberia or to the icy wastes of Antarctica. Preparation is key, and For the Greater Good gives your agents the means to travel to the coldest of climes with a
Snowmobile
(For the Greater Good, 21). The game's second Polar attachment, Snowmobile allows you to count the attached character's icons not only where it is committed but at each other story where you have characters committed, as well. Again, that makes it a powerful attachment to combine with the Relentless Stalker, who can choose not to uncommit from a story until it is won.
Descend into Madness
"Investigations and discoveries have left their mark upon him; so that his voice trembles when he tells them, and his hand trembles when he tries to write of them."
H.P. Lovecraft, The Case of Charles Dexter Ward
As well as the Agency's new tools may help your operatives survive the terrors they may encounter in their defense of humanity, they won't be able to bleach the horrors from their minds. Still, in the face of absolute chaos and ultimate ruin, there's not much choice but to stand and fight.
Now is the time to celebrate those who stand at the front lines of the greatest battles never to make the news. Now is the time to honor those who have silently and secretly fought long and hard For the Greater Good. Head to your local retailer today to pick up your copy of this eighth deluxe expansion for Call of Cthulhu: The Card Game!
Discuss this article
in our forums!
The copyrightable portions of Call of Cthulhu: The Card Game are © 2008 - 2013 Fantasy Flight Publishing, Inc. Call of Cthulhu is a registered trademark of Chaosium, Inc. Living Card Game, LCG, LCG logo and Fantasy Flight Supply are trademarks and/or registered trademarks of Fantasy Flight Publishing, Inc. All rights reserved to their respective owners.
Source: Faith, Science, and Shotguns (https://www.fantasyflightgames.com/en/news/2015/2/27/faith-science-and-shotguns/)
Title: FFG:A Galaxy at War
Post by: RSSFeeder on 23 March 2015, 09:45:04
A Galaxy at War
My ship has fallen under attack and Im afraid my mission to bring you to Alderaan has failed. I have placed information vital to the survival of the Rebellion into the memory systems of this R2 unit. My father will know how to retrieve it. You must see this droid safely delivered to him on Alderaan. This is our most desperate hour.
Leia Organa
Recently, in our preview of the fleet-building rules for Star Wars: Armada, we mentioned that each fleet must contain three objectives. These objectives add a narrative element to your games, helping to explain why you and your opponent are sending starships into battle. More importantly, though, objectives change how you score points, meaning that your games of Armada arent just about blasting away more of your opponents starships than you lose in the process.
Today, well look at these objectives more closely, reviewing all twelve of them, and exploring how they may influence the path you take toward victory.
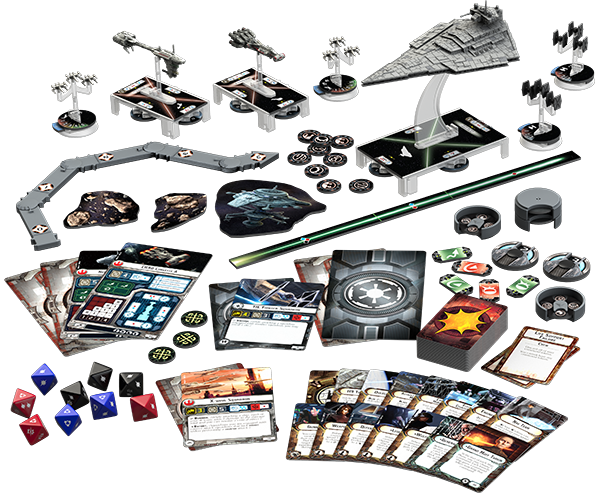
The objectives of Star Wars: Armada work along with its starships, squadrons, maneuver tool, ship cards, upgrades, command dials, attack dice, and obstacles to ensure that every single one of your battles has multiple dimensions.
Choosing an Objective
There are three categories of objectives in Armada, and you have to bring one objective from each category.
Assault: Assault objectives typically identify one or more ships that are worth extra fleet points when destroyed.
Defense: Defense objectives encourage you to position your ships so that they control specific sections of the battlefield.
Navigation: Navigation objectives reward you for maneuvering aggressively and with precision.
Early in the games setup, you and your opponent choose one objective to use for the game.
Setup Step 3. Determine Initiative: The player whose fleet has the lowest total fleet point cost chooses which player is the first player. The first player places the initiative token next to his edge with the a side faceup. If the players are tied in fleet points, flip a coin to decide which player makes the choice.
Setup Step 4. Choose Objective: The first player looks at all three of his opponents objectives cards and chooses one to be the objective for the game.
The other objectives are all set aside.
Throughout your game, the additional rules and scoring concerns that the objective introduces can greatly impact your tactics. Therefore, although its usually to your advantage to have the initiative throughout a game, its easy to imagine situations in which youll concede the initiative to your opponent in order to ensure that you play with one of your objectives, forcing your opponent to fight on terms that are favorable to your fleet.
Assault
The four different assault objectives are
Advanced Gunnery
,
Most Wanted
,
Precision Strike
, and
Opening Salvo
.
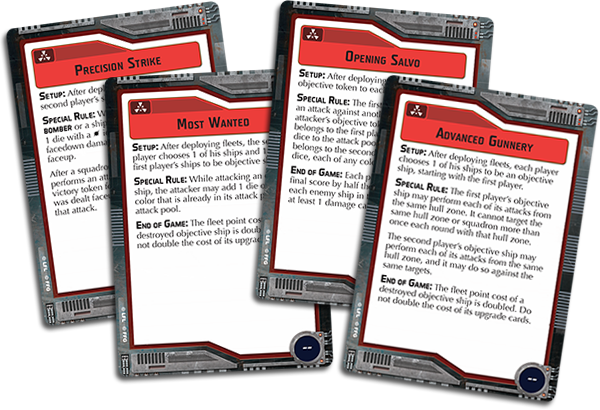
Of these assault objectives, two force you and your opponent to identify objective ships, which are worth twice as many victory points at the end of the game if theyre destroyed.
In the case of Advanced Gunnery, your objective ship gains a large tactical advantage, even as it becomes a marked target. Of course, this tactical advantage becomes even more meaningful the more dice youre able to train upon your enemies. For example, the objective allows a
Victory II-class Star Destroyer
to fire all six of its front hull zones six attack dice a second time. Thats a significant step up from the three attack dice youd be able to fire from the Star Destroyers left or right hull zone, especially if you didnt have a legal target in either of those zones.
However, because Advanced Gunnery favors ships, like the Star Destroyer, that feature massive armaments, Rebel players may favor Most Wanted, which adds an extra attack die to each attack against an objective ship. Because the Rebellions ships are generally smaller and cost fewer fleet points than the Empires, you can fit more of their ships into an Armada fleet. Then, if you have a fleet with five copies of the
CR90 Corvette A
, the extra dice youll gain from Most Wanted will very quickly add up.
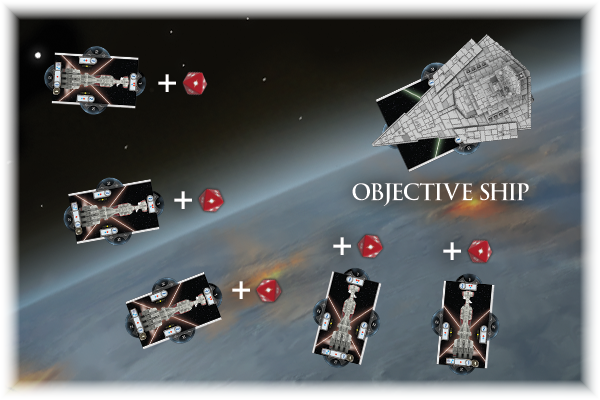
The third of these objectives, Precision Strike, features a victory point value of 15 in its bottom right corner. This means that you score fifteen victory points for each victory token you earn over the course of the game. Thus, rather than rewarding you for eliminating a prized enemy ship, Precision Strike rewards you for repeatedly dealing faceup damage cards to your opponent. This objective may be a good choice for any fleet that can guarantee critical hits, such as one that features
Admiral Screed
, or it could be good for any fleet that uses
Luke Skywalker
and
Dodonna's Pride
to bypass enemy shields and deal faceup damage.
Finally, the Opening Salvo objective adds extra dice to both players opening attacks. At the beginning of the game, each ship is marked with an objective token that it spends on its first attack against another ship. When it spends this token, it gains two attack dice. If its the first players ship, it gains two red attack dice. If its the second players ship, it gains two attack dice of the players choice. However, these extra dice do more than make it easier for you to obliterate your opponents biggest ship; they force you to make an important decision. Will you focus your fire or spread it around to force damage onto each of your opponents ships?
Because Opening Salvo allows you to score half the fleet point cost of each enemy ship that you damage, you can just as easily score the same number of points by damaging two identical ships as you can by fully eliminating one of them. As an example, if you were playing against a fleet with two Victory-class Star Destroyers, that means you could score the same number of points by punching through the one point of rear shielding to land a single damage on each as you could by blasting through all eight hull.
Defense
The four defense objectives are
Fire Lanes
,
Contested Outpost
,
Fleet Ambush
, and
Hyperspace Assault
.
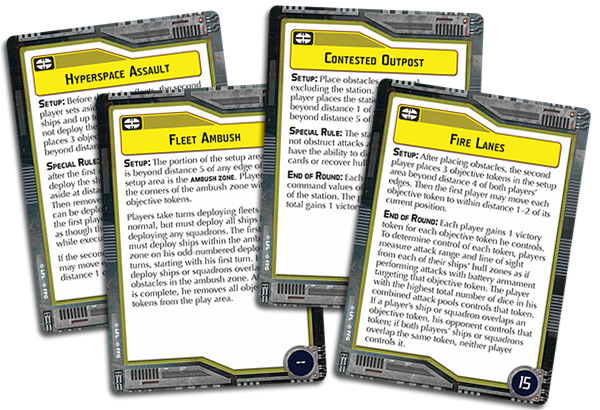
Of these defense objectives, two encourage you to fly toward objective tokens and obstacles in order to win victory tokens, and the other force the first player to respond to tricky adjustments in the deployment rules.
In games featuring the Fire Lanes objective, you can earn victory tokens by positioning your ships to seize control of the games three objective tokens. At the end of each round, you and your opponent compete for control of the objective tokens:
To determine control of each token, players measure attack range and line of sight from each of their ships hull zones as if performing attacks with battery armament targeting that objective token. The player with the highest total number of dice in his combined attack pools controls that token. If a players ship or squadron overlaps an objective token, his opponent controls that token; if both players ships or squadrons overlap the same token, neither player controls it.
Since each objective token is worth fifteen victory points, you could score as many as forty-five points each round by deploying and maneuvering your ships to control these objective tokens. However, that also means that youll likely be maneuvering your fleet in a fashion thats a little reckless and leaves it exposed to your enemy sooner than you might like. For example, its going to be terribly difficult for a Rebels CR90 corvettes and Nebulon-B frigates to wrest an objective token away from an Imperials Victory-class Star Destroyers, and the effort may simply leave you vulnerable to the Imperials guns.
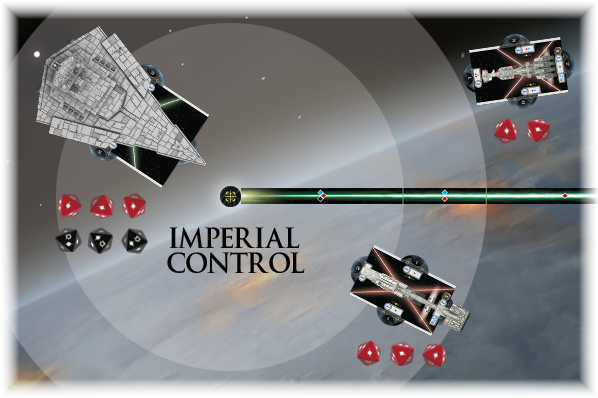
Even with the combined firepower of two Nebulon-B frigates, the Rebel player cant wrest control of the objective token away from the Imperial players single Victory I-class Star Destroyer and its six attack dice.
Alternatively, if a Rebel player manages to bait you into splitting up your Imperial fleet, you may find one of your Star Destroyers exposed to a small swarm of Rebel ships while the other is hopelessly out of range.
The second defense objective, Contested Outpost, is arguably the most straight-forward of all defense objectives. As with Fire Lanes, the players are encouraged to maneuver their ships in a fashion to win victory tokens; the difference, however, is that Contested Outpost offers twenty points each turn to whichever player is able to count the greatest total command value of all ships within distance 1 of the station. With as many as 120 potential victory points at stake, Contested Outpost encourages players to race into combat at close range. The trick, then, is to make sure that your ships survive long enough to count their command values at the end of the round!
Fleet Ambush doesnt introduce any objective tokens or victory points to change the shape of the game. Instead, it forces the first player to split his fleet in two during the games setup. Normally, all ships must deploy within distance 3 of its controllers edge of the map. However, the setup rules on Fleet Ambush create an ambush zone in the middle of the table, at distance 5 from each edge of the table. Then, the first player must deploy every other one of his ships into this ambush zone, even as the other half must follow the standard deployment rules.
Accordingly, Fleet Ambush immediately impacts the game in two ways. First, it accelerates the game, as the players begin with ships and squadrons closer to firing range from the very outset. Second, it allows the second player to isolate some of the first players ships, leaving them more vulnerable to the second players fleet. Still, even though Fleet Ambush, like all objectives, favors the second player, you might choose to face it as the first player if you feel you can quickly assemble your fleet or use the positioning to your advantage, possibly by racing your Assault Frigate Mark II out of the ambush zone and to the side of your opponents ships.
Finally, Hyperspace Assault allows the second player to set up a deadly flanking maneuver with surprising ease. At the beginning of the game, the second player sets aside one of his small or medium ships and up to three squadrons. These are not deployed during setup. Instead, the second player places three objective tokens in the play area beyond distance 3 of both players edges, and the ship and squadrons that were set aside can enter within distance 1 of any of these objective tokens at the beginning of any round after the first.
This means that as the first player, you have to adjust your strategy and the way you maneuver your fleet. You know that your ships are going to be flanked at some point, but, in the meantime, you have a significant advantage in firepower among the ships in play. Then, if youre running a fleet of Star Destroyers against a Rebel player, you might be willing to risk the flank, guarding your back with a Gladiator-class Star Destroyer, even as you rush your Victory-class Star Destroyers forward toward the bulk of your opponents fleet.

Few Rebel fleets can survive the punishing volleys of a Victory-class Star Destroyer that establishes a solid flanking position.
On the other hand, if youre playing this objective with a Rebel fleet thats facing the possibility of being flanked by a Victory-class Star Destroyer and a trio of TIE bombers, you may want to race your ships out of the area at top speed. The question, of course, is whether or not youll be able to gain any advantage through your adjusted tactics.
Navigation
The four navigation objectives are
Intel Sweep
,
Minefields
,
Superior Positions
, and
Dangerous Territory
.

Three of these navigation objectives encourage players to interact with objective tokens, while the fourth objective, Superior Positions, adjusts the players starting positions and their ships initial trajectories.
At first glance, Intel Sweep appears to favor fast and agile ships. During setup, each player chooses one ship to mark as an objective ship. Then, whenever this objective ship reveals a command dial within distance 1 of one of the games five objective tokens, its owner scores a victory token. Unlike most victory tokens, these arent worth anything on their own, but the player who manages to score the most victory tokens ends up collecting seventy-five victory points at the end of the game.
Still, while the fast, agile ships are best suited to collecting the objectives victory tokens, only one of them can be the objective ship, and since only the objective ship can actually collect the victory tokens, its going to be a heavily favored target. Accordingly, you may actually consider incorporating Intel Sweep into a strategy built around utilizing a fleet of heavy ships that can quickly deal a punishing amount of damage to a single ship and that can simultaneously endure the brunt of whatever your opponent may throw against you.
Meanwhile, players will find it much more difficult to fly their ships safely about the battlefield in any game featuring the Minefields objective. Not only will you have to avoid damaging collisions with obstacles; youll have to avoid the explosive damage of the games six mines. Moreover, since the second player places all the mines, this objective grants him the means to influence the first players flight lanes.
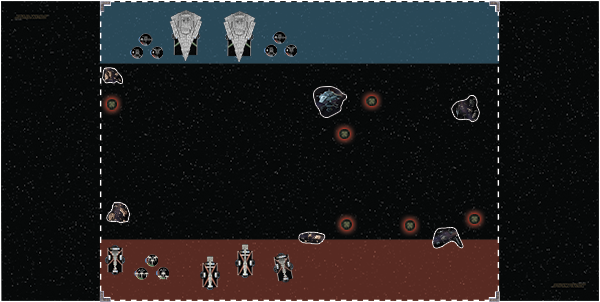
The Imperial player uses the Minefields objective to force the Rebellions ships to engage his Star Destroyers head-on or suffer damage in an explosive minefield.
Conversely, the Dangerous Territory objective rewards the second player for flying into the thick of the games asteroid and debris fields. If this is your active objective, you, as second player, would place one objective token on each of the games obstacles. Then, whenever a ship overlaps an obstacle, its owner can remove the objective token from the obstacle to gain one victory token, each of which is worth fifteen victory points at the end of the game. However, for the first player to win any of the tokens on the asteroid or debris fields, he needs to suffer the obstacles detrimental effects, either taking one faceup damage card or suffering two damage against a single hull zone. As second player, though, you ignore the effects of any asteroid fields or debris fields that your ships overlap, making this objective a good choice not only for anyone planning to navigate the games obstacles to score victory tokens, but also for anyone who would simply prefer to keep obstacles from interfering with his pursuit of enemy ships.
Finally, Superior Positions forces the first player to deploy all of his ships and squadrons before the second player deploys any, granting the second player perfect knowledge of his opponents deployment strategy. If youre the second player, Superior Positions may allow you to line up all your guns on an approach at the side of your opponents fleet, or it may help you get into flanking position where your attacks against the rear hull zones of your enemys ships can help you score victory tokens. And since you score victory tokens for every attack that deals damage, not just for attacks performed by your capital ships, Superior Positions is an excellent objective choice for fleets built around squadrons with the bomber ability.
Meeting Your Objectives En Route to Victory
Unless one player manages to eliminate all opposing ships before the end of the sixth round, the winner of a game of Armada is the player who scores the most points. Many times, you or your opponent will score the majority of those points by destroying enemy ships and squadrons. Each ship or squadron is worth a number of points equal to its fleet cost, as well as the fleet cost of its upgrades.
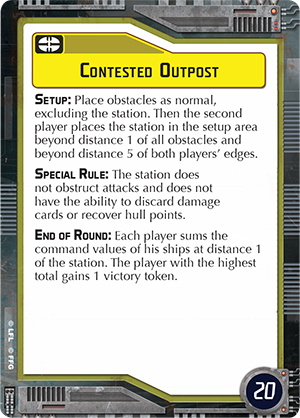 You could get thirty-nine points for destroying your opponents
CR90 Corvette B
. Your opponent might score 113 points by destroying the
Gladiator I-class Star Destroyer
that you outfitted with
Admiral Screed
,
Engine Techs
,
Expanded Launchers
, and the
Demolisher
title. Or you might score 120 points by winning all six of the victory tokens available in the Contested Outpost objective.
You could get thirty-nine points for destroying your opponents
CR90 Corvette B
. Your opponent might score 113 points by destroying the
Gladiator I-class Star Destroyer
that you outfitted with
Admiral Screed
,
Engine Techs
,
Expanded Launchers
, and the
Demolisher
title. Or you might score 120 points by winning all six of the victory tokens available in the Contested Outpost objective.
In Armada, it never hurts to destroy your opponents ships, but its not the only way to win the war. In the end, you must always adjust your strategy to balance your pursuit of enemy ships against against your pursuit of the points you can earn from the objective. In the balance lies victory.
What objectives best suit your style? How would you use them with your favorite fleet? Which would give your fleet the most trouble, and how would you adapt? Share your thoughts with the other members of the Armada community in our forums. The time to deploy your fleet is fast approaching!
Discuss this article
in our forums!
Star Wars: Armada is an epic two-player game of tactical fleet battles in the Star Wars universe. Massive Star Destroyers fly to battle against Rebel corvettes and frigates. Banks of turbolasers unleash torrential volleys of fire against squadrons of X-wing and TIEs. As Rebel and Imperial fleets collide, it is your job to issue the commands that will decide the course of battle and, ultimately, the fate of the galaxy.
© & TM Lucasfilm Ltd.
Source: A Galaxy at War (https://www.fantasyflightgames.com/en/news/2015/3/2/a-galaxy-at-war/)
Title: FFG:Join the Rebellion (or Empire)
Post by: RSSFeeder on 23 March 2015, 09:45:04
Join the Rebellion (or Empire)
With the release of our first season of Imperial Assault Tournament Expansion Kits comes tournament rules and an FAQ. Whether youre looking to play in a skirmish tournament or just play a campaign with friends, the FAQ is now available on the Imperial Assault page for reference and clarification. For players looking to compete in skirmish tournaments and tournament organizers planning to host them, the tournament rules can also be found on the Imperial Assault page.
Whether youre a player or tournament organizer, be sure to read the
FAQ
(pdf, 3.8 MB) and
tournament rules
(pdf, 726 KB) before getting involved in your first tournament.


A Word from the Developers
Hello Imperial Assault players!
In conjunction with the release of skirmish tournament rules, we are releasing an FAQ to help create the most enjoyable and competitive Imperial Assault experience possible.
The FAQ includes a handful of minor errata to rulebook and card text. Most of these should not change gameplay dramatically and are intended simply to clarify common sense rulings and close exploitable loopholes. For example, we wanted to make sure that when a Massive figure occupies blocking terrain, it is treated the same way a Mobile figure is when it occupies blocking terrain. Similarly, it was important to clarify that walls in combination with a terrain line can enclose a terrain type, to avoid disagreement over whether or not a central square of terrain qualified as difficult terrain or not. Other errata follow a similar vein, clarifying and specifying rather than dramatically altering gameplay.
Our hope with this errata is that it will not affect players day-to-day Imperial Assault experience. But rather, that when these issues come up in a rare instance and need to be addressed, a specific clarification exists and is ready to be referenced.
Good luck, roll well, and may the Force be with you!
Paul Winchester
Fantasy Flight Games
A Word from the Organized Play Team
Greetings Imperial Assault players,
The Imperial Assault skirmish tournament rules are straightforward and share many similarities with the other games we support, particularly X-Wing. Our goal in writing them, as with all of our games, was to make them accessible and easy to adopt so players and tournament organizers can concentrate on the unique aspects of Imperial Assault gameplay.
Organized Play

Thanks Paul and OP!
Download the
FAQ
and
tournament rules
now and begin preparing for Imperial Assault skirmish tournaments. Get started with Spring events at your local store, then try your hand at Regional Championships starting in May!
Discuss this article
in our forums!
Source: Join the Rebellion (or Empire) (https://www.fantasyflightgames.com/en/news/2015/3/2/join-the-rebellion-or-empire/)
Title: FFG:Escape from Mount Gram
Post by: RSSFeeder on 23 March 2015, 09:45:04
Escape from Mount Gram
"It was deep, deep, dark, such as only goblins that have taken to living in the heart of the mountains can see through. The passages there were crossed and tangled in all directions, but the goblins knew their way."
J.R.R. Tolkien, The Hobbit
Fantasy Flight Games is proud to announce the upcoming release of Escape from Mount Gram, the second Adventure Pack in the Angmar Awakened cycle for The Lord of the Rings: The Card Game!
Middle-earth is an ancient and storied place, and even such placid locations as the Shire share histories filled with drama, struggles, and warfare. Indeed, long before the Dark Lord ever cared about the Shire or the name of "Baggins," even long before the births of Frodo and Bilbo, Goblin invaders swept down from the mountains and made their way into the Northfarthing before they were turned back in the Battle of the Green Fields, where old Bullroarer Took struck the Goblin leader's head clean off his shoulders with a single blow from his wooden club.
However, no story is ever truly ended while its actors live on, and though the Goblins were routed that day, many retreated to their home at Mount Gram. There, they passed the centuries hidden from the Hobbits and the Rangers of the North. They launched no more invasions of Eriador, but they never shed their evil natures
Now, in Escape from Mount Gram, the Goblins of Mount Gram are once again up to new evils, and when they capture a host of Rangers and heroes, it's up to you and your heroes to lead a daring and dramatic prison break!
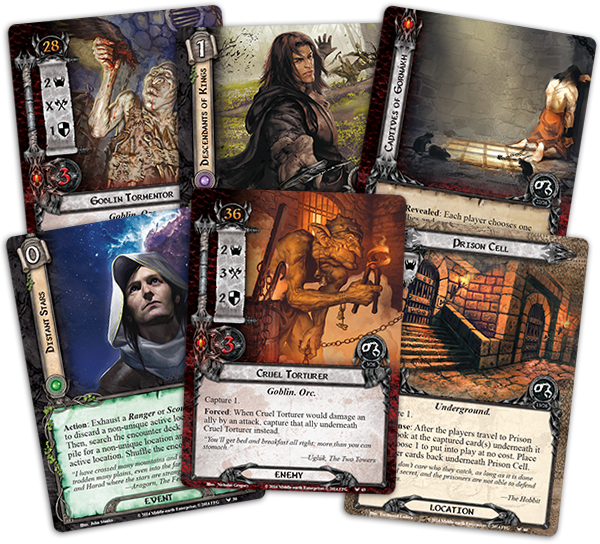
Forewarned Is Forearmed
In addition to its new scenario, Escape from Mount Gram introduces a new hero for the Lore sphere and three copies each of nine different player cards. As suggested in the introduction to the Angmar Awakened cycle, these cards explore a variety of different themes, divided among the different spheres of influence. While Leadership players benefit from a pair of cards that encourage direct action against the Enemy, Tactics players gain a pair of Ent-focused cards, and Lore players gain two cards that support a new mechanic based around manipulating the encounter deck and the victory display:
Leave No Trace
(Escape from Mount Gram, 35) and
Keen as Lances
(Escape from Mount Gram, 37).
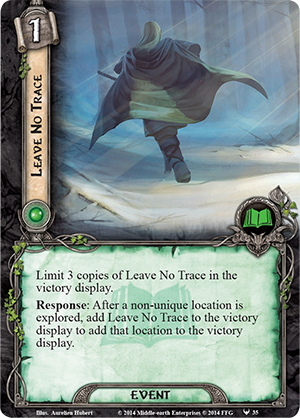 If any of the game's four spheres is built for tricky interactions with the encounter deck, it has to be Lore. Since the Core Set, the Lore sphere has been home to most of the game's draw effects, making it arguably the best sphere for exploring card combinations, and it boasts twice as many cards that target the encounter deck as the next closest sphere, Spirit. These facts make Lore the perfect home for Leave No Trace, which could easily be mistaken as an ineffectual card. Its text reads: "Response: After a non-unique location is explored, add Leave No Trace to the victory display to add that location to the victory display."
For even just one Lore resource, this doesn't initially appear to be a good bargain. Leave No Trace doesn't explore the location, nor even make progress on it. It doesn't cancel the location's effects or allow you to draw cards when the location is explored. It's not even free; you have to pay a resource to trigger it. And to top things off, it comes with the caveat, "Limit 3 copies of Leave No Trace in the victory display." This is only a concern in a multiplayer game, but even so, such explicit limitations are usually reserved for only the most powerful of cards. Black Arrow (On the Doorstep, 15), for example, reads, "Limit 1 per deck."
However, as is now likely obvious, the truth is that Leave No Trace isn't limited to three copies in the victory display because of the impact it mades right when it's played, but because of the power it has to shape the course of the game as it moves toward its conclusion. First of all, in a four-player game, or at any time that you think you might cycle through the encounter deck, Leave No Trace allows you to permanently remove from the encounter deck any locations with nasty "when revealed" effects, Doomed, or Surge. Likewise, it can remove locations with nasty ongoing effects that quickly add up whenever they start flooding into the staging area.
 Still, the card's true power becomes evident as it sets up the sorts of combinations that will become increasingly powerful throughout the Angmar Awakened cycle. For example, each time you play Leave No Trace, you reduce the cost of Keen as Lances by two once for placing Leave No Trace into the victory display and once for placing the non-unique location into the victory display. Once you've played Leave No Trace twice, Keen as Lances costs only one resource; and if there are three copies of Leave No Trace in the victory display, you'll have at least three non-unique locations along with them and your Keen as Lances will be free. Also, if you're playing multiplayer, your teammates' copies of Keen as Lances will also be free. That means that you could each, for zero resources, draw three cards, reduce your threat by four, or add two resources to a single hero.
Of course, we've already seen that other cards from the cycle can manipulate the victory display, such as
Scout Ahead
(The Wastes of Eriador, 9), and we can expect that other cards in the cycle will allow us to transfer our control over the victory display into a greater measure of control over the encounter deck. Accordingly, as we look forward to sending our heroes to aid the Rangers of the North, we can also look forward to some proper scouting. The more we know about the encounter deck and its dangers, the better prepared we'll be to defeat them. Forewarned is forearmed.
Ancient Evils Are Stirring
North of the Shire and north of Bree, ancient evils long gone quiet are stirring once more. Head into the heart of a Goblin stronghold and execute a daring prison break in Escape from Mount Gram. This second Adventure Pack in the Angmar Awakened cycle is scheduled for release early in the second quarter of 2015!
Discuss this article
in our forums!
The copyrightable portions of The Lord of the Rings: The Card Game and its expansions are © 2011 - 2013 Fantasy Flight Publishing, Inc. The Lord of the Rings, and the characters, items, events and places therein are trademarks or registered trademarks of The Saul Zaentz Company d/b/a Middle-earth Enterprises and are used, under license, by Fantasy Flight Games. Living Card Game, LCG, LCG logo and Fantasy Flight Supply are trademarks and/or registered trademarks of Fantasy Flight Publishing, Inc. All Rights Reserved to their respective owners.
Source: Escape from Mount Gram (https://www.fantasyflightgames.com/en/news/2015/3/3/escape-from-mount-gram/)
Title: FFG:Terror from Above
Post by: RSSFeeder on 23 March 2015, 09:45:04
Terror from Above
Blackest, moonless night blinded the Daqan troops as they marched forward. Safety lay just across the field, but on all sides they could see the distant fires of the Uthuk Yllan and hear the shrill whisper of poisoned arrows. Suddenly a screeching filled their ears, followed by the screams of a wounded man and the thud of his body falling on the cold ground. One of the archers rushed over and knelt by his fallen companion. The dying man lay gasping as blood streamed down his face. Claws
death
from above
Fantasy Flight Games is proud to announce the upcoming release of the Razorwings Reinforcement Pack for BattleLore Second Edition.
Those who dwell in the hills of Terrinoth have long dreaded the nocturnal Razorwings, swift batlike creatures who swoop down from their cavernous lairs and bring sudden death to their unsuspecting prey. Now, these vicious beasts join the range of wild creatures that you can harness as part of your BattleLore army. Like the recently announced Mountain Giant and Great Dragon, the Razorwings can by utilized by any faction, but you can channel their relentless ferocity in battle and use it to thwart your opponents.

The Razorwings Reinforcement Pack contains three detailed plastic figures, the cards you need to muster this unit in your army, three new lore cards to customize your lore deck, and a new cavern terrain tile. It also includes a pre-built scenario featuring this new unit and offering unprecedented strategic challenges.
Night Hunters
During the day, Razorwings rarely emerge from the darkness of their caverns. But at night these bloodthirsty creatures speed through the air, ravenously hunting for victims to feast upon. Razorwings ignore the combat and movement restrictions of hexes, soaring easily through forests, over rivers, and above other units on the battlefield. Once a target is within reach, they abruptly descend, tearing and slashing at their prey. A unit of Razorwings can slaughter an entire unit of three health with a single attack and they're still not finished dealing out damage. With their brutal, heavy claws the Razorwings can then stun another nearby unit, rendering that unit motionless and marking them for a future kill.

If you muster Razorwings as part of your army, you can replace a hill on your part of the board with a cavern hex where your Razorwings will lurk. During your Attack step, an ordered Razorwings unit may rush out of the cavern to an adjacent hex and perform an attack. Then, before the attack can be countered, the Razorwings can fly back to their cavern. Once inside, the Razorwings are safe from all non-adjacent units. Because they are able to assault even the most powerful units without fear of immediate reprisal, the Razorwings are among the most efficient and deadly predators of BattleLore.
A Shot in the Dark
The Razorwings Reinforcement Pack includes a pre-built scenario, A Shot in the Dark, that showcases the abilities of these incredibly vicious beasts. Unlike scenario cards, which shape only half of the battlefield, pre-built scenarios shape the entire landscape and create a unique objective for each faction. In A Shot in the Dark, a group of Daqan units must traverse hostile territory, bounded by rivers and Uthuk Yllan on either side. Razorwings also lurk in the hills, eager for fresh victims. It will take several days for the Daqan to reach safety, and at night, the Razorwings come out of their cavern to hunt.

The scenario alternates between day and night each turn. Every night the Razorwings reappear with full heath and attack, every day the Daqan regain the upper hand and move forward, striving to eliminate any opponents they can find. The goal for the Uthuk Yllan, with the help of the Razorwings, is to kill as many Daqan troops as they can. The Daqan seek to reach the safe haven that lies across the battlefield, and to rid this region of the rapacious Razorwings that menace its people. If they can accomplish either, they will achieve victory.
Unleash the Terror
Deploy Razorwings in your Daqan forces together with the massive Roc Warriors or alongside the Siege Golem of the Hernfar Guardians Army Pack in order to terrorize the Uthuk Yllan from the skies. Or, match Razorwings with the burrowing Doombringer of Warband of Scorn in your Uthuk Yllan army, so that you can threaten the Daqan simultaneously from both above and below. Whichever faction you play, the Razorwings savage and sudden assaults will fill your enemies hearts with fear.
The Razorwings Reinforcement Pack will be available in the second quarter of 2015. In the meantime, visit the BattleLore Second Edition website for more information and details about other upcoming expansions.
Discuss this article
in our forums!
The copyrightable portions of BattleLore Second Edition are © 2013 Fantasy Flight Publishing, Inc. BattleLore is a registered trademark of Fantasy Flight Publishing, Inc.
Source: Terror from Above (https://www.fantasyflightgames.com/en/news/2015/3/3/terror-from-above/)
Title: FFG:High Risk, High Reward
Post by: RSSFeeder on 23 March 2015, 09:45:04
High Risk, High Reward
Traveling through hyperspace isnt like dusting crops, boy!
Han Solo
Smuggling is a high risk, high reward line of work. In exchange for the freedom to enjoy the open skies and the money it takes to survive, Smugglers willingly undertake dangerous, sometimes illegal, jobs with employers that can be capricious and unsavory. Every leap into hyperspace, every approach to a planet, every interaction with a buyer or seller is full of risk.
Available now at local retailers and in our online store, the Fly Casual sourcebook for Star Wars®: Edge of the Empire features new guidelines to help GMs add more risks (and a few rewards) to Smuggling adventures. These include expanded rules on hyperspace travel and details for how to run quick-draw showdowns. In today's article, developer Max Brooke provides an overview of these integral aspects of any Smugglers tale. We'll also touch on how GMs can help a group of Smugglers find work and eventually determine how much they should get paid.
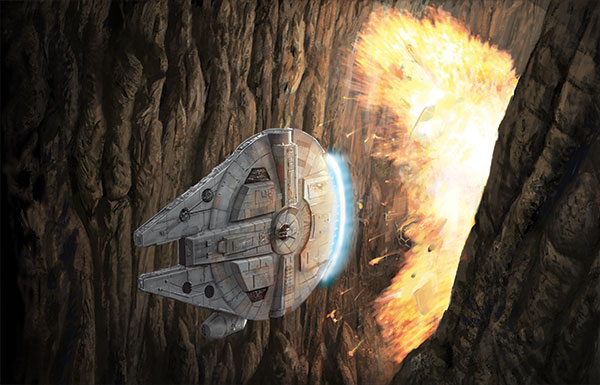
Making the Jump
Here's Max:
Thanks to the miracle of the hyperdrive, space ships can soar between the stars with astounding speed, completing journeys that once could have taken millennia in a matter of days. However, thanks to shifting hyperlanes, complexities introduced by mass shadows, and countless other factors, jumps across the interstellar void are far from safe. The calculations involved are enormously complex. Even the slightest error can mean the death of everyone aboard.
Fortunately for PCs and GMs, Fly Casual provides guidance on how to make Hyperspace Travel exciting without bogging down the game. New modifiers for the Astrogation check factor in the circumstances of departure and the route. Expanded options are given for spending advantage, triumph, despair and threat results on these checks, and a list of travel times is provided for many of the galaxys most common trading lanes and smuggling routes. Astrogation checks with sufficient advantage or threat can get the travelers to their destination early or help chart new hyperlanes, while threat and despair on the check can cast the ship adrift in uncharted space or even cause a collision with a mass shadow. Any jump is slightly dangerous, but a good Pilot backed by a skilled crew can take advantage of secret routes and shortcuts to arrive ahead of schedule or where the Imperials least expect it.

Quick Draws
Showdowns are an important part of the Star Wars mythology, and Fly Casual provides GMs with the resources for quick-draw duels. These rules provide additional options for combatants squaring off in a showdown, from the moment the parties involved begin to size up and intimidate each other to the thrilling point when someone draws and shoots. A showdown can be added to the beginning of a longer battle or be used for a conflict that ends after a single shot. While these rules are especially useful alongside characters with the new Gunslinger specialization, GMs should find them useful when crafting all sorts of Smuggler stories.
Thanks, Max!

Finding Work and Getting Paid
Beyond the expert flying and the shootouts, a smuggling job begins with the search for work and ends only when you get paid or when you dont. Fly Casual therefore offers suggestions for GMs about how to make the beginning and end of a job just as suspenseful and action-packed as the middle. A smuggling job might begin with characters meeting an underworld contact in a seedy location, receiving a coded transmission from the Rebel Alliance, or discovering that an old friend could use a little help.
With solid skills, a good crew, and a little luck, youll be able to deliver your cargo to its buyer intact and on time but getting paid for your delivery is an adventure in itself. Your pay may very well depend on a Negotiation check, so Fly Casual includes a table of Payout modifiers that helps translates the results of that check into credits or cargo rewards. Of course, you may fail to deliver the goods you promised when you promised them, so there are also options for what to do when the cargo arrives late or in an undesirable condition. In the worst case scenario, a team of Smugglers may have to face the wrath of their employer empty-handed. Fly Casual gives some ideas about what to do if that happens, from staging a shootout to deepening an Obligation, and how to keep the story moving forward to the next, hopefully more successful, smuggling job.

Shoot Faster and Fly Better
Travel through hyperspace is almost inevitable on a smuggling job, and blaster duels are common in this line of work especially when a deal goes bad. With the new guidelines introduced in Fly Casual, your Edge of the Empire gaming group will be able to find a job, speed through the stars, draw quickly, shoot first, and, in the end, get paid.
Pick up your copy of Fly Casual today!
Discuss this article
in our forums!
Participate in grim and gritty adventures on the fringes of the Star Wars universe with Star Wars®: Edge of the Empire. Edge of the Empire is a complete standalone roleplay system that transports players to some of the shadiest locations in the Outer Rim, the underbelly of the Core Worlds, and everywhere else in-between!
© and Lucasfilm Ltd.
Source: High Risk, High Reward (https://www.fantasyflightgames.com/en/news/2015/3/4/high-risk-high-reward/)
Title: FFG:Strongholds of Resistance
Post by: RSSFeeder on 23 March 2015, 18:45:10
Strongholds of Resistance
And now, your highness, we will discuss the location of your hidden Rebel base.
Darth Vader
Fantasy Flight Games is proud to announce the upcoming release of Strongholds of Resistance, a sourcebook for the Star Wars®: Age of Rebellion roleplaying game!
Strongholds of Resistance takes you to worlds that have boldly revolted from Imperial control and to the secret bases which serve as the command centers of the Rebellion. Your team of Rebel operatives might visit several of these locations in your work for the Rebel Alliance, or embark on a series of adventures amid the conflicts and challenging terrain of a single planet. Game Masters can easily integrate these new locations in their ongoing campaigns using the included modular encounters, or even launch a fresh campaign focused on worlds that are actively resisting the evil Empire or on the war efforts of a specific Rebel base.

Worlds in Revolt
In the Galactic Empires early days, Imperial agents and stormtroopers ruthlessly cracked down on any world that balked at Imperial rule. However, as some attempts to silence dissenting voices failed, other victimized planets began to express their discontent, particularly in the Outer Rim. Many planets have spawned local resistance groups, but not all such groups become part of the Rebel Alliance. And while thousands of worlds may sympathize with the Rebels and even provide support to the Rebellion, only a few hundred worlds have dared to openly resist the Empire.

A diplomatic mission might take you to the core world of Chandrila, a founding member of the Rebel Alliance and a center for poltiical debate, democracy, and peaceful protest. Or you may be sent to smuggle technology and weapons out of officially neutral planet Sullust. On Mon Cala you might swim through the planets submerged capital city and negotiate deals on capital ships that can swiftly transport starfighters and Rebel troops to the site of the next battle. Strongholds of Resistance describes multiple locations and adversaries for not only these three worlds, but also several others, ensuring an immense variety of possible adventures on a range of planets.
Hidden Rebel Bases
The Rebellion may be fueled, armed, and legitimized by openly dissenting worlds, but the true bases of its operation are in locations scattered throughout the galaxy, kept secret from the Empire at all costs. In the bustling corridors of these bases new recruits are trained, strategies are formulated, troops are mustered, and the wounded are healed. You may be charged with ensuring that a base remains secret from encroaching Imperial spies, with diffusing tensions among the Rebel leadership, or with organizing a high-risk mission on a nearby planet. No matter what your assignment, youll have to perform it in close confines and under the constant threat of sudden Imperial discovery.
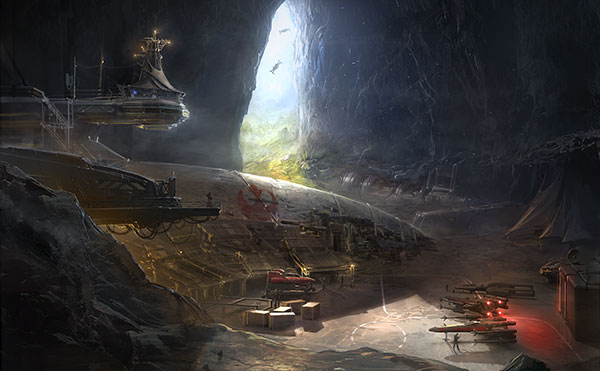
Strongholds of Resistance introduces four Rebel bases and includes suggestions for integrating them into your campaigns, or even creating your own hidden outpost. Each base has its own focus: Polis Massa is a center of espionage, starfighter support, and medical research. The Defiant Core base, constructed out of a salvaged Star Destroyer from the Clone Wars, is dedicated to hindering Imperial forces and exposing their abuses. Tierfon is a smaller base focused on keeping its starfighters operational. Finally, in the frigid wastelands of Hoth lies the most important and expansive base of all Echo Base, the current headquarters for the entire Rebellion.
Native Strengths and New Adaptations
Naturally, some members of the species native to Alliance worlds may be recruited into the Rebellion. Strongholds of Resistance therefore introduces playable species from Mon Cala, Polis Massa, and the Roche asteroid field: the proud and belligerent Quarren, the peaceful and telepathic Polis Massans, and the technophilic, communal Verpine. Each species offers a unique set of abilities and brings their own story of Imperial rule and open dissent to the Rebel Alliance.

The new species of Strongholds of Resistance: A Polis Massan, a Quarren, and a Verpine
Players and GMs will also find in this sourcebook a panoply of new gear and vehicles from repair droids to a cloaking-enabled starfighter. Some of the new gear is species-specific: Polis Massans, since they lack vocal chords, may want to purchase artificial ones. Verpine bond gauntlets mimic that species exoskeleton and help the wearer perform delicate tasks. Other gear is designed to help you navigate foreign planets. If your adventures take you to watery Mon Cala, you may want some organic gills so that you can breathe underwater, or you may find yourself traversing the bottom of the ocean in an Explorer submersible.

Defy the Empire
The war against the Empire has as many fronts as the galaxy has planets. You never know where your missions for the Rebel Alliance will take you, who you'll encounter, or what will be the location of your next home base. With the new settings, adversaries, character options, and gear introduced in Strongholds of Resistance, the possibilities are endless.
You can explore these realms of Rebel dissent in the second quarter of 2015. Until then, look for upcoming previews and current news on the Age of Rebellion website.
Discuss this article
in our forums!
Source: Strongholds of Resistance (https://www.fantasyflightgames.com/en/news/2015/3/4/strongholds-of-resistance/)
Title: FFG:Let the Galaxy Burn
Post by: RSSFeeder on 03 July 2015, 11:45:13
Let the Galaxy Burn
So boundless was his hatred, so great was his rage, that he would have killed them all without mercy. At that moment, he knew he would fight forever. He would fight until all was ruination and the entire galaxy burned.
Warhammer 40,000
A magnificent bloodbath awaits you in Forbidden Stars. The Herakon Clusters teeming populations are ripe for slaughter, their veins coursing with fresh crimson blood for the Blood God, their skulls ready to adorn his throne. More gloriously, the servants of the Imperium, the Eldar, and the Orks are also invading the sector, offering you an unprecedented opportunity to unleash your hatred, exterminate your foes, and leave a trail of misery and ruin in your wake.
Today's preview is focused on the bloody and savage World Eaters Chaos Space Marines. Youll learn about this factions hate-filled forces and hellforged starships, its diabolical use of the Warp, and how the powerful and eternal lure of Chaos increases your military might.
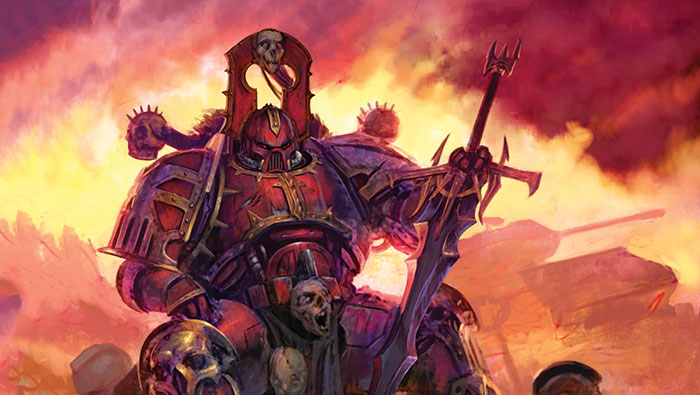
Lure of Chaos
The most omnipresent soldiers of Chaos are Cultists, drawn to the powers of darkness by promises of glory and violence. Armed with primitive weapons, Cultists can nevertheless overwhelm a superior foe though the sheer weight of their numbers, and may possess fearsome gifts from the Chaos Gods: muscles of steel, flailing tentacles, sharp, poison-dripping horns.
You enter the Herakon Cluster with two units of Cultists, each as formidable as a unit of Ultramarines Scouts. But Chaos and its vices are so enticing that Cultists rapidly proliferate. The
Prophets and Signs
Event Card brings one more Cultist, if not two more, to your army. In combat, you can play Dark Faith to gain
 from your forces devotion to the Dark Gods and possibly gain another Cultist unit. So, too, the Lure of Chaos offers you the chance to gain another Cultist who brings two
 or
or
 to the fight. You can also spread your Cultists throughout the sector and occupy uncontrolled worlds whenever you issue a Dominate Order.


Should you seek to unequivocally conquer a void, you may use Lure of Chaos to add another Iconoclast Destroyer to your fleet. These compact ships carry a formidable arsenal of weapons for their size and have been known to quickly shatter a planets orbital defences. Detested by the Imperium, Iconoclast Destroyers can as easily obliterate an enemy unit as they can convey your ravenous forces to the battlefront.
The Forces of Darkness
The heart of your armies are the Chaos Space Marines themselves, the World Eaters known for their peerless military prowess and the extreme delight they take in spilling blood for Khorne. Their hunger for killing fuels their excellence in battle: a unit of these blood soaked Berzerkers rolls one more die than a unit of their most hated foes and former breathren, the Space Marines.
As Chaos inevitably gains more power in the Herakon Cluster, you can purchase towering, crazed Helbrutes that unite the firepower of small tanks with the minds of psychotic maniacs. These armoured, rampaging monstrosities must be chained when not fighting and released only in battle to destroy everything they encounter. Yet Chaos Reaver Titans loom even more terrible than the Helbrutes. These ancient, indomitable war engines are the most powerful unit of the World Eaters faction, consecrated to the Chaos Gods and determined to perform all manners of butchery and destruction. Chaos Reaver Titans are so fearsome that lesser devotees of Chaos offer up sacrifices, even give their own lives, to help quench their thirst for bloodshed.

As Chaos Titans and Helbrutes storm the land, Repulsive Grand Cruisers bring terror to the void. These rare, gargantuan ships can withstand copious damage and launch bright torrents of deadly fire at enemy ships or vulnerable planets. Long ago manufactured to serve the Imperium, these ships are now among the most dreaded vessels of Chaos, able to eradicate tens of thousands of lives within a few seconds.
Boundless Hate
Since the massive schism of the Horus Heresy, Chaos Space Marines have fought an eternal war, fueled by boundless hatred, unquenchable rage, and an unrelenting desire to exact vengeance. These black internal drives combine with inhuman mutations and murderous technology to grant the World Eaters incredible abilities in war. The combat card Inhuman Strength grants your armies additional
and
in combat. If that strength is feeding a Helbrute or Grand Cruiser, it may cannibalize one of your units in order to wreak even greater destruction upon the enemy.

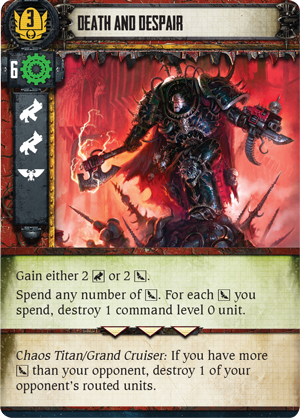
The implacable thrill of spreading bloody death and nightmarish despair throughout the galaxy also spurs on the forces of Chaos in battle. Death and Despair, one of the most powerful combat cards in the World Eaters faction, enhances your
and
, and allows you to ruthlessly eliminate any number of your enemies lower command level units on top of whatever other damage you deal. With a Chaos Titan or Grand Cruiser in the fray, this card manifests your
in the destruction of another enemy unit. Even the already defeated cannot escape the World Eaters wrath.
Lords of the Warp
Having long ago given themselves to the service of the Blood God, the World Eaters Chaos Space Marines have no dread of the Warps swirling and uncanny abyss. Of all the factions in Forbidden Stars, they alone can utilize the Warp for their own benefit. By playing a
Prayer to the Dark Gods
, you can undo how another player has moved a Warp Storm, instead shifting it in whatever direction best suits your violent aims.
From the Warp
, an order upgrade card, grants you the singular ability to move ships through Warp Storms once per turn. Similarly, the event card
Through the Warp
enables you to move an entire attacking army through a Warp Storm and increase
in the process. These cards will instill permanent dread in your opponents who thought that, surrounded by Warp Storms, their forces would remain secure. The World Eaters respect no boundaries and are limited only by their infinite cruelty, malice, and hate.
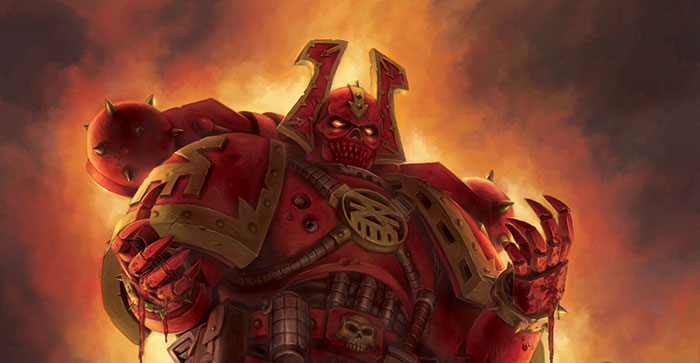
Kill, Maim, Burn
As the commander of the World Eaters, you have chosen obscene freedom and bloody gratification in the place of righteous servitude. Only war remains for you, only the incredible power of inflicting pain upon others, of soaking the ground with their blood, burning what they cherish. The Herakon Cluster is yours: all you have to do is kill, maim, and burn anyone and anything that stands in your way.
Let the galaxy burn. Pre-order Forbidden Stars from your local retailer today.
Discuss this article
in our forums!
Forbidden Stars © Copyright Games Workshop Limited 2015. Forbidden Stars, the Forbidden Stars logo, GW, Games Workshop, Space Marine, 40K, Warhammer, Warhammer 40,000, 40,000, the Aquila Double-headed Eagle logo, and all associated logos, illustrations, images, names, creatures, races, vehicles, locations, weapons, characters, and the distinctive likeness thereof, are either ® or TM, and/or © Games Workshop Limited, variably registered around the world, and used under license.
Source: Let the Galaxy Burn (https://www.fantasyflightgames.com/en/news/2015/6/16/let-the-galaxy-burn/)
Title: FFG:Taking the Black
Post by: RSSFeeder on 03 July 2015, 11:45:13
Taking the Black

Under the wounded pride, Will could sense something else in the older man. You could taste it; a nervous tension that came perilous close to fear.
George R.R. Martin, A Game of Thrones
Fantasy Flight Games is proud to announce Taking the Black, the first Chapter Pack in the Westeros cycle for A Game of Thrones: The Card Game Second Edition!
As A Song of Ice and Fire begins, King Robert Baratheon rides north to visit his old friend Eddard Stark in Winterfell. Westeros is at peace. But this deceptive calm will not long remain. Already, the seeds of unrest are growing with the ambitions of House Lannister, with the wedding of Daenerys Targaryen to a Dothraki khal, with the apparent murder of the Hand, Jon Arryn. Conflict between the Great Houses looms on the horizon as the high lords and ladies of Westeros begin to play their game of thrones.
You can take your place at the very beginning of the story with Taking the Black, the first Chapter Pack in the Westeros cycle for A Game of Thrones: The Card Game. As part of the Westeros cycle, Taking the Black explores the first chapters of A Game of Thrones with iconic characters like Renly Baratheon, the Hound, and Maester Luwin entering the game for the first time. In Taking the Black, each faction begins its journey through A Game of Thrones towards the Iron Throne!
For more on Taking the Black and the entire Westeros cycle, we turn to the designer of A Game of Thrones: The Card Game, Nate French.

Nate French on the Westeros Cycle
The Westeros cycle (that title is an homage to the first CCG base set) is the first expansion to the second edition of A Game of Thrones: The Card Game, and we tried to draw heavily from the events of the first book in A Song of Ice and Fire. Naturally, this doesnt mean that everything in these Chapter Packs is tied to the first book, but wherever possible, we turned to the beginning of the series for inspiration. (Dont worry Martell and Greyjoy fans those factions werent prominently featured in the book, but all factions get equal treatment in the cycle.)
As this is the first cycle, our primary design goal was to expand the possibilities of the Core Set without adding additional rules to the game. At a very basic level, there are two types of cards that youll find in the Westeros cycle: cards that easily slot into a core deck, and cards that pull a players understanding of a core theme in a new direction.
Another important design goal of the set was to rapidly increase the number of plot cards in the environment. Constructing and piloting a plot deck is one of the most enjoyable aspects of A Game of Thrones, and we felt that investing heavily in new plot cards would rapidly increase the strategic scope of the game. This cycle introduces eighteen new plots to the game, including a loyal plot for each faction. Each of these loyal plots like
For the Watch!
supports its factions core strategies, inviting players to further embrace each factions unique playstyle.
Working on this set and the young, second edition card pool was a lot of fun, and Im looking forward to seeing these cards influence the early metagame.
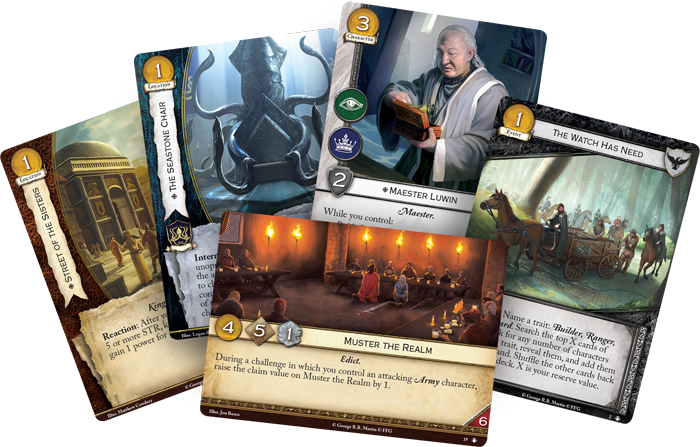
Join the Watch
Recently, we previewed the Nights Watch faction in the second edition of A Game of Thrones: The Card Game. More than any other faction, the Nights Watch relies on defense.
The Wall
(Core Set, 137) grants additional power when you oppose every challenge, and powerful characters like
Old Bear Mormont
(Core Set, 126) can bring other Nights Watch characters into play, provided you havent lost a challenge as the defending player.
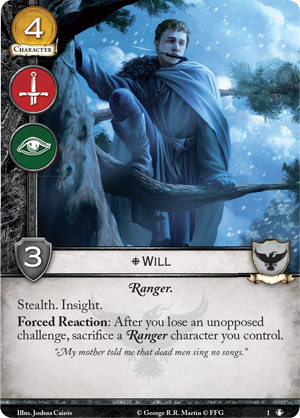
The exception to the Watchs focus on defense are its Rangers. They walk the lands beyond the Wall, gathering information and scouting for possible threats to the Watch. In the prologue of A Game of Thrones, the first characters you encounter belong to the Nights Watch, so it only makes sense that the first character you see in Taking the Black is one of these Nights Watch Rangers:
Will
(Taking the Black, 1). Will bears both the military and intrigue challenge icons, as well as two important keywords. Stealth allows Will to choose an opponents character who cannot defend the challenge, and insight invites you to draw a card if you win the challenge.
This combination of challenge icons and keywords can be formidable, especially for only four gold, but Will is not without drawbacks. The Rangers of the Watch accomplish nothing if enemies still get past the Wall. Because of this, Will also bears a Forced Reaction: After you lose an unopposed challenge, sacrifice a Ranger character you control. In other words, as long as you have a defender to oppose every challenge, Will is free to sneak by your opponents characters and learn their plans. As soon as enemies begin to slip by you, however, Will can quickly become a liability that must be sacrificed for the greater good.
Will isnt the only card the Nights Watch gains in Taking the Black. These defenders of Westeros also gain an event that allows you to gather new recruits wherever you find them. You can swell your hand with new brothers for the Nights Watch by playing
The Watch Has Need
(Taking the Black, 2). Playing this event allows you to name a trait: either Ranger, Steward, or Builder. Then, you may search a number of cards from the top of your deck equal to your plots reserve value, and add all cards that bear the named trait to you hand.
In many ways, playing The Watch Has Need can help you shore up any weaknesses in the strengths of the Nights Watch. Each of the three branches of the Nights Watch Rangers, Stewards, and Builders loosely corresponds to the three challenge icons: military, intrigue, and power. Because of this, if you desperately need more characters with the intrigue icon, you may name Steward, whereas if youre short on military icons, you may choose Ranger. Its also important to consider the reserve of your plot when you play the card.
Counting Coppers
(Core Set, 10) allows you to search ten cards for your recruits, but offers little gold to play them.
A Feast for Crows
(Core Set, 2), on the other hand, only allows you to search four cards, but gives you enough gold to play even the most expensive characters.
Say Your Vows
Taking the Black begins the Westeros cycles journey through the first book of A Song of Ice and Fire with powerful new cards for every faction. You range the lands beyond the Wall with Will and the Nights Watch, journey to the Dothraki city of Vaes Dothrak, or sit the Seastone Chair with the Lord Reavers of House Greyjoy. Begin the story of A Game of Thrones anew with the first Chapter Pack for the second edition!
Look for Taking the Black at your local retailer in the fourth quarter of 2015.
Discuss this article
in our forums!
The copyrightable portions of A Game of Thrones: The Card Game Second Edition is © 2015 Fantasy Flight Publishing, Inc. Licensed by George R.R. Martin. The names, descriptions, and depictions applied to this game are derived from works copyrighted by George R.R. Martin, and may not be used or reused without his permission. A Game of Thrones: The Card Game Second Edition, its expansion titles, Living Card Game, LCG, the LCG logo and Fantasy Flight Supply are trademarks and/or registered trademarks of Fantasy Flight Publishing, Inc. All rights reserved to their respective owners.
Source: Taking the Black (https://www.fantasyflightgames.com/en/news/2015/6/16/taking-the-black/)
Title: FFG:The Archmage's Attaché
Post by: RSSFeeder on 03 July 2015, 11:45:13
The Archmage's Attaché
"All conjectures about him were spiced with references to the bygone magic of Old Whateley, and how the hills once shook when he shrieked the dreadful name of Yog-Sothoth in the midst of a circle of stones with a great book open in his arms before him."
H.P. Lovecraft, The Dunwich Horror
As we've seen in our earlier previews of the ninth deluxe expansion for Call of Cthulhu: The Card Game, The Thousand Young, its 165 new cards (three copies each of fifty-five different cards) greatly expand the hosts and powers of Shub-Niggurath, the Black Goat of the Woods and Mother of a Thousand Young. However, we've also seen how it houses arcane secrets of every kind within the new Locations it introduces, and these secrets give power and support to each of the game's other factions. Today, we continue our exploration of what The Thousand Young offers to players with a look at its Champion Card,
The Archmage's Attaché
(The Thousand Young, 37).
2013 North American Champion Tom Capor on The Archmage's Attaché
No player has had a greater impact upon the shape of Call of Cthulhu: The Card Game than four-time World Champion Tom Capor. For years, his name has been synonymous with top-level play, including an unbroken string of victories at Gen Con Indy that date back to 2009 when the convention was the site of the game's World Championships.

However, it's not just his name and his results that have become synonymous with the game; because the game's World Champions earn the right to work with the developers to design their own cards, Tom has added to the game's card pool, as well.
The Mage Known as Magnus
(That Which Consumes, 111),
Hall of Champions
(Written and Bound, 20), and
The Mage's Machinations
(Terror in Venice, 30) are all his design, as is The Archmage's Attaché, which appears in The Thousand Young and which he earned the right to design by winning the 2013 North American Championship, once again at Gen Con Indy, the home to so many of his biggest victories.
"Today, I have the distinct pleasure and honor to show off The Archmages Attaché!
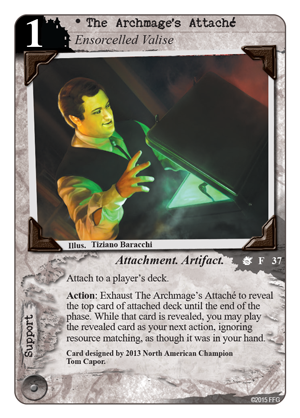 "If there was one thing that Lovecraft's stories and I have in common, it would be our attachment to strange objects. For almost the entirety of my tabletop gaming career, Ive been lugging around a briefcase. In the older times, we didnt have all these fancy ways to carry around decks and other gaming bits that we do now, so while most were transporting their cards in their assorted boxes, binders, and book bags, my solution to the problem was the briefcase.
"However, as I continued to attend events and tournaments, the briefcase became more than just an efficient way to carry my things. It became an ice breaker, and it became my symbol. It showed that I was serious, but didnt take myself too seriously. I mean, come on, who brings a briefcase to a card game?
"Personality quirks aside, when I earned this opportunity to birth a card into Call of Cthulhu: The Card Game, and after I had already briefly hinted at the briefcases presence in The Mages Machinations, it became clear to me that the briefcase should be the feature of my attachment card. When played, The Archmage's Attaché attaches to a deck and then 'opens' as an action, revealing the top card of that deck, and allowing you to play it as your next action, ignoring resource matching.
"In the spirit of flavor, The Archmages Attaché carries a lot of potential, adds a lot of choices, and allows you to pack more opportunities to react to the current game state. On one side, you have your own deck. You know what it is trying to do and the Attaché will help you get there faster. On the other, if you can correctly piece together your opponents' strategies, the Attaché might allow you to utilize or disrupt their options, as well. Herein lie the two major ways to play The Archmage's Attaché.
Your Stuff Versus My Stuff
"Its all good stuff, but in order to determine whether you'll get more value out of the Attaché by attaching it to your deck or your opponent's, you'll need to take into account cost curves, card types, synergies, and various other factors. The choice will force gamers to really stretch their analytical muscles
and I like that.
"The safer choice is always attaching the Attaché to your own deck. After all, you know what to expect out of your deck. In this case, the Attaché acts as a faux draw engine, and it comes at a relatively cheap price.

In this example, we've attached The Archmage's Attaché to our deck. Exhausting it during our operations phase reveals
Garden District
(The Thousand Young, 49), which we can now play as our next action if we choose. Because cards played by The Archmage's Attaché ignore resource matching, we not only gain the "false draw" it offers, but an extra economic efficiency since we can pay for it with our open domain that contains just one Miskatonic Resource, rather than needing to spend the Silver Twilight resource that exists only in our open domain with three resources.
"Of course, there's also the risky choice: attaching the Attaché to your opponents deck. Due to the nature of most decks, youll have a use for most of your opponents cards. After all, most of them will be attempting to do the same thing as you, in a different shape. They'll have characters, events to surprise you, and supports to reinforce their positions. However, many decks may also include a hodgepodge of cards that are completely uselessness to you, especially niche decks that dont conform to typical standards. Still, while there's a chance that you'll reveal
The Seventy Steps
(In Memory of Day, 30) after your opponent has already won a story or a copy of a unique character your opponent already controls, there's also a chance that The Archmages Attaché will present you with the unique opportunity to let you utilize your opponent's most critical cards against him, using them to advance your strategy, or simply using them to keep your opponent from advancing his. Good times either way.
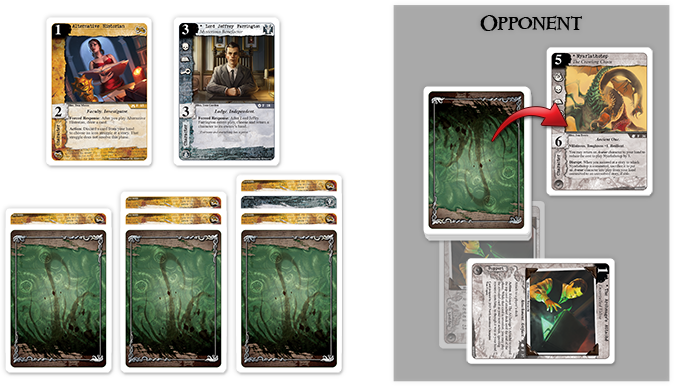
In this example, we take the riskier play with The Archmage's Attaché, attaching it to our opponent's deck. Now, when we exhaust the Attaché, it reveals our opponent's
Nyarlathotep
(The Thousand Young, 36), which we cannot afford to play, meaning our use of the Attaché was "dead" for this round. However, had we been able to play Nyarlathotep, we could have potentially denied our opponent the use of one of his most powerful unique characters, likely disrupting more than one element of his overall strategy.
"Your deck, or your opponent's. Which will you choose?
My Thanks
"Id like to thank FFG for this amazing opportunity and Damon Stone for his patience, wisdom, and his help in bringing The Archmages Attaché to life. Of course, I also wish to thank the Cthulhu community for your continued support and hope that all can enjoy this little gem of an attachment card."
Thanks, Tom!
Throughout the years, Tom has proven his mastery of the eldritch secrets of Call of Cthulhu: The Card Game, so it stands to reason that The Archmage's Attaché will be packed full of all manner of tricks, and it's likely to hold more than just your cards or your opponent's. With all the possibilities it contains, The Archmage's Attaché may very well open a gateway to an alternate reality, or it may hold the secret to crossing the boundaries of time and space.
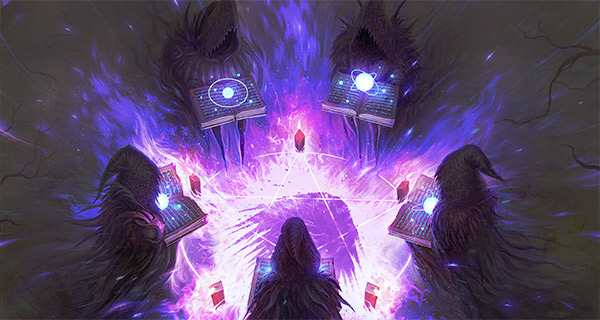
A Thousand Terrible Secrets
The Archmage's Attaché is just one of the many new cards coming in The Thousand Young, and all of them introduce new abilities and deck-building possibilities. In fact, The Thousand Young is something like a briefcase full of cards, itself, containing tools and answers for nearly every strategy. How will you make use of them? You'll soon have the chance to decide. The Thousand Young is scheduled to arrive at retailers later next week!
Discuss this article
in our forums!
The copyrightable portions of Call of Cthulhu: The Card Game are © 2008 - 2013 Fantasy Flight Publishing, Inc. Call of Cthulhu is a registered trademark of Chaosium, Inc. Living Card Game, LCG, LCG logo and Fantasy Flight Supply are trademarks and/or registered trademarks of Fantasy Flight Publishing, Inc. All rights reserved to their respective owners.
Source: The Archmage's Attaché (https://www.fantasyflightgames.com/en/news/2015/6/17/the-archmages-attache/)
Title: FFG:Charge into Battle!
Post by: RSSFeeder on 03 July 2015, 20:45:16
Charge into Battle!

Muster your armies, stake out your position, and charge into the fray! BattleLore: Command  for iOS and Android is now on sale at the price of $3.99! Based on the hit board game BattleLore Second Edition, BattleLore: Command offers you the chance to lead fantastical armies in intense tactical combat scenarios. The single-player campaign places you in charge of the noble Daqan army as they defend their homeland against the invasion of the ravaging, bloodthirsty hordes of the Uthuk Yâllan. In multiplayer, you can command an army of either Daqan or Uthuk Yâllan units and wage war against opponents from anywhere in the world. Both the iOS and Android versions feature intuitive touch-screen controls, cross-platform online multiplayer, and a 360º zoom view that allows you to see the battlefield from almost any perspective.Â

Fearless Warriors and Ferocious InvadersThe land of Terrinoth has long flourished in peace, its people making a living from farming, herding, and hunting. Now, the Uthuk Yâllan, a vicious, demon-blooded people from the desert wastelands, have sent their savage forces to invade, occupy, and lay waste to Terrinoth. The single-player campaign of BattleLore: Command puts you in charge of fighting against this terrible Uthuk Yâllan invasion. Youâll have to keep them from burning villages, stealing powerful magics, and conquering important fortresses if you want to win. As you prove your skills as a commander, more forces will come to fight under your banner, until you can field an army of not just infantry, archers, and cavalry, but even enchanted stone Rune Golems and giant, soaring raptors.Â
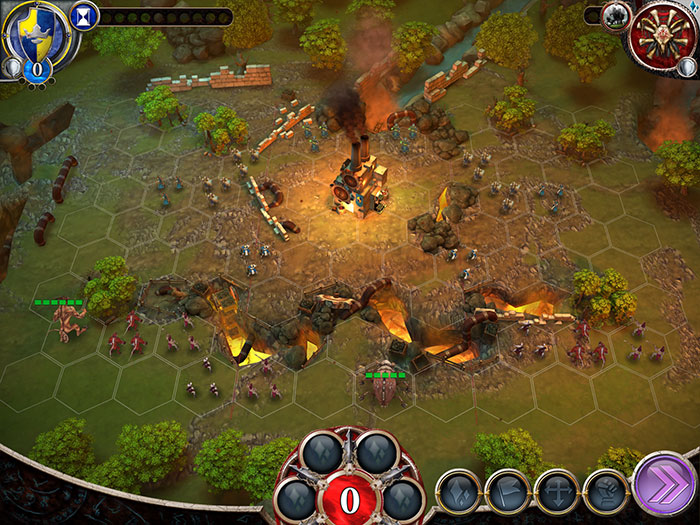
Multiplayer mode lets you undertake vicious tactical duels against an online opponent from anywhere in the world. For every battle youâll select a challenging scenario, determine how much you and your opponent can spend to muster your forces, and choose a faction. When you advance in the campaign, you can also unlock powerful new units for your multiplayer battles, such as the formidable and swashbuckling Baron of Kell or the brutal demon, Ravos the Ever-Hungry. You can add even more new units to your armies with the Locust expansion, now available for in-app purchase. The Locust expansion introduces select units from Hernfar Guardians and Warband of Scorn to the game, opens up five new maps for your player vs. player battles and gives you command of the Uthuk Y'llan in a savage mini-campaign to undermine the Daqan war effort.
Join In the ActionBattleLore: Command isnât just a digital strategy game; It also provides an excellent gateway into the tabletop action. With the new forces of Hernfar Guardians and Warband of Scorn having just taken the field, ferocious reinforcements like the Razorwings and Mountain Giant coming soon, and the Undead faction on the way, there has never been a better time to get into BattleLore Second Edition. No matter what your level of strategic skill or your favorite tactics may be, whether you prefer tabletop, desktop or mobile gaming, youâll find a vast and engaging and combat experience in BattleLore. Download BattleLore: Command from iTunes or Google Play today!
Discuss this article
in our forums!
The copyrightable portions of BattleLore Second Edition are © 2013 Fantasy Flight Publishing, Inc. BattleLore is a registered trademark of Fantasy Flight Publishing, Inc. Source: Charge into Battle! (https://www.fantasyflightgames.com/en/news/2015/6/17/charge-into-battle/)
Title: FFG:Fully Operational
Post by: RSSFeeder on 15 April 2016, 09:45:11
Fully OperationalPublished 21 March 2016|Star Wars: Rebellion (http://en/products/star-wars-rebellion/) Fully OperationalThe Rules for Star Warsâ¢: Rebellion Are Now Available for Download (https://images-cdn.fantasyflightgames.com/filer_public/7e/66/7e6661a3-1b67-4c6d-bdf6-054067cc24f7/sw03_box_left.png) (https://images-cdn.fantasyflightgames.com/filer_public/7e/66/7e6661a3-1b67-4c6d-bdf6-054067cc24f7/sw03_box_left.png) "That blast came from the Death Star! That thing's operational!"   ÂâLando Calrissian Star Warsâ¢: Rebellion (http://en/products/star-wars-rebellion/) is nearly here, and it is coming fully armed and operational! If you had ever hoped to find the whole Galactic Civil War condensed into a single game and a single box, this is it. Star Wars: Rebellion is scheduled to arrive at retailers a week from Thursday, and when you pick up your copy, you can take command of either the entire Galactic Empire or the fledgling Rebel Alliance. More than that, by picking up an early copy of Star Wars: Rebellion, you gain the opportunity to take part in the action of Rebellion: Week One (https://www.fantasyflightgames.com/en/news/2016/3/9/rebellion-week-one/). All week long, when you play your games, you can report your results and see how they help to shape the ongoing struggles between Imperial and Rebel forces. First, however, you will want to learn the game, and to that end, you can now download the rules!(https://images-cdn.fantasyflightgames.com/filer_public/c1/bb/c1bbd4d3-e35e-42fe-ae3d-07fd63cce76d/sw03_layout_left.png) (https://images-cdn.fantasyflightgames.com/filer_public/c1/bb/c1bbd4d3-e35e-42fe-ae3d-07fd63cce76d/sw03_layout_left.png) Witness the Firepower"Now witness the firepower of this fully armed and operational battle station."   ÂâEmperor Palpatine Star Wars: Rebellion is a big game. You have fleet battles, secret missions, and political gambits. You have two rival militaries vying for the hearts and minds of citizens throughout the galaxy and calling upon the resources of dozens of planets. You have Death Star Plans and Jedi training. You have probe droids scouring the galaxy to find the hidden Rebel base. Over the course of our previews, we saw how these many different concerns play out over the course of a game round. Although we also demonstrated how everything traces back to your leaders and their influence, the Galactic Civil War is still massive, and there is still a lot to absorb. Accordingly, for your convenience, the rules for Star Wars: Rebellion have been divided into two separate rulebooks. (https://images-cdn.fantasyflightgames.com/filer_public/2e/9d/2e9d8a6e-c14f-495c-aaf4-382e55cb2f78/ltp-thumb.png) (https://images-cdn.fantasyflightgames.com/filer_public/0b/07/0b07601a-6ac3-4333-ac41-b6d1b9a979da/sw03_learn_to_play_web.pdf) The Star Wars: Rebellion Learn to Play (https://images-cdn.fantasyflightgames.com/filer_public/0b/07/0b07601a-6ac3-4333-ac41-b6d1b9a979da/sw03_learn_to_play_web.pdf) booklet (pdf, 17.2 MB) serves as your introduction to the game. It is intended to lead you quickly into and through your first battles. (https://images-cdn.fantasyflightgames.com/filer_public/5e/a5/5ea55ac4-44e3-42a1-8bbd-3b097d3eb6b0/rrthumb.png) (https://images-cdn.fantasyflightgames.com/filer_public/d9/76/d97645d4-3973-41b6-ad78-6c9b927d3bc1/sw03_rules_reference_web.pdf) The Star Wars: Rebellion Rules Reference (https://images-cdn.fantasyflightgames.com/filer_public/d9/76/d97645d4-3973-41b6-ad78-6c9b927d3bc1/sw03_rules_reference_web.pdf) (pdf, 5.8 MB) is not intended to teach you the game, but it serves as an indexed resource that addresses and clarifies all rules questions that might arise over the course of your games. Once you download these documents, it is recommended that you read through the whole Learn to Play booklet before you play your first game, and then you may find it best to use the prescribed First Game Setup and save the advanced rules for a later session. In this way, you can focus less on the additional rules and more on the heated conflicts at the heart of your battles for the fate of the galaxy! Advanced Rules"The Force is with you, young Skywalker. But you are not a Jedi yet."   ÂâDarth Vader Once you have played a few games and mastered the basic rules, you will likely appreciate the ways in which the game's rules and its flavor work together to weave deeply engaging play experiences, loaded with narrative drama. Some of these experiences may line up with the films; others may lead your Galactic Civil War in other directions. For example, you might discover the Rebel base on Hoth, only for the Rebels to fire their ion cannon and make their escape. Or you might witness Emperor Palpatine successfully luring Luke Skywalker to the dark side of the Force. Either way, you are almost certain to be swept up by the tension and the larger-than-life stories that all begin with your assignment of your leaders. The advanced rules outlined in the Learn to Play booklet carry these thrilling, narrative moments even further and lend further distinction to each of your heroes or villains. While the advanced setup challenges you to respond to the task of starting with different systems each game and permits you to make tactical decisions about the deployment of your units from the outset, the main adjustment in advanced play is the way that you handle action cards. You use action cards in the basic game, but only in order to recruit new leaders. Then, after you have recruited your leader, you remove the action cards that you drew from play, placing them back in the box. However, each of these cards also features an ability that you can use in advanced play. Instead of putting them back in the box, you hold onto them and can play them at the appropriate time. Accordingly, if you choose to recruit Han Solo withThe Millennium Falcon (https://images-cdn.fantasyflightgames.com/filer_public/26/22/2622214e-e19f-4ce5-bca2-02406402428e/milleniumfalcon.png)card, you can immediately trigger the card's ability to attach theMillennium Falcon ring (https://images-cdn.fantasyflightgames.com/filer_public/b7/52/b7525f4d-ddfc-4c73-a9b1-4dbba905089b/falconring.png)to Han, which provides him the ability to rescue a captured leader after he succeeds at a mission.(https://images-cdn.fantasyflightgames.com/filer_public/f7/5d/f75df99b-9db9-4f11-a80a-7444f574bc42/hanfalcondiagram.png) (https://images-cdn.fantasyflightgames.com/filer_public/f7/5d/f75df99b-9db9-4f11-a80a-7444f574bc42/hanfalcondiagram.png) Most action cards, however, do not give you attachment rings, and only a small percentage of them need to be played immediately. In fact, there are four triggers for when an action card can be used: Assignment, Start of Combat, Immediate, and Special. - Assignment: The card is used during the Assignment Phase. Instead of assigning a leader to a mission, a player can flip the card faceup and resolve its ability.
- Start of Combat: The card is used immediately after step 1 (Add Leader) of combat.
- Immediate: The card must be used as soon as the player gains the card, either during setup or after choosing it when recruiting a leader. The card is immediately revealed and resolved.
- Special: The card is used when specified on the card.
Notably, because your action cards only provide their benefits when used in conjunction with one of the leaders they depict, the action cards that you draw in the advanced game may very well end up influencing the leaders you recruit. For example, if the opportunity arises to recruit a new leader and you drawGood Intel (https://images-cdn.fantasyflightgames.com/filer_public/e5/5e/e55e5add-30bf-4257-bef9-20768d9a0223/goodintel.png)andProceeding as Planned (https://images-cdn.fantasyflightgames.com/filer_public/5d/9c/5d9c33f5-d102-4c15-b79a-7e5dec42fe65/sw03_proceedingasplanned.png), your first instinct may be to recruit Colonel Yularen for his three Intel icons, space tactic value of two, and ground tactic value of two. But recruiting either Yularen or Soontir Fel would leave you unable to target one of the leaders shown on Proceeding as Planned, meaning you would not be able to play it and would lose the ability it grants you to search the project deck for theConstruct Death Star (https://images-cdn.fantasyflightgames.com/filer_public/e9/bd/e9bdc0c0-3746-41df-9546-beea74f1de55/constructdeathstar.png)mission. On the other hand, if you recruited Moff Jerjerrod, you could play Proceeding as Planned in the next activation phase to take the Construct Death Star mission into your hand, use it the next round to place the Death Star Under Construction miniature in a system of your choice, and begin building a second Death Star.(https://images-cdn.fantasyflightgames.com/filer_public/71/af/71af3b62-d512-4290-959b-9ba6e7600b36/deathstardiagram.png) (https://images-cdn.fantasyflightgames.com/filer_public/71/af/71af3b62-d512-4290-959b-9ba6e7600b36/deathstardiagram.png) In the end, the use of the game's advanced rules and the addition of its action cards serve to further reinforce the thematic and cinematic aspects of Star Wars: Rebellion, even as they further enhance your leaders' uniquity and importance. After all, Luke Skywalker is not just a Rebel leader with three mission icons and two tactics in both space and ground battles; he is theSon of Skywalker (https://images-cdn.fantasyflightgames.com/filer_public/a3/50/a350ceb1-55be-40b7-8ab6-8c62c34d3e2e/sw03_sonofskywalker.png)who canSeek Yoda (https://images-cdn.fantasyflightgames.com/filer_public/14/93/1493bc97-14d6-4c83-8f01-0d78c22634d9/sw03_seekyoda.png)to receive his Jedi training, and he is the Rebel ace who struck aOne in a Million (https://images-cdn.fantasyflightgames.com/filer_public/26/72/2672f759-c5f2-48c0-8e03-19beaf8b2871/sw03_oneinamillion.png)blow against the Galactic Empire by firing the shot thatexploded the Death Star (https://images-cdn.fantasyflightgames.com/filer_public/15/d1/15d1dd55-8e3d-4b75-9572-56a8279982f5/sw03_deathstarplans.png). In the advanced game, these elements make an even greater impression, even as your action cards provide you even more tactical options and sneaky ways to disrupt your opponent's best laid plans.(https://images-cdn.fantasyflightgames.com/filer_public/3e/26/3e26933b-f696-48f2-aeea-a03b633b927e/lukediagram.png) (https://images-cdn.fantasyflightgames.com/filer_public/3e/26/3e26933b-f696-48f2-aeea-a03b633b927e/lukediagram.png) Play Your Part in Rebellion: Week One!"Impressive⦠most impressive."   ÂâDarth Vader The Galactic Empire needs you! So does the Rebel Alliance! Star Wars: Rebellion is scheduled to arrive at retailers next Thursday, and we invite you to celebrate the first shots in the Galactic Civil War by jumping in, playing with your friends, and reporting your results. From Thursday through Monday April 10th, we will collect your results and add them to our constantly changing heat map. See which areas have fallen under Rebel control. See where the Empire has asserted its might and established order. Over the course of Rebellion: Week One, we want you to be a part of the greatest board game battles in the history of the Star Wars galaxy, and at the end, we plan to report which leaders and which missions saw the greatest success, as well as how many planets the Death Star manages to destroy. We also want to share some of your favorite moments, so be sure to report the most exciting and fateful moments from your games. How will the galaxy come to life on your tables? We want to know. So get ready! Thursday the 31st, the Rebellion begins! Discuss this article in our forums! © & ⢠Lucasfilm, Ltd. Source: Fully Operational (https://www.fantasyflightgames.com/en/news/2016/3/21/fully-operational/)
Title: FFG:Personal Invitation
Post by: RSSFeeder on 15 April 2016, 09:45:13
Personal Invitation
Published 22 March 2016|Talisman (http://en/products/talisman/)
Personal Invitation
Preview the Denizens and Characters of Talisman: The Cataclysm
(https://images-cdn.fantasyflightgames.com/filer_public/dd/18/dd188050-847f-4ed8-ad56-551a1fabdf3d/tm16_box_left.png) (https://images-cdn.fantasyflightgames.com/filer_public/dd/18/dd188050-847f-4ed8-ad56-551a1fabdf3d/tm16_box_left.png)Toxic, torrential rain had made travel unsafe, so the young boy had taken refuge in the tavern, along with seemingly everyone else. He was quietly eating his stew when a burly, drunken man sat down next to him. âWhatâre you doing here, kid? Whereâs your mum?ââDonât have one,â the boy replied, focusing pointedly on his stew.âThen you gotta learn how to defend yârself,â the man said. âHere. Try anâ punch me.â The boy smiled a little. He murmured a few magical words very quietly as he pulled back his fist, then punched the man in the gut, sending him sprawling across the room.âOh, I can defend myself just fine.âÂ
The Cataclysm expansion for Talisman (http://en/products/talisman/) takes you to a realm still recovering from the apocalypse. Many of the Strangers who once roamed across the Fields, Deserts, and Forests are gone, either slain in the events of the apocalypse itself or fled to another land. Yet some managed to survive, and some of those who fled are now returning. Today's preview is yourpersonal invitation (https://images-cdn.fantasyflightgames.com/filer_public/f2/e9/f2e9f29b-5260-4b35-a88a-22cd7ae05924/personal_invitation_card.png)to meet the tough Denizens who inhabit Talisman now, as well as a few of the Characters who aim to rule the realm during this time of renewal.
Denizens of a Changed Realm
Many things have changed in the realm of Talisman, but the City, Village, and Tavern have weathered the chaos of the apocalypse and the tumultuous years that followed. However, the people you used to reliably find in these civilized placesâthe Doctor, Blacksmith, Alchemist, and othersâmay be difficult to find, although rumor goes that they havenât left the realm. The Chapel, meanwhile, is less a place of worship than a refuge for healers and priests. Some people have also made homes in the decaying Graveyard and at the Castle where the Black Knight used to dwell. (https://images-cdn.fantasyflightgames.com/filer_public/d2/cd/d2cd014d-0abf-44e5-ad3b-0846bffc28a6/tm16_chancemeeting.jpg) (https://images-cdn.fantasyflightgames.com/filer_public/d2/cd/d2cd014d-0abf-44e5-ad3b-0846bffc28a6/tm16_chancemeeting.jpg)
In The Cataclysm, when you arrive at one of these places, you draw a Denizen Card to see who youâll meet there. Once theyâve appeared, Denizens tend to linger around in their favorite haunts. Over the course of the game the realmâs population will grow, and when you visit places inhabited by its Denizens, youâll be able to choose who you interact with.Â
The Denizens of the Tavern, for example, include theGambler (https://images-cdn.fantasyflightgames.com/filer_public/f4/0c/f40cd011-e0d9-425c-bfa0-1560f2cd45ac/gambler.png), always up for a game of cards, and theFamous Brawler (https://images-cdn.fantasyflightgames.com/filer_public/2f/15/2f152779-db5a-4e93-9590-2b50d2993679/famous_brawler.png), eager to give some âfighting pointersâ in exchange for gold. Meanwhile, the friendlyBarmaid (https://images-cdn.fantasyflightgames.com/filer_public/18/e1/18e14542-77bb-45fe-a80f-73e50d5bd0d1/tm16_barmaid.png)watches over tables and pours pints, serving hearty meals and getting her customers perfectly drunk. You might also meet a lonelyWanderer (https://images-cdn.fantasyflightgames.com/filer_public/eb/67/eb672f10-d409-4831-874d-68c830d028c2/wanderer.png)in the Tavern, eager to share stories about her travels and perhaps road-weary enough to sell you some of her equipment.
Some of the Denizens who frequent the Tavern can also turn up in other locales. In the Village or the Tavern, you might have a chat with theVillage Mystic (https://images-cdn.fantasyflightgames.com/filer_public/6c/c7/6cc7c25e-2b5d-499c-b0d2-180fcf0b2ba1/village_mystic.png)who can change your alignment or enhance your magical powers. Should you choose to visit the City or the Chapel, you risk running into anInquisitor (https://images-cdn.fantasyflightgames.com/filer_public/b5/8d/b58dd9e1-a08e-4316-adca-41d4c81072a0/tm16_inquisitor.png)determined to eradicate all evil from the realm, even if it means harming a few good Characters as well. If you are, in fact, evil, you might visit the Graveyard in search of aDark Being (https://images-cdn.fantasyflightgames.com/filer_public/e0/6a/e06ad7d2-2685-422e-8cdf-ad5645080e56/tm16_darkbeing.png)who can replenish your fate.(https://images-cdn.fantasyflightgames.com/filer_public/27/ff/27ffa099-1c7e-4097-b8e5-f65958d7daf3/tm16_barrowtownhunter.jpg) (https://images-cdn.fantasyflightgames.com/filer_public/27/ff/27ffa099-1c7e-4097-b8e5-f65958d7daf3/tm16_barrowtownhunter.jpg)
Changed CharactersÂ
Some of the Characters who first sought the Crown of Command may undertake that quest again in this altered, post-apocalyptic world. Competing with them in The Cataclysm are five others who have never sought it before. Some of them have long inhabited the realm. For instance, theBlack Knight (https://images-cdn.fantasyflightgames.com/filer_public/46/1f/461ff505-0f07-4458-a25c-52ebc96326f3/blackknightsheet.jpg)has abandoned his castle in the Middle Region to claim greater power. He now rides through Talisman, forcing the other Characters he meets to give him gold or else heâll take one of their lives. TheMutant (https://images-cdn.fantasyflightgames.com/filer_public/4f/fd/4ffd9350-cccf-4bac-9c19-b2c86f01dd49/mutantsheet.jpg)has also lived in this realm her whole life, and also remained there through its darkest times, but she is not longer the human that she once was. Magical energies that flared and fluctuated during the apocalypse infected her body so thoroughly that her form, Strength, Craft, and fate have continually changed.Â
(https://images-cdn.fantasyflightgames.com/filer_public/41/7d/417ddacb-7bd9-42cc-8b47-3f39a31d2bb4/tm16_arcanescion.png) (https://images-cdn.fantasyflightgames.com/filer_public/41/7d/417ddacb-7bd9-42cc-8b47-3f39a31d2bb4/tm16_arcanescion.png)Others have no memories of what it was like before the apocalypse. TheScavenger (https://images-cdn.fantasyflightgames.com/filer_public/bc/5e/bc5ece90-de6c-43b9-b6f1-ead8b99ab1a0/scavengersheet.jpg)grew up during the decades that followed and learned how to survive by staying in motion and collecting whatever Objects she could find. The most valuable ones she stashes away so that they cannot be stolen. Youngest of all is theArcane Scion (https://images-cdn.fantasyflightgames.com/filer_public/2d/d2/2dd237e6-79c6-4e57-a7a6-0abf79b0c394/arcanescioncharactersheet.jpg), born during the outbust of magical energies that transformed the Mutant. Unlike the Mutant, who cannot fully control her mutations, the Arcane Scion has harnessed those energies, using them to wield Magic Objects and cast Spells.Â
How Will You Transform Talisman?
In any game of Talisman, whoever seizes the Crown of Command gains the power to shape the realm according to his or her will. With The Cataclysm in play, however, you affect the realm from the beginning of the game. You populate the City, Village, Graveyard, and Chapel. You change the landscape (http://www.fantasyflightgames.com/en/news/3000/1/1/after-the-fall/), determining where new settlements take root and where new highways lead. No matter your Strength, Craft, alignment, or fate, your choices affect the future of the realm.Â
Pre-order your copy of Talisman: The Cataclysm from your local retailer today!
Discuss this article
in our forums!
Talisman are © Games Workshop Ltd. 1983, 1985, 1994, 2007. This edition and its expansions are © Games Workshop Ltd. 2008-2013. Games Workshop, Talisman, its the foregoing marks' respective logos and all associated marks, logos, characters, products and illustrations from the Talisman game are either ®, â¢, and/or © Games Workshop Ltd. 1983-2013, variably registered in the UK and other countries around the world. This edition published under license to Fantasy Flight Publishing, Inc. 2008. Fantasy Flight Supply is a trademark of Fantasy Flight Publishing, Inc. All rights reserved to their respective owners.
Source: Personal Invitation (https://www.fantasyflightgames.com/en/news/2016/3/22/personal-invitation/)
Title: FFG:See Things Differently
Post by: RSSFeeder on 15 April 2016, 18:45:05
See Things Differently(https://images-cdn.fantasyflightgames.com/filer_public/76/c4/76c4b292-6b9c-4fc3-b4ab-26c623950ccc/ad02_preview2.jpg) Published 23 March 2016|Android: Mainframe (http://en/android-mainframe/) See Things DifferentlyA Look at Controlling the Board in Android: Mainframe (https://images-cdn.fantasyflightgames.com/filer_public/84/5c/845ced08-a374-4a3b-9312-d5fe7e92912f/ad02_box_left.png) (https://images-cdn.fantasyflightgames.com/filer_public/84/5c/845ced08-a374-4a3b-9312-d5fe7e92912f/ad02_box_left.png) "I'm on a need-to-know basis. I need to know everything."ÂÂÂ âNero Severn In Android: Mainframe (http://en/android-mainframe/), you are one of the world's greatest runners, an elite hacker capable of slicing through ice and reshaping servers with the greatest of ease. When one of your contacts informs you that Titan Transnational Bank has had its mainframe isolated, it's time for you to go to work. A bank with its server defenses down and its sysops shut out? That's easy money. But as soon as you jack in, you discover that you're not the only user connected to the server and plundering its wealth. In Android: Mainframe, you have your shot at fantastic riches, but only if you can outmaneuver the other runners connected to Titan Transnational's mainframe. It won't be easy. These aren't bots, after all; they're the best of the bestâjust like you. However, if you move fast and form your plan on the go, you might be able to carve out a significant fortune. And you might even earn a measure of fame.(https://images-cdn.fantasyflightgames.com/filer_public/86/d7/86d705ce-f708-487a-a9ee-a114f1ff73ef/ad02_layout.png) (https://images-cdn.fantasyflightgames.com/filer_public/86/d7/86d705ce-f708-487a-a9ee-a114f1ff73ef/ad02_layout.png) Access Points and PartitionsFrom the moment you first enter the mainframe, you'll find it a maze of ever-shifting possibilities. Everyone's trying to secure Titan's data for themselves, and in so doing, they're constantly rewriting the server. You'll see programs of all varieties flare up and flash out. But in the end, you just need to focus on two basics: access points and partitions. Everything else is secondary. You start your games of Android: Mainframe with a single access point. This represents your initial connection to Titan's mainframe, and it represents your access to all the data surrounding it. However, almost as soon as you observe the distances between your access point and those of your opponents, the whole picture changes. Your opponents will start laying down lines of blue partitions to close off the board, thereby limiting your access to Titan's data. These lines of partitions may be straight or they may be jagged, but they ultimately cut off external access to anything they enclose. Accordingly, you and your opponents are constantly jockeying to secure data that only you can access, even as you're adding additional access points in order to retain your access to the data your rivals are attempting to lock away. As we noted in the game's announcement (http://www.fantasyflightgames.com/en/news/2016/2/9/android-mainframe/), you get to take one action each round: - Establish a new access point. You can discard the top program from the stack to add one of your character's tokens to the game board, placing it faceup on an unsecured node.
(https://images-cdn.fantasyflightgames.com/filer_public/cc/90/cc90ec53-0a17-402d-9081-5ca9aae61361/ad02_new-access-point_diagram.png) (https://images-cdn.fantasyflightgames.com/filer_public/cc/90/cc90ec53-0a17-402d-9081-5ca9aae61361/ad02_new-access-point_diagram.png)By adding a new access point to the area Kate "Mac" McCaffrey threatens to score, Nero Severn guarantees Kate's haul will be smaller than she might have hoped. - Execute a program. You can execute any of the generic programs in the program suite, or you can execute one of the three signature programs with which you start the game (more on this later).
(https://images-cdn.fantasyflightgames.com/filer_public/24/45/24457edc-e71c-43e9-8f8c-75ef82113121/ad02_execute-a-program_diagram.png) (https://images-cdn.fantasyflightgames.com/filer_public/24/45/24457edc-e71c-43e9-8f8c-75ef82113121/ad02_execute-a-program_diagram.png)Kate decides to execute the programLock (https://images-cdn.fantasyflightgames.com/filer_public/e9/11/e911e5ab-b6ae-4d2b-89dc-8f8fcc29374d/ad02_lock.png)and places three partitions on the board in the shape that Lock indicates. - Pass. If you choose to pass, play proceeds immediately to the next player. If all players need or choose to pass, the game ends, and you and your opponents score your runs.
To win the game, you'll need to gain more access to Titan's data than your opponents, and to do that? You'll need to secure multiple zones containing only your access points. And that means you'll have to learn not only how to see the board in terms of access points and partitions, but how to think two, three, or even four turns ahead. The trick of Android: Mainframe is that you're trying to place your access points and partitions amid a board that's always changing. You and your opponents are using programs to write partitions, establish access points, and shift things around. You might move sections of your opponents' partitions. You might swap your access point with an opponent's. You might have your partitions erased. The only time that any section of the board is "safe" is once it's been closed off around a single player's access point (or access points). This makes the game extremely fluid, and the more players you have, the more fluid everything becomes. Despite this fluidity, however, there are a number of hard-and-fast rules that determine how you can create your partitions and that give you insight into the plays your opponents might possibly make: - You cannot place a partition that would create an enclosed zone without an access point in it.
(https://images-cdn.fantasyflightgames.com/filer_public/02/87/028795b4-69f2-41a1-8869-8cdc7a9be799/ad02_place-a-partition_diagram.png) (https://images-cdn.fantasyflightgames.com/filer_public/02/87/028795b4-69f2-41a1-8869-8cdc7a9be799/ad02_place-a-partition_diagram.png)In the example on the left, the partition would create an enclosed zone without an access point and is, therefore, illegal. However, as illustrated by the example on the right, if there's an access point within the enclosed zone, the placement of the partition becomes legal. - An enclosed zone is unsecured if it contains more than one runner's access points; it is secured if it contains only one runner's access point (or access points). You cannot perform actions against the partitions, pathways, or access points in secured zones.
(https://images-cdn.fantasyflightgames.com/filer_public/b2/18/b21845a4-6d66-4fdd-93fa-870a3ce9dc62/ad02_enclosed-zone_diagram.png) (https://images-cdn.fantasyflightgames.com/filer_public/b2/18/b21845a4-6d66-4fdd-93fa-870a3ce9dc62/ad02_enclosed-zone_diagram.png)The zone on the left is contested by both Nero Severn and Kate "Mac" McCaffrey and is unsecured. The enclosed zone on the right is occupied by only Nero Severn, so it is secured and "locked" from play. - When you execute a program to write a string of partitions onto the board, you can rotate that arrangement, but you cannot mirror it.
(https://images-cdn.fantasyflightgames.com/filer_public/de/54/de549eb3-1a73-4c18-ad5f-e53d4fd2b34a/ad02_rotate-string_diagram.png) (https://images-cdn.fantasyflightgames.com/filer_public/de/54/de549eb3-1a73-4c18-ad5f-e53d4fd2b34a/ad02_rotate-string_diagram.png) - You must be able to place the full string of partitions indicated by any program you execute. Those partitions may cross existing partitions, but they may not overlap them, cut into secured zones, or extend off the edge of the board.
As you play, these rules will become second nature, flashes of light that spark within your subconscious mind as you survey the board and the row of available programs. Each round, you'll process which moves your opponents are most likely to make, given the positions of their access points, the current divisions of the board, and the generic programs you see on display. In your mind's eye, you'll see the board gridded and sectioned off in shapes and colors, each corresponding to a different runner's growing influence. The Painter and the Info Broker(https://images-cdn.fantasyflightgames.com/filer_public/5b/a5/5ba54df5-a716-4a95-a8a8-99c289f2a6bd/ad02_kate-mccaffrey.png) (https://images-cdn.fantasyflightgames.com/filer_public/5b/a5/5ba54df5-a716-4a95-a8a8-99c289f2a6bd/ad02_kate-mccaffrey.png)Of course, since you're one of the world's best runners and not some generic hacker, you won't content yourself to work solely from the row of generic programs that lie before you. You'll want to reveal your genius through the keen use of your signature programs. In the end, as everyone is trying to envision the future of Titan's servers and find the most advantageous ways to carve it up, your unique programs allow you to recognize plays that no one else can make. Each runner in Android: Mainframe has a set of five signature programs, each of which is unique, and at the beginning of the game, you randomly select three of these to add to your hand. These programs are all more powerful than those in the generic display, and the fact that they are hidden from your opponents means they serve not only as potent actions, but as threats of action, as well. Finally, because these programs are so different than your generic programs (and from each other), they go a long way toward layering personality over your game experience. Play once as the ultra-creative tinkerer Kate "Mac" McCaffrey, and you'll find an entirely different experience than you would enjoy as info broker Nero Severn. Kate "Mac" McCaffreyKate is a constant tinkerer and famous for clever program designs and modifications. All of this holds true in Android: Mainframe. Her five signature programsPaintbrush (https://images-cdn.fantasyflightgames.com/filer_public/98/df/98dfea6f-8198-45d9-bc9a-6c717f5581c3/ad02_paintbrush.png),Battering Ram (https://images-cdn.fantasyflightgames.com/filer_public/bd/c1/bdc1cf6b-e7e8-4d7d-9734-e16c0f41559a/ad02_battering-ram.png),Gordian Blade (https://images-cdn.fantasyflightgames.com/filer_public/ff/e7/ffe7e3a1-8caf-44f0-99f1-1120301d944d/ad02_gordian-blade.png),Pipeline (https://images-cdn.fantasyflightgames.com/filer_public/35/01/3501664b-cd6b-4f12-8f1d-b7391d9e0e45/ad02_pipeline.png), andTinker (https://images-cdn.fantasyflightgames.com/filer_public/0a/de/0adefc41-2c2e-4982-8dcd-9aa3839ed316/ad02_tinker.png)provide Kate with an astonishing range of versatility.(https://images-cdn.fantasyflightgames.com/filer_public/41/e9/41e90d35-108d-4f86-aed9-a6697493fef1/ad02_kate-mccaffrey-cardfan.png) (https://images-cdn.fantasyflightgames.com/filer_public/41/e9/41e90d35-108d-4f86-aed9-a6697493fef1/ad02_kate-mccaffrey-cardfan.png) She can use Paintbrush or Battering Ram to execute a generic program and deny her opponents the next visible move. Of course, there's no guarantee the program suite won't be replenished with even more effective programs, but if it is, Kate's Gordian Blade grants her the rare ability to cancel an opponent's program, forcing that opponent to add an access point instead. (https://images-cdn.fantasyflightgames.com/filer_public/0a/de/0adefc41-2c2e-4982-8dcd-9aa3839ed316/ad02_tinker.png)Meanwhile, Pipeline allows Kate to execute the top program in any discard pile, including her own, meaning she could use her Battering Ram again, or even copy the abilities from another runner's unique program. And her final program, Tinker, allows Kate to intercede even when it's not her turn. With Tinker, she can force an opponent to execute a program of her choice, denying that opponent the use of the generic program she might want on her turn, or even denying that opponent the use of a program that might secure a valuable zone. It's noteworthy to mention that while a program like Tinker might appear more valuable than a program like Paintbrush or Battering Ram, since those only interact with the suite of generic programs, there's a reason Kate counts those programs among her most valuable. Your games of Android: Mainframe end whenever all players pass, and this usually means it ends when the players are no longer able to perform actions. To get to that point, though, you must first run through one of your vital suppliesâaccess points, partitions, or programs. Of these, programs usually run out first, meaning that by clearing out the program suite and forcing it to be fully replenished, Kate is also cleverly accelerating the pace of the game. Nero SevernWhere Kate is all about tinkering with her programsâand yoursâinfo broker Nero Severn prefers to operate from a place of greater knowledge. Naturally, this inclination is reflected in his suite of unique programs:Switchblade (https://images-cdn.fantasyflightgames.com/filer_public/5e/1b/5e1b8dd7-1c1b-4a94-8d12-1e7701c10fa1/ad02_switchblade.png),Leviathan (https://images-cdn.fantasyflightgames.com/filer_public/8b/c3/8bc35f36-ed36-4699-9847-053a25470e3b/ad02_leviathan.png),Snitch (https://images-cdn.fantasyflightgames.com/filer_public/96/13/961367c0-bd87-47a0-ad79-a71e8bb959b2/ad02_snitch.png),Expert Schedule Analyzer (https://images-cdn.fantasyflightgames.com/filer_public/ea/f3/eaf308b3-663d-4076-98ac-a13512ec9e96/ad02_expert-schedule-analyzer.png), andSneakdoor Beta (https://images-cdn.fantasyflightgames.com/filer_public/4a/c8/4ac85bb0-3bb0-4e6c-bf90-548ad9ec86ed/ad02_sneakdoor-beta.png).(https://images-cdn.fantasyflightgames.com/filer_public/0e/8f/0e8f81df-7887-480f-9b35-3020ca4a9d6e/ad02_nero-severn-cardfan.png) (https://images-cdn.fantasyflightgames.com/filer_public/0e/8f/0e8f81df-7887-480f-9b35-3020ca4a9d6e/ad02_nero-severn-cardfan.png) As Nero might argue, the best option is to have more options, and the majority of his signature programs grant him additional options. Switchblade, Expert Schedule Analyzer, and Sneakdoor Beta all grant Nero advanced access to the stack of generic programs, allowing him to make plays from a range of options his rivals can't even touch. While two of these programs, Switchblade and Sneakdoor Beta, allow Nero to execute a generic program immediately, the third, Expert Schedule Analyzer, doesn't allow Nero to execute another program right away. Instead, it adds two generic programs to his hand, extending the range of hidden information he has at his disposal. (https://images-cdn.fantasyflightgames.com/filer_public/8b/c3/8bc35f36-ed36-4699-9847-053a25470e3b/ad02_leviathan.png)Snitch functions similarly in the way that it grants Nero access to additional options, but it doesn't target generic programs. Instead, it targets the unique programs in his opponents' hands. While it's unclear that he'll find a perfect play from the options he unveils, it's likely that he'll find an option more potent than any he'd find among the generic programs. And more than that, he gains advance knowledge about the plays his opponents are likely to make, allowing him to anticipate and counter them throughout the remainder of the game. Meanwhile, Leviathan doesn't allow Nero to make an immediate play, but extends his future options by allowing him to take two turns back-to-back in the next round. While this definitely changes the nature of the chess-like progressions of a two-player game, itâlike Expert Schedule Analyzerâhas even greater ramifications in a multiplayer game. The more runners in Titan's servers, the more you're likely to see them cutting off each other's moves, and a runner like Nero may be able to bank on his opponents blocking each other for a round in order to gain the options afforded him by Expert Schedule Analyzer. And the sort of delay provided by Leviathan? That's not nearly as important as the chance to plot out two movements with perfect information of the board stateâno disruptions. Plan Your Route to RichesJust as Kate "Mac" McCaffrey and Nero Severn represent two wildly different approaches to the runner-versus-runner challenges of Android: Mainframe, so do each of the four other runners and their signature programs. You'll soon be able to sample all the different playing styles of Android: Mainframe, so head to your local retailer to pre-order your copy today. Then, in the meantime, stay tuned for our next preview, in which we'll look at how the game is scored and learn more about the talents of two of the game's other runners! Discuss this article in our forums! The copyrightable portions of Android: Mainframe are © 2016 Fantasy Flight Games. Android and Android: Mainframe are trademarks of Fantasy Flight Games. Source: See Things Differently (https://www.fantasyflightgames.com/en/news/2016/3/23/see-things-differently/)
Title: FFG:Prepare for Maneuvers
Post by: RSSFeeder on 15 April 2016, 18:45:05
Prepare for ManeuversPublished 24 March 2016|X-Wing (http://en/products/x-wing/) Prepare for ManeuversThree X-Wing⢠Maneuver Dial Upgrade Kits Are Now Available (https://images-cdn.fantasyflightgames.com/filer_public/2b/e7/2be72f4c-0516-410c-8827-4240fd988f95/clamshelllineup.png) âLock S-foils in attack position.â ÂâRed Leader, Star Wars: A New HopeYouâve sighted a squadron of Imperial TIE fighters, flying in formation and ready for action. It might be foolish to attack them now, but theyâre far too close to the Rebel outpost for you to allow them to continue forward. Lock your S-foils in attack position and prepare for the first maneuvers of your dogfight with three X-Wing⢠(https://www.fantasyflightgames.com/en/products/x-wing/) Maneuver Dial Upgrade Kits, now available at your local United States retailer! - Rebel Maneuver Dial Upgrade Kit
- Imperial Manuever Dial Upgrade Kit
- Scum Maneuver Dial Upgrade Kit
(https://images-cdn.fantasyflightgames.com/filer_public/8e/e8/8ee886fe-00d3-4a20-8f6f-a746cee28d99/imperialback.png)(https://images-cdn.fantasyflightgames.com/filer_public/f3/2f/f32f5727-095d-49d3-b916-b1152f0f42c0/rebel-back.png)(https://images-cdn.fantasyflightgames.com/filer_public/91/f9/91f9ba53-5485-4416-998b-e213df2a3c87/scum-back.png) Fast and Convenient Maneuvering  Every game of X-Wing pits you against a single opponent controlling squadrons of iconic ships and characters from the Star Wars⢠universe. Each turn, youâll select your shipâs maneuver and attempt to shoot down your opponentâs starships. Now, the Maneuver Dial Upgrade Kits invite you to take another step into the gameâs limitless customizability by pairing your shipsâ maneuver dials with a stylish and secure plastic housing. There are three distinct Maneuver Dial Upgrade Kits available, corresponding to the three X-Wing factions. You may fly with the tyrannical Galactic Empire, fight for freedom with the Rebel Alliance, or make your own way with the galaxyâs Scum and Villainy. No matter which faction you play, you can represent the colors and symbols of your faction prominently with upgrade kits for your maneuver dials. Each Maneuver Dial Upgrade Kit offers three sculpted plastic shells for your squadronâs maneuver dials. To use one of these plastic shells, you simply take the cardboard maneuver dial token that shows a shipâs maneuvers and insert it into the plastic housing. Once situated, you can push the plastic maneuver selection marker into place, and youâre ready to take your ship into any interstellar dogfight with confidence.   (https://images-cdn.fantasyflightgames.com/filer_public/f4/ef/f4efcf86-4ebd-495f-9329-37c9f97ed374/imperial-front.png)(https://images-cdn.fantasyflightgames.com/filer_public/44/21/4421937f-0c31-4ee4-96b0-766ca4de29f4/rebel-front.png)(https://images-cdn.fantasyflightgames.com/filer_public/ac/0a/ac0ad3b1-5449-485d-8610-af2f724e0f4b/scum-front.png)These plastic maneuver dials have been specially designed to ensure the greatest usability. To begin with, each plastic maneuver dials allows you to clearly see all of your possible maneuvers at once. No longer will you have to rotate through your entire dial if you want to see all of your shipâs available maneuversâyou can simply take it all in at a glance.In addition, each upgraded maneuver dial features a space on the back for you to insert a dial ID token, showing a silhouette of the corresponding ship and clearly distinguishing which dial belongs to which ship. Each Maneuver Dial Upgrade Kit includes three dial ID tokens for every ship in the game, from the T-65 X-wing and TIE Fighter in the original X-Wing Core Set up to the T-70 X-wing and TIE/fo Fighter from The Force Awakens⢠Core Set (https://www.fantasyflightgames.com/en/news/2015/12/17/join-the-resistance/). Beginning with the Ghost Expansion Pack, the Mist Hunter Expansion Pack, the Punishing One Expansion Pack, and the Inquisitorâs TIE Expansion Pack, every X-Wing expansion pack will include a dial ID token for use with these plastic maneuver dials. The standard cardboard maneuver dials will continue to be included in each expansion.  Form Up on MeProtect your maneuver dials from harm even as you represent your chosen faction at every dogfight. Your opponent will know that youâre ready for action when you protect your ships with plastic maneuver dials! Pick up your Maneuver Dial Upgrade Kits at your local U.S. retailer today. Discuss this article in our forums! © and ⢠Lucasfilm Ltd. Source: Prepare for Maneuvers (https://www.fantasyflightgames.com/en/news/2016/3/24/prepare-for-maneuvers/)
Title: FFG:The Inventor's Handbook
Post by: RSSFeeder on 16 April 2016, 03:45:09
The Inventor's Handbook

"Sir, I donât know where your ship learned to communicate, but it has the most peculiar dialect. I believe, sir, it says that the power coupling on the negative axis has been polarized. Iâm afraid youâll have to replace it."
    âC-3PO Build the tech to take on the galaxy⦠Special Modifications is now available for the Star Wars®: Edge of the Empire⢠roleplaying game! The sourcebook for Technicians living at the fringes of the galaxy, Special Modifications offers plenty of tasty new gear, along with rules for crafting your own weapons, gadgets, and droids. Game Masters will find hints for getting the most from their technical encounters, such as fleshed-out guidelines for slicing that come complete with consequences for failures and situational challenges that they can add to their Technicians' mechanics checks in order to amplify the narrative tension. But as much as this book helps your Game Master better incorporate your Technician into your ongoing campaign, it is your Technician that derives the primary benefits. Among its 96 pages, Special Modifications introduces a wealth of new backgrounds, motivations, obligations, specializations, and signature abilities for your Technician. Along with the book's four new playable species, these options afford you fantastic new freedom to reinvent your Technician or to invent the one that best suits your vision of a tinkerer living and working within the galaxy's shadiest, grittiest locations.

New SpecializationsSpecial Modifications introduces three new specializations for your Technician, each of which allows you to pursue a new avenue of invention.
- The Cyber Tech excels at creating and installing mechanical prosthetics. As a Cyber Tech, you can use your talents to replace your friends' missing limbs or upgrade them with impant armor or neural recorders that would allow them to record and store sensory data with the same veracity as data stored within a computer system. Moreover, your specialization in the realm of cybernetics allows you to upgrade yourself beyond the standard limits and use your cybernetics more effectively and imaginatively than other characters might.
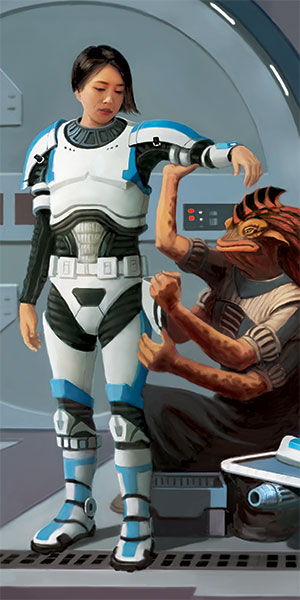
- The Droid Tech specializes in constructing, repairing, and managing droids, and is unparalleled in this capacity. While you will have to decide for yourself where you stand on the ethical concerns of limiting or altering the nature of a creature's sentience, there's no one better at developing custom droid directives or getting droids to work the way you want themâwhether that means simply talking to them in binary or rewriting their programming. And if your group needs an army of combat-ready droids? There's no one better than a Droid Tech to have on your side.
- Finally, the Modder is an expert of attachments, and can tweak personal gear and starship systems in ways that they far surpass their original factory settings. Sometimes that gear and those starships might be your own, but just as often, you're likely to be improving these things for your friends and associates. This makes you an extremely valuable addition to any group traveling through the roughest parts of the galaxy. Your group will never know what you might find along your journeys, but if your Modder's along for the trip, it's a safe bet that you'll get the best possible value from anything you find. Modders are generalists in the sense that they diversify their technical interests, but they're specialists in the sense that they always make things better than they were.
Whether you create a new Technician or explore the possibilities inherent in these specializations as you advance your existing Technician, you'll find that their unique talents allow you to tackle a whole new range of challenges. And life at the edge of the Empire is full of challenges. New Signature AbilitiesIn addition to its three new specializations, Special Modifications introduces two signature abilities that allow you to truly distinguish your elite Technician from the hordes of lesser practitioners. Both Inventive Creation and Unmatched Calibration give you new ways to spotlight your talents, but where Unmatched Calibration offers profoundly beneficial new mechanicsâsuch as dice rerollsâthat are immediately recognizable, Inventive Creation stands out for its potential impact on your game's narrative. This intriguing signature ability is rife with potential for both you and your Game Master, and developer Max Brooke takes a moment to illustrate just a bit of its potential: "The ability to escape disaster by jury-rigging a new device with nothing but the equivalent of a hydrospanner, some depleted power cells, and half of a droid chassis is a time-honored tradition in all forms of heroic adventure, and the Inventive Creation signature ability included in Special Modifications gives players (and Game Masters) a potent new storytelling tool to recreate such scenes in their own campaigns. When a Technician activates Inventive Creation, the character immediately gathers up useful items in the scene to build an item that lasts until the end of the scene. If you have upgraded your ability sufficiently, you might even be able to create a fully functioning vehicle.

"Players can benefit from this ability in many ways, some more obvious than others, but Inventive Creation gives GMs new opportunities, too. For instance, when a character activates Inventive Creation, the GM can use it to flesh out the scene and engage players. Instead of simply allowing the character to build the device, the GM can identify the list of unlikely items that the player has at hand and ask how the Technician retrofits them into a functional device, encouraging the player to be as creative as the Technician in the description.
"Alternately, the GM can ask the player to list the supplies available in an environment controlled by the PCs. This establishes details for use later in the scene. For instance, if the Technicianâs player says that there happens to be a barrel of tibanna gasâuseful for fueling many devicesâthen the GM should keep this barrel of extremely flammable material in mind for later, especially if a firefight breaks out in the impromptu workshop. If the player and GM are both stuck for ideas as to supplies on hand, the GM can solicit the other players for ideas, and in some scenes the other PCs might need to chip in, giving some of their gear to the Technician to help build the device to get them out of their current situation.
"The GM should also keep in mind that the signature ability dictates that the jury-rigged device always fails at the end of the encounter. If the characters arenât careful, they might be making their escape in a patchwork vehicle right as its engine goes out. Or they might be relying on a rapidly assembled weapon, only for it to run out of ammunition as one fight wraps up and another begins. Just as Inventive Creation is a very powerful problem-solving tool for the PCs, it can also be a very potent problem-creating tool for the GM. For that reason, the ability's greatest strength may be in how it can help keep the story moving quickly from one action-packed encounter to the next."

Bring Your HydrospannerThe Star Wars galaxy is a vast and fantastic place, full of myriad adventures, but for all its greatness, it's always possible to make it just a little bit better. You want to start tweaking and tinkering with it? You had better bring your hydrospanner, and you'd do well to pick up your copy of Special Modifications. Special Modifications is now available at your local retailer and online through our webstore. Pick up your copy today!
Discuss this article
in our forums!
Participate in grim and gritty adventures on the fringes of the Star Wars universe with Star Wars®: Edge of the Empireâ¢. Edge of the Empire is a complete standalone roleplay system that transports players to some of the shadiest locations in the Outer Rim, the underbelly of the Core Worlds, and everywhere else in-between! © and ⢠Lucasfilm Ltd.  Source: The Inventor's Handbook (https://www.fantasyflightgames.com/en/news/2016/3/24/the-inventors-handbook/)
Title: Re: FFG: Fantasy Flight Games News
Post by: RSSFeeder on 02 August 2018, 09:55:16
Arkham Horror Third Edition (https://www.fantasyflightgames.com/en/news/2018/8/1/arkham-horror-third-edition/)
(https://images-cdn.fantasyflightgames.com/filer_public/91/c9/91c99bed-9167-4656-8628-5268bc680b28/ahb01_preview1.png)
Published 1 August 2018 | Arkham Horror Third Edition
Arkham Horror Third Edition
Announcing a New Edition of the Classic Board Game of Cosmic Horror
(https://images-cdn.fantasyflightgames.com/filer_public/26/8e/268e8253-d747-4a7f-a9b7-57498e0de04e/ahb01_box_left.png)
"You dont want to see real magic, kid. Nobody does.
Dexter Drake
Order your own copy of Arkham Horror Third Edition at your local retailer or online through our website today!
The year is 1926, and it is the height of the Roaring Twenties. Flappers dance till dawn in smoke-filled speakeasies, drinking alcohol supplied by rum runners and the mob. Its a celebration to end all celebrations in the aftermath of the War to End All Wars.
Yet a dark shadow grows in the city of Arkham. Alien entities known as Ancient Ones lurk in the emptiness beyond space and time, writhing at the thresholds between worlds. Occult rituals must be stopped and alien creatures destroyed; before the Ancient Ones make our world their ruined dominion.
Only a handful of investigators stand against the horrors threatening to tear this world apart. Will they prevail?
(https://images-cdn.fantasyflightgames.com/filer_public/a0/91/a091e07b-6da5-4c18-8207-b9abadcf1c79/ahb01_layout_700x.png)
Fantasy Flight Games is proud to announce Arkham Horror Third Edition (https://www.fantasyflightgames.com/en/arkham-horror-3rd-ed-showcase/), the next evolution of the classic cooperative board game of cosmic horror for one to six players. Originally developed in 1987 by Richard Launius and re-released by Fantasy Flight Games in 2005, Arkham Horror has long been synonymous with thrilling, thematic, cooperative board gaming. Now, we invite you to return to the Lovecraftian-inspired nightmare againor visit it for the first time!with a modern take on the classic game. You can pre-order your copy at your local retailer or online through our webstore today, then read on to learn more.
Return to the nightmare with Arkham Horror Third Edition!
A Light in the Dark
Arkham Horror Third Edition sees players taking on the roles of investigators in the bizarre town of Arkham, Massachusetts. Unspeakable evil waits in the space between moments and just past the veil of our existence, and investigators must work together to unravel the mysteries of the Ancient Ones, risking their lives and sanity along the way.
(https://images-cdn.fantasyflightgames.com/filer_public/6b/a0/6ba0f92b-caef-4915-8b8c-de379ddb0102/ahb01_sample-lg.png)
As the wall against the encroaching darkness, Arkham Horror Third Edition features twelve iconic investigators, each prepared, in their own way, to defend the world. Each investigator not only comes with a unique ability, but also a customizable starting kit, letting you choose how you want to outfit your investigator for the coming game. And ultimately, each investigator has their own history, and their own reasons for investigating the horrors of Arkham.
(https://images-cdn.fantasyflightgames.com/filer_public/65/aa/65aa3fbc-247d-473c-93cf-e6ac87eb7fd4/ahb01_cardfan_investigators1_v2.png)
Although she may be a great lover of wealth and comfort, Jenny Barnes always had a curious and adventurous streak. While she adored the fashion and society of Paris and Venice, she was equally at home sport-shooting in rural Scotland or trawling the jazz clubs of New Orleans. Shed even funded an archaeological dig of her own, just for the fun of being the first one into the old tomb. So when she learned that her sister Isabelle was missing, Jenny came to Arkham to handle the matter herself. Perhaps a life of wealth and power had made her overconfident
or perhaps the rogues whod taken her sister had just made their last mistake.
(https://images-cdn.fantasyflightgames.com/filer_public/79/a7/79a74f1d-847d-40ac-880b-da417697edd0/ahb01_sheet_jenny-barnes1.png)
Jenny Barnes is one of Arkhams most prolific and recognizable investigators, so it's only natural that she makes an appearance in Arkham Horror Third Edition! She's joined by eleven other investigators, many of whom will be familiar to players of Arkham Horror: the Card Game (https://www.fantasyflightgames.com/en/products/arkham-horror-the-card-game/) or Mansions of Madness Second Edition (https://www.fantasyflightgames.com/en/products/mansions-of-madness-second-edition/). It is these heroes who will provide a light in the darkness, who will stand against the terrors of the unknown, and if fortune favors them, will succeed in saving Arkham and the world.
The Approaching Doom
Each game of Arkham Horror Third Edition sees you and your friends exploring one of four different scenarios in the dark and deadly town. Each adventure brings your investigators to the edge of their sanity and beyond.
These scenarios see a race between the investigators desperately searching for clues across the city, and the forces of evil spreading doom to further their cause. Finding clues can advance the narrative of each scenario, inching you closer to victory. Spreading doom not only produces effects that will hinder you, but can lead to a very different conclusion
one where the world isnt so fortunate.
While this push and pull between uncovered clues and impending doom will often determine how the narrative advances, other factors can come in to play, including choices made by the players. The fate of the world is in your hands. Do you have what it takes to succeed?
(https://images-cdn.fantasyflightgames.com/filer_public/b8/0b/b80b05f4-98f8-4885-ac7b-8021513dbf87/ahb01_cardfan_approach-of-azathoth.png)
But what is all this madness in search of? What greater goal are the investigators trying to achieve? How will the unlucky few who know of these cosmic horrors discover a way to thwart them?
It's not simply a matter of closing gates to other worlds and hoping that the problem goes away. At the start of the game, the exact goals of your scenario are a mystery to investigators and players alike. As a scenario progresses, archive cards are added to a codex that sits above the board. Each of these cards advances the narrative and offers new objectives for the investigators to strive for, with victory eventually in sight. Finding clues may lead to favorable new archive cards, while the spread of doom may reveal cards that were best left unearthed. Ultimately, the choices that you make and the specific events of each scenario lead you down branching paths, encouraging you to explore the scenarios and determine the best way to achieve your unique goals!
(https://images-cdn.fantasyflightgames.com/filer_public/45/40/4540976a-b513-419c-9778-d9ce09e2fcfe/ahb01_cardfan_aoa-codex1-2_v2.png)
Archive cards guide the narrative of the story, offering a branching path within the scenario!
No matter which scneario you're embarking upon, investigators will have to stay ever-vigilant. Moving around Arkham to discover clues will progress the scenario, but our heroes will also fight and evade monsters, gain resources, perform tests of skill, and more. Still, you wont be alone; you and your friends will work together to defeat this unknowable evil and, by some miracle, you could come out victorious.
A Cycle of Chaos
Playing a game of Arkham Horror takes place over a number of rounds, each consisting of four phases. Well look at these phases in greater depth in later previews, but for now, they are:
The Action Phase
The Monster Phase
The Encounter Phase
The Mythos Phase
The Action Phase is the investigators chance to unravel the mysteries of Arkham. You can move around the town, attack monsters, discover clues, and more as you investigate Arkham like never before. Double-sided, modular hexagonal tiles (new to this edition) represent the different neighborhoods of this troubled city, and every scenario sees these neighborhoods arranged in a different way, offering a new look and a new piece of Arkham with every challenge.
(https://images-cdn.fantasyflightgames.com/filer_public/0b/2f/0b2fbe3c-5000-400b-8e57-0141090f3919/ahb01_board-layout1.png)
A modular board design makes every game of Arkham Horror Third Edition a different experience!
But investigators wont simply be walking around the city. Alien creatures encroach on Arkham, and fighting and evading these beasts will be essential to success. You must balance these encounters with researching clues and purchasing the new tools that will be vital to your survival.
(https://images-cdn.fantasyflightgames.com/filer_public/e9/d1/e9d1e6a0-fd22-41b7-ac24-1594535884ce/ahb01_diagram_movement-2sp_v2.png)
Investigators can move up to two spaces during their turn. The symbols on the spaces give hints as to what kind of encounters await them at that location!
After you've acted, the Monster Phase sees your darkest nightmares come to life. Monsters roam freely about the city, attacking investigators both physically and mentally, instilling fear and disrupting your carefully laid plans. Fans of Arkham Horror: The Card Game will instantly recognize this phase and understand the horror it brings.
On their character sheet, every investigator has two values representing the threshold of their health and sanity. Every attack can lower one or both of these values, and if either your health or your sanity hits zero, your investigator is removed from the game, physically unable to continue or driven to utter madness by the horrors they have discovered.
(https://images-cdn.fantasyflightgames.com/filer_public/92/12/921218da-009a-4965-85cc-bf50c9cb2925/ahb01_cardfan_monsters1_v2.png)
When monsters spawn, they will exhibit some sort of pattern to their movement. Once they engage with an investigator, their card is flipped and true terror is revealed.
The Encounter Phase sees the world of Arkham come to life via encounter cards. Every neighborhood has its own full set of encounter cards, and players draw them one at a time to discover a new twist in their narrative based on their location.
Along with the encounter cards that are distinct to each neighborhood on the board, every scenario also offers different event cards that are slowly slotted into the encounter deck, providing a truly new adventure in every game. Maybe you find a weapon to defend yourself in a mysterious shop on the far side of town, or perhaps the police finally believe your mind-bending story. Every encounter reveals a new piece of your evolving story and a new piece of life in Arkham.
Many of these encounters will see your investigator performing attribute tests. Success can be a moment of respite from the horror surrounding you, but failure can see your investigator dive deeper into madness and despair. Every investigator can be distilled down to a set of five attributes: lore, influence, observation, strength, and will. Encounters see these skills put to the test, and they can lead your investigator closer to the truth, or to madness.
(https://images-cdn.fantasyflightgames.com/filer_public/82/34/82341668-5004-4869-b607-cccb1fb232ce/ahb01_cardfan_dt-encounter1-2.png)
Finally, the Mythos Phase sees the town of Arkham growing and changing. During the Mythos Phase, players take turns pulling tokens out of a Mythos Cup. These tokens can do everything from inviting more monsters into the town, to spreading doom across the city, to triggering a terrible reckoning. As the cup is passed from player to player, the board shifts and changes. While many of these tokens will make the game harder for investigators, they are also one of the few ways to introduce more clues to the board, giving the investigators a goal to strive for.
(https://images-cdn.fantasyflightgames.com/filer_public/83/dd/83dd5d4e-1dc4-4b93-abf6-ad9fc13dbb96/ahb01_mythos-tokens.png)
Beyond Reality
Behind our own dimension lurk horrors beyond comprehension. No longer can you drift blissfully unaware on the blind side of the veil. Evil lurks around every corner. Can you save the world with your sanity intact? Find out in the fourth quarter of 2018!
Return to the nightmare with Arkham Horror Third Edition (AHB01), available now for pre-order from your local retailer or our website! (https://shop.fantasyflightgames.com/preorders/create/AHB01/)
|


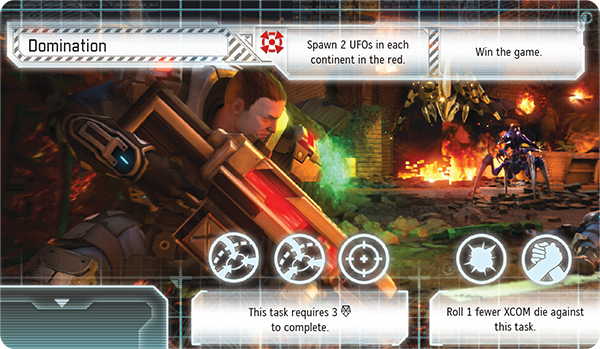

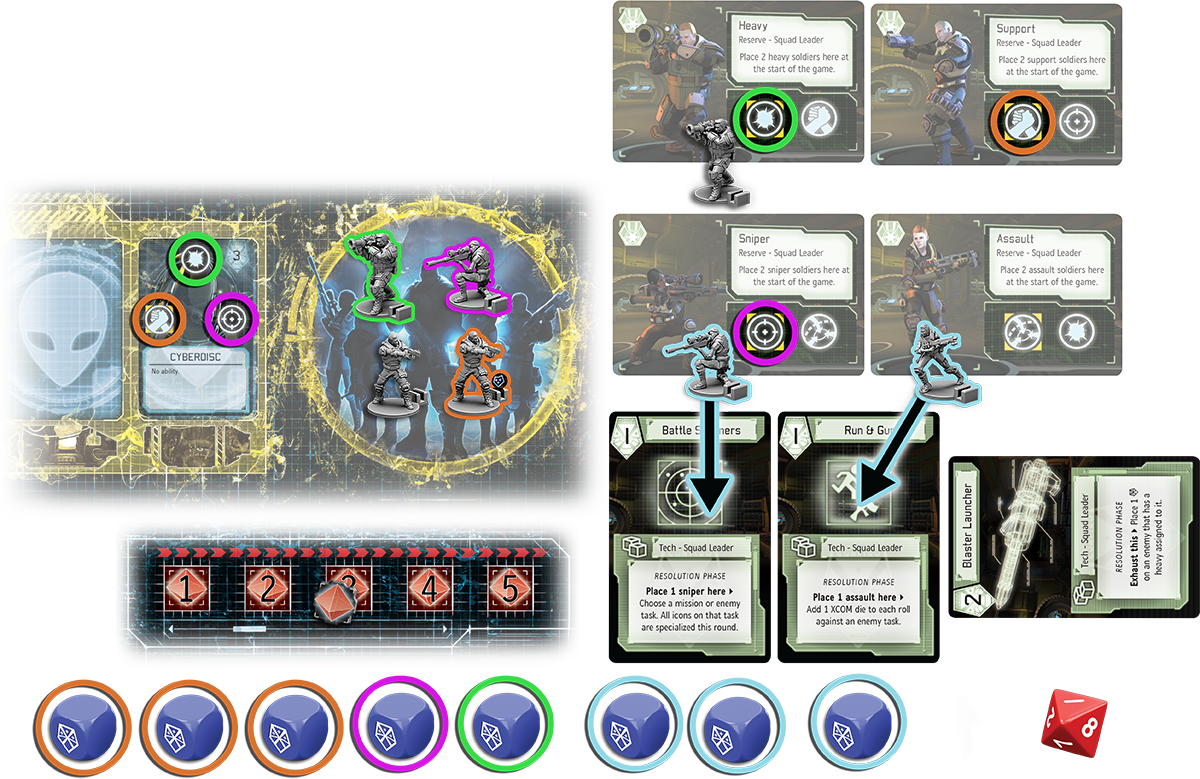


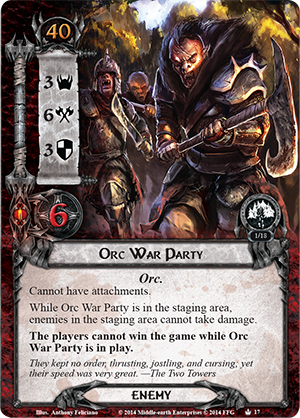
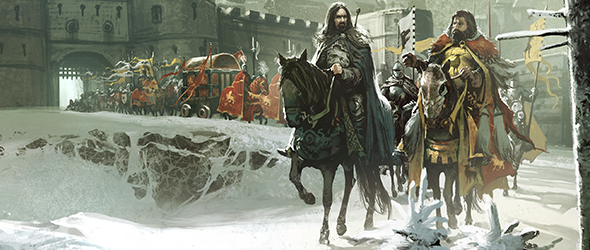


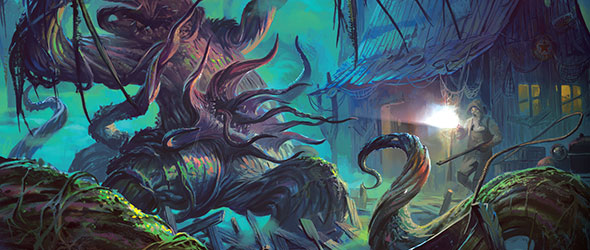


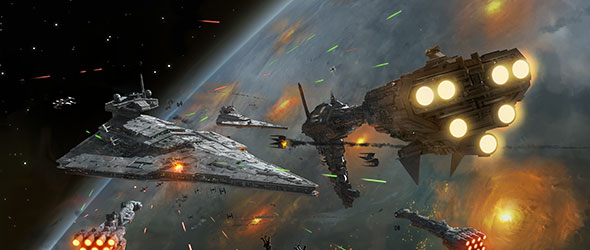
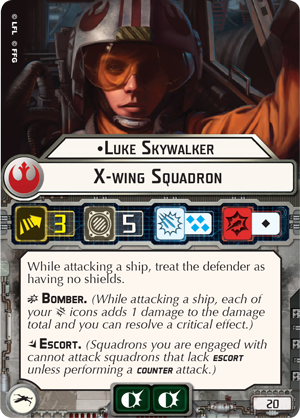


 2x Abbess Allegria Di Biase
 3x
3x


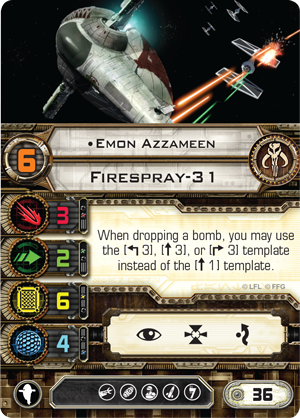


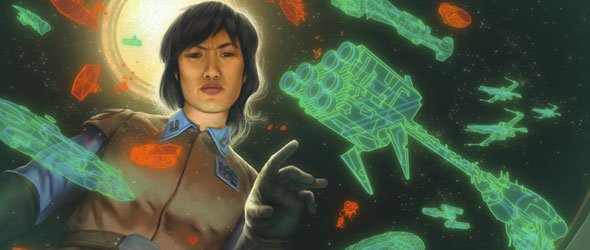


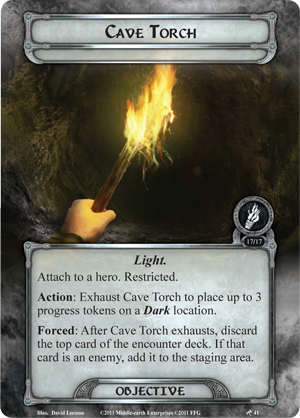
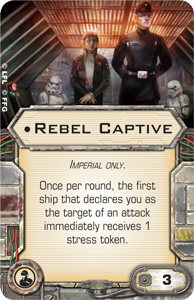
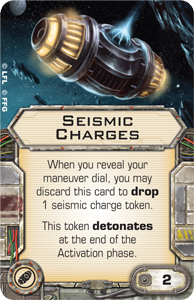
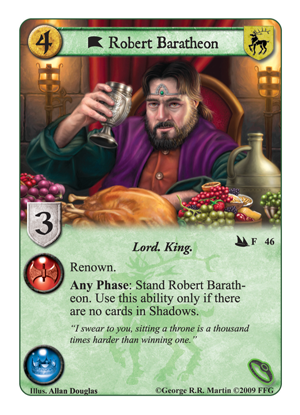
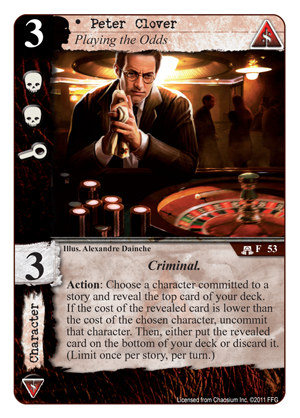
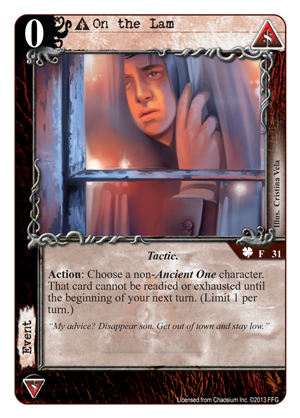
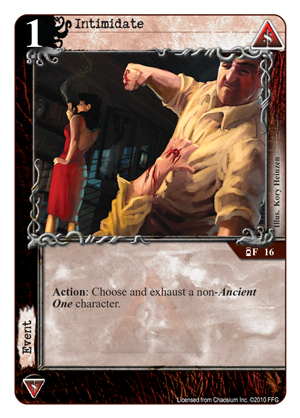
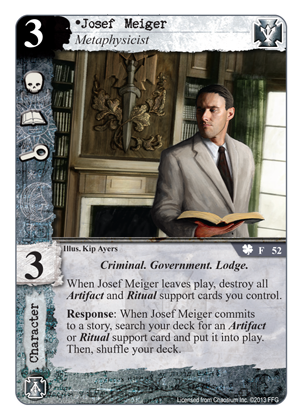
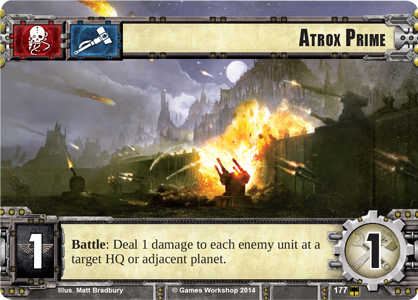
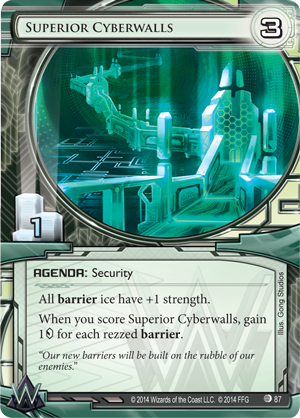
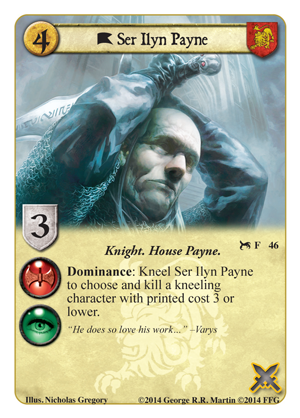
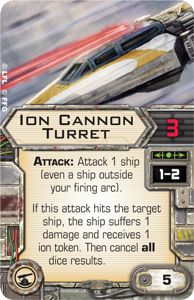
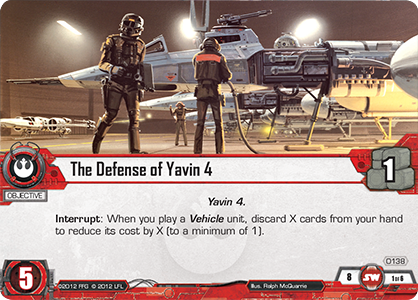
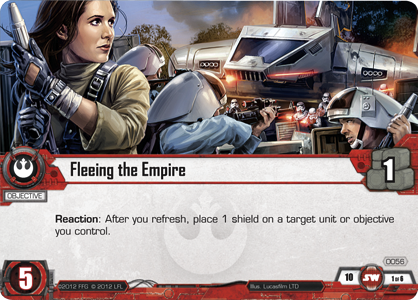
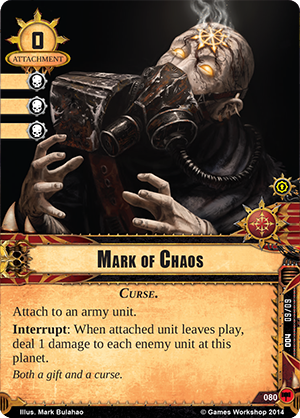
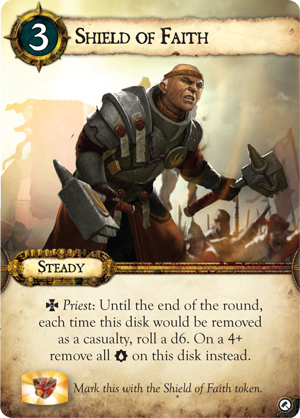
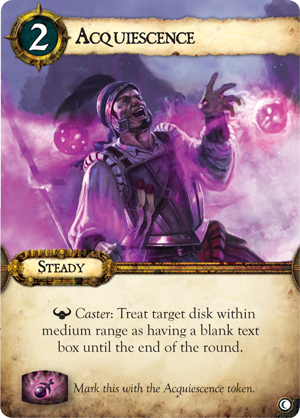
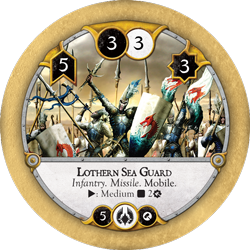
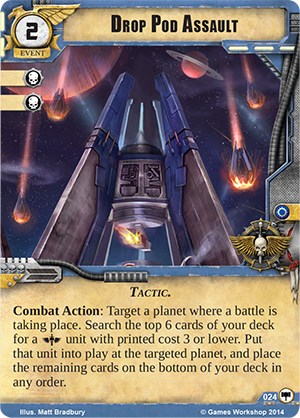
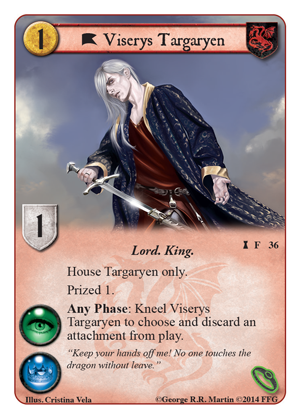
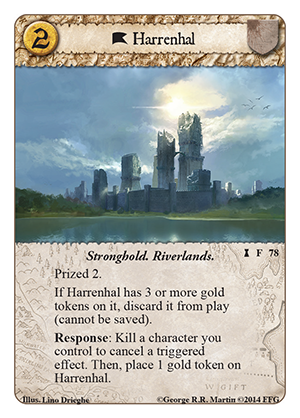
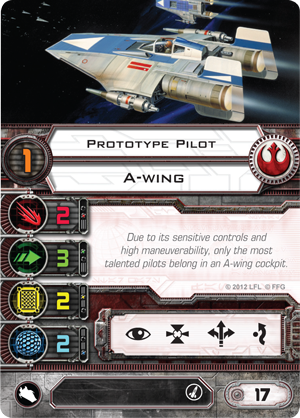
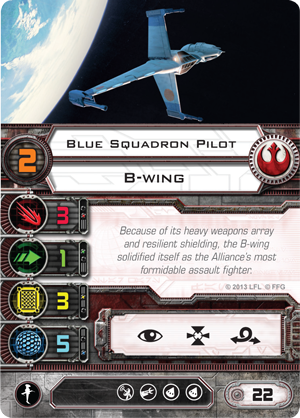
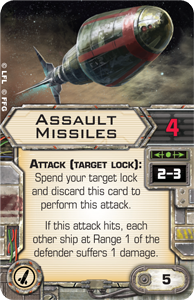
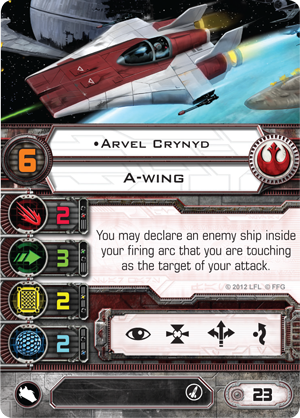
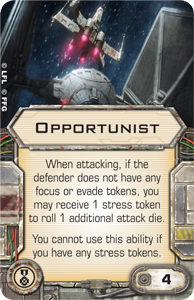
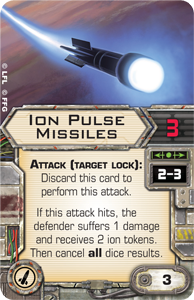
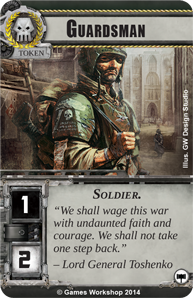
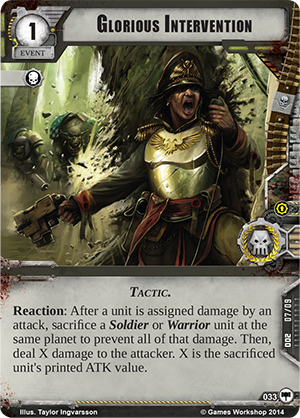
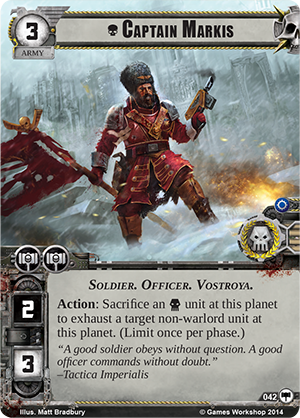
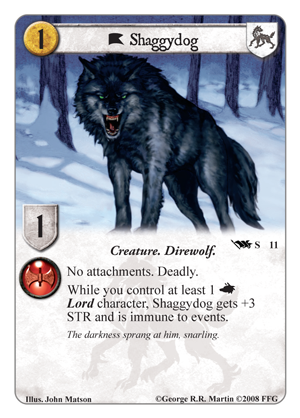
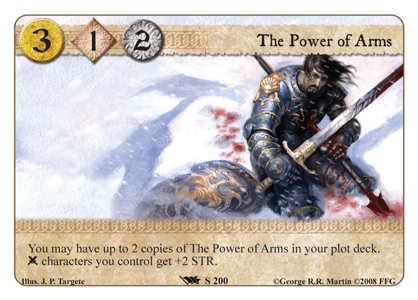
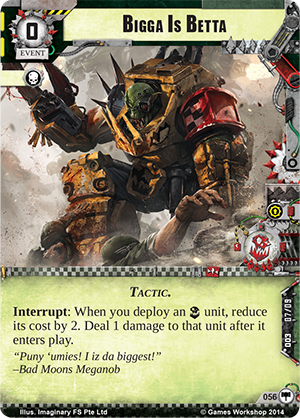
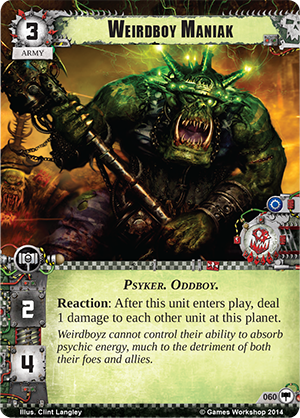
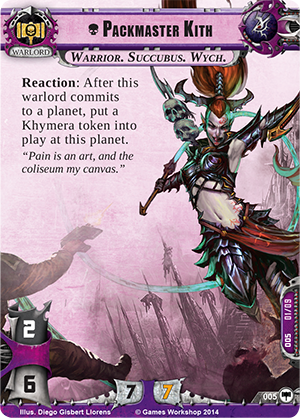
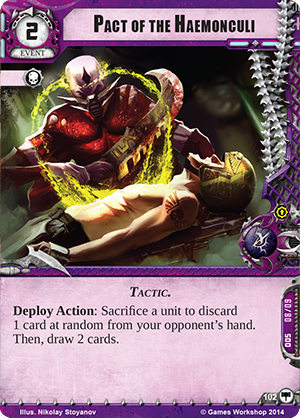
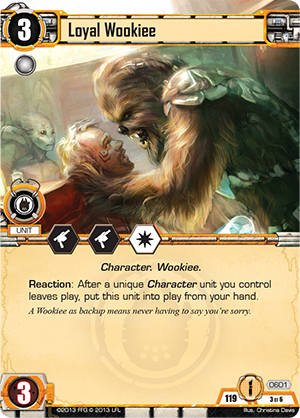
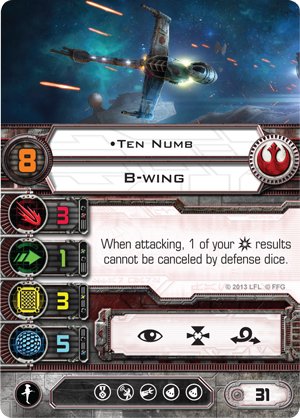
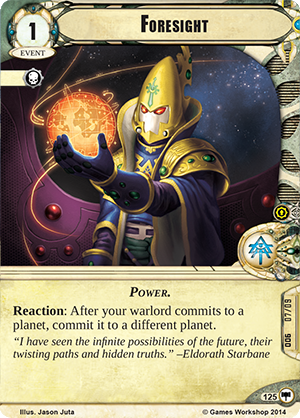
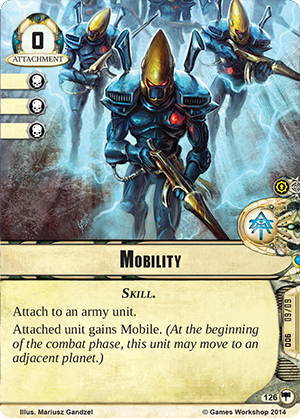
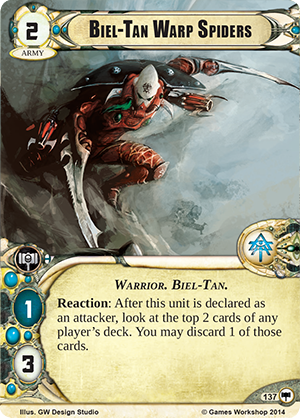
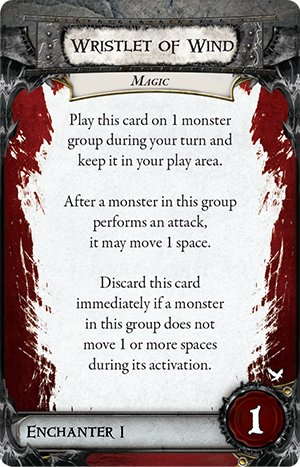
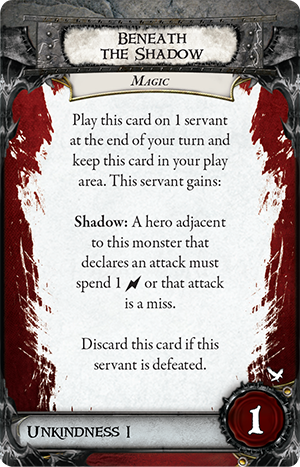
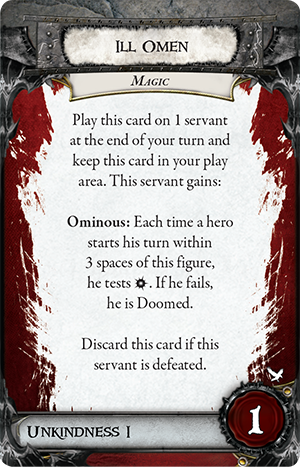
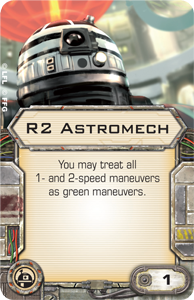
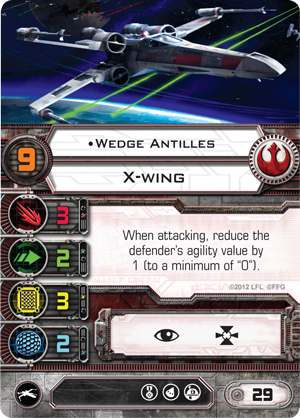
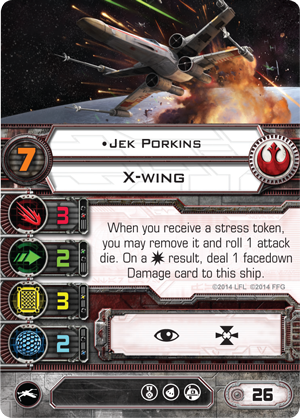
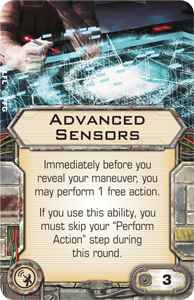
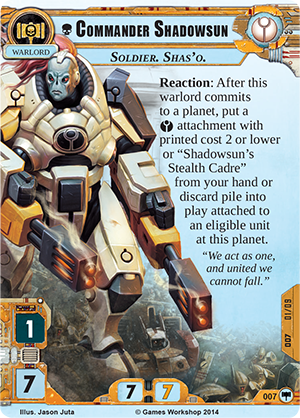
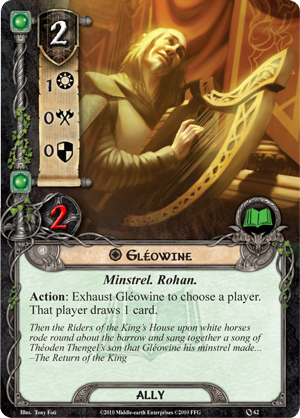
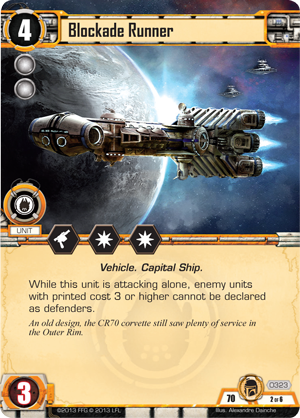
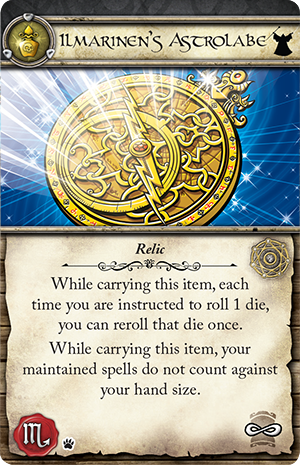
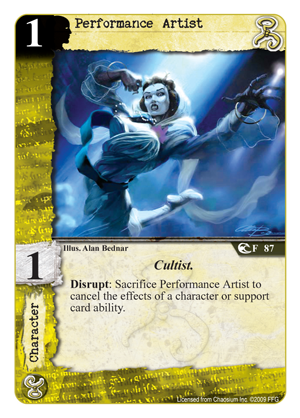
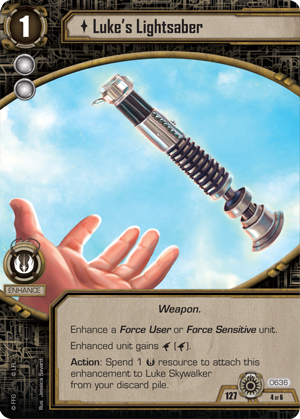
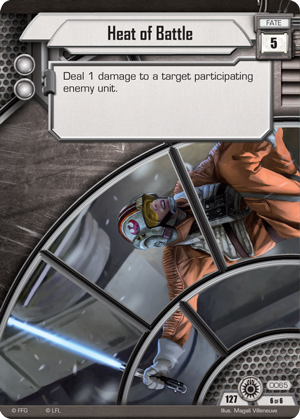
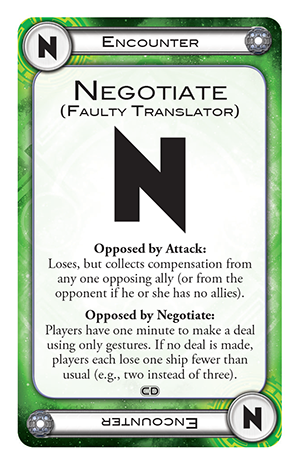
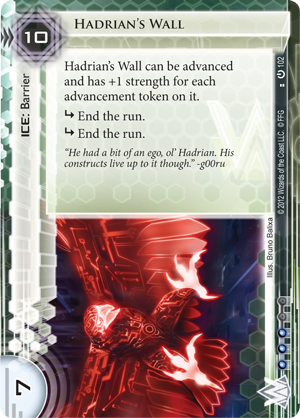
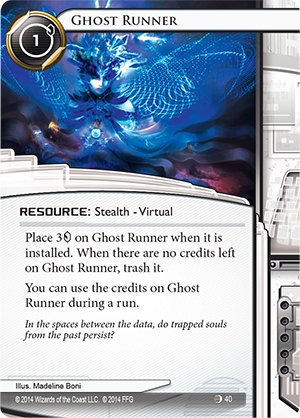
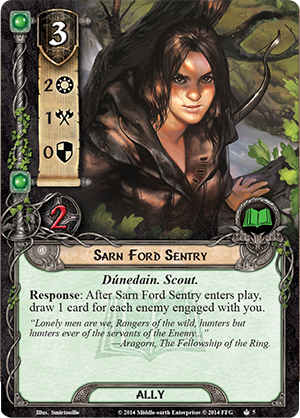
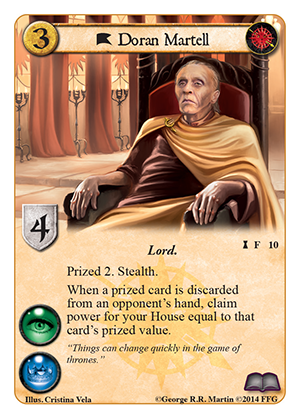
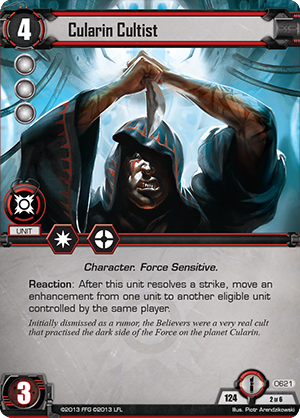
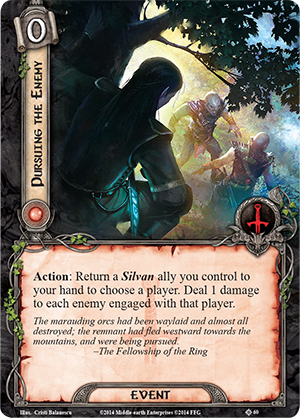
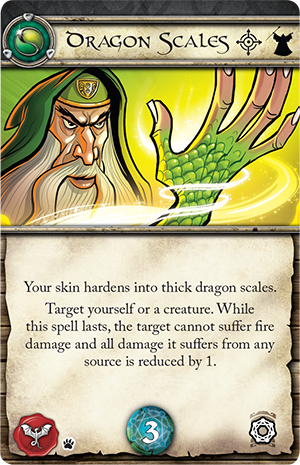
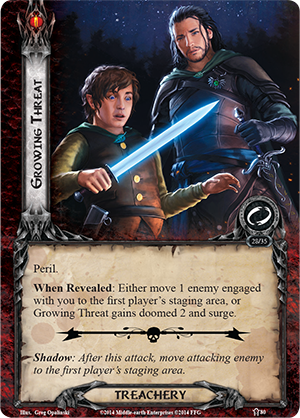
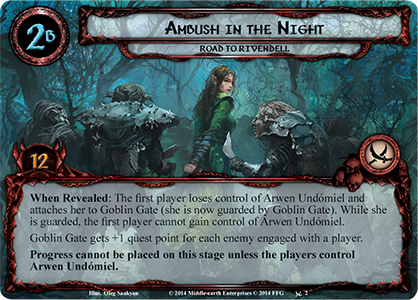
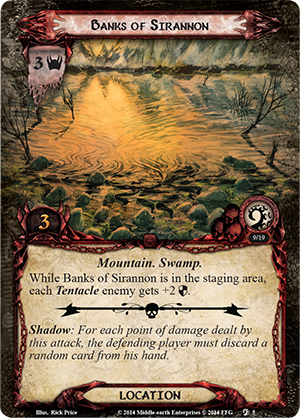
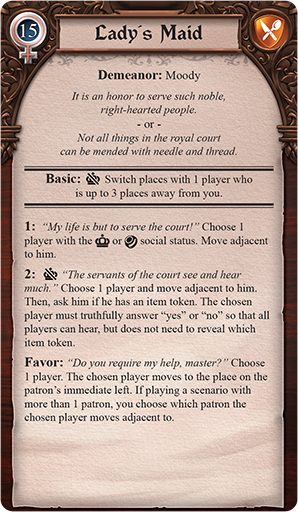
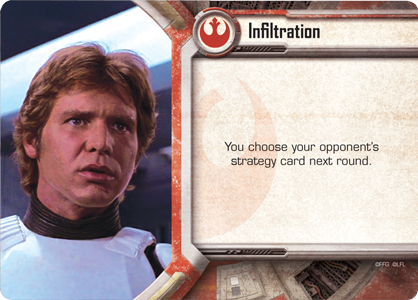
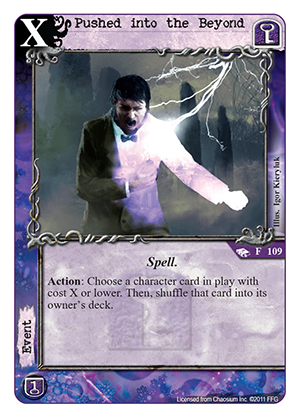
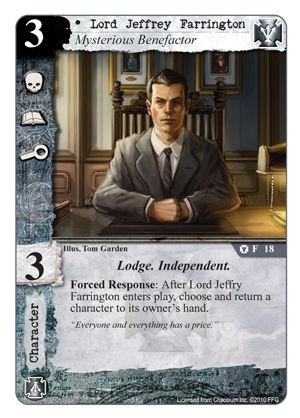
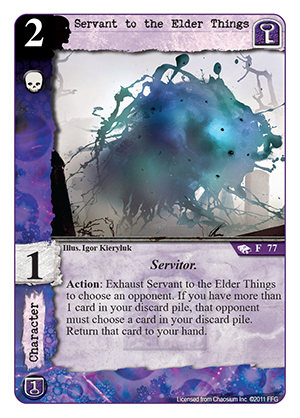
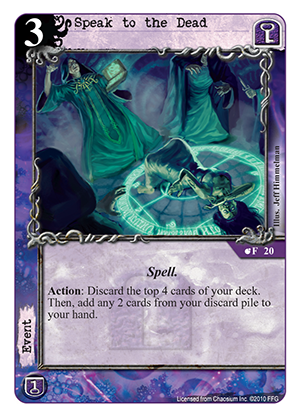
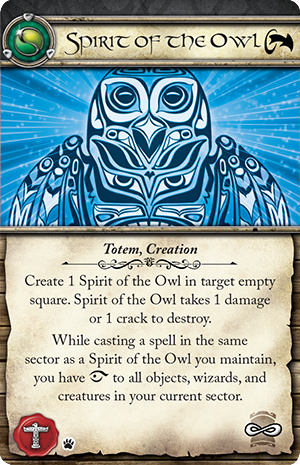
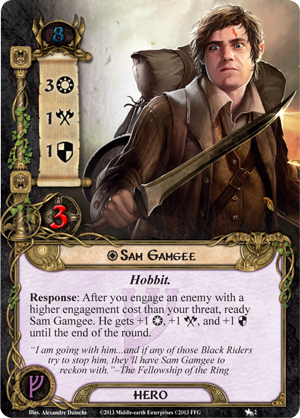
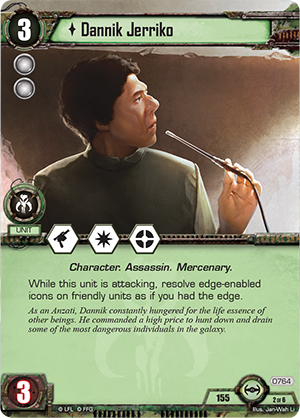
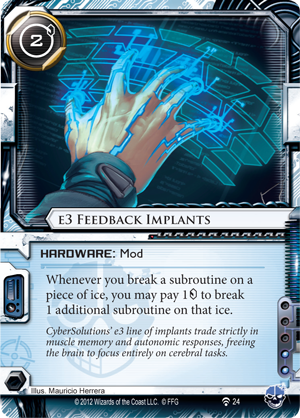
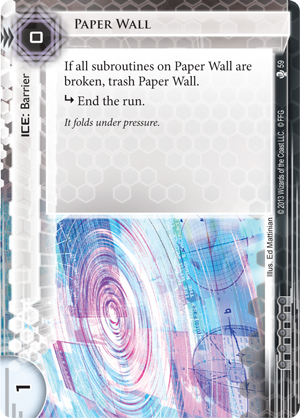
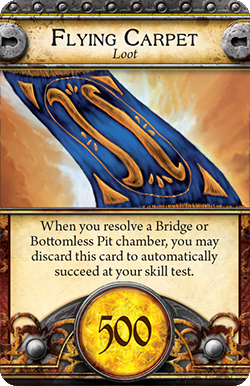
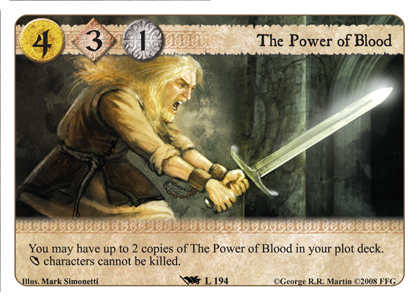
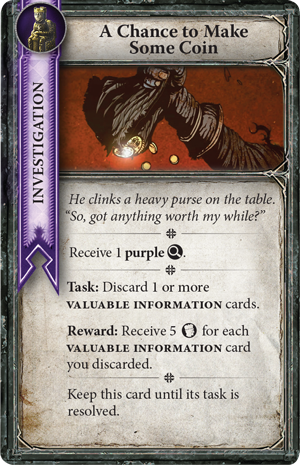
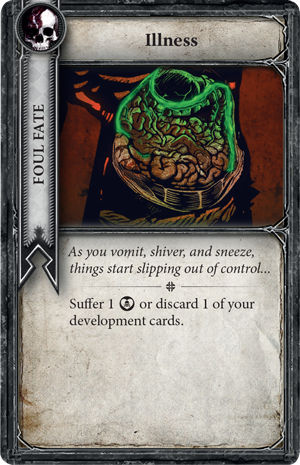
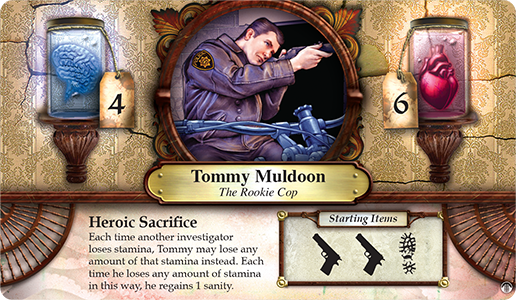
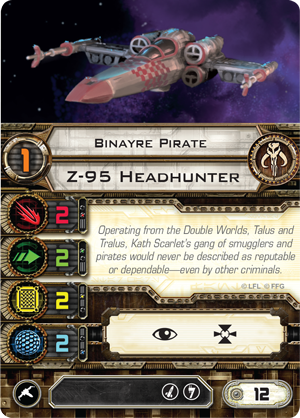
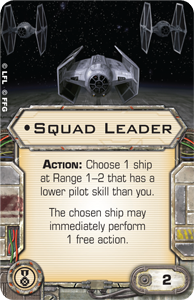
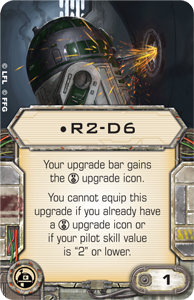
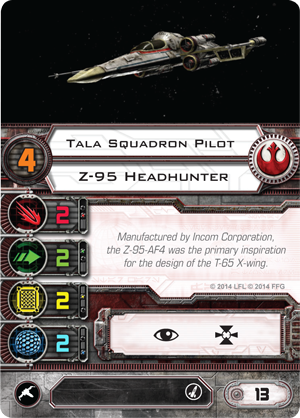
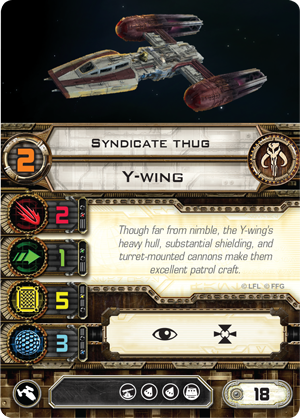
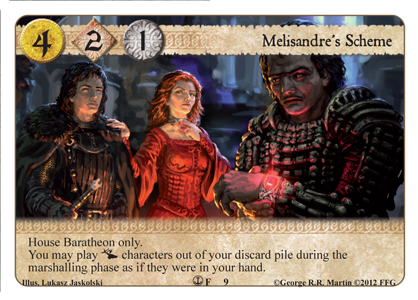
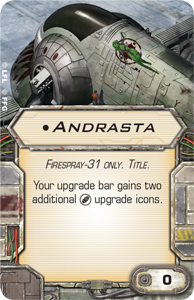
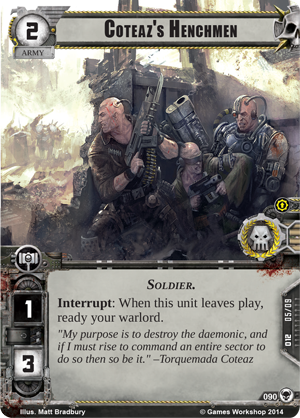
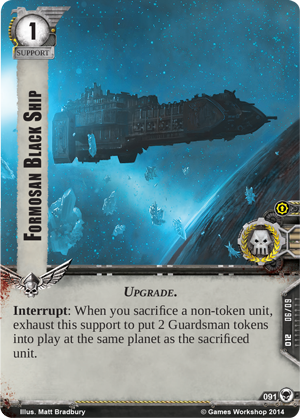
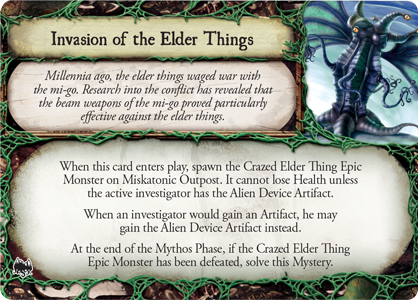
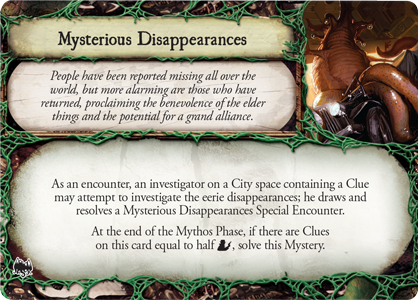
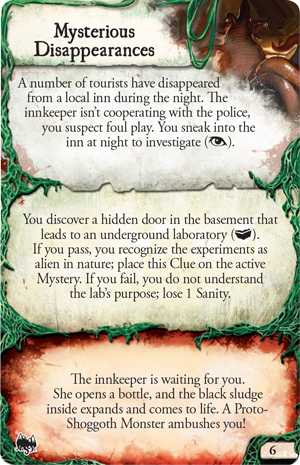
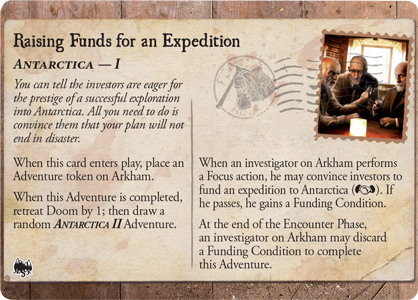
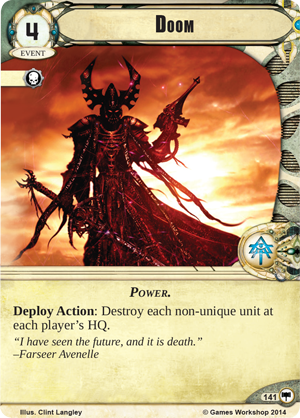
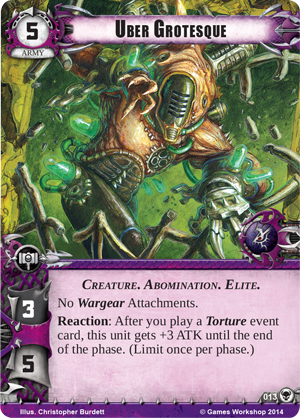
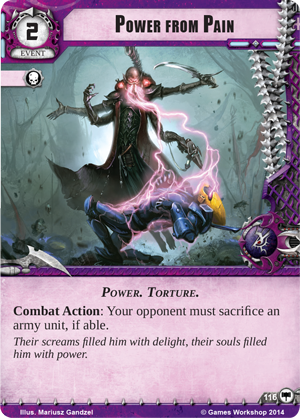
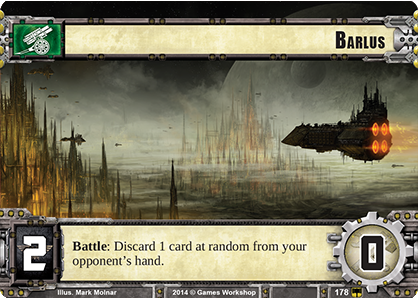
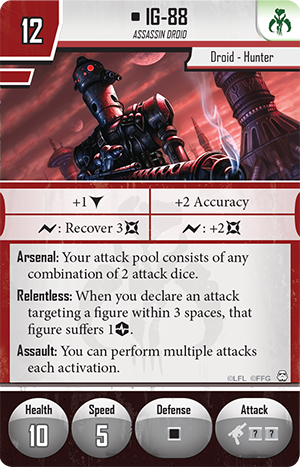
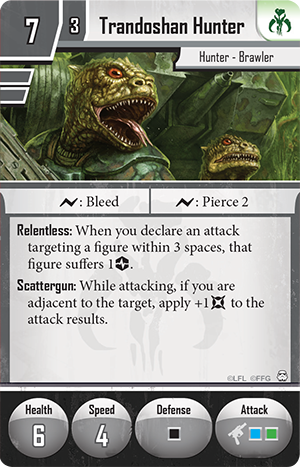
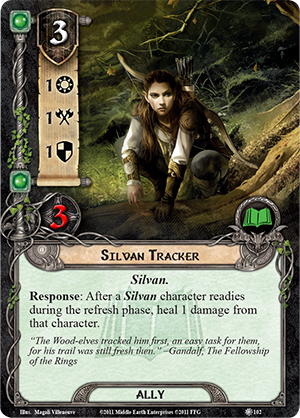
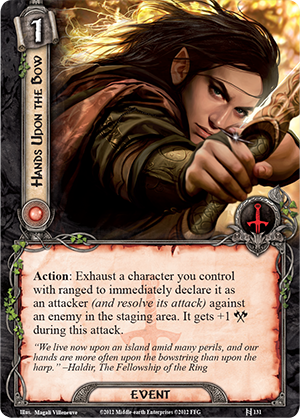
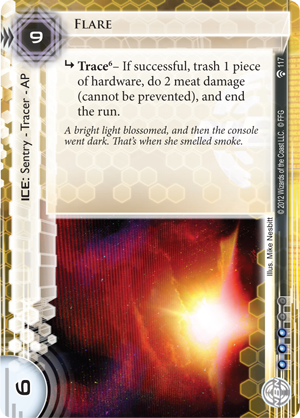
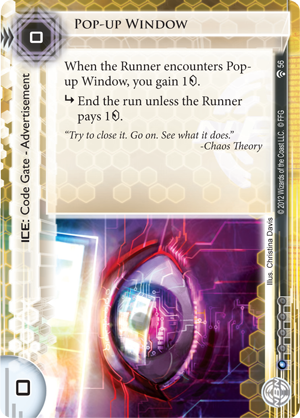
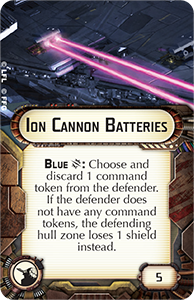
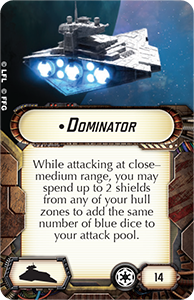
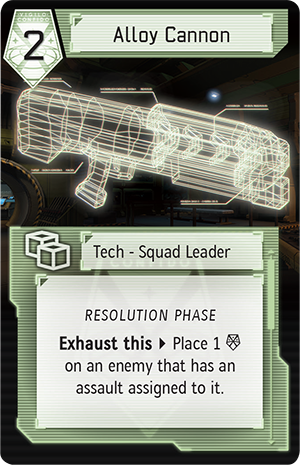
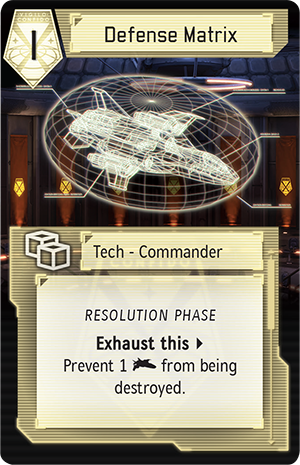
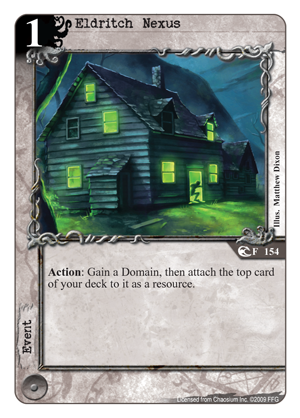
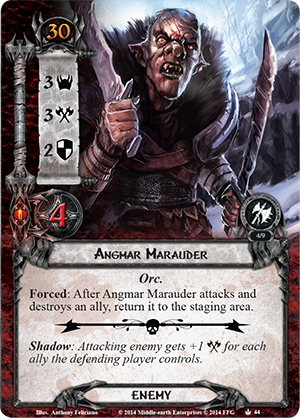
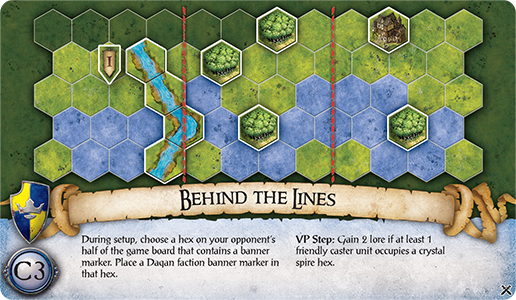
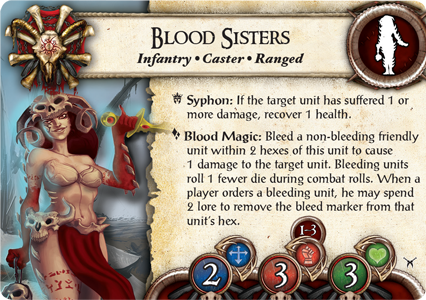
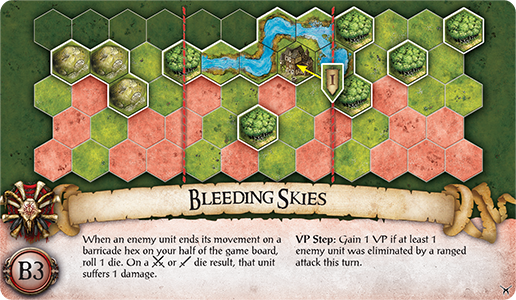
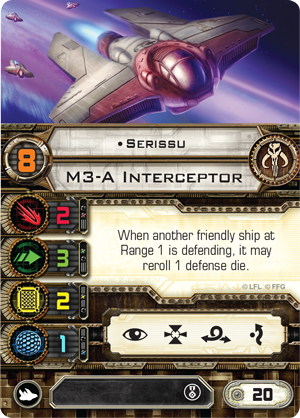
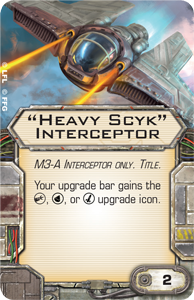
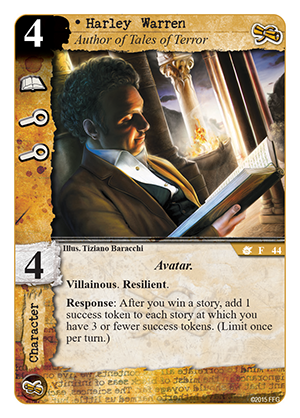
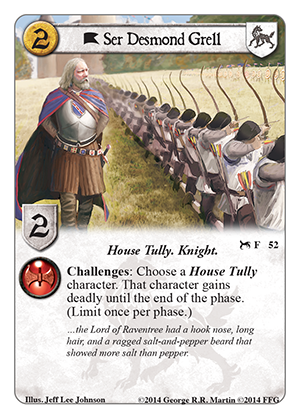
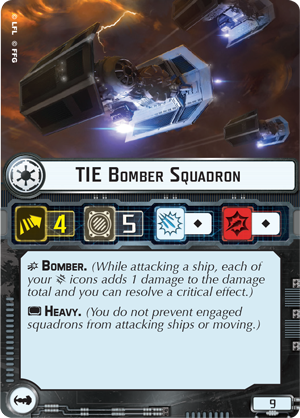
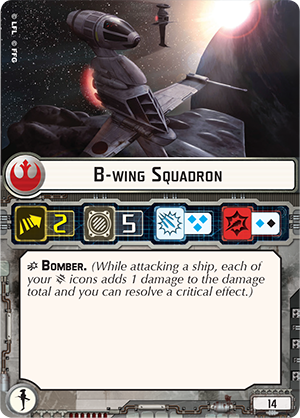
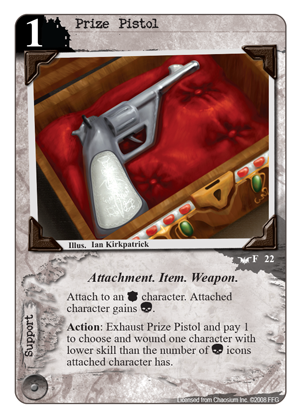
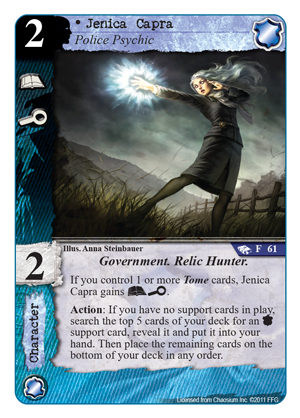